• Skip to primary navigation
  • Skip to main content
  • Skip to primary sidebar
Homesmad

Homesmad

  • Home
  • Breakfast & Brunch
  • Appetizers & Snacks
  • Dinner
  • Dessert
  • About
  • Privacy Policy
  • Contact
Homesmad
  • Home
  • Breakfast & Brunch
  • Appetizers & Snacks
  • Dinner
  • Dessert
  • About
  • Privacy Policy
  • Contact

Vibrant Chickpea Feta Avocado Salad: Healthy & Delicious

September 23, 2025 by Lily author

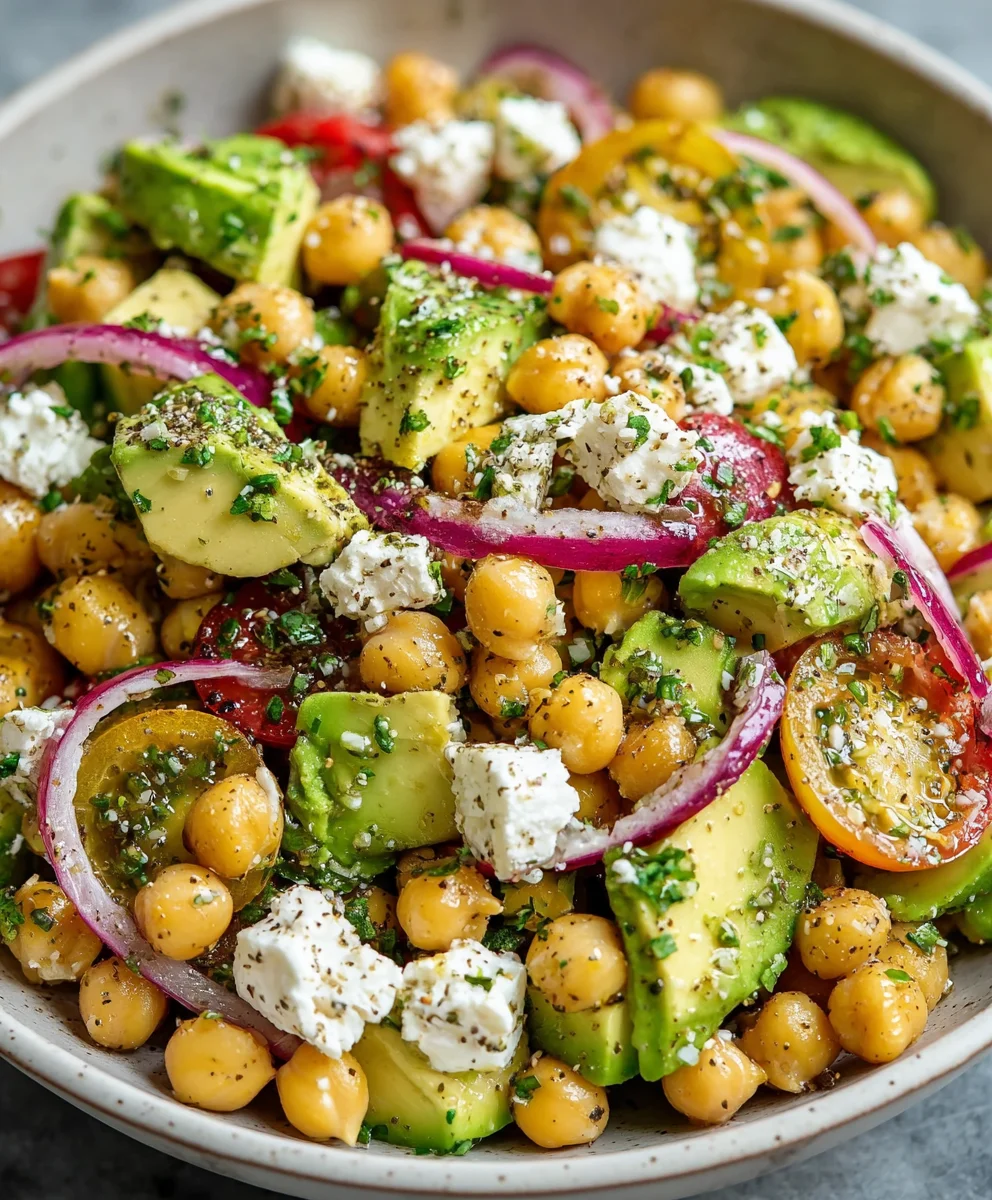
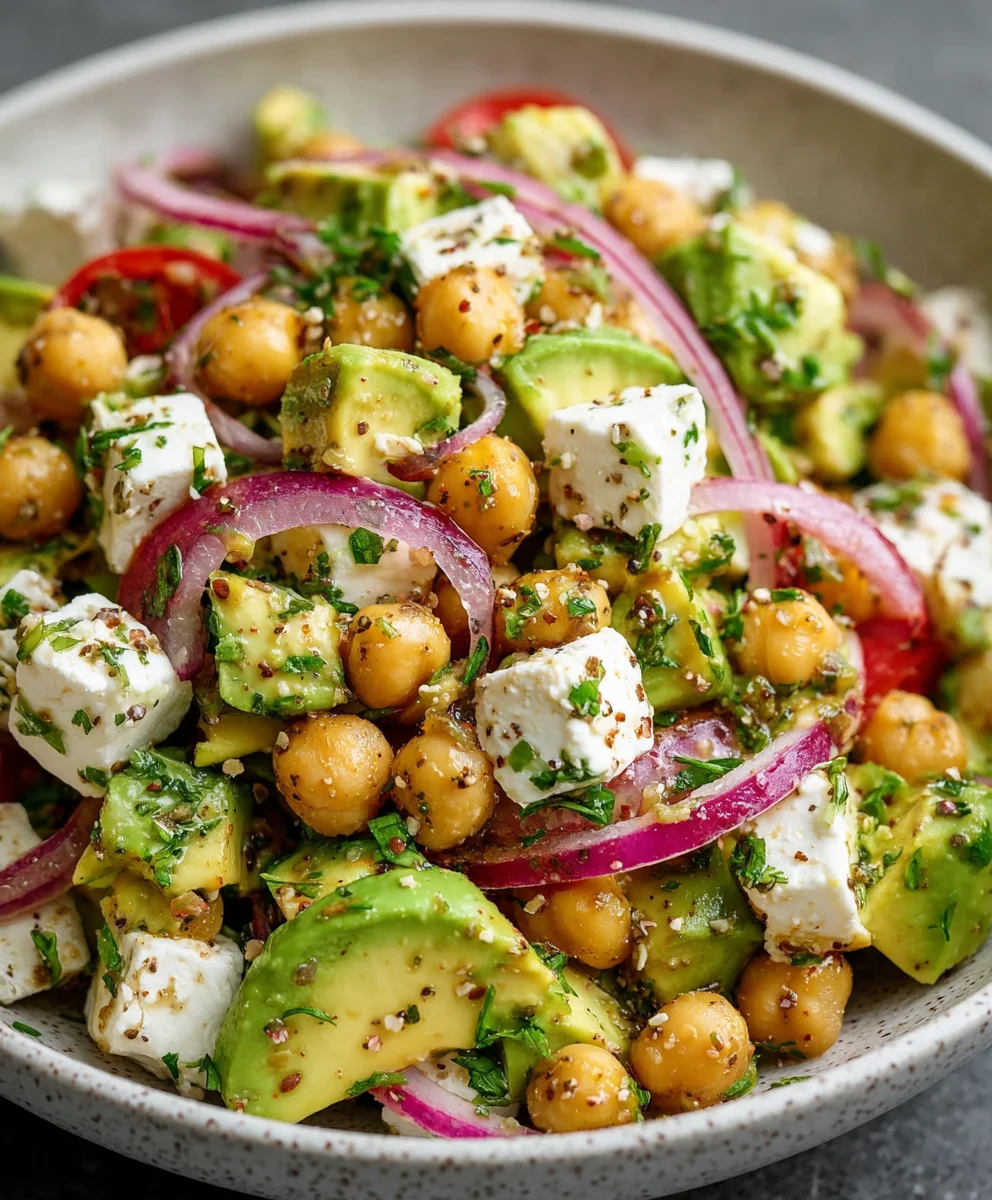
Chickpea Feta Avocado Salad is more than just a dish; it’s a vibrant celebration of fresh flavors and satisfying textures that promises to brighten any meal. Imagine a symphony of creamy avocado, briny feta, and robust chickpeas, all tossed together in a refreshing dressing – it’s an experience that truly invigorates the senses. I find myself constantly reaching for this recipe because it perfectly embodies the ideal balance between being incredibly wholesome and utterly delicious.

While this particular combination might be a modern culinary fusion, its individual components boast rich histories. Chickpeas have been a staple in Middle Eastern and Mediterranean diets for millennia, revered for their versatility and nutritional value, much like feta, a cheese with ancient Greek origins. The avocado, a fruit native to South Central Mexico, has become a global favorite, cherished for its healthy fats and silky texture. This salad masterfully unites these timeless ingredients into a contemporary classic.

Why We Adore This Dish: The Magic of Chickpea Feta Avocado Salad

People simply adore this salad for its remarkable versatility and incredible flavor profile. It’s wonderfully quick to prepare, making it an excellent choice for a nutritious lunch, a light dinner, or a vibrant side dish. The dish offers a delightful contrast of textures – the firm bite of chickpeas, the soft creaminess of avocado, and the crumbly saltiness of feta – all harmoniously balanced with a bright, zesty dressing. It’s truly a powerhouse of protein and healthy fats, making this Chickpea Feta Avocado Salad not only satisfying but also incredibly good for you. It’s a meal that feels indulgent yet is packed with goodness!

Vibrant Chickpea Feta Avocado Salad: Healthy & Delicious this RECIPE

Ingredients:

  • For the Salad Base:
    • 2 (15-ounce) cans chickpeas (also known as garbanzo beans), drained and thoroughly rinsed. I always opt for organic chickpeas when possible, and rinsing them really makes a difference in removing excess sodium and that “canned” taste.
    • 1 large English cucumber, diced into approximately ½-inch pieces. English cucumbers are fantastic because they have fewer seeds and thinner skin, meaning no need to peel!
    • 1 pint cherry or grape tomatoes, halved. These little bursts of sweetness are essential. If you can find heirloom cherry tomatoes, they add a beautiful variety of color.
    • ½ medium red onion, very thinly sliced or finely diced. Red onion adds a lovely zing and crunch. If you find raw red onion too strong, you can soak the diced onion in cold water for 10-15 minutes, then drain before adding to the salad.
    • ½ cup fresh parsley, finely chopped. Flat-leaf parsley, please! It has a much more vibrant flavor than curly parsley.
    • ¼ cup fresh mint leaves, finely chopped. Mint is the secret ingredient here, elevating this Chickpea Feta Avocado Salad to something truly special and refreshing. Don’t skip it!
    • 4 ounces crumbled feta cheese. I love to buy a block of feta and crumble it myself; it often has a creamier texture and more authentic flavor than pre-crumbled varieties, but either works beautifully.
    • 2 ripe avocados, diced into ½-inch pieces. Make sure they’re perfectly ripe – not too hard, not too mushy. A gentle squeeze should yield slightly.
  • For the Zesty Lemon-Herb Dressing:
    • ¼ cup extra virgin olive oil. Use a good quality olive oil here; it makes a noticeable difference in the dressing’s flavor.
    • 3 tablespoons fresh lemon juice (from about 1-2 lemons). Always use fresh lemon juice! The bright, acidic notes are crucial for balancing the richness of the Chickpea Feta Avocado Salad.
    • 1 clove garlic, minced. Freshly minced garlic provides the best punch. If you don’t have fresh, a tiny pinch of garlic powder can work in a pinch.
    • ½ teaspoon dried oregano. This classic Mediterranean herb brings a lovely earthy undertone.
    • ¼ teaspoon sea salt, or to taste. I always start with less and add more if needed.
    • ⅛ teaspoon black pepper, freshly ground, or to taste. Freshly ground pepper is always superior for flavor.

Preparing the Core Components for Your Chickpea Feta Avocado Salad

  1. Prepare the Chickpeas: Begin by taking your two cans of chickpeas. Carefully pour them into a fine-mesh colander. Under cool running water, thoroughly rinse the chickpeas for at least a minute, gently tossing them with your hand to ensure all surfaces are cleaned. This step is incredibly important as it removes the starchy liquid they are packed in, which can affect the flavor and texture of your salad. Once rinsed, let them drain completely in the colander for a few minutes. For an even drier texture, you can spread them out on a clean kitchen towel and gently pat them dry. I find that drier chickpeas absorb the dressing much better, infusing every bite with more flavor.
  2. Dice the Cucumber: Take your large English cucumber. There’s no need to peel it since the skin is thin and adds a lovely color and nutrients. First, trim off the ends. Then, cut the cucumber lengthwise into quarters. Now, holding the quarters together, slice them crosswise into uniform ½-inch dice. Aim for consistency in size, as this ensures an even distribution throughout your Chickpea Feta Avocado Salad and a pleasant bite. Place the diced cucumber into a very large mixing bowl – this will be our main assembly bowl.
  3. Halve the Tomatoes: Wash your pint of cherry or grape tomatoes. The quickest way to halve a large batch of small tomatoes is to place them on a flat surface, like a cutting board, then place another flat surface (like a second cutting board or a plastic container lid) on top of them, pressing down gently to hold them in place. Carefully slice through the middle of all the tomatoes horizontally with a sharp serrated knife. This method is a real time-saver! Add the halved tomatoes to the bowl with the cucumber.
  4. Dice or Slice the Red Onion: Take your half red onion. First, peel off the papery outer layers. For a finer texture, I prefer to finely dice the red onion. To do this, cut the half onion in half again lengthwise, then make several parallel cuts almost to the root end, followed by perpendicular cuts. If you prefer thinly sliced onion, use a mandoline or a very sharp knife to get paper-thin slices. If you are sensitive to the strong flavor of raw red onion, dice or slice it, then place it in a small bowl and cover it with cold water. Let it sit for 10-15 minutes, then drain thoroughly before adding it to the main salad bowl. This little trick helps to mellow its pungency considerably.
  5. Chop the Fresh Herbs: Gather your fresh parsley and mint. For the parsley, strip the leaves from the thicker stems and then finely chop them. For the mint, simply stack the leaves, roll them tightly (a technique called chiffonade), and then thinly slice to create beautiful, delicate ribbons, which you can then chop finely. Fresh herbs are where a lot of the vibrant flavor in this Chickpea Feta Avocado Salad comes from, so don’t skimp on them! Add both the chopped parsley and mint to your large mixing bowl with the other prepared vegetables.

Crafting the Zesty Lemon-Herb Dressing

  1. Combine Dressing Ingredients: In a small bowl or a jar with a tight-fitting lid, combine all the dressing ingredients: the ¼ cup of extra virgin olive oil, 3 tablespoons of fresh lemon juice, 1 minced clove of garlic, ½ teaspoon of dried oregano, ¼ teaspoon of sea salt, and ⅛ teaspoon of freshly ground black pepper. Using a jar is my go-to method because you can just shake it vigorously to combine, which is incredibly efficient and helps everything emulsify beautifully.
  2. Whisk or Shake the Dressing: If using a bowl, use a small whisk to thoroughly combine the ingredients. Whisk until the oil and lemon juice are well emulsified and the dressing looks slightly cloudy. If using a jar, simply put on the lid and shake vigorously for about 30 seconds. This vigorous mixing is key to ensuring all the flavors meld together perfectly.
  3. Taste and Adjust: Dip a clean spoon into the dressing and give it a taste. This is your chance to adjust the seasoning to your preference. Does it need a little more salt to brighten the flavors? Perhaps an extra squeeze of lemon for more zing? Or a touch more pepper? Remember, the dressing needs to be flavorful enough to season the entire salad, so don’t be afraid to make it taste good on its own. Set the dressing aside while you finish assembling the salad.

Assembling Your Refreshing Chickpea Feta Avocado Salad

  1. Combine Salad Base Components: To the large mixing bowl containing your prepared chickpeas, cucumber, tomatoes, red onion, parsley, and mint, add the 4 ounces of crumbled feta cheese. The feta brings a wonderful salty, tangy creaminess that is truly irresistible in this salad.
  2. Gently Toss the Salad: Using two large spoons or salad tongs, gently toss all the ingredients in the bowl. Be careful not to mash the chickpeas or overwork the fresh herbs. The goal is to evenly distribute all the colorful components, creating a beautiful and harmonious base for your Chickpea Feta Avocado Salad.
  3. Prepare the Avocados (Crucial Timing!): Now for the star – the avocado! It’s important to prepare the avocados just before serving to prevent them from browning. Cut each avocado in half lengthwise around the pit. Twist the halves apart, then carefully remove the pit. You can either scoop out the flesh with a spoon and then dice it on a cutting board, or you can carefully score the avocado flesh into a grid pattern while it’s still in its skin, then scoop out the diced pieces with a spoon. Aim for ½-inch dice, similar in size to your cucumber.
  4. Add Avocados to the Salad: Gently add the diced avocado to the large mixing bowl with the other salad ingredients. This is where you need to be extra gentle.
  5. Dress and Final Toss: Pour the prepared lemon-herb dressing over the salad ingredients, including the avocado. Using your large spoons or tongs, very gently toss the salad one last time. The goal is to coat everything evenly with the dressing without mashing the delicate avocado pieces. You want the avocado to retain its shape and creamy texture. If you’re not serving the entire batch immediately, consider dressing only the portion you plan to eat to keep the avocado fresh longer.

Final Touches and Serving Suggestions

  1. Taste and Season One Last Time: Before serving, take a small portion of the Chickpea Feta Avocado Salad and taste it. Does it need a final sprinkle of sea salt or a grind of fresh black pepper to bring all the flavors together? Sometimes, after all the components are combined, a little extra seasoning can make it truly sing. Adjust according to your palate.
  2. Serve Fresh and Enjoy: This Chickpea Feta Avocado Salad is truly best enjoyed fresh, especially with the avocado at its peak. Serve it immediately as a light and refreshing main course, or as a vibrant side dish to grilled chicken, fish, or falafel. It’s also fantastic scooped into warm pita bread or lettuce cups for a quick lunch.
  3. Storage Tips (If Any Leftovers): If you happen to have any leftovers of your amazing Chickpea Feta Avocado Salad, I recommend storing them in an airtight container in the refrigerator for up to 1-2 days. However, be aware that the avocado will likely start to brown over time, even with the lemon juice in the dressing. To minimize browning, you can try pressing a piece of plastic wrap directly onto the surface of the salad before sealing the container. For the absolute best experience, I always suggest only adding avocado to the portion you plan to eat right away. Enjoy every delightful bite of this healthy, flavorful, and incredibly satisfying salad!

Vibrant Chickpea Feta Avocado Salad: Healthy & Delicious

Conclusion:

And there you have it, friends! We’ve journeyed through the simple steps to create a dish that I genuinely believe will become a staple in your kitchen: the incredible Chickpea Feta Avocado Salad. If you’ve been searching for that perfect balance of convenience, flavor, and nourishing ingredients, then your quest truly ends here. This isn’t just another salad; it’s a vibrant symphony of textures and tastes, a culinary delight that proves healthy eating can be utterly delicious and incredibly easy. I often find myself craving its refreshing crunch and creamy richness, and it’s a recipe I return to again and again because it consistently delivers on all fronts.

So, why is this particular salad a must-try, you ask? Well, let me count the ways! First, the flavor profile is simply unmatched. You get the earthy, satisfying bite of the chickpeas, perfectly complemented by the salty tang of the feta. Then comes the star, the creamy, luxurious avocado, which brings a beautiful richness and smooth texture that ties everything together. The crisp freshness of the cucumbers and tomatoes, along with the bright, zesty dressing, elevate every mouthful into a truly exhilarating experience. It’s a harmonious blend that feels both indulgent and remarkably light. Beyond the taste, this salad is a nutritional powerhouse. Packed with plant-based protein from the chickpeas, healthy monounsaturated fats from the creamy avocado, and a good dose of fiber from all the fresh vegetables, this isn’t just a delicious dish; it’s a meal that genuinely fuels your body and keeps you feeling satisfied and energized throughout your day. You can truly feel good about every bite, knowing you’re providing your body with fantastic nutrients.

But the brilliance of this recipe doesn’t stop at its taste and health benefits; its versatility is truly what makes it shine. While it’s absolutely fantastic on its own as a light lunch or a delightful dinner, think of it as a canvas for your culinary creativity. For a heartier meal, I love serving a generous scoop alongside some perfectly grilled chicken or flaky salmon; the flavors meld together beautifully. It’s also phenomenal as a vibrant side dish for almost any barbecue or potluck, instantly elevating the spread with its colorful presence. Imagine stuffing it into warm pita bread or crunchy lettuce wraps for a quick and satisfying lunch on the go. The possibilities are endless!

And when it comes to variations, don’t be afraid to experiment! If you’re looking to add another layer of flavor, consider tossing in some finely chopped red bell pepper for a sweet crunch, or perhaps some corn for a touch of sweetness. A sprinkle of fresh dill or mint can elevate the herby notes, transforming the salad into something even brighter and more aromatic, perfect for a summer afternoon. For those who enjoy a bit of heat, a pinch of red pepper flakes or a dash of your favorite hot sauce would add a delightful kick. If you’re catering to different dietary needs, making it vegan is a breeze – simply omit the feta, or substitute it with a plant-based feta alternative or even a sprinkle of nutritional yeast for that savory, cheesy umami. This salad truly welcomes your personal touch, allowing you to tailor it to your preferences and what you have available in your fridge.

So, now it’s your turn! I genuinely hope you feel inspired to whip up this fantastic Chickpea Feta Avocado Salad in your own kitchen very soon. It’s incredibly simple to prepare, requires no cooking, and comes together in minutes, making it ideal for busy weeknights or lazy weekends. I promise, once you take that first bite, you’ll understand why I’m so enthusiastic about it. And when you do try it, please, please, please come back and share your experience with me! Did you add any unique twists? Did your family rave about it? I absolutely love hearing about your culinary adventures and seeing your creations. Don’t forget to tag me if you share photos online – I can’t wait to see your delicious results. Happy cooking, and enjoy every refreshing bite!

People Also Ask:

Can I make this Chickpea Feta Avocado Salad ahead of time?

While this salad is best enjoyed fresh, especially for the creamy avocado, you can certainly prepare some components in advance. I recommend chopping the chickpeas, feta, cucumbers, and tomatoes, and mixing the dressing, storing them separately in airtight containers in the refrigerator. Wait to add the avocado until just before serving to prevent it from browning. If you absolutely need to pre-mix, a squeeze of extra lemon juice over the avocado can help slow down oxidation, but for optimal freshness, a last-minute avocado addition is key.

How long does this salad last in the refrigerator?

When stored in an airtight container in the refrigerator, this Chickpea Feta Avocado Salad will typically last for about 1-2 days. The avocado will start to brown and soften after the first day, so keep that in mind. If you prepare the salad without avocado, the remaining ingredients can last happily for 3-4 days, allowing you to add fresh avocado to individual servings as needed.

What can I substitute for feta cheese if I don’t like it or am vegan?

If feta isn’t your thing or you’re looking for a dairy-free option, there are some great substitutes! For a different flavor profile, consider crumbled goat cheese for a creamier, tangier alternative, or even a salty cotija cheese. For a vegan version, you can either omit the cheese entirely and let the other flavors shine, or use a high-quality plant-based feta alternative. Nutritional yeast can also be sprinkled in for a cheesy, umami flavor without any dairy.

Is this Chickpea Feta Avocado Salad suitable for meal prep?

Absolutely! This salad is a fantastic option for meal prep. My best tip is to prepare all the ingredients except the avocado, and keep the dressing separate. When you’re ready to enjoy a portion, simply add freshly diced avocado and a drizzle of dressing. This way, you ensure every meal prep container is as fresh and vibrant as possible, avoiding soggy greens or brown avocado. It makes for a quick and healthy lunch throughout the week!

What are some ways to make this salad more substantial for a main course?

To transform this already satisfying salad into an even more substantial main course, you have several delicious options. I love adding a source of lean protein like grilled chicken breast, seared shrimp, or flaked salmon. For a plant-based boost, consider tossing in some cooked quinoa or farro for extra fiber and protein. You could also serve it over a bed of mixed greens or spinach, or even alongside some warm whole-grain pita bread or crusty artisan bread for dipping.


Chickpea Feta Avocado Salad

Chickpea Feta Avocado Salad

A vibrant and refreshing salad featuring creamy avocado, briny feta, robust chickpeas, and fresh herbs, all tossed in a zesty lemon-herb dressing. Healthy and delicious for any meal.

Prep Time
15 Minutes

Cook Time
PT0S

Total Time
15 Minutes

Servings
2 servings

Ingredients

  • 1 (15-ounce/425g) can chickpeas, drained and rinsed
  • 1 avocado, pitted and diced
  • 4 ounces/115g feta cheese, crumbled
  • 1/2 cup/75g red onion, thinly sliced
  • 1/2 cup/50g fresh parsley, chopped
  • 1/4 cup/25g fresh mint, chopped
  • 3 tablespoons/45ml olive oil
  • 2 tablespoons/30ml lemon juice, freshly squeezed
  • 1 clove garlic, minced
  • 1/2 teaspoon/2.5ml dried oregano
  • Salt to taste
  • Pepper to taste

Instructions

  1. Step 1
    Rinse and thoroughly drain the chickpeas. Thinly slice the red onion. Finely chop the fresh parsley and mint.
  2. Step 2
    In a small bowl or jar, combine olive oil, lemon juice, minced garlic, dried oregano, salt, and pepper. Whisk or shake vigorously until well combined. Taste and adjust seasoning.
  3. Step 3
    In a large mixing bowl, combine the rinsed chickpeas, sliced red onion, chopped parsley, chopped mint, and crumbled feta cheese. Toss gently.
  4. Step 4
    Just before serving, pit and dice the avocado. Add it to the salad bowl. Pour the prepared dressing over the salad and very gently toss everything, ensuring the avocado remains intact.
  5. Step 5
    Taste the salad and adjust any final seasonings. Serve immediately for optimal freshness and flavor.

Important Information

Nutrition Facts (Per Serving)

It is important to consider this information as approximate and not to use it as definitive health advice.

Allergy Information

Please check ingredients for potential allergens and consult a health professional if in doubt.

« Previous Post
Quick Weeknight High Protein Creamy Beef Pasta Recipe
Next Post »
Creamy Vegetable Rice Sauce: A Simple Recipe for Delicious Sides

If you enjoyed this…

Chicken Enchiladas with Creamy Sour Cream White Sauce

Italian Sushi: The Ultimate Fusion Dish You Must Try Now!

Creamy Garlic Parmesan Chicken Breast – Easy & Delicious Recipe

Primary Sidebar

Browse by Diet

BreakfastDinnerLunchDessertAppetizer

Sweet Peach Yogurt Parfait Delight

One of my fondest memories is from a lazy summer afternoon spent at my grandmother’s house. The sun filtered through the kitchen window, casting a warm glow over the table where she would create her culinary magic. It was during one of those blissful moments that I first tasted her Peach Yogurt Parfait with Honey and Granola. The sweet aroma of ripe peaches mingling with creamy yogurt and the crunch of granola was nothing short of heavenly. It felt like summer captured in a bowl, and I still remember the joy of diving in with a spoon, each layer revealing a new burst of flavor.

When I think about that parfait, I can almost hear the gentle hum of the bees outside, reminding me of the floral notes that honey brings to every bite. The vibrant yellows and soft oranges of the peaches contrast beautifully with the creamy white yogurt and the golden crunch of granola. It’s a dish that not only looks delightful but also tastes like a celebration of fresh, wholesome ingredients.

What makes my version of this Peach Yogurt Parfait special is the careful balance of flavors and textures. I use ripe, juicy peaches, drizzled with locally sourced honey, and a homemade granola that’s bursting with nuts and seeds for an extra crunch. It’s a simple dish, but every layer is crafted with love and attention.

Let me show you exactly how to make this delightful parfait, so you can bring a bit of that summer magic into your kitchen!

Sweet Peach Yogurt Parfait Delight

Why You’ll Love This Recipe

  • Delightfully creamy texture from the Greek yogurt, paired with the juicy sweetness of fresh peaches.
  • Ready in under 20 minutes, making it a quick and satisfying breakfast or snack option.
  • Budget-friendly, using common ingredients that you may already have in your pantry.
  • Customizable with your favorite granola and nuts, allowing you to tailor each parfait to your taste.
  • Perfectly balanced flavors with the bright acidity of lemon juice and the sweetness of honey enhancing the peaches.

Ingredients

  • For the Parfait:
  • 2 cups plain Greek yogurt (or vanilla yogurt for a sweeter option)
  • 2 large ripe peaches, diced (about 2 cups)
  • 1 tablespoon fresh lemon juice (to prevent browning of peaches)
  • 2 tablespoons honey (plus more for drizzling)
  • 1 teaspoon vanilla extract (optional for extra flavor)
  • For the Granola:
  • 1 cup granola (store-bought or homemade; see notes for a simple granola recipe)
  • 1/4 cup sliced almonds (optional for added crunch)
  • 1/4 cup shredded coconut (optional for added flavor)

Let’s dive into some key ingredients that make this Peach Yogurt Parfait so delightful! First, the Greek yogurt is not only creamy but also packed with protein, making it a satisfying option for breakfast or a snack. If you’re looking for a sweeter option, you can easily substitute it with vanilla yogurt, though it may alter the overall flavor balance. Next, the ripe peaches are the star of the show; their natural sweetness shines through, so I recommend choosing peaches that yield slightly to pressure, indicating they’re perfectly ripe. If peaches aren’t in season, feel free to use nectarines or even frozen peaches—just thaw them before use. Finally, honey adds a lovely floral sweetness that ties everything together. If you prefer, maple syrup can serve as a delicious substitute.

Step-by-Step Instructions

  1. Start by preparing the peaches. Wash them thoroughly, then slice and dice them into bite-sized pieces. In a medium bowl, toss the diced peaches with 1 tablespoon of fresh lemon juice to prevent browning. Set aside for about 5 minutes while the lemon juice works its magic.
  2. In a separate bowl, combine the Greek yogurt, 2 tablespoons of honey, and 1 teaspoon of vanilla extract if using. Stir the mixture until smooth and thoroughly blended. This should take about a minute. Avoid overmixing to maintain the creaminess of the yogurt.
  3. Now it’s time to layer your parfait. Grab a clear glass or bowl to showcase your beautiful creation. Start with a generous spoonful of the yogurt mixture at the bottom—about 1/4 cup will do. Use a spoon to spread it evenly.
  4. Add a layer of the diced peaches over the yogurt, ensuring they cover the yogurt completely. You might want to use about half of what you have prepared—roughly 1 cup. This layer should be visually appealing, so arrange the peaches neatly.
  5. Sprinkle 1/4 cup of granola over the peaches. This adds a delightful crunch. Make sure to distribute it evenly to ensure every bite has that satisfying texture. Avoid packing it down too tightly, as you want it to maintain its crunch.
  6. Repeat the layers: spoon in another 1/4 cup of yogurt, followed by another cup of peaches, and another sprinkle of granola. You should have at least two layers, but feel free to add more depending on your glass size.
  7. Finish off your parfait with a drizzle of honey on top for added sweetness and a touch of elegance. If you’re using sliced almonds or shredded coconut, sprinkle them on top now. It adds a lovely visual contrast and extra flavor.
  8. Serve immediately or refrigerate for up to 30 minutes before serving to allow the flavors to meld together. However, I recommend enjoying it fresh to maintain the granola’s crunch.

Pro Tips for the Best Peach Yogurt Parfait With Honey And Granola

  • Make sure to choose ripe peaches for the best flavor and texture. A common mistake is using unripe fruit, which can lead to a less enjoyable parfait. Look for peaches that are fragrant and slightly soft to the touch.
  • Use a clear glass to assemble your parfait; this not only makes for a beautiful presentation but also allows you to see the colorful layers, which adds to the enjoyment of eating it.
  • For an even creamier texture, consider whipping the Greek yogurt with a hand mixer for a couple of minutes before layering. This small adjustment makes a huge difference in mouthfeel.
  • Be mindful of the granola-to-yogurt ratio. Too much granola can overwhelm the parfait, while too little can make it feel too creamy. Aim for about 1/4 cup of granola per layer for the perfect balance.
  • If you’re making this for a gathering, consider preparing the yogurt and peaches ahead of time and layering them just before serving. This ensures the granola stays crunchy!

Variations & Serving Ideas

There are so many ways to get creative with your Peach Yogurt Parfait! For a tropical twist, swap out the peaches for mangoes or pineapples and top with coconut flakes. If you prefer a berry flavor, mix in some blueberries or strawberries with the peaches for added color and taste. For a nutty version, incorporate chopped walnuts or pecans instead of almonds.

As for serving ideas, this parfait pairs beautifully with a side of scrambled eggs for a hearty breakfast or fresh fruit salad for a light lunch. You might also enjoy it alongside whole grain toast with almond butter for an energizing snack. The contrast of flavors and textures will elevate your meal experience!

Storage, Make-Ahead & Reheating

The Peach Yogurt Parfait is best enjoyed fresh, but you can prepare some components ahead of time. Store the layered parfait in an airtight container in the refrigerator for up to 24 hours. However, be cautious; the granola may lose its crunch if stored too long. You can freeze the yogurt and peach mixture for up to 2 months; just remember to thaw it in the refrigerator overnight before serving.

If you plan to enjoy this dish the next day, it can taste even better as the flavors meld together. Just remember to add the granola right before serving to keep its delightful crunch!

Frequently Asked Questions

Can I make Peach Yogurt Parfait With Honey And Granola ahead of time?

Yes — in fact, it tastes even better the next day as the flavors meld. However, I recommend waiting to add the granola until just before serving to maintain its crunch.

What can I substitute for Greek yogurt?

If you prefer a lighter option, you can substitute Greek yogurt with regular yogurt or a dairy-free alternative like coconut yogurt. Just remember that this may alter the creaminess and flavor profile slightly.

Can I use frozen peaches for this parfait?

Absolutely! Just make sure to thaw the frozen peaches before using them. They will still add great flavor, though the texture may be slightly softer than fresh peaches.

How do I make the parfait vegan?

To make a vegan version, substitute the Greek yogurt with a plant-based yogurt alternative, and replace honey with maple syrup or agave nectar. This keeps the parfait sweet while adhering to a vegan diet.

What other fruits can I use in this recipe?

You can mix and match fruits based on your preference. Try using strawberries, blueberries, raspberries, or even bananas. Just make sure to adjust the lemon juice as needed to prevent browning.

Sweet Peach Yogurt Parfait Delight

Final Thoughts

The Peach Yogurt Parfait with Honey and Granola is a delightful blend of creamy yogurt, sweet peaches, and crunchy granola that creates a satisfying and nourishing treat. Each layer bursts with flavor, making it a perfect choice for breakfast or a light dessert.

This is the kind of recipe I come back to again and again, especially when I want something refreshing and wholesome to start my day. The harmony of sweet and tart flavors, combined with the delightful crunch, never fails to lift my spirits!

I encourage you to give this parfait a try and indulge in its comforting goodness. Feel free to share your results or even add your own twist—perhaps a sprinkle of cinnamon or a handful of nuts. Enjoy creating your perfect parfait!

Print
clock clock iconcutlery cutlery iconflag flag iconfolder folder iconinstagram instagram iconpinterest pinterest iconfacebook facebook iconprint print iconsquares squares iconheart heart iconheart solid heart solid icon

Peach Yogurt Parfait


  • Author: Lily author
  • Total Time: 15 minutes
  • Yield: 4 servings 1x
Pin Recipe
Print Recipe

Description

This Peach Yogurt Parfait combines creamy Greek yogurt, juicy peaches, and crunchy granola for a delightful treat. It’s a perfect breakfast or snack that captures the essence of summer in every bite.


Ingredients

Scale
  • For the Parfait:
  • 2 cups plain Greek yogurt (or vanilla yogurt for a sweeter option)
  • 2 large ripe peaches, diced (about 2 cups)
  • 1 tablespoon fresh lemon juice (to prevent browning of peaches)
  • 2 tablespoons honey (plus more for drizzling)
  • 1 teaspoon vanilla extract (optional for extra flavor)
  • For the Granola:
  • 1 cup granola (store-bought or homemade; see notes for a simple granola recipe)
  • 1/4 cup sliced almonds (optional for added crunch)
  • 1/4 cup shredded coconut (optional for added flavor)

Instructions

  1. Start by preparing the peaches. Wash them thoroughly, then slice and dice them into bite-sized pieces. In a medium bowl, toss the diced peaches with 1 tablespoon of fresh lemon juice to prevent browning. Set aside for about 5 minutes while the lemon juice works its magic.
  2. In a separate bowl, combine the Greek yogurt, 2 tablespoons of honey, and 1 teaspoon of vanilla extract if using. Stir the mixture until smooth and thoroughly blended. This should take about a minute. Avoid overmixing to maintain the creaminess of the yogurt.
  3. Now it’s time to layer your parfait. Grab a clear glass or bowl to showcase your beautiful creation. Start with a generous spoonful of the yogurt mixture at the bottom—about 1/4 cup will do. Use a spoon to spread it evenly.
  4. Add a layer of the diced peaches over the yogurt, ensuring they cover the yogurt completely. You might want to use about half of what you have prepared—roughly 1 cup. This layer should be visually appealing, so arrange the peaches neatly.
  5. Sprinkle 1/4 cup of granola over the peaches. This adds a delightful crunch. Make sure to distribute it evenly to ensure every bite has that satisfying texture. Avoid packing it down too tightly, as you want it to maintain its crunch.
  6. Repeat the layers: spoon in another 1/4 cup of yogurt, followed by another cup of peaches, and another sprinkle of granola. You should have at least two layers, but feel free to add more depending on your glass size.
  7. Finish off your parfait with a drizzle of honey on top for added sweetness and a touch of elegance. If you’re using sliced almonds or shredded coconut, sprinkle them on top now. It adds a lovely visual contrast and extra flavor.
  8. Serve immediately or refrigerate for up to 30 minutes before serving to allow the flavors to meld together. However, I recommend enjoying it fresh to maintain the granola’s crunch.
  • Prep Time: 15 mins
  • Cook Time: 0 mins
  • Category: Breakfast
  • Method: No-cook
  • Cuisine: American

Nutrition

  • Serving Size: 1 parfait
  • Calories: 250
  • Sugar: 20 g
  • Sodium: 50 mg
  • Fat: 5 g
  • Saturated Fat: 2 g
  • Unsaturated Fat: 3 g
  • Trans Fat: 0 g
  • Carbohydrates: 40 g
  • Fiber: 3 g
  • Protein: 10 g
  • Cholesterol: 10 mg

Keywords: Choose ripe peaches for the best flavor and texture. Use a clear glass for a beautiful presentation. For creaminess, consider whipping the yogurt before layering. Be mindful of the granola-to-yogurt ratio. Prepare yogurt and peaches ahead of time for gatherings, layering just before serving.

Did you make this recipe?

Share a photo and tag us — we can't wait to see what you've made!

Sun-Kissed Frozen Orange Cream Slush

As a child, summer days felt like they lasted forever. I remember the sticky heat wrapping around me as I played outside, my laughter mingling with the sounds of the neighborhood. But nothing could cool me down quite like the moment I’d spot my grandmother, laboring over her blender, whipping up her famous Frozen Orange Creamsicle Slush. That vibrant orange treat, with its frosty texture and sweet citrus aroma, was like a burst of sunshine in a cup. Just one sip, and I could feel the coolness wash over me, sparking pure joy.

This Frozen Orange Creamsicle Slush has a way of making you feel like a kid again. Its creamy, dreamy consistency is a delightful balance of bright orange and soft vanilla, inviting you to dive right in. The refreshing tang of orange dances on your tongue, while the smooth creaminess envelops you in a comforting embrace. It’s a nostalgic treat that’s perfect for hot summer afternoons or anytime you need a little pick-me-up.

What makes my version of this slush stand out is the addition of a hint of vanilla bean, which elevates the flavor and adds an extra layer of richness. Plus, it’s super easy to whip up with just a few simple ingredients that you probably already have on hand! So, if you’re ready to relive those sun-soaked memories, let me show you exactly how to make it.

Sun-Kissed Frozen Orange Cream Slush

Why You’ll Love This Recipe

  • Each slush is a perfect blend of creamy vanilla and zesty orange, creating a nostalgic flavor reminiscent of summer days.
  • This refreshing treat is ready in under 15 minutes, making it an ideal quick dessert for unexpected guests or hot afternoons.
  • With just 8 simple ingredients, it’s budget-friendly, ensuring you don’t have to break the bank to enjoy a delicious slush.
  • The slush has a perfectly smooth texture, thanks to the combination of ice and ice cream, providing a delightful contrast to the bright citrus flavors.
  • It’s highly customizable; you can easily adjust the sweetness and add fresh herbs for a unique twist that suits your taste.

Ingredients

  • 2 cups orange juice (freshly squeezed or store-bought)
  • 1 cup vanilla ice cream
  • 1 cup crushed ice
  • 1/2 cup milk (whole or 2%)
  • 1/4 cup granulated sugar (adjust based on sweetness preference)
  • 1 teaspoon vanilla extract
  • Zest of 1 orange (for added flavor)
  • Fresh orange slices and mint leaves (for garnish)

The star of this Frozen Orange Creamsicle Slush is the orange juice, which provides the vibrant, citrusy base. Freshly squeezed juice will yield the brightest flavor, but store-bought options can be just as convenient. If you’re opting for store-bought, choose 100% pure juice with no added sugars for the best results. Another essential ingredient is the vanilla ice cream; it adds creaminess and sweetness. You can substitute it with dairy-free ice cream if you’re looking for a vegan option. Whole or 2% milk complements the ice cream, creating a smooth blend. If you want a lower-calorie version, almond or oat milk can be good alternatives.

Lastly, the granulated sugar can be adjusted based on your sweetness preference. If you prefer a more natural sweetener, consider using honey or agave syrup. The orange zest enhances the flavor profile, providing an aromatic pop that brings the whole slush together. Don’t skip it! It adds an extra layer of brightness that makes this slush truly special.

Step-by-Step Instructions

  1. Start by preparing your ingredients. Gather 2 cups of orange juice, 1 cup of vanilla ice cream, and 1 cup of crushed ice. Make sure the ice is finely crushed, as larger chunks can make blending difficult.
  2. In a blender, combine the orange juice, vanilla ice cream, crushed ice, and 1/2 cup of milk. Add 1/4 cup of granulated sugar and 1 teaspoon of vanilla extract. If you like a sweeter slush, consider adding a bit more sugar at this stage.
  3. Add the zest of 1 orange to the blender. This step is crucial for enhancing the citrus flavor of your slush. Make sure not to include the bitter white pith—only the flavorful zest.
  4. Blend the mixture on medium-high speed for about 30-45 seconds. Stop once the ingredients are fully combined and the slush has a smooth, even consistency. If you notice large chunks of ice, blend for an additional 10-15 seconds. Avoid over-blending, as this can make the slush too liquidy.
  5. Once blended, taste the slush. If it needs more sweetness, add a little more sugar and blend for a few more seconds. If it’s too thick, you can add a splash of milk to reach your desired consistency.
  6. Pour the slush into glasses. This recipe typically serves 4, but you can easily double it for larger gatherings. Use a spoon to help guide the slush into the glasses if needed.
  7. Garnish each serving with fresh orange slices and mint leaves. The mint not only adds a pop of color but also a refreshing aroma that complements the citrus flavors beautifully.
  8. Serve immediately and enjoy! If you’ve made extra, you can refrigerate it for a short time, but it’s best enjoyed fresh.

Pro Tips for the Best Frozen Orange Creamsicle Slush

  • Don’t skip the orange zest! It’s a game-changer for flavor. Always zest before juicing to make it easier.
  • Use a high-powered blender for the best texture. A standard blender may struggle with ice, leading to uneven consistency. If you have a food processor, that can work too, but ensure the ice is finely crushed.
  • Adjust the ice-to-liquid ratio carefully. If your slush is too thick, it won’t blend well. Start with less ice and add more until you reach your preferred texture.
  • Be cautious with the sugar! Always start with the lower amount, as you can easily add more, but it’s hard to fix an overly sweet slush.
  • For a fun twist, consider adding a splash of coconut milk or a handful of fresh fruit like strawberries or pineapple. This not only enhances the flavor but also adds a beautiful color contrast.

Variations & Serving Ideas

There are countless ways to put a spin on your Frozen Orange Creamsicle Slush. Consider making a tropical version by adding in some pineapple juice or coconut milk for a delightful tropical twist. If you’re feeling adventurous, try incorporating a handful of frozen mango or peach slices for added sweetness. For a lighter version, swap out the vanilla ice cream for Greek yogurt for a creamy yet tangy alternative.

As for serving ideas, this refreshing slush pairs wonderfully with light summer dishes like grilled chicken skewers, fish tacos, or a simple salad topped with citrus vinaigrette. The bright, zesty flavors of the slush complement these dishes perfectly, making them an ideal pairing for a sunny day.

Storage, Make-Ahead & Reheating

This Frozen Orange Creamsicle Slush is best enjoyed fresh, but if you have leftovers, you can store them in an airtight container in the fridge for up to 2 days. Just keep in mind that the slush may lose some of its texture over time as the ice melts. It doesn’t freeze well, as the ice will turn into a solid block. If you must freeze it, blend again after thawing to restore the slushy consistency. This treat is best the day you make it, as the flavors meld together beautifully overnight, enhancing its deliciousness.

Frequently Asked Questions

Can I make Frozen Orange Creamsicle Slush ahead of time?

Yes — in fact, it tastes even better the next day as the flavors meld. However, it’s best to enjoy it fresh, as the texture can change if stored for too long. If you need to prepare it ahead, keep it in the fridge and re-blend before serving.

What kind of orange juice should I use?

For the best flavor, use freshly squeezed orange juice. However, if you’re short on time, opt for 100% pure store-bought juice without added sugars. This will ensure that your slush remains flavorful and refreshing.

Can I substitute the vanilla ice cream?

Absolutely! If you’re looking for a dairy-free option, coconut milk ice cream or a non-dairy vanilla ice cream can work wonderfully. They will still provide the creamy texture and sweetness you desire.

How can I adjust the sweetness of my slush?

You can easily adjust the sweetness by modifying the amount of sugar added. Start with 1/4 cup and taste the mixture before blending. If you prefer it sweeter, add more sugar gradually until it reaches your desired level.

What should I do if my slush is too thick?

If your slush is too thick, simply add a splash of milk or orange juice and blend again. This will help achieve a more drinkable consistency while maintaining the slushy texture. Adjust gradually to reach your preferred thickness.

Sun-Kissed Frozen Orange Cream Slush

Final Thoughts

The Frozen Orange Creamsicle Slush is a delightful blend of refreshing citrus and creamy goodness, making it a perfect treat for warm days or any time you crave a taste of nostalgia. The way the bright orange flavor dances with the creamy texture truly elevates this slush, transforming it into a satisfying escape from the everyday.

This is the kind of recipe I come back to again and again, especially when I’m looking to cool down or impress guests at a summer gathering. It’s simple to make and always brings smiles all around! I encourage you to try this recipe for yourself—don’t hesitate to share your results or even put your own spin on it. Happy slushing!

Print
clock clock iconcutlery cutlery iconflag flag iconfolder folder iconinstagram instagram iconpinterest pinterest iconfacebook facebook iconprint print iconsquares squares iconheart heart iconheart solid heart solid icon

Frozen Orange Creamsicle Slush


  • Author: Lily author
  • Total Time: 15 minutes
  • Yield: 4 servings 1x
Pin Recipe
Print Recipe

Description

This Frozen Orange Creamsicle Slush is a refreshing treat that combines creamy vanilla and zesty orange flavors. Perfect for hot summer days, it brings back nostalgic memories with every sip.


Ingredients

Scale
  • 2 cups orange juice (freshly squeezed or store-bought)
  • 1 cup vanilla ice cream
  • 1 cup crushed ice
  • 1/2 cup milk (whole or 2%)
  • 1/4 cup granulated sugar (adjust based on sweetness preference)
  • 1 teaspoon vanilla extract
  • Zest of 1 orange (for added flavor)
  • Fresh orange slices and mint leaves (for garnish)

Instructions

  1. Start by preparing your ingredients. Gather 2 cups of orange juice, 1 cup of vanilla ice cream, and 1 cup of crushed ice. Make sure the ice is finely crushed, as larger chunks can make blending difficult.
  2. In a blender, combine the orange juice, vanilla ice cream, crushed ice, and 1/2 cup of milk. Add 1/4 cup of granulated sugar and 1 teaspoon of vanilla extract. If you like a sweeter slush, consider adding a bit more sugar at this stage.
  3. Add the zest of 1 orange to the blender. This step is crucial for enhancing the citrus flavor of your slush. Make sure not to include the bitter white pith—only the flavorful zest.
  4. Blend the mixture on medium-high speed for about 30-45 seconds. Stop once the ingredients are fully combined and the slush has a smooth, even consistency. If you notice large chunks of ice, blend for an additional 10-15 seconds. Avoid over-blending, as this can make the slush too liquidy.
  5. Once blended, taste the slush. If it needs more sweetness, add a little more sugar and blend for a few more seconds. If it’s too thick, you can add a splash of milk to reach your desired consistency.
  6. Pour the slush into glasses. This recipe typically serves 4, but you can easily double it for larger gatherings. Use a spoon to help guide the slush into the glasses if needed.
  7. Garnish each serving with fresh orange slices and mint leaves. The mint not only adds a pop of color but also a refreshing aroma that complements the citrus flavors beautifully.
  8. Serve immediately and enjoy! If you’ve made extra, you can refrigerate it for a short time, but it's best enjoyed fresh.
  • Prep Time: 15 min
  • Cook Time: 0 min
  • Category: Dessert
  • Method: Blending
  • Cuisine: American

Nutrition

  • Serving Size: 1 serving
  • Calories: 200
  • Sugar: 30 g
  • Sodium: 50 mg
  • Fat: 5 g
  • Saturated Fat: 3 g
  • Unsaturated Fat: 2 g
  • Trans Fat: 0 g
  • Carbohydrates: 40 g
  • Fiber: 1 g
  • Protein: 2 g
  • Cholesterol: 20 mg

Keywords: Don't skip the orange zest! It's a game-changer for flavor. Always zest before juicing to make it easier.

Did you make this recipe?

Share a photo and tag us — we can't wait to see what you've made!

Zesty Lemon Poppy Seed Delight

One rainy afternoon, I found myself in my grandmother’s cozy kitchen, the kind that always smelled like warmth and love. She was whipping up her famous Lemon Poppy Seed Loaf, a recipe that had been passed down through generations. As the batter came together, the zesty aroma of fresh lemons filled the air, mingling perfectly with the nutty fragrance of poppy seeds. I can still picture her, apron-clad, as she expertly drizzled a vibrant citrus icing over the loaf, creating a glossy, sun-kissed finish that beckoned us to dive in. It was a moment that sparked my own passion for baking, and this recipe has become a cherished staple in my home ever since.

When you take a bite of this Lemon Poppy Seed Loaf, it’s like a burst of sunshine on your palate. The loaf is beautifully golden, with a tender crumb that melts in your mouth. Each slice is speckled with tiny poppy seeds, adding a delightful crunch that contrasts beautifully with the tangy sweetness of the lemon. And that citrus icing? It’s the finishing touch that elevates this loaf from ordinary to extraordinary, with its bright, zesty flavor dancing on your taste buds.

This recipe stands out because it embraces simplicity while delivering on flavor. I’ve added a hint of vanilla to the batter, enhancing the overall taste and making it even more indulgent. Trust me, once you make this Lemon Poppy Seed Loaf With Citrus Icing, it’ll become a go-to in your baking repertoire.

So, let me show you exactly how to make it!

Zesty Lemon Poppy Seed Delight

Why You’ll Love This Recipe

  • Moist and tender crumb that melts in your mouth, thanks to the perfect balance of butter and buttermilk.
  • Bright, zesty lemon flavor paired with crunchy poppy seeds, creating a delightful texture and taste experience.
  • Easy to whip up in just about an hour, perfect for last-minute gatherings or a cozy afternoon treat.
  • Budget-friendly with everyday ingredients, making it an accessible option for all home bakers.
  • The citrus icing adds a sweet tang that elevates the loaf, turning a simple recipe into a showstopper!

Ingredients

  • 1 ½ cups (190g) all-purpose flour
  • 1 teaspoon baking powder
  • ½ teaspoon baking soda
  • ½ teaspoon salt
  • 3 tablespoons poppy seeds
  • ½ cup (115g) unsalted butter, softened to room temperature
  • 1 cup (200g) granulated sugar
  • 2 large eggs
  • 1 teaspoon vanilla extract
  • 1 teaspoon lemon zest (from about 1 medium lemon)
  • ½ cup (120ml) buttermilk
  • 2 tablespoons fresh lemon juice

For the Citrus Icing:

  • 1 cup (120g) powdered sugar
  • 2 tablespoons fresh lemon juice
  • 1 tablespoon orange juice
  • 1 teaspoon lemon zest (for garnish, optional)

Let’s dive into the key ingredients that make this Lemon Poppy Seed Loaf so special. The all-purpose flour provides the structure and base for the loaf, while the baking powder and baking soda ensure it rises perfectly, giving the loaf a light texture. For a gluten-free variation, you could substitute the flour with a gluten-free all-purpose blend. Poppy seeds not only add a delightful crunch but also contribute to the unique flavor profile that pairs well with the citrus notes.

Unsalted butter is crucial for achieving the buttery richness that makes this loaf so moist. If you’re looking for a dairy-free option, coconut oil or a vegan butter can be used instead. The buttermilk is another essential component, providing acidity that activates the baking soda for a fluffy texture. If you don’t have buttermilk on hand, you can easily make a substitute by mixing ½ cup of milk with 1 tablespoon of vinegar or lemon juice and letting it sit for about 5 minutes.

Step-by-Step Instructions

  1. Preheat your oven to 350°F (175°C). Grease a 9×5-inch loaf pan or line it with parchment paper for easy removal later.
  2. In a medium mixing bowl, whisk together 1 ½ cups of all-purpose flour, 1 teaspoon of baking powder, ½ teaspoon of baking soda, ½ teaspoon of salt, and 3 tablespoons of poppy seeds. This helps to evenly distribute the baking agents and ensures a uniform rise.
  3. In a large mixing bowl, cream together ½ cup of softened unsalted butter and 1 cup of granulated sugar using an electric mixer on medium speed for about 3-4 minutes, until the mixture is light and fluffy. Make sure to scrape down the sides of the bowl occasionally.
  4. Add 2 large eggs, 1 teaspoon of vanilla extract, and 1 teaspoon of lemon zest to the creamed butter and sugar, mixing until fully combined. You want a smooth consistency, so ensure there are no lumps of butter.
  5. In a small bowl, combine ½ cup of buttermilk and 2 tablespoons of fresh lemon juice. Alternately add the dry ingredients and buttermilk mixture to the butter mixture, starting and ending with the dry ingredients. Mix just until combined; do not overmix, as this can lead to a dense loaf.
  6. Pour the batter into the prepared loaf pan. Smooth the top with a spatula, ensuring it’s even. Bake in the preheated oven for 50-60 minutes, or until a toothpick inserted in the center comes out clean. The edges should be lightly golden brown, and the center should feel just set.
  7. Once baked, remove the loaf from the oven and allow it to cool in the pan for about 10 minutes. Then, transfer it to a wire rack to cool completely. Resist the urge to slice too soon, as it will be crumbly if it’s still warm.
  8. While the loaf is cooling, prepare the citrus icing. In a medium bowl, whisk together 1 cup of powdered sugar, 2 tablespoons of fresh lemon juice, and 1 tablespoon of orange juice until smooth. If the icing is too thick, you can add a little more juice to reach your desired consistency.
  9. Once the loaf is completely cool, drizzle the citrus icing over the top. If you like, sprinkle with an additional teaspoon of lemon zest for an extra pop of flavor and color.

Pro Tips for the Best Lemon Poppy Seed Loaf With Citrus Icing

  • Be careful not to overmix your batter; this is a common mistake that can lead to a dense loaf. Mix just until the dry ingredients are incorporated for a light and fluffy texture.
  • Use room temperature ingredients, especially the butter and eggs. This helps to create a smoother batter and ensures even baking. Take your eggs out of the fridge about 30 minutes before you start.
  • For a more pronounced lemon flavor, consider adding a little lemon extract in addition to the zest and juice. Just a half teaspoon can elevate the citrus notes significantly.
  • When measuring your flour, spoon it into the measuring cup and level it off with a knife instead of scooping directly from the bag. This prevents packing and ensures you don’t end up with a dry loaf.
  • Invest in a good quality loaf pan; it makes a difference in heat distribution, which ensures even baking. If your pan is dark-coated, reduce the oven temperature by 25°F to prevent over-browning.

Variations & Serving Ideas

For a delightful twist, consider adding blueberries or raspberries to the batter for a fruity burst of flavor. You can also experiment with different citrus fruits—try lime or grapefruit zest and juice for a refreshing change. For a healthier option, substitute half of the all-purpose flour with whole wheat flour for added fiber without compromising too much on texture.

This Lemon Poppy Seed Loaf pairs beautifully with a light salad, such as a mixed greens salad with a vinaigrette, or a cup of tea for a cozy afternoon treat. It also complements a creamy cheese platter, as the acidity of the loaf balances rich cheeses perfectly. Lastly, a scoop of vanilla ice cream on the side creates a delightful contrast of temperatures and flavors!

Storage, Make-Ahead & Reheating

This Lemon Poppy Seed Loaf can be stored at room temperature for up to 3 days if wrapped tightly in plastic wrap. If you want to keep it longer, it freezes well for up to 3 months. To freeze, wrap the loaf tightly in plastic wrap and then in aluminum foil to prevent freezer burn.

When you’re ready to enjoy it again, simply thaw it in the fridge overnight. Reheat individual slices in the microwave for 15-20 seconds or in a toaster oven until warmed through. Interestingly, many people find that this loaf tastes even better the next day, as the flavors have time to meld!

Frequently Asked Questions

Can I make Lemon Poppy Seed Loaf With Citrus Icing ahead of time?

Yes — in fact, it tastes even better the next day! You can make the loaf a day in advance, allowing the flavors to develop. Just be sure to store it in an airtight container to maintain its moisture.

Can I substitute the poppy seeds?

Absolutely! If you don’t have poppy seeds on hand or prefer an alternative, you can use sesame seeds for a similar crunch or omit them entirely for a smooth loaf.

What can I use instead of buttermilk?

If you don’t have buttermilk, you can easily create a substitute by mixing ½ cup of milk (dairy or plant-based) with 1 tablespoon of vinegar or lemon juice. Let it sit for 5 minutes before using in the recipe.

How can I make this recipe gluten-free?

To make a gluten-free version of this Lemon Poppy Seed Loaf, substitute the all-purpose flour with a gluten-free all-purpose flour blend. Just ensure that the blend contains a binding agent like xanthan gum for the best results.

What is the best way to store leftover loaf?

Leftover Lemon Poppy Seed Loaf should be stored in an airtight container at room temperature for up to 3 days. For longer storage, wrap it tightly and freeze for up to 3 months. Thaw it before serving for the best texture.

Zesty Lemon Poppy Seed Delight

Final Thoughts

The Lemon Poppy Seed Loaf with Citrus Icing is truly a delightful treat that brings a burst of brightness to any occasion. The zesty lemon flavor combined with the subtle crunch of poppy seeds creates a satisfying balance, while the citrus icing adds a touch of sweetness that perfectly complements the loaf’s tanginess.

This is the kind of recipe I come back to again and again, especially when I want to brighten up a gloomy day or celebrate a small victory. The aroma that fills the kitchen as it bakes is absolutely heavenly! I encourage you to give this recipe a try; you might just find it becoming a beloved staple in your home. Don’t forget to share your results or even add your own unique twist—I can’t wait to see what you create!

Print
clock clock iconcutlery cutlery iconflag flag iconfolder folder iconinstagram instagram iconpinterest pinterest iconfacebook facebook iconprint print iconsquares squares iconheart heart iconheart solid heart solid icon

Lemon Poppy Seed Loaf


  • Author: Lily author
  • Total Time: 13 minute
  • Yield: 1 loaf 1x
Pin Recipe
Print Recipe

Description

This Lemon Poppy Seed Loaf is a delightful treat that combines zesty lemon flavor with crunchy poppy seeds. Topped with a citrus icing, it’s perfect for any occasion.


Ingredients

Scale
  • 1 ½ cups (190g) all-purpose flour
  • 1 teaspoon baking powder
  • ½ teaspoon baking soda
  • ½ teaspoon salt
  • 3 tablespoons poppy seeds
  • ½ cup (115g) unsalted butter, softened to room temperature
  • 1 cup (200g) granulated sugar
  • 2 large eggs
  • 1 teaspoon vanilla extract
  • 1 teaspoon lemon zest (from about 1 medium lemon)
  • ½ cup (120ml) buttermilk
  • 2 tablespoons fresh lemon juice
  • 1 cup (120g) powdered sugar
  • 2 tablespoons fresh lemon juice
  • 1 tablespoon orange juice
  • 1 teaspoon lemon zest (for garnish, optional)

Instructions

  1. Preheat your oven to 350°F (175°C). Grease a 9×5-inch loaf pan or line it with parchment paper for easy removal later.
  2. In a medium mixing bowl, whisk together 1 ½ cups of all-purpose flour, 1 teaspoon of baking powder, ½ teaspoon of baking soda, ½ teaspoon of salt, and 3 tablespoons of poppy seeds. This helps to evenly distribute the baking agents and ensures a uniform rise.
  3. In a large mixing bowl, cream together ½ cup of softened unsalted butter and 1 cup of granulated sugar using an electric mixer on medium speed for about 3-4 minutes, until the mixture is light and fluffy. Make sure to scrape down the sides of the bowl occasionally.
  4. Add 2 large eggs, 1 teaspoon of vanilla extract, and 1 teaspoon of lemon zest to the creamed butter and sugar, mixing until fully combined. You want a smooth consistency, so ensure there are no lumps of butter.
  5. In a small bowl, combine ½ cup of buttermilk and 2 tablespoons of fresh lemon juice. Alternately add the dry ingredients and buttermilk mixture to the butter mixture, starting and ending with the dry ingredients. Mix just until combined; do not overmix, as this can lead to a dense loaf.
  6. Pour the batter into the prepared loaf pan. Smooth the top with a spatula, ensuring it’s even. Bake in the preheated oven for 50-60 minutes, or until a toothpick inserted in the center comes out clean. The edges should be lightly golden brown, and the center should feel just set.
  7. Once baked, remove the loaf from the oven and allow it to cool in the pan for about 10 minutes. Then, transfer it to a wire rack to cool completely. Resist the urge to slice too soon, as it will be crumbly if it’s still warm.
  8. While the loaf is cooling, prepare the citrus icing. In a medium bowl, whisk together 1 cup of powdered sugar, 2 tablespoons of fresh lemon juice, and 1 tablespoon of orange juice until smooth. If the icing is too thick, you can add a little more juice to reach your desired consistency.
  9. Once the loaf is completely cool, drizzle the citrus icing over the top. If you like, sprinkle with an additional teaspoon of lemon zest for an extra pop of flavor and color.
  • Prep Time: 15 mins
  • Cook Time: 50-60 mins
  • Category: Dessert
  • Method: Baking
  • Cuisine: American

Nutrition

  • Serving Size: 1 slice
  • Calories: 200
  • Sugar: 15 g
  • Sodium: 150 mg
  • Fat: 8 g
  • Saturated Fat: 5 g
  • Unsaturated Fat: 3 g
  • Trans Fat: 0 g
  • Carbohydrates: 30 g
  • Fiber: 1 g
  • Protein: 3 g
  • Cholesterol: 40 mg

Keywords: Be careful not to overmix your batter; this is a common mistake that can lead to a dense loaf. Use room temperature ingredients for a smoother batter and even baking.

Did you make this recipe?

Share a photo and tag us — we can't wait to see what you've made!

  • Privacy Policy
  • Terms Of Service
  • Contact
  • About
  • GDPR

Copyright © 2025 Homesmad