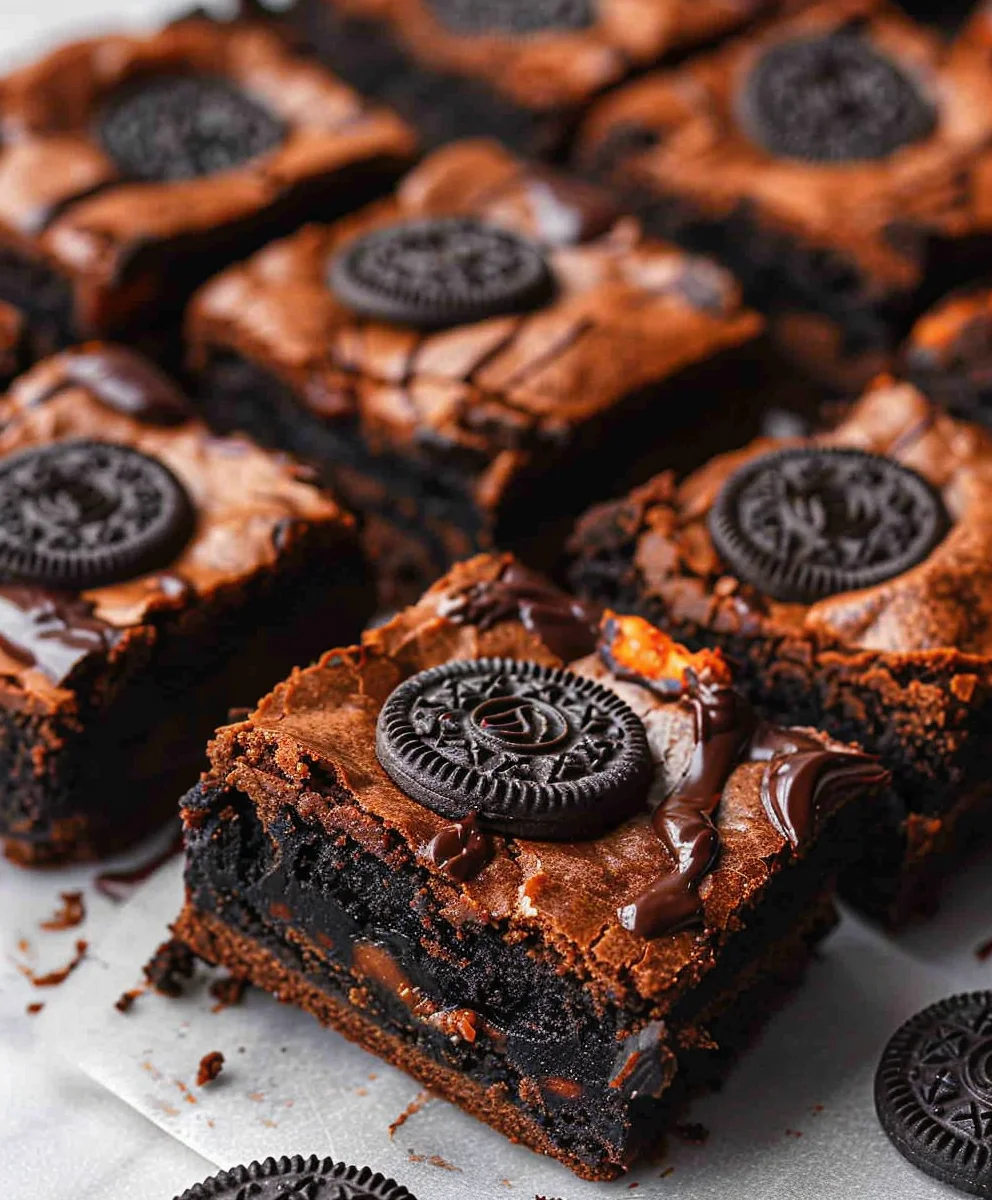
Halloween Oreo Brownies are more than just a dessert; they are an essential part of the spooky season’s culinary delight! As October draws to a close and the air becomes crisp, our thoughts naturally turn to costumes, decorations, and, of course, a delightful array of treats. What better way to celebrate the spirit of Halloween than with a fudgy, rich brownie base generously studded with everyone’s favorite cream-filled chocolate cookies?
This irresistible combination perfectly captures the playful essence of Halloween. While brownies themselves have a long-standing history as a beloved American classic, adding Oreos transforms them into a whimsical, texture-rich masterpiece. The iconic black and white of the Oreo cookies offers a subtle nod to classic Halloween colors, making these treats visually appealing for any ghoulish gathering or family night in. I find that the marriage of the deep chocolate brownie with the crisp, sweet crunch of the Oreos creates an absolutely unforgettable experience.
Why Everyone Loves Halloween Oreo Brownies
People simply adore these Halloween Oreo Brownies because they offer the ultimate comfort food with an exciting, festive twist. The deep chocolate flavor, the incredibly moist and fudgy texture, and that satisfying crunch from the Oreos make every bite a celebration. They are remarkably easy to prepare, making them an ideal choice for busy parents or anyone looking for a show-stopping dessert without hours of effort. Get ready to bake a batch that will disappear faster than a ghost on a windy night!

Ingredients:
- For the Fudgy Brownie Base:
- 1 cup (2 sticks / 226g) unsalted butter
- 1 cup (180g) semi-sweet chocolate chips (or good quality chopped baking chocolate), I always say, go for quality here, it truly makes a difference in flavor!
- 1 ¾ cups (350g) granulated sugar
- 4 large eggs, at room temperature (this helps everything emulsify beautifully)
- 1 teaspoon pure vanilla extract, don’t skimp on the good stuff!
- ¾ cup (75g) all-purpose flour
- ½ cup (50g) unsweetened cocoa powder, Dutch-processed for a darker, richer, more fudgy brownie, which is exactly what we’re going for with these Halloween Oreo Brownies.
- ½ teaspoon salt, just a pinch to balance all that sweetness.
- For the Oreo Layer:
- Approximately 36-40 Oreo cookies (about 1.5 standard packages, or one “family size” package). Original flavor is my go-to for that classic Oreo crunch and taste.
- For the Spooky Oreo Frosting:
- 1 cup (2 sticks / 226g) unsalted butter, softened to room temperature (essential for a smooth frosting!)
- 4 cups (480g) powdered sugar (also known as confectioners’ sugar), I always recommend sifting this to avoid any dreaded lumps in your beautiful frosting.
- ½ cup (120ml) heavy cream or whole milk, for creaminess.
- 1 teaspoon pure vanilla extract
- Pinch of salt, to cut through the sweetness.
- Black food gel coloring (gel works absolute wonders for intense color, much better than liquid drops!).
- Orange food gel coloring (optional, but fun for decorative accents on your Halloween Oreo Brownies).
- For the Halloween Topping & Decoration:
- 10-12 additional Oreo cookies, crushed (you can use the remaining half package or so from the Oreo layer, we’re all about no waste!).
- Assorted Halloween sprinkles (think ghosts, pumpkins, bats – let your creativity shine!).
- Small candy eyeballs (optional, but trust me, they add so much personality and a truly spooky touch to your treats!).
Equipment You’ll Need:
Having the right tools makes baking these Halloween Oreo Brownies a breeze. Here’s what I recommend you gather:
- A sturdy 9×13-inch baking pan.
- Parchment paper, with a slight overhang on two sides for easy lifting.
- A large microwave-safe bowl or a double boiler setup for melting your butter and chocolate.
- A medium mixing bowl for your dry ingredients.
- A whisk, for combining dry ingredients and light mixing.
- A reliable rubber spatula, invaluable for folding and scraping down bowls.
- An electric mixer (either a stand mixer with a paddle attachment or a good hand mixer) for whipping up that glorious frosting.
- A wire rack for cooling your brownies completely. This is crucial!
- A piping bag fitted with a star tip (optional, but fantastic if you want to pipe a decorative border on your brownies).
- A small zipper-top bag or a food processor for easily crushing your Oreos.
Let’s Get Started: Preparing the Fudgy Brownie Base
Get ready for some serious chocolate action! These brownies are the perfect base for our Halloween Oreo Brownies, delivering that deep, rich, fudgy texture we all crave.
- Prepare Your Pan: First things first, preheat your oven to 350°F (175°C). Then, line your 9×13-inch baking pan with parchment paper, leaving an overhang on the two longer sides. This little trick makes lifting the finished brownies out so incredibly easy. Give the parchment paper a light spray with non-stick cooking spray, just for good measure.
- Melt Chocolate and Butter: In your large microwave-safe bowl, combine the unsalted butter and semi-sweet chocolate chips. Microwave in 30-second intervals, stirring well after each, until the mixture is completely melted and smooth. Alternatively, if you prefer the stovetop, use a double boiler over simmering water, stirring until smooth. Be careful not to overheat the chocolate, as it can seize! Let this mixture cool slightly for about 5-10 minutes.
- Whisk in Sugar: Once the chocolate mixture has cooled a bit, add the granulated sugar to the bowl. Whisk vigorously until well combined. The mixture might look a little grainy at first, but keep going until it starts to look glossy and smooth. This step is important for creating that desirable crackly top!
- Add Eggs and Vanilla: Now, one at a time, crack in your eggs, whisking well after each addition until fully incorporated. Don’t rush this part! Mixing well after each egg helps to create that chewy texture. Finally, stir in the vanilla extract. The mixture should be thick, glossy, and beautifully emulsified at this point.
- Combine Dry Ingredients: In a separate medium mixing bowl, whisk together the all-purpose flour, Dutch-processed cocoa powder, and salt. Make sure there are no lumps in the cocoa powder.
- Fold in Dry to Wet: Gradually add the dry ingredients to the wet ingredients, folding gently with your rubber spatula until just combined. The key here is not to overmix! Overmixing develops the gluten in the flour, which can lead to tough, cakey brownies, and we want fudgy. Stop mixing as soon as you no longer see streaks of dry ingredients.
Assembling Your Halloween Oreo Brownies
This is where the magic really starts to happen for our Halloween Oreo Brownies! Adding that layer of whole Oreos takes these from great to absolutely unforgettable.
- Layer Half the Batter: Pour about half of your brownie batter into the prepared baking pan. Use your rubber spatula to spread it evenly into a thin layer. It doesn’t have to be perfect, just a nice, consistent base.
- Add the Whole Oreos: Carefully arrange your whole Oreo cookies over the layer of brownie batter. Place them in neat rows, as close together as you can get them without overlapping too much. I usually fit about 36-40 Oreos in a 9×13 pan. This creates a delightful crunchy surprise in the middle of your fudgy brownies!
- Top with Remaining Batter: Gently dollop the remaining brownie batter over the Oreo layer. Use your spatula to carefully spread it out, making sure to cover all the Oreos as much as possible. It might be a little tricky, but be patient and spread it slowly. You want to encapsulate those Oreos in pure chocolatey goodness!
Baking Your Fudgy Delights
Patience, my friends, is a virtue when baking these amazing Halloween Oreo Brownies. Proper baking ensures they’re perfectly fudgy and not overdone.
- Bake to Perfection: Place your pan in the preheated oven and bake for 28-35 minutes. Baking times can vary depending on your oven, so keep an eye on them.
- Check for Doneness: The brownies are done when the edges look set and a toothpick inserted into the center (making sure you don’t hit an Oreo!) comes out with moist crumbs, but not wet batter. If it comes out clean, they might be a tad overbaked, but still delicious! We’re aiming for that perfectly gooey center.
- Cool Completely: Remove the pan from the oven and place it on a wire rack to cool completely. This step is absolutely critical! Do not attempt to frost or cut your brownies while they are warm, or they will fall apart, and your frosting will melt. I often let mine cool for several hours, or even pop them in the fridge for an hour or two once they’ve reached room temperature, especially when I’m eager to frost them. This cooling process allows the brownies to set up beautifully, giving you those clean cuts and perfect fudgy texture.
Whipping Up the Spooky Oreo Frosting
No Halloween Oreo Brownies are complete without a dramatic, spooky frosting! This black buttercream is easy to make and looks incredibly striking.
- Cream the Butter: In the bowl of your electric mixer, cream the softened unsalted butter on medium speed until it’s light and fluffy, usually about 2-3 minutes. This incorporates air and makes your frosting wonderfully smooth.
- Gradually Add Powdered Sugar: With the mixer on low speed, gradually add the sifted powdered sugar, one cup at a time. Once incorporated, increase the speed to medium and beat for another minute or two.
- Add Liquids and Flavor: Pour in the heavy cream (or milk), vanilla extract, and pinch of salt. Beat on low speed until combined, then increase to medium-high and beat for another 3-5 minutes, until the frosting is light, fluffy, and smooth. If it’s too thick, add a tiny bit more cream; if too thin, add a bit more powdered sugar.
- Achieve Spooky Black Color: Now for the fun part! Add your black food gel coloring. Start with a good amount, then mix on low speed until the color is evenly distributed. You’ll likely need to add quite a bit of gel to achieve a true, deep black. Keep adding and mixing until you reach your desired shade of spooky black. I sometimes let it sit for 10-15 minutes after mixing, then give it another mix; colors tend to deepen over time. You want it to look like midnight magic!
Decorating Your Halloween Masterpiece
This is where your Halloween Oreo Brownies truly come to life! Get creative and have fun making them as spooky or whimsical as you like.
- Crush Remaining Oreos: Place the additional 10-12 Oreo cookies into a sturdy zipper-top bag. Use a rolling pin or the bottom of a heavy glass to crush them into coarse crumbs. Some larger pieces are great for texture! Alternatively, a food processor does a quick job.
- Frost the Brownies: Once your brownies are completely cool, carefully lift them out of the pan using the parchment paper overhang and transfer them to a cutting board or serving platter. Evenly spread the black Oreo frosting over the top of the cooled brownies using an offset spatula or the back of a spoon. Aim for a smooth, eerie surface.
- Add Crushed Oreo Topping: Generously sprinkle the crushed Oreo cookies all over the top of the black frosting. This adds fantastic texture and reinforces that classic Oreo flavor. It looks a bit like scattered dirt, which is perfect for a spooky Halloween theme!
- Decorate with Halloween Sprinkles: Scatter your assorted Halloween sprinkles (ghosts, pumpkins, bats – whatever you have!) over the crushed Oreos. This adds pops of color and holiday cheer.
- Place Candy Eyeballs (Optional but Recommended!): For an extra touch of creepiness and fun, strategically place small candy eyeballs on top of your brownies. You can group them in pairs to look like peering monsters or scatter them individually for a more abstract effect. My favorite is to create little monster faces peeking out from the crushed Oreos.
- Optional Piping: If you’re feeling fancy and used a piping bag with a star tip, you could pipe a decorative border around the edges of your brownies using a bit of your black frosting, or even use some orange frosting for a pop of color to truly make these Halloween Oreo Brownies shine!
Storage Tips to Keep Them Fresh:
To enjoy your delicious Halloween Oreo Brownies for days to come, proper storage is key!
- Store the brownies in an airtight container at room temperature for up to 3-4 days.
- If you live in a warm climate or want them to last longer, you can store them in the refrigerator for up to a week. Just be sure to let them come to room temperature for about 30 minutes before serving for the best fudgy texture.
- These brownies also freeze beautifully! Place cut brownies in a single layer on a baking sheet to flash freeze for about an hour, then transfer them to an airtight, freezer-safe container or bag for up to 2-3 months. Thaw at room temperature when you’re ready to indulge.
Pro-Tips for Perfect Halloween Oreo Brownies:
I’ve made these Halloween Oreo Brownies countless times, and I’ve picked up a few tricks along the way that I’d love to share to help you achieve absolute perfection!
- Quality Ingredients Matter: Especially for the chocolate and cocoa powder. Using a good quality semi-sweet chocolate and Dutch-processed cocoa powder will elevate the flavor and richness of your brownies significantly. It truly makes a noticeable difference.
- Don’t Overbake: This is perhaps the most important rule for fudgy brownies. It’s better to slightly underbake than overbake. The brownies will continue to set as they cool. Remember, a toothpick with moist crumbs (not wet batter!) is your ideal indicator.
- Room Temperature Eggs: Seriously, don’t skip this step! Room temperature eggs emulsify much better with the other ingredients, leading to a smoother batter and a more uniform texture in your finished brownies. Just set them out on the counter for 30 minutes to an hour before you start, or warm them gently in a bowl of warm water for a few minutes.
- Cool Completely, I Repeat, Completely! I know the urge to dig in is strong, but for neat cuts and perfectly set frosting, you absolutely must let the brownies cool down all the way. A warm brownie will just turn into a gooey, frosted mess. Patience is a virtue here, and it will be rewarded!
- Achieving True Black Frosting: Black food gel coloring can be tricky. Don’t be shy with it! It often looks grey at first. Keep adding small amounts and mixing. Sometimes letting the frosting sit for 10-15 minutes after you think you’ve reached your desired shade, and then mixing again, helps the color deepen to a true, dark black.
- Customize Your Spookiness: These Halloween Oreo Brownies are a fantastic canvas. Feel free to experiment with other Halloween candies – perhaps some candy corn around the edges, or mini chocolate bats. Let your creativity run wild and make them uniquely yours!
- Clean Cuts: For perfectly clean brownie squares, I recommend chilling the brownies (once frosted and set) for about 30 minutes in the fridge before slicing. Use a large, sharp knife, wiping the blade clean with a hot, damp cloth between each cut. This creates those picture-perfect slices.
Enjoy these incredibly fudgy, deliciously spooky Halloween Oreo Brownies! They are always a huge hit at any Halloween gathering, and frankly, they’re so good, you might just want to make them all year round!
Conclusion:
So, there you have it – my absolute favorite recipe for these incredible treats. If you’ve been searching for that perfect blend of gooey chocolate, satisfying crunch, and festive flair, then look no further. These Halloween Oreo Brownies are truly a game-changer. They’re not just a dessert; they’re an experience, a delightful journey into rich, fudgy goodness elevated by the iconic creaminess and crispiness of Oreos. I promise you, one bite of these decadent squares and you’ll understand why I rave about them so much. They strike that exquisite balance between being incredibly indulgent and surprisingly simple to whip up, making them the ultimate crowd-pleaser for any gathering, especially as we head into the spooky season. Forget dry, crumbly brownies; these are moist, dense, and packed with flavor, ensuring every single mouthful is pure bliss. They embody everything you could ever want in a festive baked good – fun, flavorful, and fantastically memorable. Trust me when I say, once you try them, they’ll become a staple in your autumnal baking repertoire, bringing smiles and satisfied groans of delight to everyone lucky enough to get a piece.
Make Them Even More Special: Serving Suggestions & Variations
Now, let’s talk about how to make these even more spectacular, or how to put your own unique twist on them. While these brownies are undeniably magnificent on their own, a scoop of vanilla bean ice cream melting gently on top takes them to an entirely new level of indulgence. The cold, creamy ice cream against the warm, fudgy brownie is a match made in dessert heaven. A drizzle of warm chocolate fudge or a dollop of freshly whipped cream wouldn’t go amiss either, adding another layer of luxurious texture. For a truly captivating presentation, especially for a Halloween party, consider adding a sprinkle of festive, spooky-themed sprinkles on top of the warm brownies right after they come out of the oven, allowing them to stick as the chocolate sets. You could even dust them lightly with powdered sugar through a stencil to create ghost or spiderweb patterns once cooled for an extra touch of seasonal magic.
If you’re feeling adventurous, don’t hesitate to experiment with different Oreo flavors – imagine mint Oreos for a chillingly good treat that brings a refreshing zing, or peanut butter Oreos for an extra layer of nutty richness that complements the chocolate beautifully. Another fantastic variation is to chop up some Reese’s peanut butter cups or mini candy corn and scatter them into the batter alongside the Oreos for an explosion of additional flavors and colors that scream ‘Halloween’! For those who love a bit of extra texture, a handful of chocolate chips or chopped nuts can always be folded into the batter, enhancing the complex layers of flavor. These brownies are incredibly versatile, inviting you to unleash your inner baking artist. You could even cut them into smaller, bite-sized pieces for a diverse dessert platter, or use themed cookie cutters (ghosts, pumpkins, bats!) on the cooled sheet of brownies before serving to make them extra special and visually appealing for the holiday. The possibilities are truly endless when it comes to customizing these delightful treats.
I’ve shared all my secrets and tips, and now it’s your turn! I genuinely hope you’re feeling inspired to roll up your sleeves and give this recipe a try. I can almost taste the magic already! There’s nothing more satisfying for me than knowing someone has brought a little joy into their home, or to their friends and family, with one of my recipes. Please, when you make these, don’t be shy – I absolutely adore seeing your creations! Snap a photo, share your experience, tell me what variations you tried, or what your loved ones thought. Was it the hit of your Halloween party? Did the kids beg for more? Did you find your new favorite brownie recipe? Your feedback and shared moments are what truly fuel my passion for baking and sharing. So go forth, bake up a batch of these glorious brownies, and let’s spread some delicious, spooky cheer together! I’m genuinely excited to hear all about your baking adventures and see the amazing treats you bring to life in your kitchen. Happy baking, and happy feasting!
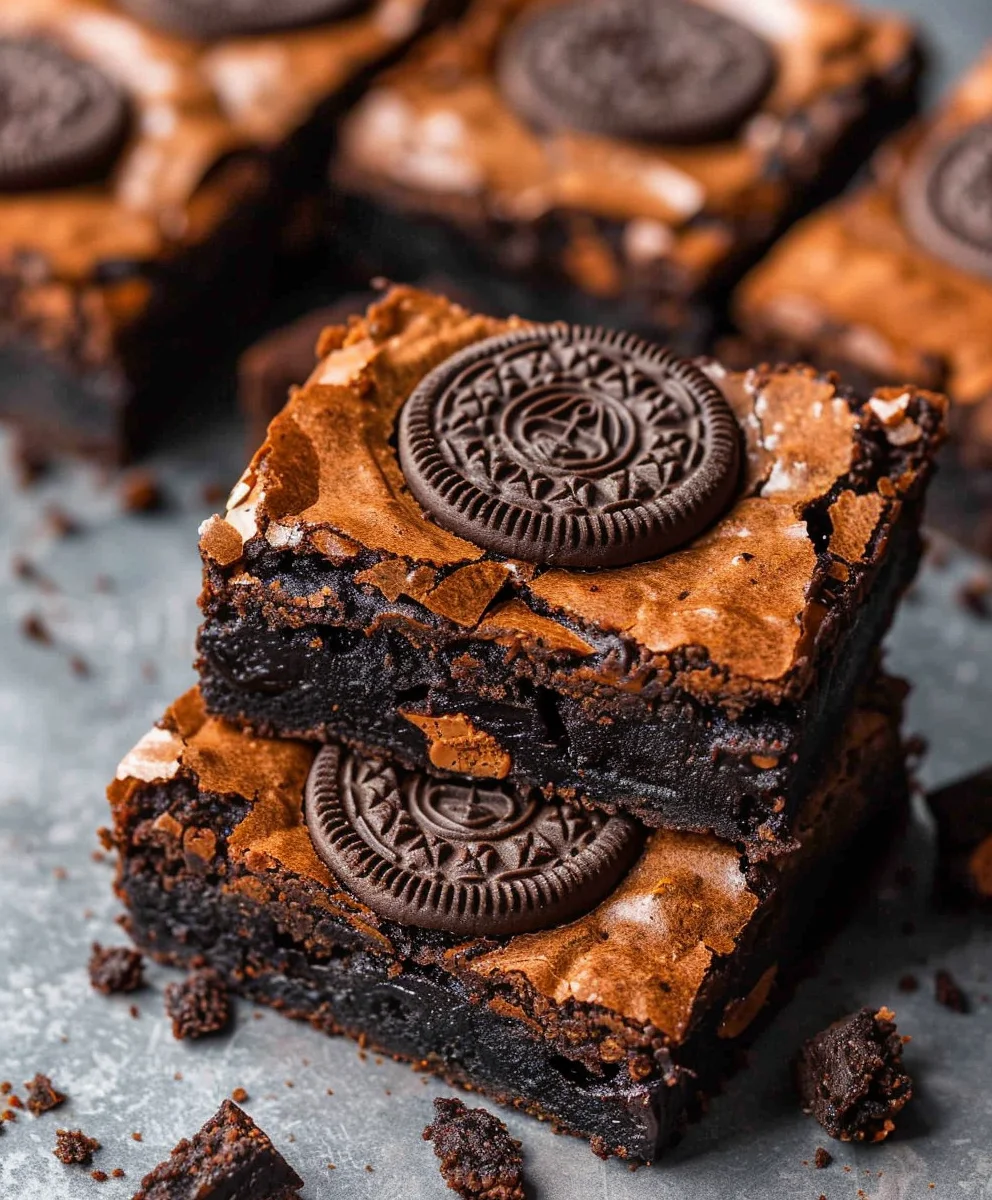
Easy Halloween Oreo Brownies
Fudgy, rich brownies generously studded with classic Oreo cookies, creating a delightful crunch and chocolatey treat perfect for the spooky season.
Ingredients
-
2/3 cup unsalted butter
-
1/4 cup vegetable oil
-
1 cup granulated sugar
-
1/3 cup brown sugar
-
2/3 cup unsweetened cocoa powder (Dutch-processed recommended)
-
2 large eggs, cold
-
1 tsp pure vanilla extract
-
1/2 tsp salt
-
1/2 cup all-purpose flour
-
15 Oreo cookies (for brownie batter)
-
5 Oreo cookies (for topping)
Instructions
-
Step 1
Preheat oven to 350°F (175°C). Line a 9×13-inch baking pan with parchment paper, leaving an overhang on two sides for easy lifting. Lightly spray parchment with non-stick spray. -
Step 2
In a large microwave-safe bowl, melt butter and vegetable oil. Whisk in granulated sugar and brown sugar until glossy and well combined. -
Step 3
Whisk in the cold eggs one at a time until fully incorporated after each addition. Stir in the pure vanilla extract. The mixture should be thick and glossy. -
Step 4
In a separate medium bowl, whisk together the all-purpose flour, unsweetened cocoa powder, and salt. Ensure there are no lumps in the cocoa powder. -
Step 5
Gradually add the dry ingredients to the wet mixture, folding gently with a rubber spatula until just combined. Be careful not to overmix, as this can lead to tough brownies. -
Step 6
Pour about half of the brownie batter into the prepared pan and spread evenly. Carefully arrange 15 whole Oreo cookies in neat rows over this layer of batter. Gently dollop and spread the remaining brownie batter over the Oreos, ensuring they are mostly covered. -
Step 7
Place the pan in the preheated oven and bake for 28-35 minutes. Brownies are done when the edges look set and a toothpick inserted into the center (avoiding an Oreo) comes out with moist crumbs, not wet batter. -
Step 8
Remove the pan from the oven and place it on a wire rack to cool completely. This is crucial for fudgy texture and clean cuts. Once cooled, crush the 5 additional Oreo cookies into coarse crumbs and generously sprinkle them over the brownies. -
Step 9
For clean cuts, you may chill the cooled brownies for about 30 minutes before slicing. Use a sharp knife, wiping the blade clean between each cut. Enjoy these fudgy Halloween Oreo Brownies!
Important Information
Nutrition Facts (Per Serving)
It is important to consider this information as approximate and not to use it as definitive health advice.
Allergy Information
Please check ingredients for potential allergens and consult a health professional if in doubt.