Halloween Breakfast is more than just a meal; it’s the magical start to one of the most anticipated days of the year! I always find immense joy in transforming an ordinary morning into a delightfully eerie experience, setting the perfect tone for a day filled with costumes, carved pumpkins, and trick-or-treating adventures. For generations, the essence of Halloween has been about playful frights and sweet indulgence, and what better way to embrace this spirit than by infusing it into our very first meal? It’s a wonderful way to extend the holiday excitement beyond just the evening’s festivities, creating cherished family memories right from sunrise.
I’ve noticed that people adore a special Halloween Breakfast because it brings a unique blend of creativity, excitement, and delicious satisfaction. It’s about crafting spooky treats that are both visually thrilling and incredibly tasty, making every bite a celebration of the season. I truly believe that starting the day with such a fun, themed meal not only amplifies the enchantment of Halloween but also ensures everyone, from the littlest ghouls to the oldest monsters, begins their day with a smile and a dash of delightful fright. Get ready to stir up some holiday magic!
Ingredients:
- For the Spooky Spiderweb Pumpkin Spice Pancakes:
- 1 ½ cups (190g) all-purpose flour
- 2 tablespoons (25g) granulated sugar
- 2 teaspoons baking powder
- 1 teaspoon baking soda
- ½ teaspoon salt
- 1 ½ teaspoons pumpkin pie spice blend (or your own mix of cinnamon, nutmeg, ginger, cloves)
- 1 cup (240ml) milk (any kind, I prefer whole milk for richness)
- ½ cup (120g) pumpkin puree (not pie filling)
- 1 large egg, lightly beaten
- 2 tablespoons (30ml) unsalted butter, melted and slightly cooled, plus extra for greasing the griddle
- 1 teaspoon vanilla extract
- 2 tablespoons (15g) unsweetened cocoa powder OR 1 ounce (28g) dark chocolate, melted (for the spiderweb design)
- A few tablespoons of extra milk or water, if needed, to thin the cocoa batter
- For the Mummified Breakfast Sausages:
- 1 package (about 10-12 links) breakfast sausage links (fully cooked or raw, adjust baking time accordingly)
- 1 sheet (or half of a 17.3-ounce package) frozen puff pastry, thawed, OR 1 can (8 ounces) crescent roll dough
- 1 large egg, whisked with 1 tablespoon water (for egg wash)
- Candy googly eyes (optional, but highly recommended for fun!)
- For the Warm Pumpkin Spice Maple Syrup:
- 1 cup (240ml) pure maple syrup
- ¼ cup (60g) pumpkin puree
- ½ teaspoon pumpkin pie spice blend
- 1 tablespoon (15g) unsalted butter
- ½ teaspoon vanilla extract
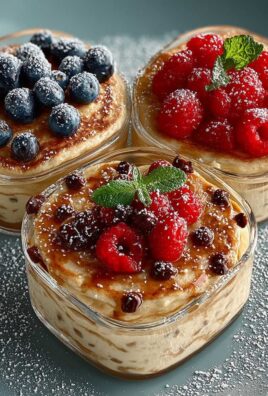
- Optional Garnishes:
- Whipped cream (for little ghost shapes)
- Halloween sprinkles
- Fresh berries (blackberries or blueberries for dark accents)
Preparing the Pumpkin Spice Pancake Batter
- Gather Your Tools and Ingredients: Before you even think about mixing, lay out all your ingredients and tools. This way, you won’t be scrambling for something in the middle of the process. I always find it makes the cooking experience so much more enjoyable and less stressful. Make sure your pumpkin puree is 100% pumpkin, not pie filling, as the pie filling contains added spices and sugar that might throw off the balance of our pancake batter.
- Combine the Dry Ingredients: In a large mixing bowl, I like to whisk together the all-purpose flour, granulated sugar, baking powder, baking soda, salt, and pumpkin pie spice. Whisking ensures that all these dry elements are thoroughly combined and evenly distributed. This step is crucial for achieving that consistent rise and flavor in every pancake. We want those warming spices to be present in every bite!
- Mix the Wet Ingredients: In a separate, medium-sized bowl, I’ll gently whisk the milk, pumpkin puree, lightly beaten egg, melted butter, and vanilla extract until they are well combined. It’s important that your melted butter has cooled slightly before adding it to the eggs, as you don’t want to accidentally cook the egg! A lukewarm temperature is perfect.
- Combine Wet and Dry: Now comes the magic! Pour the wet ingredients into the dry ingredients. Using a spatula or a whisk, mix them just until they are combined. The key here is not to overmix! A few lumps are perfectly fine and actually desired. Overmixing develops the gluten in the flour, which can lead to tough, rubbery pancakes, and we’re aiming for light, fluffy, and tender pancakes for our Halloween breakfast.
- Create the Spiderweb Batter: Scoop about ¼ cup of your pancake batter into a small bowl. Into this small portion, sift in the unsweetened cocoa powder or add the melted dark chocolate. If using cocoa powder, you might need to add a teaspoon or two of extra milk or water to achieve a consistency that’s just a little bit thinner than your main pancake batter, but still thick enough to hold its shape when piped. This is our “spiderweb” batter, and we want it to be easy to drizzle. Give it a good stir until smooth. If you’re going for maximum visual impact, you can transfer this chocolate batter into a small piping bag or a Ziploc bag with a tiny corner snipped off for precision.
- Rest the Batter: This is a step I never skip! Let your main pancake batter rest for 5-10 minutes at room temperature. This resting period allows the gluten to relax, the flour to fully hydrate, and the baking powder and baking soda to start working their magic, leading to even fluffier pancakes. While it rests, you can start on the mummified sausages or the syrup!
Making the Mummified Sausages
- Preheat and Prep: Preheat your oven to 375°F (190°C). Line a baking sheet with parchment paper for easy cleanup and to prevent sticking. If you’re using raw breakfast sausages, ensure they are fully cooked through first according to package directions. For pre-cooked sausages, you’re good to go!
- Prepare the Dough: If using puff pastry, unfold the thawed sheet onto a lightly floured surface. Using a pizza cutter or a sharp knife, cut the pastry into thin strips, about ¼ to ½ inch wide. If you’re using crescent roll dough, separate the triangles and then cut each triangle lengthwise into several thin strips. The idea is to create “bandages” for our mummies.
- Wrap the Sausages: Take one sausage link and begin wrapping a strip of dough around it, starting from one end and working your way to the other. Overlap the dough slightly as you go, leaving a small gap near one end for the “face” of your mummy to show through. Don’t wrap too tightly, as the dough will expand. The haphazard, slightly messy wrapping actually adds to the mummified look, so don’t strive for perfection! It’s supposed to look ancient and spooky.
- Egg Wash and Bake: Place the wrapped sausages seam-side down on your prepared baking sheet. In a small bowl, whisk one large egg with a tablespoon of water to create an egg wash. Lightly brush the egg wash over the dough-wrapped sausages. This will give them a beautiful golden-brown color and a nice sheen. Bake for 12-18 minutes, or until the pastry is puffed and golden brown and the sausages are heated through. Baking times may vary slightly based on your oven and whether your sausages were raw or pre-cooked. Keep an eye on them!
- Add the Eyes: Once the mummies are out of the oven and still warm, carefully place two candy googly eyes onto the exposed “face” area of each sausage. The warmth of the sausage will help the candy eyes adhere. If they don’t stick well, a tiny dot of leftover chocolate batter (if you have any) or even a bit of cream cheese can act as “glue.” These little details truly bring the Halloween breakfast theme to life!
Whipping Up the Pumpkin Spice Maple Syrup
- Combine Ingredients: In a small saucepan, combine the pure maple syrup, pumpkin puree, pumpkin pie spice blend, and unsalted butter. I love how quickly this comes together, transforming regular maple syrup into something extra special for the holiday.
- Gentle Heat: Place the saucepan over medium-low heat. Whisk gently and continuously until the butter is melted and all the ingredients are thoroughly combined and warmed through. You don’t want to bring it to a rolling boil, just a gentle simmer. This allows the flavors to meld beautifully without scorching the syrup.
- Add Vanilla: Once everything is warm and smooth, remove the saucepan from the heat and stir in the vanilla extract. The vanilla adds another layer of warmth and complexity to the flavor profile.
- Serve Warm: Keep the syrup warm on the lowest setting of your stove or transfer it to a small pitcher that can be warmed slightly before serving. There’s nothing quite like warm, spiced syrup drizzled over fresh pancakes!
Cooking the Spooky Spiderweb Pancakes
- Heat the Griddle: Place a large non-stick griddle or frying pan over medium-low heat. I find that a slightly lower heat is best for pancakes, as it allows them to cook through evenly without burning the outside, especially when we’re adding the spiderweb design. Lightly grease the griddle with a little melted butter or cooking spray. You want it hot enough that a drop of water sizzles, but not smoking.
- Pour the Base Pancake: Pour about ¼ to ⅓ cup of the main pumpkin spice pancake batter onto the hot griddle for each pancake. The exact amount will depend on how large you want your pancakes. I usually aim for a medium size, about 4-5 inches in diameter, which gives ample space for the spiderweb.
- Create the Spiderweb Design: Immediately after pouring the main batter, take your chocolate spiderweb batter (either from the piping bag or carefully drizzled from a spoon). Starting from the center of the wet pancake batter, pipe or drizzle a small dot, then create 2-3 concentric circles around it, leaving some space between each circle.
- Draw the Web: While the batter is still wet, quickly drag a toothpick or the tip of a skewer from the center of the pancake outwards, through the chocolate circles, to create the “spokes” of the spiderweb. Repeat this motion 6-8 times around the pancake, moving from the center to the edge. Work quickly here, as the batter sets surprisingly fast! The contrast between the light pumpkin pancake and the dark chocolate creates a truly impressive spooky effect.
- Cook the First Side: Let the pancake cook for about 2-3 minutes, or until you see bubbles forming on the surface of the batter and the edges look set. The spiderweb design should also look a bit drier and less shiny. This is your cue that it’s ready to flip!
- Flip and Finish: Carefully slide a spatula under the pancake and gently flip it over. Cook for another 1-2 minutes on the second side, or until golden brown and cooked through. I always like to gently press down on the center of the pancake to ensure it feels springy, indicating it’s done.
- Keep Warm: As you finish each pancake, transfer it to a plate and keep it warm in a low oven (around 200°F/95°C) while you cook the remaining pancakes. This ensures everyone gets to enjoy warm, fresh pancakes together.
- Troubleshooting Tip: If your pancakes are browning too quickly, lower the heat. If they’re not browning at all, increase the heat slightly. Every griddle and stove is a little different, so don’t be afraid to adjust the temperature as needed after the first pancake or two. The first pancake is often the “tester”!
Assembling Your Haunted Harvest Halloween Breakfast Platter
- Arrange the Stars: On each plate, stack two or three of your beautifully spidery pumpkin spice pancakes as the centerpiece. Their vibrant color and intricate web design are sure to delight.
- Add the Mummies: Next, place 2-3 mummified sausages alongside the pancakes. Their little candy eyes peeking out from the dough “bandages” add a playful, spooky touch that makes this Halloween breakfast truly special.
- Drizzle the Syrup: Generously drizzle your warm pumpkin spice maple syrup over the pancakes and even a little over the mummies if you like. The rich, spiced aroma will fill the air and get everyone in the mood for a festive meal.
- Optional Ghostly Touches: For an extra fun element, I love adding small dollops of whipped cream next to the pancakes. You can shape them into little “ghosts” by pulling up a peak and adding two tiny chocolate chips or sprinkles for eyes. A sprinkle of Halloween-themed sprinkles or some dark berries like blackberries or blueberries scattered around the plate can add more color and a “spooky forest floor” vibe.
- Serve Immediately: This is a breakfast meant to be enjoyed fresh and warm! Gather your family or friends and dig into this delightful and delightfully spooky Halloween breakfast. It’s perfect for fueling up before a day of trick-or-treating or a fun morning activity. Enjoy the smiles and compliments that are sure to come your way!
Conclusion:
I am absolutely thrilled to share this recipe with you, because truly, it’s more than just a dish; it’s an experience. If you’ve been looking for something that effortlessly combines incredible flavor with visual appeal, then you’ve landed on the right page. This recipe delivers a harmonious blend of rich, comforting warmth and delightful textures, making every bite an absolute delight. What makes it a must-try, in my humble opinion, is its unique ability to impress without demanding hours of intricate work in the kitchen. It looks sophisticated, tastes divine, and yet the process is surprisingly straightforward, which is precisely why I adore it. I’ve found myself making this time and time again, not just for special occasions, but even on a quiet Sunday morning when I want to elevate our usual routine. It brings a touch of magic to the table, creating lasting memories with minimal effort. This is the kind of recipe that will have your family and friends asking for the secret, and you’ll smile, knowing just how simple and satisfying it truly is. It transforms any morning into a celebration, promising comfort and joy with every serving.
Now, while the recipe is perfect as is, part of the joy of cooking is making it truly your own! I have so many ideas for how you can elevate this already fantastic dish. For a classic approach, consider serving it alongside a generous drizzle of premium maple syrup or a dollop of freshly whipped cream, perhaps infused with a hint of vanilla or almond extract. Fresh berries like raspberries, blueberries, or sliced strawberries add a burst of color and a lovely tart counterpoint. For those with a sweet tooth, a sprinkle of chocolate chips (dark, milk, or white!) or a dusting of confectioners’ sugar can transform it into an even more decadent treat.
But let’s think beyond the basic! Imagine these as the star of your Halloween Breakfast spread. You could get wonderfully creative with themed toppings. Perhaps a spooky spiderweb design using chocolate sauce on top of whipped cream, or a sprinkle of festive orange and black nonpareils. For a savory twist, if the base recipe allows, you might consider pairing it with crispy bacon or a well-seasoned breakfast sausage. A side of perfectly scrambled eggs or a vibrant fruit salad would round out the meal beautifully, offering a full and satisfying start to your day. You could even incorporate some fun food coloring into the batter itself for an extra festive touch, making them vibrant green or purple – perfect for a ghoulishly good treat. Think about a dash of pumpkin spice for an autumnal twist, or a swirl of cream cheese frosting for an even more indulgent experience. The versatility truly knows no bounds, allowing you to adapt it for any holiday or simply to suit your personal cravings.
And for variations? Don’t be afraid to experiment! If you’re feeling adventurous, try adding a pinch of ground cinnamon or nutmeg to the batter for a warm, autumnal flavor. A splash of orange zest can brighten the profile, while a teaspoon of almond extract can add a sophisticated touch. For those with dietary restrictions, consider swapping out regular milk for an unsweetened almond or oat milk, and experimenting with a gluten-free flour blend – I’ve had great success with a 1:1 gluten-free baking flour. The beauty of this recipe lies in its adaptability, allowing you to tailor it to your preferences and pantry staples. You can even prepare certain elements the night before to make your morning even smoother, ensuring a stress-free start to any day, especially a busy holiday morning. This recipe truly shines with a little personal flair!
I genuinely hope you’re feeling inspired to give this recipe a try. Trust me when I say, it’s going to become a staple in your kitchen. There’s something incredibly rewarding about creating a dish that not only tastes amazing but also brings a smile to everyone’s face. Don’t just take my word for it; experience the magic for yourself! Gather your ingredients, put on your favorite tunes, and enjoy the process of bringing this delightful creation to life. It’s a moment of culinary joy waiting to happen, and I’m so excited for you to discover it.
Once you’ve made it, I would absolutely love to hear from you! Your experiences and creative twists are what make this community so vibrant. Did you try a unique topping? Did you adapt it for a specific dietary need? Or did you simply enjoy it exactly as written? Please share your thoughts and photos with me! You can leave a comment below, or even better, snap a picture and share it on your favorite social media platform, making sure to tag me so I can see your wonderful creations and celebrate with you! Knowing that you’ve enjoyed a recipe I’ve shared truly makes my day. So, go ahead, dive in, and let’s make some delicious memories together. Happy cooking!
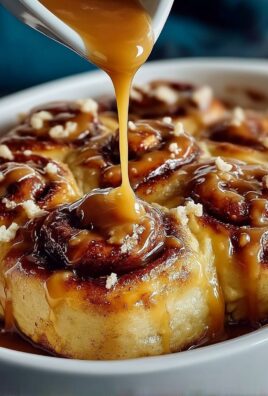
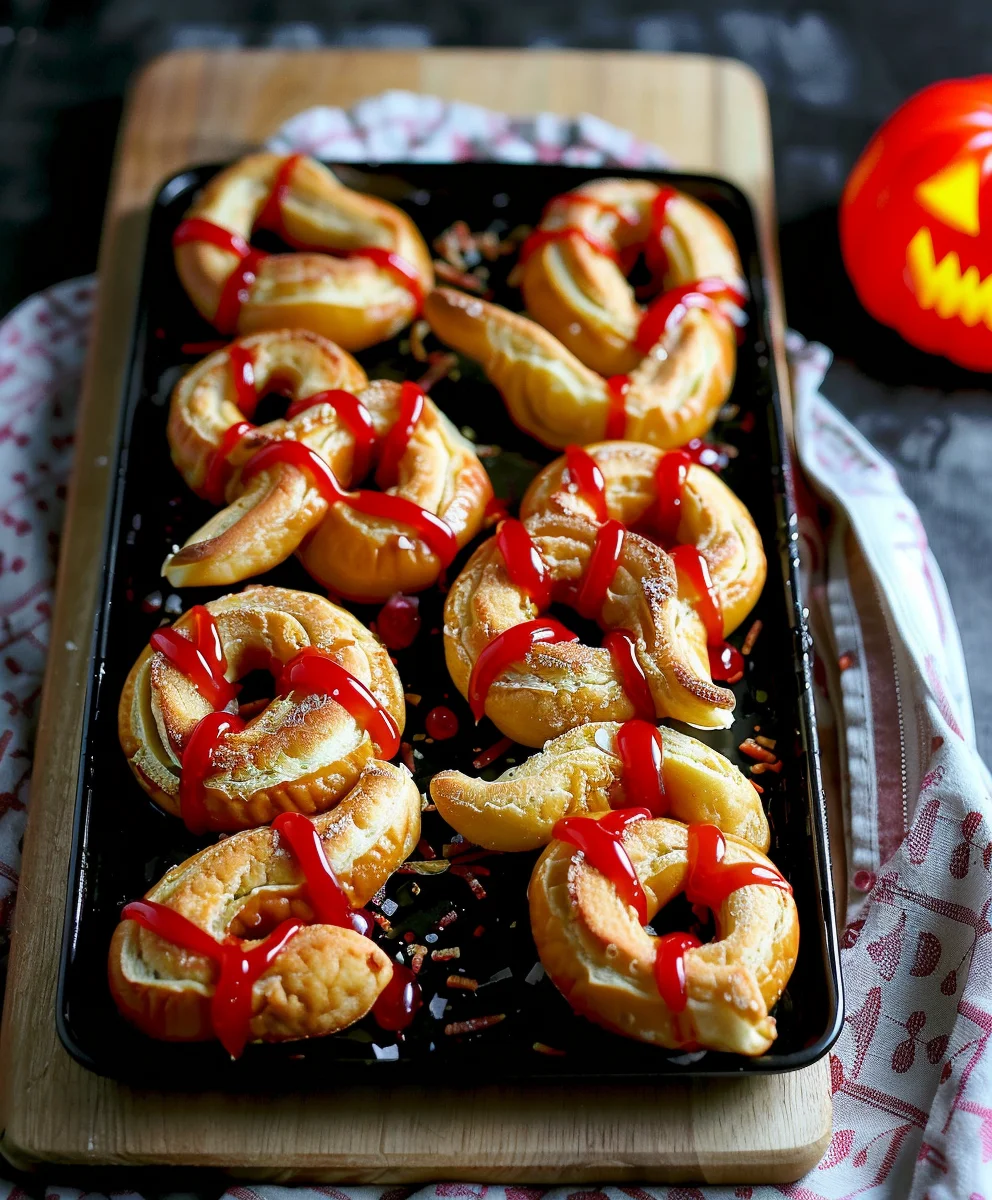
Halloween Mummy Cinnamon Rolls
Kick off your Halloween festivities with these fun and eerie mummy-themed cinnamon rolls! Made with unraveling store-bought dough and ‘bloody’ red icing, they’re a quick and delightful breakfast treat that sets the perfect spooky tone for the day.
Ingredients
-
2 (8 count) packages store-bought cinnamon rolls (unraveling type)
-
1 cup powdered sugar
-
2 tbsp milk, plus more as needed
-
Red gel food coloring
Instructions
-
Step 1
Preheat oven as directed on cinnamon roll packaging. Line a baking sheet with parchment paper. -
Step 2
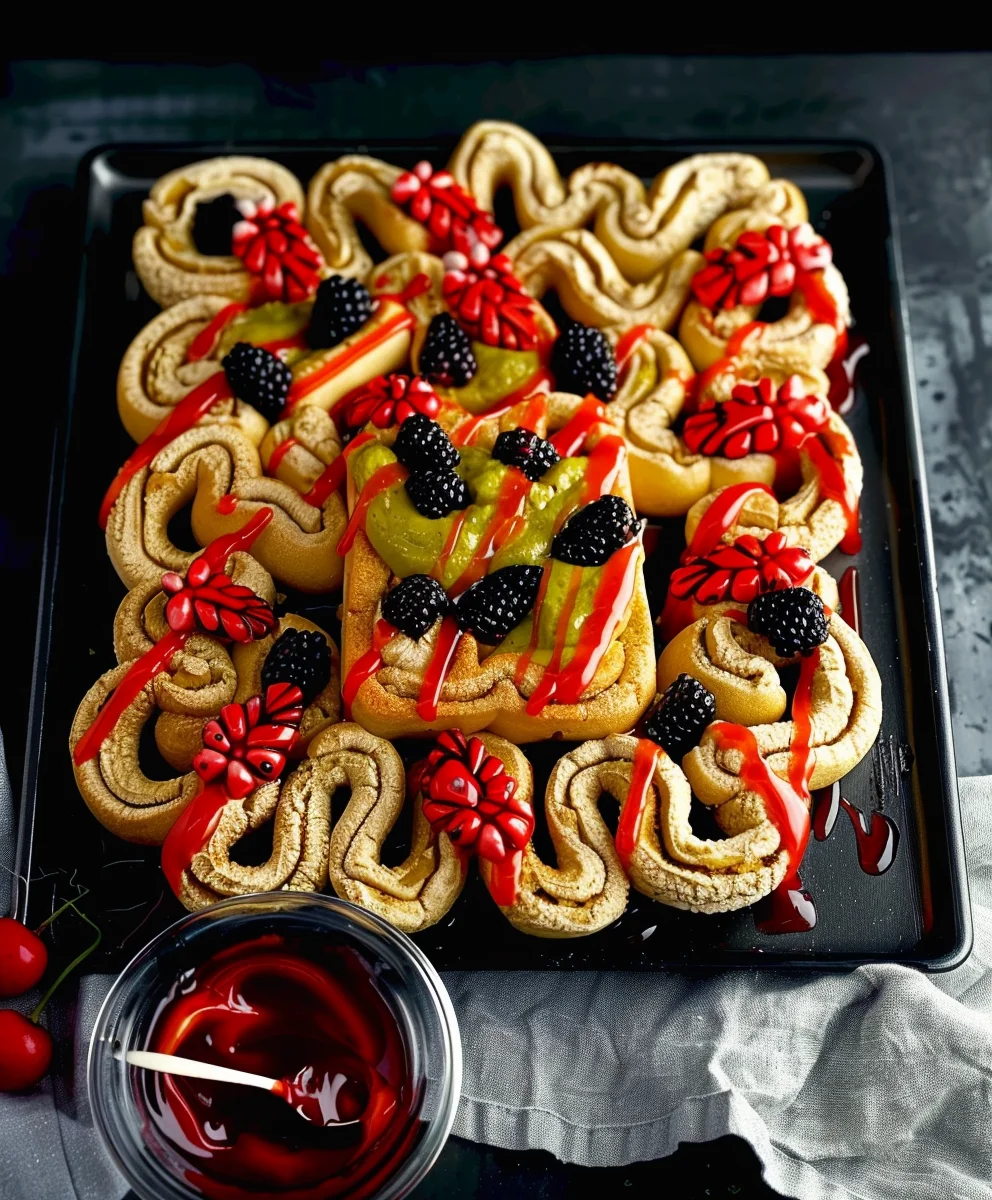
Unroll each cinnamon roll dough into a long strip. On the prepared baking sheet, loosely wrap dough strips to form mummy shapes, leaving a small space for ‘eyes’ at one end. -
Step 3
Bake for 12-18 minutes, or until golden brown. Let cool slightly on the baking sheet. -
Step 4
In a small bowl, whisk powdered sugar, 2 tbsp milk, and enough red gel food coloring until smooth. Add more milk if needed for desired drizzling consistency. -
Step 5
Once baked rolls are cool enough to handle, drizzle red icing over them in a bandage pattern, leaving the ‘eye’ opening clear. Serve warm. Optional: Add candy googly eyes before icing sets.
Important Information
Nutrition Facts (Per Serving)
It is important to consider this information as approximate and not to use it as definitive health advice.
Allergy Information
Please check ingredients for potential allergens and consult a health professional if in doubt.