• Skip to primary navigation
  • Skip to main content
  • Skip to primary sidebar
Homesmad

Homesmad

  • Home
  • Breakfast & Brunch
  • Appetizers & Snacks
  • Dinner
  • Dessert
  • About
  • Privacy Policy
  • Contact
Homesmad
  • Home
  • Breakfast & Brunch
  • Appetizers & Snacks
  • Dinner
  • Dessert
  • About
  • Privacy Policy
  • Contact

Delicious Apple Pie Recipe – Simple Steps for a Perfect Dessert

October 1, 2025 by Lily author

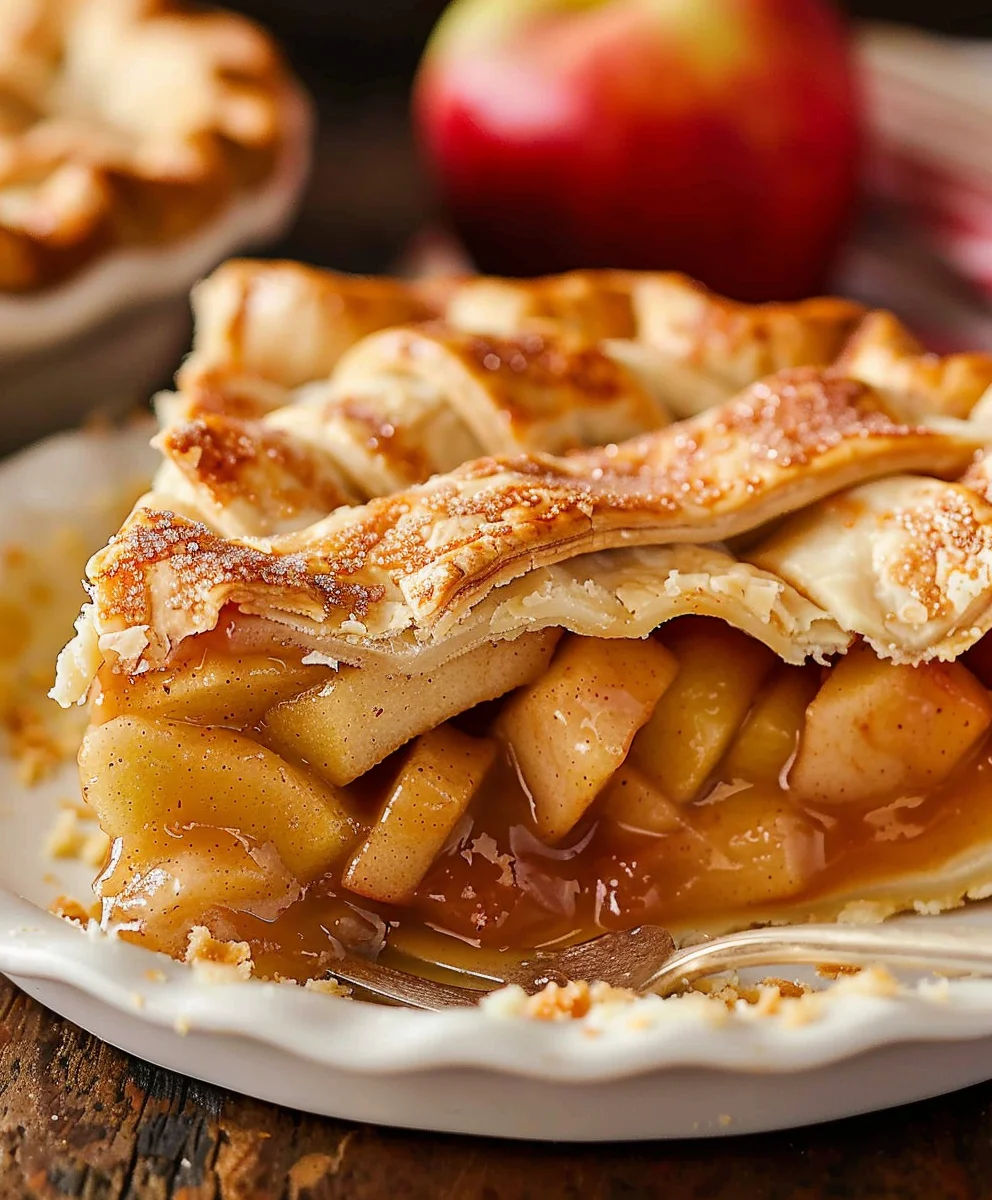
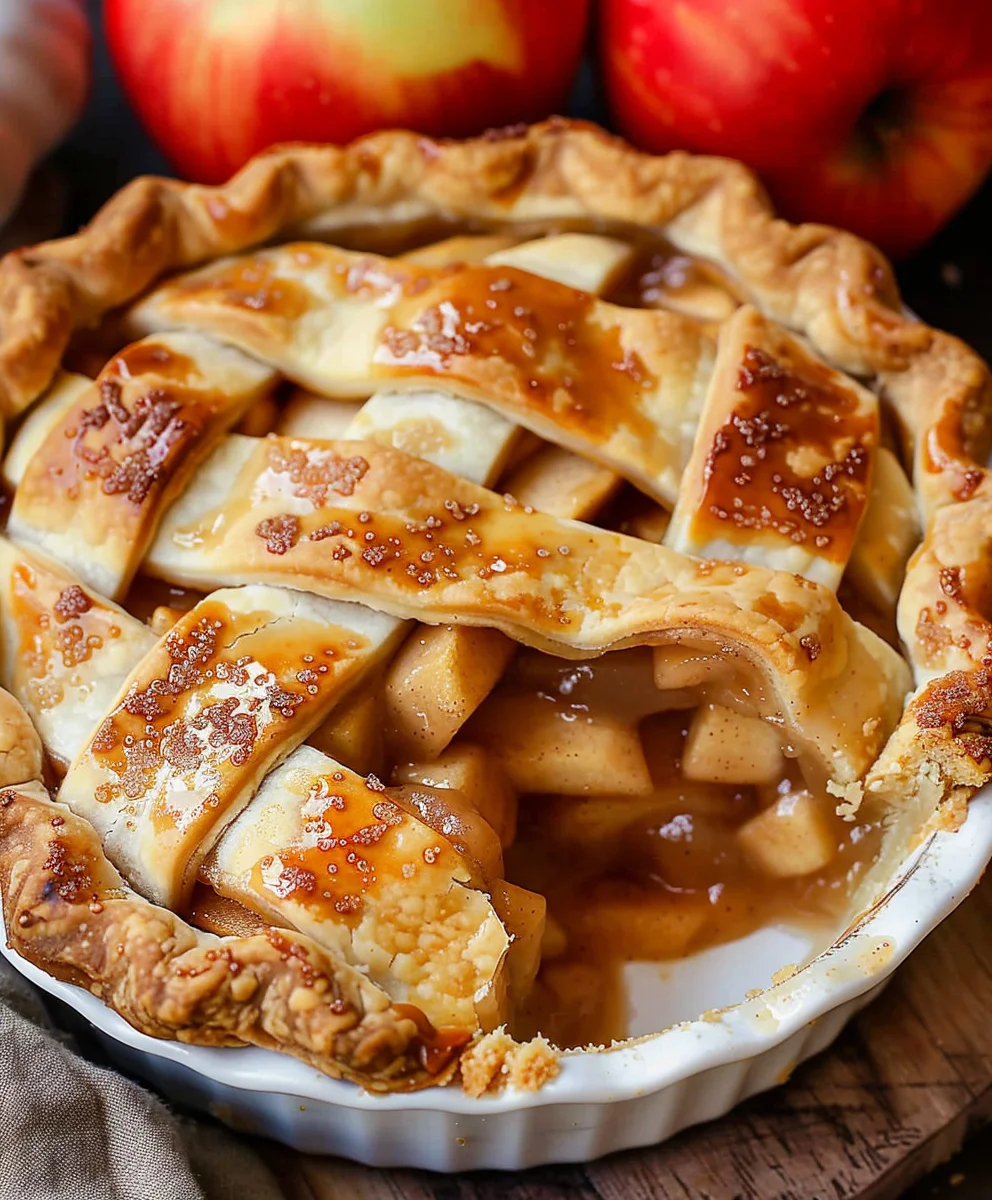
Apple Pie, the mere mention conjures images of warmth, comfort, and the quintessential taste of home. There’s something truly magical about a golden-brown, lattice-topped pie, brimming with tender, spiced apples that bubble gently beneath a perfectly flaky crust. I remember my grandmother’s kitchen, often filled with that unmistakable aroma, signaling a treat that transcended mere dessert; it was an experience, a memory in the making.

A Sweet Slice of History

While often considered an iconic American dessert, the origins of apple pie are surprisingly European, with recipes dating back to medieval England. However, it was truly embraced and popularized in America, becoming synonymous with wholesome, homemade goodness. It’s a dish deeply woven into the fabric of our culinary heritage, evolving over centuries to become the beloved classic we cherish today. This rich history only adds to its charm, making each bite feel like a connection to generations past.

What makes a perfect Apple Pie so universally adored? I believe it’s the masterful balance of flavors and textures: the crisp, slightly tart apples softening to a buttery consistency, brightened by cinnamon and nutmeg, all encased in a rich, golden, and incredibly flaky pastry. It’s a simple pleasure that speaks volumes, providing comfort on a chilly evening and a delightful finish to any meal. This recipe promises to deliver that cherished experience, guiding you to create a dessert that will undoubtedly become a new favorite in your home.

Delicious Apple Pie Recipe – Simple Steps for a Perfect Dessert this RECIPE

Ingredients:

For the Perfect Flaky Pie Crust:

  • 2 ½ cups (300g) all-purpose flour, plus extra for dusting your work surface. I always prefer unbleached all-purpose flour for a better texture.
  • 1 teaspoon salt. A good quality fine sea salt works wonders here.
  • 1 cup (226g) unsalted butter, very cold and cut into ½-inch cubes. This is about two sticks of butter. Using extremely cold butter is the secret to a truly flaky crust for your Apple Pie!
  • ½ cup (120ml) ice water, plus a tablespoon or two more if needed. It’s crucial that this water is icy cold.

For the Irresistible Apple Pie Filling:

  • 6-8 medium-sized apples, about 3 pounds total. I love using a mix of tart and sweet apples like Granny Smith for a bright tang, Honeycrisp for crispness and sweetness, and Fuji or Gala for texture and aroma. This blend creates the most complex and delightful flavor for your Apple Pie.
  • ½ cup (100g) granulated sugar. Adjust this based on the sweetness of your chosen apples and your personal preference.
  • ¼ cup (50g) packed light brown sugar. This adds a lovely molasses note and helps the filling caramelize beautifully.
  • 1 tablespoon fresh lemon juice. This brightens the flavor of the apples and helps prevent them from browning.
  • 1 teaspoon ground cinnamon. The quintessential spice for Apple Pie!
  • ¼ teaspoon ground nutmeg. Just a touch enhances the cinnamon perfectly.
  • ⅛ teaspoon ground allspice or ground cloves (optional, but highly recommended for depth).
  • ¼ cup (30g) all-purpose flour or 2 tablespoons cornstarch. This acts as a thickener for your filling, ensuring it’s not too watery. I often lean towards flour for a slightly less glossy finish.
  • 2 tablespoons unsalted butter, cut into small pieces. These bits will melt into the filling, adding richness and a beautiful gloss.

For the Egg Wash & Finishing Touches:

  • 1 large egg.
  • 1 tablespoon milk or water.
  • 1-2 tablespoons granulated sugar, for sprinkling on top of the crust. This gives your Apple Pie a gorgeous sparkle and a delightful crunch.

Instructions:

Phase 1: Crafting Your Flaky Pie Crust

  1. Combine Dry Ingredients: In a large mixing bowl, whisk together the 2 ½ cups of all-purpose flour and 1 teaspoon of salt. This ensures the salt is evenly distributed, which is important for flavor. I always make sure these are thoroughly combined before moving on.
  2. Cut in the Cold Butter: Add the ½-inch cubes of very cold unsalted butter to the flour mixture. Using a pastry blender, two knives, or even your fingertips (working quickly so the butter doesn’t warm up), cut the butter into the flour until the mixture resembles coarse crumbs with some pea-sized pieces of butter remaining. This is absolutely crucial for a flaky Apple Pie crust – those butter pieces will melt and create steam, separating the layers of dough as it bakes. Avoid overworking the butter, as this can lead to a tough crust.
  3. Add Ice Water Gradually: Pour in ½ cup of ice water, a tablespoon at a time, mixing gently with a fork or your hands until the dough just starts to come together. You might not need all of it, or you might need a tiny bit more – the goal is a dough that holds together when squeezed but isn’t sticky or wet. I cannot stress enough the importance of ice water; it keeps the butter cold and prevents gluten from over-developing.
  4. Form and Chill the Dough: Divide the dough in half. Gently form each half into a flat disk, about 1-inch thick. Avoid kneading the dough excessively, as this develops gluten and will make your crust tough. Wrap each disk tightly in plastic wrap and refrigerate for at least 1 hour, or preferably 2 hours. You can even make this dough a day or two in advance. This chilling period allows the gluten to relax, making the dough easier to roll out, and ensures the butter stays firm.

Phase 2: Preparing the Divine Apple Pie Filling

  1. Prepare the Apples: Peel, core, and slice your chosen apples. I aim for slices about ¼-inch thick. Consistency in slice thickness is important so they cook evenly. If your slices are too thick, they might be crunchy; too thin, and they’ll turn to mush. Place the sliced apples in a very large bowl.
  2. Combine Filling Ingredients: Add the granulated sugar, light brown sugar, fresh lemon juice, ground cinnamon, ground nutmeg, and optional allspice or cloves to the apples. Toss everything gently with your hands or a large spoon until the apples are evenly coated.
  3. Add Thickener: Sprinkle the all-purpose flour or cornstarch over the apple mixture. Toss again to ensure the thickener is evenly distributed over all the apple slices. This step is vital to prevent a watery Apple Pie.
  4. Let it Macerate (Optional, but Recommended): Let the apple mixture sit for about 15-30 minutes. The sugars will draw out some moisture from the apples, creating a delicious syrupy base. This also allows the flavors to meld beautifully. You’ll notice liquid collecting at the bottom of the bowl – that’s a good thing!

Phase 3: Assembling Your Apple Pie Masterpiece

  1. Preheat Your Oven: Position an oven rack in the lower third of your oven and preheat to 425°F (220°C). Having the rack lower helps the bottom crust cook thoroughly and prevents a soggy bottom for your Apple Pie.
  2. Roll Out the Bottom Crust: On a lightly floured surface, unwrap one disk of chilled pie dough. Roll it out into a 12-inch circle, about ⅛-inch thick. Don’t be afraid to use a little flour to prevent sticking, but avoid using too much, as it can make the crust tough.
  3. Place in Pie Plate: Carefully transfer the rolled dough to a 9-inch pie plate. Trim the edges, leaving about a ½-inch overhang. I usually fold this overhang under itself to create a slightly thicker edge.
  4. Add the Filling: Pour the apple filling into the pie crust, mounding it slightly in the center. Dot the top of the apples with the small pieces of unsalted butter. These will melt into the filling, adding richness and creating that beautiful glossy finish we all love in an Apple Pie.
  5. Roll Out the Top Crust: Unwrap the second disk of chilled pie dough. Roll it out into an 11-inch circle. You can either place this circle directly over the filling, cutting a few slits in the top for steam to escape, or you can cut it into strips to create a beautiful lattice top. For a classic Apple Pie, I often opt for a full top crust with elegant vents.
  6. Seal and Crimp: If using a full top crust, carefully place it over the apple filling. Trim the edges to match the bottom crust’s overhang. Now, crimp the edges of both crusts together to seal the pie. You can use your fingers, a fork, or a combination of both to create a decorative edge. Ensuring a good seal is important to keep those delicious apple juices inside!
  7. Prepare the Egg Wash: In a small bowl, whisk together the large egg and 1 tablespoon of milk or water. This egg wash will give your Apple Pie a gorgeous golden-brown shine.
  8. Apply Egg Wash and Sugar: Brush the top crust evenly with the egg wash. Then, generously sprinkle 1-2 tablespoons of granulated sugar over the entire top surface. This sugar not only adds sweetness but also creates a beautiful sparkling, slightly crispy crust.

Phase 4: Baking Your Golden Apple Pie

  1. Initial High Heat Bake: Place the assembled Apple Pie on a baking sheet (this helps catch any potential drips and makes transferring easier). Bake in the preheated 425°F (220°C) oven for the first 15-20 minutes. This initial high heat helps to set the crust quickly and initiate a good crust development, preventing a soggy bottom.
  2. Reduce Temperature and Continue Baking: After 15-20 minutes, reduce the oven temperature to 375°F (190°C) and continue baking for another 40-50 minutes, or until the crust is deeply golden brown and the filling is bubbling thickly in the center (you should see it through the vents).
  3. Prevent Over-Browning: If the edges of your pie crust start to brown too quickly during baking, loosely cover them with aluminum foil or use a pie shield. This will protect the edges while allowing the rest of the pie to finish cooking. A perfectly golden-brown crust is a hallmark of a well-baked Apple Pie!
  4. Check for Doneness: To ensure the apples are tender, you can carefully insert a thin skewer or knife through one of the vents into the filling. If it goes in easily with little resistance, your Apple Pie is ready.

Phase 5: Cooling and Serving the Perfect Apple Pie

  1. Cool Completely: This is arguably the most crucial step for a perfect Apple Pie experience. Once baked, carefully remove the pie from the oven and transfer it to a wire rack to cool completely for at least 3-4 hours, or even longer, at room temperature. I know, it’s torture to wait, but patience is key here! During this cooling period, the hot filling will continue to thicken and set. If you cut into the pie too early, the filling will be runny and spill out.
  2. Serve and Enjoy: Once your Apple Pie has cooled sufficiently and the filling has set, it’s ready to be sliced and served. I love serving it slightly warm with a scoop of vanilla bean ice cream or a dollop of fresh whipped cream. It’s also absolutely delicious at room temperature.
  3. Storage: Leftover Apple Pie can be covered loosely with foil or plastic wrap and stored at room temperature for up to 2 days, or in the refrigerator for up to 4 days. If refrigerated, I recommend gently warming individual slices in the oven or microwave before serving for the best experience. There’s nothing quite like a slice of homemade Apple Pie!

Delicious Apple Pie Recipe – Simple Steps for a Perfect Dessert

Conclusion:

So, there you have it! We’ve journeyed through the steps of creating what I truly believe is not just an apple pie, but the apple pie. This isn’t just another dessert recipe; it’s an invitation to experience pure, unadulterated comfort and joy. What makes this specific rendition a non-negotiable addition to your baking repertoire is its perfect harmony of flavors and textures. Imagine a golden, flaky crust that shatters delicately with each bite, giving way to a filling brimming with tender, juicy apples. The spices we’ve chosen don’t overpower but rather enhance the natural sweetness and slight tartness of the fruit, creating a symphony of taste that resonates with warmth and nostalgia. It’s the kind of pie that fills your home with an intoxicating aroma, drawing everyone to the kitchen before it’s even cooled. It’s comforting, familiar, yet remarkably fresh and vibrant, promising to be the star of any gathering or a delightful treat for a quiet evening in. The balance achieved in this recipe transforms simple ingredients into something truly extraordinary and memorable.

Elevate Your Experience: Serving Suggestions

Now, let’s talk about how to truly elevate your homemade creation. While this Apple Pie is absolutely glorious on its own, a blank canvas of deliciousness ready to be enjoyed, there are countless ways to make each slice an unforgettable experience. My personal favorite, and a classic for a reason, is serving it à la mode. A generous scoop of rich vanilla bean ice cream, slowly melting over a warm slice, creates an irresistible contrast of hot and cold, creamy and crumbly. But don’t stop there! Consider a dollop of freshly whipped cream, perhaps lightly sweetened with a touch of maple syrup or a dash of cinnamon for an extra layer of flavor. For those who prefer a little more indulgence, a drizzle of warm caramel sauce or a homemade butterscotch sauce can take your pie to decadent new heights. Even a sprinkle of toasted pecans or walnuts adds a lovely crunch and nutty depth that complements the apple filling beautifully. And for a truly sophisticated touch, a small dish of aged sharp cheddar cheese served alongside might sound unconventional to some, but it’s a time-honored tradition in many places, offering a surprising and delightful savory counterpoint to the pie’s sweetness. Each of these additions doesn’t just accessorize the pie; they transform it, allowing you to tailor the experience to your mood or the occasion.

Creative Twists: Embrace Variations

But the magic of baking doesn’t end with serving; it extends to endless possibilities for variation. This recipe provides a solid foundation, a perfect base from which you can experiment and make it uniquely yours. Feeling adventurous? Try incorporating different fruit combinations; a handful of fresh cranberries or a few tart raspberries can add a fantastic zing and a beautiful color burst to your apple filling. A sprinkle of dried cherries or golden raisins would also introduce lovely chewiness and a different kind of sweetness. You could also play with the spices – a touch of cardamom or a tiny pinch of cloves can introduce a new dimension of warmth and complexity. For a nutty twist, fold in some finely chopped toasted almonds or pecans directly into the filling. If you’re looking to change the crust, consider adding a streusel topping for an extra layer of buttery crunch, or even experimenting with a whole wheat crust for a heartier, nuttier flavor profile. You can also adapt the presentation: instead of one large pie, why not make individual hand pies or mini tarts? These are perfect for parties, lunchboxes, or simply for portion control, and they’re incredibly charming. Each little alteration opens up a new world of flavor and texture, ensuring that your culinary journey with this Apple Pie recipe remains exciting and endlessly creative. Don’t be afraid to embrace your inner pastry chef and personalize it!

Your Turn: Bake, Share, & Enjoy!

Now that you have all the tools, tips, and inspiration, it’s truly your turn. I wholeheartedly encourage you to roll up your sleeves, gather your ingredients, and dive into the wonderful world of homemade Apple Pie. Don’t worry about perfection; focus on the process, the joy of creating something with your own hands, and the incredible reward of that first warm, fragrant bite. Trust me, the aroma alone will be worth every moment spent in the kitchen. Once you’ve baked this masterpiece and perhaps even added your own unique spin, I would absolutely love to hear about your experience! Did you serve it with ice cream or whipped cream? Did you add a secret ingredient to the filling? Did your family rave about it? Share your baking triumphs, your delicious discoveries, and any photos you might capture. Your feedback and stories are what truly enrich this community of food lovers. So go ahead, create some magic, and let’s celebrate the timeless joy of a perfectly baked pie together!


Delicious Apple Pie Recipe

Delicious Apple Pie Recipe

Create a truly magical, golden-brown apple pie with a perfectly flaky crust and tender, spiced apple filling. This recipe guides you through simple steps for a dessert that feels like a sweet slice of home and history.

Prep Time
45 Minutes

Cook Time
10 Minutes

Total Time
55 Minutes

Servings
8 servings

Ingredients

  • 1 homemade double pie crust (2 sheets of pie dough)
  • 1/4 teaspoon lemon zest
  • 2 tablespoons lemon juice (from half a lemon)
  • 5 pounds apples (before peeling and coring), sliced
  • 3/4 cup brown sugar, packed
  • 3/4 cup granulated sugar
  • 5 tablespoons all purpose flour
  • 1/4 teaspoon kosher salt
  • 1 1/2 teaspoons cinnamon
  • 3/4 teaspoon nutmeg
  • 1/2 teaspoon cardamom (optional)
  • 1 teaspoon vanilla
  • 1 tablespoon milk (for brushing on pie)
  • 1 tablespoon beaten egg (optional, for brushing on pie)
  • 1 tablespoon raw sugar (for topping pie)

Instructions

  1. Step 1
    Peel, core, and slice apples to 1/4-inch thickness. In a large bowl, combine apples with lemon zest, lemon juice, brown sugar, granulated sugar, all purpose flour, kosher salt, cinnamon, nutmeg, cardamom (if using), and vanilla. Toss gently until evenly coated. Let the mixture sit for 15-30 minutes to macerate, allowing juices to form.
  2. Step 2
    Preheat oven to 425°F (220°C) with a rack in the lower third. On a lightly floured surface, roll out one sheet of pie dough (from your double pie crust) into a 12-inch circle, about 1/8-inch thick. Carefully transfer the dough to a 9-inch pie plate. Trim edges, leaving a 1/2-inch overhang, and fold under.
  3. Step 3
    Pour the apple filling into the prepared bottom crust, mounding it slightly in the center.
  4. Step 4
    Roll out the second sheet of pie dough into an 11-inch circle. Place it over the apple filling, cut a few slits for steam to escape, or create a lattice. Trim edges to match the bottom crust, then crimp to seal the pie.
  5. Step 5
    In a small bowl, whisk together the milk and optional beaten egg to create an egg wash. Brush the top crust evenly with the egg wash. Generously sprinkle 1 tablespoon of raw sugar over the entire top surface for sparkle and crunch.
  6. Step 6
    Place the pie on a baking sheet. Bake in the preheated 425°F (220°C) oven for 15-20 minutes. Reduce the oven temperature to 375°F (190°C) and continue baking for another 40-50 minutes, or until the crust is deeply golden brown and the filling is bubbling thickly. If edges brown too quickly, loosely cover them with aluminum foil.
  7. Step 7
    Remove pie from oven and transfer to a wire rack. Cool completely for at least 3-4 hours at room temperature; this is crucial for the filling to set. Slice and serve warm with ice cream or whipped cream, or at room temperature. Store leftovers loosely covered at room temperature for up to 2 days, or in the refrigerator for up to 4 days.

Important Information

Nutrition Facts (Per Serving)

It is important to consider this information as approximate and not to use it as definitive health advice.

Allergy Information

Please check ingredients for potential allergens and consult a health professional if in doubt.

« Previous Post
Delicious Easy Lasagna Soup Recipe - Family Favorite Dinner
Next Post »
Apple Crumble Cheesecake: Irresistible & Easy Recipe

If you enjoyed this…

Pistachio Chocolate Chunk Cookies: The Ultimate Recipe

Easy White Chocolate Snowball Truffles with Condensed Milk

Reeses White Chocolate Cheesecake Cookies: The Ultimate Recipe

Primary Sidebar

Browse by Diet

BreakfastDinnerLunchDessertAppetizer

Sweet Peach Yogurt Parfait Delight

One of my fondest memories is from a lazy summer afternoon spent at my grandmother’s house. The sun filtered through the kitchen window, casting a warm glow over the table where she would create her culinary magic. It was during one of those blissful moments that I first tasted her Peach Yogurt Parfait with Honey and Granola. The sweet aroma of ripe peaches mingling with creamy yogurt and the crunch of granola was nothing short of heavenly. It felt like summer captured in a bowl, and I still remember the joy of diving in with a spoon, each layer revealing a new burst of flavor.

When I think about that parfait, I can almost hear the gentle hum of the bees outside, reminding me of the floral notes that honey brings to every bite. The vibrant yellows and soft oranges of the peaches contrast beautifully with the creamy white yogurt and the golden crunch of granola. It’s a dish that not only looks delightful but also tastes like a celebration of fresh, wholesome ingredients.

What makes my version of this Peach Yogurt Parfait special is the careful balance of flavors and textures. I use ripe, juicy peaches, drizzled with locally sourced honey, and a homemade granola that’s bursting with nuts and seeds for an extra crunch. It’s a simple dish, but every layer is crafted with love and attention.

Let me show you exactly how to make this delightful parfait, so you can bring a bit of that summer magic into your kitchen!

Sweet Peach Yogurt Parfait Delight

Why You’ll Love This Recipe

  • Delightfully creamy texture from the Greek yogurt, paired with the juicy sweetness of fresh peaches.
  • Ready in under 20 minutes, making it a quick and satisfying breakfast or snack option.
  • Budget-friendly, using common ingredients that you may already have in your pantry.
  • Customizable with your favorite granola and nuts, allowing you to tailor each parfait to your taste.
  • Perfectly balanced flavors with the bright acidity of lemon juice and the sweetness of honey enhancing the peaches.

Ingredients

  • For the Parfait:
  • 2 cups plain Greek yogurt (or vanilla yogurt for a sweeter option)
  • 2 large ripe peaches, diced (about 2 cups)
  • 1 tablespoon fresh lemon juice (to prevent browning of peaches)
  • 2 tablespoons honey (plus more for drizzling)
  • 1 teaspoon vanilla extract (optional for extra flavor)
  • For the Granola:
  • 1 cup granola (store-bought or homemade; see notes for a simple granola recipe)
  • 1/4 cup sliced almonds (optional for added crunch)
  • 1/4 cup shredded coconut (optional for added flavor)

Let’s dive into some key ingredients that make this Peach Yogurt Parfait so delightful! First, the Greek yogurt is not only creamy but also packed with protein, making it a satisfying option for breakfast or a snack. If you’re looking for a sweeter option, you can easily substitute it with vanilla yogurt, though it may alter the overall flavor balance. Next, the ripe peaches are the star of the show; their natural sweetness shines through, so I recommend choosing peaches that yield slightly to pressure, indicating they’re perfectly ripe. If peaches aren’t in season, feel free to use nectarines or even frozen peaches—just thaw them before use. Finally, honey adds a lovely floral sweetness that ties everything together. If you prefer, maple syrup can serve as a delicious substitute.

Step-by-Step Instructions

  1. Start by preparing the peaches. Wash them thoroughly, then slice and dice them into bite-sized pieces. In a medium bowl, toss the diced peaches with 1 tablespoon of fresh lemon juice to prevent browning. Set aside for about 5 minutes while the lemon juice works its magic.
  2. In a separate bowl, combine the Greek yogurt, 2 tablespoons of honey, and 1 teaspoon of vanilla extract if using. Stir the mixture until smooth and thoroughly blended. This should take about a minute. Avoid overmixing to maintain the creaminess of the yogurt.
  3. Now it’s time to layer your parfait. Grab a clear glass or bowl to showcase your beautiful creation. Start with a generous spoonful of the yogurt mixture at the bottom—about 1/4 cup will do. Use a spoon to spread it evenly.
  4. Add a layer of the diced peaches over the yogurt, ensuring they cover the yogurt completely. You might want to use about half of what you have prepared—roughly 1 cup. This layer should be visually appealing, so arrange the peaches neatly.
  5. Sprinkle 1/4 cup of granola over the peaches. This adds a delightful crunch. Make sure to distribute it evenly to ensure every bite has that satisfying texture. Avoid packing it down too tightly, as you want it to maintain its crunch.
  6. Repeat the layers: spoon in another 1/4 cup of yogurt, followed by another cup of peaches, and another sprinkle of granola. You should have at least two layers, but feel free to add more depending on your glass size.
  7. Finish off your parfait with a drizzle of honey on top for added sweetness and a touch of elegance. If you’re using sliced almonds or shredded coconut, sprinkle them on top now. It adds a lovely visual contrast and extra flavor.
  8. Serve immediately or refrigerate for up to 30 minutes before serving to allow the flavors to meld together. However, I recommend enjoying it fresh to maintain the granola’s crunch.

Pro Tips for the Best Peach Yogurt Parfait With Honey And Granola

  • Make sure to choose ripe peaches for the best flavor and texture. A common mistake is using unripe fruit, which can lead to a less enjoyable parfait. Look for peaches that are fragrant and slightly soft to the touch.
  • Use a clear glass to assemble your parfait; this not only makes for a beautiful presentation but also allows you to see the colorful layers, which adds to the enjoyment of eating it.
  • For an even creamier texture, consider whipping the Greek yogurt with a hand mixer for a couple of minutes before layering. This small adjustment makes a huge difference in mouthfeel.
  • Be mindful of the granola-to-yogurt ratio. Too much granola can overwhelm the parfait, while too little can make it feel too creamy. Aim for about 1/4 cup of granola per layer for the perfect balance.
  • If you’re making this for a gathering, consider preparing the yogurt and peaches ahead of time and layering them just before serving. This ensures the granola stays crunchy!

Variations & Serving Ideas

There are so many ways to get creative with your Peach Yogurt Parfait! For a tropical twist, swap out the peaches for mangoes or pineapples and top with coconut flakes. If you prefer a berry flavor, mix in some blueberries or strawberries with the peaches for added color and taste. For a nutty version, incorporate chopped walnuts or pecans instead of almonds.

As for serving ideas, this parfait pairs beautifully with a side of scrambled eggs for a hearty breakfast or fresh fruit salad for a light lunch. You might also enjoy it alongside whole grain toast with almond butter for an energizing snack. The contrast of flavors and textures will elevate your meal experience!

Storage, Make-Ahead & Reheating

The Peach Yogurt Parfait is best enjoyed fresh, but you can prepare some components ahead of time. Store the layered parfait in an airtight container in the refrigerator for up to 24 hours. However, be cautious; the granola may lose its crunch if stored too long. You can freeze the yogurt and peach mixture for up to 2 months; just remember to thaw it in the refrigerator overnight before serving.

If you plan to enjoy this dish the next day, it can taste even better as the flavors meld together. Just remember to add the granola right before serving to keep its delightful crunch!

Frequently Asked Questions

Can I make Peach Yogurt Parfait With Honey And Granola ahead of time?

Yes — in fact, it tastes even better the next day as the flavors meld. However, I recommend waiting to add the granola until just before serving to maintain its crunch.

What can I substitute for Greek yogurt?

If you prefer a lighter option, you can substitute Greek yogurt with regular yogurt or a dairy-free alternative like coconut yogurt. Just remember that this may alter the creaminess and flavor profile slightly.

Can I use frozen peaches for this parfait?

Absolutely! Just make sure to thaw the frozen peaches before using them. They will still add great flavor, though the texture may be slightly softer than fresh peaches.

How do I make the parfait vegan?

To make a vegan version, substitute the Greek yogurt with a plant-based yogurt alternative, and replace honey with maple syrup or agave nectar. This keeps the parfait sweet while adhering to a vegan diet.

What other fruits can I use in this recipe?

You can mix and match fruits based on your preference. Try using strawberries, blueberries, raspberries, or even bananas. Just make sure to adjust the lemon juice as needed to prevent browning.

Sweet Peach Yogurt Parfait Delight

Final Thoughts

The Peach Yogurt Parfait with Honey and Granola is a delightful blend of creamy yogurt, sweet peaches, and crunchy granola that creates a satisfying and nourishing treat. Each layer bursts with flavor, making it a perfect choice for breakfast or a light dessert.

This is the kind of recipe I come back to again and again, especially when I want something refreshing and wholesome to start my day. The harmony of sweet and tart flavors, combined with the delightful crunch, never fails to lift my spirits!

I encourage you to give this parfait a try and indulge in its comforting goodness. Feel free to share your results or even add your own twist—perhaps a sprinkle of cinnamon or a handful of nuts. Enjoy creating your perfect parfait!

Print
clock clock iconcutlery cutlery iconflag flag iconfolder folder iconinstagram instagram iconpinterest pinterest iconfacebook facebook iconprint print iconsquares squares iconheart heart iconheart solid heart solid icon

Peach Yogurt Parfait


  • Author: Lily author
  • Total Time: 15 minutes
  • Yield: 4 servings 1x
Pin Recipe
Print Recipe

Description

This Peach Yogurt Parfait combines creamy Greek yogurt, juicy peaches, and crunchy granola for a delightful treat. It’s a perfect breakfast or snack that captures the essence of summer in every bite.


Ingredients

Scale
  • For the Parfait:
  • 2 cups plain Greek yogurt (or vanilla yogurt for a sweeter option)
  • 2 large ripe peaches, diced (about 2 cups)
  • 1 tablespoon fresh lemon juice (to prevent browning of peaches)
  • 2 tablespoons honey (plus more for drizzling)
  • 1 teaspoon vanilla extract (optional for extra flavor)
  • For the Granola:
  • 1 cup granola (store-bought or homemade; see notes for a simple granola recipe)
  • 1/4 cup sliced almonds (optional for added crunch)
  • 1/4 cup shredded coconut (optional for added flavor)

Instructions

  1. Start by preparing the peaches. Wash them thoroughly, then slice and dice them into bite-sized pieces. In a medium bowl, toss the diced peaches with 1 tablespoon of fresh lemon juice to prevent browning. Set aside for about 5 minutes while the lemon juice works its magic.
  2. In a separate bowl, combine the Greek yogurt, 2 tablespoons of honey, and 1 teaspoon of vanilla extract if using. Stir the mixture until smooth and thoroughly blended. This should take about a minute. Avoid overmixing to maintain the creaminess of the yogurt.
  3. Now it’s time to layer your parfait. Grab a clear glass or bowl to showcase your beautiful creation. Start with a generous spoonful of the yogurt mixture at the bottom—about 1/4 cup will do. Use a spoon to spread it evenly.
  4. Add a layer of the diced peaches over the yogurt, ensuring they cover the yogurt completely. You might want to use about half of what you have prepared—roughly 1 cup. This layer should be visually appealing, so arrange the peaches neatly.
  5. Sprinkle 1/4 cup of granola over the peaches. This adds a delightful crunch. Make sure to distribute it evenly to ensure every bite has that satisfying texture. Avoid packing it down too tightly, as you want it to maintain its crunch.
  6. Repeat the layers: spoon in another 1/4 cup of yogurt, followed by another cup of peaches, and another sprinkle of granola. You should have at least two layers, but feel free to add more depending on your glass size.
  7. Finish off your parfait with a drizzle of honey on top for added sweetness and a touch of elegance. If you’re using sliced almonds or shredded coconut, sprinkle them on top now. It adds a lovely visual contrast and extra flavor.
  8. Serve immediately or refrigerate for up to 30 minutes before serving to allow the flavors to meld together. However, I recommend enjoying it fresh to maintain the granola’s crunch.
  • Prep Time: 15 mins
  • Cook Time: 0 mins
  • Category: Breakfast
  • Method: No-cook
  • Cuisine: American

Nutrition

  • Serving Size: 1 parfait
  • Calories: 250
  • Sugar: 20 g
  • Sodium: 50 mg
  • Fat: 5 g
  • Saturated Fat: 2 g
  • Unsaturated Fat: 3 g
  • Trans Fat: 0 g
  • Carbohydrates: 40 g
  • Fiber: 3 g
  • Protein: 10 g
  • Cholesterol: 10 mg

Keywords: Choose ripe peaches for the best flavor and texture. Use a clear glass for a beautiful presentation. For creaminess, consider whipping the yogurt before layering. Be mindful of the granola-to-yogurt ratio. Prepare yogurt and peaches ahead of time for gatherings, layering just before serving.

Did you make this recipe?

Share a photo and tag us — we can't wait to see what you've made!

Sun-Kissed Frozen Orange Cream Slush

As a child, summer days felt like they lasted forever. I remember the sticky heat wrapping around me as I played outside, my laughter mingling with the sounds of the neighborhood. But nothing could cool me down quite like the moment I’d spot my grandmother, laboring over her blender, whipping up her famous Frozen Orange Creamsicle Slush. That vibrant orange treat, with its frosty texture and sweet citrus aroma, was like a burst of sunshine in a cup. Just one sip, and I could feel the coolness wash over me, sparking pure joy.

This Frozen Orange Creamsicle Slush has a way of making you feel like a kid again. Its creamy, dreamy consistency is a delightful balance of bright orange and soft vanilla, inviting you to dive right in. The refreshing tang of orange dances on your tongue, while the smooth creaminess envelops you in a comforting embrace. It’s a nostalgic treat that’s perfect for hot summer afternoons or anytime you need a little pick-me-up.

What makes my version of this slush stand out is the addition of a hint of vanilla bean, which elevates the flavor and adds an extra layer of richness. Plus, it’s super easy to whip up with just a few simple ingredients that you probably already have on hand! So, if you’re ready to relive those sun-soaked memories, let me show you exactly how to make it.

Sun-Kissed Frozen Orange Cream Slush

Why You’ll Love This Recipe

  • Each slush is a perfect blend of creamy vanilla and zesty orange, creating a nostalgic flavor reminiscent of summer days.
  • This refreshing treat is ready in under 15 minutes, making it an ideal quick dessert for unexpected guests or hot afternoons.
  • With just 8 simple ingredients, it’s budget-friendly, ensuring you don’t have to break the bank to enjoy a delicious slush.
  • The slush has a perfectly smooth texture, thanks to the combination of ice and ice cream, providing a delightful contrast to the bright citrus flavors.
  • It’s highly customizable; you can easily adjust the sweetness and add fresh herbs for a unique twist that suits your taste.

Ingredients

  • 2 cups orange juice (freshly squeezed or store-bought)
  • 1 cup vanilla ice cream
  • 1 cup crushed ice
  • 1/2 cup milk (whole or 2%)
  • 1/4 cup granulated sugar (adjust based on sweetness preference)
  • 1 teaspoon vanilla extract
  • Zest of 1 orange (for added flavor)
  • Fresh orange slices and mint leaves (for garnish)

The star of this Frozen Orange Creamsicle Slush is the orange juice, which provides the vibrant, citrusy base. Freshly squeezed juice will yield the brightest flavor, but store-bought options can be just as convenient. If you’re opting for store-bought, choose 100% pure juice with no added sugars for the best results. Another essential ingredient is the vanilla ice cream; it adds creaminess and sweetness. You can substitute it with dairy-free ice cream if you’re looking for a vegan option. Whole or 2% milk complements the ice cream, creating a smooth blend. If you want a lower-calorie version, almond or oat milk can be good alternatives.

Lastly, the granulated sugar can be adjusted based on your sweetness preference. If you prefer a more natural sweetener, consider using honey or agave syrup. The orange zest enhances the flavor profile, providing an aromatic pop that brings the whole slush together. Don’t skip it! It adds an extra layer of brightness that makes this slush truly special.

Step-by-Step Instructions

  1. Start by preparing your ingredients. Gather 2 cups of orange juice, 1 cup of vanilla ice cream, and 1 cup of crushed ice. Make sure the ice is finely crushed, as larger chunks can make blending difficult.
  2. In a blender, combine the orange juice, vanilla ice cream, crushed ice, and 1/2 cup of milk. Add 1/4 cup of granulated sugar and 1 teaspoon of vanilla extract. If you like a sweeter slush, consider adding a bit more sugar at this stage.
  3. Add the zest of 1 orange to the blender. This step is crucial for enhancing the citrus flavor of your slush. Make sure not to include the bitter white pith—only the flavorful zest.
  4. Blend the mixture on medium-high speed for about 30-45 seconds. Stop once the ingredients are fully combined and the slush has a smooth, even consistency. If you notice large chunks of ice, blend for an additional 10-15 seconds. Avoid over-blending, as this can make the slush too liquidy.
  5. Once blended, taste the slush. If it needs more sweetness, add a little more sugar and blend for a few more seconds. If it’s too thick, you can add a splash of milk to reach your desired consistency.
  6. Pour the slush into glasses. This recipe typically serves 4, but you can easily double it for larger gatherings. Use a spoon to help guide the slush into the glasses if needed.
  7. Garnish each serving with fresh orange slices and mint leaves. The mint not only adds a pop of color but also a refreshing aroma that complements the citrus flavors beautifully.
  8. Serve immediately and enjoy! If you’ve made extra, you can refrigerate it for a short time, but it’s best enjoyed fresh.

Pro Tips for the Best Frozen Orange Creamsicle Slush

  • Don’t skip the orange zest! It’s a game-changer for flavor. Always zest before juicing to make it easier.
  • Use a high-powered blender for the best texture. A standard blender may struggle with ice, leading to uneven consistency. If you have a food processor, that can work too, but ensure the ice is finely crushed.
  • Adjust the ice-to-liquid ratio carefully. If your slush is too thick, it won’t blend well. Start with less ice and add more until you reach your preferred texture.
  • Be cautious with the sugar! Always start with the lower amount, as you can easily add more, but it’s hard to fix an overly sweet slush.
  • For a fun twist, consider adding a splash of coconut milk or a handful of fresh fruit like strawberries or pineapple. This not only enhances the flavor but also adds a beautiful color contrast.

Variations & Serving Ideas

There are countless ways to put a spin on your Frozen Orange Creamsicle Slush. Consider making a tropical version by adding in some pineapple juice or coconut milk for a delightful tropical twist. If you’re feeling adventurous, try incorporating a handful of frozen mango or peach slices for added sweetness. For a lighter version, swap out the vanilla ice cream for Greek yogurt for a creamy yet tangy alternative.

As for serving ideas, this refreshing slush pairs wonderfully with light summer dishes like grilled chicken skewers, fish tacos, or a simple salad topped with citrus vinaigrette. The bright, zesty flavors of the slush complement these dishes perfectly, making them an ideal pairing for a sunny day.

Storage, Make-Ahead & Reheating

This Frozen Orange Creamsicle Slush is best enjoyed fresh, but if you have leftovers, you can store them in an airtight container in the fridge for up to 2 days. Just keep in mind that the slush may lose some of its texture over time as the ice melts. It doesn’t freeze well, as the ice will turn into a solid block. If you must freeze it, blend again after thawing to restore the slushy consistency. This treat is best the day you make it, as the flavors meld together beautifully overnight, enhancing its deliciousness.

Frequently Asked Questions

Can I make Frozen Orange Creamsicle Slush ahead of time?

Yes — in fact, it tastes even better the next day as the flavors meld. However, it’s best to enjoy it fresh, as the texture can change if stored for too long. If you need to prepare it ahead, keep it in the fridge and re-blend before serving.

What kind of orange juice should I use?

For the best flavor, use freshly squeezed orange juice. However, if you’re short on time, opt for 100% pure store-bought juice without added sugars. This will ensure that your slush remains flavorful and refreshing.

Can I substitute the vanilla ice cream?

Absolutely! If you’re looking for a dairy-free option, coconut milk ice cream or a non-dairy vanilla ice cream can work wonderfully. They will still provide the creamy texture and sweetness you desire.

How can I adjust the sweetness of my slush?

You can easily adjust the sweetness by modifying the amount of sugar added. Start with 1/4 cup and taste the mixture before blending. If you prefer it sweeter, add more sugar gradually until it reaches your desired level.

What should I do if my slush is too thick?

If your slush is too thick, simply add a splash of milk or orange juice and blend again. This will help achieve a more drinkable consistency while maintaining the slushy texture. Adjust gradually to reach your preferred thickness.

Sun-Kissed Frozen Orange Cream Slush

Final Thoughts

The Frozen Orange Creamsicle Slush is a delightful blend of refreshing citrus and creamy goodness, making it a perfect treat for warm days or any time you crave a taste of nostalgia. The way the bright orange flavor dances with the creamy texture truly elevates this slush, transforming it into a satisfying escape from the everyday.

This is the kind of recipe I come back to again and again, especially when I’m looking to cool down or impress guests at a summer gathering. It’s simple to make and always brings smiles all around! I encourage you to try this recipe for yourself—don’t hesitate to share your results or even put your own spin on it. Happy slushing!

Print
clock clock iconcutlery cutlery iconflag flag iconfolder folder iconinstagram instagram iconpinterest pinterest iconfacebook facebook iconprint print iconsquares squares iconheart heart iconheart solid heart solid icon

Frozen Orange Creamsicle Slush


  • Author: Lily author
  • Total Time: 15 minutes
  • Yield: 4 servings 1x
Pin Recipe
Print Recipe

Description

This Frozen Orange Creamsicle Slush is a refreshing treat that combines creamy vanilla and zesty orange flavors. Perfect for hot summer days, it brings back nostalgic memories with every sip.


Ingredients

Scale
  • 2 cups orange juice (freshly squeezed or store-bought)
  • 1 cup vanilla ice cream
  • 1 cup crushed ice
  • 1/2 cup milk (whole or 2%)
  • 1/4 cup granulated sugar (adjust based on sweetness preference)
  • 1 teaspoon vanilla extract
  • Zest of 1 orange (for added flavor)
  • Fresh orange slices and mint leaves (for garnish)

Instructions

  1. Start by preparing your ingredients. Gather 2 cups of orange juice, 1 cup of vanilla ice cream, and 1 cup of crushed ice. Make sure the ice is finely crushed, as larger chunks can make blending difficult.
  2. In a blender, combine the orange juice, vanilla ice cream, crushed ice, and 1/2 cup of milk. Add 1/4 cup of granulated sugar and 1 teaspoon of vanilla extract. If you like a sweeter slush, consider adding a bit more sugar at this stage.
  3. Add the zest of 1 orange to the blender. This step is crucial for enhancing the citrus flavor of your slush. Make sure not to include the bitter white pith—only the flavorful zest.
  4. Blend the mixture on medium-high speed for about 30-45 seconds. Stop once the ingredients are fully combined and the slush has a smooth, even consistency. If you notice large chunks of ice, blend for an additional 10-15 seconds. Avoid over-blending, as this can make the slush too liquidy.
  5. Once blended, taste the slush. If it needs more sweetness, add a little more sugar and blend for a few more seconds. If it’s too thick, you can add a splash of milk to reach your desired consistency.
  6. Pour the slush into glasses. This recipe typically serves 4, but you can easily double it for larger gatherings. Use a spoon to help guide the slush into the glasses if needed.
  7. Garnish each serving with fresh orange slices and mint leaves. The mint not only adds a pop of color but also a refreshing aroma that complements the citrus flavors beautifully.
  8. Serve immediately and enjoy! If you’ve made extra, you can refrigerate it for a short time, but it's best enjoyed fresh.
  • Prep Time: 15 min
  • Cook Time: 0 min
  • Category: Dessert
  • Method: Blending
  • Cuisine: American

Nutrition

  • Serving Size: 1 serving
  • Calories: 200
  • Sugar: 30 g
  • Sodium: 50 mg
  • Fat: 5 g
  • Saturated Fat: 3 g
  • Unsaturated Fat: 2 g
  • Trans Fat: 0 g
  • Carbohydrates: 40 g
  • Fiber: 1 g
  • Protein: 2 g
  • Cholesterol: 20 mg

Keywords: Don't skip the orange zest! It's a game-changer for flavor. Always zest before juicing to make it easier.

Did you make this recipe?

Share a photo and tag us — we can't wait to see what you've made!

Zesty Lemon Poppy Seed Delight

One rainy afternoon, I found myself in my grandmother’s cozy kitchen, the kind that always smelled like warmth and love. She was whipping up her famous Lemon Poppy Seed Loaf, a recipe that had been passed down through generations. As the batter came together, the zesty aroma of fresh lemons filled the air, mingling perfectly with the nutty fragrance of poppy seeds. I can still picture her, apron-clad, as she expertly drizzled a vibrant citrus icing over the loaf, creating a glossy, sun-kissed finish that beckoned us to dive in. It was a moment that sparked my own passion for baking, and this recipe has become a cherished staple in my home ever since.

When you take a bite of this Lemon Poppy Seed Loaf, it’s like a burst of sunshine on your palate. The loaf is beautifully golden, with a tender crumb that melts in your mouth. Each slice is speckled with tiny poppy seeds, adding a delightful crunch that contrasts beautifully with the tangy sweetness of the lemon. And that citrus icing? It’s the finishing touch that elevates this loaf from ordinary to extraordinary, with its bright, zesty flavor dancing on your taste buds.

This recipe stands out because it embraces simplicity while delivering on flavor. I’ve added a hint of vanilla to the batter, enhancing the overall taste and making it even more indulgent. Trust me, once you make this Lemon Poppy Seed Loaf With Citrus Icing, it’ll become a go-to in your baking repertoire.

So, let me show you exactly how to make it!

Zesty Lemon Poppy Seed Delight

Why You’ll Love This Recipe

  • Moist and tender crumb that melts in your mouth, thanks to the perfect balance of butter and buttermilk.
  • Bright, zesty lemon flavor paired with crunchy poppy seeds, creating a delightful texture and taste experience.
  • Easy to whip up in just about an hour, perfect for last-minute gatherings or a cozy afternoon treat.
  • Budget-friendly with everyday ingredients, making it an accessible option for all home bakers.
  • The citrus icing adds a sweet tang that elevates the loaf, turning a simple recipe into a showstopper!

Ingredients

  • 1 ½ cups (190g) all-purpose flour
  • 1 teaspoon baking powder
  • ½ teaspoon baking soda
  • ½ teaspoon salt
  • 3 tablespoons poppy seeds
  • ½ cup (115g) unsalted butter, softened to room temperature
  • 1 cup (200g) granulated sugar
  • 2 large eggs
  • 1 teaspoon vanilla extract
  • 1 teaspoon lemon zest (from about 1 medium lemon)
  • ½ cup (120ml) buttermilk
  • 2 tablespoons fresh lemon juice

For the Citrus Icing:

  • 1 cup (120g) powdered sugar
  • 2 tablespoons fresh lemon juice
  • 1 tablespoon orange juice
  • 1 teaspoon lemon zest (for garnish, optional)

Let’s dive into the key ingredients that make this Lemon Poppy Seed Loaf so special. The all-purpose flour provides the structure and base for the loaf, while the baking powder and baking soda ensure it rises perfectly, giving the loaf a light texture. For a gluten-free variation, you could substitute the flour with a gluten-free all-purpose blend. Poppy seeds not only add a delightful crunch but also contribute to the unique flavor profile that pairs well with the citrus notes.

Unsalted butter is crucial for achieving the buttery richness that makes this loaf so moist. If you’re looking for a dairy-free option, coconut oil or a vegan butter can be used instead. The buttermilk is another essential component, providing acidity that activates the baking soda for a fluffy texture. If you don’t have buttermilk on hand, you can easily make a substitute by mixing ½ cup of milk with 1 tablespoon of vinegar or lemon juice and letting it sit for about 5 minutes.

Step-by-Step Instructions

  1. Preheat your oven to 350°F (175°C). Grease a 9×5-inch loaf pan or line it with parchment paper for easy removal later.
  2. In a medium mixing bowl, whisk together 1 ½ cups of all-purpose flour, 1 teaspoon of baking powder, ½ teaspoon of baking soda, ½ teaspoon of salt, and 3 tablespoons of poppy seeds. This helps to evenly distribute the baking agents and ensures a uniform rise.
  3. In a large mixing bowl, cream together ½ cup of softened unsalted butter and 1 cup of granulated sugar using an electric mixer on medium speed for about 3-4 minutes, until the mixture is light and fluffy. Make sure to scrape down the sides of the bowl occasionally.
  4. Add 2 large eggs, 1 teaspoon of vanilla extract, and 1 teaspoon of lemon zest to the creamed butter and sugar, mixing until fully combined. You want a smooth consistency, so ensure there are no lumps of butter.
  5. In a small bowl, combine ½ cup of buttermilk and 2 tablespoons of fresh lemon juice. Alternately add the dry ingredients and buttermilk mixture to the butter mixture, starting and ending with the dry ingredients. Mix just until combined; do not overmix, as this can lead to a dense loaf.
  6. Pour the batter into the prepared loaf pan. Smooth the top with a spatula, ensuring it’s even. Bake in the preheated oven for 50-60 minutes, or until a toothpick inserted in the center comes out clean. The edges should be lightly golden brown, and the center should feel just set.
  7. Once baked, remove the loaf from the oven and allow it to cool in the pan for about 10 minutes. Then, transfer it to a wire rack to cool completely. Resist the urge to slice too soon, as it will be crumbly if it’s still warm.
  8. While the loaf is cooling, prepare the citrus icing. In a medium bowl, whisk together 1 cup of powdered sugar, 2 tablespoons of fresh lemon juice, and 1 tablespoon of orange juice until smooth. If the icing is too thick, you can add a little more juice to reach your desired consistency.
  9. Once the loaf is completely cool, drizzle the citrus icing over the top. If you like, sprinkle with an additional teaspoon of lemon zest for an extra pop of flavor and color.

Pro Tips for the Best Lemon Poppy Seed Loaf With Citrus Icing

  • Be careful not to overmix your batter; this is a common mistake that can lead to a dense loaf. Mix just until the dry ingredients are incorporated for a light and fluffy texture.
  • Use room temperature ingredients, especially the butter and eggs. This helps to create a smoother batter and ensures even baking. Take your eggs out of the fridge about 30 minutes before you start.
  • For a more pronounced lemon flavor, consider adding a little lemon extract in addition to the zest and juice. Just a half teaspoon can elevate the citrus notes significantly.
  • When measuring your flour, spoon it into the measuring cup and level it off with a knife instead of scooping directly from the bag. This prevents packing and ensures you don’t end up with a dry loaf.
  • Invest in a good quality loaf pan; it makes a difference in heat distribution, which ensures even baking. If your pan is dark-coated, reduce the oven temperature by 25°F to prevent over-browning.

Variations & Serving Ideas

For a delightful twist, consider adding blueberries or raspberries to the batter for a fruity burst of flavor. You can also experiment with different citrus fruits—try lime or grapefruit zest and juice for a refreshing change. For a healthier option, substitute half of the all-purpose flour with whole wheat flour for added fiber without compromising too much on texture.

This Lemon Poppy Seed Loaf pairs beautifully with a light salad, such as a mixed greens salad with a vinaigrette, or a cup of tea for a cozy afternoon treat. It also complements a creamy cheese platter, as the acidity of the loaf balances rich cheeses perfectly. Lastly, a scoop of vanilla ice cream on the side creates a delightful contrast of temperatures and flavors!

Storage, Make-Ahead & Reheating

This Lemon Poppy Seed Loaf can be stored at room temperature for up to 3 days if wrapped tightly in plastic wrap. If you want to keep it longer, it freezes well for up to 3 months. To freeze, wrap the loaf tightly in plastic wrap and then in aluminum foil to prevent freezer burn.

When you’re ready to enjoy it again, simply thaw it in the fridge overnight. Reheat individual slices in the microwave for 15-20 seconds or in a toaster oven until warmed through. Interestingly, many people find that this loaf tastes even better the next day, as the flavors have time to meld!

Frequently Asked Questions

Can I make Lemon Poppy Seed Loaf With Citrus Icing ahead of time?

Yes — in fact, it tastes even better the next day! You can make the loaf a day in advance, allowing the flavors to develop. Just be sure to store it in an airtight container to maintain its moisture.

Can I substitute the poppy seeds?

Absolutely! If you don’t have poppy seeds on hand or prefer an alternative, you can use sesame seeds for a similar crunch or omit them entirely for a smooth loaf.

What can I use instead of buttermilk?

If you don’t have buttermilk, you can easily create a substitute by mixing ½ cup of milk (dairy or plant-based) with 1 tablespoon of vinegar or lemon juice. Let it sit for 5 minutes before using in the recipe.

How can I make this recipe gluten-free?

To make a gluten-free version of this Lemon Poppy Seed Loaf, substitute the all-purpose flour with a gluten-free all-purpose flour blend. Just ensure that the blend contains a binding agent like xanthan gum for the best results.

What is the best way to store leftover loaf?

Leftover Lemon Poppy Seed Loaf should be stored in an airtight container at room temperature for up to 3 days. For longer storage, wrap it tightly and freeze for up to 3 months. Thaw it before serving for the best texture.

Zesty Lemon Poppy Seed Delight

Final Thoughts

The Lemon Poppy Seed Loaf with Citrus Icing is truly a delightful treat that brings a burst of brightness to any occasion. The zesty lemon flavor combined with the subtle crunch of poppy seeds creates a satisfying balance, while the citrus icing adds a touch of sweetness that perfectly complements the loaf’s tanginess.

This is the kind of recipe I come back to again and again, especially when I want to brighten up a gloomy day or celebrate a small victory. The aroma that fills the kitchen as it bakes is absolutely heavenly! I encourage you to give this recipe a try; you might just find it becoming a beloved staple in your home. Don’t forget to share your results or even add your own unique twist—I can’t wait to see what you create!

Print
clock clock iconcutlery cutlery iconflag flag iconfolder folder iconinstagram instagram iconpinterest pinterest iconfacebook facebook iconprint print iconsquares squares iconheart heart iconheart solid heart solid icon

Lemon Poppy Seed Loaf


  • Author: Lily author
  • Total Time: 14 minute
  • Yield: 1 loaf 1x
Pin Recipe
Print Recipe

Description

This Lemon Poppy Seed Loaf is a delightful treat that combines zesty lemon flavor with crunchy poppy seeds. Topped with a citrus icing, it’s perfect for any occasion.


Ingredients

Scale
  • 1 ½ cups (190g) all-purpose flour
  • 1 teaspoon baking powder
  • ½ teaspoon baking soda
  • ½ teaspoon salt
  • 3 tablespoons poppy seeds
  • ½ cup (115g) unsalted butter, softened to room temperature
  • 1 cup (200g) granulated sugar
  • 2 large eggs
  • 1 teaspoon vanilla extract
  • 1 teaspoon lemon zest (from about 1 medium lemon)
  • ½ cup (120ml) buttermilk
  • 2 tablespoons fresh lemon juice
  • 1 cup (120g) powdered sugar
  • 2 tablespoons fresh lemon juice
  • 1 tablespoon orange juice
  • 1 teaspoon lemon zest (for garnish, optional)

Instructions

  1. Preheat your oven to 350°F (175°C). Grease a 9×5-inch loaf pan or line it with parchment paper for easy removal later.
  2. In a medium mixing bowl, whisk together 1 ½ cups of all-purpose flour, 1 teaspoon of baking powder, ½ teaspoon of baking soda, ½ teaspoon of salt, and 3 tablespoons of poppy seeds. This helps to evenly distribute the baking agents and ensures a uniform rise.
  3. In a large mixing bowl, cream together ½ cup of softened unsalted butter and 1 cup of granulated sugar using an electric mixer on medium speed for about 3-4 minutes, until the mixture is light and fluffy. Make sure to scrape down the sides of the bowl occasionally.
  4. Add 2 large eggs, 1 teaspoon of vanilla extract, and 1 teaspoon of lemon zest to the creamed butter and sugar, mixing until fully combined. You want a smooth consistency, so ensure there are no lumps of butter.
  5. In a small bowl, combine ½ cup of buttermilk and 2 tablespoons of fresh lemon juice. Alternately add the dry ingredients and buttermilk mixture to the butter mixture, starting and ending with the dry ingredients. Mix just until combined; do not overmix, as this can lead to a dense loaf.
  6. Pour the batter into the prepared loaf pan. Smooth the top with a spatula, ensuring it’s even. Bake in the preheated oven for 50-60 minutes, or until a toothpick inserted in the center comes out clean. The edges should be lightly golden brown, and the center should feel just set.
  7. Once baked, remove the loaf from the oven and allow it to cool in the pan for about 10 minutes. Then, transfer it to a wire rack to cool completely. Resist the urge to slice too soon, as it will be crumbly if it’s still warm.
  8. While the loaf is cooling, prepare the citrus icing. In a medium bowl, whisk together 1 cup of powdered sugar, 2 tablespoons of fresh lemon juice, and 1 tablespoon of orange juice until smooth. If the icing is too thick, you can add a little more juice to reach your desired consistency.
  9. Once the loaf is completely cool, drizzle the citrus icing over the top. If you like, sprinkle with an additional teaspoon of lemon zest for an extra pop of flavor and color.
  • Prep Time: 15 mins
  • Cook Time: 50-60 mins
  • Category: Dessert
  • Method: Baking
  • Cuisine: American

Nutrition

  • Serving Size: 1 slice
  • Calories: 200
  • Sugar: 15 g
  • Sodium: 150 mg
  • Fat: 8 g
  • Saturated Fat: 5 g
  • Unsaturated Fat: 3 g
  • Trans Fat: 0 g
  • Carbohydrates: 30 g
  • Fiber: 1 g
  • Protein: 3 g
  • Cholesterol: 40 mg

Keywords: Be careful not to overmix your batter; this is a common mistake that can lead to a dense loaf. Use room temperature ingredients for a smoother batter and even baking.

Did you make this recipe?

Share a photo and tag us — we can't wait to see what you've made!

  • Privacy Policy
  • Terms Of Service
  • Contact
  • About
  • GDPR

Copyright © 2025 Homesmad