• Skip to primary navigation
  • Skip to main content
  • Skip to primary sidebar
Homesmad

Homesmad

  • Home
  • Breakfast & Brunch
  • Appetizers & Snacks
  • Dinner
  • Dessert
  • About
  • Privacy Policy
  • Contact
Homesmad
  • Home
  • Breakfast & Brunch
  • Appetizers & Snacks
  • Dinner
  • Dessert
  • About
  • Privacy Policy
  • Contact

Make The Best Apple Pie Bars – Sweet, Simple & Scrumptious!

October 1, 2025 by Lily author

How To Make The Best Apple Pie Bars is a question I get asked often, and today, I am thrilled to share my ultimate recipe that perfectly captures the essence of a classic apple pie in a wonderfully convenient bar form. Imagine the warm, comforting embrace of spiced apples nestled beneath a buttery, crumbly topping, all without the fuss of rolling out an entire pie crust. Apple pie itself boasts a long, cherished history, evolving from a humble, often savory dish in the Middle Ages to the sweet American icon we adore today. While traditional apple pie holds a special place in our culinary heritage, these bars offer an irresistible modern twist, making that quintessential dessert more accessible than ever.

Why These Apple Pie Bars Will Become Your New Favorite Dessert

People absolutely adore this dish because it delivers all the beloved flavors and textures of a classic apple pie – the tender, cinnamon-kissed apple filling, the crisp-tender crust – but in an easy-to-handle, perfectly portioned format. It’s ideal for gatherings, potlucks, or simply a cozy evening at home when you crave that homemade comfort without the extensive prep time. I truly believe that mastering How To Make The Best Apple Pie Bars will become a staple in your baking repertoire, bringing smiles and deliciousness to every occasion with its unmatched taste and delightful convenience.

Make The Best Apple Pie Bars - Sweet, Simple & Scrumptious! this RECIPE

Ingredients:

  • For the Shortbread Crust:

    • 2 ½ cups (300g) all-purpose flour, spooned and leveled
    • ½ cup (100g) granulated sugar
    • ½ teaspoon fine sea salt
    • 1 cup (226g) unsalted butter, very cold, cut into ½-inch cubes
    • ¼ cup (60ml) ice water, plus 1-2 tablespoons more if needed
  • For the Apple Pie Filling:

    • 6-7 medium apples (about 2 ½ – 3 pounds), such as Granny Smith, Honeycrisp, or Fuji, peeled, cored, and thinly sliced (about ¼-inch thick, yielding 6-7 cups of slices)
    • ½ cup (100g) granulated sugar
    • ¼ cup (50g) packed light brown sugar
    • 2 tablespoons all-purpose flour (or cornstarch for a gluten-free option)
    • 1 ½ teaspoons ground cinnamon
    • ½ teaspoon ground nutmeg
    • ¼ teaspoon ground allspice
    • 1 tablespoon fresh lemon juice
    • 2 tablespoons unsalted butter, cut into small pieces
  • For the Maple Glaze (Optional but Recommended!):

    • 1 ½ cups (180g) powdered sugar, sifted
    • 3 tablespoons pure maple syrup
    • 1-2 tablespoons milk or cream (whole milk works best)
    • ½ teaspoon vanilla extract

Preparing the Tender Shortbread Crust

  1. Combine Dry Ingredients: In a large mixing bowl, combine your 2 ½ cups of all-purpose flour, ½ cup of granulated sugar, and ½ teaspoon of fine sea salt. Use a whisk to thoroughly mix these dry ingredients together. This ensures an even distribution of flavor and helps prevent clumps later on. A well-mixed dry base is key to achieving a consistently tender crust for our apple pie bars.
  2. Incorporate the Cold Butter: Now, add the 1 cup of very cold, unsalted butter, cut into ½-inch cubes, to your dry mixture. It’s absolutely crucial that your butter is as cold as possible; this prevents it from melting too quickly and allows it to create pockets of steam during baking, resulting in a wonderfully flaky and tender crust. You can incorporate the butter using several methods:

    • Pastry Blender: This is my preferred tool. Cut the butter into the flour mixture until it resembles coarse crumbs, with some pea-sized pieces of butter remaining.
    • Your Fingertips: If you don’t have a pastry blender, use your clean fingertips to quickly rub the butter into the flour. Work quickly to prevent the butter from warming too much.
    • Food Processor: For an even quicker method, pulse the dry ingredients and butter together in a food processor until you reach the desired crumbly texture. Be careful not to over-process.

    The goal is a mixture that looks like coarse sand with some larger pea-sized pieces of butter still visible. These butter pieces are what contribute to the characteristic flakiness of a great shortbread crust, making it an ideal foundation for How To Make The Best Apple Pie Bars.

  3. Add Ice Water: Gradually add the ¼ cup of ice water, one tablespoon at a time, mixing gently after each addition. You might not need all of it, or you might need an extra tablespoon or two. The dough should just barely come together when pressed. Do not overmix! Overmixing develops the gluten in the flour, which will lead to a tough crust, and we definitely want a tender one for these bars. Stop mixing as soon as the dough forms a shaggy ball.
  4. Prepare the Baking Pan: Lightly grease a 9×13-inch baking pan. For easier removal of your apple pie bars, I highly recommend lining the bottom of the pan with parchment paper, leaving an overhang on the longer sides. This acts as a sling to lift the cooled bars out effortlessly.
  5. Press the Dough into the Pan: Transfer the dough into the prepared pan. Using your fingertips, evenly press the dough across the bottom of the pan and about ½-inch up the sides. Ensure the thickness is consistent to promote even baking. If the dough is sticky, you can lightly flour your hands or place a piece of plastic wrap over the dough to press it down. This forms the sturdy and delicious base for your amazing apple pie bars.
  6. Chill the Crust: Once pressed, place the pan with the crust in the refrigerator to chill for at least 30 minutes. This step is crucial for two reasons: it allows the gluten to relax, preventing the crust from shrinking during baking, and it re-chills the butter, which contributes to a flakier texture.
  7. Pre-bake the Crust: While the crust is chilling, preheat your oven to 375°F (190°C). Once chilled, remove the pan from the refrigerator. Prick the bottom of the crust all over with a fork. This helps prevent the crust from puffing up too much during baking. Bake the crust for 18-20 minutes, or until it’s lightly golden around the edges. We’re looking for a partially baked crust here, as it will finish baking with the apple filling. Remove from the oven and let it cool slightly while you prepare the filling.

Crafting the Irresistible Apple Pie Filling

  1. Prepare the Apples: First, ensure you have your 6-7 medium apples (about 2 ½ – 3 pounds) peeled, cored, and thinly sliced to about ¼-inch thick. Using a mix of apple varieties like Granny Smith for tartness and Honeycrisp or Fuji for sweetness and texture creates a more complex and flavorful filling. Uniform slices are important for even cooking. Place all your apple slices into a very large bowl.
  2. Mix Dry Filling Ingredients: In a separate small bowl, whisk together the ½ cup of granulated sugar, ¼ cup of packed light brown sugar, 2 tablespoons of all-purpose flour (this will help thicken the juices released by the apples), 1 ½ teaspoons of ground cinnamon, ½ teaspoon of ground nutmeg, and ¼ teaspoon of ground allspice. These warm spices are the heart of apple pie flavor.
  3. Combine Apples and Spices: Pour the dry sugar and spice mixture over the sliced apples. Add the 1 tablespoon of fresh lemon juice; this brightens the apple flavor and helps prevent the apples from browning. Gently toss everything together with your hands or a large spoon until the apples are evenly coated. You want to be thorough but gentle to avoid breaking the delicate apple slices.
  4. Let Apples Macerate (Optional but Recommended): Let the apple mixture sit for about 15-20 minutes at room temperature. During this time, the sugar will draw out some of the moisture from the apples, creating a delicious, syrupy juice that will perfectly coat our filling when baked. This step ensures a wonderfully flavorful and not-too-dry filling for your “How To Make The Best Apple Pie Bars” endeavor.

Assembling and Baking the Ultimate Apple Pie Bars

  1. Assemble the Bars: Once your pre-baked crust has cooled slightly, carefully spoon the apple pie filling evenly over the crust. Try to arrange the apples nicely, ensuring an even layer. Dot the top of the apples with the 2 tablespoons of unsalted butter, cut into small pieces. These little butter pieces will melt into the apples, adding richness and a beautiful sheen to the filling.
  2. Bake to Perfection: Return the pan to the preheated 375°F (190°C) oven. Bake for 45-55 minutes, or until the apples are tender when pierced with a fork, the filling is bubbly, and the crust is deeply golden brown. If you notice the crust browning too quickly, you can loosely tent the pan with aluminum foil for the remaining baking time. The aroma filling your kitchen right now is simply divine, promising the best apple pie bars you’ve ever made!
  3. Crucial Cooling Step: This step is non-negotiable for perfectly structured bars. Once baked, remove the apple pie bars from the oven and place the pan on a wire rack to cool completely. This can take anywhere from 2 to 4 hours, or even longer. Resist the urge to cut into them warm! The filling needs this time to set properly, otherwise, your bars will be a delicious, but messy, heap. Patience truly is a virtue here, especially when you’re aiming for the perfect slice to show off your hard work on “How To Make The Best Apple Pie Bars.”

Whipping Up the Optional Maple Glaze

  1. Combine Glaze Ingredients: In a medium bowl, combine the 1 ½ cups of sifted powdered sugar, 3 tablespoons of pure maple syrup, 1 tablespoon of milk or cream, and ½ teaspoon of vanilla extract. Sifting the powdered sugar beforehand is highly recommended to avoid any lumps in your glaze.
  2. Whisk Until Smooth: Whisk vigorously until the glaze is completely smooth and creamy. If the glaze is too thick, add more milk or cream, a teaspoon at a time, until you reach your desired drizzling consistency. If it’s too thin, add a little more sifted powdered sugar. The goal is a glaze that flows smoothly but is thick enough to coat the bars beautifully.
  3. Glaze the Cooled Bars: Once the apple pie bars are completely cooled, drizzle the maple glaze evenly over the top. You can use a spoon, a fork, or even a piping bag with a small round tip for a more controlled drizzle. Let the glaze set for about 15-20 minutes before slicing. This maple glaze adds an extra layer of sweetness and a touch of elegance that truly elevates these already incredible apple pie bars.

Serving and Storing Your Delicious Apple Pie Bars

  1. Slice and Serve: Once the bars are fully cooled and the glaze has set (if you used it), use the parchment paper overhangs to carefully lift the entire slab of bars out of the pan and onto a cutting board. Using a sharp knife, cut into 12-16 bars, depending on your desired serving size. You can clean the knife between cuts for the neatest edges. These bars are wonderful served at room temperature, perhaps with a dusting of extra cinnamon or a dollop of whipped cream or vanilla ice cream for an extra treat. They are perfect for parties, potlucks, or just a cozy evening treat.
  2. Storage Tips: Store any leftover apple pie bars in an airtight container at room temperature for up to 2-3 days, or in the refrigerator for up to 4-5 days. If refrigerated, allow them to come to room temperature before serving for the best flavor and texture. For longer storage, you can freeze the uncut or pre-cut bars (without the glaze) in an airtight container or freezer bag for up to 2-3 months. Thaw them in the refrigerator overnight and then add the glaze if desired before serving. These storage tips will ensure you can enjoy the fruits of your labor long after you’ve mastered “How To Make The Best Apple Pie Bars.”

Make The Best Apple Pie Bars - Sweet, Simple & Scrumptious!

Conclusion:

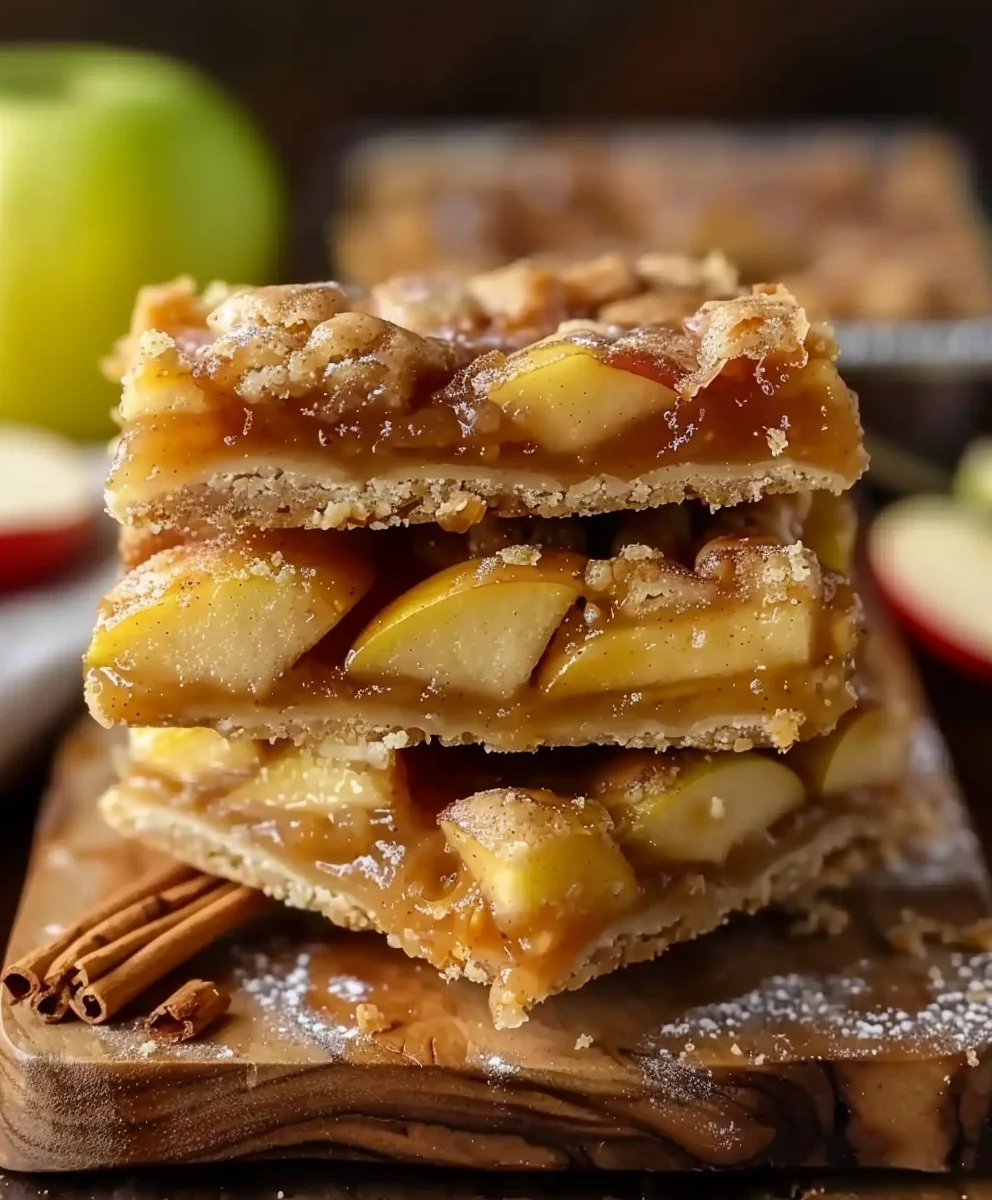
So there you have it, my friends! We’ve journeyed together through the simple yet incredibly satisfying process of creating a dessert that is truly special. These apple pie bars aren’t just a treat; they’re a revelation, offering all the comforting flavors and textures of a classic apple pie without the fuss and extensive commitment of a traditional double-crust pastry. I genuinely believe that once you taste them, they will become an instant favorite, a go-to recipe for any occasion, big or small. The buttery, crumbly shortbread crust, which practically melts in your mouth, provides the perfect foundation for the tender, spiced apple filling. Each bite delivers that quintessential apple pie experience – a harmonious blend of sweet, tart, and warm cinnamon notes that evokes pure autumnal bliss, no matter the season.

What truly makes this recipe a must-try, in my humble opinion, is its unparalleled convenience and incredible portability. Forget about struggling with a fragile pie crust or worrying about slices falling apart; these bars are perfectly portioned and robust enough to transport to potlucks, picnics, or simply enjoy on the go. They are wonderfully satisfying, offering that homemade goodness without the stress. I’ve spent countless hours refining this recipe, striving for that ideal balance of flavors and textures, and I am confident that by following these steps, you too will discover How To Make The Best Apple Pie Bars that will earn you rave reviews from everyone who tries them. It’s a recipe designed to bring joy and ease into your baking, promising delicious results every single time.

While these bars are absolutely divine served at room temperature, I have to confess, my absolute favorite way to enjoy them is slightly warm. Picture this: a warm apple pie bar, fresh from the oven, topped with a generous scoop of creamy vanilla bean ice cream that slowly begins to melt into the spiced apple filling. The contrast of warm and cold, soft and crisp, is simply heavenly. For an extra touch of indulgence, a dollop of freshly whipped cream or a decadent drizzle of homemade caramel sauce elevates them to an even higher level of dessert nirvana. And don’t forget a simple dusting of powdered sugar or a sprinkle of extra cinnamon for that final, inviting flourish.

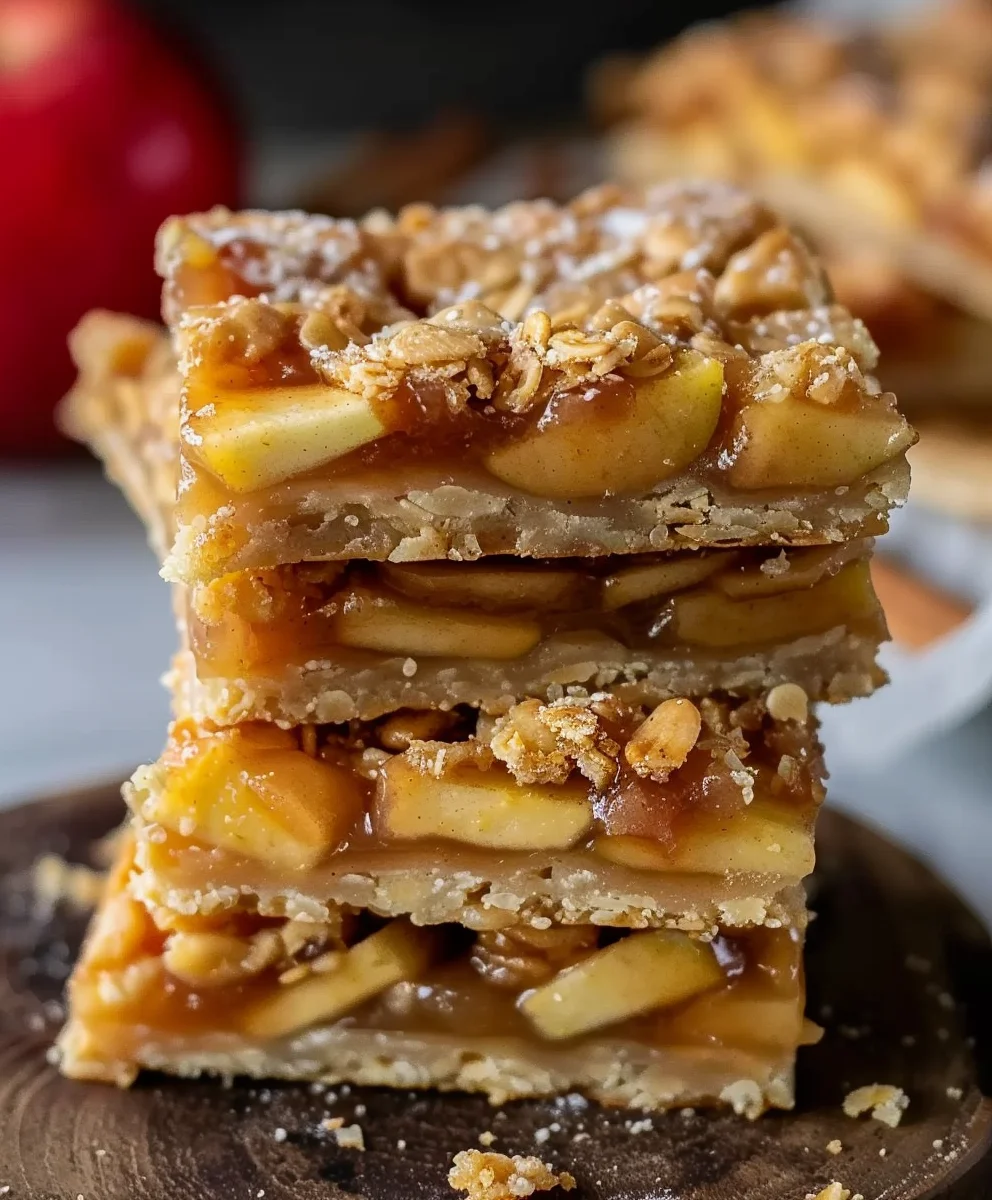
But don’t stop there! This recipe is incredibly versatile, practically inviting you to put your own creative spin on it. For an added layer of texture and nutty flavor, consider stirring in a handful of chopped walnuts or pecans into the apple filling before baking. If you’re a fan of a little extra crunch, a simple streusel topping, made from a mix of oats, brown sugar, butter, and flour, sprinkled over the apples before they go into the oven, works wonderfully. You could also experiment with your apple varieties; while I love a mix of Granny Smith and Honeycrisp for their balance of tartness and sweetness, feel free to use your favorite baking apples. For a subtle twist on the spice profile, a tiny pinch of ground cardamom or ginger can add a beautiful depth to the cinnamon. And if you’re feeling extra fancy, a light lemon glaze drizzled over the cooled bars adds a lovely zesty finish that perfectly complements the rich apple flavor.

Now it’s your turn! I genuinely hope you feel inspired to head into your kitchen and give this incredible recipe a try. There’s something incredibly rewarding about creating a homemade dessert that fills your home with comforting aromas and brings smiles to the faces of your loved ones. I promise, once you take that first bite, you’ll understand why I’m so passionate about these particular apple pie bars. They are truly a testament to simple ingredients yielding extraordinary results. And when you do, please, please come back here and let me know all about your experience! Did you love them as much as I do? Did you try a fun variation or a unique serving suggestion? Share your stories and even your photos with us; your feedback and culinary adventures truly make my day, and they help our wonderful community of home bakers grow and discover new favorites. Happy baking, my friends! I can’t wait to hear from you and celebrate your delicious successes.


How To Make The Best Apple Pie Bars

How To Make The Best Apple Pie Bars

This ultimate recipe captures the essence of classic apple pie in a convenient bar form. Imagine warm, spiced apples beneath a buttery, crumbly topping, all without the fuss of a traditional pie crust. Perfect for gatherings or a cozy evening, these bars offer a delightful modern twist on a beloved dessert.

Prep Time
45 Minutes

Cook Time
15 Minutes

Total Time
4 Hours

Servings
12-16 bars

Ingredients

  • 2 ½ cups all-purpose flour (for crust)
  • 1 cup cold unsalted butter, cubed (for crust)
  • ½ cup granulated sugar (for crust)
  • 1 tsp salt (for crust)
  • 1 tsp vanilla extract (for crust)
  • 1 large egg (for crust)
  • 4-5 medium apples, peeled, thinly sliced (Granny Smith, Honeycrisp)
  • ¾ cup brown sugar (for filling)
  • 1 tbsp lemon juice (for filling)
  • 2 tsp cinnamon (for filling)
  • ½ tsp nutmeg (for filling)
  • 1 tbsp cornstarch (for filling)
  • Pinch of salt (for filling)
  • ½ cup rolled oats (for topping)
  • ½ cup all-purpose flour (for topping)
  • ¼ cup brown sugar (for topping)
  • ½ tsp cinnamon (for topping)
  • ¼ cup melted unsalted butter (for topping)
  • 1 ½ cups powdered sugar, sifted (for optional glaze)
  • 3 tbsp pure maple syrup (for optional glaze)
  • 1-2 tbsp milk or cream (for optional glaze)
  • ½ tsp vanilla extract (for optional glaze)

Instructions

  1. Step 1
    Whisk 2 ½ cups flour, ½ cup granulated sugar, and 1 tsp salt in a large bowl. Cut in 1 cup cold butter until coarse crumbs form. Stir in 1 large egg and 1 tsp vanilla extract until dough just comes together. Do not overmix. Press dough evenly into a greased and parchment-lined 9×13-inch pan. Chill for 30 minutes.
  2. Step 2
    Preheat oven to 375°F (190°C). Prick the chilled crust all over with a fork. Bake for 18-20 minutes, or until lightly golden around the edges. Remove and cool slightly while preparing the filling.
  3. Step 3
    In a large bowl, combine 4-5 peeled, cored, and thinly sliced apples. In a separate small bowl, whisk ¾ cup brown sugar, 2 tsp cinnamon, ½ tsp nutmeg, 1 tbsp cornstarch, and a pinch of salt. Pour dry mixture over apples, add 1 tbsp lemon juice, and gently toss until evenly coated. Let sit for 15-20 minutes to macerate.
  4. Step 4
    In a medium bowl, combine ½ cup rolled oats, ½ cup flour, ¼ cup brown sugar, and ½ tsp cinnamon. Pour in ¼ cup melted unsalted butter and mix until moist, crumbly pieces form.
  5. Step 5
    Evenly spoon the apple filling over the pre-baked crust. Sprinkle the crumb topping evenly over the apples. Return the pan to the 375°F (190°C) oven and bake for 45-55 minutes, or until apples are tender, filling is bubbly, and topping is golden brown.
  6. Step 6
    Remove from oven and place on a wire rack to cool completely. This is crucial for the filling to set, taking 2-4 hours. Do not cut warm.
  7. Step 7
    Once bars are completely cool, whisk 1 ½ cups sifted powdered sugar, 3 tbsp pure maple syrup, 1-2 tbsp milk or cream, and ½ tsp vanilla extract until smooth. Add more milk or sugar to adjust consistency.
  8. Step 8
    Drizzle the maple glaze evenly over the cooled bars. Let the glaze set for 15-20 minutes. Use parchment overhangs to lift the slab, then slice into 12-16 bars. Serve at room temperature.
  9. Step 9
    Store leftover bars in an airtight container at room temperature for 2-3 days, or refrigerate for 4-5 days. For longer storage, freeze unglazed bars for 2-3 months; thaw overnight in the refrigerator.

Important Information

Nutrition Facts (Per Serving)

It is important to consider this information as approximate and not to use it as definitive health advice.

Allergy Information

Please check ingredients for potential allergens and consult a health professional if in doubt.

« Previous Post
Apple Pie Oatmeal Cookies: A Delicious Fall Treat!
Next Post »
Apple Brownies Recipe: Chewy, Sweet & Easy Dessert!

If you enjoyed this…

Best Ever Costco Copycat Marshmallow Crispy Cookies

Shirley Temple Ice Cream Float: A Refreshing Summer Treat

Perfect Skillet Brownie | Crackly Top, Melt-in-Mouth Gooey

Primary Sidebar

Browse by Diet

BreakfastDinnerLunchDessertAppetizer

Sweet Peach Yogurt Parfait Delight

One of my fondest memories is from a lazy summer afternoon spent at my grandmother’s house. The sun filtered through the kitchen window, casting a warm glow over the table where she would create her culinary magic. It was during one of those blissful moments that I first tasted her Peach Yogurt Parfait with Honey and Granola. The sweet aroma of ripe peaches mingling with creamy yogurt and the crunch of granola was nothing short of heavenly. It felt like summer captured in a bowl, and I still remember the joy of diving in with a spoon, each layer revealing a new burst of flavor.

When I think about that parfait, I can almost hear the gentle hum of the bees outside, reminding me of the floral notes that honey brings to every bite. The vibrant yellows and soft oranges of the peaches contrast beautifully with the creamy white yogurt and the golden crunch of granola. It’s a dish that not only looks delightful but also tastes like a celebration of fresh, wholesome ingredients.

What makes my version of this Peach Yogurt Parfait special is the careful balance of flavors and textures. I use ripe, juicy peaches, drizzled with locally sourced honey, and a homemade granola that’s bursting with nuts and seeds for an extra crunch. It’s a simple dish, but every layer is crafted with love and attention.

Let me show you exactly how to make this delightful parfait, so you can bring a bit of that summer magic into your kitchen!

Sweet Peach Yogurt Parfait Delight

Why You’ll Love This Recipe

  • Delightfully creamy texture from the Greek yogurt, paired with the juicy sweetness of fresh peaches.
  • Ready in under 20 minutes, making it a quick and satisfying breakfast or snack option.
  • Budget-friendly, using common ingredients that you may already have in your pantry.
  • Customizable with your favorite granola and nuts, allowing you to tailor each parfait to your taste.
  • Perfectly balanced flavors with the bright acidity of lemon juice and the sweetness of honey enhancing the peaches.

Ingredients

  • For the Parfait:
  • 2 cups plain Greek yogurt (or vanilla yogurt for a sweeter option)
  • 2 large ripe peaches, diced (about 2 cups)
  • 1 tablespoon fresh lemon juice (to prevent browning of peaches)
  • 2 tablespoons honey (plus more for drizzling)
  • 1 teaspoon vanilla extract (optional for extra flavor)
  • For the Granola:
  • 1 cup granola (store-bought or homemade; see notes for a simple granola recipe)
  • 1/4 cup sliced almonds (optional for added crunch)
  • 1/4 cup shredded coconut (optional for added flavor)

Let’s dive into some key ingredients that make this Peach Yogurt Parfait so delightful! First, the Greek yogurt is not only creamy but also packed with protein, making it a satisfying option for breakfast or a snack. If you’re looking for a sweeter option, you can easily substitute it with vanilla yogurt, though it may alter the overall flavor balance. Next, the ripe peaches are the star of the show; their natural sweetness shines through, so I recommend choosing peaches that yield slightly to pressure, indicating they’re perfectly ripe. If peaches aren’t in season, feel free to use nectarines or even frozen peaches—just thaw them before use. Finally, honey adds a lovely floral sweetness that ties everything together. If you prefer, maple syrup can serve as a delicious substitute.

Step-by-Step Instructions

  1. Start by preparing the peaches. Wash them thoroughly, then slice and dice them into bite-sized pieces. In a medium bowl, toss the diced peaches with 1 tablespoon of fresh lemon juice to prevent browning. Set aside for about 5 minutes while the lemon juice works its magic.
  2. In a separate bowl, combine the Greek yogurt, 2 tablespoons of honey, and 1 teaspoon of vanilla extract if using. Stir the mixture until smooth and thoroughly blended. This should take about a minute. Avoid overmixing to maintain the creaminess of the yogurt.
  3. Now it’s time to layer your parfait. Grab a clear glass or bowl to showcase your beautiful creation. Start with a generous spoonful of the yogurt mixture at the bottom—about 1/4 cup will do. Use a spoon to spread it evenly.
  4. Add a layer of the diced peaches over the yogurt, ensuring they cover the yogurt completely. You might want to use about half of what you have prepared—roughly 1 cup. This layer should be visually appealing, so arrange the peaches neatly.
  5. Sprinkle 1/4 cup of granola over the peaches. This adds a delightful crunch. Make sure to distribute it evenly to ensure every bite has that satisfying texture. Avoid packing it down too tightly, as you want it to maintain its crunch.
  6. Repeat the layers: spoon in another 1/4 cup of yogurt, followed by another cup of peaches, and another sprinkle of granola. You should have at least two layers, but feel free to add more depending on your glass size.
  7. Finish off your parfait with a drizzle of honey on top for added sweetness and a touch of elegance. If you’re using sliced almonds or shredded coconut, sprinkle them on top now. It adds a lovely visual contrast and extra flavor.
  8. Serve immediately or refrigerate for up to 30 minutes before serving to allow the flavors to meld together. However, I recommend enjoying it fresh to maintain the granola’s crunch.

Pro Tips for the Best Peach Yogurt Parfait With Honey And Granola

  • Make sure to choose ripe peaches for the best flavor and texture. A common mistake is using unripe fruit, which can lead to a less enjoyable parfait. Look for peaches that are fragrant and slightly soft to the touch.
  • Use a clear glass to assemble your parfait; this not only makes for a beautiful presentation but also allows you to see the colorful layers, which adds to the enjoyment of eating it.
  • For an even creamier texture, consider whipping the Greek yogurt with a hand mixer for a couple of minutes before layering. This small adjustment makes a huge difference in mouthfeel.
  • Be mindful of the granola-to-yogurt ratio. Too much granola can overwhelm the parfait, while too little can make it feel too creamy. Aim for about 1/4 cup of granola per layer for the perfect balance.
  • If you’re making this for a gathering, consider preparing the yogurt and peaches ahead of time and layering them just before serving. This ensures the granola stays crunchy!

Variations & Serving Ideas

There are so many ways to get creative with your Peach Yogurt Parfait! For a tropical twist, swap out the peaches for mangoes or pineapples and top with coconut flakes. If you prefer a berry flavor, mix in some blueberries or strawberries with the peaches for added color and taste. For a nutty version, incorporate chopped walnuts or pecans instead of almonds.

As for serving ideas, this parfait pairs beautifully with a side of scrambled eggs for a hearty breakfast or fresh fruit salad for a light lunch. You might also enjoy it alongside whole grain toast with almond butter for an energizing snack. The contrast of flavors and textures will elevate your meal experience!

Storage, Make-Ahead & Reheating

The Peach Yogurt Parfait is best enjoyed fresh, but you can prepare some components ahead of time. Store the layered parfait in an airtight container in the refrigerator for up to 24 hours. However, be cautious; the granola may lose its crunch if stored too long. You can freeze the yogurt and peach mixture for up to 2 months; just remember to thaw it in the refrigerator overnight before serving.

If you plan to enjoy this dish the next day, it can taste even better as the flavors meld together. Just remember to add the granola right before serving to keep its delightful crunch!

Frequently Asked Questions

Can I make Peach Yogurt Parfait With Honey And Granola ahead of time?

Yes — in fact, it tastes even better the next day as the flavors meld. However, I recommend waiting to add the granola until just before serving to maintain its crunch.

What can I substitute for Greek yogurt?

If you prefer a lighter option, you can substitute Greek yogurt with regular yogurt or a dairy-free alternative like coconut yogurt. Just remember that this may alter the creaminess and flavor profile slightly.

Can I use frozen peaches for this parfait?

Absolutely! Just make sure to thaw the frozen peaches before using them. They will still add great flavor, though the texture may be slightly softer than fresh peaches.

How do I make the parfait vegan?

To make a vegan version, substitute the Greek yogurt with a plant-based yogurt alternative, and replace honey with maple syrup or agave nectar. This keeps the parfait sweet while adhering to a vegan diet.

What other fruits can I use in this recipe?

You can mix and match fruits based on your preference. Try using strawberries, blueberries, raspberries, or even bananas. Just make sure to adjust the lemon juice as needed to prevent browning.

Sweet Peach Yogurt Parfait Delight

Final Thoughts

The Peach Yogurt Parfait with Honey and Granola is a delightful blend of creamy yogurt, sweet peaches, and crunchy granola that creates a satisfying and nourishing treat. Each layer bursts with flavor, making it a perfect choice for breakfast or a light dessert.

This is the kind of recipe I come back to again and again, especially when I want something refreshing and wholesome to start my day. The harmony of sweet and tart flavors, combined with the delightful crunch, never fails to lift my spirits!

I encourage you to give this parfait a try and indulge in its comforting goodness. Feel free to share your results or even add your own twist—perhaps a sprinkle of cinnamon or a handful of nuts. Enjoy creating your perfect parfait!

Print
clock clock iconcutlery cutlery iconflag flag iconfolder folder iconinstagram instagram iconpinterest pinterest iconfacebook facebook iconprint print iconsquares squares iconheart heart iconheart solid heart solid icon

Peach Yogurt Parfait


  • Author: Lily author
  • Total Time: 15 minutes
  • Yield: 4 servings 1x
Pin Recipe
Print Recipe

Description

This Peach Yogurt Parfait combines creamy Greek yogurt, juicy peaches, and crunchy granola for a delightful treat. It’s a perfect breakfast or snack that captures the essence of summer in every bite.


Ingredients

Scale
  • For the Parfait:
  • 2 cups plain Greek yogurt (or vanilla yogurt for a sweeter option)
  • 2 large ripe peaches, diced (about 2 cups)
  • 1 tablespoon fresh lemon juice (to prevent browning of peaches)
  • 2 tablespoons honey (plus more for drizzling)
  • 1 teaspoon vanilla extract (optional for extra flavor)
  • For the Granola:
  • 1 cup granola (store-bought or homemade; see notes for a simple granola recipe)
  • 1/4 cup sliced almonds (optional for added crunch)
  • 1/4 cup shredded coconut (optional for added flavor)

Instructions

  1. Start by preparing the peaches. Wash them thoroughly, then slice and dice them into bite-sized pieces. In a medium bowl, toss the diced peaches with 1 tablespoon of fresh lemon juice to prevent browning. Set aside for about 5 minutes while the lemon juice works its magic.
  2. In a separate bowl, combine the Greek yogurt, 2 tablespoons of honey, and 1 teaspoon of vanilla extract if using. Stir the mixture until smooth and thoroughly blended. This should take about a minute. Avoid overmixing to maintain the creaminess of the yogurt.
  3. Now it’s time to layer your parfait. Grab a clear glass or bowl to showcase your beautiful creation. Start with a generous spoonful of the yogurt mixture at the bottom—about 1/4 cup will do. Use a spoon to spread it evenly.
  4. Add a layer of the diced peaches over the yogurt, ensuring they cover the yogurt completely. You might want to use about half of what you have prepared—roughly 1 cup. This layer should be visually appealing, so arrange the peaches neatly.
  5. Sprinkle 1/4 cup of granola over the peaches. This adds a delightful crunch. Make sure to distribute it evenly to ensure every bite has that satisfying texture. Avoid packing it down too tightly, as you want it to maintain its crunch.
  6. Repeat the layers: spoon in another 1/4 cup of yogurt, followed by another cup of peaches, and another sprinkle of granola. You should have at least two layers, but feel free to add more depending on your glass size.
  7. Finish off your parfait with a drizzle of honey on top for added sweetness and a touch of elegance. If you’re using sliced almonds or shredded coconut, sprinkle them on top now. It adds a lovely visual contrast and extra flavor.
  8. Serve immediately or refrigerate for up to 30 minutes before serving to allow the flavors to meld together. However, I recommend enjoying it fresh to maintain the granola’s crunch.
  • Prep Time: 15 mins
  • Cook Time: 0 mins
  • Category: Breakfast
  • Method: No-cook
  • Cuisine: American

Nutrition

  • Serving Size: 1 parfait
  • Calories: 250
  • Sugar: 20 g
  • Sodium: 50 mg
  • Fat: 5 g
  • Saturated Fat: 2 g
  • Unsaturated Fat: 3 g
  • Trans Fat: 0 g
  • Carbohydrates: 40 g
  • Fiber: 3 g
  • Protein: 10 g
  • Cholesterol: 10 mg

Keywords: Choose ripe peaches for the best flavor and texture. Use a clear glass for a beautiful presentation. For creaminess, consider whipping the yogurt before layering. Be mindful of the granola-to-yogurt ratio. Prepare yogurt and peaches ahead of time for gatherings, layering just before serving.

Did you make this recipe?

Share a photo and tag us — we can't wait to see what you've made!

Sun-Kissed Frozen Orange Cream Slush

As a child, summer days felt like they lasted forever. I remember the sticky heat wrapping around me as I played outside, my laughter mingling with the sounds of the neighborhood. But nothing could cool me down quite like the moment I’d spot my grandmother, laboring over her blender, whipping up her famous Frozen Orange Creamsicle Slush. That vibrant orange treat, with its frosty texture and sweet citrus aroma, was like a burst of sunshine in a cup. Just one sip, and I could feel the coolness wash over me, sparking pure joy.

This Frozen Orange Creamsicle Slush has a way of making you feel like a kid again. Its creamy, dreamy consistency is a delightful balance of bright orange and soft vanilla, inviting you to dive right in. The refreshing tang of orange dances on your tongue, while the smooth creaminess envelops you in a comforting embrace. It’s a nostalgic treat that’s perfect for hot summer afternoons or anytime you need a little pick-me-up.

What makes my version of this slush stand out is the addition of a hint of vanilla bean, which elevates the flavor and adds an extra layer of richness. Plus, it’s super easy to whip up with just a few simple ingredients that you probably already have on hand! So, if you’re ready to relive those sun-soaked memories, let me show you exactly how to make it.

Sun-Kissed Frozen Orange Cream Slush

Why You’ll Love This Recipe

  • Each slush is a perfect blend of creamy vanilla and zesty orange, creating a nostalgic flavor reminiscent of summer days.
  • This refreshing treat is ready in under 15 minutes, making it an ideal quick dessert for unexpected guests or hot afternoons.
  • With just 8 simple ingredients, it’s budget-friendly, ensuring you don’t have to break the bank to enjoy a delicious slush.
  • The slush has a perfectly smooth texture, thanks to the combination of ice and ice cream, providing a delightful contrast to the bright citrus flavors.
  • It’s highly customizable; you can easily adjust the sweetness and add fresh herbs for a unique twist that suits your taste.

Ingredients

  • 2 cups orange juice (freshly squeezed or store-bought)
  • 1 cup vanilla ice cream
  • 1 cup crushed ice
  • 1/2 cup milk (whole or 2%)
  • 1/4 cup granulated sugar (adjust based on sweetness preference)
  • 1 teaspoon vanilla extract
  • Zest of 1 orange (for added flavor)
  • Fresh orange slices and mint leaves (for garnish)

The star of this Frozen Orange Creamsicle Slush is the orange juice, which provides the vibrant, citrusy base. Freshly squeezed juice will yield the brightest flavor, but store-bought options can be just as convenient. If you’re opting for store-bought, choose 100% pure juice with no added sugars for the best results. Another essential ingredient is the vanilla ice cream; it adds creaminess and sweetness. You can substitute it with dairy-free ice cream if you’re looking for a vegan option. Whole or 2% milk complements the ice cream, creating a smooth blend. If you want a lower-calorie version, almond or oat milk can be good alternatives.

Lastly, the granulated sugar can be adjusted based on your sweetness preference. If you prefer a more natural sweetener, consider using honey or agave syrup. The orange zest enhances the flavor profile, providing an aromatic pop that brings the whole slush together. Don’t skip it! It adds an extra layer of brightness that makes this slush truly special.

Step-by-Step Instructions

  1. Start by preparing your ingredients. Gather 2 cups of orange juice, 1 cup of vanilla ice cream, and 1 cup of crushed ice. Make sure the ice is finely crushed, as larger chunks can make blending difficult.
  2. In a blender, combine the orange juice, vanilla ice cream, crushed ice, and 1/2 cup of milk. Add 1/4 cup of granulated sugar and 1 teaspoon of vanilla extract. If you like a sweeter slush, consider adding a bit more sugar at this stage.
  3. Add the zest of 1 orange to the blender. This step is crucial for enhancing the citrus flavor of your slush. Make sure not to include the bitter white pith—only the flavorful zest.
  4. Blend the mixture on medium-high speed for about 30-45 seconds. Stop once the ingredients are fully combined and the slush has a smooth, even consistency. If you notice large chunks of ice, blend for an additional 10-15 seconds. Avoid over-blending, as this can make the slush too liquidy.
  5. Once blended, taste the slush. If it needs more sweetness, add a little more sugar and blend for a few more seconds. If it’s too thick, you can add a splash of milk to reach your desired consistency.
  6. Pour the slush into glasses. This recipe typically serves 4, but you can easily double it for larger gatherings. Use a spoon to help guide the slush into the glasses if needed.
  7. Garnish each serving with fresh orange slices and mint leaves. The mint not only adds a pop of color but also a refreshing aroma that complements the citrus flavors beautifully.
  8. Serve immediately and enjoy! If you’ve made extra, you can refrigerate it for a short time, but it’s best enjoyed fresh.

Pro Tips for the Best Frozen Orange Creamsicle Slush

  • Don’t skip the orange zest! It’s a game-changer for flavor. Always zest before juicing to make it easier.
  • Use a high-powered blender for the best texture. A standard blender may struggle with ice, leading to uneven consistency. If you have a food processor, that can work too, but ensure the ice is finely crushed.
  • Adjust the ice-to-liquid ratio carefully. If your slush is too thick, it won’t blend well. Start with less ice and add more until you reach your preferred texture.
  • Be cautious with the sugar! Always start with the lower amount, as you can easily add more, but it’s hard to fix an overly sweet slush.
  • For a fun twist, consider adding a splash of coconut milk or a handful of fresh fruit like strawberries or pineapple. This not only enhances the flavor but also adds a beautiful color contrast.

Variations & Serving Ideas

There are countless ways to put a spin on your Frozen Orange Creamsicle Slush. Consider making a tropical version by adding in some pineapple juice or coconut milk for a delightful tropical twist. If you’re feeling adventurous, try incorporating a handful of frozen mango or peach slices for added sweetness. For a lighter version, swap out the vanilla ice cream for Greek yogurt for a creamy yet tangy alternative.

As for serving ideas, this refreshing slush pairs wonderfully with light summer dishes like grilled chicken skewers, fish tacos, or a simple salad topped with citrus vinaigrette. The bright, zesty flavors of the slush complement these dishes perfectly, making them an ideal pairing for a sunny day.

Storage, Make-Ahead & Reheating

This Frozen Orange Creamsicle Slush is best enjoyed fresh, but if you have leftovers, you can store them in an airtight container in the fridge for up to 2 days. Just keep in mind that the slush may lose some of its texture over time as the ice melts. It doesn’t freeze well, as the ice will turn into a solid block. If you must freeze it, blend again after thawing to restore the slushy consistency. This treat is best the day you make it, as the flavors meld together beautifully overnight, enhancing its deliciousness.

Frequently Asked Questions

Can I make Frozen Orange Creamsicle Slush ahead of time?

Yes — in fact, it tastes even better the next day as the flavors meld. However, it’s best to enjoy it fresh, as the texture can change if stored for too long. If you need to prepare it ahead, keep it in the fridge and re-blend before serving.

What kind of orange juice should I use?

For the best flavor, use freshly squeezed orange juice. However, if you’re short on time, opt for 100% pure store-bought juice without added sugars. This will ensure that your slush remains flavorful and refreshing.

Can I substitute the vanilla ice cream?

Absolutely! If you’re looking for a dairy-free option, coconut milk ice cream or a non-dairy vanilla ice cream can work wonderfully. They will still provide the creamy texture and sweetness you desire.

How can I adjust the sweetness of my slush?

You can easily adjust the sweetness by modifying the amount of sugar added. Start with 1/4 cup and taste the mixture before blending. If you prefer it sweeter, add more sugar gradually until it reaches your desired level.

What should I do if my slush is too thick?

If your slush is too thick, simply add a splash of milk or orange juice and blend again. This will help achieve a more drinkable consistency while maintaining the slushy texture. Adjust gradually to reach your preferred thickness.

Sun-Kissed Frozen Orange Cream Slush

Final Thoughts

The Frozen Orange Creamsicle Slush is a delightful blend of refreshing citrus and creamy goodness, making it a perfect treat for warm days or any time you crave a taste of nostalgia. The way the bright orange flavor dances with the creamy texture truly elevates this slush, transforming it into a satisfying escape from the everyday.

This is the kind of recipe I come back to again and again, especially when I’m looking to cool down or impress guests at a summer gathering. It’s simple to make and always brings smiles all around! I encourage you to try this recipe for yourself—don’t hesitate to share your results or even put your own spin on it. Happy slushing!

Print
clock clock iconcutlery cutlery iconflag flag iconfolder folder iconinstagram instagram iconpinterest pinterest iconfacebook facebook iconprint print iconsquares squares iconheart heart iconheart solid heart solid icon

Frozen Orange Creamsicle Slush


  • Author: Lily author
  • Total Time: 15 minutes
  • Yield: 4 servings 1x
Pin Recipe
Print Recipe

Description

This Frozen Orange Creamsicle Slush is a refreshing treat that combines creamy vanilla and zesty orange flavors. Perfect for hot summer days, it brings back nostalgic memories with every sip.


Ingredients

Scale
  • 2 cups orange juice (freshly squeezed or store-bought)
  • 1 cup vanilla ice cream
  • 1 cup crushed ice
  • 1/2 cup milk (whole or 2%)
  • 1/4 cup granulated sugar (adjust based on sweetness preference)
  • 1 teaspoon vanilla extract
  • Zest of 1 orange (for added flavor)
  • Fresh orange slices and mint leaves (for garnish)

Instructions

  1. Start by preparing your ingredients. Gather 2 cups of orange juice, 1 cup of vanilla ice cream, and 1 cup of crushed ice. Make sure the ice is finely crushed, as larger chunks can make blending difficult.
  2. In a blender, combine the orange juice, vanilla ice cream, crushed ice, and 1/2 cup of milk. Add 1/4 cup of granulated sugar and 1 teaspoon of vanilla extract. If you like a sweeter slush, consider adding a bit more sugar at this stage.
  3. Add the zest of 1 orange to the blender. This step is crucial for enhancing the citrus flavor of your slush. Make sure not to include the bitter white pith—only the flavorful zest.
  4. Blend the mixture on medium-high speed for about 30-45 seconds. Stop once the ingredients are fully combined and the slush has a smooth, even consistency. If you notice large chunks of ice, blend for an additional 10-15 seconds. Avoid over-blending, as this can make the slush too liquidy.
  5. Once blended, taste the slush. If it needs more sweetness, add a little more sugar and blend for a few more seconds. If it’s too thick, you can add a splash of milk to reach your desired consistency.
  6. Pour the slush into glasses. This recipe typically serves 4, but you can easily double it for larger gatherings. Use a spoon to help guide the slush into the glasses if needed.
  7. Garnish each serving with fresh orange slices and mint leaves. The mint not only adds a pop of color but also a refreshing aroma that complements the citrus flavors beautifully.
  8. Serve immediately and enjoy! If you’ve made extra, you can refrigerate it for a short time, but it's best enjoyed fresh.
  • Prep Time: 15 min
  • Cook Time: 0 min
  • Category: Dessert
  • Method: Blending
  • Cuisine: American

Nutrition

  • Serving Size: 1 serving
  • Calories: 200
  • Sugar: 30 g
  • Sodium: 50 mg
  • Fat: 5 g
  • Saturated Fat: 3 g
  • Unsaturated Fat: 2 g
  • Trans Fat: 0 g
  • Carbohydrates: 40 g
  • Fiber: 1 g
  • Protein: 2 g
  • Cholesterol: 20 mg

Keywords: Don't skip the orange zest! It's a game-changer for flavor. Always zest before juicing to make it easier.

Did you make this recipe?

Share a photo and tag us — we can't wait to see what you've made!

Zesty Lemon Poppy Seed Delight

One rainy afternoon, I found myself in my grandmother’s cozy kitchen, the kind that always smelled like warmth and love. She was whipping up her famous Lemon Poppy Seed Loaf, a recipe that had been passed down through generations. As the batter came together, the zesty aroma of fresh lemons filled the air, mingling perfectly with the nutty fragrance of poppy seeds. I can still picture her, apron-clad, as she expertly drizzled a vibrant citrus icing over the loaf, creating a glossy, sun-kissed finish that beckoned us to dive in. It was a moment that sparked my own passion for baking, and this recipe has become a cherished staple in my home ever since.

When you take a bite of this Lemon Poppy Seed Loaf, it’s like a burst of sunshine on your palate. The loaf is beautifully golden, with a tender crumb that melts in your mouth. Each slice is speckled with tiny poppy seeds, adding a delightful crunch that contrasts beautifully with the tangy sweetness of the lemon. And that citrus icing? It’s the finishing touch that elevates this loaf from ordinary to extraordinary, with its bright, zesty flavor dancing on your taste buds.

This recipe stands out because it embraces simplicity while delivering on flavor. I’ve added a hint of vanilla to the batter, enhancing the overall taste and making it even more indulgent. Trust me, once you make this Lemon Poppy Seed Loaf With Citrus Icing, it’ll become a go-to in your baking repertoire.

So, let me show you exactly how to make it!

Zesty Lemon Poppy Seed Delight

Why You’ll Love This Recipe

  • Moist and tender crumb that melts in your mouth, thanks to the perfect balance of butter and buttermilk.
  • Bright, zesty lemon flavor paired with crunchy poppy seeds, creating a delightful texture and taste experience.
  • Easy to whip up in just about an hour, perfect for last-minute gatherings or a cozy afternoon treat.
  • Budget-friendly with everyday ingredients, making it an accessible option for all home bakers.
  • The citrus icing adds a sweet tang that elevates the loaf, turning a simple recipe into a showstopper!

Ingredients

  • 1 ½ cups (190g) all-purpose flour
  • 1 teaspoon baking powder
  • ½ teaspoon baking soda
  • ½ teaspoon salt
  • 3 tablespoons poppy seeds
  • ½ cup (115g) unsalted butter, softened to room temperature
  • 1 cup (200g) granulated sugar
  • 2 large eggs
  • 1 teaspoon vanilla extract
  • 1 teaspoon lemon zest (from about 1 medium lemon)
  • ½ cup (120ml) buttermilk
  • 2 tablespoons fresh lemon juice

For the Citrus Icing:

  • 1 cup (120g) powdered sugar
  • 2 tablespoons fresh lemon juice
  • 1 tablespoon orange juice
  • 1 teaspoon lemon zest (for garnish, optional)

Let’s dive into the key ingredients that make this Lemon Poppy Seed Loaf so special. The all-purpose flour provides the structure and base for the loaf, while the baking powder and baking soda ensure it rises perfectly, giving the loaf a light texture. For a gluten-free variation, you could substitute the flour with a gluten-free all-purpose blend. Poppy seeds not only add a delightful crunch but also contribute to the unique flavor profile that pairs well with the citrus notes.

Unsalted butter is crucial for achieving the buttery richness that makes this loaf so moist. If you’re looking for a dairy-free option, coconut oil or a vegan butter can be used instead. The buttermilk is another essential component, providing acidity that activates the baking soda for a fluffy texture. If you don’t have buttermilk on hand, you can easily make a substitute by mixing ½ cup of milk with 1 tablespoon of vinegar or lemon juice and letting it sit for about 5 minutes.

Step-by-Step Instructions

  1. Preheat your oven to 350°F (175°C). Grease a 9×5-inch loaf pan or line it with parchment paper for easy removal later.
  2. In a medium mixing bowl, whisk together 1 ½ cups of all-purpose flour, 1 teaspoon of baking powder, ½ teaspoon of baking soda, ½ teaspoon of salt, and 3 tablespoons of poppy seeds. This helps to evenly distribute the baking agents and ensures a uniform rise.
  3. In a large mixing bowl, cream together ½ cup of softened unsalted butter and 1 cup of granulated sugar using an electric mixer on medium speed for about 3-4 minutes, until the mixture is light and fluffy. Make sure to scrape down the sides of the bowl occasionally.
  4. Add 2 large eggs, 1 teaspoon of vanilla extract, and 1 teaspoon of lemon zest to the creamed butter and sugar, mixing until fully combined. You want a smooth consistency, so ensure there are no lumps of butter.
  5. In a small bowl, combine ½ cup of buttermilk and 2 tablespoons of fresh lemon juice. Alternately add the dry ingredients and buttermilk mixture to the butter mixture, starting and ending with the dry ingredients. Mix just until combined; do not overmix, as this can lead to a dense loaf.
  6. Pour the batter into the prepared loaf pan. Smooth the top with a spatula, ensuring it’s even. Bake in the preheated oven for 50-60 minutes, or until a toothpick inserted in the center comes out clean. The edges should be lightly golden brown, and the center should feel just set.
  7. Once baked, remove the loaf from the oven and allow it to cool in the pan for about 10 minutes. Then, transfer it to a wire rack to cool completely. Resist the urge to slice too soon, as it will be crumbly if it’s still warm.
  8. While the loaf is cooling, prepare the citrus icing. In a medium bowl, whisk together 1 cup of powdered sugar, 2 tablespoons of fresh lemon juice, and 1 tablespoon of orange juice until smooth. If the icing is too thick, you can add a little more juice to reach your desired consistency.
  9. Once the loaf is completely cool, drizzle the citrus icing over the top. If you like, sprinkle with an additional teaspoon of lemon zest for an extra pop of flavor and color.

Pro Tips for the Best Lemon Poppy Seed Loaf With Citrus Icing

  • Be careful not to overmix your batter; this is a common mistake that can lead to a dense loaf. Mix just until the dry ingredients are incorporated for a light and fluffy texture.
  • Use room temperature ingredients, especially the butter and eggs. This helps to create a smoother batter and ensures even baking. Take your eggs out of the fridge about 30 minutes before you start.
  • For a more pronounced lemon flavor, consider adding a little lemon extract in addition to the zest and juice. Just a half teaspoon can elevate the citrus notes significantly.
  • When measuring your flour, spoon it into the measuring cup and level it off with a knife instead of scooping directly from the bag. This prevents packing and ensures you don’t end up with a dry loaf.
  • Invest in a good quality loaf pan; it makes a difference in heat distribution, which ensures even baking. If your pan is dark-coated, reduce the oven temperature by 25°F to prevent over-browning.

Variations & Serving Ideas

For a delightful twist, consider adding blueberries or raspberries to the batter for a fruity burst of flavor. You can also experiment with different citrus fruits—try lime or grapefruit zest and juice for a refreshing change. For a healthier option, substitute half of the all-purpose flour with whole wheat flour for added fiber without compromising too much on texture.

This Lemon Poppy Seed Loaf pairs beautifully with a light salad, such as a mixed greens salad with a vinaigrette, or a cup of tea for a cozy afternoon treat. It also complements a creamy cheese platter, as the acidity of the loaf balances rich cheeses perfectly. Lastly, a scoop of vanilla ice cream on the side creates a delightful contrast of temperatures and flavors!

Storage, Make-Ahead & Reheating

This Lemon Poppy Seed Loaf can be stored at room temperature for up to 3 days if wrapped tightly in plastic wrap. If you want to keep it longer, it freezes well for up to 3 months. To freeze, wrap the loaf tightly in plastic wrap and then in aluminum foil to prevent freezer burn.

When you’re ready to enjoy it again, simply thaw it in the fridge overnight. Reheat individual slices in the microwave for 15-20 seconds or in a toaster oven until warmed through. Interestingly, many people find that this loaf tastes even better the next day, as the flavors have time to meld!

Frequently Asked Questions

Can I make Lemon Poppy Seed Loaf With Citrus Icing ahead of time?

Yes — in fact, it tastes even better the next day! You can make the loaf a day in advance, allowing the flavors to develop. Just be sure to store it in an airtight container to maintain its moisture.

Can I substitute the poppy seeds?

Absolutely! If you don’t have poppy seeds on hand or prefer an alternative, you can use sesame seeds for a similar crunch or omit them entirely for a smooth loaf.

What can I use instead of buttermilk?

If you don’t have buttermilk, you can easily create a substitute by mixing ½ cup of milk (dairy or plant-based) with 1 tablespoon of vinegar or lemon juice. Let it sit for 5 minutes before using in the recipe.

How can I make this recipe gluten-free?

To make a gluten-free version of this Lemon Poppy Seed Loaf, substitute the all-purpose flour with a gluten-free all-purpose flour blend. Just ensure that the blend contains a binding agent like xanthan gum for the best results.

What is the best way to store leftover loaf?

Leftover Lemon Poppy Seed Loaf should be stored in an airtight container at room temperature for up to 3 days. For longer storage, wrap it tightly and freeze for up to 3 months. Thaw it before serving for the best texture.

Zesty Lemon Poppy Seed Delight

Final Thoughts

The Lemon Poppy Seed Loaf with Citrus Icing is truly a delightful treat that brings a burst of brightness to any occasion. The zesty lemon flavor combined with the subtle crunch of poppy seeds creates a satisfying balance, while the citrus icing adds a touch of sweetness that perfectly complements the loaf’s tanginess.

This is the kind of recipe I come back to again and again, especially when I want to brighten up a gloomy day or celebrate a small victory. The aroma that fills the kitchen as it bakes is absolutely heavenly! I encourage you to give this recipe a try; you might just find it becoming a beloved staple in your home. Don’t forget to share your results or even add your own unique twist—I can’t wait to see what you create!

Print
clock clock iconcutlery cutlery iconflag flag iconfolder folder iconinstagram instagram iconpinterest pinterest iconfacebook facebook iconprint print iconsquares squares iconheart heart iconheart solid heart solid icon

Lemon Poppy Seed Loaf


  • Author: Lily author
  • Total Time: 16 minute
  • Yield: 1 loaf 1x
Pin Recipe
Print Recipe

Description

This Lemon Poppy Seed Loaf is a delightful treat that combines zesty lemon flavor with crunchy poppy seeds. Topped with a citrus icing, it’s perfect for any occasion.


Ingredients

Scale
  • 1 ½ cups (190g) all-purpose flour
  • 1 teaspoon baking powder
  • ½ teaspoon baking soda
  • ½ teaspoon salt
  • 3 tablespoons poppy seeds
  • ½ cup (115g) unsalted butter, softened to room temperature
  • 1 cup (200g) granulated sugar
  • 2 large eggs
  • 1 teaspoon vanilla extract
  • 1 teaspoon lemon zest (from about 1 medium lemon)
  • ½ cup (120ml) buttermilk
  • 2 tablespoons fresh lemon juice
  • 1 cup (120g) powdered sugar
  • 2 tablespoons fresh lemon juice
  • 1 tablespoon orange juice
  • 1 teaspoon lemon zest (for garnish, optional)

Instructions

  1. Preheat your oven to 350°F (175°C). Grease a 9×5-inch loaf pan or line it with parchment paper for easy removal later.
  2. In a medium mixing bowl, whisk together 1 ½ cups of all-purpose flour, 1 teaspoon of baking powder, ½ teaspoon of baking soda, ½ teaspoon of salt, and 3 tablespoons of poppy seeds. This helps to evenly distribute the baking agents and ensures a uniform rise.
  3. In a large mixing bowl, cream together ½ cup of softened unsalted butter and 1 cup of granulated sugar using an electric mixer on medium speed for about 3-4 minutes, until the mixture is light and fluffy. Make sure to scrape down the sides of the bowl occasionally.
  4. Add 2 large eggs, 1 teaspoon of vanilla extract, and 1 teaspoon of lemon zest to the creamed butter and sugar, mixing until fully combined. You want a smooth consistency, so ensure there are no lumps of butter.
  5. In a small bowl, combine ½ cup of buttermilk and 2 tablespoons of fresh lemon juice. Alternately add the dry ingredients and buttermilk mixture to the butter mixture, starting and ending with the dry ingredients. Mix just until combined; do not overmix, as this can lead to a dense loaf.
  6. Pour the batter into the prepared loaf pan. Smooth the top with a spatula, ensuring it’s even. Bake in the preheated oven for 50-60 minutes, or until a toothpick inserted in the center comes out clean. The edges should be lightly golden brown, and the center should feel just set.
  7. Once baked, remove the loaf from the oven and allow it to cool in the pan for about 10 minutes. Then, transfer it to a wire rack to cool completely. Resist the urge to slice too soon, as it will be crumbly if it’s still warm.
  8. While the loaf is cooling, prepare the citrus icing. In a medium bowl, whisk together 1 cup of powdered sugar, 2 tablespoons of fresh lemon juice, and 1 tablespoon of orange juice until smooth. If the icing is too thick, you can add a little more juice to reach your desired consistency.
  9. Once the loaf is completely cool, drizzle the citrus icing over the top. If you like, sprinkle with an additional teaspoon of lemon zest for an extra pop of flavor and color.
  • Prep Time: 15 mins
  • Cook Time: 50-60 mins
  • Category: Dessert
  • Method: Baking
  • Cuisine: American

Nutrition

  • Serving Size: 1 slice
  • Calories: 200
  • Sugar: 15 g
  • Sodium: 150 mg
  • Fat: 8 g
  • Saturated Fat: 5 g
  • Unsaturated Fat: 3 g
  • Trans Fat: 0 g
  • Carbohydrates: 30 g
  • Fiber: 1 g
  • Protein: 3 g
  • Cholesterol: 40 mg

Keywords: Be careful not to overmix your batter; this is a common mistake that can lead to a dense loaf. Use room temperature ingredients for a smoother batter and even baking.

Did you make this recipe?

Share a photo and tag us — we can't wait to see what you've made!

  • Privacy Policy
  • Terms Of Service
  • Contact
  • About
  • GDPR

Copyright © 2025 Homesmad