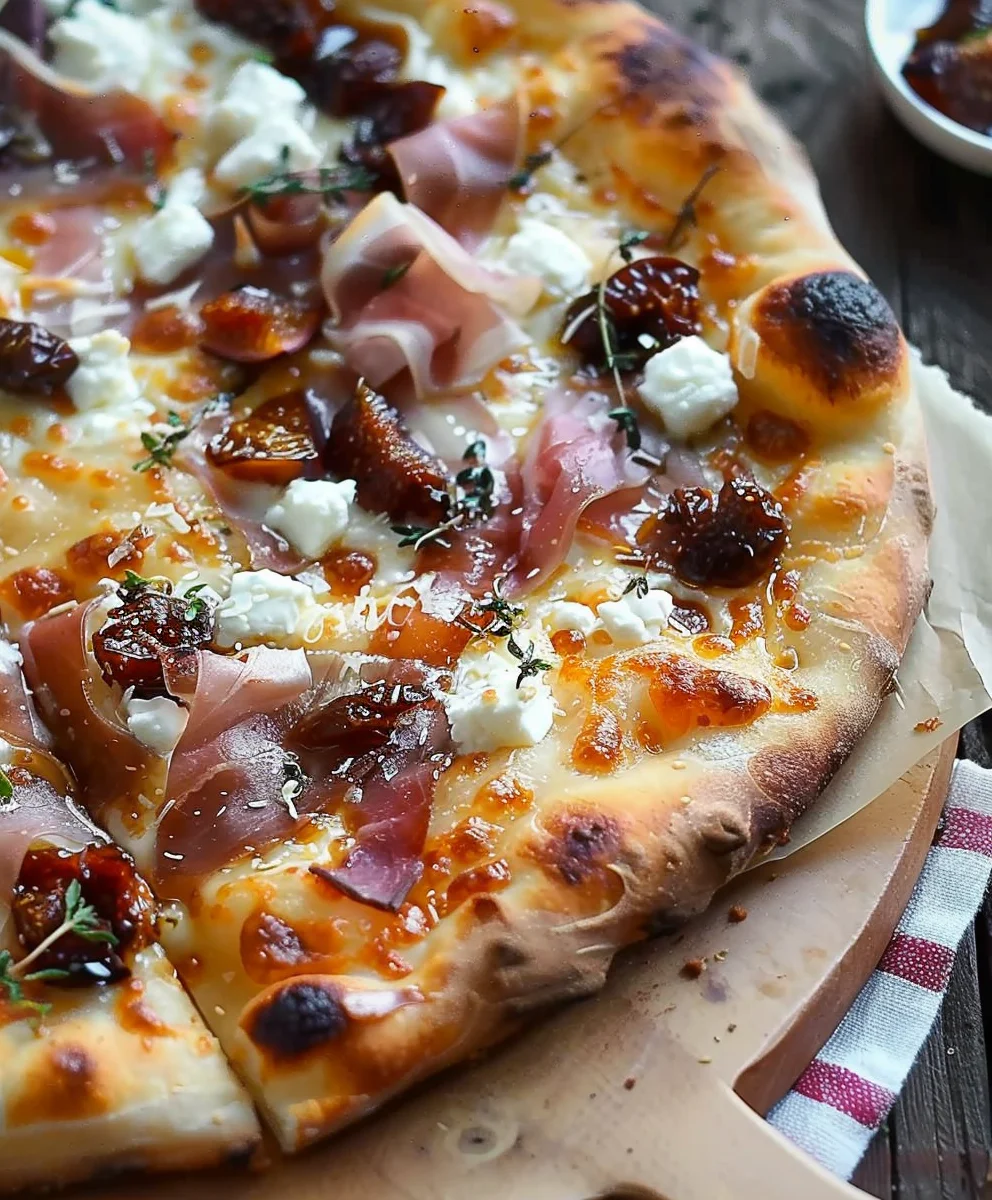
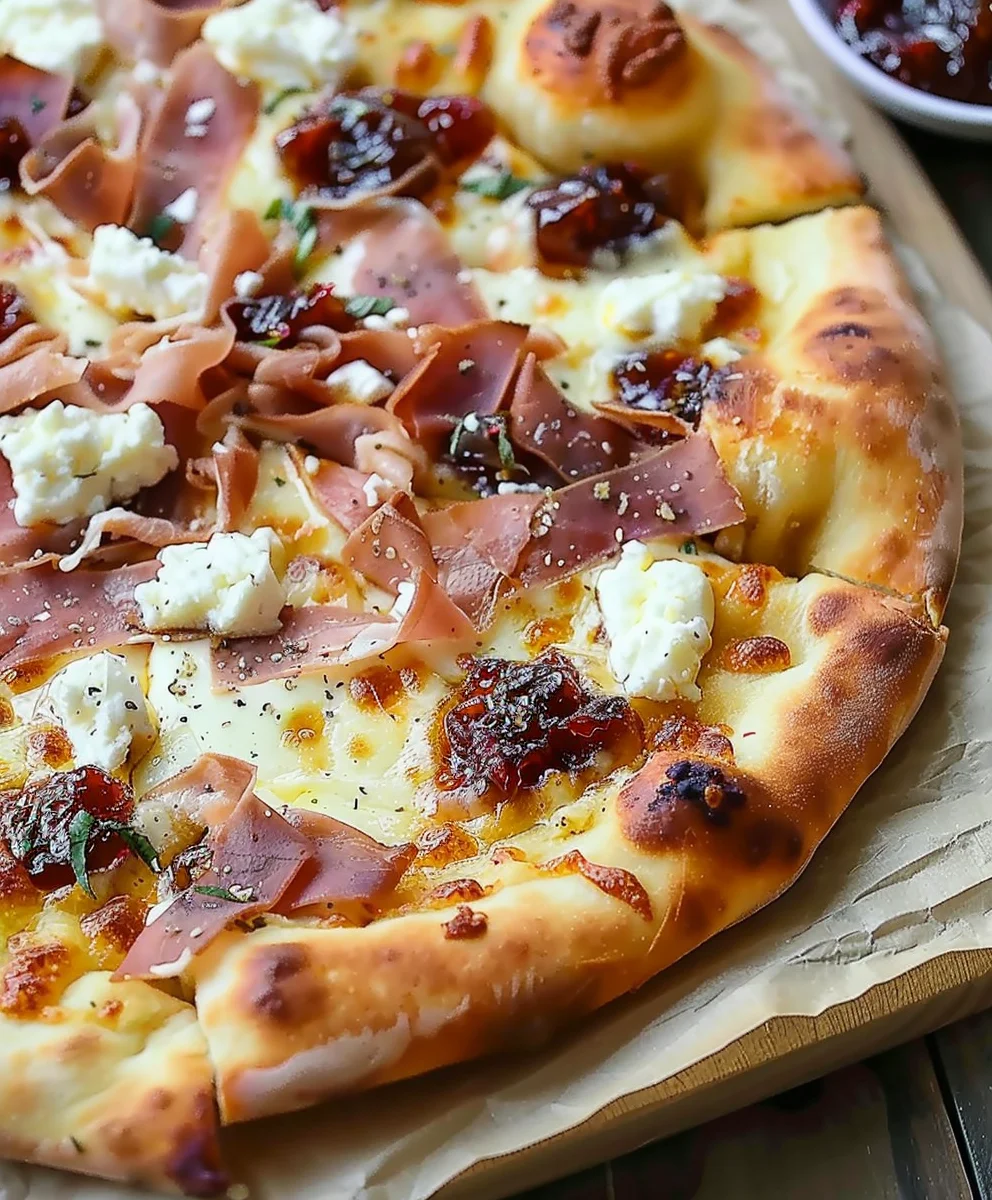
Easy Minute Fig Jam Pizza With Goat Cheese And Beef Prosciutto is more than just a recipe; it’s an invitation to experience a culinary masterpiece that effortlessly marries sophisticated flavors with remarkable convenience. Imagine a dish that delivers an explosion of sweet, savory, and tangy notes, all while being incredibly simple to assemble. This exquisite pizza concept takes inspiration from the rich heritage of Italian pizza-making, elevating it with a modern, gourmet twist. While pizza itself boasts a storied past, originating as a humble flatbread, this particular combination showcases how a classic can evolve into something truly spectacular.
Why This Dish Will Become Your New Favorite
People absolutely adore this pizza for a multitude of reasons. Firstly, the harmonious blend of flavors is simply irresistible: the luscious sweetness of fig jam perfectly complements the creamy, tangy goat cheese, while the delicate saltiness and rich umami of beef prosciutto add a layer of luxurious depth. Texturally, it’s a dream – a crisp crust providing the perfect foundation for the tender toppings. Secondly, its “minute” aspect is a game-changer. It’s designed for those moments when you crave something extraordinary but are short on time, making it ideal for a quick, elegant weeknight dinner or an impressive appetizer for guests. I am thrilled to guide you through crafting this exceptional Easy Minute Fig Jam Pizza With Goat Cheese And Beef Prosciutto, a dish that consistently delights with its unparalleled taste and impressive simplicity.

<h2>Ingredients:</h2>
<ul>
<li><strong>Pizza Crust:</strong> 2 individual (8-10 inch) pre-made, thin-crust pizza bases, or 1 large (12-14 inch) thin-crust pizza base. I find that using a high-quality, pre-made thin-crust pizza base is the secret weapon for making this a true ‘minute’ pizza. It cooks up quickly and provides a wonderfully crispy foundation for our delicious toppings. You can often find these in the refrigerated or frozen section of your grocery store. If using frozen, be sure to follow the package instructions for thawing, if necessary, before proceeding.</li>
<li><strong>Fig Jam:</strong> ½ cup (approximately 120g) high-quality fig jam. Look for a fig jam that isn’t overly sweetened; you want the natural, earthy sweetness of the figs to shine through, not be overwhelmed by sugar. The deep, rich flavor of fig jam is the star of this dish, providing a luxurious base that perfectly complements the savory elements.</li>
<li><strong>Goat Cheese (Chèvre):</strong> 4-6 ounces (115-170g) soft goat cheese, crumbled. The creamy texture and delightful tang of goat cheese are absolutely essential for balancing the sweetness of the fig jam and the richness of the beef prosciutto. Its unique flavor profile brings a sophisticated touch to every bite. I prefer the fresh, logs of chèvre that crumble easily, but pre-crumbled varieties work just as well in a pinch.</li>
<li><strong>Beef Prosciutto (Bresaola):</strong> 3-4 ounces (85-115g) thinly sliced beef prosciutto, also known as Bresaola. This air-dried, salted beef adds a wonderful depth of flavor and a slightly salty, savory element that truly elevates the pizza. Its delicate texture and robust taste are a fantastic alternative to traditional pork prosciutto and are often found in the deli section or with specialty cheeses. If you can’t find beef prosciutto, regular prosciutto or even thinly sliced coppa would be lovely substitutes.</li>
<li><strong>Fresh Rosemary:</strong> 1-2 sprigs, finely chopped (about 1 tablespoon). The aromatic, piney notes of fresh rosemary are simply magical with figs and goat cheese. It adds an earthy fragrance that will fill your kitchen as the pizza bakes. Make sure to chop it finely so that its flavor is distributed evenly without any overwhelming woody bits.</li>
<li><strong>Red Onion:</strong> ¼ small red onion, very thinly sliced. A small amount of red onion, sliced almost transparently thin, adds a subtle bite and a touch of sharpness that cuts through the richness of the other ingredients. I recommend using a mandoline if you have one to achieve those super-thin slices; otherwise, a very sharp knife and a steady hand will do the trick.</li>
<li><strong>Fresh Arugula:</strong> 1 cup (about 30g) fresh arugula leaves. This peppery green is added after baking, providing a fresh, vibrant contrast to the warm, savory pizza. Its slightly bitter notes are a perfect complement to the sweetness of the fig jam and the tang of the goat cheese, making each bite incredibly balanced and complex.</li>
<li><strong>Balsamic Glaze:</strong> 2 tablespoons (30ml). A sweet and tangy balsamic glaze is the perfect finishing touch, adding a beautiful sheen and an extra layer of flavor that ties all the ingredients together. You can find excellent quality balsamic glazes in most grocery stores, or you can easily make your own by simmering balsamic vinegar until it reduces and thickens.</li>
<li><strong>Extra Virgin Olive Oil:</strong> 1 tablespoon (15ml). A drizzle of good quality extra virgin olive oil before baking helps crisp the crust and adds a subtle fruity note. I also like to give the crust a very light brush to ensure it gets beautifully golden.</li>
<li><strong>Freshly Ground Black Pepper:</strong> To taste. A generous grinding of fresh black pepper adds a little warmth and spice, enhancing the overall flavor profile without being overly dominant.</li>
<li><strong>Flaky Sea Salt:</strong> A pinch, optional, for finishing. Just a whisper of flaky sea salt sprinkled over the finished pizza can really make all the flavors pop, adding a lovely textural contrast and a burst of salinity.</li>
</ul>
<h3>Equipment You’ll Need:</h3>
<ul>
<li>Baking sheet or pizza stone</li>
<li>Parchment paper (optional, but recommended for easy cleanup)</li>
<li>Sharp knife</li>
<li>Cutting board</li>
<li>Small brush (for olive oil, optional)</li>
<li>Spatula or spoon for spreading</li>
<li>Pizza cutter or large chef’s knife</li>
</ul>
<h3>Prepping for Success: Your Culinary Canvas</h3>
<ol>
<li> <strong>Preheat Your Oven:</strong> First things first, let’s get that oven roaring! Preheat your oven to 400°F (200°C). If you’re using a pizza stone, place it in the oven while it preheats to ensure it gets screaming hot. This will give you that irresistible crispy crust that we all adore. If you’re using a baking sheet, you can place it in the oven to preheat as well, or simply place your pizza directly on it when you’re ready to bake.</li>
<li> <strong>Prepare Your Workstation:</strong> While the oven is heating, gather all your ingredients and have them ready on your countertop. This is what we call <em>mise en place</em> – everything in its place – and it makes the entire cooking process so much smoother and more enjoyable. Line your baking sheet with a piece of parchment paper if you’re not using a pizza stone; this makes for incredibly easy transfer and cleanup later.</li>
<li> <strong>Prep the Produce:</strong> Finely chop your fresh rosemary, ensuring it’s almost minced to release its full aroma. Slice your red onion as thinly as humanly possible; we want delicate whispers of flavor, not chunky bites. If you have a mandoline, this is its moment to shine! Give your arugula a quick rinse and gently pat it dry; excess water can make your pizza soggy.</li>
</ol>
<h3>Assembling the Easy Minute Fig Jam Pizza:</h3>
<ol>
<li> <strong>Prepare the Pizza Base:</strong> Carefully place your pre-made pizza crust(s) onto your prepared baking sheet or directly onto your hot pizza stone (if you’re brave and quick!). If using a baking sheet, I sometimes like to give the edges of the crust a very light brush with a tiny bit of olive oil – this helps achieve a beautiful golden-brown finish and adds a subtle richness.</li>
<li> <strong>Lay Down the Fig Jam Foundation:</strong> Now for the star of the show! Using the back of a spoon or a small spatula, gently spread the fig jam evenly across the entire surface of the pizza crust, leaving a small border (about ½ to ¾ inch) around the edge for the crust to puff up slightly. Don’t be shy with the jam; you want a good, flavorful layer, but also be mindful not to make it too thick, as it can make the pizza a bit wet. Aim for a consistent, thin-to-medium layer. <strong>This sweet and sticky base is truly what sets this pizza apart!</strong></li>
<li> <strong>Crumble the Goat Cheese:</strong> Next, with clean hands, crumble the soft goat cheese generously over the fig jam. I love how the creamy, tangy goat cheese provides such a wonderful contrast to the sweetness of the fig jam. Try to distribute it as evenly as possible so that every slice gets a delightful burst of that characteristic chèvre flavor. The warmth of the oven will transform it into delightful pockets of creamy goodness.</li>
<li> <strong>Add the Beef Prosciutto:</strong> Now, take your thinly sliced beef prosciutto and arrange it artfully over the goat cheese and fig jam. You can lay the slices flat, or for a more rustic look, you can slightly crumple or fold them before placing them. The rich, savory notes of the beef prosciutto will become slightly crispy and deeply flavorful as it bakes, offering that perfect salty counterpoint that makes this pizza so addictive.</li>
<li> <strong>Sprinkle the Aromatics:</strong> Carefully scatter the finely chopped fresh rosemary over the entire pizza. The scent alone is enough to get your mouth watering! Then, delicately place the super-thin red onion slices on top. Remember, less is more with the red onion; we want a hint of its pungent freshness, not an overpowering bite. <strong>These aromatics are key to layering the flavors beautifully.</strong></li>
<li> <strong>A Drizzle of Olive Oil:</strong> Finish the assembly with a very light drizzle of extra virgin olive oil over the top of the toppings. This helps with the roasting process, adding flavor and ensuring everything crisps up beautifully in the oven.</li>
</ol>
<h3>The Art of Baking: Achieving Golden Perfection</h3>
<ol>
<li> <strong>Into the Oven It Goes!</strong> Carefully transfer your assembled pizza (on its baking sheet or directly from your peel if using a stone) to the preheated oven. Place it on the middle rack for even cooking. <strong>The magic is about to happen!</strong></li>
<li> <strong>Bake to Golden Perfection:</strong> Bake for 10-15 minutes. The exact time will depend on your oven and the thickness of your crust. You’re looking for a few key indicators: the crust should be beautifully golden-brown and crispy, the goat cheese should be melted and lightly bubbly, and the beef prosciutto should be slightly crisp around the edges, releasing its intoxicating aroma. <strong>Keep a close eye on it, especially towards the end,</strong> as thin-crust pizzas can go from perfect to overdone quite quickly. If you notice one side browning faster than the other, you can carefully rotate the baking sheet halfway through.</li>
<li> <strong>Check for Doneness:</strong> If you’re unsure, you can gently lift an edge of the pizza with a spatula to check if the bottom crust is golden and firm. A slightly crispy bottom is what we’re aiming for!</li>
</ol>
<h3>The Grand Finale: Garnish and Serve!</h3>
<ol>
<li> <strong>Remove and Rest:</strong> Once baked to perfection, carefully remove the pizza from the oven. If you used parchment paper, you can slide the entire pizza onto a wire rack or cutting board. Allow it to rest for just 2-3 minutes. This brief resting period helps the cheese set slightly and makes for cleaner slices.</li>
<li> <strong>Add the Fresh Arugula:</strong> Now for a burst of freshness! Scatter the fresh arugula evenly over the hot pizza. The residual warmth from the freshly baked pizza will gently wilt the arugula just enough to release its peppery notes without making it soggy. <strong>This fresh green element is crucial for cutting through the richness and adding a vibrant contrast.</strong></li>
<li> <strong>Drizzle with Balsamic Glaze:</strong> The final flourish! Drizzle the balsamic glaze generously over the top of the pizza. You can zig-zag it artistically or apply it in more concentrated areas. The sweet and tangy glaze not only adds an incredible depth of flavor but also a beautiful glossy finish that makes the pizza look incredibly appetizing.</li>
<li> <strong>Season with Pepper and Salt (Optional):</strong> If desired, give the pizza a final grinding of fresh black pepper and a delicate sprinkle of flaky sea salt. These last touches can truly elevate all the other flavors.</li>
<li> <strong>Slice and Serve:</strong> Using a pizza cutter or a very sharp chef’s knife, slice your <strong>”Easy Minute Fig Jam Pizza With Goat Cheese And Beef Prosciutto”</strong> into desired portions. I usually go for 6-8 slices for a large pizza, or 4-6 for individual ones. Serve immediately, while it’s warm and all those incredible aromas are at their peak. <h4>Enjoy every single gourmet bite!</h4></li>
</ol>
<h3>My Personal Tips for the Best Fig Jam Pizza:</h3>
<p>This pizza, while incredibly simple, offers so much room for subtle tweaks that can really enhance the experience. Over the years of making this dish, I’ve picked up a few tricks and considerations that I’d love to share with you, my fellow home chef.</p>
<h4>Choosing Your Crust Wisely:</h4>
<p>While I specify pre-made thin crusts for speed, don’t be afraid to experiment. If you have an extra minute or two, a good quality pre-made fresh pizza dough from your grocery store’s bakery section can be wonderful. Just roll it out thinly. For an even quicker, single-serving version, I’ve had fantastic results using sturdy flatbreads like naan or pita bread as a base. They crisp up beautifully and are perfect for a spontaneous gourmet snack or light lunch. The key is thinness – we want a crispy vessel, not a thick, doughy one, especially with the rich toppings.</p>
<h4>The Wonderful World of Fig Jam:</h4>
<p>Not all fig jams are created equal! I always recommend seeking out a jam that has a high fruit content and isn’t overly sweet. Sometimes, specialty food stores or even farmers’ markets will have artisanal fig jams that are truly exceptional. If you’re feeling adventurous, you could even make your own simple fig jam by simmering dried figs with a little water, sugar, and a touch of lemon juice. If figs aren’t in season or you want to try something different, a good quality apricot or even a cherry jam can offer a similar sweet-tart balance, though the unique earthiness of fig is hard to beat.</p>
<h4>Goat Cheese Variations:</h4>
<p>While chèvre is my go-to for its classic tang and creaminess, this pizza is surprisingly versatile when it comes to cheese. For a milder flavor, try crumbling fresh mozzarella or even a soft burrata (added after baking for ultimate creaminess). If you enjoy a bolder taste, a small amount of crumbled blue cheese can add an incredible punch, though it will definitely change the flavor profile significantly. Feta cheese is another excellent option, offering a salty, briny kick that complements the fig jam beautifully.</p>
<h4>Beyond Beef Prosciutto:</h4>
<p>Beef prosciutto (Bresaola) offers a unique, slightly leaner flavor profile, but traditional pork prosciutto is equally fantastic. You could also crisp up some pancetta or thin-sliced bacon beforehand and sprinkle it on for extra texture and smoky flavor. For a vegetarian twist, consider sun-dried tomatoes (chopped), caramelized onions, or even some thinly sliced grilled eggplant. Just ensure your vegetarian additions aren’t too watery, or they might make the pizza soggy.</p>
<h4>Herbs and Spices:</h4>
<p>Rosemary is a classic pairing, but fresh thyme or even a hint of fresh oregano can also work wonders. For a subtle kick, a pinch of red pepper flakes sprinkled over the jam can add a lovely warmth without overwhelming the other delicate flavors. A tiny grating of fresh nutmeg over the goat cheese before baking can also introduce an unexpected layer of complexity that is truly delightful.</p>
<h4>Balsamic Glaze – Store-Bought vs. Homemade:</h4>
<p>Store-bought balsamic glaze is a fantastic shortcut, and many brands offer excellent quality. However, making your own is incredibly simple and allows you to control the sweetness and thickness. To make your own, simply simmer about ½ cup of good quality balsamic vinegar in a small saucepan over medium-low heat until it reduces by half and coats the back of a spoon (about 10-15 minutes). Be careful not to let it burn! It will thicken further as it cools.</p>
<h4>Serving Suggestions:</h4>
<p>This pizza is incredibly versatile. It makes a fantastic appetizer for a dinner party, sliced into smaller squares. It’s also perfect as a light lunch or a sophisticated snack. Pair it with a simple green salad dressed with a lemon vinaigrette for a complete meal. For a truly indulgent experience, I love serving this with a crisp, dry white wine like a Sauvignon Blanc or a light-bodied red like a Pinot Noir. Even a sparkling prosecco can be a delightful accompaniment, cutting through the richness and enhancing the festive flavors.</p>
<h4>Make Ahead & Storage:</h4>
<p>While best served fresh, you can definitely do some prep work in advance. Chop your rosemary and slice your onion ahead of time. You can even crumble your goat cheese. Keep these components separate and refrigerated until you’re ready to assemble and bake. Leftovers (if there are any!) can be stored in an airtight container in the refrigerator for up to 2 days. Reheat gently in a toaster oven or conventional oven to bring back some of that desired crispiness; a microwave will make it soft.</p>
<h5>I hope these tips help you personalize and perfect your <strong>”Easy Minute Fig Jam Pizza With Goat Cheese And Beef Prosciutto”</strong>! It’s truly a testament to how simple ingredients, thoughtfully combined, can create something truly extraordinary.</h5>
Conclusion:
As we wrap up our culinary journey, I truly hope you’re feeling as inspired and excited as I am about this incredible dish. There are some recipes that simply stand out, becoming instant favorites, and I have no doubt that the
Easy Minute Fig Jam Pizza With Goat Cheese And Beef Prosciutto
is destined to be one of them in your kitchen. It’s a symphony of flavors that truly has to be experienced to be believed. Imagine the sweet, sticky richness of fig jam melting into the creamy, tangy embrace of goat cheese, all perfectly balanced by the salty, delicate chew of beef prosciutto. This isn’t just a pizza; it’s an elevated experience, a sophisticated bite that feels incredibly gourmet yet comes together with astonishing speed and minimal fuss. I often find myself reaching for this recipe when I want something special, something impressive, but don’t have hours to spend in the kitchen. It’s the kind of dish that garners compliments and curiosity, making it a fantastic choice for entertaining or simply treating yourself to a luxurious meal at home.
What makes this pizza an absolute must-try, in my humble opinion, is its masterful balance. The distinct sweetness from the figs cuts through the richness, while the goat cheese adds that beautiful, characteristic tang that brightens every mouthful. Then, the beef prosciutto comes in with its savory depth, introducing a complex layer that keeps you coming back for more. The textural contrast is also divine: a crisp, golden crust beneath a soft, yielding topping, dotted with those delectable ingredients. It’s a complete sensory experience that truly satisfies on multiple levels, making it far more than just a quick snack. It embodies elegance and simplicity, delivering big, bold flavors without any intimidation. If you’re looking for a recipe that feels indulgent, tastes exquisite, and respects your precious time, then look no further.
Elevate Your Experience: Serving Suggestions & Creative Variations
One of the many joys of this recipe is its incredible versatility. While it’s absolutely perfect as a standalone dish, I love thinking about how we can enhance or adapt it. For serving, consider pairing it with a simple, peppery arugula salad dressed with a light balsamic vinaigrette. The peppery bite of the arugula and the acidity of the dressing provide a wonderful counterpoint to the rich pizza. A glass of crisp Sauvignon Blanc or a light-bodied Pinot Noir would also complement the flavors beautifully, making it an ideal choice for a sophisticated appetizer at your next dinner party or a delightful light lunch. For a more substantial meal, you could serve smaller slices alongside a hearty bowl of tomato soup or a grilled chicken salad.
But the fun doesn’t stop there! This recipe is a fantastic canvas for your own culinary creativity. If you want to experiment with cheeses, consider swapping out the goat cheese for creamy brie, sharp crumbled blue cheese, or even a smoked mozzarella for a different flavor profile. For the meat, regular prosciutto (pork) works wonderfully, or you could try speck for a more intense smoky flavor. For a vegetarian twist, simply omit the beef prosciutto and perhaps add some caramelized onions or toasted walnuts for extra texture and flavor. Another delightful addition I’ve tried is a drizzle of high-quality balsamic glaze or a touch of hot honey just before serving – it adds another layer of sweet-sour complexity that is simply divine.
You could also play with the fruit component. While fig jam is undeniably perfect here, apricot jam or a spiced apple butter could offer intriguing alternatives. Don’t be afraid to sprinkle fresh herbs like rosemary or thyme over the pizza during the last few minutes of baking; their fragrant oils will release and infuse the dish with an extra layer of aroma. And for those who love a bit of crunch, a scattering of toasted pine nuts or chopped pistachios after baking can add a delightful textural contrast. The beauty of this
Easy Minute Fig Jam Pizza With Goat Cheese And Beef Prosciutto
is that its core flavor profile is so robust and harmonious, it can handle subtle modifications while still shining brightly.
Your Turn: Try It, Love It, Share It!
Now that I’ve shared all my secrets and enthusiasm for this truly magnificent recipe, it’s your turn! I genuinely encourage you to step into your kitchen, gather these simple ingredients, and experience the magic of this
Easy Minute Fig Jam Pizza With Goat Cheese And Beef Prosciutto
for yourself. You’ll be amazed at how quickly such a sophisticated dish can come to life, transforming an ordinary meal into something truly extraordinary. Don’t be shy about making it your own – feel free to adapt it with your favorite cheeses, meats, or additional toppings. That’s the beauty of cooking, isn’t it? Taking a foundation and adding your unique touch.
Once you’ve had the pleasure of tasting your creation, I would absolutely love to hear about your experience! Did you stick to the original recipe, or did you venture into some delicious variations? What did your family or guests think? Please share your thoughts, your triumphant stories, and even your beautiful photos. Your feedback and creativity inspire not just me, but our entire community of food lovers. So, preheat that oven, get ready for an explosion of flavor, and prepare to add a new, unforgettable dish to your culinary repertoire. Happy cooking, my friends!
Easy Minute Fig Jam Pizza With Goat Cheese And Beef Prosciutto
Easy Minute Fig Jam Pizza With Goat Cheese And Beef Prosciutto is more than just a recipe; it’s an invitation to experience a culinary masterpiece that effortlessly marries sophisticated flavors with remarkable convenience. Imagine a dish that delivers an explosion of sweet, savory, and tangy notes, all while being incredibly simple to assemble.
Ingredients
-
2 individual (8-10 inch) or 1 large (12-14 inch) thin-crust pizza base
-
2/3 cup fig preserves
-
2 ounces crumbled goat cheese
-
1 1/2 cups grated mozzarella cheese
-
3-4 ounces thinly sliced beef prosciutto (Bresaola)
-
1-2 sprigs fresh rosemary, finely chopped
-
1/4 small red onion, very thinly sliced
-
1 cup fresh arugula leaves
-
2 tablespoons balsamic glaze
-
1 tablespoon extra virgin olive oil
-
Freshly ground black pepper, to taste
-
Pinch flaky sea salt, optional
Instructions
-
Step 1
Preheat oven to 400°F (200°C). Place a pizza stone or baking sheet in the oven to preheat. -
Step 2
Finely chop rosemary and very thinly slice red onion. Rinse and pat dry arugula. -
Step 3
Place pizza crust(s) on the preheated baking sheet or pizza stone. Optionally, brush crust edges with a little olive oil. -
Step 4
Spread fig preserves evenly over the crust, leaving a small border. -
Step 5
Crumble goat cheese and scatter grated mozzarella cheese over the fig preserves. -
Step 6
Arrange beef prosciutto slices over the cheese. -
Step 7
Sprinkle finely chopped fresh rosemary and thinly sliced red onion over the pizza. Drizzle lightly with extra virgin olive oil. -
Step 8
Bake for 10-15 minutes, or until the crust is golden-brown and crispy, and the cheese is melted and bubbly. -
Step 9
Remove pizza from the oven and let rest for 2-3 minutes. -
Step 10
Scatter fresh arugula over the hot pizza. Drizzle generously with balsamic glaze. -
Step 11
Finish with fresh black pepper and an optional pinch of flaky sea salt. Slice and serve immediately.
Important Information
Nutrition Facts (Per Serving)
It is important to consider this information as approximate and not to use it as definitive health advice.
Allergy Information
Please check ingredients for potential allergens and consult a health professional if in doubt.