• Skip to primary navigation
  • Skip to main content
  • Skip to primary sidebar
Homesmad

Homesmad

  • Home
  • Breakfast & Brunch
  • Appetizers & Snacks
  • Dinner
  • Dessert
  • About
  • Privacy Policy
  • Contact
Homesmad
  • Home
  • Breakfast & Brunch
  • Appetizers & Snacks
  • Dinner
  • Dessert
  • About
  • Privacy Policy
  • Contact

Cinnamon Roll French Toast Bites: Easy & Delicious Recipe!

October 16, 2025 by Lily author

Cinnamon Roll French Toast Bites Recipe – get ready to redefine your breakfast experience! Have you ever found yourself torn between the sweet, gooey indulgence of a warm cinnamon roll and the custardy comfort of golden French toast? What if I told you there’s a culinary creation that beautifully marries both, transforming them into irresistible, dippable bites perfect for any morning? I am absolutely thrilled to share with you a dish that is quickly becoming a household favorite, destined to elevate your mornings from ordinary to extraordinary.

While the classic cinnamon roll boasts a rich history, believed to have originated in Sweden, and French toast dates back to medieval Europe as a clever way to utilize stale bread, this particular fusion is a brilliant, modern innovation. It takes the best of both worlds – the aromatic spice and sugary swirl of a traditional cinnamon roll combined with the tender, egg-dipped goodness of French toast – creating something truly extraordinary that pays homage to its delicious predecessors while forging a new path of flavor.

Why You’ll Adore These Bites

People simply adore this dish because it offers an unparalleled combination of textures and flavors. Imagine a crispy, golden exterior giving way to a soft, cinnamon-swirled interior, all bathed in a hint of maple syrup. They are incredibly convenient as individual bites, making them perfect for sharing, brunch buffets, or simply enjoying a decadent morning treat without the mess. This isn’t just breakfast; it’s an occasion, a delightful indulgence that brings warmth and happiness to the table. This Cinnamon Roll French Toast Bites Recipe delivers pure joy with every delicious, bite-sized piece, promising a taste experience you’ll want to revisit again and again.

Cinnamon Roll French Toast Bites: Easy & Delicious Recipe! this RECIPE

Ingredients:

  • For the Cinnamon Roll Base:
    • 2 (12.4 ounce) cans refrigerated cinnamon rolls with original icing (the standard size you find in the dairy aisle)
    • A light coating of olive oil or non-stick cooking spray for preparing your baking sheet
  • For the Luxurious French Toast Batter:
    • 4 large eggs, preferably organic for richer yolks and a more vibrant color
    • 1/2 cup whole milk; you can substitute with half-and-half for an even richer, more custardy texture
    • 1/4 cup heavy cream (optional, but I highly recommend it for that truly decadent, custardy interior)
    • 2 tablespoons granulated sugar (remember, the cinnamon rolls are already quite sweet, so this just adds a subtle enhancement)
    • 1 teaspoon pure vanilla extract, for that classic comforting aroma and flavor
    • 1/2 teaspoon ground cinnamon, to amplify the inherent cinnamon flavor of the rolls
    • A small pinch of fine sea salt, to balance all the wonderful sweetness and bring out the other flavors
  • For Cooking:
    • 2-3 tablespoons unsalted butter, divided, for greasing your skillet or griddle and adding a beautiful golden crust
  • For the Irresistible Cream Cheese Glaze:
    • The two tubs of cream cheese icing that come with your cinnamon rolls (don’t discard them!)
    • 2 ounces cream cheese, softened to room temperature (this is about 1/4 of a standard 8-ounce block, adding extra tang and body)
    • 1/4 cup powdered sugar (confectioners’ sugar), sifted to ensure a super smooth glaze
    • 1-2 tablespoons milk or cream, to adjust the consistency of your glaze to drizzling perfection
    • 1/2 teaspoon pure vanilla extract, to complement the cream cheese and add a lovely warmth
  • Optional Garnishes and Accompaniments:
    • Fresh berries (such as juicy strawberries, plump blueberries, or tart raspberries) for a burst of freshness and color
    • A light dusting of extra powdered sugar for an elegant finish
    • A side of warm maple syrup or a decadent caramel sauce for dipping, if you’re feeling extra indulgent

Preparing Your Cinnamon Roll Base:

  1. First things first, let’s get your cinnamon rolls ready. Preheat your oven to 375°F (190°C). While the oven heats, grab a large baking sheet and line it with parchment paper or give it a good spray with non-stick cooking spray or a light brush of olive oil. This simple step will prevent any sticking and make cleanup a breeze.
  2. Carefully open both cans of refrigerated cinnamon rolls. Make sure to set aside those little tubs of cream cheese icing that come with them; we’ll be using those later to make our super special enhanced glaze! Gently separate each cinnamon roll from the spiral, trying your best to keep its shape intact.
  3. Now for the fun part that makes these “Cinnamon Roll French Toast Bites Recipe” truly bite-sized and perfect for dipping. Take each individual cinnamon roll and cut it into smaller pieces. I find that cutting each roll into about 4 to 6 equally sized pieces works wonderfully. You can do this by cutting it in half, then cutting each half into two or three more pieces. The goal here is to create small, manageable chunks that have plenty of surface area for soaking up our delicious French toast batter.
  4. Arrange these freshly cut cinnamon roll bites in a single layer on your prepared baking sheet. Try not to overcrowd them; give them a little space so they can bake evenly.
  5. Pop the baking sheet into your preheated oven and bake for about 5 to 7 minutes. We’re not looking to fully bake them here; rather, this brief stint in the oven is crucial. It helps to firm up the raw dough just enough so that it doesn’t become overly soggy when it hits the French toast batter. This little trick is key to achieving that perfect texture in your “Cinnamon Roll French Toast Bites Recipe” – slightly crispy on the outside, tender on the inside, and not a trace of raw dough.
  6. Once lightly golden and slightly firm to the touch, remove the cinnamon roll bites from the oven and let them cool completely on the baking sheet. They need to be cool before you dip them into the batter, as warm dough tends to absorb too much liquid too quickly. While they cool, you can move on to preparing our incredible French toast batter.

Crafting the Luxurious French Toast Batter:

  1. Grab a large mixing bowl; we’re about to create the magic that will transform those cinnamon roll bites. Crack your 4 large eggs into the bowl. I always aim for organic eggs when I can; their yolks are usually richer and lend a beautiful color to the final dish.
  2. Using a whisk, beat the eggs vigorously until the yolks and whites are fully combined and there are no streaks of clear egg white remaining. You want a uniform, slightly frothy mixture at this stage. This ensures a consistent coating on every single bite.
  3. Now, pour in your 1/2 cup of whole milk (or half-and-half, if you opted for extra richness). If you’re going for ultimate decadence, this is also when you’ll stir in your 1/4 cup of heavy cream. Trust me, the heavy cream adds an unparalleled custardy texture that takes these “Cinnamon Roll French Toast Bites Recipe” to a whole new level of gourmet.
  4. Add your 2 tablespoons of granulated sugar. While the cinnamon rolls are sweet, this extra touch in the batter enhances the caramelization during cooking and provides a lovely balance. Next, measure in your 1 teaspoon of pure vanilla extract. The scent alone is intoxicating!
  5. Stir in your 1/2 teaspoon of ground cinnamon. This isn’t just for flavor; it also reinforces the “cinnamon roll” aspect, giving your French toast bites an extra layer of warmth and spice. Finally, add that tiny pinch of fine sea salt. It might seem counterintuitive in a sweet dish, but salt is a flavor enhancer, and it truly makes all the other sweet flavors sing.
  6. Whisk everything together again, thoroughly. Make sure the sugar has completely dissolved and all the ingredients are beautifully incorporated into a smooth, homogenous batter. You want this batter to be silky and inviting.
  7. Once your batter is ready, pour it into a shallow dish or a pie plate. This shape is ideal for easily dipping your cinnamon roll bites. Set it aside, ready for action!

Cooking Your “Cinnamon Roll French Toast Bites Recipe” Masterpiece:

  1. Place a large non-stick skillet or an electric griddle over medium heat. Let it warm up for a few minutes. Heat control is crucial here; you want it hot enough to create a golden crust but not so hot that it burns the outside before the inside warms through.
  2. Add about 1 tablespoon of unsalted butter to the hot pan. Let it melt and swirl it around to coat the bottom evenly. The butter not only prevents sticking but also gives our French toast bites an incredible flavor and beautiful golden-brown color.
  3. Now, it’s time to bring those cooled cinnamon roll bites to the batter. Take a few of the pre-baked cinnamon roll pieces and gently place them into the French toast batter. Allow them to soak for just about 10-15 seconds per side. Do not over-soak them! Because the cinnamon rolls were pre-baked, they’ll absorb the batter more efficiently than regular bread. An over-soaked bite will fall apart and become mushy. We’re aiming for a perfect balance: enough batter to create that custardy French toast exterior, but not so much that it compromises the structure of the cinnamon roll.
  4. Carefully lift each batter-coated cinnamon roll bite from the dish, allowing any excess batter to drip off back into the dish.
  5. Gently place the soaked bites into the hot, buttered skillet. Make sure not to overcrowd the pan. Cook them in batches if necessary, giving each piece enough space to cook evenly and allow for easy flipping. Overcrowding can lower the pan temperature and lead to steaming rather than searing.
  6. Let them cook for about 2-3 minutes on the first side, or until they are beautifully golden brown and lightly crisp. Use tongs or a spatula to carefully flip each bite to the other side. Continue cooking for another 2-3 minutes, until that side is also golden brown and the bites are warmed through. You’ll notice the wonderful aroma of cinnamon, vanilla, and butter filling your kitchen – that’s when you know you’re doing it right!
  7. As each batch finishes cooking, transfer the “Cinnamon Roll French Toast Bites Recipe” to a wire rack set over a baking sheet. This allows air to circulate around them, preventing them from becoming soggy. If you’re making a larger batch, you can place the baking sheet with the wire rack in a warm oven (around 200°F or 95°C) to keep the cooked bites warm while you finish cooking the rest.
  8. Repeat the process with the remaining butter, cinnamon roll bites, and French toast batter until all your delicious bites are cooked to golden perfection. You might need to add a fresh pat of butter to the pan between batches to ensure consistent browning and prevent sticking.

Whipping Up the Irresistible Cream Cheese Glaze:

  1. While your “Cinnamon Roll French Toast Bites Recipe” are cooking or cooling slightly, let’s make that incredible glaze. Remember those two tubs of cream cheese icing you set aside from the cinnamon rolls? Scoop them into a medium mixing bowl.
  2. Add your 2 ounces of softened cream cheese to the bowl. Make sure it’s at room temperature; this is key for a super smooth, lump-free glaze.
  3. Sift your 1/4 cup of powdered sugar into the bowl. Sifting prevents any lumps and ensures a silky texture for your glaze.
  4. Pour in your 1/2 teaspoon of pure vanilla extract. This extra vanilla boost enhances the classic cream cheese glaze flavor.
  5. Using a whisk or an electric hand mixer, beat all these ingredients together until the mixture is completely smooth, creamy, and wonderfully light. You want absolutely no lumps of cream cheese remaining. Scrape down the sides of the bowl as needed to ensure everything is incorporated.
  6. Now, assess the consistency. The goal is a glaze that’s thick enough to cling to the bites but thin enough to drizzle beautifully. If your glaze seems too thick, add milk or cream one tablespoon at a time, whisking well after each addition, until you reach your desired drizzling consistency. A little goes a long way here, so add slowly!
  7. Once your glaze is perfect, you can transfer it to a piping bag with a small round tip (if you want a professional look) or simply keep it in the bowl and use a spoon for a more rustic drizzle.

Serving Your Delightful Cinnamon Roll French Toast Bites:

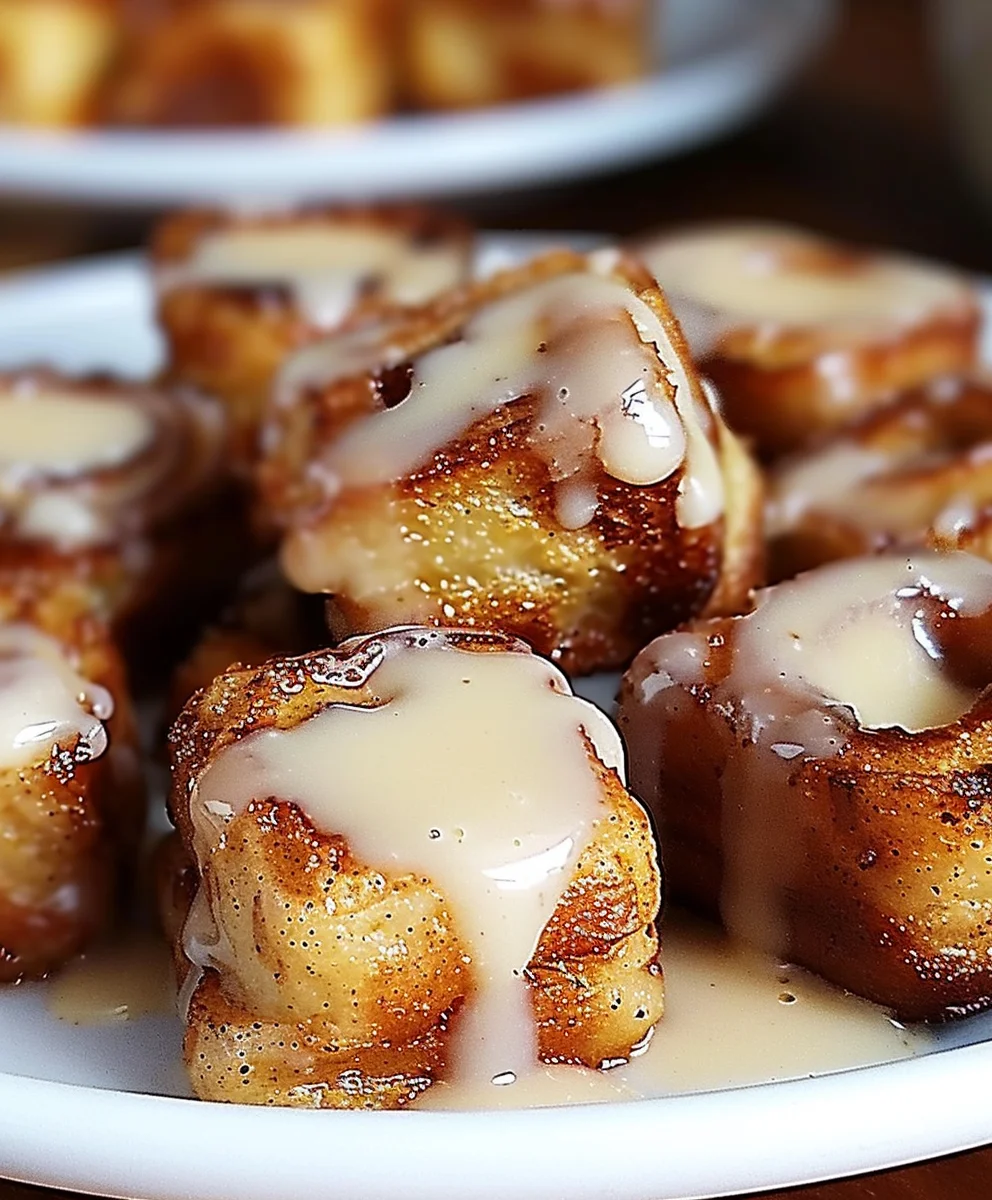
  1. Once all your “Cinnamon Roll French Toast Bites Recipe” are cooked and beautifully golden, arrange them artfully on a serving platter or individual plates. They look fantastic piled high!
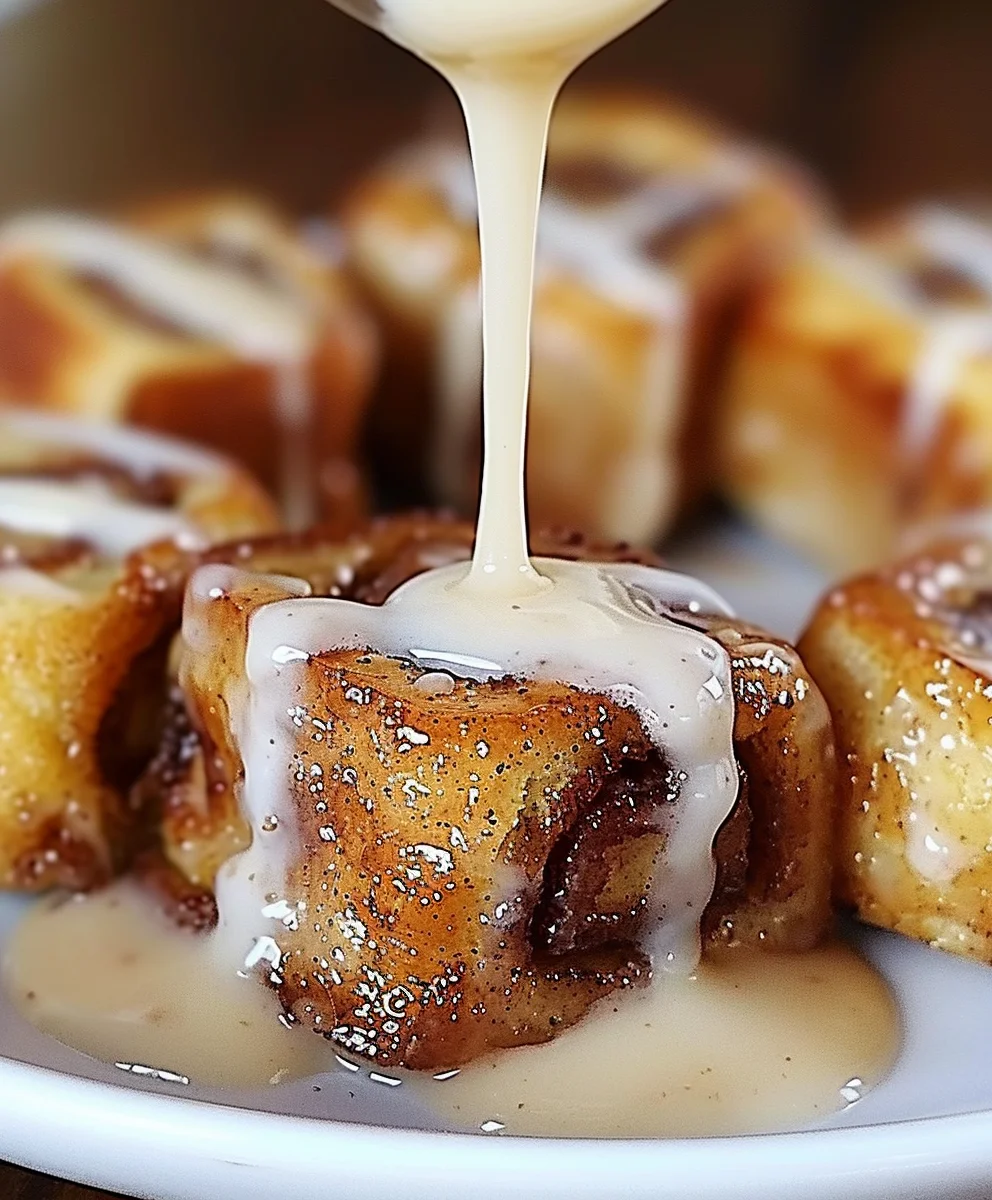
  2. Now for the grand finale: generously drizzle your warm, irresistible cream cheese glaze over the top of the French toast bites. Don’t be shy; the glaze is a huge part of what makes this recipe so incredibly delicious and iconic. The warmth of the bites will slightly soften the glaze, allowing it to melt into every crevice.
  3. If you’re using optional garnishes, this is the time to add them. Sprinkle some fresh berries around the platter for a pop of color and a burst of juicy freshness. A light dusting of extra powdered sugar can also add a charming, snowy finish.
  4. Serve your “Cinnamon Roll French Toast Bites Recipe” immediately while they are still warm. They are absolutely at their best when enjoyed fresh, with that perfect contrast of warm, soft interior and slightly crisp exterior, all coated in sweet, tangy glaze.
  5. For an extra treat, you can offer a small bowl of warm maple syrup or caramel sauce on the side for dipping, though with the amazing glaze, it’s hardly necessary!
  6. Storage Tip: If by some miracle you have leftovers, store them in an airtight container in the refrigerator for up to 2-3 days. Reheat gently in the microwave or a toaster oven until warmed through. You might want to drizzle with a fresh bit of glaze after reheating, as the original glaze tends to firm up in the fridge.
  7. These “Cinnamon Roll French Toast Bites Recipe” are perfect for a special weekend breakfast, a decadent brunch, or even a fun dessert. They’re a guaranteed crowd-pleaser and offer a delightful twist on two beloved breakfast classics!

Cinnamon Roll French Toast Bites: Easy & Delicious Recipe!

Conclusion:

And there you have it, my friends! We’ve journeyed through the steps of creating something truly extraordinary, a dish that effortlessly marries two beloved breakfast titans into one utterly irresistible creation. I honestly cannot stress enough how much I adore this particular recipe, and I’m genuinely thrilled to share it with you. This isn’t just another breakfast idea; it’s an invitation to elevate your mornings, to turn a simple meal into an occasion, and to treat yourself and your loved ones to an explosion of comforting flavors. Imagine the golden-brown exterior, slightly crispy from its time on the griddle, giving way to an incredibly soft, custardy interior that’s bursting with that signature cinnamon sugar swirl and a hint of vanilla. Every single bite is a little piece of heaven, designed to bring a smile to your face and warmth to your soul. It’s a game-changer for brunch, a spectacular start to any weekend, and frankly, just a phenomenal way to make any day feel a little more special.

The beauty of this recipe extends beyond its incredible taste; it’s also wonderfully versatile when it comes to serving. While it’s absolutely divine on its own, perhaps with just a light dusting of powdered sugar, I highly encourage you to get creative with your toppings. A classic drizzle of warm maple syrup is always a winner, but why stop there? For an extra touch of decadence, consider a dollop of freshly whipped cream, perhaps infused with a hint of vanilla or a touch of orange zest. Fresh berries – a medley of raspberries, blueberries, and sliced strawberries – add a lovely tartness that beautifully cuts through the richness, creating a harmonious balance of flavors and textures. Sliced bananas, especially if caramelized briefly in butter, make another fantastic addition. If you’re feeling particularly indulgent, a scoop of vanilla bean ice cream or a drizzle of warm caramel or chocolate sauce transforms these bites into an unbelievably good dessert. Think outside the box: a sprinkle of chopped toasted pecans or walnuts can add a delightful crunch, or for a truly authentic cinnamon roll experience, whip up a quick cream cheese glaze to generously drizzle over the top. Simply whisk together some softened cream cheese, powdered sugar, a splash of milk, and a touch of vanilla extract until smooth. You can even experiment with the spices in the batter itself; a pinch of nutmeg or cardamom could add another layer of aromatic complexity. For those busy mornings, remember you can often prepare the French toast batter the night before, allowing the bread to soak thoroughly for an even richer texture, making your morning prep a breeze.

I truly hope I’ve managed to convey just how special this Cinnamon Roll French Toast Bites Recipe is. It’s a recipe that I believe everyone deserves to try at least once, and I have a feeling that once you do, it will quickly become a cherished favorite in your own culinary repertoire. The joy of cooking, for me, comes not just from the act of creation itself, but from sharing that creation with others, and seeing their faces light up with every bite. This dish has a way of doing just that – sparking joy and creating delicious memories. So, please, take the plunge! Gather your ingredients, set aside some time, and embark on this delightful culinary adventure. I promise you, the heavenly aroma filling your kitchen as these bites cook, and the sheer delight of tasting them, will make every moment worthwhile. Don’t be shy about experimenting with your favorite toppings or adding your unique spin to the recipe. Cooking is all about personal expression and enjoyment.

Once you’ve had a chance to whip up your own batch of these incredible Cinnamon Roll French Toast Bites, I would absolutely love to hear all about your experience! Did you stick to the classic toppings, or did you venture into new, exciting territory? What was your favorite part of making them? Did they become an instant hit with your family or friends? Please share your thoughts, your successes, and even any fun twists you came up with in the comments section. Your feedback and creativity inspire not just me, but other readers too. Better yet, if you snap some photos of your gorgeous creations, please consider sharing them on social media – I always adore seeing your culinary masterpieces come to life. Let’s spread the word about this fantastic recipe and encourage more people to experience the pure bliss of these delightful bites. Happy cooking, and even happier eating!


Cinnamon Roll French Toast Bites

Cinnamon Roll French Toast Bites

Redefine your breakfast with these irresistible Cinnamon Roll French Toast Bites! This recipe marries the sweet, gooey indulgence of warm cinnamon rolls with the custardy comfort of golden French toast, transforming them into perfect dippable bites for any morning.

Prep Time
20 Minutes

Cook Time
25 Minutes

Total Time
45 Minutes

Servings
4-6 servings

Ingredients

  • 2 (12.4 ounce) cans refrigerated cinnamon rolls with icing
  • Light coating of olive oil or non-stick cooking spray
  • 4 large eggs
  • 1/2 cup whole milk
  • 1/4 cup heavy cream (optional)
  • 2 tablespoons granulated sugar
  • 1 teaspoon pure vanilla extract
  • 1/2 teaspoon ground cinnamon
  • Pinch of fine sea salt
  • 2-3 tablespoons unsalted butter, divided
  • 2 tubs cream cheese icing (from cinnamon rolls)
  • 2 ounces cream cheese, softened
  • 1/4 cup powdered sugar, sifted
  • 1-2 tablespoons milk or cream
  • 1/2 teaspoon pure vanilla extract
  • Fresh berries (optional)
  • Extra powdered sugar (optional)
  • Warm maple syrup or caramel sauce (optional)

Instructions

  1. Step 1
    Preheat oven to 375°F (190°C). Line a large baking sheet with parchment paper or spray with non-stick cooking spray. Open cinnamon roll cans, reserving icing tubs. Cut each cinnamon roll into 4 to 6 pieces. Arrange on the baking sheet and bake for 5 to 7 minutes to firm up the dough. Remove and let cool completely.
  2. Step 2
    In a large mixing bowl, whisk eggs until combined. Add milk (and heavy cream, if using), granulated sugar, 1 teaspoon vanilla extract, 1/2 teaspoon ground cinnamon, and sea salt. Whisk until smooth and thoroughly combined. Pour the batter into a shallow dish or pie plate.
  3. Step 3
    Heat 1 tablespoon unsalted butter in a large non-stick skillet or electric griddle over medium heat. Dip a few cooled cinnamon roll pieces into the French toast batter for 10-15 seconds per side; do not over-soak. Allow excess batter to drip off. Place soaked bites in the hot skillet and cook for 2-3 minutes per side until golden brown and warmed through. Transfer cooked bites to a wire rack set over a baking sheet to keep warm. Repeat with remaining butter, cinnamon roll pieces, and batter, adding fresh butter between batches as needed.
  4. Step 4
    In a medium mixing bowl, combine the reserved cream cheese icing tubs, softened cream cheese, sifted powdered sugar, and 1/2 teaspoon vanilla extract. Whisk or beat with an electric mixer until completely smooth and creamy. Add 1-2 tablespoons of milk or cream, one tablespoon at a time, until the glaze reaches a desired drizzling consistency.
  5. Step 5
    Arrange the warm Cinnamon Roll French Toast Bites on a serving platter. Generously drizzle the cream cheese glaze over the top. Garnish with fresh berries or a dusting of extra powdered sugar, if desired. Serve immediately with warm maple syrup or caramel sauce on the side for dipping, if you’re feeling extra indulgent. Store leftovers in an airtight container in the refrigerator for up to 2-3 days; reheat gently and add fresh glaze if desired.

Important Information

Nutrition Facts (Per Serving)

It is important to consider this information as approximate and not to use it as definitive health advice.

Allergy Information

Please check ingredients for potential allergens and consult a health professional if in doubt.

« Previous Post
Cheesecake Cookie Dough Tacos - Your New Favorite Dessert!
Next Post »
Chicken Avocado Melt Sandwich: Easy, Cheesy & Irresistible

If you enjoyed this…

Apple Cinnamon Muffins: A Deliciously Easy Recipe

Bananenbrot einfach backen: Das beste Rezept für Anfänger

Cornbread Waffle Bites: A Delicious Twist on a Southern Classic

Primary Sidebar

Browse by Diet

BreakfastDinnerLunchDessertAppetizer

Sweet Peach Yogurt Parfait Delight

One of my fondest memories is from a lazy summer afternoon spent at my grandmother’s house. The sun filtered through the kitchen window, casting a warm glow over the table where she would create her culinary magic. It was during one of those blissful moments that I first tasted her Peach Yogurt Parfait with Honey and Granola. The sweet aroma of ripe peaches mingling with creamy yogurt and the crunch of granola was nothing short of heavenly. It felt like summer captured in a bowl, and I still remember the joy of diving in with a spoon, each layer revealing a new burst of flavor.

When I think about that parfait, I can almost hear the gentle hum of the bees outside, reminding me of the floral notes that honey brings to every bite. The vibrant yellows and soft oranges of the peaches contrast beautifully with the creamy white yogurt and the golden crunch of granola. It’s a dish that not only looks delightful but also tastes like a celebration of fresh, wholesome ingredients.

What makes my version of this Peach Yogurt Parfait special is the careful balance of flavors and textures. I use ripe, juicy peaches, drizzled with locally sourced honey, and a homemade granola that’s bursting with nuts and seeds for an extra crunch. It’s a simple dish, but every layer is crafted with love and attention.

Let me show you exactly how to make this delightful parfait, so you can bring a bit of that summer magic into your kitchen!

Sweet Peach Yogurt Parfait Delight

Why You’ll Love This Recipe

  • Delightfully creamy texture from the Greek yogurt, paired with the juicy sweetness of fresh peaches.
  • Ready in under 20 minutes, making it a quick and satisfying breakfast or snack option.
  • Budget-friendly, using common ingredients that you may already have in your pantry.
  • Customizable with your favorite granola and nuts, allowing you to tailor each parfait to your taste.
  • Perfectly balanced flavors with the bright acidity of lemon juice and the sweetness of honey enhancing the peaches.

Ingredients

  • For the Parfait:
  • 2 cups plain Greek yogurt (or vanilla yogurt for a sweeter option)
  • 2 large ripe peaches, diced (about 2 cups)
  • 1 tablespoon fresh lemon juice (to prevent browning of peaches)
  • 2 tablespoons honey (plus more for drizzling)
  • 1 teaspoon vanilla extract (optional for extra flavor)
  • For the Granola:
  • 1 cup granola (store-bought or homemade; see notes for a simple granola recipe)
  • 1/4 cup sliced almonds (optional for added crunch)
  • 1/4 cup shredded coconut (optional for added flavor)

Let’s dive into some key ingredients that make this Peach Yogurt Parfait so delightful! First, the Greek yogurt is not only creamy but also packed with protein, making it a satisfying option for breakfast or a snack. If you’re looking for a sweeter option, you can easily substitute it with vanilla yogurt, though it may alter the overall flavor balance. Next, the ripe peaches are the star of the show; their natural sweetness shines through, so I recommend choosing peaches that yield slightly to pressure, indicating they’re perfectly ripe. If peaches aren’t in season, feel free to use nectarines or even frozen peaches—just thaw them before use. Finally, honey adds a lovely floral sweetness that ties everything together. If you prefer, maple syrup can serve as a delicious substitute.

Step-by-Step Instructions

  1. Start by preparing the peaches. Wash them thoroughly, then slice and dice them into bite-sized pieces. In a medium bowl, toss the diced peaches with 1 tablespoon of fresh lemon juice to prevent browning. Set aside for about 5 minutes while the lemon juice works its magic.
  2. In a separate bowl, combine the Greek yogurt, 2 tablespoons of honey, and 1 teaspoon of vanilla extract if using. Stir the mixture until smooth and thoroughly blended. This should take about a minute. Avoid overmixing to maintain the creaminess of the yogurt.
  3. Now it’s time to layer your parfait. Grab a clear glass or bowl to showcase your beautiful creation. Start with a generous spoonful of the yogurt mixture at the bottom—about 1/4 cup will do. Use a spoon to spread it evenly.
  4. Add a layer of the diced peaches over the yogurt, ensuring they cover the yogurt completely. You might want to use about half of what you have prepared—roughly 1 cup. This layer should be visually appealing, so arrange the peaches neatly.
  5. Sprinkle 1/4 cup of granola over the peaches. This adds a delightful crunch. Make sure to distribute it evenly to ensure every bite has that satisfying texture. Avoid packing it down too tightly, as you want it to maintain its crunch.
  6. Repeat the layers: spoon in another 1/4 cup of yogurt, followed by another cup of peaches, and another sprinkle of granola. You should have at least two layers, but feel free to add more depending on your glass size.
  7. Finish off your parfait with a drizzle of honey on top for added sweetness and a touch of elegance. If you’re using sliced almonds or shredded coconut, sprinkle them on top now. It adds a lovely visual contrast and extra flavor.
  8. Serve immediately or refrigerate for up to 30 minutes before serving to allow the flavors to meld together. However, I recommend enjoying it fresh to maintain the granola’s crunch.

Pro Tips for the Best Peach Yogurt Parfait With Honey And Granola

  • Make sure to choose ripe peaches for the best flavor and texture. A common mistake is using unripe fruit, which can lead to a less enjoyable parfait. Look for peaches that are fragrant and slightly soft to the touch.
  • Use a clear glass to assemble your parfait; this not only makes for a beautiful presentation but also allows you to see the colorful layers, which adds to the enjoyment of eating it.
  • For an even creamier texture, consider whipping the Greek yogurt with a hand mixer for a couple of minutes before layering. This small adjustment makes a huge difference in mouthfeel.
  • Be mindful of the granola-to-yogurt ratio. Too much granola can overwhelm the parfait, while too little can make it feel too creamy. Aim for about 1/4 cup of granola per layer for the perfect balance.
  • If you’re making this for a gathering, consider preparing the yogurt and peaches ahead of time and layering them just before serving. This ensures the granola stays crunchy!

Variations & Serving Ideas

There are so many ways to get creative with your Peach Yogurt Parfait! For a tropical twist, swap out the peaches for mangoes or pineapples and top with coconut flakes. If you prefer a berry flavor, mix in some blueberries or strawberries with the peaches for added color and taste. For a nutty version, incorporate chopped walnuts or pecans instead of almonds.

As for serving ideas, this parfait pairs beautifully with a side of scrambled eggs for a hearty breakfast or fresh fruit salad for a light lunch. You might also enjoy it alongside whole grain toast with almond butter for an energizing snack. The contrast of flavors and textures will elevate your meal experience!

Storage, Make-Ahead & Reheating

The Peach Yogurt Parfait is best enjoyed fresh, but you can prepare some components ahead of time. Store the layered parfait in an airtight container in the refrigerator for up to 24 hours. However, be cautious; the granola may lose its crunch if stored too long. You can freeze the yogurt and peach mixture for up to 2 months; just remember to thaw it in the refrigerator overnight before serving.

If you plan to enjoy this dish the next day, it can taste even better as the flavors meld together. Just remember to add the granola right before serving to keep its delightful crunch!

Frequently Asked Questions

Can I make Peach Yogurt Parfait With Honey And Granola ahead of time?

Yes — in fact, it tastes even better the next day as the flavors meld. However, I recommend waiting to add the granola until just before serving to maintain its crunch.

What can I substitute for Greek yogurt?

If you prefer a lighter option, you can substitute Greek yogurt with regular yogurt or a dairy-free alternative like coconut yogurt. Just remember that this may alter the creaminess and flavor profile slightly.

Can I use frozen peaches for this parfait?

Absolutely! Just make sure to thaw the frozen peaches before using them. They will still add great flavor, though the texture may be slightly softer than fresh peaches.

How do I make the parfait vegan?

To make a vegan version, substitute the Greek yogurt with a plant-based yogurt alternative, and replace honey with maple syrup or agave nectar. This keeps the parfait sweet while adhering to a vegan diet.

What other fruits can I use in this recipe?

You can mix and match fruits based on your preference. Try using strawberries, blueberries, raspberries, or even bananas. Just make sure to adjust the lemon juice as needed to prevent browning.

Sweet Peach Yogurt Parfait Delight

Final Thoughts

The Peach Yogurt Parfait with Honey and Granola is a delightful blend of creamy yogurt, sweet peaches, and crunchy granola that creates a satisfying and nourishing treat. Each layer bursts with flavor, making it a perfect choice for breakfast or a light dessert.

This is the kind of recipe I come back to again and again, especially when I want something refreshing and wholesome to start my day. The harmony of sweet and tart flavors, combined with the delightful crunch, never fails to lift my spirits!

I encourage you to give this parfait a try and indulge in its comforting goodness. Feel free to share your results or even add your own twist—perhaps a sprinkle of cinnamon or a handful of nuts. Enjoy creating your perfect parfait!

Print
clock clock iconcutlery cutlery iconflag flag iconfolder folder iconinstagram instagram iconpinterest pinterest iconfacebook facebook iconprint print iconsquares squares iconheart heart iconheart solid heart solid icon

Peach Yogurt Parfait


  • Author: Lily author
  • Total Time: 15 minutes
  • Yield: 4 servings 1x
Pin Recipe
Print Recipe

Description

This Peach Yogurt Parfait combines creamy Greek yogurt, juicy peaches, and crunchy granola for a delightful treat. It’s a perfect breakfast or snack that captures the essence of summer in every bite.


Ingredients

Scale
  • For the Parfait:
  • 2 cups plain Greek yogurt (or vanilla yogurt for a sweeter option)
  • 2 large ripe peaches, diced (about 2 cups)
  • 1 tablespoon fresh lemon juice (to prevent browning of peaches)
  • 2 tablespoons honey (plus more for drizzling)
  • 1 teaspoon vanilla extract (optional for extra flavor)
  • For the Granola:
  • 1 cup granola (store-bought or homemade; see notes for a simple granola recipe)
  • 1/4 cup sliced almonds (optional for added crunch)
  • 1/4 cup shredded coconut (optional for added flavor)

Instructions

  1. Start by preparing the peaches. Wash them thoroughly, then slice and dice them into bite-sized pieces. In a medium bowl, toss the diced peaches with 1 tablespoon of fresh lemon juice to prevent browning. Set aside for about 5 minutes while the lemon juice works its magic.
  2. In a separate bowl, combine the Greek yogurt, 2 tablespoons of honey, and 1 teaspoon of vanilla extract if using. Stir the mixture until smooth and thoroughly blended. This should take about a minute. Avoid overmixing to maintain the creaminess of the yogurt.
  3. Now it’s time to layer your parfait. Grab a clear glass or bowl to showcase your beautiful creation. Start with a generous spoonful of the yogurt mixture at the bottom—about 1/4 cup will do. Use a spoon to spread it evenly.
  4. Add a layer of the diced peaches over the yogurt, ensuring they cover the yogurt completely. You might want to use about half of what you have prepared—roughly 1 cup. This layer should be visually appealing, so arrange the peaches neatly.
  5. Sprinkle 1/4 cup of granola over the peaches. This adds a delightful crunch. Make sure to distribute it evenly to ensure every bite has that satisfying texture. Avoid packing it down too tightly, as you want it to maintain its crunch.
  6. Repeat the layers: spoon in another 1/4 cup of yogurt, followed by another cup of peaches, and another sprinkle of granola. You should have at least two layers, but feel free to add more depending on your glass size.
  7. Finish off your parfait with a drizzle of honey on top for added sweetness and a touch of elegance. If you’re using sliced almonds or shredded coconut, sprinkle them on top now. It adds a lovely visual contrast and extra flavor.
  8. Serve immediately or refrigerate for up to 30 minutes before serving to allow the flavors to meld together. However, I recommend enjoying it fresh to maintain the granola’s crunch.
  • Prep Time: 15 mins
  • Cook Time: 0 mins
  • Category: Breakfast
  • Method: No-cook
  • Cuisine: American

Nutrition

  • Serving Size: 1 parfait
  • Calories: 250
  • Sugar: 20 g
  • Sodium: 50 mg
  • Fat: 5 g
  • Saturated Fat: 2 g
  • Unsaturated Fat: 3 g
  • Trans Fat: 0 g
  • Carbohydrates: 40 g
  • Fiber: 3 g
  • Protein: 10 g
  • Cholesterol: 10 mg

Keywords: Choose ripe peaches for the best flavor and texture. Use a clear glass for a beautiful presentation. For creaminess, consider whipping the yogurt before layering. Be mindful of the granola-to-yogurt ratio. Prepare yogurt and peaches ahead of time for gatherings, layering just before serving.

Did you make this recipe?

Share a photo and tag us — we can't wait to see what you've made!

Sun-Kissed Frozen Orange Cream Slush

As a child, summer days felt like they lasted forever. I remember the sticky heat wrapping around me as I played outside, my laughter mingling with the sounds of the neighborhood. But nothing could cool me down quite like the moment I’d spot my grandmother, laboring over her blender, whipping up her famous Frozen Orange Creamsicle Slush. That vibrant orange treat, with its frosty texture and sweet citrus aroma, was like a burst of sunshine in a cup. Just one sip, and I could feel the coolness wash over me, sparking pure joy.

This Frozen Orange Creamsicle Slush has a way of making you feel like a kid again. Its creamy, dreamy consistency is a delightful balance of bright orange and soft vanilla, inviting you to dive right in. The refreshing tang of orange dances on your tongue, while the smooth creaminess envelops you in a comforting embrace. It’s a nostalgic treat that’s perfect for hot summer afternoons or anytime you need a little pick-me-up.

What makes my version of this slush stand out is the addition of a hint of vanilla bean, which elevates the flavor and adds an extra layer of richness. Plus, it’s super easy to whip up with just a few simple ingredients that you probably already have on hand! So, if you’re ready to relive those sun-soaked memories, let me show you exactly how to make it.

Sun-Kissed Frozen Orange Cream Slush

Why You’ll Love This Recipe

  • Each slush is a perfect blend of creamy vanilla and zesty orange, creating a nostalgic flavor reminiscent of summer days.
  • This refreshing treat is ready in under 15 minutes, making it an ideal quick dessert for unexpected guests or hot afternoons.
  • With just 8 simple ingredients, it’s budget-friendly, ensuring you don’t have to break the bank to enjoy a delicious slush.
  • The slush has a perfectly smooth texture, thanks to the combination of ice and ice cream, providing a delightful contrast to the bright citrus flavors.
  • It’s highly customizable; you can easily adjust the sweetness and add fresh herbs for a unique twist that suits your taste.

Ingredients

  • 2 cups orange juice (freshly squeezed or store-bought)
  • 1 cup vanilla ice cream
  • 1 cup crushed ice
  • 1/2 cup milk (whole or 2%)
  • 1/4 cup granulated sugar (adjust based on sweetness preference)
  • 1 teaspoon vanilla extract
  • Zest of 1 orange (for added flavor)
  • Fresh orange slices and mint leaves (for garnish)

The star of this Frozen Orange Creamsicle Slush is the orange juice, which provides the vibrant, citrusy base. Freshly squeezed juice will yield the brightest flavor, but store-bought options can be just as convenient. If you’re opting for store-bought, choose 100% pure juice with no added sugars for the best results. Another essential ingredient is the vanilla ice cream; it adds creaminess and sweetness. You can substitute it with dairy-free ice cream if you’re looking for a vegan option. Whole or 2% milk complements the ice cream, creating a smooth blend. If you want a lower-calorie version, almond or oat milk can be good alternatives.

Lastly, the granulated sugar can be adjusted based on your sweetness preference. If you prefer a more natural sweetener, consider using honey or agave syrup. The orange zest enhances the flavor profile, providing an aromatic pop that brings the whole slush together. Don’t skip it! It adds an extra layer of brightness that makes this slush truly special.

Step-by-Step Instructions

  1. Start by preparing your ingredients. Gather 2 cups of orange juice, 1 cup of vanilla ice cream, and 1 cup of crushed ice. Make sure the ice is finely crushed, as larger chunks can make blending difficult.
  2. In a blender, combine the orange juice, vanilla ice cream, crushed ice, and 1/2 cup of milk. Add 1/4 cup of granulated sugar and 1 teaspoon of vanilla extract. If you like a sweeter slush, consider adding a bit more sugar at this stage.
  3. Add the zest of 1 orange to the blender. This step is crucial for enhancing the citrus flavor of your slush. Make sure not to include the bitter white pith—only the flavorful zest.
  4. Blend the mixture on medium-high speed for about 30-45 seconds. Stop once the ingredients are fully combined and the slush has a smooth, even consistency. If you notice large chunks of ice, blend for an additional 10-15 seconds. Avoid over-blending, as this can make the slush too liquidy.
  5. Once blended, taste the slush. If it needs more sweetness, add a little more sugar and blend for a few more seconds. If it’s too thick, you can add a splash of milk to reach your desired consistency.
  6. Pour the slush into glasses. This recipe typically serves 4, but you can easily double it for larger gatherings. Use a spoon to help guide the slush into the glasses if needed.
  7. Garnish each serving with fresh orange slices and mint leaves. The mint not only adds a pop of color but also a refreshing aroma that complements the citrus flavors beautifully.
  8. Serve immediately and enjoy! If you’ve made extra, you can refrigerate it for a short time, but it’s best enjoyed fresh.

Pro Tips for the Best Frozen Orange Creamsicle Slush

  • Don’t skip the orange zest! It’s a game-changer for flavor. Always zest before juicing to make it easier.
  • Use a high-powered blender for the best texture. A standard blender may struggle with ice, leading to uneven consistency. If you have a food processor, that can work too, but ensure the ice is finely crushed.
  • Adjust the ice-to-liquid ratio carefully. If your slush is too thick, it won’t blend well. Start with less ice and add more until you reach your preferred texture.
  • Be cautious with the sugar! Always start with the lower amount, as you can easily add more, but it’s hard to fix an overly sweet slush.
  • For a fun twist, consider adding a splash of coconut milk or a handful of fresh fruit like strawberries or pineapple. This not only enhances the flavor but also adds a beautiful color contrast.

Variations & Serving Ideas

There are countless ways to put a spin on your Frozen Orange Creamsicle Slush. Consider making a tropical version by adding in some pineapple juice or coconut milk for a delightful tropical twist. If you’re feeling adventurous, try incorporating a handful of frozen mango or peach slices for added sweetness. For a lighter version, swap out the vanilla ice cream for Greek yogurt for a creamy yet tangy alternative.

As for serving ideas, this refreshing slush pairs wonderfully with light summer dishes like grilled chicken skewers, fish tacos, or a simple salad topped with citrus vinaigrette. The bright, zesty flavors of the slush complement these dishes perfectly, making them an ideal pairing for a sunny day.

Storage, Make-Ahead & Reheating

This Frozen Orange Creamsicle Slush is best enjoyed fresh, but if you have leftovers, you can store them in an airtight container in the fridge for up to 2 days. Just keep in mind that the slush may lose some of its texture over time as the ice melts. It doesn’t freeze well, as the ice will turn into a solid block. If you must freeze it, blend again after thawing to restore the slushy consistency. This treat is best the day you make it, as the flavors meld together beautifully overnight, enhancing its deliciousness.

Frequently Asked Questions

Can I make Frozen Orange Creamsicle Slush ahead of time?

Yes — in fact, it tastes even better the next day as the flavors meld. However, it’s best to enjoy it fresh, as the texture can change if stored for too long. If you need to prepare it ahead, keep it in the fridge and re-blend before serving.

What kind of orange juice should I use?

For the best flavor, use freshly squeezed orange juice. However, if you’re short on time, opt for 100% pure store-bought juice without added sugars. This will ensure that your slush remains flavorful and refreshing.

Can I substitute the vanilla ice cream?

Absolutely! If you’re looking for a dairy-free option, coconut milk ice cream or a non-dairy vanilla ice cream can work wonderfully. They will still provide the creamy texture and sweetness you desire.

How can I adjust the sweetness of my slush?

You can easily adjust the sweetness by modifying the amount of sugar added. Start with 1/4 cup and taste the mixture before blending. If you prefer it sweeter, add more sugar gradually until it reaches your desired level.

What should I do if my slush is too thick?

If your slush is too thick, simply add a splash of milk or orange juice and blend again. This will help achieve a more drinkable consistency while maintaining the slushy texture. Adjust gradually to reach your preferred thickness.

Sun-Kissed Frozen Orange Cream Slush

Final Thoughts

The Frozen Orange Creamsicle Slush is a delightful blend of refreshing citrus and creamy goodness, making it a perfect treat for warm days or any time you crave a taste of nostalgia. The way the bright orange flavor dances with the creamy texture truly elevates this slush, transforming it into a satisfying escape from the everyday.

This is the kind of recipe I come back to again and again, especially when I’m looking to cool down or impress guests at a summer gathering. It’s simple to make and always brings smiles all around! I encourage you to try this recipe for yourself—don’t hesitate to share your results or even put your own spin on it. Happy slushing!

Print
clock clock iconcutlery cutlery iconflag flag iconfolder folder iconinstagram instagram iconpinterest pinterest iconfacebook facebook iconprint print iconsquares squares iconheart heart iconheart solid heart solid icon

Frozen Orange Creamsicle Slush


  • Author: Lily author
  • Total Time: 15 minutes
  • Yield: 4 servings 1x
Pin Recipe
Print Recipe

Description

This Frozen Orange Creamsicle Slush is a refreshing treat that combines creamy vanilla and zesty orange flavors. Perfect for hot summer days, it brings back nostalgic memories with every sip.


Ingredients

Scale
  • 2 cups orange juice (freshly squeezed or store-bought)
  • 1 cup vanilla ice cream
  • 1 cup crushed ice
  • 1/2 cup milk (whole or 2%)
  • 1/4 cup granulated sugar (adjust based on sweetness preference)
  • 1 teaspoon vanilla extract
  • Zest of 1 orange (for added flavor)
  • Fresh orange slices and mint leaves (for garnish)

Instructions

  1. Start by preparing your ingredients. Gather 2 cups of orange juice, 1 cup of vanilla ice cream, and 1 cup of crushed ice. Make sure the ice is finely crushed, as larger chunks can make blending difficult.
  2. In a blender, combine the orange juice, vanilla ice cream, crushed ice, and 1/2 cup of milk. Add 1/4 cup of granulated sugar and 1 teaspoon of vanilla extract. If you like a sweeter slush, consider adding a bit more sugar at this stage.
  3. Add the zest of 1 orange to the blender. This step is crucial for enhancing the citrus flavor of your slush. Make sure not to include the bitter white pith—only the flavorful zest.
  4. Blend the mixture on medium-high speed for about 30-45 seconds. Stop once the ingredients are fully combined and the slush has a smooth, even consistency. If you notice large chunks of ice, blend for an additional 10-15 seconds. Avoid over-blending, as this can make the slush too liquidy.
  5. Once blended, taste the slush. If it needs more sweetness, add a little more sugar and blend for a few more seconds. If it’s too thick, you can add a splash of milk to reach your desired consistency.
  6. Pour the slush into glasses. This recipe typically serves 4, but you can easily double it for larger gatherings. Use a spoon to help guide the slush into the glasses if needed.
  7. Garnish each serving with fresh orange slices and mint leaves. The mint not only adds a pop of color but also a refreshing aroma that complements the citrus flavors beautifully.
  8. Serve immediately and enjoy! If you’ve made extra, you can refrigerate it for a short time, but it's best enjoyed fresh.
  • Prep Time: 15 min
  • Cook Time: 0 min
  • Category: Dessert
  • Method: Blending
  • Cuisine: American

Nutrition

  • Serving Size: 1 serving
  • Calories: 200
  • Sugar: 30 g
  • Sodium: 50 mg
  • Fat: 5 g
  • Saturated Fat: 3 g
  • Unsaturated Fat: 2 g
  • Trans Fat: 0 g
  • Carbohydrates: 40 g
  • Fiber: 1 g
  • Protein: 2 g
  • Cholesterol: 20 mg

Keywords: Don't skip the orange zest! It's a game-changer for flavor. Always zest before juicing to make it easier.

Did you make this recipe?

Share a photo and tag us — we can't wait to see what you've made!

Zesty Lemon Poppy Seed Delight

One rainy afternoon, I found myself in my grandmother’s cozy kitchen, the kind that always smelled like warmth and love. She was whipping up her famous Lemon Poppy Seed Loaf, a recipe that had been passed down through generations. As the batter came together, the zesty aroma of fresh lemons filled the air, mingling perfectly with the nutty fragrance of poppy seeds. I can still picture her, apron-clad, as she expertly drizzled a vibrant citrus icing over the loaf, creating a glossy, sun-kissed finish that beckoned us to dive in. It was a moment that sparked my own passion for baking, and this recipe has become a cherished staple in my home ever since.

When you take a bite of this Lemon Poppy Seed Loaf, it’s like a burst of sunshine on your palate. The loaf is beautifully golden, with a tender crumb that melts in your mouth. Each slice is speckled with tiny poppy seeds, adding a delightful crunch that contrasts beautifully with the tangy sweetness of the lemon. And that citrus icing? It’s the finishing touch that elevates this loaf from ordinary to extraordinary, with its bright, zesty flavor dancing on your taste buds.

This recipe stands out because it embraces simplicity while delivering on flavor. I’ve added a hint of vanilla to the batter, enhancing the overall taste and making it even more indulgent. Trust me, once you make this Lemon Poppy Seed Loaf With Citrus Icing, it’ll become a go-to in your baking repertoire.

So, let me show you exactly how to make it!

Zesty Lemon Poppy Seed Delight

Why You’ll Love This Recipe

  • Moist and tender crumb that melts in your mouth, thanks to the perfect balance of butter and buttermilk.
  • Bright, zesty lemon flavor paired with crunchy poppy seeds, creating a delightful texture and taste experience.
  • Easy to whip up in just about an hour, perfect for last-minute gatherings or a cozy afternoon treat.
  • Budget-friendly with everyday ingredients, making it an accessible option for all home bakers.
  • The citrus icing adds a sweet tang that elevates the loaf, turning a simple recipe into a showstopper!

Ingredients

  • 1 ½ cups (190g) all-purpose flour
  • 1 teaspoon baking powder
  • ½ teaspoon baking soda
  • ½ teaspoon salt
  • 3 tablespoons poppy seeds
  • ½ cup (115g) unsalted butter, softened to room temperature
  • 1 cup (200g) granulated sugar
  • 2 large eggs
  • 1 teaspoon vanilla extract
  • 1 teaspoon lemon zest (from about 1 medium lemon)
  • ½ cup (120ml) buttermilk
  • 2 tablespoons fresh lemon juice

For the Citrus Icing:

  • 1 cup (120g) powdered sugar
  • 2 tablespoons fresh lemon juice
  • 1 tablespoon orange juice
  • 1 teaspoon lemon zest (for garnish, optional)

Let’s dive into the key ingredients that make this Lemon Poppy Seed Loaf so special. The all-purpose flour provides the structure and base for the loaf, while the baking powder and baking soda ensure it rises perfectly, giving the loaf a light texture. For a gluten-free variation, you could substitute the flour with a gluten-free all-purpose blend. Poppy seeds not only add a delightful crunch but also contribute to the unique flavor profile that pairs well with the citrus notes.

Unsalted butter is crucial for achieving the buttery richness that makes this loaf so moist. If you’re looking for a dairy-free option, coconut oil or a vegan butter can be used instead. The buttermilk is another essential component, providing acidity that activates the baking soda for a fluffy texture. If you don’t have buttermilk on hand, you can easily make a substitute by mixing ½ cup of milk with 1 tablespoon of vinegar or lemon juice and letting it sit for about 5 minutes.

Step-by-Step Instructions

  1. Preheat your oven to 350°F (175°C). Grease a 9×5-inch loaf pan or line it with parchment paper for easy removal later.
  2. In a medium mixing bowl, whisk together 1 ½ cups of all-purpose flour, 1 teaspoon of baking powder, ½ teaspoon of baking soda, ½ teaspoon of salt, and 3 tablespoons of poppy seeds. This helps to evenly distribute the baking agents and ensures a uniform rise.
  3. In a large mixing bowl, cream together ½ cup of softened unsalted butter and 1 cup of granulated sugar using an electric mixer on medium speed for about 3-4 minutes, until the mixture is light and fluffy. Make sure to scrape down the sides of the bowl occasionally.
  4. Add 2 large eggs, 1 teaspoon of vanilla extract, and 1 teaspoon of lemon zest to the creamed butter and sugar, mixing until fully combined. You want a smooth consistency, so ensure there are no lumps of butter.
  5. In a small bowl, combine ½ cup of buttermilk and 2 tablespoons of fresh lemon juice. Alternately add the dry ingredients and buttermilk mixture to the butter mixture, starting and ending with the dry ingredients. Mix just until combined; do not overmix, as this can lead to a dense loaf.
  6. Pour the batter into the prepared loaf pan. Smooth the top with a spatula, ensuring it’s even. Bake in the preheated oven for 50-60 minutes, or until a toothpick inserted in the center comes out clean. The edges should be lightly golden brown, and the center should feel just set.
  7. Once baked, remove the loaf from the oven and allow it to cool in the pan for about 10 minutes. Then, transfer it to a wire rack to cool completely. Resist the urge to slice too soon, as it will be crumbly if it’s still warm.
  8. While the loaf is cooling, prepare the citrus icing. In a medium bowl, whisk together 1 cup of powdered sugar, 2 tablespoons of fresh lemon juice, and 1 tablespoon of orange juice until smooth. If the icing is too thick, you can add a little more juice to reach your desired consistency.
  9. Once the loaf is completely cool, drizzle the citrus icing over the top. If you like, sprinkle with an additional teaspoon of lemon zest for an extra pop of flavor and color.

Pro Tips for the Best Lemon Poppy Seed Loaf With Citrus Icing

  • Be careful not to overmix your batter; this is a common mistake that can lead to a dense loaf. Mix just until the dry ingredients are incorporated for a light and fluffy texture.
  • Use room temperature ingredients, especially the butter and eggs. This helps to create a smoother batter and ensures even baking. Take your eggs out of the fridge about 30 minutes before you start.
  • For a more pronounced lemon flavor, consider adding a little lemon extract in addition to the zest and juice. Just a half teaspoon can elevate the citrus notes significantly.
  • When measuring your flour, spoon it into the measuring cup and level it off with a knife instead of scooping directly from the bag. This prevents packing and ensures you don’t end up with a dry loaf.
  • Invest in a good quality loaf pan; it makes a difference in heat distribution, which ensures even baking. If your pan is dark-coated, reduce the oven temperature by 25°F to prevent over-browning.

Variations & Serving Ideas

For a delightful twist, consider adding blueberries or raspberries to the batter for a fruity burst of flavor. You can also experiment with different citrus fruits—try lime or grapefruit zest and juice for a refreshing change. For a healthier option, substitute half of the all-purpose flour with whole wheat flour for added fiber without compromising too much on texture.

This Lemon Poppy Seed Loaf pairs beautifully with a light salad, such as a mixed greens salad with a vinaigrette, or a cup of tea for a cozy afternoon treat. It also complements a creamy cheese platter, as the acidity of the loaf balances rich cheeses perfectly. Lastly, a scoop of vanilla ice cream on the side creates a delightful contrast of temperatures and flavors!

Storage, Make-Ahead & Reheating

This Lemon Poppy Seed Loaf can be stored at room temperature for up to 3 days if wrapped tightly in plastic wrap. If you want to keep it longer, it freezes well for up to 3 months. To freeze, wrap the loaf tightly in plastic wrap and then in aluminum foil to prevent freezer burn.

When you’re ready to enjoy it again, simply thaw it in the fridge overnight. Reheat individual slices in the microwave for 15-20 seconds or in a toaster oven until warmed through. Interestingly, many people find that this loaf tastes even better the next day, as the flavors have time to meld!

Frequently Asked Questions

Can I make Lemon Poppy Seed Loaf With Citrus Icing ahead of time?

Yes — in fact, it tastes even better the next day! You can make the loaf a day in advance, allowing the flavors to develop. Just be sure to store it in an airtight container to maintain its moisture.

Can I substitute the poppy seeds?

Absolutely! If you don’t have poppy seeds on hand or prefer an alternative, you can use sesame seeds for a similar crunch or omit them entirely for a smooth loaf.

What can I use instead of buttermilk?

If you don’t have buttermilk, you can easily create a substitute by mixing ½ cup of milk (dairy or plant-based) with 1 tablespoon of vinegar or lemon juice. Let it sit for 5 minutes before using in the recipe.

How can I make this recipe gluten-free?

To make a gluten-free version of this Lemon Poppy Seed Loaf, substitute the all-purpose flour with a gluten-free all-purpose flour blend. Just ensure that the blend contains a binding agent like xanthan gum for the best results.

What is the best way to store leftover loaf?

Leftover Lemon Poppy Seed Loaf should be stored in an airtight container at room temperature for up to 3 days. For longer storage, wrap it tightly and freeze for up to 3 months. Thaw it before serving for the best texture.

Zesty Lemon Poppy Seed Delight

Final Thoughts

The Lemon Poppy Seed Loaf with Citrus Icing is truly a delightful treat that brings a burst of brightness to any occasion. The zesty lemon flavor combined with the subtle crunch of poppy seeds creates a satisfying balance, while the citrus icing adds a touch of sweetness that perfectly complements the loaf’s tanginess.

This is the kind of recipe I come back to again and again, especially when I want to brighten up a gloomy day or celebrate a small victory. The aroma that fills the kitchen as it bakes is absolutely heavenly! I encourage you to give this recipe a try; you might just find it becoming a beloved staple in your home. Don’t forget to share your results or even add your own unique twist—I can’t wait to see what you create!

Print
clock clock iconcutlery cutlery iconflag flag iconfolder folder iconinstagram instagram iconpinterest pinterest iconfacebook facebook iconprint print iconsquares squares iconheart heart iconheart solid heart solid icon

Lemon Poppy Seed Loaf


  • Author: Lily author
  • Total Time: 13 minute
  • Yield: 1 loaf 1x
Pin Recipe
Print Recipe

Description

This Lemon Poppy Seed Loaf is a delightful treat that combines zesty lemon flavor with crunchy poppy seeds. Topped with a citrus icing, it’s perfect for any occasion.


Ingredients

Scale
  • 1 ½ cups (190g) all-purpose flour
  • 1 teaspoon baking powder
  • ½ teaspoon baking soda
  • ½ teaspoon salt
  • 3 tablespoons poppy seeds
  • ½ cup (115g) unsalted butter, softened to room temperature
  • 1 cup (200g) granulated sugar
  • 2 large eggs
  • 1 teaspoon vanilla extract
  • 1 teaspoon lemon zest (from about 1 medium lemon)
  • ½ cup (120ml) buttermilk
  • 2 tablespoons fresh lemon juice
  • 1 cup (120g) powdered sugar
  • 2 tablespoons fresh lemon juice
  • 1 tablespoon orange juice
  • 1 teaspoon lemon zest (for garnish, optional)

Instructions

  1. Preheat your oven to 350°F (175°C). Grease a 9×5-inch loaf pan or line it with parchment paper for easy removal later.
  2. In a medium mixing bowl, whisk together 1 ½ cups of all-purpose flour, 1 teaspoon of baking powder, ½ teaspoon of baking soda, ½ teaspoon of salt, and 3 tablespoons of poppy seeds. This helps to evenly distribute the baking agents and ensures a uniform rise.
  3. In a large mixing bowl, cream together ½ cup of softened unsalted butter and 1 cup of granulated sugar using an electric mixer on medium speed for about 3-4 minutes, until the mixture is light and fluffy. Make sure to scrape down the sides of the bowl occasionally.
  4. Add 2 large eggs, 1 teaspoon of vanilla extract, and 1 teaspoon of lemon zest to the creamed butter and sugar, mixing until fully combined. You want a smooth consistency, so ensure there are no lumps of butter.
  5. In a small bowl, combine ½ cup of buttermilk and 2 tablespoons of fresh lemon juice. Alternately add the dry ingredients and buttermilk mixture to the butter mixture, starting and ending with the dry ingredients. Mix just until combined; do not overmix, as this can lead to a dense loaf.
  6. Pour the batter into the prepared loaf pan. Smooth the top with a spatula, ensuring it’s even. Bake in the preheated oven for 50-60 minutes, or until a toothpick inserted in the center comes out clean. The edges should be lightly golden brown, and the center should feel just set.
  7. Once baked, remove the loaf from the oven and allow it to cool in the pan for about 10 minutes. Then, transfer it to a wire rack to cool completely. Resist the urge to slice too soon, as it will be crumbly if it’s still warm.
  8. While the loaf is cooling, prepare the citrus icing. In a medium bowl, whisk together 1 cup of powdered sugar, 2 tablespoons of fresh lemon juice, and 1 tablespoon of orange juice until smooth. If the icing is too thick, you can add a little more juice to reach your desired consistency.
  9. Once the loaf is completely cool, drizzle the citrus icing over the top. If you like, sprinkle with an additional teaspoon of lemon zest for an extra pop of flavor and color.
  • Prep Time: 15 mins
  • Cook Time: 50-60 mins
  • Category: Dessert
  • Method: Baking
  • Cuisine: American

Nutrition

  • Serving Size: 1 slice
  • Calories: 200
  • Sugar: 15 g
  • Sodium: 150 mg
  • Fat: 8 g
  • Saturated Fat: 5 g
  • Unsaturated Fat: 3 g
  • Trans Fat: 0 g
  • Carbohydrates: 30 g
  • Fiber: 1 g
  • Protein: 3 g
  • Cholesterol: 40 mg

Keywords: Be careful not to overmix your batter; this is a common mistake that can lead to a dense loaf. Use room temperature ingredients for a smoother batter and even baking.

Did you make this recipe?

Share a photo and tag us — we can't wait to see what you've made!

  • Privacy Policy
  • Terms Of Service
  • Contact
  • About
  • GDPR

Copyright © 2025 Homesmad