• Skip to primary navigation
  • Skip to main content
  • Skip to primary sidebar
Homesmad

Homesmad

  • Home
  • Breakfast & Brunch
  • Appetizers & Snacks
  • Dinner
  • Dessert
  • About
  • Privacy Policy
  • Contact
Homesmad
  • Home
  • Breakfast & Brunch
  • Appetizers & Snacks
  • Dinner
  • Dessert
  • About
  • Privacy Policy
  • Contact

Chicken Avocado Melt Sandwich: Easy, Cheesy & Irresistible

October 16, 2025 by Lily author

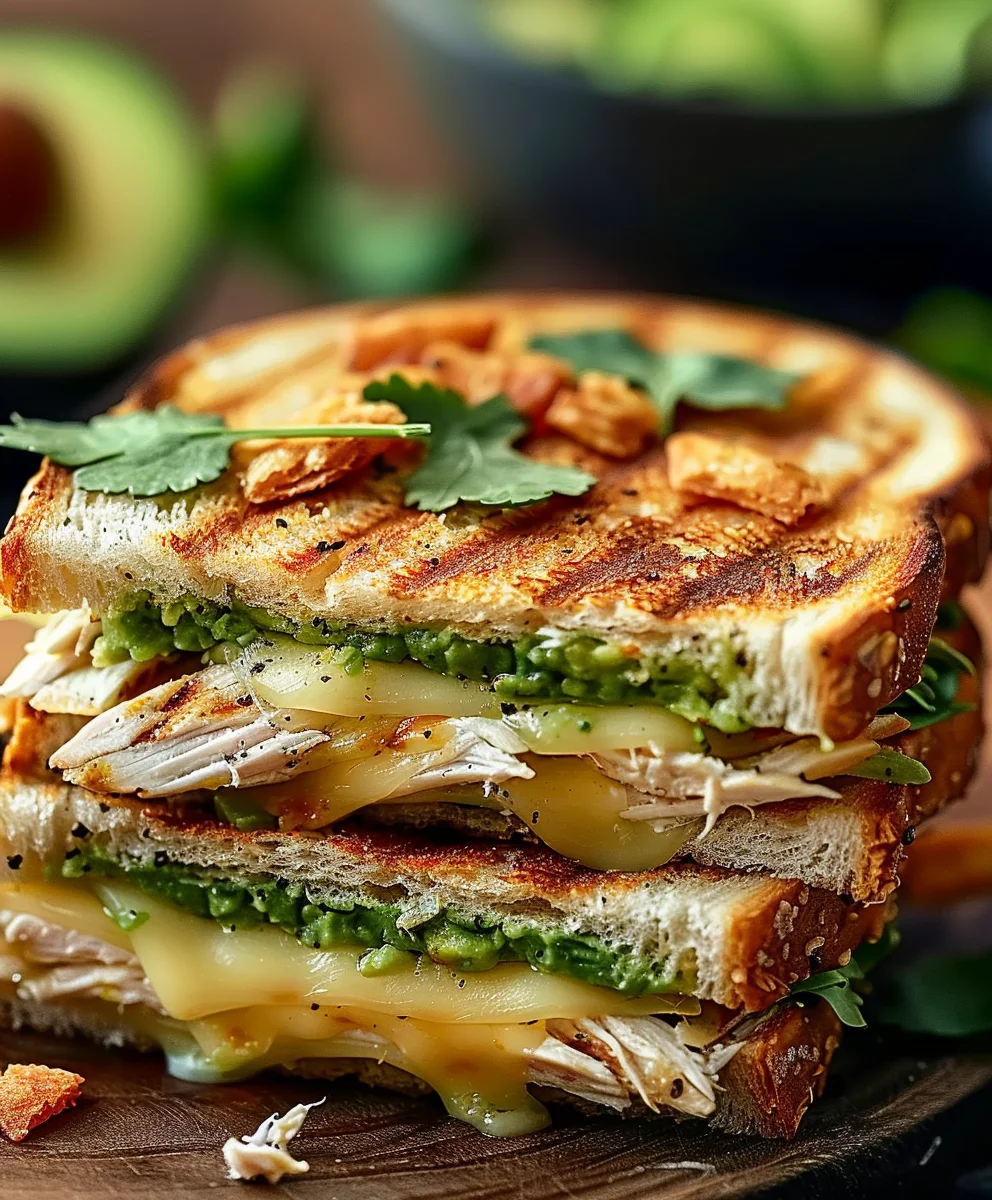
Chicken Avocado Melt Sandwich – imagine a culinary symphony where tender, seasoned chicken meets the creamy richness of ripe avocado, all nestled between slices of perfectly toasted bread and crowned with a luscious layer of melted cheese. This isn’t just a sandwich; it’s an experience, a warm embrace for your taste buds that transforms a simple meal into something truly extraordinary.

The concept of a ‘melt’ sandwich has long been cherished for its ability to deliver comforting warmth and delightful gooeyness, offering a satisfying alternative to the traditional cold sandwich. While its origins are debated, the appeal of a hot, cheesy filling encased in crisp bread remains universal. Our modern take elevates this classic, incorporating the beloved avocado, which gained immense popularity for its health benefits and unparalleled creamy texture, turning a good sandwich into a great one.

People absolutely adore this dish for its exquisite balance of flavors and textures. The savory chicken provides a robust foundation, while the cool, buttery avocado adds a refreshing contrast and a luxurious mouthfeel. Then, the gooey, melted cheese binds everything together with its tangy, salty notes, all complemented by the satisfying crunch of toasted bread. Whether you’re seeking a quick, delicious lunch or a comforting dinner, this Chicken Avocado Melt Sandwich promises convenience without compromising on gourmet appeal. It’s a testament to how simple, quality ingredients can combine to create something truly memorable and deeply satisfying.

Chicken Avocado Melt Sandwich: Easy, Cheesy & Irresistible this RECIPE

Ingredients:

  • For the Chicken:
    • 2 boneless, skinless chicken breasts (about 6-8 oz each)
    • 1 tablespoon olive oil
    • 1/2 teaspoon garlic powder
    • 1/2 teaspoon onion powder
    • 1/2 teaspoon paprika
    • 1/4 teaspoon black pepper
    • 1/2 teaspoon sea salt, or to taste
  • For the Avocado Mash:
    • 2 ripe avocados
    • 1 tablespoon fresh lime juice
    • 1/4 teaspoon sea salt, or to taste
    • Pinch of black pepper
    • Optional: 1 tablespoon finely chopped fresh cilantro
    • Optional: A tiny pinch of red pepper flakes for a subtle kick
  • For the Sandwich Assembly:
    • 8 slices of your favorite bread (sourdough, whole wheat, or country white work beautifully)
    • 4 slices provolone cheese, or a cheese of your choice (cheddar, Monterey Jack, or Swiss also melt wonderfully)
    • 4 slices Monterey Jack cheese (or another cheese if you prefer, combining two types adds complexity)
    • 2-4 tablespoons unsalted butter, softened, or mayonnaise for spreading on the bread
    • Optional: Sliced red onion, thinly sliced tomato, crispy bacon, or a drizzle of sriracha mayo for extra flavor and texture.

Preparing the Chicken for Your Chicken Avocado Melt Sandwich

Creating the perfect filling is the cornerstone of an exceptional Chicken Avocado Melt Sandwich. We’ll start by preparing our chicken, ensuring it’s flavorful, tender, and ready to meld harmoniously with the creamy avocado and melted cheese. I personally love a well-seasoned, pan-seared chicken for this, as it locks in moisture and develops a lovely crust that adds another layer of texture.

  1. Prepare the Chicken Breasts: First things first, pat your chicken breasts dry thoroughly with paper towels. This step is crucial because excess moisture can steam the chicken instead of allowing it to sear properly, preventing that desirable golden-brown exterior. If your chicken breasts are particularly thick, you might want to gently pound them to an even thickness of about 3/4 to 1 inch. This ensures they cook uniformly and quickly. I usually place them between two pieces of plastic wrap and use a meat mallet or a heavy rolling pin.
  2. Season the Chicken: In a small bowl, combine your garlic powder, onion powder, paprika, black pepper, and sea salt. Mix these spices together well. Now, sprinkle this seasoning blend generously over both sides of each chicken breast. Make sure to rub the seasoning in gently, ensuring every surface is coated. This creates a flavorful crust that will elevate the entire sandwich experience.
  3. Heat the Pan: Place a large non-stick skillet or a cast-iron pan over medium-high heat. Add the tablespoon of olive oil to the pan and let it heat until shimmering. You want the pan to be hot enough so that when the chicken hits it, you hear a satisfying sizzle – this indicates a good sear is about to form.
  4. Sear the Chicken: Carefully place the seasoned chicken breasts into the hot pan. Allow them to sear undisturbed for about 5-7 minutes on the first side, or until they develop a beautiful golden-brown crust. Resist the urge to move them too soon! That crust is flavor.
  5. Flip and Finish Cooking: Flip the chicken breasts over and reduce the heat to medium. Continue to cook for another 6-8 minutes, or until the internal temperature reaches 165°F (74°C) when measured with an instant-read thermometer at the thickest part of the breast. Cooking to this temperature ensures the chicken is safe to eat while remaining juicy and tender. Overcooked chicken can be dry and tough, which we definitely want to avoid for our delicious melt.
  6. Rest the Chicken: Once cooked, remove the chicken breasts from the pan and transfer them to a clean cutting board. Cover them loosely with foil and let them rest for at least 5-10 minutes. This resting period is incredibly important as it allows the juices to redistribute throughout the meat, resulting in much juicier chicken. If you cut into it too soon, all those delicious juices will run out onto your board, leaving you with drier chicken.
  7. Prepare for the Sandwich: After resting, you have a couple of options for preparing the chicken for your Chicken Avocado Melt Sandwich. You can either slice it against the grain into thin strips, or for a more rustic feel, shred it using two forks. I often prefer shredding as it creates more nooks and crannies for the cheese and avocado to cling to, ensuring every bite is bursting with flavor. Set the chicken aside.

Crafting the Creamy Avocado Mash

The avocado mash is undeniably the star creamy element in our Chicken Avocado Melt Sandwich. Its rich, buttery texture and fresh flavor perfectly complement the savory chicken and sharp cheese. Getting this just right is key to the overall success of the sandwich.

  1. Select Ripe Avocados: Choosing the right avocados is paramount. Look for avocados that yield slightly to gentle pressure when squeezed in your palm, but aren’t mushy. The skin should be dark green to almost black. Avoid avocados that are too hard (they won’t mash well) or too soft (they might be bruised or overripe).
  2. Halve and Pit the Avocados: Carefully slice each avocado in half lengthwise around the large central pit. Twist the halves to separate them. To remove the pit, gently but firmly tap the pit with the sharp edge of a chef’s knife, then twist the knife to lift the pit out. Be cautious when doing this! Alternatively, you can scoop it out with a spoon.
  3. Scoop out the Flesh: Using a spoon, carefully scoop the green flesh out of each avocado half into a medium-sized mixing bowl. Try to get as much of that vibrant green goodness as possible.
  4. Mash the Avocado: With a fork or a potato masher, gently mash the avocado flesh to your desired consistency. Some people prefer a very smooth, creamy mash, while others enjoy a chunkier texture with small pieces of avocado still visible. I usually aim for something in between – mostly smooth with a few small delightful chunks for textural interest.
  5. Season the Mash: Add the fresh lime juice, sea salt, and black pepper to the mashed avocado. The lime juice is not just for flavor; it’s also crucial for preventing the avocado from browning. It provides a bright, acidic counterpoint to the richness of the avocado. Mix everything thoroughly to ensure the seasonings are evenly distributed.
  6. Optional Flavor Enhancements: If you’re feeling adventurous, now is the time to stir in your optional additions. A tablespoon of finely chopped fresh cilantro adds a wonderful herbaceous freshness. For a very subtle warmth, a tiny pinch of red pepper flakes can be a delightful surprise, enhancing the flavor without making it overly spicy. Give it a taste test and adjust the seasoning if needed. Remember, this is your Chicken Avocado Melt Sandwich, so make it perfect for your palate!
  7. Set Aside: Cover the bowl with plastic wrap, pressing the wrap directly onto the surface of the avocado mash to minimize air exposure. This will further help prevent browning while you prepare the other components.

Assembling Your Perfect Chicken Avocado Melt Sandwich

With our flavorful chicken and creamy avocado mash ready, it’s time for the exciting part: assembling our sandwiches. This stage sets the foundation for a truly magnificent Chicken Avocado Melt Sandwich, focusing on layering and ensuring every bite is balanced.

  1. Prepare Your Bread: Lay out your 8 slices of bread on a clean work surface. Decide whether you prefer butter or mayonnaise for grilling. I personally love the rich flavor and golden crust that butter provides, so I’ll be using that. Spread a thin, even layer of softened unsalted butter (or mayonnaise, if preferred) on one side of each bread slice. This buttered side will be the exterior of your sandwich, making contact with the hot pan and getting wonderfully crispy and golden.
  2. Layer the Cheese (First Layer): Take four slices of bread, with the buttered side facing down. On the unbuttered side of each of these four slices, place one slice of provolone cheese (or your preferred cheese like cheddar or Monterey Jack). The cheese acts as a barrier, helping to prevent the avocado from making the bread soggy, and more importantly, it creates a fantastic gooey foundation.
  3. Add the Shredded Chicken: Divide the prepared shredded or sliced chicken evenly among the four bread slices with cheese. Make sure to spread it out to the edges as much as possible so you get chicken in every single bite of your Chicken Avocado Melt Sandwich. Don’t pile it too high, as we still have more layers to go!
  4. Generously Apply Avocado Mash: Now, spoon a generous amount of your creamy avocado mash over the chicken on each of the four sandwiches. Use the back of the spoon to gently spread it out, covering the chicken layer completely. This is where the magic really starts to happen, as the colors and textures come together.
  5. Optional Add-ins: If you’re using any optional ingredients like thinly sliced red onion, fresh tomato slices, or crispy bacon, this is the time to add them on top of the avocado mash. These additions provide extra crunch, tang, or savory depth, making your Chicken Avocado Melt Sandwich even more bespoke and delightful.
  6. Layer the Second Cheese: Place one slice of Monterey Jack cheese (or your second choice of cheese) on top of the avocado and any optional ingredients on each of the four sandwiches. This second layer of cheese will contribute to an incredibly gooey interior and help hold everything together once melted.
  7. Top with Remaining Bread: Finally, place the remaining four slices of bread on top of each sandwich, with the buttered side facing up. Gently press down on each sandwich with your palm to slightly compact the layers. This helps to make the sandwich more cohesive and easier to handle when it’s time to grill. At this point, your beautiful, towering Chicken Avocado Melt Sandwich constructions are ready for their transformation!

Grilling Your Chicken Avocado Melt Sandwich to Perfection

The final step in creating our ultimate Chicken Avocado Melt Sandwich is the grilling process. This is where the magic truly happens: the bread turns golden and crispy, the chicken heats through, the avocado warms slightly, and most importantly, the cheese becomes gloriously gooey and melty. Precision here ensures a perfect outcome.

  1. Prepare the Grilling Pan: Place a large non-stick skillet or a griddle over medium-low to medium heat. The key here is to use a moderate heat. If the heat is too high, the bread will burn before the cheese has a chance to fully melt and the interior components warm through. If it’s too low, the bread won’t get that lovely golden crust. You want a consistent, even heat.
  2. Place Sandwiches in Pan: Once the pan is heated, carefully transfer two of your assembled Chicken Avocado Melt Sandwiches into the pan. Avoid overcrowding the pan; allow enough space between the sandwiches so they cook evenly and are easy to flip. If your pan is large enough for all four, great, but often it’s better to work in batches to maintain consistent pan temperature.
  3. Grill the First Side: Allow the sandwiches to grill for 4-6 minutes on the first side. During this time, the buttered bread will begin to turn a beautiful golden-brown, and you’ll start to see the cheese on the bottom layer just beginning to soften and melt around the edges. Visually check the underside periodically by gently lifting a corner with a spatula. You’re looking for that perfect, appealing golden color, not a dark brown or burnt hue.
  4. Press the Sandwiches (Optional but Recommended): For an even crispier crust and to help the cheese melt more uniformly, you can gently press down on the sandwiches with a flat spatula or even place a heavy pan (like another cast iron skillet) on top of them during the last minute or two of cooking on each side. This also helps to compact the sandwich, making it easier to eat.
  5. Flip the Sandwiches: Once the first side is perfectly golden, carefully use a wide spatula to flip each sandwich over. Be gentle but confident in your flip to keep all the delicious fillings intact.
  6. Grill the Second Side: Continue to grill the second side for another 4-6 minutes, or until it also turns golden brown and, crucially, the cheese inside is completely melted and gooey. This is the moment we’ve been waiting for! You should see the cheese oozing just slightly from the sides. The internal ingredients, especially the chicken, should be thoroughly warmed.
  7. Monitor and Adjust: Throughout the grilling process, keep an eye on the heat. If the bread is browning too quickly, slightly lower the heat. If it’s not browning enough and the cheese isn’t melting, increase it slightly. Achieving the perfect balance is key to a truly outstanding Chicken Avocado Melt Sandwich.
  8. Remove and Rest: Once both sides are beautifully golden and the cheese is fully melted, carefully remove the grilled sandwiches from the pan and transfer them to a cutting board.
  9. Repeat for Remaining Sandwiches: If you’re cooking in batches, add more butter to the pan if needed and repeat the process for the remaining sandwiches.

Serving Suggestions and Variations for Your Chicken Avocado Melt Sandwich

Congratulations! You’ve successfully crafted a truly spectacular Chicken Avocado Melt Sandwich. Now comes the moment of truth – serving and savoring your masterpiece. But before you dive in, a few thoughtful touches can elevate the experience even further.

  1. Slice and Serve Immediately: To truly appreciate the molten cheese and warm, flavorful interior, the Chicken Avocado Melt Sandwich is best served hot off the pan. I recommend cutting each sandwich in half, either straight down the middle or diagonally from corner to corner. Diagonal cuts not only look appealing but also expose the beautiful layers within, showcasing your culinary efforts. The steam rising from the cut edges, revealing the gooey cheese and vibrant avocado, is always a rewarding sight!
  2. Pair with Classic Sides: A grilled sandwich like this pairs wonderfully with simple, classic accompaniments.
    • Crispy Chips: A handful of your favorite potato or tortilla chips offers a delightful crunch that contrasts with the sandwich’s soft interior.
    • Fresh Salad: A light, crisp green salad with a simple vinaigrette can cut through the richness of the melt and add a refreshing element. Think mixed greens, cherry tomatoes, and cucumber.
    • Soup: For a heartier meal, especially on a cooler day, serve your Chicken Avocado Melt Sandwich alongside a warm bowl of tomato soup, cream of mushroom, or even a robust chicken noodle soup. The classic grilled cheese and tomato soup combo is always a winner, and this avocado chicken melt is no exception to that pairing excellence.
    • Pickles: A dill pickle spear on the side adds a tangy, briny contrast that many find irresistible with any melt sandwich.
  3. Enhance with Dips and Sauces: While the sandwich is incredible on its own, a little something extra for dipping can be fun:
    • Sriracha Mayo: A drizzle of sriracha mayo or a small bowl for dipping adds a creamy, spicy kick.
    • Ranch or Blue Cheese Dressing: For those who love a cooler, tangy dip, these dressings can complement the chicken beautifully.
    • Pesto Mayo: Stirring a tablespoon of pesto into mayonnaise creates another fantastic spread or dip that enhances the herbaceous notes.
  4. Explore Variations and Customizations: The beauty of a sandwich is its versatility. Once you’ve mastered the basic Chicken Avocado Melt Sandwich, don’t hesitate to experiment with different additions and changes to make it your own.
    • Different Cheeses: Try a blend of sharp cheddar and pepper jack for a spicy, tangy kick, or go for a smoked gouda for a deeper, more complex flavor. Swiss cheese offers a nutty, almost sweet note.
    • Spice it Up: Add thinly sliced jalapeños or a sprinkle of crushed red pepper flakes directly into the avocado mash or over the chicken for those who love heat.
    • Add Vegetables: Beyond red onion and tomato, consider adding some sautéed spinach, caramelized onions, or even roasted red peppers for extra flavor and texture.
    • Incorporate Crispy Elements: A couple of slices of crispy bacon or turkey bacon layered in adds an undeniable smoky, salty crunch that is absolutely delightful.
    • Switch Up the Bread: While sourdough is a personal favorite, a hearty whole wheat, a rustic country white, or even a pumpernickel bread can offer different flavor profiles and textures.
    • Herbaceous Touches: Fresh basil leaves tucked into the sandwich just before grilling can add a lovely aromatic lift.
    • A Touch of Sweetness: Some people enjoy a thin slice of apple or pear for a surprising burst of sweetness and crunch, especially with cheddar cheese.

    Ultimately, the Chicken Avocado Melt Sandwich is a canvas for your culinary creativity. Enjoy every delicious, gooey, and satisfying bite!

Chicken Avocado Melt Sandwich: Easy, Cheesy & Irresistible

Conclusion:

If there’s one recipe I’m truly enthusiastic about, it’s this one. I genuinely believe that every kitchen, every home cook, and every hungry stomach deserves to experience the sheer delight that is the Chicken Avocado Melt Sandwich. We’ve journeyed through the simple steps, but the result is anything but basic. What makes this sandwich an absolute must-try, a true staple in my own culinary repertoire, is its incredible balance of flavors and textures. Imagine the tender, seasoned chicken, perfectly cooked and providing a comforting, protein-rich foundation. Then, picture the luscious, creamy avocado, adding a silky smoothness and a fresh, subtly earthy note that elevates every bite. This isn’t just a healthy addition; it’s a star player, contributing a richness that makes the sandwich incredibly satisfying. And, of course, the melt. Oh, the glorious melt! The way the cheese – whatever your preferred variety, be it sharp cheddar, gooey mozzarella, or tangy provolone – blankets the filling, creating those irresistible cheese pulls and a savory, salty dimension that binds all the components together. Finally, it’s all nestled between slices of your chosen bread, toasted to golden perfection, offering that essential crunch and a warm, inviting aroma. It’s comfort food perfected, a quick lunch elevated, and a delightful dinner that feels both indulgent and wonderfully wholesome. It’s the kind of meal that doesn’t just fill you up; it genuinely makes you happy.

But the beauty of a truly great recipe, especially one as versatile as this, lies not only in its core perfection but also in its boundless potential for personalization. While it shines brightly on its own, I’m always eager to explore new ways to enjoy it or pair it with other delightful dishes. For a classic, comforting experience, I love serving my Chicken Avocado Melt Sandwich alongside a warm bowl of creamy tomato soup. The rich, tangy soup is the perfect counterpoint to the savory sandwich, making for an ideal cozy lunch or dinner. Alternatively, if I’m leaning towards something lighter, a crisp, vibrant side salad with a lemon-herb vinaigrette provides a refreshing contrast, cutting through the richness beautifully. A handful of crunchy kettle chips or a few zesty pickle spears can also make excellent companions, adding that extra bit of textural excitement to your plate.

Creative Variations to Make It Your Own:

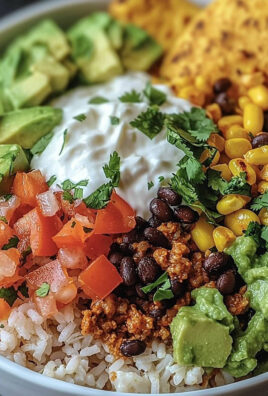
And let’s talk about variations – this is where the fun truly begins! Don’t be shy about experimenting. For a touch of smoky flavor and extra crunch, try adding a slice or two of crispy bacon. If you crave a bit of heat, a drizzle of sriracha mayo or a few pickled jalapeño slices can really kick things up a notch. Fresh herbs like cilantro or basil, finely chopped and mixed with the chicken and avocado, can introduce a bright, aromatic twist. Consider swapping out your bread for something different: a hearty sourdough, a robust whole wheat, or even a soft brioche for a slightly sweeter touch. You can also play with the cheese; a pepper jack would add a subtle spice, while smoked gouda would impart a sophisticated depth of flavor. For a heartier meal, you could even add thinly sliced tomatoes or red onions, or a layer of crisp lettuce and a sprinkle of black pepper for freshness after grilling. The possibilities are truly endless, allowing you to tailor this incredible sandwich to your exact cravings every single time you make it. It’s a canvas for your culinary imagination, encouraging you to infuse your personal touch into an already fantastic dish. Perhaps you’ll create a “spicy southwestern” version with corn and black beans, or a “Mediterranean delight” with feta and olives. The core remains delicious, but the variations keep it exciting and fresh.

So, now it’s your turn! I’ve shared my secrets and my passion for this fantastic creation, and I genuinely hope you’re feeling inspired to give the Chicken Avocado Melt Sandwich a try in your own kitchen. I promise you, it’s a recipe that delivers on all fronts: flavor, satisfaction, and ease of preparation. Don’t hesitate to dive in and experience the magic for yourself. And once you do, I would absolutely love to hear about it! Please share your experience, your triumphs, and any wonderful variations you come up with. Did you add bacon? Experiment with different cheeses? Serve it with a particular soup? Your culinary adventures inspire me and the entire community. Cooking is an act of love and sharing, and I can’t wait to see what delicious creations you bring to life. Happy cooking, my friends!


Chicken Avocado Melt Sandwich

Chicken Avocado Melt Sandwich

A delightful Chicken Avocado Melt Sandwich featuring tender, seasoned chicken, creamy avocado, and two layers of gooey melted cheese, all grilled to perfection on toasted bread. It’s an irresistible and satisfying meal.

Prep Time
25 Minutes

Cook Time
25 Minutes

Total Time
50 Minutes

Servings
4 servings

Ingredients

  • 8 slices sourdough or artisan bread
  • 2 ripe avocados
  • 2 boneless, skinless chicken breasts (about 12-16 oz total)
  • 8 slices cheese (e.g., Provolone, Monterey Jack, Cheddar)
  • 4 tbsp unsalted butter, softened (or mayonnaise)
  • 1 tbsp fresh lime juice
  • 1 tbsp olive oil
  • 1/2 tsp garlic powder
  • 1/2 tsp onion powder
  • 1/2 tsp paprika
  • 1/4 tsp black pepper
  • 1/2 tsp sea salt (for chicken)
  • 1/4 tsp sea salt (for avocado)
  • Optional: 1 tbsp fresh cilantro, chopped
  • Optional: Pinch red pepper flakes
  • Optional add-ins: Sliced red onion, sliced tomato, crispy beef bacon

Instructions

  1. Step 1
    Pat chicken breasts dry and pound to 3/4-1 inch thickness. Combine 1/2 tsp garlic powder, 1/2 tsp onion powder, 1/2 tsp paprika, 1/4 tsp black pepper, and 1/2 tsp sea salt; season chicken thoroughly. Heat 1 tbsp olive oil in a skillet over medium-high heat. Sear chicken 5-7 minutes per side until golden-brown and internal temperature reaches 165°F (74°C). Rest for 5-10 minutes, then slice or shred.
  2. Step 2
    Halve and pit avocados, then scoop flesh into a bowl. Mash with a fork to desired consistency. Stir in 1 tbsp lime juice, 1/4 tsp sea salt, and a pinch of black pepper. Optionally, add 1 tbsp chopped fresh cilantro and a tiny pinch of red pepper flakes. Cover directly with plastic wrap to prevent browning.
  3. Step 3
    Spread softened butter (or mayonnaise) on one side of each of the 8 bread slices. Place 4 slices, buttered-side down, on a work surface. On the unbuttered side of each, layer with 1 slice of cheese, then 1/4 of the cooked chicken, and a generous portion of avocado mash. Add any optional ingredients (e.g., red onion, tomato, crispy beef bacon). Top with a second slice of cheese, then complete with the remaining 4 bread slices, buttered-side up. Gently press to compact.
  4. Step 4
    Heat a large non-stick skillet or griddle over medium-low to medium heat. Place 2 assembled sandwiches in the pan, allowing space. Grill for 4-6 minutes per side, gently pressing with a spatula, until the bread is golden-brown and crispy, and the cheese is fully melted and gooey. Repeat for remaining sandwiches.
  5. Step 5
    Remove grilled sandwiches from the pan, slice diagonally or straight down the middle, and serve immediately. Pairs wonderfully with crispy chips, a fresh green salad, or a warm bowl of tomato soup.

Important Information

Nutrition Facts (Per Serving)

It is important to consider this information as approximate and not to use it as definitive health advice.

Allergy Information

Please check ingredients for potential allergens and consult a health professional if in doubt.

« Previous Post
Cinnamon Roll French Toast Bites: Easy & Delicious Recipe!
Next Post »
Irresistible Apple Crumble Cupcakes: Your New Favorite!

If you enjoyed this…

Cuban Sliders Sandwiches: A Delicious Bite-Sized Delight

Greek Chicken Pita Wraps with Garlic Sauce

Chili Cheese Fries: The Ultimate Guide to Making Perfect Loaded Fries

Primary Sidebar

Browse by Diet

BreakfastDinnerLunchDessertAppetizer

Sweet Peach Yogurt Parfait Delight

One of my fondest memories is from a lazy summer afternoon spent at my grandmother’s house. The sun filtered through the kitchen window, casting a warm glow over the table where she would create her culinary magic. It was during one of those blissful moments that I first tasted her Peach Yogurt Parfait with Honey and Granola. The sweet aroma of ripe peaches mingling with creamy yogurt and the crunch of granola was nothing short of heavenly. It felt like summer captured in a bowl, and I still remember the joy of diving in with a spoon, each layer revealing a new burst of flavor.

When I think about that parfait, I can almost hear the gentle hum of the bees outside, reminding me of the floral notes that honey brings to every bite. The vibrant yellows and soft oranges of the peaches contrast beautifully with the creamy white yogurt and the golden crunch of granola. It’s a dish that not only looks delightful but also tastes like a celebration of fresh, wholesome ingredients.

What makes my version of this Peach Yogurt Parfait special is the careful balance of flavors and textures. I use ripe, juicy peaches, drizzled with locally sourced honey, and a homemade granola that’s bursting with nuts and seeds for an extra crunch. It’s a simple dish, but every layer is crafted with love and attention.

Let me show you exactly how to make this delightful parfait, so you can bring a bit of that summer magic into your kitchen!

Sweet Peach Yogurt Parfait Delight

Why You’ll Love This Recipe

  • Delightfully creamy texture from the Greek yogurt, paired with the juicy sweetness of fresh peaches.
  • Ready in under 20 minutes, making it a quick and satisfying breakfast or snack option.
  • Budget-friendly, using common ingredients that you may already have in your pantry.
  • Customizable with your favorite granola and nuts, allowing you to tailor each parfait to your taste.
  • Perfectly balanced flavors with the bright acidity of lemon juice and the sweetness of honey enhancing the peaches.

Ingredients

  • For the Parfait:
  • 2 cups plain Greek yogurt (or vanilla yogurt for a sweeter option)
  • 2 large ripe peaches, diced (about 2 cups)
  • 1 tablespoon fresh lemon juice (to prevent browning of peaches)
  • 2 tablespoons honey (plus more for drizzling)
  • 1 teaspoon vanilla extract (optional for extra flavor)
  • For the Granola:
  • 1 cup granola (store-bought or homemade; see notes for a simple granola recipe)
  • 1/4 cup sliced almonds (optional for added crunch)
  • 1/4 cup shredded coconut (optional for added flavor)

Let’s dive into some key ingredients that make this Peach Yogurt Parfait so delightful! First, the Greek yogurt is not only creamy but also packed with protein, making it a satisfying option for breakfast or a snack. If you’re looking for a sweeter option, you can easily substitute it with vanilla yogurt, though it may alter the overall flavor balance. Next, the ripe peaches are the star of the show; their natural sweetness shines through, so I recommend choosing peaches that yield slightly to pressure, indicating they’re perfectly ripe. If peaches aren’t in season, feel free to use nectarines or even frozen peaches—just thaw them before use. Finally, honey adds a lovely floral sweetness that ties everything together. If you prefer, maple syrup can serve as a delicious substitute.

Step-by-Step Instructions

  1. Start by preparing the peaches. Wash them thoroughly, then slice and dice them into bite-sized pieces. In a medium bowl, toss the diced peaches with 1 tablespoon of fresh lemon juice to prevent browning. Set aside for about 5 minutes while the lemon juice works its magic.
  2. In a separate bowl, combine the Greek yogurt, 2 tablespoons of honey, and 1 teaspoon of vanilla extract if using. Stir the mixture until smooth and thoroughly blended. This should take about a minute. Avoid overmixing to maintain the creaminess of the yogurt.
  3. Now it’s time to layer your parfait. Grab a clear glass or bowl to showcase your beautiful creation. Start with a generous spoonful of the yogurt mixture at the bottom—about 1/4 cup will do. Use a spoon to spread it evenly.
  4. Add a layer of the diced peaches over the yogurt, ensuring they cover the yogurt completely. You might want to use about half of what you have prepared—roughly 1 cup. This layer should be visually appealing, so arrange the peaches neatly.
  5. Sprinkle 1/4 cup of granola over the peaches. This adds a delightful crunch. Make sure to distribute it evenly to ensure every bite has that satisfying texture. Avoid packing it down too tightly, as you want it to maintain its crunch.
  6. Repeat the layers: spoon in another 1/4 cup of yogurt, followed by another cup of peaches, and another sprinkle of granola. You should have at least two layers, but feel free to add more depending on your glass size.
  7. Finish off your parfait with a drizzle of honey on top for added sweetness and a touch of elegance. If you’re using sliced almonds or shredded coconut, sprinkle them on top now. It adds a lovely visual contrast and extra flavor.
  8. Serve immediately or refrigerate for up to 30 minutes before serving to allow the flavors to meld together. However, I recommend enjoying it fresh to maintain the granola’s crunch.

Pro Tips for the Best Peach Yogurt Parfait With Honey And Granola

  • Make sure to choose ripe peaches for the best flavor and texture. A common mistake is using unripe fruit, which can lead to a less enjoyable parfait. Look for peaches that are fragrant and slightly soft to the touch.
  • Use a clear glass to assemble your parfait; this not only makes for a beautiful presentation but also allows you to see the colorful layers, which adds to the enjoyment of eating it.
  • For an even creamier texture, consider whipping the Greek yogurt with a hand mixer for a couple of minutes before layering. This small adjustment makes a huge difference in mouthfeel.
  • Be mindful of the granola-to-yogurt ratio. Too much granola can overwhelm the parfait, while too little can make it feel too creamy. Aim for about 1/4 cup of granola per layer for the perfect balance.
  • If you’re making this for a gathering, consider preparing the yogurt and peaches ahead of time and layering them just before serving. This ensures the granola stays crunchy!

Variations & Serving Ideas

There are so many ways to get creative with your Peach Yogurt Parfait! For a tropical twist, swap out the peaches for mangoes or pineapples and top with coconut flakes. If you prefer a berry flavor, mix in some blueberries or strawberries with the peaches for added color and taste. For a nutty version, incorporate chopped walnuts or pecans instead of almonds.

As for serving ideas, this parfait pairs beautifully with a side of scrambled eggs for a hearty breakfast or fresh fruit salad for a light lunch. You might also enjoy it alongside whole grain toast with almond butter for an energizing snack. The contrast of flavors and textures will elevate your meal experience!

Storage, Make-Ahead & Reheating

The Peach Yogurt Parfait is best enjoyed fresh, but you can prepare some components ahead of time. Store the layered parfait in an airtight container in the refrigerator for up to 24 hours. However, be cautious; the granola may lose its crunch if stored too long. You can freeze the yogurt and peach mixture for up to 2 months; just remember to thaw it in the refrigerator overnight before serving.

If you plan to enjoy this dish the next day, it can taste even better as the flavors meld together. Just remember to add the granola right before serving to keep its delightful crunch!

Frequently Asked Questions

Can I make Peach Yogurt Parfait With Honey And Granola ahead of time?

Yes — in fact, it tastes even better the next day as the flavors meld. However, I recommend waiting to add the granola until just before serving to maintain its crunch.

What can I substitute for Greek yogurt?

If you prefer a lighter option, you can substitute Greek yogurt with regular yogurt or a dairy-free alternative like coconut yogurt. Just remember that this may alter the creaminess and flavor profile slightly.

Can I use frozen peaches for this parfait?

Absolutely! Just make sure to thaw the frozen peaches before using them. They will still add great flavor, though the texture may be slightly softer than fresh peaches.

How do I make the parfait vegan?

To make a vegan version, substitute the Greek yogurt with a plant-based yogurt alternative, and replace honey with maple syrup or agave nectar. This keeps the parfait sweet while adhering to a vegan diet.

What other fruits can I use in this recipe?

You can mix and match fruits based on your preference. Try using strawberries, blueberries, raspberries, or even bananas. Just make sure to adjust the lemon juice as needed to prevent browning.

Sweet Peach Yogurt Parfait Delight

Final Thoughts

The Peach Yogurt Parfait with Honey and Granola is a delightful blend of creamy yogurt, sweet peaches, and crunchy granola that creates a satisfying and nourishing treat. Each layer bursts with flavor, making it a perfect choice for breakfast or a light dessert.

This is the kind of recipe I come back to again and again, especially when I want something refreshing and wholesome to start my day. The harmony of sweet and tart flavors, combined with the delightful crunch, never fails to lift my spirits!

I encourage you to give this parfait a try and indulge in its comforting goodness. Feel free to share your results or even add your own twist—perhaps a sprinkle of cinnamon or a handful of nuts. Enjoy creating your perfect parfait!

Print
clock clock iconcutlery cutlery iconflag flag iconfolder folder iconinstagram instagram iconpinterest pinterest iconfacebook facebook iconprint print iconsquares squares iconheart heart iconheart solid heart solid icon

Peach Yogurt Parfait


  • Author: Lily author
  • Total Time: 15 minutes
  • Yield: 4 servings 1x
Pin Recipe
Print Recipe

Description

This Peach Yogurt Parfait combines creamy Greek yogurt, juicy peaches, and crunchy granola for a delightful treat. It’s a perfect breakfast or snack that captures the essence of summer in every bite.


Ingredients

Scale
  • For the Parfait:
  • 2 cups plain Greek yogurt (or vanilla yogurt for a sweeter option)
  • 2 large ripe peaches, diced (about 2 cups)
  • 1 tablespoon fresh lemon juice (to prevent browning of peaches)
  • 2 tablespoons honey (plus more for drizzling)
  • 1 teaspoon vanilla extract (optional for extra flavor)
  • For the Granola:
  • 1 cup granola (store-bought or homemade; see notes for a simple granola recipe)
  • 1/4 cup sliced almonds (optional for added crunch)
  • 1/4 cup shredded coconut (optional for added flavor)

Instructions

  1. Start by preparing the peaches. Wash them thoroughly, then slice and dice them into bite-sized pieces. In a medium bowl, toss the diced peaches with 1 tablespoon of fresh lemon juice to prevent browning. Set aside for about 5 minutes while the lemon juice works its magic.
  2. In a separate bowl, combine the Greek yogurt, 2 tablespoons of honey, and 1 teaspoon of vanilla extract if using. Stir the mixture until smooth and thoroughly blended. This should take about a minute. Avoid overmixing to maintain the creaminess of the yogurt.
  3. Now it’s time to layer your parfait. Grab a clear glass or bowl to showcase your beautiful creation. Start with a generous spoonful of the yogurt mixture at the bottom—about 1/4 cup will do. Use a spoon to spread it evenly.
  4. Add a layer of the diced peaches over the yogurt, ensuring they cover the yogurt completely. You might want to use about half of what you have prepared—roughly 1 cup. This layer should be visually appealing, so arrange the peaches neatly.
  5. Sprinkle 1/4 cup of granola over the peaches. This adds a delightful crunch. Make sure to distribute it evenly to ensure every bite has that satisfying texture. Avoid packing it down too tightly, as you want it to maintain its crunch.
  6. Repeat the layers: spoon in another 1/4 cup of yogurt, followed by another cup of peaches, and another sprinkle of granola. You should have at least two layers, but feel free to add more depending on your glass size.
  7. Finish off your parfait with a drizzle of honey on top for added sweetness and a touch of elegance. If you’re using sliced almonds or shredded coconut, sprinkle them on top now. It adds a lovely visual contrast and extra flavor.
  8. Serve immediately or refrigerate for up to 30 minutes before serving to allow the flavors to meld together. However, I recommend enjoying it fresh to maintain the granola’s crunch.
  • Prep Time: 15 mins
  • Cook Time: 0 mins
  • Category: Breakfast
  • Method: No-cook
  • Cuisine: American

Nutrition

  • Serving Size: 1 parfait
  • Calories: 250
  • Sugar: 20 g
  • Sodium: 50 mg
  • Fat: 5 g
  • Saturated Fat: 2 g
  • Unsaturated Fat: 3 g
  • Trans Fat: 0 g
  • Carbohydrates: 40 g
  • Fiber: 3 g
  • Protein: 10 g
  • Cholesterol: 10 mg

Keywords: Choose ripe peaches for the best flavor and texture. Use a clear glass for a beautiful presentation. For creaminess, consider whipping the yogurt before layering. Be mindful of the granola-to-yogurt ratio. Prepare yogurt and peaches ahead of time for gatherings, layering just before serving.

Did you make this recipe?

Share a photo and tag us — we can't wait to see what you've made!

Sun-Kissed Frozen Orange Cream Slush

As a child, summer days felt like they lasted forever. I remember the sticky heat wrapping around me as I played outside, my laughter mingling with the sounds of the neighborhood. But nothing could cool me down quite like the moment I’d spot my grandmother, laboring over her blender, whipping up her famous Frozen Orange Creamsicle Slush. That vibrant orange treat, with its frosty texture and sweet citrus aroma, was like a burst of sunshine in a cup. Just one sip, and I could feel the coolness wash over me, sparking pure joy.

This Frozen Orange Creamsicle Slush has a way of making you feel like a kid again. Its creamy, dreamy consistency is a delightful balance of bright orange and soft vanilla, inviting you to dive right in. The refreshing tang of orange dances on your tongue, while the smooth creaminess envelops you in a comforting embrace. It’s a nostalgic treat that’s perfect for hot summer afternoons or anytime you need a little pick-me-up.

What makes my version of this slush stand out is the addition of a hint of vanilla bean, which elevates the flavor and adds an extra layer of richness. Plus, it’s super easy to whip up with just a few simple ingredients that you probably already have on hand! So, if you’re ready to relive those sun-soaked memories, let me show you exactly how to make it.

Sun-Kissed Frozen Orange Cream Slush

Why You’ll Love This Recipe

  • Each slush is a perfect blend of creamy vanilla and zesty orange, creating a nostalgic flavor reminiscent of summer days.
  • This refreshing treat is ready in under 15 minutes, making it an ideal quick dessert for unexpected guests or hot afternoons.
  • With just 8 simple ingredients, it’s budget-friendly, ensuring you don’t have to break the bank to enjoy a delicious slush.
  • The slush has a perfectly smooth texture, thanks to the combination of ice and ice cream, providing a delightful contrast to the bright citrus flavors.
  • It’s highly customizable; you can easily adjust the sweetness and add fresh herbs for a unique twist that suits your taste.

Ingredients

  • 2 cups orange juice (freshly squeezed or store-bought)
  • 1 cup vanilla ice cream
  • 1 cup crushed ice
  • 1/2 cup milk (whole or 2%)
  • 1/4 cup granulated sugar (adjust based on sweetness preference)
  • 1 teaspoon vanilla extract
  • Zest of 1 orange (for added flavor)
  • Fresh orange slices and mint leaves (for garnish)

The star of this Frozen Orange Creamsicle Slush is the orange juice, which provides the vibrant, citrusy base. Freshly squeezed juice will yield the brightest flavor, but store-bought options can be just as convenient. If you’re opting for store-bought, choose 100% pure juice with no added sugars for the best results. Another essential ingredient is the vanilla ice cream; it adds creaminess and sweetness. You can substitute it with dairy-free ice cream if you’re looking for a vegan option. Whole or 2% milk complements the ice cream, creating a smooth blend. If you want a lower-calorie version, almond or oat milk can be good alternatives.

Lastly, the granulated sugar can be adjusted based on your sweetness preference. If you prefer a more natural sweetener, consider using honey or agave syrup. The orange zest enhances the flavor profile, providing an aromatic pop that brings the whole slush together. Don’t skip it! It adds an extra layer of brightness that makes this slush truly special.

Step-by-Step Instructions

  1. Start by preparing your ingredients. Gather 2 cups of orange juice, 1 cup of vanilla ice cream, and 1 cup of crushed ice. Make sure the ice is finely crushed, as larger chunks can make blending difficult.
  2. In a blender, combine the orange juice, vanilla ice cream, crushed ice, and 1/2 cup of milk. Add 1/4 cup of granulated sugar and 1 teaspoon of vanilla extract. If you like a sweeter slush, consider adding a bit more sugar at this stage.
  3. Add the zest of 1 orange to the blender. This step is crucial for enhancing the citrus flavor of your slush. Make sure not to include the bitter white pith—only the flavorful zest.
  4. Blend the mixture on medium-high speed for about 30-45 seconds. Stop once the ingredients are fully combined and the slush has a smooth, even consistency. If you notice large chunks of ice, blend for an additional 10-15 seconds. Avoid over-blending, as this can make the slush too liquidy.
  5. Once blended, taste the slush. If it needs more sweetness, add a little more sugar and blend for a few more seconds. If it’s too thick, you can add a splash of milk to reach your desired consistency.
  6. Pour the slush into glasses. This recipe typically serves 4, but you can easily double it for larger gatherings. Use a spoon to help guide the slush into the glasses if needed.
  7. Garnish each serving with fresh orange slices and mint leaves. The mint not only adds a pop of color but also a refreshing aroma that complements the citrus flavors beautifully.
  8. Serve immediately and enjoy! If you’ve made extra, you can refrigerate it for a short time, but it’s best enjoyed fresh.

Pro Tips for the Best Frozen Orange Creamsicle Slush

  • Don’t skip the orange zest! It’s a game-changer for flavor. Always zest before juicing to make it easier.
  • Use a high-powered blender for the best texture. A standard blender may struggle with ice, leading to uneven consistency. If you have a food processor, that can work too, but ensure the ice is finely crushed.
  • Adjust the ice-to-liquid ratio carefully. If your slush is too thick, it won’t blend well. Start with less ice and add more until you reach your preferred texture.
  • Be cautious with the sugar! Always start with the lower amount, as you can easily add more, but it’s hard to fix an overly sweet slush.
  • For a fun twist, consider adding a splash of coconut milk or a handful of fresh fruit like strawberries or pineapple. This not only enhances the flavor but also adds a beautiful color contrast.

Variations & Serving Ideas

There are countless ways to put a spin on your Frozen Orange Creamsicle Slush. Consider making a tropical version by adding in some pineapple juice or coconut milk for a delightful tropical twist. If you’re feeling adventurous, try incorporating a handful of frozen mango or peach slices for added sweetness. For a lighter version, swap out the vanilla ice cream for Greek yogurt for a creamy yet tangy alternative.

As for serving ideas, this refreshing slush pairs wonderfully with light summer dishes like grilled chicken skewers, fish tacos, or a simple salad topped with citrus vinaigrette. The bright, zesty flavors of the slush complement these dishes perfectly, making them an ideal pairing for a sunny day.

Storage, Make-Ahead & Reheating

This Frozen Orange Creamsicle Slush is best enjoyed fresh, but if you have leftovers, you can store them in an airtight container in the fridge for up to 2 days. Just keep in mind that the slush may lose some of its texture over time as the ice melts. It doesn’t freeze well, as the ice will turn into a solid block. If you must freeze it, blend again after thawing to restore the slushy consistency. This treat is best the day you make it, as the flavors meld together beautifully overnight, enhancing its deliciousness.

Frequently Asked Questions

Can I make Frozen Orange Creamsicle Slush ahead of time?

Yes — in fact, it tastes even better the next day as the flavors meld. However, it’s best to enjoy it fresh, as the texture can change if stored for too long. If you need to prepare it ahead, keep it in the fridge and re-blend before serving.

What kind of orange juice should I use?

For the best flavor, use freshly squeezed orange juice. However, if you’re short on time, opt for 100% pure store-bought juice without added sugars. This will ensure that your slush remains flavorful and refreshing.

Can I substitute the vanilla ice cream?

Absolutely! If you’re looking for a dairy-free option, coconut milk ice cream or a non-dairy vanilla ice cream can work wonderfully. They will still provide the creamy texture and sweetness you desire.

How can I adjust the sweetness of my slush?

You can easily adjust the sweetness by modifying the amount of sugar added. Start with 1/4 cup and taste the mixture before blending. If you prefer it sweeter, add more sugar gradually until it reaches your desired level.

What should I do if my slush is too thick?

If your slush is too thick, simply add a splash of milk or orange juice and blend again. This will help achieve a more drinkable consistency while maintaining the slushy texture. Adjust gradually to reach your preferred thickness.

Sun-Kissed Frozen Orange Cream Slush

Final Thoughts

The Frozen Orange Creamsicle Slush is a delightful blend of refreshing citrus and creamy goodness, making it a perfect treat for warm days or any time you crave a taste of nostalgia. The way the bright orange flavor dances with the creamy texture truly elevates this slush, transforming it into a satisfying escape from the everyday.

This is the kind of recipe I come back to again and again, especially when I’m looking to cool down or impress guests at a summer gathering. It’s simple to make and always brings smiles all around! I encourage you to try this recipe for yourself—don’t hesitate to share your results or even put your own spin on it. Happy slushing!

Print
clock clock iconcutlery cutlery iconflag flag iconfolder folder iconinstagram instagram iconpinterest pinterest iconfacebook facebook iconprint print iconsquares squares iconheart heart iconheart solid heart solid icon

Frozen Orange Creamsicle Slush


  • Author: Lily author
  • Total Time: 15 minutes
  • Yield: 4 servings 1x
Pin Recipe
Print Recipe

Description

This Frozen Orange Creamsicle Slush is a refreshing treat that combines creamy vanilla and zesty orange flavors. Perfect for hot summer days, it brings back nostalgic memories with every sip.


Ingredients

Scale
  • 2 cups orange juice (freshly squeezed or store-bought)
  • 1 cup vanilla ice cream
  • 1 cup crushed ice
  • 1/2 cup milk (whole or 2%)
  • 1/4 cup granulated sugar (adjust based on sweetness preference)
  • 1 teaspoon vanilla extract
  • Zest of 1 orange (for added flavor)
  • Fresh orange slices and mint leaves (for garnish)

Instructions

  1. Start by preparing your ingredients. Gather 2 cups of orange juice, 1 cup of vanilla ice cream, and 1 cup of crushed ice. Make sure the ice is finely crushed, as larger chunks can make blending difficult.
  2. In a blender, combine the orange juice, vanilla ice cream, crushed ice, and 1/2 cup of milk. Add 1/4 cup of granulated sugar and 1 teaspoon of vanilla extract. If you like a sweeter slush, consider adding a bit more sugar at this stage.
  3. Add the zest of 1 orange to the blender. This step is crucial for enhancing the citrus flavor of your slush. Make sure not to include the bitter white pith—only the flavorful zest.
  4. Blend the mixture on medium-high speed for about 30-45 seconds. Stop once the ingredients are fully combined and the slush has a smooth, even consistency. If you notice large chunks of ice, blend for an additional 10-15 seconds. Avoid over-blending, as this can make the slush too liquidy.
  5. Once blended, taste the slush. If it needs more sweetness, add a little more sugar and blend for a few more seconds. If it’s too thick, you can add a splash of milk to reach your desired consistency.
  6. Pour the slush into glasses. This recipe typically serves 4, but you can easily double it for larger gatherings. Use a spoon to help guide the slush into the glasses if needed.
  7. Garnish each serving with fresh orange slices and mint leaves. The mint not only adds a pop of color but also a refreshing aroma that complements the citrus flavors beautifully.
  8. Serve immediately and enjoy! If you’ve made extra, you can refrigerate it for a short time, but it's best enjoyed fresh.
  • Prep Time: 15 min
  • Cook Time: 0 min
  • Category: Dessert
  • Method: Blending
  • Cuisine: American

Nutrition

  • Serving Size: 1 serving
  • Calories: 200
  • Sugar: 30 g
  • Sodium: 50 mg
  • Fat: 5 g
  • Saturated Fat: 3 g
  • Unsaturated Fat: 2 g
  • Trans Fat: 0 g
  • Carbohydrates: 40 g
  • Fiber: 1 g
  • Protein: 2 g
  • Cholesterol: 20 mg

Keywords: Don't skip the orange zest! It's a game-changer for flavor. Always zest before juicing to make it easier.

Did you make this recipe?

Share a photo and tag us — we can't wait to see what you've made!

Zesty Lemon Poppy Seed Delight

One rainy afternoon, I found myself in my grandmother’s cozy kitchen, the kind that always smelled like warmth and love. She was whipping up her famous Lemon Poppy Seed Loaf, a recipe that had been passed down through generations. As the batter came together, the zesty aroma of fresh lemons filled the air, mingling perfectly with the nutty fragrance of poppy seeds. I can still picture her, apron-clad, as she expertly drizzled a vibrant citrus icing over the loaf, creating a glossy, sun-kissed finish that beckoned us to dive in. It was a moment that sparked my own passion for baking, and this recipe has become a cherished staple in my home ever since.

When you take a bite of this Lemon Poppy Seed Loaf, it’s like a burst of sunshine on your palate. The loaf is beautifully golden, with a tender crumb that melts in your mouth. Each slice is speckled with tiny poppy seeds, adding a delightful crunch that contrasts beautifully with the tangy sweetness of the lemon. And that citrus icing? It’s the finishing touch that elevates this loaf from ordinary to extraordinary, with its bright, zesty flavor dancing on your taste buds.

This recipe stands out because it embraces simplicity while delivering on flavor. I’ve added a hint of vanilla to the batter, enhancing the overall taste and making it even more indulgent. Trust me, once you make this Lemon Poppy Seed Loaf With Citrus Icing, it’ll become a go-to in your baking repertoire.

So, let me show you exactly how to make it!

Zesty Lemon Poppy Seed Delight

Why You’ll Love This Recipe

  • Moist and tender crumb that melts in your mouth, thanks to the perfect balance of butter and buttermilk.
  • Bright, zesty lemon flavor paired with crunchy poppy seeds, creating a delightful texture and taste experience.
  • Easy to whip up in just about an hour, perfect for last-minute gatherings or a cozy afternoon treat.
  • Budget-friendly with everyday ingredients, making it an accessible option for all home bakers.
  • The citrus icing adds a sweet tang that elevates the loaf, turning a simple recipe into a showstopper!

Ingredients

  • 1 ½ cups (190g) all-purpose flour
  • 1 teaspoon baking powder
  • ½ teaspoon baking soda
  • ½ teaspoon salt
  • 3 tablespoons poppy seeds
  • ½ cup (115g) unsalted butter, softened to room temperature
  • 1 cup (200g) granulated sugar
  • 2 large eggs
  • 1 teaspoon vanilla extract
  • 1 teaspoon lemon zest (from about 1 medium lemon)
  • ½ cup (120ml) buttermilk
  • 2 tablespoons fresh lemon juice

For the Citrus Icing:

  • 1 cup (120g) powdered sugar
  • 2 tablespoons fresh lemon juice
  • 1 tablespoon orange juice
  • 1 teaspoon lemon zest (for garnish, optional)

Let’s dive into the key ingredients that make this Lemon Poppy Seed Loaf so special. The all-purpose flour provides the structure and base for the loaf, while the baking powder and baking soda ensure it rises perfectly, giving the loaf a light texture. For a gluten-free variation, you could substitute the flour with a gluten-free all-purpose blend. Poppy seeds not only add a delightful crunch but also contribute to the unique flavor profile that pairs well with the citrus notes.

Unsalted butter is crucial for achieving the buttery richness that makes this loaf so moist. If you’re looking for a dairy-free option, coconut oil or a vegan butter can be used instead. The buttermilk is another essential component, providing acidity that activates the baking soda for a fluffy texture. If you don’t have buttermilk on hand, you can easily make a substitute by mixing ½ cup of milk with 1 tablespoon of vinegar or lemon juice and letting it sit for about 5 minutes.

Step-by-Step Instructions

  1. Preheat your oven to 350°F (175°C). Grease a 9×5-inch loaf pan or line it with parchment paper for easy removal later.
  2. In a medium mixing bowl, whisk together 1 ½ cups of all-purpose flour, 1 teaspoon of baking powder, ½ teaspoon of baking soda, ½ teaspoon of salt, and 3 tablespoons of poppy seeds. This helps to evenly distribute the baking agents and ensures a uniform rise.
  3. In a large mixing bowl, cream together ½ cup of softened unsalted butter and 1 cup of granulated sugar using an electric mixer on medium speed for about 3-4 minutes, until the mixture is light and fluffy. Make sure to scrape down the sides of the bowl occasionally.
  4. Add 2 large eggs, 1 teaspoon of vanilla extract, and 1 teaspoon of lemon zest to the creamed butter and sugar, mixing until fully combined. You want a smooth consistency, so ensure there are no lumps of butter.
  5. In a small bowl, combine ½ cup of buttermilk and 2 tablespoons of fresh lemon juice. Alternately add the dry ingredients and buttermilk mixture to the butter mixture, starting and ending with the dry ingredients. Mix just until combined; do not overmix, as this can lead to a dense loaf.
  6. Pour the batter into the prepared loaf pan. Smooth the top with a spatula, ensuring it’s even. Bake in the preheated oven for 50-60 minutes, or until a toothpick inserted in the center comes out clean. The edges should be lightly golden brown, and the center should feel just set.
  7. Once baked, remove the loaf from the oven and allow it to cool in the pan for about 10 minutes. Then, transfer it to a wire rack to cool completely. Resist the urge to slice too soon, as it will be crumbly if it’s still warm.
  8. While the loaf is cooling, prepare the citrus icing. In a medium bowl, whisk together 1 cup of powdered sugar, 2 tablespoons of fresh lemon juice, and 1 tablespoon of orange juice until smooth. If the icing is too thick, you can add a little more juice to reach your desired consistency.
  9. Once the loaf is completely cool, drizzle the citrus icing over the top. If you like, sprinkle with an additional teaspoon of lemon zest for an extra pop of flavor and color.

Pro Tips for the Best Lemon Poppy Seed Loaf With Citrus Icing

  • Be careful not to overmix your batter; this is a common mistake that can lead to a dense loaf. Mix just until the dry ingredients are incorporated for a light and fluffy texture.
  • Use room temperature ingredients, especially the butter and eggs. This helps to create a smoother batter and ensures even baking. Take your eggs out of the fridge about 30 minutes before you start.
  • For a more pronounced lemon flavor, consider adding a little lemon extract in addition to the zest and juice. Just a half teaspoon can elevate the citrus notes significantly.
  • When measuring your flour, spoon it into the measuring cup and level it off with a knife instead of scooping directly from the bag. This prevents packing and ensures you don’t end up with a dry loaf.
  • Invest in a good quality loaf pan; it makes a difference in heat distribution, which ensures even baking. If your pan is dark-coated, reduce the oven temperature by 25°F to prevent over-browning.

Variations & Serving Ideas

For a delightful twist, consider adding blueberries or raspberries to the batter for a fruity burst of flavor. You can also experiment with different citrus fruits—try lime or grapefruit zest and juice for a refreshing change. For a healthier option, substitute half of the all-purpose flour with whole wheat flour for added fiber without compromising too much on texture.

This Lemon Poppy Seed Loaf pairs beautifully with a light salad, such as a mixed greens salad with a vinaigrette, or a cup of tea for a cozy afternoon treat. It also complements a creamy cheese platter, as the acidity of the loaf balances rich cheeses perfectly. Lastly, a scoop of vanilla ice cream on the side creates a delightful contrast of temperatures and flavors!

Storage, Make-Ahead & Reheating

This Lemon Poppy Seed Loaf can be stored at room temperature for up to 3 days if wrapped tightly in plastic wrap. If you want to keep it longer, it freezes well for up to 3 months. To freeze, wrap the loaf tightly in plastic wrap and then in aluminum foil to prevent freezer burn.

When you’re ready to enjoy it again, simply thaw it in the fridge overnight. Reheat individual slices in the microwave for 15-20 seconds or in a toaster oven until warmed through. Interestingly, many people find that this loaf tastes even better the next day, as the flavors have time to meld!

Frequently Asked Questions

Can I make Lemon Poppy Seed Loaf With Citrus Icing ahead of time?

Yes — in fact, it tastes even better the next day! You can make the loaf a day in advance, allowing the flavors to develop. Just be sure to store it in an airtight container to maintain its moisture.

Can I substitute the poppy seeds?

Absolutely! If you don’t have poppy seeds on hand or prefer an alternative, you can use sesame seeds for a similar crunch or omit them entirely for a smooth loaf.

What can I use instead of buttermilk?

If you don’t have buttermilk, you can easily create a substitute by mixing ½ cup of milk (dairy or plant-based) with 1 tablespoon of vinegar or lemon juice. Let it sit for 5 minutes before using in the recipe.

How can I make this recipe gluten-free?

To make a gluten-free version of this Lemon Poppy Seed Loaf, substitute the all-purpose flour with a gluten-free all-purpose flour blend. Just ensure that the blend contains a binding agent like xanthan gum for the best results.

What is the best way to store leftover loaf?

Leftover Lemon Poppy Seed Loaf should be stored in an airtight container at room temperature for up to 3 days. For longer storage, wrap it tightly and freeze for up to 3 months. Thaw it before serving for the best texture.

Zesty Lemon Poppy Seed Delight

Final Thoughts

The Lemon Poppy Seed Loaf with Citrus Icing is truly a delightful treat that brings a burst of brightness to any occasion. The zesty lemon flavor combined with the subtle crunch of poppy seeds creates a satisfying balance, while the citrus icing adds a touch of sweetness that perfectly complements the loaf’s tanginess.

This is the kind of recipe I come back to again and again, especially when I want to brighten up a gloomy day or celebrate a small victory. The aroma that fills the kitchen as it bakes is absolutely heavenly! I encourage you to give this recipe a try; you might just find it becoming a beloved staple in your home. Don’t forget to share your results or even add your own unique twist—I can’t wait to see what you create!

Print
clock clock iconcutlery cutlery iconflag flag iconfolder folder iconinstagram instagram iconpinterest pinterest iconfacebook facebook iconprint print iconsquares squares iconheart heart iconheart solid heart solid icon

Lemon Poppy Seed Loaf


  • Author: Lily author
  • Total Time: 11 minute
  • Yield: 1 loaf 1x
Pin Recipe
Print Recipe

Description

This Lemon Poppy Seed Loaf is a delightful treat that combines zesty lemon flavor with crunchy poppy seeds. Topped with a citrus icing, it’s perfect for any occasion.


Ingredients

Scale
  • 1 ½ cups (190g) all-purpose flour
  • 1 teaspoon baking powder
  • ½ teaspoon baking soda
  • ½ teaspoon salt
  • 3 tablespoons poppy seeds
  • ½ cup (115g) unsalted butter, softened to room temperature
  • 1 cup (200g) granulated sugar
  • 2 large eggs
  • 1 teaspoon vanilla extract
  • 1 teaspoon lemon zest (from about 1 medium lemon)
  • ½ cup (120ml) buttermilk
  • 2 tablespoons fresh lemon juice
  • 1 cup (120g) powdered sugar
  • 2 tablespoons fresh lemon juice
  • 1 tablespoon orange juice
  • 1 teaspoon lemon zest (for garnish, optional)

Instructions

  1. Preheat your oven to 350°F (175°C). Grease a 9×5-inch loaf pan or line it with parchment paper for easy removal later.
  2. In a medium mixing bowl, whisk together 1 ½ cups of all-purpose flour, 1 teaspoon of baking powder, ½ teaspoon of baking soda, ½ teaspoon of salt, and 3 tablespoons of poppy seeds. This helps to evenly distribute the baking agents and ensures a uniform rise.
  3. In a large mixing bowl, cream together ½ cup of softened unsalted butter and 1 cup of granulated sugar using an electric mixer on medium speed for about 3-4 minutes, until the mixture is light and fluffy. Make sure to scrape down the sides of the bowl occasionally.
  4. Add 2 large eggs, 1 teaspoon of vanilla extract, and 1 teaspoon of lemon zest to the creamed butter and sugar, mixing until fully combined. You want a smooth consistency, so ensure there are no lumps of butter.
  5. In a small bowl, combine ½ cup of buttermilk and 2 tablespoons of fresh lemon juice. Alternately add the dry ingredients and buttermilk mixture to the butter mixture, starting and ending with the dry ingredients. Mix just until combined; do not overmix, as this can lead to a dense loaf.
  6. Pour the batter into the prepared loaf pan. Smooth the top with a spatula, ensuring it’s even. Bake in the preheated oven for 50-60 minutes, or until a toothpick inserted in the center comes out clean. The edges should be lightly golden brown, and the center should feel just set.
  7. Once baked, remove the loaf from the oven and allow it to cool in the pan for about 10 minutes. Then, transfer it to a wire rack to cool completely. Resist the urge to slice too soon, as it will be crumbly if it’s still warm.
  8. While the loaf is cooling, prepare the citrus icing. In a medium bowl, whisk together 1 cup of powdered sugar, 2 tablespoons of fresh lemon juice, and 1 tablespoon of orange juice until smooth. If the icing is too thick, you can add a little more juice to reach your desired consistency.
  9. Once the loaf is completely cool, drizzle the citrus icing over the top. If you like, sprinkle with an additional teaspoon of lemon zest for an extra pop of flavor and color.
  • Prep Time: 15 mins
  • Cook Time: 50-60 mins
  • Category: Dessert
  • Method: Baking
  • Cuisine: American

Nutrition

  • Serving Size: 1 slice
  • Calories: 200
  • Sugar: 15 g
  • Sodium: 150 mg
  • Fat: 8 g
  • Saturated Fat: 5 g
  • Unsaturated Fat: 3 g
  • Trans Fat: 0 g
  • Carbohydrates: 30 g
  • Fiber: 1 g
  • Protein: 3 g
  • Cholesterol: 40 mg

Keywords: Be careful not to overmix your batter; this is a common mistake that can lead to a dense loaf. Use room temperature ingredients for a smoother batter and even baking.

Did you make this recipe?

Share a photo and tag us — we can't wait to see what you've made!

  • Privacy Policy
  • Terms Of Service
  • Contact
  • About
  • GDPR

Copyright © 2025 Homesmad