• Skip to primary navigation
  • Skip to main content
  • Skip to primary sidebar
Homesmad

Homesmad

  • Home
  • Breakfast & Brunch
  • Appetizers & Snacks
  • Dinner
  • Dessert
  • About
  • Privacy Policy
  • Contact
Homesmad
  • Home
  • Breakfast & Brunch
  • Appetizers & Snacks
  • Dinner
  • Dessert
  • About
  • Privacy Policy
  • Contact

Apple Crisp Mini Cheesecakes: Easy Fall Dessert Recipe

October 19, 2025 by Lily author

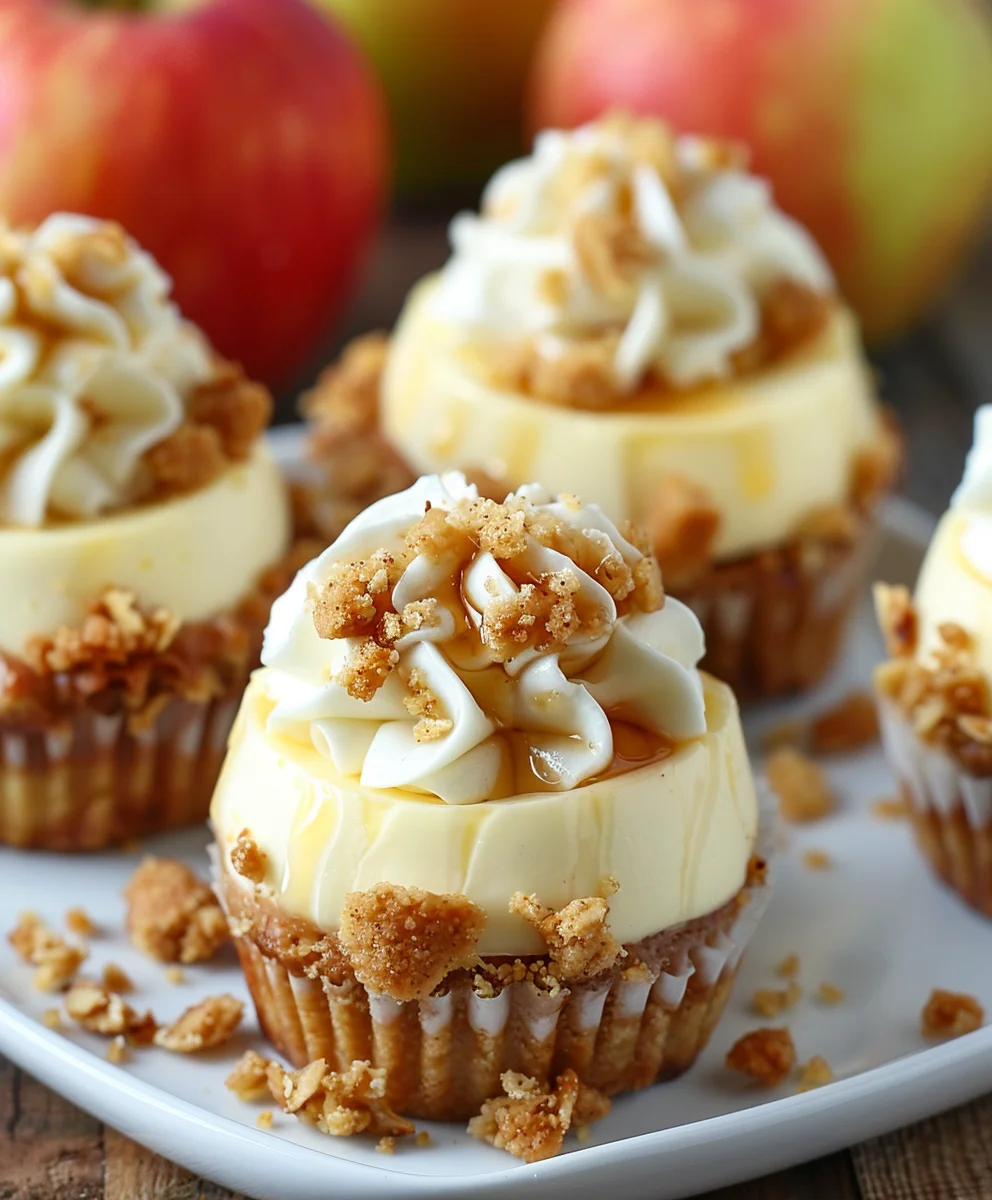
Apple Crisp Mini Cheesecakes are here to redefine your dessert experience, offering a captivating blend of autumnal comfort and sophisticated sweetness. I truly believe there’s nothing quite like the harmonious marriage of crisp, spiced apples, a buttery streusel topping, and the velvety richness of cheesecake. This delightful creation encapsulates the very essence of fall flavors, yet it delivers a luxurious, creamy texture that is simply irresistible year-round.

A Modern Twist on Classic Comfort

While traditional apple crisps emerged as a heartwarming, humble dessert, often born from resourceful baking during wartime, and cheesecakes boast a venerable history stretching back to ancient Greece, this particular recipe represents a modern culinary triumph. It’s a testament to how beloved classic flavors can be artfully combined into something entirely new and exciting. The genius of presenting these as mini cheesecakes lies in their perfect portion control and charming individual presentation, making them an ideal choice for entertaining or a delightful personal treat for any occasion.

I am so excited for you to discover the magic of making these Apple Crisp Mini Cheesecakes. Prepare to enchant your taste buds and impress your guests with this extraordinary dessert that truly offers the best of both worlds: the familiar warmth of a crisp and the indulgent creaminess of a cheesecake, all in one adorable, bite-sized package!

Apple Crisp Mini Cheesecakes: Easy Fall Dessert Recipe this RECIPE

Ingredients:

  • For the Graham Cracker Crust:

    • 1 ½ cups (about 180g) finely crushed graham cracker crumbs (from approximately 12-14 full sheets)
    • ¼ cup (50g) granulated sugar
    • ½ teaspoon ground cinnamon
    • 6 tablespoons (85g) unsalted butter, melted
  • For the Creamy Cheesecake Filling:

    • 2 (8-ounce) packages (450g total) full-fat cream cheese, softened to room temperature
    • ½ cup (100g) granulated sugar
    • 2 large eggs, at room temperature
    • 1 teaspoon pure vanilla extract
    • ¼ teaspoon salt
    • 1 tablespoon all-purpose flour (to help prevent cracks)
    • 2 tablespoons sour cream or full-fat Greek yogurt, at room temperature (for extra creaminess)
  • For the Spiced Apple Topping:

    • 2 medium-sized apples (I love using Honeycrisp or Granny Smith for a nice tart balance), peeled, cored, and finely diced into ¼-inch pieces
    • 2 tablespoons (28g) unsalted butter
    • 2 tablespoons light brown sugar, packed
    • ¼ teaspoon ground cinnamon
    • Pinch of ground nutmeg
    • 1 tablespoon fresh lemon juice
    • 2 tablespoons water
    • ½ teaspoon cornstarch (mixed with 1 tablespoon cold water to form a slurry, optional, for thicker sauce)
  • For the Crisp Crumble Topping:

    • ¼ cup (30g) all-purpose flour
    • ¼ cup (50g) light brown sugar, packed
    • ¼ cup (25g) old-fashioned rolled oats (not instant)
    • ¼ teaspoon ground cinnamon
    • Pinch of salt
    • 3 tablespoons (42g) unsalted butter, very cold and cut into small cubes

For the Graham Cracker Crust:

  1. Prepare your baking cups: First things first, preheat your oven to 325°F (160°C). Then, line a 12-cup standard muffin tin with paper liners. I find that spraying the inside of the paper liners lightly with non-stick cooking spray helps prevent the cheesecakes from sticking later, especially if you plan to remove the liners before serving. This crucial step sets the stage for beautifully presented Apple Crisp Mini Cheesecakes.
  2. Combine dry crust ingredients: In a medium bowl, combine your finely crushed graham cracker crumbs, granulated sugar, and ground cinnamon. Give it a good whisk with a fork or a small spatula to ensure all the ingredients are evenly distributed. This fragrant mix is the foundation of our delightful mini cheesecakes.
  3. Add melted butter: Pour the melted butter over the dry graham cracker mixture. Using a fork or your fingertips, mix until everything is thoroughly combined and the mixture resembles wet sand. Every crumb should be moistened; this ensures a sturdy, flavorful crust that won’t crumble when you bite into your finished Apple Crisp Mini Cheesecakes.
  4. Press into muffin cups: Divide the graham cracker mixture evenly among the 12 prepared muffin cups, placing about 1 ½ tablespoons into each. Use the back of a spoon or a small tamper to press the mixture firmly and evenly into the bottom of each liner. A tight pack is key here for a solid crust.
  5. Pre-bake the crusts: Bake the crusts in your preheated oven for 5-7 minutes. This short bake helps to set the crust, making it less likely to get soggy once the cheesecake filling is added. Once baked, remove them from the oven and let them cool completely on a wire rack while you prepare the filling. Keeping them in the muffin tin is perfectly fine for cooling.

For the Creamy Cheesecake Filling:

  1. Soften cream cheese: Make sure your cream cheese is at room temperature. This is incredibly important for a smooth, lump-free cheesecake filling. If it’s too cold, you’ll end up with lumps, no matter how much you mix. I usually take it out of the fridge at least an hour before I plan to start.
  2. Cream together cream cheese and sugar: In a large bowl, using an electric mixer (either a stand mixer with a paddle attachment or a hand mixer), beat the softened cream cheese on medium speed for about 1-2 minutes until it’s completely smooth and creamy. Then, gradually add the granulated sugar, beating until well combined and fluffy, scraping down the sides of the bowl as needed. You want this base to be incredibly smooth.
  3. Incorporate eggs and vanilla: Add the eggs one at a time, beating on low speed just until each egg is incorporated. Be careful not to overmix at this stage, as too much air can cause cracks in your cheesecakes. Stir in the vanilla extract and salt.
  4. Add flour and sour cream: Finally, gently mix in the tablespoon of all-purpose flour. This little trick helps to stabilize the cheesecake and prevent cracking. Then, fold in the sour cream or Greek yogurt. The sour cream adds an extra layer of richness and tang, making these Apple Crisp Mini Cheesecakes truly irresistible. Mix just until everything is combined and the batter is smooth. Avoid overmixing once the flour is added.

For the Spiced Apple Topping:

  1. Prepare your apples: Peel, core, and finely dice your apples into small ¼-inch pieces. The smaller the dice, the softer and more evenly they will cook, creating a delightful texture that complements the creamy cheesecake.
  2. Sauté the apples: In a medium non-stick skillet over medium heat, melt the unsalted butter. Add the diced apples and sauté for 3-5 minutes, stirring occasionally, until they start to soften slightly.
  3. Add flavorings: Stir in the light brown sugar, ground cinnamon, and a pinch of ground nutmeg. Continue to cook for another 2-3 minutes, allowing the sugar to melt and coat the apples beautifully, infusing them with warm, comforting spices.
  4. Simmer with liquids: Pour in the fresh lemon juice and water. Bring the mixture to a gentle simmer. If you want a thicker sauce, now is the time to add your cornstarch slurry (cornstarch mixed with cold water). Stir it in and continue to simmer for another 2-3 minutes, or until the apples are tender-crisp and the sauce has thickened slightly. We don’t want mushy apples, but they should be pleasantly soft.
  5. Cool the topping: Remove the skillet from the heat and transfer the spiced apple topping to a small bowl. Let it cool completely to room temperature before adding it to the cheesecakes. This prevents the hot apples from cooking the cheesecake batter prematurely.

For the Crisp Crumble Topping:

  1. Combine dry ingredients: In a separate small bowl, combine the all-purpose flour, light brown sugar, old-fashioned rolled oats, ground cinnamon, and a pinch of salt. Whisk these dry ingredients together thoroughly. This blend forms the “crisp” part of our amazing Apple Crisp Mini Cheesecakes.
  2. Cut in cold butter: Add the very cold, cubed unsalted butter to the dry mixture. Using a pastry blender, two knives, or your fingertips, cut the butter into the flour mixture until it resembles coarse crumbs. Some larger pea-sized pieces are perfectly fine and will create lovely pockets of buttery goodness when baked. The key here is to work quickly so the butter doesn’t get too warm.
  3. Chill the crumble: Place the bowl with the crumble topping in the refrigerator while you assemble the cheesecakes. Chilling the butter helps the topping to stay crumbly and prevents it from melting too quickly in the oven, ensuring a truly crisp texture.

Assembling Your Apple Crisp Mini Cheesecakes:

  1. Fill the crusts with cheesecake batter: Spoon the creamy cheesecake filling over the pre-baked graham cracker crusts in the muffin tin. Fill each cup about two-thirds full, or approximately to the top of the paper liner. Use an offset spatula or the back of a spoon to gently smooth the top of the batter.
  2. Add the spiced apple topping: Carefully spoon a small amount (about 1-2 teaspoons) of the cooled spiced apple topping onto the center of each cheesecake batter-filled cup. You can gently press them down a tiny bit, but mostly they will settle nicely.
  3. Sprinkle with crisp topping: Generously sprinkle the chilled crisp crumble topping over the apple layer on each mini cheesecake. You want a good layer here to ensure every bite delivers that satisfying crisp texture, truly living up to the name Apple Crisp Mini Cheesecakes.

Baking and Cooling:

  1. Prepare for baking: Place the muffin tin with the assembled Apple Crisp Mini Cheesecakes onto a baking sheet. This makes it easier to transfer in and out of the oven and catches any potential drips, though it’s unlikely with mini cheesecakes.
  2. Bake the cheesecakes: Bake in your preheated 325°F (160°C) oven for 20-25 minutes, or until the edges of the cheesecakes are set and the centers have just a slight wobble when you gently shake the pan. The crumble topping should be golden brown and fragrant. Overbaking can lead to cracks, so keep an eye on them.
  3. Cool gradually: Once baked, turn off the oven and prop open the oven door slightly (you can use a wooden spoon). Let the cheesecakes cool inside the oven for an additional 15-20 minutes. This slow cooling process helps prevent drastic temperature changes, which can lead to cracking.
  4. Finish cooling: Remove the muffin tin from the oven and transfer it to a wire rack to cool completely at room temperature for at least 1 hour. It’s crucial that they are completely cool before chilling.
  5. Chill thoroughly: Once at room temperature, transfer the muffin tin to the refrigerator and chill the Apple Crisp Mini Cheesecakes for at least 4 hours, or preferably overnight. Chilling allows the flavors to meld and the cheesecake to firm up to the perfect creamy consistency. Do not skip this step! It’s what makes a great cheesecake.

Serving and Storage Suggestions:

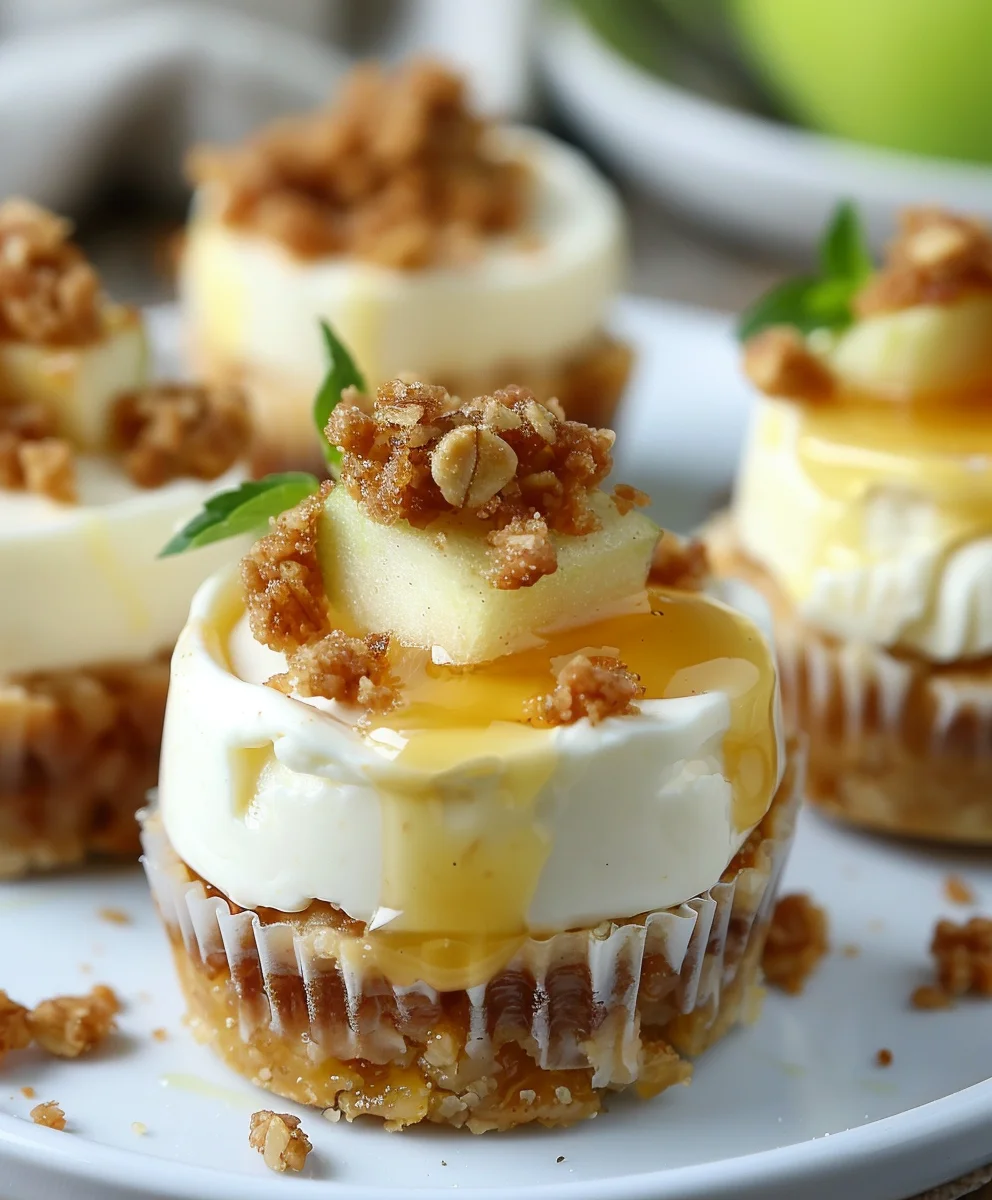
  1. Serving: Once thoroughly chilled, carefully remove the Apple Crisp Mini Cheesecakes from the muffin tin. You can serve them in their paper liners or gently peel the liners off for a more elegant presentation. These delightful treats are perfect on their own, but a tiny dollop of whipped cream or a dusting of cinnamon can elevate them further. They are absolutely ideal for parties, potlucks, or just a special individual dessert after dinner.
  2. Storage: Store any leftover Apple Crisp Mini Cheesecakes in an airtight container in the refrigerator for up to 3-4 days. For longer storage, you can freeze them individually on a baking sheet until solid, then transfer them to a freezer-safe bag or container for up to 1 month. Thaw them in the refrigerator overnight before serving. The crisp topping might lose a little bit of its crunch after freezing, but the flavors will still be fantastic.

Apple Crisp Mini Cheesecakes: Easy Fall Dessert Recipe

Conclusion:

If there is one dessert I truly believe everyone should have in their baking repertoire, it’s this incredibly special creation. We’ve explored the delightful journey of combining two beloved classics into one show-stopping treat, and I sincerely hope you’re feeling as excited as I am about it. This recipe isn’t just another dessert; it’s a harmonious blend of creamy, dreamy cheesecake and the comforting, spiced crunch of a classic apple crisp. The beauty of these individual portions means you get all the sophisticated charm of a gourmet dessert without any of the fuss of slicing or serving, making them absolutely perfect for any gathering, from an elegant dinner party to a casual family get-together. I truly believe that the unique combination of the rich, smooth cheesecake base with the tart, spiced apples and that irresistible buttery, oat-filled crisp topping creates an experience that is simply unparalleled. It’s the kind of dessert that elicits gasps of delight and requests for the recipe, every single time. These Apple Crisp Mini Cheesecakes are, without a doubt, a must-try for any dessert lover looking to impress with minimal stress.

Elevate Your Serving Experience and Explore New Horizons!

When it comes to serving these magnificent treats, you have a few delightful options. While they are undeniably exquisite chilled straight from the refrigerator, I highly recommend letting them sit at room temperature for about 10-15 minutes before serving to allow the flavors and textures to truly sing. For an extra touch of indulgence, a dollop of freshly whipped cream, perhaps infused with a hint of vanilla or maple, makes for an absolutely divine topping. A delicate drizzle of warm caramel sauce can also elevate the experience, enhancing the apple notes beautifully. Don’t shy away from a light dusting of extra cinnamon or even a tiny sprinkle of toasted pecans for added texture and aroma. And for those who enjoy a bit of warmth, serving them alongside a small scoop of high-quality vanilla bean ice cream creates a magnificent contrast in temperature and richness, especially if you gently warm the crisp topping part just before serving.

But the fun doesn’t stop there! This recipe is incredibly adaptable, encouraging you to unleash your inner culinary artist. While apples are the star here, imagine swapping them out for other seasonal fruits. Pear crisp mini cheesecakes offer a subtly different sweetness, or perhaps a mixed berry version for a burst of vibrant flavor and color in the summer months. You could even play with the spices in the apple filling – a pinch of nutmeg, allspice, or even a touch of cardamom could add a fascinating new dimension. For the crust, while graham crackers are classic, consider using crushed ginger snaps for a spicy kick, or even shortbread cookies for a buttery, elegant base. Want to make them even richer? A hint of bourbon or maple syrup in the cheesecake batter itself can introduce a wonderfully complex depth of flavor. For those with dietary considerations, this recipe can be easily adapted; use gluten-free graham crackers and certified gluten-free oats for a coeliac-friendly version, and with a few smart substitutions for dairy products, a vegan version is also entirely achievable. Don’t be afraid to experiment with mini ramekins or even small glass jars for a rustic, charming presentation that’s perfect for picnics or individual gifts.

Your Culinary Adventure Awaits – Share Your Sweet Success!

Now that I’ve shared all my tips and tricks, it’s truly your turn to step into the kitchen and experience the magic firsthand. I promise you, the joy of pulling these gorgeous individual desserts from the oven, with their golden crisp tops and the intoxicating aroma of spiced apples and rich cheesecake, is an experience not to be missed. Making these Apple Crisp Mini Cheesecakes is more than just following a recipe; it’s about creating moments of pure delight, both for yourself and for those you share them with. I absolutely love hearing about your baking adventures, so please, once you’ve made them, don’t be shy! Share your creations with me and the community. Let me know what variations you tried, what toppings you chose, and most importantly, how much you and your loved ones enjoyed them. Your feedback, photos, and personal twists are always so inspiring and help us all grow as bakers. I’m genuinely excited for you to discover the deliciousness of this recipe. Happy baking, and may your kitchen be filled with the sweetest aromas!


Apple Crisp Mini Cheesecakes

Apple Crisp Mini Cheesecakes

Apple Crisp Mini Cheesecakes offer a blend of spiced apples and velvety cheesecake in charming mini portions. This easy fall dessert is a modern twist on classic comfort, perfect for entertaining or a delightful personal treat.

Prep Time
1 Hours

Cook Time
35 Minutes

Total Time
55 Minutes

Servings
12 mini cheesecakes

Ingredients

  • 3/4 cup graham cracker crumbs
  • 1 1/2 tablespoons sugar
  • 1/2 teaspoon cinnamon
  • 3 tablespoons unsalted butter, melted
  • 10 oz cream cheese, softened
  • 6 tablespoons sugar
  • 1 1/2 teaspoons vanilla
  • 2 teaspoons all-purpose flour
  • 1 egg
  • 2 medium-small apples, peeled and chopped finely
  • 2 teaspoons freshly squeezed lemon juice
  • 1 1/2 teaspoons cinnamon
  • 1/4 teaspoon nutmeg
  • 2 tablespoons light brown sugar
  • 1 1/2 teaspoons cornstarch

Instructions

  1. Step 1
    Preheat oven to 325°F (160°C). Line a 12-cup muffin tin with paper liners; spray lightly. In a medium bowl, combine graham cracker crumbs, 1 1/2 tablespoons sugar, and 1/2 teaspoon cinnamon. Add 3 tablespoons melted unsalted butter; mix until moist. Divide mixture among 12 muffin cups and press firmly into bottoms. Bake for 5-7 minutes, then cool completely.
  2. Step 2
    Ensure 10 oz cream cheese is at room temperature. In a large bowl, beat softened cream cheese until smooth. Gradually add 6 tablespoons sugar, beating until fluffy. Add 1 egg at a time, beating on low until just incorporated. Stir in 1 1/2 teaspoons vanilla. Gently mix in 2 teaspoons all-purpose flour until batter is smooth; avoid overmixing.
  3. Step 3
    Peel, core, and finely dice 2 medium-small apples into ¼-inch pieces. In a medium non-stick skillet over medium heat, sauté diced apples for 3-5 minutes until slightly softened. Stir in 2 tablespoons light brown sugar, 1 1/2 teaspoons cinnamon, and 1/4 teaspoon nutmeg. Cook for 2-3 minutes. Pour in 2 teaspoons freshly squeezed lemon juice. Bring to a gentle simmer. To thicken, mix 1 1/2 teaspoons cornstarch with cold water to form a slurry; stir into apples. Simmer 2-3 minutes until apples are tender-crisp and sauce thickens slightly. Transfer to a bowl and cool completely.
  4. Step 4
    Spoon cheesecake filling into cooled crusts, about two-thirds full. Smooth tops. Carefully spoon about 1-2 teaspoons of cooled spiced apple topping onto the center of each cheesecake cup.
  5. Step 5
    Place muffin tin on a baking sheet. Bake at 325°F (160°C) for 20-25 minutes, until edges are set and centers have a slight wobble. Turn off oven, prop door open slightly, and cool cheesecakes in oven for 15-20 minutes. Remove from oven, cool completely on a wire rack for at least 1 hour. Chill in refrigerator for at least 4 hours, or preferably overnight, before serving.
  6. Step 6
    Serve chilled, in or out of paper liners. Store leftovers in an airtight container in refrigerator for 3-4 days. For longer storage, freeze individually then transfer to freezer-safe bag for up to 1 month. Thaw in refrigerator overnight.

Important Information

Nutrition Facts (Per Serving)

It is important to consider this information as approximate and not to use it as definitive health advice.

Allergy Information

Please check ingredients for potential allergens and consult a health professional if in doubt.

« Previous Post
No Bake Peanut Butter Lasagna: Easy, Creamy Dessert!
Next Post »
Amazing High Protein Honey Garlic Shrimp - Easy Dinner!

If you enjoyed this…

Delicious No-Bake White Chocolate Rice Krispie Balls

Perfect Non-Alcoholic White Chocolate Beer Cookies Recipe

Summer Berry Lasagna: A Delicious & Easy Dessert Recipe

Primary Sidebar

Browse by Diet

BreakfastDinnerLunchDessertAppetizer

Sweet Peach Yogurt Parfait Delight

One of my fondest memories is from a lazy summer afternoon spent at my grandmother’s house. The sun filtered through the kitchen window, casting a warm glow over the table where she would create her culinary magic. It was during one of those blissful moments that I first tasted her Peach Yogurt Parfait with Honey and Granola. The sweet aroma of ripe peaches mingling with creamy yogurt and the crunch of granola was nothing short of heavenly. It felt like summer captured in a bowl, and I still remember the joy of diving in with a spoon, each layer revealing a new burst of flavor.

When I think about that parfait, I can almost hear the gentle hum of the bees outside, reminding me of the floral notes that honey brings to every bite. The vibrant yellows and soft oranges of the peaches contrast beautifully with the creamy white yogurt and the golden crunch of granola. It’s a dish that not only looks delightful but also tastes like a celebration of fresh, wholesome ingredients.

What makes my version of this Peach Yogurt Parfait special is the careful balance of flavors and textures. I use ripe, juicy peaches, drizzled with locally sourced honey, and a homemade granola that’s bursting with nuts and seeds for an extra crunch. It’s a simple dish, but every layer is crafted with love and attention.

Let me show you exactly how to make this delightful parfait, so you can bring a bit of that summer magic into your kitchen!

Sweet Peach Yogurt Parfait Delight

Why You’ll Love This Recipe

  • Delightfully creamy texture from the Greek yogurt, paired with the juicy sweetness of fresh peaches.
  • Ready in under 20 minutes, making it a quick and satisfying breakfast or snack option.
  • Budget-friendly, using common ingredients that you may already have in your pantry.
  • Customizable with your favorite granola and nuts, allowing you to tailor each parfait to your taste.
  • Perfectly balanced flavors with the bright acidity of lemon juice and the sweetness of honey enhancing the peaches.

Ingredients

  • For the Parfait:
  • 2 cups plain Greek yogurt (or vanilla yogurt for a sweeter option)
  • 2 large ripe peaches, diced (about 2 cups)
  • 1 tablespoon fresh lemon juice (to prevent browning of peaches)
  • 2 tablespoons honey (plus more for drizzling)
  • 1 teaspoon vanilla extract (optional for extra flavor)
  • For the Granola:
  • 1 cup granola (store-bought or homemade; see notes for a simple granola recipe)
  • 1/4 cup sliced almonds (optional for added crunch)
  • 1/4 cup shredded coconut (optional for added flavor)

Let’s dive into some key ingredients that make this Peach Yogurt Parfait so delightful! First, the Greek yogurt is not only creamy but also packed with protein, making it a satisfying option for breakfast or a snack. If you’re looking for a sweeter option, you can easily substitute it with vanilla yogurt, though it may alter the overall flavor balance. Next, the ripe peaches are the star of the show; their natural sweetness shines through, so I recommend choosing peaches that yield slightly to pressure, indicating they’re perfectly ripe. If peaches aren’t in season, feel free to use nectarines or even frozen peaches—just thaw them before use. Finally, honey adds a lovely floral sweetness that ties everything together. If you prefer, maple syrup can serve as a delicious substitute.

Step-by-Step Instructions

  1. Start by preparing the peaches. Wash them thoroughly, then slice and dice them into bite-sized pieces. In a medium bowl, toss the diced peaches with 1 tablespoon of fresh lemon juice to prevent browning. Set aside for about 5 minutes while the lemon juice works its magic.
  2. In a separate bowl, combine the Greek yogurt, 2 tablespoons of honey, and 1 teaspoon of vanilla extract if using. Stir the mixture until smooth and thoroughly blended. This should take about a minute. Avoid overmixing to maintain the creaminess of the yogurt.
  3. Now it’s time to layer your parfait. Grab a clear glass or bowl to showcase your beautiful creation. Start with a generous spoonful of the yogurt mixture at the bottom—about 1/4 cup will do. Use a spoon to spread it evenly.
  4. Add a layer of the diced peaches over the yogurt, ensuring they cover the yogurt completely. You might want to use about half of what you have prepared—roughly 1 cup. This layer should be visually appealing, so arrange the peaches neatly.
  5. Sprinkle 1/4 cup of granola over the peaches. This adds a delightful crunch. Make sure to distribute it evenly to ensure every bite has that satisfying texture. Avoid packing it down too tightly, as you want it to maintain its crunch.
  6. Repeat the layers: spoon in another 1/4 cup of yogurt, followed by another cup of peaches, and another sprinkle of granola. You should have at least two layers, but feel free to add more depending on your glass size.
  7. Finish off your parfait with a drizzle of honey on top for added sweetness and a touch of elegance. If you’re using sliced almonds or shredded coconut, sprinkle them on top now. It adds a lovely visual contrast and extra flavor.
  8. Serve immediately or refrigerate for up to 30 minutes before serving to allow the flavors to meld together. However, I recommend enjoying it fresh to maintain the granola’s crunch.

Pro Tips for the Best Peach Yogurt Parfait With Honey And Granola

  • Make sure to choose ripe peaches for the best flavor and texture. A common mistake is using unripe fruit, which can lead to a less enjoyable parfait. Look for peaches that are fragrant and slightly soft to the touch.
  • Use a clear glass to assemble your parfait; this not only makes for a beautiful presentation but also allows you to see the colorful layers, which adds to the enjoyment of eating it.
  • For an even creamier texture, consider whipping the Greek yogurt with a hand mixer for a couple of minutes before layering. This small adjustment makes a huge difference in mouthfeel.
  • Be mindful of the granola-to-yogurt ratio. Too much granola can overwhelm the parfait, while too little can make it feel too creamy. Aim for about 1/4 cup of granola per layer for the perfect balance.
  • If you’re making this for a gathering, consider preparing the yogurt and peaches ahead of time and layering them just before serving. This ensures the granola stays crunchy!

Variations & Serving Ideas

There are so many ways to get creative with your Peach Yogurt Parfait! For a tropical twist, swap out the peaches for mangoes or pineapples and top with coconut flakes. If you prefer a berry flavor, mix in some blueberries or strawberries with the peaches for added color and taste. For a nutty version, incorporate chopped walnuts or pecans instead of almonds.

As for serving ideas, this parfait pairs beautifully with a side of scrambled eggs for a hearty breakfast or fresh fruit salad for a light lunch. You might also enjoy it alongside whole grain toast with almond butter for an energizing snack. The contrast of flavors and textures will elevate your meal experience!

Storage, Make-Ahead & Reheating

The Peach Yogurt Parfait is best enjoyed fresh, but you can prepare some components ahead of time. Store the layered parfait in an airtight container in the refrigerator for up to 24 hours. However, be cautious; the granola may lose its crunch if stored too long. You can freeze the yogurt and peach mixture for up to 2 months; just remember to thaw it in the refrigerator overnight before serving.

If you plan to enjoy this dish the next day, it can taste even better as the flavors meld together. Just remember to add the granola right before serving to keep its delightful crunch!

Frequently Asked Questions

Can I make Peach Yogurt Parfait With Honey And Granola ahead of time?

Yes — in fact, it tastes even better the next day as the flavors meld. However, I recommend waiting to add the granola until just before serving to maintain its crunch.

What can I substitute for Greek yogurt?

If you prefer a lighter option, you can substitute Greek yogurt with regular yogurt or a dairy-free alternative like coconut yogurt. Just remember that this may alter the creaminess and flavor profile slightly.

Can I use frozen peaches for this parfait?

Absolutely! Just make sure to thaw the frozen peaches before using them. They will still add great flavor, though the texture may be slightly softer than fresh peaches.

How do I make the parfait vegan?

To make a vegan version, substitute the Greek yogurt with a plant-based yogurt alternative, and replace honey with maple syrup or agave nectar. This keeps the parfait sweet while adhering to a vegan diet.

What other fruits can I use in this recipe?

You can mix and match fruits based on your preference. Try using strawberries, blueberries, raspberries, or even bananas. Just make sure to adjust the lemon juice as needed to prevent browning.

Sweet Peach Yogurt Parfait Delight

Final Thoughts

The Peach Yogurt Parfait with Honey and Granola is a delightful blend of creamy yogurt, sweet peaches, and crunchy granola that creates a satisfying and nourishing treat. Each layer bursts with flavor, making it a perfect choice for breakfast or a light dessert.

This is the kind of recipe I come back to again and again, especially when I want something refreshing and wholesome to start my day. The harmony of sweet and tart flavors, combined with the delightful crunch, never fails to lift my spirits!

I encourage you to give this parfait a try and indulge in its comforting goodness. Feel free to share your results or even add your own twist—perhaps a sprinkle of cinnamon or a handful of nuts. Enjoy creating your perfect parfait!

Print
clock clock iconcutlery cutlery iconflag flag iconfolder folder iconinstagram instagram iconpinterest pinterest iconfacebook facebook iconprint print iconsquares squares iconheart heart iconheart solid heart solid icon

Peach Yogurt Parfait


  • Author: Lily author
  • Total Time: 15 minutes
  • Yield: 4 servings 1x
Pin Recipe
Print Recipe

Description

This Peach Yogurt Parfait combines creamy Greek yogurt, juicy peaches, and crunchy granola for a delightful treat. It’s a perfect breakfast or snack that captures the essence of summer in every bite.


Ingredients

Scale
  • For the Parfait:
  • 2 cups plain Greek yogurt (or vanilla yogurt for a sweeter option)
  • 2 large ripe peaches, diced (about 2 cups)
  • 1 tablespoon fresh lemon juice (to prevent browning of peaches)
  • 2 tablespoons honey (plus more for drizzling)
  • 1 teaspoon vanilla extract (optional for extra flavor)
  • For the Granola:
  • 1 cup granola (store-bought or homemade; see notes for a simple granola recipe)
  • 1/4 cup sliced almonds (optional for added crunch)
  • 1/4 cup shredded coconut (optional for added flavor)

Instructions

  1. Start by preparing the peaches. Wash them thoroughly, then slice and dice them into bite-sized pieces. In a medium bowl, toss the diced peaches with 1 tablespoon of fresh lemon juice to prevent browning. Set aside for about 5 minutes while the lemon juice works its magic.
  2. In a separate bowl, combine the Greek yogurt, 2 tablespoons of honey, and 1 teaspoon of vanilla extract if using. Stir the mixture until smooth and thoroughly blended. This should take about a minute. Avoid overmixing to maintain the creaminess of the yogurt.
  3. Now it’s time to layer your parfait. Grab a clear glass or bowl to showcase your beautiful creation. Start with a generous spoonful of the yogurt mixture at the bottom—about 1/4 cup will do. Use a spoon to spread it evenly.
  4. Add a layer of the diced peaches over the yogurt, ensuring they cover the yogurt completely. You might want to use about half of what you have prepared—roughly 1 cup. This layer should be visually appealing, so arrange the peaches neatly.
  5. Sprinkle 1/4 cup of granola over the peaches. This adds a delightful crunch. Make sure to distribute it evenly to ensure every bite has that satisfying texture. Avoid packing it down too tightly, as you want it to maintain its crunch.
  6. Repeat the layers: spoon in another 1/4 cup of yogurt, followed by another cup of peaches, and another sprinkle of granola. You should have at least two layers, but feel free to add more depending on your glass size.
  7. Finish off your parfait with a drizzle of honey on top for added sweetness and a touch of elegance. If you’re using sliced almonds or shredded coconut, sprinkle them on top now. It adds a lovely visual contrast and extra flavor.
  8. Serve immediately or refrigerate for up to 30 minutes before serving to allow the flavors to meld together. However, I recommend enjoying it fresh to maintain the granola’s crunch.
  • Prep Time: 15 mins
  • Cook Time: 0 mins
  • Category: Breakfast
  • Method: No-cook
  • Cuisine: American

Nutrition

  • Serving Size: 1 parfait
  • Calories: 250
  • Sugar: 20 g
  • Sodium: 50 mg
  • Fat: 5 g
  • Saturated Fat: 2 g
  • Unsaturated Fat: 3 g
  • Trans Fat: 0 g
  • Carbohydrates: 40 g
  • Fiber: 3 g
  • Protein: 10 g
  • Cholesterol: 10 mg

Keywords: Choose ripe peaches for the best flavor and texture. Use a clear glass for a beautiful presentation. For creaminess, consider whipping the yogurt before layering. Be mindful of the granola-to-yogurt ratio. Prepare yogurt and peaches ahead of time for gatherings, layering just before serving.

Did you make this recipe?

Share a photo and tag us — we can't wait to see what you've made!

Sun-Kissed Frozen Orange Cream Slush

As a child, summer days felt like they lasted forever. I remember the sticky heat wrapping around me as I played outside, my laughter mingling with the sounds of the neighborhood. But nothing could cool me down quite like the moment I’d spot my grandmother, laboring over her blender, whipping up her famous Frozen Orange Creamsicle Slush. That vibrant orange treat, with its frosty texture and sweet citrus aroma, was like a burst of sunshine in a cup. Just one sip, and I could feel the coolness wash over me, sparking pure joy.

This Frozen Orange Creamsicle Slush has a way of making you feel like a kid again. Its creamy, dreamy consistency is a delightful balance of bright orange and soft vanilla, inviting you to dive right in. The refreshing tang of orange dances on your tongue, while the smooth creaminess envelops you in a comforting embrace. It’s a nostalgic treat that’s perfect for hot summer afternoons or anytime you need a little pick-me-up.

What makes my version of this slush stand out is the addition of a hint of vanilla bean, which elevates the flavor and adds an extra layer of richness. Plus, it’s super easy to whip up with just a few simple ingredients that you probably already have on hand! So, if you’re ready to relive those sun-soaked memories, let me show you exactly how to make it.

Sun-Kissed Frozen Orange Cream Slush

Why You’ll Love This Recipe

  • Each slush is a perfect blend of creamy vanilla and zesty orange, creating a nostalgic flavor reminiscent of summer days.
  • This refreshing treat is ready in under 15 minutes, making it an ideal quick dessert for unexpected guests or hot afternoons.
  • With just 8 simple ingredients, it’s budget-friendly, ensuring you don’t have to break the bank to enjoy a delicious slush.
  • The slush has a perfectly smooth texture, thanks to the combination of ice and ice cream, providing a delightful contrast to the bright citrus flavors.
  • It’s highly customizable; you can easily adjust the sweetness and add fresh herbs for a unique twist that suits your taste.

Ingredients

  • 2 cups orange juice (freshly squeezed or store-bought)
  • 1 cup vanilla ice cream
  • 1 cup crushed ice
  • 1/2 cup milk (whole or 2%)
  • 1/4 cup granulated sugar (adjust based on sweetness preference)
  • 1 teaspoon vanilla extract
  • Zest of 1 orange (for added flavor)
  • Fresh orange slices and mint leaves (for garnish)

The star of this Frozen Orange Creamsicle Slush is the orange juice, which provides the vibrant, citrusy base. Freshly squeezed juice will yield the brightest flavor, but store-bought options can be just as convenient. If you’re opting for store-bought, choose 100% pure juice with no added sugars for the best results. Another essential ingredient is the vanilla ice cream; it adds creaminess and sweetness. You can substitute it with dairy-free ice cream if you’re looking for a vegan option. Whole or 2% milk complements the ice cream, creating a smooth blend. If you want a lower-calorie version, almond or oat milk can be good alternatives.

Lastly, the granulated sugar can be adjusted based on your sweetness preference. If you prefer a more natural sweetener, consider using honey or agave syrup. The orange zest enhances the flavor profile, providing an aromatic pop that brings the whole slush together. Don’t skip it! It adds an extra layer of brightness that makes this slush truly special.

Step-by-Step Instructions

  1. Start by preparing your ingredients. Gather 2 cups of orange juice, 1 cup of vanilla ice cream, and 1 cup of crushed ice. Make sure the ice is finely crushed, as larger chunks can make blending difficult.
  2. In a blender, combine the orange juice, vanilla ice cream, crushed ice, and 1/2 cup of milk. Add 1/4 cup of granulated sugar and 1 teaspoon of vanilla extract. If you like a sweeter slush, consider adding a bit more sugar at this stage.
  3. Add the zest of 1 orange to the blender. This step is crucial for enhancing the citrus flavor of your slush. Make sure not to include the bitter white pith—only the flavorful zest.
  4. Blend the mixture on medium-high speed for about 30-45 seconds. Stop once the ingredients are fully combined and the slush has a smooth, even consistency. If you notice large chunks of ice, blend for an additional 10-15 seconds. Avoid over-blending, as this can make the slush too liquidy.
  5. Once blended, taste the slush. If it needs more sweetness, add a little more sugar and blend for a few more seconds. If it’s too thick, you can add a splash of milk to reach your desired consistency.
  6. Pour the slush into glasses. This recipe typically serves 4, but you can easily double it for larger gatherings. Use a spoon to help guide the slush into the glasses if needed.
  7. Garnish each serving with fresh orange slices and mint leaves. The mint not only adds a pop of color but also a refreshing aroma that complements the citrus flavors beautifully.
  8. Serve immediately and enjoy! If you’ve made extra, you can refrigerate it for a short time, but it’s best enjoyed fresh.

Pro Tips for the Best Frozen Orange Creamsicle Slush

  • Don’t skip the orange zest! It’s a game-changer for flavor. Always zest before juicing to make it easier.
  • Use a high-powered blender for the best texture. A standard blender may struggle with ice, leading to uneven consistency. If you have a food processor, that can work too, but ensure the ice is finely crushed.
  • Adjust the ice-to-liquid ratio carefully. If your slush is too thick, it won’t blend well. Start with less ice and add more until you reach your preferred texture.
  • Be cautious with the sugar! Always start with the lower amount, as you can easily add more, but it’s hard to fix an overly sweet slush.
  • For a fun twist, consider adding a splash of coconut milk or a handful of fresh fruit like strawberries or pineapple. This not only enhances the flavor but also adds a beautiful color contrast.

Variations & Serving Ideas

There are countless ways to put a spin on your Frozen Orange Creamsicle Slush. Consider making a tropical version by adding in some pineapple juice or coconut milk for a delightful tropical twist. If you’re feeling adventurous, try incorporating a handful of frozen mango or peach slices for added sweetness. For a lighter version, swap out the vanilla ice cream for Greek yogurt for a creamy yet tangy alternative.

As for serving ideas, this refreshing slush pairs wonderfully with light summer dishes like grilled chicken skewers, fish tacos, or a simple salad topped with citrus vinaigrette. The bright, zesty flavors of the slush complement these dishes perfectly, making them an ideal pairing for a sunny day.

Storage, Make-Ahead & Reheating

This Frozen Orange Creamsicle Slush is best enjoyed fresh, but if you have leftovers, you can store them in an airtight container in the fridge for up to 2 days. Just keep in mind that the slush may lose some of its texture over time as the ice melts. It doesn’t freeze well, as the ice will turn into a solid block. If you must freeze it, blend again after thawing to restore the slushy consistency. This treat is best the day you make it, as the flavors meld together beautifully overnight, enhancing its deliciousness.

Frequently Asked Questions

Can I make Frozen Orange Creamsicle Slush ahead of time?

Yes — in fact, it tastes even better the next day as the flavors meld. However, it’s best to enjoy it fresh, as the texture can change if stored for too long. If you need to prepare it ahead, keep it in the fridge and re-blend before serving.

What kind of orange juice should I use?

For the best flavor, use freshly squeezed orange juice. However, if you’re short on time, opt for 100% pure store-bought juice without added sugars. This will ensure that your slush remains flavorful and refreshing.

Can I substitute the vanilla ice cream?

Absolutely! If you’re looking for a dairy-free option, coconut milk ice cream or a non-dairy vanilla ice cream can work wonderfully. They will still provide the creamy texture and sweetness you desire.

How can I adjust the sweetness of my slush?

You can easily adjust the sweetness by modifying the amount of sugar added. Start with 1/4 cup and taste the mixture before blending. If you prefer it sweeter, add more sugar gradually until it reaches your desired level.

What should I do if my slush is too thick?

If your slush is too thick, simply add a splash of milk or orange juice and blend again. This will help achieve a more drinkable consistency while maintaining the slushy texture. Adjust gradually to reach your preferred thickness.

Sun-Kissed Frozen Orange Cream Slush

Final Thoughts

The Frozen Orange Creamsicle Slush is a delightful blend of refreshing citrus and creamy goodness, making it a perfect treat for warm days or any time you crave a taste of nostalgia. The way the bright orange flavor dances with the creamy texture truly elevates this slush, transforming it into a satisfying escape from the everyday.

This is the kind of recipe I come back to again and again, especially when I’m looking to cool down or impress guests at a summer gathering. It’s simple to make and always brings smiles all around! I encourage you to try this recipe for yourself—don’t hesitate to share your results or even put your own spin on it. Happy slushing!

Print
clock clock iconcutlery cutlery iconflag flag iconfolder folder iconinstagram instagram iconpinterest pinterest iconfacebook facebook iconprint print iconsquares squares iconheart heart iconheart solid heart solid icon

Frozen Orange Creamsicle Slush


  • Author: Lily author
  • Total Time: 15 minutes
  • Yield: 4 servings 1x
Pin Recipe
Print Recipe

Description

This Frozen Orange Creamsicle Slush is a refreshing treat that combines creamy vanilla and zesty orange flavors. Perfect for hot summer days, it brings back nostalgic memories with every sip.


Ingredients

Scale
  • 2 cups orange juice (freshly squeezed or store-bought)
  • 1 cup vanilla ice cream
  • 1 cup crushed ice
  • 1/2 cup milk (whole or 2%)
  • 1/4 cup granulated sugar (adjust based on sweetness preference)
  • 1 teaspoon vanilla extract
  • Zest of 1 orange (for added flavor)
  • Fresh orange slices and mint leaves (for garnish)

Instructions

  1. Start by preparing your ingredients. Gather 2 cups of orange juice, 1 cup of vanilla ice cream, and 1 cup of crushed ice. Make sure the ice is finely crushed, as larger chunks can make blending difficult.
  2. In a blender, combine the orange juice, vanilla ice cream, crushed ice, and 1/2 cup of milk. Add 1/4 cup of granulated sugar and 1 teaspoon of vanilla extract. If you like a sweeter slush, consider adding a bit more sugar at this stage.
  3. Add the zest of 1 orange to the blender. This step is crucial for enhancing the citrus flavor of your slush. Make sure not to include the bitter white pith—only the flavorful zest.
  4. Blend the mixture on medium-high speed for about 30-45 seconds. Stop once the ingredients are fully combined and the slush has a smooth, even consistency. If you notice large chunks of ice, blend for an additional 10-15 seconds. Avoid over-blending, as this can make the slush too liquidy.
  5. Once blended, taste the slush. If it needs more sweetness, add a little more sugar and blend for a few more seconds. If it’s too thick, you can add a splash of milk to reach your desired consistency.
  6. Pour the slush into glasses. This recipe typically serves 4, but you can easily double it for larger gatherings. Use a spoon to help guide the slush into the glasses if needed.
  7. Garnish each serving with fresh orange slices and mint leaves. The mint not only adds a pop of color but also a refreshing aroma that complements the citrus flavors beautifully.
  8. Serve immediately and enjoy! If you’ve made extra, you can refrigerate it for a short time, but it's best enjoyed fresh.
  • Prep Time: 15 min
  • Cook Time: 0 min
  • Category: Dessert
  • Method: Blending
  • Cuisine: American

Nutrition

  • Serving Size: 1 serving
  • Calories: 200
  • Sugar: 30 g
  • Sodium: 50 mg
  • Fat: 5 g
  • Saturated Fat: 3 g
  • Unsaturated Fat: 2 g
  • Trans Fat: 0 g
  • Carbohydrates: 40 g
  • Fiber: 1 g
  • Protein: 2 g
  • Cholesterol: 20 mg

Keywords: Don't skip the orange zest! It's a game-changer for flavor. Always zest before juicing to make it easier.

Did you make this recipe?

Share a photo and tag us — we can't wait to see what you've made!

Zesty Lemon Poppy Seed Delight

One rainy afternoon, I found myself in my grandmother’s cozy kitchen, the kind that always smelled like warmth and love. She was whipping up her famous Lemon Poppy Seed Loaf, a recipe that had been passed down through generations. As the batter came together, the zesty aroma of fresh lemons filled the air, mingling perfectly with the nutty fragrance of poppy seeds. I can still picture her, apron-clad, as she expertly drizzled a vibrant citrus icing over the loaf, creating a glossy, sun-kissed finish that beckoned us to dive in. It was a moment that sparked my own passion for baking, and this recipe has become a cherished staple in my home ever since.

When you take a bite of this Lemon Poppy Seed Loaf, it’s like a burst of sunshine on your palate. The loaf is beautifully golden, with a tender crumb that melts in your mouth. Each slice is speckled with tiny poppy seeds, adding a delightful crunch that contrasts beautifully with the tangy sweetness of the lemon. And that citrus icing? It’s the finishing touch that elevates this loaf from ordinary to extraordinary, with its bright, zesty flavor dancing on your taste buds.

This recipe stands out because it embraces simplicity while delivering on flavor. I’ve added a hint of vanilla to the batter, enhancing the overall taste and making it even more indulgent. Trust me, once you make this Lemon Poppy Seed Loaf With Citrus Icing, it’ll become a go-to in your baking repertoire.

So, let me show you exactly how to make it!

Zesty Lemon Poppy Seed Delight

Why You’ll Love This Recipe

  • Moist and tender crumb that melts in your mouth, thanks to the perfect balance of butter and buttermilk.
  • Bright, zesty lemon flavor paired with crunchy poppy seeds, creating a delightful texture and taste experience.
  • Easy to whip up in just about an hour, perfect for last-minute gatherings or a cozy afternoon treat.
  • Budget-friendly with everyday ingredients, making it an accessible option for all home bakers.
  • The citrus icing adds a sweet tang that elevates the loaf, turning a simple recipe into a showstopper!

Ingredients

  • 1 ½ cups (190g) all-purpose flour
  • 1 teaspoon baking powder
  • ½ teaspoon baking soda
  • ½ teaspoon salt
  • 3 tablespoons poppy seeds
  • ½ cup (115g) unsalted butter, softened to room temperature
  • 1 cup (200g) granulated sugar
  • 2 large eggs
  • 1 teaspoon vanilla extract
  • 1 teaspoon lemon zest (from about 1 medium lemon)
  • ½ cup (120ml) buttermilk
  • 2 tablespoons fresh lemon juice

For the Citrus Icing:

  • 1 cup (120g) powdered sugar
  • 2 tablespoons fresh lemon juice
  • 1 tablespoon orange juice
  • 1 teaspoon lemon zest (for garnish, optional)

Let’s dive into the key ingredients that make this Lemon Poppy Seed Loaf so special. The all-purpose flour provides the structure and base for the loaf, while the baking powder and baking soda ensure it rises perfectly, giving the loaf a light texture. For a gluten-free variation, you could substitute the flour with a gluten-free all-purpose blend. Poppy seeds not only add a delightful crunch but also contribute to the unique flavor profile that pairs well with the citrus notes.

Unsalted butter is crucial for achieving the buttery richness that makes this loaf so moist. If you’re looking for a dairy-free option, coconut oil or a vegan butter can be used instead. The buttermilk is another essential component, providing acidity that activates the baking soda for a fluffy texture. If you don’t have buttermilk on hand, you can easily make a substitute by mixing ½ cup of milk with 1 tablespoon of vinegar or lemon juice and letting it sit for about 5 minutes.

Step-by-Step Instructions

  1. Preheat your oven to 350°F (175°C). Grease a 9×5-inch loaf pan or line it with parchment paper for easy removal later.
  2. In a medium mixing bowl, whisk together 1 ½ cups of all-purpose flour, 1 teaspoon of baking powder, ½ teaspoon of baking soda, ½ teaspoon of salt, and 3 tablespoons of poppy seeds. This helps to evenly distribute the baking agents and ensures a uniform rise.
  3. In a large mixing bowl, cream together ½ cup of softened unsalted butter and 1 cup of granulated sugar using an electric mixer on medium speed for about 3-4 minutes, until the mixture is light and fluffy. Make sure to scrape down the sides of the bowl occasionally.
  4. Add 2 large eggs, 1 teaspoon of vanilla extract, and 1 teaspoon of lemon zest to the creamed butter and sugar, mixing until fully combined. You want a smooth consistency, so ensure there are no lumps of butter.
  5. In a small bowl, combine ½ cup of buttermilk and 2 tablespoons of fresh lemon juice. Alternately add the dry ingredients and buttermilk mixture to the butter mixture, starting and ending with the dry ingredients. Mix just until combined; do not overmix, as this can lead to a dense loaf.
  6. Pour the batter into the prepared loaf pan. Smooth the top with a spatula, ensuring it’s even. Bake in the preheated oven for 50-60 minutes, or until a toothpick inserted in the center comes out clean. The edges should be lightly golden brown, and the center should feel just set.
  7. Once baked, remove the loaf from the oven and allow it to cool in the pan for about 10 minutes. Then, transfer it to a wire rack to cool completely. Resist the urge to slice too soon, as it will be crumbly if it’s still warm.
  8. While the loaf is cooling, prepare the citrus icing. In a medium bowl, whisk together 1 cup of powdered sugar, 2 tablespoons of fresh lemon juice, and 1 tablespoon of orange juice until smooth. If the icing is too thick, you can add a little more juice to reach your desired consistency.
  9. Once the loaf is completely cool, drizzle the citrus icing over the top. If you like, sprinkle with an additional teaspoon of lemon zest for an extra pop of flavor and color.

Pro Tips for the Best Lemon Poppy Seed Loaf With Citrus Icing

  • Be careful not to overmix your batter; this is a common mistake that can lead to a dense loaf. Mix just until the dry ingredients are incorporated for a light and fluffy texture.
  • Use room temperature ingredients, especially the butter and eggs. This helps to create a smoother batter and ensures even baking. Take your eggs out of the fridge about 30 minutes before you start.
  • For a more pronounced lemon flavor, consider adding a little lemon extract in addition to the zest and juice. Just a half teaspoon can elevate the citrus notes significantly.
  • When measuring your flour, spoon it into the measuring cup and level it off with a knife instead of scooping directly from the bag. This prevents packing and ensures you don’t end up with a dry loaf.
  • Invest in a good quality loaf pan; it makes a difference in heat distribution, which ensures even baking. If your pan is dark-coated, reduce the oven temperature by 25°F to prevent over-browning.

Variations & Serving Ideas

For a delightful twist, consider adding blueberries or raspberries to the batter for a fruity burst of flavor. You can also experiment with different citrus fruits—try lime or grapefruit zest and juice for a refreshing change. For a healthier option, substitute half of the all-purpose flour with whole wheat flour for added fiber without compromising too much on texture.

This Lemon Poppy Seed Loaf pairs beautifully with a light salad, such as a mixed greens salad with a vinaigrette, or a cup of tea for a cozy afternoon treat. It also complements a creamy cheese platter, as the acidity of the loaf balances rich cheeses perfectly. Lastly, a scoop of vanilla ice cream on the side creates a delightful contrast of temperatures and flavors!

Storage, Make-Ahead & Reheating

This Lemon Poppy Seed Loaf can be stored at room temperature for up to 3 days if wrapped tightly in plastic wrap. If you want to keep it longer, it freezes well for up to 3 months. To freeze, wrap the loaf tightly in plastic wrap and then in aluminum foil to prevent freezer burn.

When you’re ready to enjoy it again, simply thaw it in the fridge overnight. Reheat individual slices in the microwave for 15-20 seconds or in a toaster oven until warmed through. Interestingly, many people find that this loaf tastes even better the next day, as the flavors have time to meld!

Frequently Asked Questions

Can I make Lemon Poppy Seed Loaf With Citrus Icing ahead of time?

Yes — in fact, it tastes even better the next day! You can make the loaf a day in advance, allowing the flavors to develop. Just be sure to store it in an airtight container to maintain its moisture.

Can I substitute the poppy seeds?

Absolutely! If you don’t have poppy seeds on hand or prefer an alternative, you can use sesame seeds for a similar crunch or omit them entirely for a smooth loaf.

What can I use instead of buttermilk?

If you don’t have buttermilk, you can easily create a substitute by mixing ½ cup of milk (dairy or plant-based) with 1 tablespoon of vinegar or lemon juice. Let it sit for 5 minutes before using in the recipe.

How can I make this recipe gluten-free?

To make a gluten-free version of this Lemon Poppy Seed Loaf, substitute the all-purpose flour with a gluten-free all-purpose flour blend. Just ensure that the blend contains a binding agent like xanthan gum for the best results.

What is the best way to store leftover loaf?

Leftover Lemon Poppy Seed Loaf should be stored in an airtight container at room temperature for up to 3 days. For longer storage, wrap it tightly and freeze for up to 3 months. Thaw it before serving for the best texture.

Zesty Lemon Poppy Seed Delight

Final Thoughts

The Lemon Poppy Seed Loaf with Citrus Icing is truly a delightful treat that brings a burst of brightness to any occasion. The zesty lemon flavor combined with the subtle crunch of poppy seeds creates a satisfying balance, while the citrus icing adds a touch of sweetness that perfectly complements the loaf’s tanginess.

This is the kind of recipe I come back to again and again, especially when I want to brighten up a gloomy day or celebrate a small victory. The aroma that fills the kitchen as it bakes is absolutely heavenly! I encourage you to give this recipe a try; you might just find it becoming a beloved staple in your home. Don’t forget to share your results or even add your own unique twist—I can’t wait to see what you create!

Print
clock clock iconcutlery cutlery iconflag flag iconfolder folder iconinstagram instagram iconpinterest pinterest iconfacebook facebook iconprint print iconsquares squares iconheart heart iconheart solid heart solid icon

Lemon Poppy Seed Loaf


  • Author: Lily author
  • Total Time: 35 minute
  • Yield: 1 loaf 1x
Pin Recipe
Print Recipe

Description

This Lemon Poppy Seed Loaf is a delightful treat that combines zesty lemon flavor with crunchy poppy seeds. Topped with a citrus icing, it’s perfect for any occasion.


Ingredients

Scale
  • 1 ½ cups (190g) all-purpose flour
  • 1 teaspoon baking powder
  • ½ teaspoon baking soda
  • ½ teaspoon salt
  • 3 tablespoons poppy seeds
  • ½ cup (115g) unsalted butter, softened to room temperature
  • 1 cup (200g) granulated sugar
  • 2 large eggs
  • 1 teaspoon vanilla extract
  • 1 teaspoon lemon zest (from about 1 medium lemon)
  • ½ cup (120ml) buttermilk
  • 2 tablespoons fresh lemon juice
  • 1 cup (120g) powdered sugar
  • 2 tablespoons fresh lemon juice
  • 1 tablespoon orange juice
  • 1 teaspoon lemon zest (for garnish, optional)

Instructions

  1. Preheat your oven to 350°F (175°C). Grease a 9×5-inch loaf pan or line it with parchment paper for easy removal later.
  2. In a medium mixing bowl, whisk together 1 ½ cups of all-purpose flour, 1 teaspoon of baking powder, ½ teaspoon of baking soda, ½ teaspoon of salt, and 3 tablespoons of poppy seeds. This helps to evenly distribute the baking agents and ensures a uniform rise.
  3. In a large mixing bowl, cream together ½ cup of softened unsalted butter and 1 cup of granulated sugar using an electric mixer on medium speed for about 3-4 minutes, until the mixture is light and fluffy. Make sure to scrape down the sides of the bowl occasionally.
  4. Add 2 large eggs, 1 teaspoon of vanilla extract, and 1 teaspoon of lemon zest to the creamed butter and sugar, mixing until fully combined. You want a smooth consistency, so ensure there are no lumps of butter.
  5. In a small bowl, combine ½ cup of buttermilk and 2 tablespoons of fresh lemon juice. Alternately add the dry ingredients and buttermilk mixture to the butter mixture, starting and ending with the dry ingredients. Mix just until combined; do not overmix, as this can lead to a dense loaf.
  6. Pour the batter into the prepared loaf pan. Smooth the top with a spatula, ensuring it’s even. Bake in the preheated oven for 50-60 minutes, or until a toothpick inserted in the center comes out clean. The edges should be lightly golden brown, and the center should feel just set.
  7. Once baked, remove the loaf from the oven and allow it to cool in the pan for about 10 minutes. Then, transfer it to a wire rack to cool completely. Resist the urge to slice too soon, as it will be crumbly if it’s still warm.
  8. While the loaf is cooling, prepare the citrus icing. In a medium bowl, whisk together 1 cup of powdered sugar, 2 tablespoons of fresh lemon juice, and 1 tablespoon of orange juice until smooth. If the icing is too thick, you can add a little more juice to reach your desired consistency.
  9. Once the loaf is completely cool, drizzle the citrus icing over the top. If you like, sprinkle with an additional teaspoon of lemon zest for an extra pop of flavor and color.
  • Prep Time: 15 mins
  • Cook Time: 50-60 mins
  • Category: Dessert
  • Method: Baking
  • Cuisine: American

Nutrition

  • Serving Size: 1 slice
  • Calories: 200
  • Sugar: 15 g
  • Sodium: 150 mg
  • Fat: 8 g
  • Saturated Fat: 5 g
  • Unsaturated Fat: 3 g
  • Trans Fat: 0 g
  • Carbohydrates: 30 g
  • Fiber: 1 g
  • Protein: 3 g
  • Cholesterol: 40 mg

Keywords: Be careful not to overmix your batter; this is a common mistake that can lead to a dense loaf. Use room temperature ingredients for a smoother batter and even baking.

Did you make this recipe?

Share a photo and tag us — we can't wait to see what you've made!

  • Privacy Policy
  • Terms Of Service
  • Contact
  • About
  • GDPR

Copyright © 2025 Homesmad