• Skip to primary navigation
  • Skip to main content
  • Skip to primary sidebar
Homesmad

Homesmad

  • Home
  • Breakfast & Brunch
  • Appetizers & Snacks
  • Dinner
  • Dessert
  • About
  • Privacy Policy
  • Contact
Homesmad
  • Home
  • Breakfast & Brunch
  • Appetizers & Snacks
  • Dinner
  • Dessert
  • About
  • Privacy Policy
  • Contact

Quick Sheet Pan Chicken Pitas & Herby Ranch: Dinner Done!

October 18, 2025 by Lily author

Sheet Pan Chicken Pitas With Herby Ranch offers a culinary experience that perfectly blends convenience with an explosion of fresh, vibrant flavors. As someone who appreciates both efficiency and deliciousness in the kitchen, I am absolutely thrilled to share this recipe with you. Imagine a weeknight dinner that requires minimal effort yet delivers maximum satisfaction – that’s precisely what awaits you. The beauty of the sheet pan method lies in its simplicity; everything cooks together harmoniously, ensuring tender, perfectly seasoned chicken without the fuss of multiple pots and pans. While the humble pita bread boasts a rich history spanning millennia as a staple in Mediterranean and Middle Eastern cuisines, providing a wonderful, soft canvas, our modern twist transforms it into an exciting, complete meal.

Why This Dish Will Become Your New Favorite

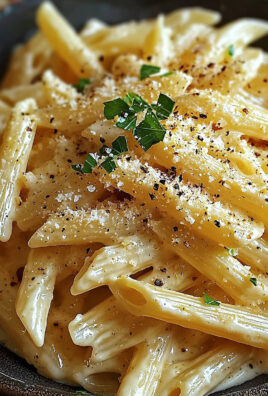
What truly sets these Sheet Pan Chicken Pitas With Herby Ranch apart is the delightful combination of textures and tastes. You’ll discover succulent pieces of chicken, beautifully roasted alongside vibrant vegetables (if you choose to add them), all nestled within warm, pillowy pita bread. And let’s not forget the star of the show: a homemade, vibrant herby ranch dressing that provides a burst of refreshing, creamy tang, tying all the components together magnificently. It’s a dish I genuinely believe you and your loved ones will adore, making busy evenings both flavorful and stress-free.

Quick Sheet Pan Chicken Pitas & Herby Ranch: Dinner Done! this RECIPE

Ingredients:

  • For the Herby Ranch Dressing:

    • 1/2 cup good quality mayonnaise (I always opt for full-fat for the creamiest texture!)
    • 1/2 cup sour cream (or plain Greek yogurt if you prefer a slightly tangier, lighter version)
    • 1/4 cup buttermilk (this is key for that classic ranch tang and thinner consistency, don’t skip it if you can help it!)
    • 2 tablespoons fresh dill, finely chopped
    • 2 tablespoons fresh chives, finely chopped
    • 2 tablespoons fresh parsley, finely chopped
    • 1 small clove garlic, minced very finely (or 1/2 teaspoon garlic powder)
    • 1/2 teaspoon onion powder
    • 1/4 teaspoon salt (or to taste)
    • 1/8 teaspoon black pepper (or to taste)
    • 1 teaspoon fresh lemon juice (a secret ingredient for brightness!)
  • For the Sheet Pan Chicken and Veggies:

    • 1.5 pounds boneless, skinless chicken breasts or thighs, cut into 1-inch pieces (I love using a mix of both for varied texture!)
    • 2 tablespoons olive oil, plus more for drizzling
    • 1 teaspoon smoked paprika (for a lovely depth of flavor and color)
    • 1/2 teaspoon garlic powder
    • 1/2 teaspoon onion powder
    • 1/2 teaspoon dried oregano
    • 1/4 teaspoon salt (or to taste)
    • 1/8 teaspoon black pepper (or to taste)
    • Pinch of cayenne pepper (optional, for a subtle kick!)
    • 1 large bell pepper (any color you like, I often use red or yellow for sweetness), deseeded and cut into 1-inch strips
    • 1/2 red onion, cut into 1/2-inch wedges
    • 1 pint cherry tomatoes, halved (optional, but they add a fantastic juicy burst!)
  • For Serving:

    • 6-8 pita breads, warmed (whole wheat or white, your choice!)
    • Shredded lettuce (romaine or iceberg work beautifully)
    • Diced cucumber
    • Crumbled feta cheese (optional, but highly recommended for a salty bite)
    • Extra fresh dill or parsley for garnish

Preparing the Herby Ranch Dressing:

Let’s kick things off by whipping up our incredibly fresh and flavorful Herby Ranch Dressing. This is the heart of our Sheet Pan Chicken Pitas With Herby Ranch, and letting it chill while we prepare the rest of the meal allows the flavors to truly meld and deepen.

  1. Grab a medium-sized mixing bowl. Into this bowl, I like to add my mayonnaise, sour cream (or Greek yogurt), and buttermilk. Make sure you’re using full-fat versions of the mayo and sour cream if you want that truly rich, creamy ranch experience. The buttermilk is absolutely essential here; it provides that signature tang and helps thin the dressing to the perfect consistency. If you don’t have buttermilk on hand, you can make a quick substitute by adding 1 tablespoon of lemon juice or white vinegar to regular milk and letting it sit for 5-10 minutes until it slightly curdles, then measure out 1/4 cup.

  2. Next up are our glorious fresh herbs. This is where the “herby” in Herby Ranch really shines! I meticulously finely chop my fresh dill, chives, and parsley. The fresher the herbs, the more vibrant your dressing will be. I aim for about 2 tablespoons of each, but feel free to adjust based on your preference. If you’re a big dill fan, add a little extra! These fresh green beauties will infuse the dressing with incredible aromatics and a beautiful visual appeal.

  3. Now, let’s introduce some savory depth. I mince one small clove of garlic very, very finely, almost to a paste. If you’re not a fan of fresh garlic or want to keep it super mild, 1/2 teaspoon of garlic powder works wonderfully too. Along with that, add 1/2 teaspoon of onion powder. These powdered aromatics dissolve seamlessly into the dressing, providing a consistent flavor throughout.

  4. Seasoning is next: add 1/4 teaspoon of salt and 1/8 teaspoon of black pepper. Remember, you can always add more later, so start with a little and taste. Finally, for a touch of bright acidity that really lifts all the flavors, I squeeze in about 1 teaspoon of fresh lemon juice. This small addition makes a surprisingly big difference!

  5. Using a whisk, gently combine all the ingredients in the bowl. Whisk until everything is thoroughly mixed and the dressing is smooth and lump-free. Give it a taste. This is your moment to adjust! Does it need more salt? A little more pepper? Perhaps another squeeze of lemon? Or maybe a touch more buttermilk if you prefer a thinner consistency? Once you’re happy with the flavor, cover the bowl with plastic wrap and pop it into the refrigerator. Letting it chill for at least 30 minutes, or even longer, truly allows all those incredible flavors to marry and develop. This step is a game-changer for homemade ranch.

Preparing the Sheet Pan Chicken and Veggies:

While our Herby Ranch is chilling and getting perfectly acquainted with itself, we’ll turn our attention to the star of the show: the succulent chicken and vibrant veggies that will roast beautifully on a single sheet pan. This is where the magic of “sheet pan” cooking truly shines – minimal cleanup and maximum flavor!

  1. Preheat your oven to 400°F (200°C). Line a large, sturdy rimmed baking sheet with parchment paper. Trust me on the parchment paper – it makes cleanup an absolute breeze, especially with sticky marinades or roasted veggies. Make sure your sheet pan is large enough so that the chicken and vegetables can be spread in a single layer without overcrowding. An overcrowded pan will steam your ingredients instead of roasting them, preventing that lovely caramelization we’re aiming for.

  2. Now for the chicken! I take my 1.5 pounds of boneless, skinless chicken breasts or thighs (or a delightful combination of both) and cut them into uniform 1-inch pieces. Uniformity is key here for even cooking. If some pieces are too small, they’ll dry out, and if some are too large, they won’t cook through at the same rate. Place the cut chicken into a large mixing bowl.

  3. Time to season our chicken! Drizzle 2 tablespoons of olive oil over the chicken pieces. Then, sprinkle generously with 1 teaspoon of smoked paprika, 1/2 teaspoon of garlic powder, 1/2 teaspoon of onion powder, 1/2 teaspoon of dried oregano, 1/4 teaspoon of salt, and 1/8 teaspoon of black pepper. If you like a little heat, a pinch of cayenne pepper is a fantastic addition here. Using your hands (I always find this is the best way!), toss everything together until every piece of chicken is thoroughly coated in the oil and spices. The aroma at this stage is already incredible!

  4. Next, let’s prepare our vegetables. Take your large bell pepper (I usually go for red or yellow for their sweetness and vibrant color) and deseed it, then cut it into 1-inch strips. For the red onion, cut half of it into 1/2-inch wedges. These sizes will allow them to roast perfectly alongside the chicken, becoming tender and slightly caramelized without turning to mush. If you’re using cherry tomatoes, set them aside for now; they’ll be added later.

  5. Add the prepared bell pepper strips and red onion wedges directly to the bowl with the seasoned chicken. Add an additional drizzle of olive oil over the vegetables, along with another tiny pinch of salt and pepper. Toss everything together again gently, ensuring the vegetables are also lightly coated in the oil and spices. This shared seasoning blend ensures every bite of your Sheet Pan Chicken Pitas With Herby Ranch is cohesive and delicious.

  6. Carefully transfer the chicken and vegetable mixture onto your prepared baking sheet. Spread everything out into a single layer. Again, ensure there’s enough space between the pieces. If your pan seems too crowded, it’s better to use two sheet pans to achieve optimal roasting results.

The Cooking Process: Roasting and Finishing Touches:

Now for the main event – getting that chicken and those veggies perfectly cooked, tender, and slightly charred. This is where the “sheet pan” part of our Sheet Pan Chicken Pitas With Herby Ranch truly comes to life!

  1. Slide the baking sheet into your preheated 400°F (200°C) oven. Roast for 15 minutes. At this point, the chicken will be starting to cook through, and the vegetables will be softening and developing some color.

  2. After 15 minutes, carefully remove the sheet pan from the oven. Using a spatula, give the chicken and vegetables a good stir, flipping them over to ensure even cooking and browning on all sides. This agitation helps expose different surfaces to the direct heat of the oven, promoting that lovely caramelization.

  3. If you’re using cherry tomatoes, now is the time to add them to the sheet pan. Scatter the halved tomatoes amongst the chicken and other vegetables. The tomatoes only need a short roasting time to become wonderfully burst-tender and juicy, so adding them too early might cause them to break down too much. They release their sweet, slightly acidic juices which are perfect for complementing the savory chicken.

  4. Return the baking sheet to the oven and continue to roast for another 8-12 minutes, or until the chicken is cooked through and reaches an internal temperature of 165°F (74°C). The vegetables should be tender-crisp and nicely caramelized around the edges. Keep a close eye on your chicken to prevent it from drying out! Every oven is a little different, so the exact timing might vary. Once cooked, remove the sheet pan from the oven. I like to let it rest for a few minutes on the counter, allowing the juices in the chicken to redistribute.

Preparing the Pitas and Assembling Your Sheet Pan Chicken Pitas:

With our beautifully roasted chicken and veggies ready, and our glorious Herby Ranch dressing chilled to perfection, it’s time to bring everything together into these incredible, handheld Sheet Pan Chicken Pitas With Herby Ranch. This is where your meal transforms from components into a truly satisfying and memorable dish.

  1. While the chicken is resting, warm your pita breads. I often do this right on the oven rack for a minute or two after I’ve removed the chicken, or you can do it in a dry skillet over medium heat for about 30 seconds per side until they’re soft and pliable. Some people even like to slightly toast them for a bit of extra texture. The goal is to make them warm and flexible so they don’t tear when you stuff them.

  2. Now, gather all your serving components: the warm pitas, the roasted chicken and vegetables, the shredded lettuce, diced cucumber, and your chilled Herby Ranch dressing. If you’re using feta cheese, have that ready too!

  3. To assemble, gently open each pita bread to create a pocket. If you’re using smaller pitas, you might just lay them flat and create an open-faced sandwich. I find that gently running a knife along the top edge of a warm pita often helps create a perfect pocket without tearing.

  4. First, I like to spread a generous layer of our delightful Herby Ranch dressing inside the pita pocket (or over the flat pita). This ensures every bite is infused with that creamy, tangy goodness. Don’t be shy here; the ranch is truly a star of this dish!

  5. Next, spoon in a hearty portion of the roasted chicken and vegetables. Make sure you get a good mix of chicken, colorful bell peppers, and those wonderfully tender red onions and burst tomatoes. The warm, savory filling against the cool, crisp toppings is a delightful contrast.

  6. Top the chicken and veggie mixture with a generous handful of shredded lettuce and some refreshing diced cucumber. If you’re a fan of a salty, briny kick, sprinkle some crumbled feta cheese on top at this stage. These fresh elements provide essential crunch and coolness that balance the richness of the chicken and dressing.

  7. Finish with another drizzle of that glorious Herby Ranch dressing, and if you have any extra fresh dill or parsley, a little sprinkle on top adds both visual appeal and an extra burst of freshness. Serve your Sheet Pan Chicken Pitas With Herby Ranch immediately and enjoy the incredible flavors and textures you’ve created with such ease!

Quick Sheet Pan Chicken Pitas & Herby Ranch: Dinner Done!

Conclusion:

And there you have it, my friends! We’ve journeyed through the creation of what I truly believe will become a staple in your culinary repertoire. This isn’t just another dinner recipe; it’s a testament to the power of simple, fresh ingredients, expertly combined to deliver an explosion of flavor with minimal fuss. I designed this dish with you in mind – the busy home cook who craves nutritious, satisfying meals without spending hours slaving over a hot stove. Imagine coming home after a long day, knowing that a truly delicious and wholesome meal is just a short prep time and a single sheet pan away. That, to me, is pure kitchen magic. The vibrant colors, the intoxicating aroma as it bakes, and the incredible, balanced taste of the tender chicken and crisp vegetables, all brought together by that unforgettable herby ranch dressing – it all culminates in an experience that goes far beyond just filling your stomach.

What truly elevates this meal to “must-try” status is its remarkable balance. The protein-packed chicken offers satiety, the crisp, roasted vegetables provide essential nutrients and a delightful texture contrast, and the fresh, bright Herby Ranch dressing ties everything together with a creamy, zesty finish. It’s the kind of dish that feels incredibly gourmet, yet comes together with astonishing ease. I’ve heard from so many people how transformative it is to discover a recipe that delivers restaurant-quality taste right from their own oven, and this one absolutely fits the bill. There’s something inherently satisfying about a meal that requires only one pan for cooking, significantly cutting down on cleanup time, which is, let’s be honest, half the battle on a weeknight. This recipe truly champions efficiency without compromising on taste or quality, making it a reliable choice for weeknight dinners, meal prepping for the week ahead, or even a casual gathering with friends where you want to impress without the stress.

Now, while I adore the classic presentation, one of the greatest joys of cooking is making a recipe your own, and this one offers a playground of possibilities. Don’t feel confined to pita bread if you’re looking for an alternative; this incredible chicken and veggie mixture is equally delicious served over a bed of fluffy quinoa or brown rice for a hearty bowl, or even tucked into large lettuce wraps for a lighter, gluten-free option. Consider adding other vegetables like cherry tomatoes for a burst of juiciness, zucchini for extra green goodness, or even a sprinkle of crumbled feta cheese over the top after roasting for a salty, tangy kick. If you’re feeling adventurous, swap out the chicken for shrimp for a seafood variation, or use sturdy halloumi cheese for a fantastic vegetarian twist. The beauty of the Herby Ranch is its versatility – it also makes a wonderful dip for raw vegetables or a vibrant dressing for a simple side salad. You could even play with different herbs in the ranch to truly customize it to your palate; dill, chives, or a hint of smoked paprika could all bring new dimensions. The core flavors of this Sheet Pan Chicken Pitas With Herby Ranch are so robust and complementary, they can handle a bit of creative interpretation.

So, what are you waiting for? I genuinely hope that after reading through this, you feel inspired and excited to roll up your sleeves and give this incredible recipe a try. It’s a dinner solution that promises to delight your taste buds, simplify your kitchen routine, and leave you feeling proud of the delicious meal you’ve created. Don’t just take my word for it; experience the ease and flavor for yourself. And please, please, please, when you do make it, come back and share your experience! I absolutely love hearing from you and seeing your culinary triumphs. Did you try a fun variation? Did your family rave about it? Did it become your new go-to weeknight savior? Your feedback and shared joy are what make this whole cooking journey so incredibly rewarding for me. So go on, preheat that oven, gather your ingredients, and prepare to fall in love with your new favorite weeknight meal. Happy cooking, everyone!


Sheet Pan Chicken with Herby Yogurt Dressing

Sheet Pan Chicken with Herby Yogurt Dressing

A convenient sheet pan recipe featuring succulent chicken pieces seasoned and roasted, served with a fresh, vibrant herby yogurt dressing. Designed for minimal effort, this dish is perfect for a quick weeknight meal. While the main ingredients focus on the chicken and dressing, it’s ideally served in warm pita bread with fresh toppings for a complete meal.

Prep Time
15 Minutes

Cook Time
25 Minutes

Total Time
40 Minutes

Servings
6-8 servings

Ingredients

  • 1 lb boneless, skinless chicken breasts, cut into 1-inch pieces
  • 2 tbsp brown sugar
  • 1½ tsp smoked paprika
  • ½ tsp garlic powder
  • ½ tsp onion powder
  • ½ tsp cayenne pepper
  • ½ tsp kosher salt
  • 1 tbsp olive oil
  • ½ lemon, sliced
  • ½ cup plain yogurt
  • ¼ cup fresh dill, finely chopped
  • ¼ cup fresh parsley, finely chopped
  • 2 tbsp fresh chives, minced
  • Juice from ½ lemon
  • 2 tbsp additional olive oil

Instructions

  1. Step 1
    In a medium bowl, combine ½ cup plain yogurt, ¼ cup finely chopped fresh dill, ¼ cup finely chopped fresh parsley, 2 tbsp minced fresh chives, and juice from ½ lemon. Whisk until smooth and well combined. Cover the bowl with plastic wrap and chill in the refrigerator for at least 30 minutes to allow the flavors to meld.
  2. Step 2
    Preheat your oven to 400°F (200°C). Line a large, sturdy rimmed baking sheet with parchment paper for easy cleanup. Ensure the sheet pan is large enough to spread ingredients in a single layer.
  3. Step 3
    Place the 1 lb boneless, skinless chicken breasts, cut into 1-inch pieces, into a large mixing bowl. Drizzle with 1 tbsp olive oil. Sprinkle with 2 tbsp brown sugar, 1½ tsp smoked paprika, ½ tsp garlic powder, ½ tsp onion powder, ½ tsp cayenne pepper, and ½ tsp kosher salt. Toss everything together until every piece of chicken is thoroughly coated in the oil and spices.
  4. Step 4
    Carefully transfer the seasoned chicken mixture onto your prepared baking sheet, spreading it out into a single layer. Arrange the ½ sliced lemon among the chicken pieces. Slide the baking sheet into the preheated oven and roast for 15 minutes. After 15 minutes, carefully remove the pan, stir the chicken to ensure even cooking and browning. Return to the oven and continue to roast for another 8-12 minutes, or until the chicken is cooked through and reaches an internal temperature of 165°F (74°C). The chicken should be lightly caramelized. Remove the sheet pan from the oven and let it rest for a few minutes.
  5. Step 5
    Serve the warm roasted chicken immediately with the chilled Herby Yogurt Dressing. For the full ‘pita’ experience, warm 6-8 pita breads (using the additional 2 tbsp olive oil to lightly brush and warm, if desired). Fill each warm pita with chicken, a generous drizzle of the Herby Yogurt Dressing, and optionally, fresh toppings such as shredded lettuce, diced cucumber, or crumbled feta cheese (note: these additional serving suggestions are not included in the ingredient list). Garnish with extra fresh dill or parsley if desired.

Important Information

Nutrition Facts (Per Serving)

It is important to consider this information as approximate and not to use it as definitive health advice.

Allergy Information

Please check ingredients for potential allergens and consult a health professional if in doubt.

« Previous Post
Best Buffalo Chicken Cheesesteak Ever! Easy Recipe
Next Post »
Honey Pepper Chicken Panini Pasta: Easy Dinner Recipe

If you enjoyed this…

Creamy Garlic Penne Pasta: A Deliciously Easy Recipe for Pasta Lovers

Lemon Chicken Pasta: A Delicious & Easy Weeknight Recipe

Creamy Sausage Tomato Soup with Cream Cheese Delight

Primary Sidebar

Browse by Diet

BreakfastDinnerLunchDessertAppetizer

Sweet Peach Yogurt Parfait Delight

One of my fondest memories is from a lazy summer afternoon spent at my grandmother’s house. The sun filtered through the kitchen window, casting a warm glow over the table where she would create her culinary magic. It was during one of those blissful moments that I first tasted her Peach Yogurt Parfait with Honey and Granola. The sweet aroma of ripe peaches mingling with creamy yogurt and the crunch of granola was nothing short of heavenly. It felt like summer captured in a bowl, and I still remember the joy of diving in with a spoon, each layer revealing a new burst of flavor.

When I think about that parfait, I can almost hear the gentle hum of the bees outside, reminding me of the floral notes that honey brings to every bite. The vibrant yellows and soft oranges of the peaches contrast beautifully with the creamy white yogurt and the golden crunch of granola. It’s a dish that not only looks delightful but also tastes like a celebration of fresh, wholesome ingredients.

What makes my version of this Peach Yogurt Parfait special is the careful balance of flavors and textures. I use ripe, juicy peaches, drizzled with locally sourced honey, and a homemade granola that’s bursting with nuts and seeds for an extra crunch. It’s a simple dish, but every layer is crafted with love and attention.

Let me show you exactly how to make this delightful parfait, so you can bring a bit of that summer magic into your kitchen!

Sweet Peach Yogurt Parfait Delight

Why You’ll Love This Recipe

  • Delightfully creamy texture from the Greek yogurt, paired with the juicy sweetness of fresh peaches.
  • Ready in under 20 minutes, making it a quick and satisfying breakfast or snack option.
  • Budget-friendly, using common ingredients that you may already have in your pantry.
  • Customizable with your favorite granola and nuts, allowing you to tailor each parfait to your taste.
  • Perfectly balanced flavors with the bright acidity of lemon juice and the sweetness of honey enhancing the peaches.

Ingredients

  • For the Parfait:
  • 2 cups plain Greek yogurt (or vanilla yogurt for a sweeter option)
  • 2 large ripe peaches, diced (about 2 cups)
  • 1 tablespoon fresh lemon juice (to prevent browning of peaches)
  • 2 tablespoons honey (plus more for drizzling)
  • 1 teaspoon vanilla extract (optional for extra flavor)
  • For the Granola:
  • 1 cup granola (store-bought or homemade; see notes for a simple granola recipe)
  • 1/4 cup sliced almonds (optional for added crunch)
  • 1/4 cup shredded coconut (optional for added flavor)

Let’s dive into some key ingredients that make this Peach Yogurt Parfait so delightful! First, the Greek yogurt is not only creamy but also packed with protein, making it a satisfying option for breakfast or a snack. If you’re looking for a sweeter option, you can easily substitute it with vanilla yogurt, though it may alter the overall flavor balance. Next, the ripe peaches are the star of the show; their natural sweetness shines through, so I recommend choosing peaches that yield slightly to pressure, indicating they’re perfectly ripe. If peaches aren’t in season, feel free to use nectarines or even frozen peaches—just thaw them before use. Finally, honey adds a lovely floral sweetness that ties everything together. If you prefer, maple syrup can serve as a delicious substitute.

Step-by-Step Instructions

  1. Start by preparing the peaches. Wash them thoroughly, then slice and dice them into bite-sized pieces. In a medium bowl, toss the diced peaches with 1 tablespoon of fresh lemon juice to prevent browning. Set aside for about 5 minutes while the lemon juice works its magic.
  2. In a separate bowl, combine the Greek yogurt, 2 tablespoons of honey, and 1 teaspoon of vanilla extract if using. Stir the mixture until smooth and thoroughly blended. This should take about a minute. Avoid overmixing to maintain the creaminess of the yogurt.
  3. Now it’s time to layer your parfait. Grab a clear glass or bowl to showcase your beautiful creation. Start with a generous spoonful of the yogurt mixture at the bottom—about 1/4 cup will do. Use a spoon to spread it evenly.
  4. Add a layer of the diced peaches over the yogurt, ensuring they cover the yogurt completely. You might want to use about half of what you have prepared—roughly 1 cup. This layer should be visually appealing, so arrange the peaches neatly.
  5. Sprinkle 1/4 cup of granola over the peaches. This adds a delightful crunch. Make sure to distribute it evenly to ensure every bite has that satisfying texture. Avoid packing it down too tightly, as you want it to maintain its crunch.
  6. Repeat the layers: spoon in another 1/4 cup of yogurt, followed by another cup of peaches, and another sprinkle of granola. You should have at least two layers, but feel free to add more depending on your glass size.
  7. Finish off your parfait with a drizzle of honey on top for added sweetness and a touch of elegance. If you’re using sliced almonds or shredded coconut, sprinkle them on top now. It adds a lovely visual contrast and extra flavor.
  8. Serve immediately or refrigerate for up to 30 minutes before serving to allow the flavors to meld together. However, I recommend enjoying it fresh to maintain the granola’s crunch.

Pro Tips for the Best Peach Yogurt Parfait With Honey And Granola

  • Make sure to choose ripe peaches for the best flavor and texture. A common mistake is using unripe fruit, which can lead to a less enjoyable parfait. Look for peaches that are fragrant and slightly soft to the touch.
  • Use a clear glass to assemble your parfait; this not only makes for a beautiful presentation but also allows you to see the colorful layers, which adds to the enjoyment of eating it.
  • For an even creamier texture, consider whipping the Greek yogurt with a hand mixer for a couple of minutes before layering. This small adjustment makes a huge difference in mouthfeel.
  • Be mindful of the granola-to-yogurt ratio. Too much granola can overwhelm the parfait, while too little can make it feel too creamy. Aim for about 1/4 cup of granola per layer for the perfect balance.
  • If you’re making this for a gathering, consider preparing the yogurt and peaches ahead of time and layering them just before serving. This ensures the granola stays crunchy!

Variations & Serving Ideas

There are so many ways to get creative with your Peach Yogurt Parfait! For a tropical twist, swap out the peaches for mangoes or pineapples and top with coconut flakes. If you prefer a berry flavor, mix in some blueberries or strawberries with the peaches for added color and taste. For a nutty version, incorporate chopped walnuts or pecans instead of almonds.

As for serving ideas, this parfait pairs beautifully with a side of scrambled eggs for a hearty breakfast or fresh fruit salad for a light lunch. You might also enjoy it alongside whole grain toast with almond butter for an energizing snack. The contrast of flavors and textures will elevate your meal experience!

Storage, Make-Ahead & Reheating

The Peach Yogurt Parfait is best enjoyed fresh, but you can prepare some components ahead of time. Store the layered parfait in an airtight container in the refrigerator for up to 24 hours. However, be cautious; the granola may lose its crunch if stored too long. You can freeze the yogurt and peach mixture for up to 2 months; just remember to thaw it in the refrigerator overnight before serving.

If you plan to enjoy this dish the next day, it can taste even better as the flavors meld together. Just remember to add the granola right before serving to keep its delightful crunch!

Frequently Asked Questions

Can I make Peach Yogurt Parfait With Honey And Granola ahead of time?

Yes — in fact, it tastes even better the next day as the flavors meld. However, I recommend waiting to add the granola until just before serving to maintain its crunch.

What can I substitute for Greek yogurt?

If you prefer a lighter option, you can substitute Greek yogurt with regular yogurt or a dairy-free alternative like coconut yogurt. Just remember that this may alter the creaminess and flavor profile slightly.

Can I use frozen peaches for this parfait?

Absolutely! Just make sure to thaw the frozen peaches before using them. They will still add great flavor, though the texture may be slightly softer than fresh peaches.

How do I make the parfait vegan?

To make a vegan version, substitute the Greek yogurt with a plant-based yogurt alternative, and replace honey with maple syrup or agave nectar. This keeps the parfait sweet while adhering to a vegan diet.

What other fruits can I use in this recipe?

You can mix and match fruits based on your preference. Try using strawberries, blueberries, raspberries, or even bananas. Just make sure to adjust the lemon juice as needed to prevent browning.

Sweet Peach Yogurt Parfait Delight

Final Thoughts

The Peach Yogurt Parfait with Honey and Granola is a delightful blend of creamy yogurt, sweet peaches, and crunchy granola that creates a satisfying and nourishing treat. Each layer bursts with flavor, making it a perfect choice for breakfast or a light dessert.

This is the kind of recipe I come back to again and again, especially when I want something refreshing and wholesome to start my day. The harmony of sweet and tart flavors, combined with the delightful crunch, never fails to lift my spirits!

I encourage you to give this parfait a try and indulge in its comforting goodness. Feel free to share your results or even add your own twist—perhaps a sprinkle of cinnamon or a handful of nuts. Enjoy creating your perfect parfait!

Print
clock clock iconcutlery cutlery iconflag flag iconfolder folder iconinstagram instagram iconpinterest pinterest iconfacebook facebook iconprint print iconsquares squares iconheart heart iconheart solid heart solid icon

Peach Yogurt Parfait


  • Author: Lily author
  • Total Time: 15 minutes
  • Yield: 4 servings 1x
Pin Recipe
Print Recipe

Description

This Peach Yogurt Parfait combines creamy Greek yogurt, juicy peaches, and crunchy granola for a delightful treat. It’s a perfect breakfast or snack that captures the essence of summer in every bite.


Ingredients

Scale
  • For the Parfait:
  • 2 cups plain Greek yogurt (or vanilla yogurt for a sweeter option)
  • 2 large ripe peaches, diced (about 2 cups)
  • 1 tablespoon fresh lemon juice (to prevent browning of peaches)
  • 2 tablespoons honey (plus more for drizzling)
  • 1 teaspoon vanilla extract (optional for extra flavor)
  • For the Granola:
  • 1 cup granola (store-bought or homemade; see notes for a simple granola recipe)
  • 1/4 cup sliced almonds (optional for added crunch)
  • 1/4 cup shredded coconut (optional for added flavor)

Instructions

  1. Start by preparing the peaches. Wash them thoroughly, then slice and dice them into bite-sized pieces. In a medium bowl, toss the diced peaches with 1 tablespoon of fresh lemon juice to prevent browning. Set aside for about 5 minutes while the lemon juice works its magic.
  2. In a separate bowl, combine the Greek yogurt, 2 tablespoons of honey, and 1 teaspoon of vanilla extract if using. Stir the mixture until smooth and thoroughly blended. This should take about a minute. Avoid overmixing to maintain the creaminess of the yogurt.
  3. Now it’s time to layer your parfait. Grab a clear glass or bowl to showcase your beautiful creation. Start with a generous spoonful of the yogurt mixture at the bottom—about 1/4 cup will do. Use a spoon to spread it evenly.
  4. Add a layer of the diced peaches over the yogurt, ensuring they cover the yogurt completely. You might want to use about half of what you have prepared—roughly 1 cup. This layer should be visually appealing, so arrange the peaches neatly.
  5. Sprinkle 1/4 cup of granola over the peaches. This adds a delightful crunch. Make sure to distribute it evenly to ensure every bite has that satisfying texture. Avoid packing it down too tightly, as you want it to maintain its crunch.
  6. Repeat the layers: spoon in another 1/4 cup of yogurt, followed by another cup of peaches, and another sprinkle of granola. You should have at least two layers, but feel free to add more depending on your glass size.
  7. Finish off your parfait with a drizzle of honey on top for added sweetness and a touch of elegance. If you’re using sliced almonds or shredded coconut, sprinkle them on top now. It adds a lovely visual contrast and extra flavor.
  8. Serve immediately or refrigerate for up to 30 minutes before serving to allow the flavors to meld together. However, I recommend enjoying it fresh to maintain the granola’s crunch.
  • Prep Time: 15 mins
  • Cook Time: 0 mins
  • Category: Breakfast
  • Method: No-cook
  • Cuisine: American

Nutrition

  • Serving Size: 1 parfait
  • Calories: 250
  • Sugar: 20 g
  • Sodium: 50 mg
  • Fat: 5 g
  • Saturated Fat: 2 g
  • Unsaturated Fat: 3 g
  • Trans Fat: 0 g
  • Carbohydrates: 40 g
  • Fiber: 3 g
  • Protein: 10 g
  • Cholesterol: 10 mg

Keywords: Choose ripe peaches for the best flavor and texture. Use a clear glass for a beautiful presentation. For creaminess, consider whipping the yogurt before layering. Be mindful of the granola-to-yogurt ratio. Prepare yogurt and peaches ahead of time for gatherings, layering just before serving.

Did you make this recipe?

Share a photo and tag us — we can't wait to see what you've made!

Sun-Kissed Frozen Orange Cream Slush

As a child, summer days felt like they lasted forever. I remember the sticky heat wrapping around me as I played outside, my laughter mingling with the sounds of the neighborhood. But nothing could cool me down quite like the moment I’d spot my grandmother, laboring over her blender, whipping up her famous Frozen Orange Creamsicle Slush. That vibrant orange treat, with its frosty texture and sweet citrus aroma, was like a burst of sunshine in a cup. Just one sip, and I could feel the coolness wash over me, sparking pure joy.

This Frozen Orange Creamsicle Slush has a way of making you feel like a kid again. Its creamy, dreamy consistency is a delightful balance of bright orange and soft vanilla, inviting you to dive right in. The refreshing tang of orange dances on your tongue, while the smooth creaminess envelops you in a comforting embrace. It’s a nostalgic treat that’s perfect for hot summer afternoons or anytime you need a little pick-me-up.

What makes my version of this slush stand out is the addition of a hint of vanilla bean, which elevates the flavor and adds an extra layer of richness. Plus, it’s super easy to whip up with just a few simple ingredients that you probably already have on hand! So, if you’re ready to relive those sun-soaked memories, let me show you exactly how to make it.

Sun-Kissed Frozen Orange Cream Slush

Why You’ll Love This Recipe

  • Each slush is a perfect blend of creamy vanilla and zesty orange, creating a nostalgic flavor reminiscent of summer days.
  • This refreshing treat is ready in under 15 minutes, making it an ideal quick dessert for unexpected guests or hot afternoons.
  • With just 8 simple ingredients, it’s budget-friendly, ensuring you don’t have to break the bank to enjoy a delicious slush.
  • The slush has a perfectly smooth texture, thanks to the combination of ice and ice cream, providing a delightful contrast to the bright citrus flavors.
  • It’s highly customizable; you can easily adjust the sweetness and add fresh herbs for a unique twist that suits your taste.

Ingredients

  • 2 cups orange juice (freshly squeezed or store-bought)
  • 1 cup vanilla ice cream
  • 1 cup crushed ice
  • 1/2 cup milk (whole or 2%)
  • 1/4 cup granulated sugar (adjust based on sweetness preference)
  • 1 teaspoon vanilla extract
  • Zest of 1 orange (for added flavor)
  • Fresh orange slices and mint leaves (for garnish)

The star of this Frozen Orange Creamsicle Slush is the orange juice, which provides the vibrant, citrusy base. Freshly squeezed juice will yield the brightest flavor, but store-bought options can be just as convenient. If you’re opting for store-bought, choose 100% pure juice with no added sugars for the best results. Another essential ingredient is the vanilla ice cream; it adds creaminess and sweetness. You can substitute it with dairy-free ice cream if you’re looking for a vegan option. Whole or 2% milk complements the ice cream, creating a smooth blend. If you want a lower-calorie version, almond or oat milk can be good alternatives.

Lastly, the granulated sugar can be adjusted based on your sweetness preference. If you prefer a more natural sweetener, consider using honey or agave syrup. The orange zest enhances the flavor profile, providing an aromatic pop that brings the whole slush together. Don’t skip it! It adds an extra layer of brightness that makes this slush truly special.

Step-by-Step Instructions

  1. Start by preparing your ingredients. Gather 2 cups of orange juice, 1 cup of vanilla ice cream, and 1 cup of crushed ice. Make sure the ice is finely crushed, as larger chunks can make blending difficult.
  2. In a blender, combine the orange juice, vanilla ice cream, crushed ice, and 1/2 cup of milk. Add 1/4 cup of granulated sugar and 1 teaspoon of vanilla extract. If you like a sweeter slush, consider adding a bit more sugar at this stage.
  3. Add the zest of 1 orange to the blender. This step is crucial for enhancing the citrus flavor of your slush. Make sure not to include the bitter white pith—only the flavorful zest.
  4. Blend the mixture on medium-high speed for about 30-45 seconds. Stop once the ingredients are fully combined and the slush has a smooth, even consistency. If you notice large chunks of ice, blend for an additional 10-15 seconds. Avoid over-blending, as this can make the slush too liquidy.
  5. Once blended, taste the slush. If it needs more sweetness, add a little more sugar and blend for a few more seconds. If it’s too thick, you can add a splash of milk to reach your desired consistency.
  6. Pour the slush into glasses. This recipe typically serves 4, but you can easily double it for larger gatherings. Use a spoon to help guide the slush into the glasses if needed.
  7. Garnish each serving with fresh orange slices and mint leaves. The mint not only adds a pop of color but also a refreshing aroma that complements the citrus flavors beautifully.
  8. Serve immediately and enjoy! If you’ve made extra, you can refrigerate it for a short time, but it’s best enjoyed fresh.

Pro Tips for the Best Frozen Orange Creamsicle Slush

  • Don’t skip the orange zest! It’s a game-changer for flavor. Always zest before juicing to make it easier.
  • Use a high-powered blender for the best texture. A standard blender may struggle with ice, leading to uneven consistency. If you have a food processor, that can work too, but ensure the ice is finely crushed.
  • Adjust the ice-to-liquid ratio carefully. If your slush is too thick, it won’t blend well. Start with less ice and add more until you reach your preferred texture.
  • Be cautious with the sugar! Always start with the lower amount, as you can easily add more, but it’s hard to fix an overly sweet slush.
  • For a fun twist, consider adding a splash of coconut milk or a handful of fresh fruit like strawberries or pineapple. This not only enhances the flavor but also adds a beautiful color contrast.

Variations & Serving Ideas

There are countless ways to put a spin on your Frozen Orange Creamsicle Slush. Consider making a tropical version by adding in some pineapple juice or coconut milk for a delightful tropical twist. If you’re feeling adventurous, try incorporating a handful of frozen mango or peach slices for added sweetness. For a lighter version, swap out the vanilla ice cream for Greek yogurt for a creamy yet tangy alternative.

As for serving ideas, this refreshing slush pairs wonderfully with light summer dishes like grilled chicken skewers, fish tacos, or a simple salad topped with citrus vinaigrette. The bright, zesty flavors of the slush complement these dishes perfectly, making them an ideal pairing for a sunny day.

Storage, Make-Ahead & Reheating

This Frozen Orange Creamsicle Slush is best enjoyed fresh, but if you have leftovers, you can store them in an airtight container in the fridge for up to 2 days. Just keep in mind that the slush may lose some of its texture over time as the ice melts. It doesn’t freeze well, as the ice will turn into a solid block. If you must freeze it, blend again after thawing to restore the slushy consistency. This treat is best the day you make it, as the flavors meld together beautifully overnight, enhancing its deliciousness.

Frequently Asked Questions

Can I make Frozen Orange Creamsicle Slush ahead of time?

Yes — in fact, it tastes even better the next day as the flavors meld. However, it’s best to enjoy it fresh, as the texture can change if stored for too long. If you need to prepare it ahead, keep it in the fridge and re-blend before serving.

What kind of orange juice should I use?

For the best flavor, use freshly squeezed orange juice. However, if you’re short on time, opt for 100% pure store-bought juice without added sugars. This will ensure that your slush remains flavorful and refreshing.

Can I substitute the vanilla ice cream?

Absolutely! If you’re looking for a dairy-free option, coconut milk ice cream or a non-dairy vanilla ice cream can work wonderfully. They will still provide the creamy texture and sweetness you desire.

How can I adjust the sweetness of my slush?

You can easily adjust the sweetness by modifying the amount of sugar added. Start with 1/4 cup and taste the mixture before blending. If you prefer it sweeter, add more sugar gradually until it reaches your desired level.

What should I do if my slush is too thick?

If your slush is too thick, simply add a splash of milk or orange juice and blend again. This will help achieve a more drinkable consistency while maintaining the slushy texture. Adjust gradually to reach your preferred thickness.

Sun-Kissed Frozen Orange Cream Slush

Final Thoughts

The Frozen Orange Creamsicle Slush is a delightful blend of refreshing citrus and creamy goodness, making it a perfect treat for warm days or any time you crave a taste of nostalgia. The way the bright orange flavor dances with the creamy texture truly elevates this slush, transforming it into a satisfying escape from the everyday.

This is the kind of recipe I come back to again and again, especially when I’m looking to cool down or impress guests at a summer gathering. It’s simple to make and always brings smiles all around! I encourage you to try this recipe for yourself—don’t hesitate to share your results or even put your own spin on it. Happy slushing!

Print
clock clock iconcutlery cutlery iconflag flag iconfolder folder iconinstagram instagram iconpinterest pinterest iconfacebook facebook iconprint print iconsquares squares iconheart heart iconheart solid heart solid icon

Frozen Orange Creamsicle Slush


  • Author: Lily author
  • Total Time: 15 minutes
  • Yield: 4 servings 1x
Pin Recipe
Print Recipe

Description

This Frozen Orange Creamsicle Slush is a refreshing treat that combines creamy vanilla and zesty orange flavors. Perfect for hot summer days, it brings back nostalgic memories with every sip.


Ingredients

Scale
  • 2 cups orange juice (freshly squeezed or store-bought)
  • 1 cup vanilla ice cream
  • 1 cup crushed ice
  • 1/2 cup milk (whole or 2%)
  • 1/4 cup granulated sugar (adjust based on sweetness preference)
  • 1 teaspoon vanilla extract
  • Zest of 1 orange (for added flavor)
  • Fresh orange slices and mint leaves (for garnish)

Instructions

  1. Start by preparing your ingredients. Gather 2 cups of orange juice, 1 cup of vanilla ice cream, and 1 cup of crushed ice. Make sure the ice is finely crushed, as larger chunks can make blending difficult.
  2. In a blender, combine the orange juice, vanilla ice cream, crushed ice, and 1/2 cup of milk. Add 1/4 cup of granulated sugar and 1 teaspoon of vanilla extract. If you like a sweeter slush, consider adding a bit more sugar at this stage.
  3. Add the zest of 1 orange to the blender. This step is crucial for enhancing the citrus flavor of your slush. Make sure not to include the bitter white pith—only the flavorful zest.
  4. Blend the mixture on medium-high speed for about 30-45 seconds. Stop once the ingredients are fully combined and the slush has a smooth, even consistency. If you notice large chunks of ice, blend for an additional 10-15 seconds. Avoid over-blending, as this can make the slush too liquidy.
  5. Once blended, taste the slush. If it needs more sweetness, add a little more sugar and blend for a few more seconds. If it’s too thick, you can add a splash of milk to reach your desired consistency.
  6. Pour the slush into glasses. This recipe typically serves 4, but you can easily double it for larger gatherings. Use a spoon to help guide the slush into the glasses if needed.
  7. Garnish each serving with fresh orange slices and mint leaves. The mint not only adds a pop of color but also a refreshing aroma that complements the citrus flavors beautifully.
  8. Serve immediately and enjoy! If you’ve made extra, you can refrigerate it for a short time, but it's best enjoyed fresh.
  • Prep Time: 15 min
  • Cook Time: 0 min
  • Category: Dessert
  • Method: Blending
  • Cuisine: American

Nutrition

  • Serving Size: 1 serving
  • Calories: 200
  • Sugar: 30 g
  • Sodium: 50 mg
  • Fat: 5 g
  • Saturated Fat: 3 g
  • Unsaturated Fat: 2 g
  • Trans Fat: 0 g
  • Carbohydrates: 40 g
  • Fiber: 1 g
  • Protein: 2 g
  • Cholesterol: 20 mg

Keywords: Don't skip the orange zest! It's a game-changer for flavor. Always zest before juicing to make it easier.

Did you make this recipe?

Share a photo and tag us — we can't wait to see what you've made!

Zesty Lemon Poppy Seed Delight

One rainy afternoon, I found myself in my grandmother’s cozy kitchen, the kind that always smelled like warmth and love. She was whipping up her famous Lemon Poppy Seed Loaf, a recipe that had been passed down through generations. As the batter came together, the zesty aroma of fresh lemons filled the air, mingling perfectly with the nutty fragrance of poppy seeds. I can still picture her, apron-clad, as she expertly drizzled a vibrant citrus icing over the loaf, creating a glossy, sun-kissed finish that beckoned us to dive in. It was a moment that sparked my own passion for baking, and this recipe has become a cherished staple in my home ever since.

When you take a bite of this Lemon Poppy Seed Loaf, it’s like a burst of sunshine on your palate. The loaf is beautifully golden, with a tender crumb that melts in your mouth. Each slice is speckled with tiny poppy seeds, adding a delightful crunch that contrasts beautifully with the tangy sweetness of the lemon. And that citrus icing? It’s the finishing touch that elevates this loaf from ordinary to extraordinary, with its bright, zesty flavor dancing on your taste buds.

This recipe stands out because it embraces simplicity while delivering on flavor. I’ve added a hint of vanilla to the batter, enhancing the overall taste and making it even more indulgent. Trust me, once you make this Lemon Poppy Seed Loaf With Citrus Icing, it’ll become a go-to in your baking repertoire.

So, let me show you exactly how to make it!

Zesty Lemon Poppy Seed Delight

Why You’ll Love This Recipe

  • Moist and tender crumb that melts in your mouth, thanks to the perfect balance of butter and buttermilk.
  • Bright, zesty lemon flavor paired with crunchy poppy seeds, creating a delightful texture and taste experience.
  • Easy to whip up in just about an hour, perfect for last-minute gatherings or a cozy afternoon treat.
  • Budget-friendly with everyday ingredients, making it an accessible option for all home bakers.
  • The citrus icing adds a sweet tang that elevates the loaf, turning a simple recipe into a showstopper!

Ingredients

  • 1 ½ cups (190g) all-purpose flour
  • 1 teaspoon baking powder
  • ½ teaspoon baking soda
  • ½ teaspoon salt
  • 3 tablespoons poppy seeds
  • ½ cup (115g) unsalted butter, softened to room temperature
  • 1 cup (200g) granulated sugar
  • 2 large eggs
  • 1 teaspoon vanilla extract
  • 1 teaspoon lemon zest (from about 1 medium lemon)
  • ½ cup (120ml) buttermilk
  • 2 tablespoons fresh lemon juice

For the Citrus Icing:

  • 1 cup (120g) powdered sugar
  • 2 tablespoons fresh lemon juice
  • 1 tablespoon orange juice
  • 1 teaspoon lemon zest (for garnish, optional)

Let’s dive into the key ingredients that make this Lemon Poppy Seed Loaf so special. The all-purpose flour provides the structure and base for the loaf, while the baking powder and baking soda ensure it rises perfectly, giving the loaf a light texture. For a gluten-free variation, you could substitute the flour with a gluten-free all-purpose blend. Poppy seeds not only add a delightful crunch but also contribute to the unique flavor profile that pairs well with the citrus notes.

Unsalted butter is crucial for achieving the buttery richness that makes this loaf so moist. If you’re looking for a dairy-free option, coconut oil or a vegan butter can be used instead. The buttermilk is another essential component, providing acidity that activates the baking soda for a fluffy texture. If you don’t have buttermilk on hand, you can easily make a substitute by mixing ½ cup of milk with 1 tablespoon of vinegar or lemon juice and letting it sit for about 5 minutes.

Step-by-Step Instructions

  1. Preheat your oven to 350°F (175°C). Grease a 9×5-inch loaf pan or line it with parchment paper for easy removal later.
  2. In a medium mixing bowl, whisk together 1 ½ cups of all-purpose flour, 1 teaspoon of baking powder, ½ teaspoon of baking soda, ½ teaspoon of salt, and 3 tablespoons of poppy seeds. This helps to evenly distribute the baking agents and ensures a uniform rise.
  3. In a large mixing bowl, cream together ½ cup of softened unsalted butter and 1 cup of granulated sugar using an electric mixer on medium speed for about 3-4 minutes, until the mixture is light and fluffy. Make sure to scrape down the sides of the bowl occasionally.
  4. Add 2 large eggs, 1 teaspoon of vanilla extract, and 1 teaspoon of lemon zest to the creamed butter and sugar, mixing until fully combined. You want a smooth consistency, so ensure there are no lumps of butter.
  5. In a small bowl, combine ½ cup of buttermilk and 2 tablespoons of fresh lemon juice. Alternately add the dry ingredients and buttermilk mixture to the butter mixture, starting and ending with the dry ingredients. Mix just until combined; do not overmix, as this can lead to a dense loaf.
  6. Pour the batter into the prepared loaf pan. Smooth the top with a spatula, ensuring it’s even. Bake in the preheated oven for 50-60 minutes, or until a toothpick inserted in the center comes out clean. The edges should be lightly golden brown, and the center should feel just set.
  7. Once baked, remove the loaf from the oven and allow it to cool in the pan for about 10 minutes. Then, transfer it to a wire rack to cool completely. Resist the urge to slice too soon, as it will be crumbly if it’s still warm.
  8. While the loaf is cooling, prepare the citrus icing. In a medium bowl, whisk together 1 cup of powdered sugar, 2 tablespoons of fresh lemon juice, and 1 tablespoon of orange juice until smooth. If the icing is too thick, you can add a little more juice to reach your desired consistency.
  9. Once the loaf is completely cool, drizzle the citrus icing over the top. If you like, sprinkle with an additional teaspoon of lemon zest for an extra pop of flavor and color.

Pro Tips for the Best Lemon Poppy Seed Loaf With Citrus Icing

  • Be careful not to overmix your batter; this is a common mistake that can lead to a dense loaf. Mix just until the dry ingredients are incorporated for a light and fluffy texture.
  • Use room temperature ingredients, especially the butter and eggs. This helps to create a smoother batter and ensures even baking. Take your eggs out of the fridge about 30 minutes before you start.
  • For a more pronounced lemon flavor, consider adding a little lemon extract in addition to the zest and juice. Just a half teaspoon can elevate the citrus notes significantly.
  • When measuring your flour, spoon it into the measuring cup and level it off with a knife instead of scooping directly from the bag. This prevents packing and ensures you don’t end up with a dry loaf.
  • Invest in a good quality loaf pan; it makes a difference in heat distribution, which ensures even baking. If your pan is dark-coated, reduce the oven temperature by 25°F to prevent over-browning.

Variations & Serving Ideas

For a delightful twist, consider adding blueberries or raspberries to the batter for a fruity burst of flavor. You can also experiment with different citrus fruits—try lime or grapefruit zest and juice for a refreshing change. For a healthier option, substitute half of the all-purpose flour with whole wheat flour for added fiber without compromising too much on texture.

This Lemon Poppy Seed Loaf pairs beautifully with a light salad, such as a mixed greens salad with a vinaigrette, or a cup of tea for a cozy afternoon treat. It also complements a creamy cheese platter, as the acidity of the loaf balances rich cheeses perfectly. Lastly, a scoop of vanilla ice cream on the side creates a delightful contrast of temperatures and flavors!

Storage, Make-Ahead & Reheating

This Lemon Poppy Seed Loaf can be stored at room temperature for up to 3 days if wrapped tightly in plastic wrap. If you want to keep it longer, it freezes well for up to 3 months. To freeze, wrap the loaf tightly in plastic wrap and then in aluminum foil to prevent freezer burn.

When you’re ready to enjoy it again, simply thaw it in the fridge overnight. Reheat individual slices in the microwave for 15-20 seconds or in a toaster oven until warmed through. Interestingly, many people find that this loaf tastes even better the next day, as the flavors have time to meld!

Frequently Asked Questions

Can I make Lemon Poppy Seed Loaf With Citrus Icing ahead of time?

Yes — in fact, it tastes even better the next day! You can make the loaf a day in advance, allowing the flavors to develop. Just be sure to store it in an airtight container to maintain its moisture.

Can I substitute the poppy seeds?

Absolutely! If you don’t have poppy seeds on hand or prefer an alternative, you can use sesame seeds for a similar crunch or omit them entirely for a smooth loaf.

What can I use instead of buttermilk?

If you don’t have buttermilk, you can easily create a substitute by mixing ½ cup of milk (dairy or plant-based) with 1 tablespoon of vinegar or lemon juice. Let it sit for 5 minutes before using in the recipe.

How can I make this recipe gluten-free?

To make a gluten-free version of this Lemon Poppy Seed Loaf, substitute the all-purpose flour with a gluten-free all-purpose flour blend. Just ensure that the blend contains a binding agent like xanthan gum for the best results.

What is the best way to store leftover loaf?

Leftover Lemon Poppy Seed Loaf should be stored in an airtight container at room temperature for up to 3 days. For longer storage, wrap it tightly and freeze for up to 3 months. Thaw it before serving for the best texture.

Zesty Lemon Poppy Seed Delight

Final Thoughts

The Lemon Poppy Seed Loaf with Citrus Icing is truly a delightful treat that brings a burst of brightness to any occasion. The zesty lemon flavor combined with the subtle crunch of poppy seeds creates a satisfying balance, while the citrus icing adds a touch of sweetness that perfectly complements the loaf’s tanginess.

This is the kind of recipe I come back to again and again, especially when I want to brighten up a gloomy day or celebrate a small victory. The aroma that fills the kitchen as it bakes is absolutely heavenly! I encourage you to give this recipe a try; you might just find it becoming a beloved staple in your home. Don’t forget to share your results or even add your own unique twist—I can’t wait to see what you create!

Print
clock clock iconcutlery cutlery iconflag flag iconfolder folder iconinstagram instagram iconpinterest pinterest iconfacebook facebook iconprint print iconsquares squares iconheart heart iconheart solid heart solid icon

Lemon Poppy Seed Loaf


  • Author: Lily author
  • Total Time: 21 minute
  • Yield: 1 loaf 1x
Pin Recipe
Print Recipe

Description

This Lemon Poppy Seed Loaf is a delightful treat that combines zesty lemon flavor with crunchy poppy seeds. Topped with a citrus icing, it’s perfect for any occasion.


Ingredients

Scale
  • 1 ½ cups (190g) all-purpose flour
  • 1 teaspoon baking powder
  • ½ teaspoon baking soda
  • ½ teaspoon salt
  • 3 tablespoons poppy seeds
  • ½ cup (115g) unsalted butter, softened to room temperature
  • 1 cup (200g) granulated sugar
  • 2 large eggs
  • 1 teaspoon vanilla extract
  • 1 teaspoon lemon zest (from about 1 medium lemon)
  • ½ cup (120ml) buttermilk
  • 2 tablespoons fresh lemon juice
  • 1 cup (120g) powdered sugar
  • 2 tablespoons fresh lemon juice
  • 1 tablespoon orange juice
  • 1 teaspoon lemon zest (for garnish, optional)

Instructions

  1. Preheat your oven to 350°F (175°C). Grease a 9×5-inch loaf pan or line it with parchment paper for easy removal later.
  2. In a medium mixing bowl, whisk together 1 ½ cups of all-purpose flour, 1 teaspoon of baking powder, ½ teaspoon of baking soda, ½ teaspoon of salt, and 3 tablespoons of poppy seeds. This helps to evenly distribute the baking agents and ensures a uniform rise.
  3. In a large mixing bowl, cream together ½ cup of softened unsalted butter and 1 cup of granulated sugar using an electric mixer on medium speed for about 3-4 minutes, until the mixture is light and fluffy. Make sure to scrape down the sides of the bowl occasionally.
  4. Add 2 large eggs, 1 teaspoon of vanilla extract, and 1 teaspoon of lemon zest to the creamed butter and sugar, mixing until fully combined. You want a smooth consistency, so ensure there are no lumps of butter.
  5. In a small bowl, combine ½ cup of buttermilk and 2 tablespoons of fresh lemon juice. Alternately add the dry ingredients and buttermilk mixture to the butter mixture, starting and ending with the dry ingredients. Mix just until combined; do not overmix, as this can lead to a dense loaf.
  6. Pour the batter into the prepared loaf pan. Smooth the top with a spatula, ensuring it’s even. Bake in the preheated oven for 50-60 minutes, or until a toothpick inserted in the center comes out clean. The edges should be lightly golden brown, and the center should feel just set.
  7. Once baked, remove the loaf from the oven and allow it to cool in the pan for about 10 minutes. Then, transfer it to a wire rack to cool completely. Resist the urge to slice too soon, as it will be crumbly if it’s still warm.
  8. While the loaf is cooling, prepare the citrus icing. In a medium bowl, whisk together 1 cup of powdered sugar, 2 tablespoons of fresh lemon juice, and 1 tablespoon of orange juice until smooth. If the icing is too thick, you can add a little more juice to reach your desired consistency.
  9. Once the loaf is completely cool, drizzle the citrus icing over the top. If you like, sprinkle with an additional teaspoon of lemon zest for an extra pop of flavor and color.
  • Prep Time: 15 mins
  • Cook Time: 50-60 mins
  • Category: Dessert
  • Method: Baking
  • Cuisine: American

Nutrition

  • Serving Size: 1 slice
  • Calories: 200
  • Sugar: 15 g
  • Sodium: 150 mg
  • Fat: 8 g
  • Saturated Fat: 5 g
  • Unsaturated Fat: 3 g
  • Trans Fat: 0 g
  • Carbohydrates: 30 g
  • Fiber: 1 g
  • Protein: 3 g
  • Cholesterol: 40 mg

Keywords: Be careful not to overmix your batter; this is a common mistake that can lead to a dense loaf. Use room temperature ingredients for a smoother batter and even baking.

Did you make this recipe?

Share a photo and tag us — we can't wait to see what you've made!

  • Privacy Policy
  • Terms Of Service
  • Contact
  • About
  • GDPR

Copyright © 2025 Homesmad