• Skip to primary navigation
  • Skip to main content
  • Skip to primary sidebar
Homesmad

Homesmad

  • Home
  • Breakfast & Brunch
  • Appetizers & Snacks
  • Dinner
  • Dessert
  • About
  • Privacy Policy
  • Contact
Homesmad
  • Home
  • Breakfast & Brunch
  • Appetizers & Snacks
  • Dinner
  • Dessert
  • About
  • Privacy Policy
  • Contact

Honey Pepper Chicken Panini Pasta: Easy Dinner Recipe

October 18, 2025 by Lily author

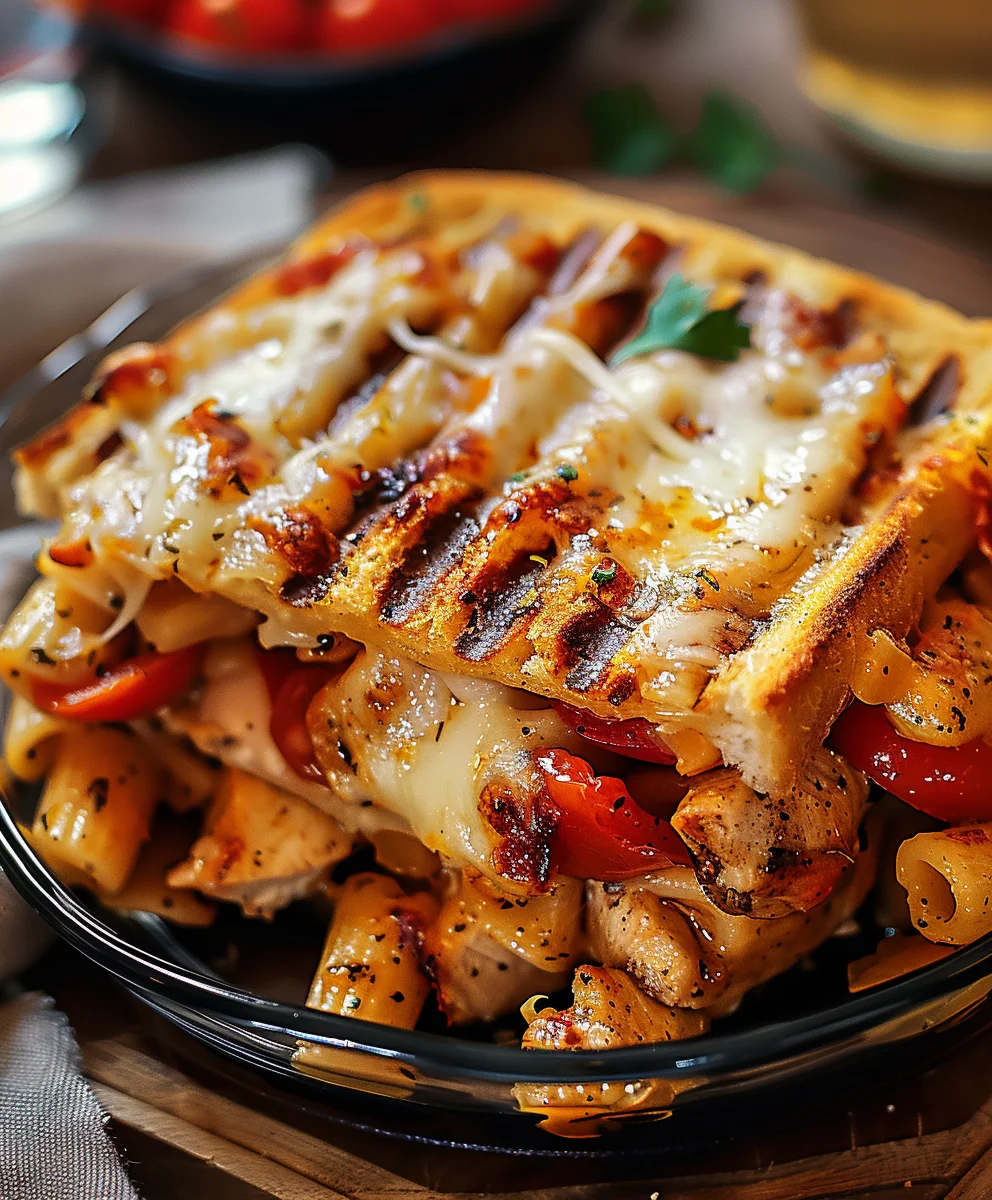
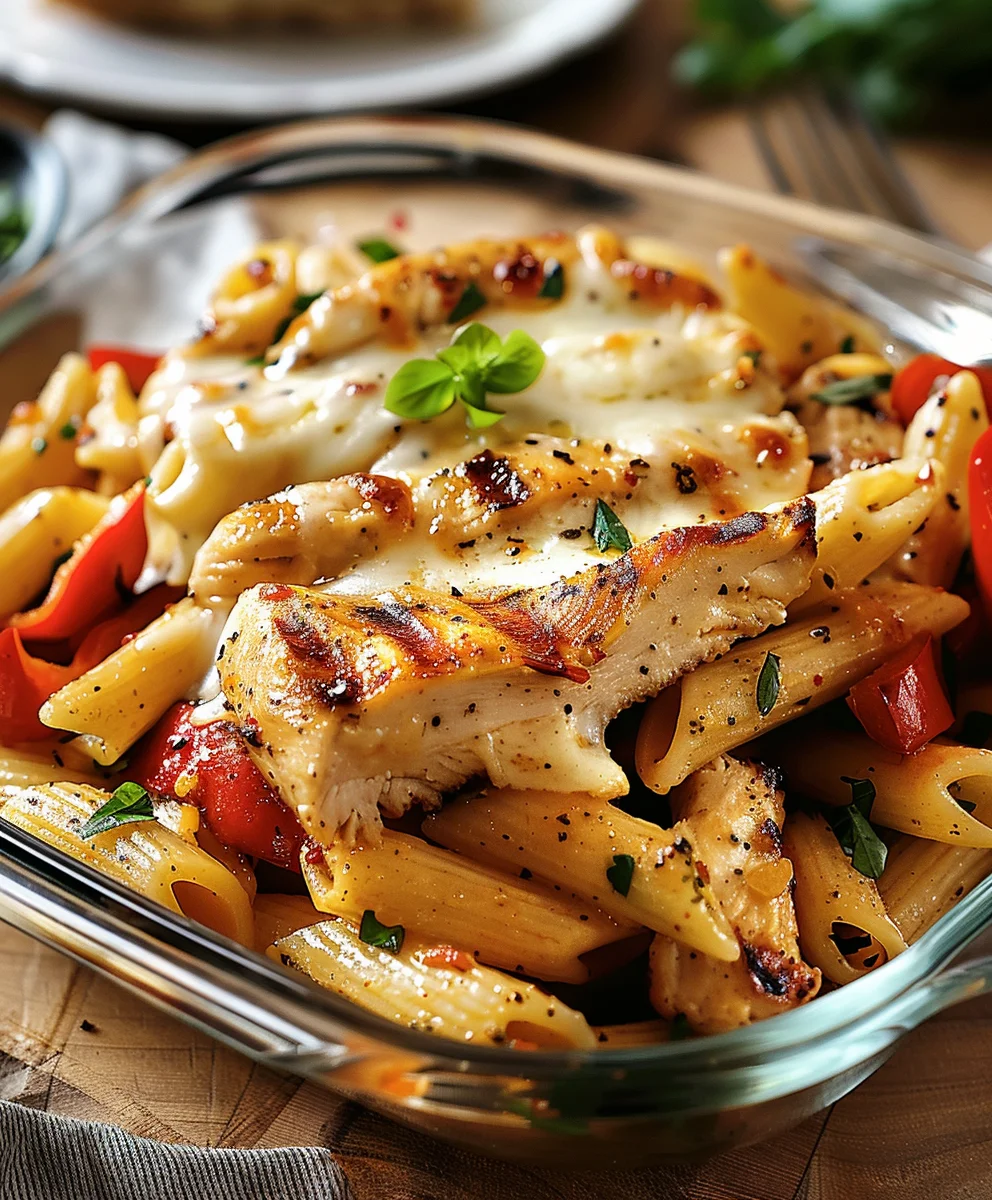
Honey Pepper Chicken Panini Pasta is not merely a dish; it is an innovative culinary experience that promises to elevate your perception of comfort food. I am incredibly excited to share this unique recipe, which masterfully blends the beloved elements of a crispy panini, succulent honey pepper chicken, and satisfying pasta into one unforgettable meal. Prepare to be amazed as this dish transforms your dinner table, offering an exciting medley of flavors and textures.

While this particular combination might not trace back to ancient origins, it is a testament to the modern culinary spirit, celebrating the joy of fusion and bringing together widely adored components in a fresh, ingenious way. It embodies the essence of creative home cooking, where familiar tastes are reimagined to deliver something extraordinary.

People absolutely adore this dish because it delivers on every front. Imagine the delightful crunch of a perfectly pressed panini, giving way to tender, sweet-and-spicy honey pepper chicken, all intertwined with comforting, al dente pasta. This harmonious blend of sweet, savory, and a subtle kick, coupled with the satisfying interplay of textures, makes the Honey Pepper Chicken Panini Pasta an instant favorite. It’s a complete meal in itself, offering both convenience and an explosion of flavor that will leave everyone asking for more.

Honey Pepper Chicken Panini Pasta: Easy Dinner Recipe this RECIPE

Ingredients:

  • For the Honey Pepper Chicken:
    • 2 large boneless, skinless chicken breasts (about 1.5 lbs total)
    • 2 tablespoons olive oil, plus more for searing
    • 2 cloves garlic, minced
    • 1 teaspoon fresh ginger, grated
    • 1/4 cup soy sauce (low sodium preferred)
    • 1/4 cup honey
    • 2 tablespoons apple cider vinegar
    • 1 tablespoon sriracha or red pepper flakes (adjust to your spice preference)
    • 1 teaspoon freshly ground black pepper, plus more for seasoning
    • 1/2 teaspoon salt, plus more for seasoning
    • 1 tablespoon cornstarch mixed with 2 tablespoons cold water (slurry)
    • 2 tablespoons unsalted butter
    • Fresh chives or cilantro, chopped, for garnish (optional)
  • For the Creamy Panini Pasta:
    • 12 ounces penne or fusilli pasta
    • 1 tablespoon olive oil
    • 1 small yellow onion, finely diced
    • 2 cloves garlic, minced
    • 4 ounces cremini mushrooms, sliced
    • 1/2 cup dry white wine (like Pinot Grigio or Sauvignon Blanc), optional but recommended
    • 1 cup chicken broth
    • 1/2 cup heavy cream
    • 1/4 cup grated Parmesan cheese, plus more for serving
    • 2 tablespoons fresh parsley, chopped
    • Salt and freshly ground black pepper to taste
  • For the Panini Assembly:
    • 4 large ciabatta rolls or crusty sandwich bread slices
    • 2 tablespoons mayonnaise (or a mix of mayo and Dijon mustard)
    • 1 cup baby spinach or arugula
    • 4 slices provolone cheese (or mozzarella, Swiss)
    • Butter or olive oil for grilling

Phase 1: Preparing the Honey Pepper Chicken

My journey to creating the perfect “Honey Pepper Chicken Panini Pasta” begins with the star of the show: the succulent honey pepper chicken. This isn’t just any chicken; it’s a symphony of sweet, spicy, and savory notes that truly elevates the entire dish. Let’s get started on infusing that incredible flavor!

  1. Prepare the Chicken: First, I like to take my boneless, skinless chicken breasts and, if they’re particularly thick, slice them horizontally to create two thinner cutlets. This helps them cook more evenly and absorb the marinade better, ensuring every bite of our future Honey Pepper Chicken Panini Pasta is tender and flavorful. Pat them dry with paper towels; this is a crucial step for achieving a nice sear later on.
  2. Whisk the Marinade: In a medium bowl, I combine the minced garlic, grated ginger, soy sauce, honey, apple cider vinegar, sriracha (or red pepper flakes if you prefer a less saucy kick), and one teaspoon of freshly ground black pepper. I give it a good whisk until everything is well incorporated. The honey is key here, providing that beautiful sticky sweetness that will caramelize so wonderfully.
  3. Marinate the Chicken: I place the prepared chicken cutlets into a shallow dish or a Ziploc bag, then pour the glorious marinade over them, ensuring each piece is thoroughly coated. I let this sit in the refrigerator for at least 30 minutes, but honestly, an hour or even two will yield even deeper flavors, making our Honey Pepper Chicken truly unforgettable. If you’re short on time, even 15 minutes is better than nothing!
  4. Sear the Chicken: When it’s time to cook, I heat two tablespoons of olive oil in a large skillet over medium-high heat until it shimmers. Carefully, I remove the chicken from the marinade, letting any excess drip off (don’t discard the marinade just yet!). I place the chicken into the hot skillet and sear for 3-5 minutes per side, until it’s beautifully golden brown and caramelized. This initial searing locks in juices and builds incredible flavor.
  5. Create the Honey Pepper Glaze: Once the chicken is seared, I reduce the heat to medium. I pour the reserved marinade into the skillet, stirring gently to deglaze the pan and pick up all those delicious browned bits. Bring the sauce to a gentle simmer.
  6. Thicken the Sauce: In a small bowl, whisk together the cornstarch with cold water to create a slurry. While the marinade is simmering, gradually whisk in the cornstarch slurry. Continue to cook, stirring constantly, for 1-2 minutes, or until the sauce thickens into a glossy, beautiful glaze. This glaze is what truly defines the “Honey Pepper” in our Honey Pepper Chicken Panini Pasta!
  7. Finish and Rest: Add the two tablespoons of unsalted butter to the sauce, stirring until it’s melted and fully incorporated, which adds a lovely richness and shine. At this point, I remove the chicken from the skillet and let it rest on a cutting board for 5-10 minutes. Resting allows the juices to redistribute, ensuring our chicken remains incredibly tender. Once rested, I slice the chicken against the grain into thin strips, ready to be layered into our panini.

Phase 2: Crafting the Creamy Panini Pasta

Now that our fantastic honey pepper chicken is resting, it’s time to turn our attention to the creamy pasta component of our “Honey Pepper Chicken Panini Pasta.” This pasta needs to be comforting, flavorful, and a perfect counterpoint to the chicken. It’s not just a side; it’s an integral part of the experience.

  1. Cook the Pasta: I bring a large pot of heavily salted water to a rolling boil. Once boiling, I add the penne (or fusilli) and cook according to package directions until it’s perfectly al dente. This means it should be firm to the bite, not mushy, as it will finish cooking slightly in the sauce. Before draining, I always reserve about 1 cup of the starchy pasta water; it’s pure gold for loosening and emulsifying our sauce!
  2. Sauté Aromatics: While the pasta is cooking, I heat one tablespoon of olive oil in a large, deep skillet or Dutch oven over medium heat. Add the finely diced yellow onion and sauté for 3-4 minutes until it softens and becomes translucent, filling my kitchen with a wonderful aroma.
  3. Add Garlic and Mushrooms: Next, I toss in the minced garlic and sliced cremini mushrooms. I continue to cook for another 5-7 minutes, stirring occasionally, until the mushrooms release their moisture, brown nicely, and become tender. The earthiness of the mushrooms adds a delightful depth to the creamy sauce.
  4. Deglaze with Wine (Optional but Recommended): If I’m using white wine, this is the moment! I pour in the 1/2 cup of dry white wine and let it simmer for 2-3 minutes, scraping up any browned bits from the bottom of the pan with a wooden spoon. This not only adds a sophisticated layer of flavor but also ensures our sauce is incredibly rich. If you prefer not to use wine, simply skip this step.
  5. Build the Creamy Sauce: Pour in the chicken broth and bring it to a gentle simmer. Let it cook for about 5 minutes to reduce slightly. Then, I stir in the heavy cream and grated Parmesan cheese. Continue to simmer for another 2-3 minutes, stirring, until the cheese has melted and the sauce begins to thicken slightly. Season generously with salt and freshly ground black pepper to taste. Remember, the pasta water and cheese will also add saltiness.
  6. Combine Pasta and Sauce: Drain the cooked pasta and immediately add it to the skillet with the creamy sauce. Toss everything together, ensuring every piece of pasta is coated in the luxurious sauce. If the sauce seems too thick, I add a splash or two of the reserved pasta water until it reaches my desired consistency – loose enough to coat but not watery.
  7. Finish with Fresh Herbs: Finally, I stir in the fresh chopped parsley. This adds a burst of freshness and a vibrant color to our creamy panini pasta. Give it one last taste and adjust seasoning if necessary. This pasta is now ready to be a delicious foundation for our ultimate Honey Pepper Chicken Panini Pasta!

Phase 3: Assembling and Grilling the Panini

We’re on the home stretch! The honey pepper chicken is perfectly glazed, and the creamy pasta is ready. Now, for the final, exciting phase: assembling and grilling our magnificent “Honey Pepper Chicken Panini Pasta.” This is where all the components come together to create a truly epic sandwich.

  1. Prepare the Panini Press or Skillet: I preheat my panini press to medium-high heat. If you don’t have a panini press, don’t worry! A heavy-bottomed skillet or cast-iron pan will work beautifully. Just place another heavy pan on top of the sandwich to press it down. Lightly butter or brush olive oil on the grilling surfaces of your panini press or skillet. This ensures a golden, crispy exterior.
  2. Prepare the Bread: I take my ciabatta rolls (or slices of crusty bread) and slice them horizontally if they aren’t already. On the inside of both halves of each roll, I spread a thin, even layer of mayonnaise (or your mayo-Dijon mix). This isn’t just for flavor; the mayonnaise helps the bread get wonderfully golden and crispy on the grill!
  3. Layer the Ingredients – The “Honey Pepper Chicken Panini Pasta” Stack:

    Now for the fun part – building our masterpiece! On the bottom half of each bread piece, I start by layering a generous handful of fresh baby spinach or arugula. This adds a lovely fresh crunch and a touch of green.

    Next, I arrange a few slices of our delicious Honey Pepper Chicken over the greens. Make sure to get some of that glorious glaze on there!

    Then, it’s time for the unexpected star: a good scoop of the creamy panini pasta. I spread it evenly over the chicken. Don’t be shy here; this is what makes our “Honey Pepper Chicken Panini Pasta” truly unique and satisfying!

    Finally, I top the pasta with a slice of provolone cheese. The cheese will melt beautifully, holding everything together and adding another layer of creamy richness.

    Place the top half of the bread on top, pressing down gently.

  4. Grill the Panini: Carefully transfer the assembled panini to the preheated panini press or skillet. Close the press, or if using a skillet, place another heavy pan on top to press the sandwich down.
  5. Achieve Golden Perfection: Grill for 4-7 minutes, or until the bread is beautifully golden brown, crisp, and the cheese inside is gloriously melted and gooey. You’ll know it’s ready when the aroma of toasted bread, melted cheese, and that savory honey pepper chicken fills your kitchen! If using a skillet, you might need to flip the panini halfway through to ensure even browning on both sides.

Phase 4: Bringing it All Together – The “Honey Pepper Chicken Panini Pasta” Experience

The moment of truth has arrived! Our Honey Pepper Chicken Panini Pasta is hot, melty, and utterly irresistible. This isn’t just a meal; it’s an experience, a delightful fusion of comfort food and gourmet flair. Here’s how I like to serve it to truly make it shine.

  1. Rest and Slice: Once grilled to perfection, I carefully remove the Honey Pepper Chicken Panini Pasta from the press or skillet. It’s a good idea to let it rest for just 1-2 minutes on a cutting board. This small pause helps the fillings set slightly, making it much easier to slice without everything oozing out immediately. Then, using a sharp serrated knife, I slice each panini in half, either straight down the middle or on a diagonal, for that classic sandwich presentation. The diagonal cut always feels a bit fancier, doesn’t it?
  2. Garnish and Serve: I often like to sprinkle a little extra freshly grated Parmesan cheese over the exposed pasta and chicken filling. A light scattering of fresh chopped chives or cilantro (if using) over the plate or even directly on the panini adds a pop of color and a fresh herbal note that really complements the richness of the Honey Pepper Chicken and the creamy pasta.
  3. Enjoy Immediately: This Honey Pepper Chicken Panini Pasta is best enjoyed warm, right off the press. The contrast of the crispy, buttery bread, the warm, tender honey pepper chicken, the luscious creamy pasta, and the melted cheese is simply divine. Each bite offers a delightful texture and flavor explosion that truly justifies the effort.
  4. Pairing Suggestions: While this panini is a meal in itself, it also pairs wonderfully with a simple side salad dressed with a light vinaigrette to cut through the richness, or even a cup of warm tomato soup for an extra layer of comfort. For a refreshing beverage, iced tea or a light lager would be fantastic.
  5. A Dish to Remember: This isn’t just a recipe; it’s an invitation to create something truly special and memorable. The combination of sweet and spicy honey pepper chicken, savory creamy pasta, and the crispy, cheesy embrace of a perfectly grilled panini makes this “Honey Pepper Chicken Panini Pasta” a standout dish that I promise you’ll want to make again and again. It’s hearty, it’s comforting, and it’s packed with so much flavor that it will become an instant favorite in your kitchen. Enjoy every single glorious bite!

Honey Pepper Chicken Panini Pasta: Easy Dinner Recipe

So, there you have it – the journey through a recipe that I truly believe is destined to become a cherished staple in your kitchen. This isn’t just another meal; it’s a culinary experience waiting to unfold, a testament to how simple ingredients, combined with a touch of passion, can yield extraordinary results. The beautiful dance of sweet honey, the gentle warmth of black pepper, and the succulent tenderness of perfectly cooked chicken, all lovingly intertwined with al dente pasta, creates a symphony of flavors that is both profoundly comforting and excitingly fresh. It’s a dish that manages to be both sophisticated enough for a dinner party and approachable enough for a busy weeknight.

I genuinely feel this recipe embodies everything we love about home cooking: it’s flavorful, satisfying, and relatively straightforward to prepare. The harmonious blend of textures and tastes ensures every bite is an adventure, leaving you feeling utterly content. Forget your preconceived notions about pasta dishes; this one truly stands apart, offering a gourmet experience with accessible ingredients. It’s designed to delight your palate and impress your family and friends without demanding hours of meticulous effort in the kitchen. The unique combination of sweet and savory notes, with that irresistible peppery kick, is what truly elevates this dish from good to absolutely unforgettable. It’s a complete flavor profile that hits all the right notes, making it a guaranteed crowd-pleaser and a personal favorite of mine.

While the recipe as written is absolutely perfect on its own, a simple accompaniment can elevate the dining experience even further. I highly recommend serving this delightful creation alongside a crisp, vibrant green salad, perhaps with a light vinaigrette. The freshness of the greens provides a wonderful contrast to the rich, flavorful pasta, balancing the meal beautifully. A side of warm, crusty artisan bread is also a fantastic addition, perfect for soaking up every last drop of the delectable sauce. For a touch of added sophistication, consider a simple side of roasted asparagus or tender-crisp broccoli, seasoned lightly to allow the main dish to truly shine. Or, if you’re feeling indulgent, a glass of chilled white wine, perhaps a Sauvignon Blanc or a Pinot Grigio, would complement the flavors exquisitely.

One of the aspects I adore most about cooking is the freedom to experiment and personalize, and this recipe is incredibly forgiving and adaptable. Feel free to unleash your inner chef! If chicken isn’t your preference, juicy pan-seared shrimp, flavorful cubes of tofu, or even thinly sliced pork loin would make excellent substitutions, each offering a distinct yet equally delicious profile. For our vegetarian friends, hearty portobello mushrooms or a robust plant-based chicken alternative would work wonderfully. If you crave a bit more heat, a generous pinch of red pepper flakes stirred in during the cooking process will undoubtedly elevate the spice level to your liking. Love your vegetables? Don’t hesitate to toss in some colorful bell peppers, tender spinach, earthy mushrooms, or sweet cherry tomatoes during the last few minutes of cooking for added nutrients, texture, and visual appeal. Different pasta shapes can also transform the dish; think penne, rotini, or even a longer strand like linguine or fettuccine if you prefer a different mouthfeel. And for those who enjoy a touch of creamy luxury, a splash of heavy cream or a handful of freshly grated Parmesan cheese stirred in at the very end can add an extra layer of richness and depth, taking this already amazing meal to new heights. Truly, this Honey Pepper Chicken Panini Pasta recipe is a magnificent canvas for your culinary creativity.

Now that you have all the insights, the only thing left to do is to roll up your sleeves and bring this incredible dish to life in your own kitchen. I promise you, the aroma alone will be enough to get your taste buds tingling, and the first bite will confirm that you’ve discovered a new favorite. Don’t just take my word for it; experience the joy of creating something truly special and incredibly delicious. Once you’ve tried it, I would absolutely love to hear about your experience! Did you stick to the original recipe, or did you put your own unique spin on it? Please share your photos, your tips, your triumphs, and any delicious variations you came up with in the comments section below. Your feedback and creativity not only inspire me but also our entire growing community of food lovers. Let’s build a delicious conversation around this recipe and share our culinary adventures. Happy cooking, my friends, and get ready to fall head over heels in love with your new go-to meal!


Honey Pepper Chicken Panini Pasta

Honey Pepper Chicken Panini Pasta

Honey Pepper Chicken Panini Pasta is an innovative culinary experience that promises to elevate your perception of comfort food. It masterfully blends the beloved elements of a crispy panini, succulent honey pepper chicken, and satisfying pasta into one unforgettable meal, offering an exciting medley of flavors and textures.

Prep Time
50 Minutes

Cook Time
60 Minutes

Total Time
50 Minutes

Servings
4 servings

Ingredients

  • 1 pound boneless, skinless chicken breasts or thighs
  • 1/3 cup honey
  • 1/4 cup low-sodium soy sauce
  • 1 tablespoon apple cider vinegar
  • 1 teaspoon fresh ginger, grated
  • 1 teaspoon black pepper
  • 1/2 teaspoon red chili flakes (optional)
  • 1 teaspoon garlic powder
  • 1 tablespoon cornstarch
  • 2 tablespoons cold water (for slurry)
  • 1/2 cup all-purpose flour
  • 1/2 teaspoon paprika
  • 1/4 teaspoon salt
  • 1/4 teaspoon black pepper
  • 3 tablespoons olive oil (for searing chicken)
  • 2 tablespoons unsalted butter
  • Fresh chives or cilantro, chopped (optional, for garnish)
  • 12 ounces penne or rigatoni pasta
  • 1 tablespoon olive oil (for sautéing aromatics)
  • 1 small yellow onion, finely diced
  • 3 cloves garlic, minced
  • 4 ounces cremini mushrooms, sliced
  • 1/2 cup non-alcoholic white cooking wine or extra chicken broth (optional)
  • 1 cup chicken broth
  • 1/2 cup heavy cream
  • 1/4 cup grated Parmesan cheese, plus more for serving
  • 2 tablespoons fresh parsley, chopped
  • Salt and freshly ground black pepper (to taste)
  • 4 large ciabatta rolls or crusty sandwich bread slices
  • 2 tablespoons mayonnaise
  • 1 cup baby spinach or arugula
  • 4 slices provolone cheese
  • Butter or olive oil (for grilling panini)

Instructions

  1. Step 1
    Slice 1 lb chicken breasts horizontally. In a bowl, whisk 1/3 cup honey, 1/4 cup low-sodium soy sauce, 1 tbsp apple cider vinegar, 1 tsp grated fresh ginger, 1 tsp black pepper, 1/2 tsp red chili flakes (optional), and 1 tsp garlic powder. Marinate chicken in this mixture for 30-120 minutes in the refrigerator.
  2. Step 2
    Heat 3 tbsp olive oil in a large skillet over medium-high heat. Remove chicken from marinade (reserve marinade). Sear chicken 3-5 minutes per side until golden and caramelized. Remove chicken and set aside to rest.
  3. Step 3
    Reduce heat to medium. Pour reserved marinade into the skillet, deglazing the pan. Bring to a simmer. In a small bowl, whisk 1 tbsp cornstarch with 2 tbsp cold water to create a slurry. Gradually whisk the slurry into the simmering sauce. Cook, stirring constantly, until the sauce thickens into a glossy glaze.
  4. Step 4
    Stir in 2 tbsp unsalted butter until melted. Return chicken to the pan to coat with the glaze. Remove chicken, let rest 5-10 minutes, then slice thinly against the grain.
  5. Step 5
    Boil 12 oz penne or rigatoni pasta in heavily salted water until al dente. Reserve 1 cup of the starchy pasta water, then drain the pasta.
  6. Step 6
    While pasta cooks, heat 1 tbsp olive oil in a large skillet. Sauté 1 small finely diced yellow onion for 3-4 minutes until softened. Add 3 minced garlic cloves and 4 oz sliced cremini mushrooms; cook for 5-7 minutes until mushrooms release moisture and are tender.
  7. Step 7
    If using, add 1/2 cup non-alcoholic white cooking wine or extra chicken broth and simmer for 2-3 minutes. Pour in 1 cup chicken broth and bring to a gentle simmer for about 5 minutes. Stir in 1/2 cup heavy cream and 1/4 cup grated Parmesan cheese. Simmer for 2-3 minutes until slightly thickened. Season generously with salt and pepper to taste.
  8. Step 8
    Add the drained pasta to the skillet with the creamy sauce. Toss everything together, adding a splash or two of the reserved pasta water if the sauce is too thick. Stir in 2 tbsp fresh chopped parsley.
  9. Step 9
    Preheat your panini press to medium-high heat (or use a heavy-bottomed skillet). Lightly butter or brush olive oil on the grilling surfaces.
  10. Step 10
    Take 4 ciabatta rolls and slice horizontally. Spread a thin layer of 2 tbsp mayonnaise on the inside of both halves of each roll. On the bottom half, layer 1 cup baby spinach, a generous portion of sliced Honey Pepper Chicken, a scoop of the creamy pasta, and finally, 1 slice of provolone cheese. Place the top half of the bread on top, pressing gently.
  11. Step 11
    Carefully transfer the assembled paninis to the preheated press (or skillet with a heavy pan on top to press). Grill for 4-7 minutes, or until the bread is beautifully golden brown, crisp, and the cheese inside is gloriously melted and gooey.
  12. Step 12
    Once grilled to perfection, remove the paninis and let them rest for 1-2 minutes on a cutting board. Slice each panini in half. Garnish with a sprinkle of extra Parmesan cheese and fresh chives or cilantro (if desired). Serve immediately and enjoy warm.

Important Information

Nutrition Facts (Per Serving)

It is important to consider this information as approximate and not to use it as definitive health advice.

Allergy Information

Please check ingredients for potential allergens and consult a health professional if in doubt.

« Previous Post
Quick Sheet Pan Chicken Pitas & Herby Ranch: Dinner Done!
Next Post »
Crispy Cinnamon Sugar Air Fryer Banana Chips Snack

If you enjoyed this…

Rotisserie Chicken Broccoli Pasta: Easy Family Dinner!

Wedding Dinner Chicken: Delicious Recipes and Planning Tips

Garlic Parmesan Pasta: A Deliciously Easy Recipe for Any Night

Primary Sidebar

Browse by Diet

BreakfastDinnerLunchDessertAppetizer

Sweet Peach Yogurt Parfait Delight

One of my fondest memories is from a lazy summer afternoon spent at my grandmother’s house. The sun filtered through the kitchen window, casting a warm glow over the table where she would create her culinary magic. It was during one of those blissful moments that I first tasted her Peach Yogurt Parfait with Honey and Granola. The sweet aroma of ripe peaches mingling with creamy yogurt and the crunch of granola was nothing short of heavenly. It felt like summer captured in a bowl, and I still remember the joy of diving in with a spoon, each layer revealing a new burst of flavor.

When I think about that parfait, I can almost hear the gentle hum of the bees outside, reminding me of the floral notes that honey brings to every bite. The vibrant yellows and soft oranges of the peaches contrast beautifully with the creamy white yogurt and the golden crunch of granola. It’s a dish that not only looks delightful but also tastes like a celebration of fresh, wholesome ingredients.

What makes my version of this Peach Yogurt Parfait special is the careful balance of flavors and textures. I use ripe, juicy peaches, drizzled with locally sourced honey, and a homemade granola that’s bursting with nuts and seeds for an extra crunch. It’s a simple dish, but every layer is crafted with love and attention.

Let me show you exactly how to make this delightful parfait, so you can bring a bit of that summer magic into your kitchen!

Sweet Peach Yogurt Parfait Delight

Why You’ll Love This Recipe

  • Delightfully creamy texture from the Greek yogurt, paired with the juicy sweetness of fresh peaches.
  • Ready in under 20 minutes, making it a quick and satisfying breakfast or snack option.
  • Budget-friendly, using common ingredients that you may already have in your pantry.
  • Customizable with your favorite granola and nuts, allowing you to tailor each parfait to your taste.
  • Perfectly balanced flavors with the bright acidity of lemon juice and the sweetness of honey enhancing the peaches.

Ingredients

  • For the Parfait:
  • 2 cups plain Greek yogurt (or vanilla yogurt for a sweeter option)
  • 2 large ripe peaches, diced (about 2 cups)
  • 1 tablespoon fresh lemon juice (to prevent browning of peaches)
  • 2 tablespoons honey (plus more for drizzling)
  • 1 teaspoon vanilla extract (optional for extra flavor)
  • For the Granola:
  • 1 cup granola (store-bought or homemade; see notes for a simple granola recipe)
  • 1/4 cup sliced almonds (optional for added crunch)
  • 1/4 cup shredded coconut (optional for added flavor)

Let’s dive into some key ingredients that make this Peach Yogurt Parfait so delightful! First, the Greek yogurt is not only creamy but also packed with protein, making it a satisfying option for breakfast or a snack. If you’re looking for a sweeter option, you can easily substitute it with vanilla yogurt, though it may alter the overall flavor balance. Next, the ripe peaches are the star of the show; their natural sweetness shines through, so I recommend choosing peaches that yield slightly to pressure, indicating they’re perfectly ripe. If peaches aren’t in season, feel free to use nectarines or even frozen peaches—just thaw them before use. Finally, honey adds a lovely floral sweetness that ties everything together. If you prefer, maple syrup can serve as a delicious substitute.

Step-by-Step Instructions

  1. Start by preparing the peaches. Wash them thoroughly, then slice and dice them into bite-sized pieces. In a medium bowl, toss the diced peaches with 1 tablespoon of fresh lemon juice to prevent browning. Set aside for about 5 minutes while the lemon juice works its magic.
  2. In a separate bowl, combine the Greek yogurt, 2 tablespoons of honey, and 1 teaspoon of vanilla extract if using. Stir the mixture until smooth and thoroughly blended. This should take about a minute. Avoid overmixing to maintain the creaminess of the yogurt.
  3. Now it’s time to layer your parfait. Grab a clear glass or bowl to showcase your beautiful creation. Start with a generous spoonful of the yogurt mixture at the bottom—about 1/4 cup will do. Use a spoon to spread it evenly.
  4. Add a layer of the diced peaches over the yogurt, ensuring they cover the yogurt completely. You might want to use about half of what you have prepared—roughly 1 cup. This layer should be visually appealing, so arrange the peaches neatly.
  5. Sprinkle 1/4 cup of granola over the peaches. This adds a delightful crunch. Make sure to distribute it evenly to ensure every bite has that satisfying texture. Avoid packing it down too tightly, as you want it to maintain its crunch.
  6. Repeat the layers: spoon in another 1/4 cup of yogurt, followed by another cup of peaches, and another sprinkle of granola. You should have at least two layers, but feel free to add more depending on your glass size.
  7. Finish off your parfait with a drizzle of honey on top for added sweetness and a touch of elegance. If you’re using sliced almonds or shredded coconut, sprinkle them on top now. It adds a lovely visual contrast and extra flavor.
  8. Serve immediately or refrigerate for up to 30 minutes before serving to allow the flavors to meld together. However, I recommend enjoying it fresh to maintain the granola’s crunch.

Pro Tips for the Best Peach Yogurt Parfait With Honey And Granola

  • Make sure to choose ripe peaches for the best flavor and texture. A common mistake is using unripe fruit, which can lead to a less enjoyable parfait. Look for peaches that are fragrant and slightly soft to the touch.
  • Use a clear glass to assemble your parfait; this not only makes for a beautiful presentation but also allows you to see the colorful layers, which adds to the enjoyment of eating it.
  • For an even creamier texture, consider whipping the Greek yogurt with a hand mixer for a couple of minutes before layering. This small adjustment makes a huge difference in mouthfeel.
  • Be mindful of the granola-to-yogurt ratio. Too much granola can overwhelm the parfait, while too little can make it feel too creamy. Aim for about 1/4 cup of granola per layer for the perfect balance.
  • If you’re making this for a gathering, consider preparing the yogurt and peaches ahead of time and layering them just before serving. This ensures the granola stays crunchy!

Variations & Serving Ideas

There are so many ways to get creative with your Peach Yogurt Parfait! For a tropical twist, swap out the peaches for mangoes or pineapples and top with coconut flakes. If you prefer a berry flavor, mix in some blueberries or strawberries with the peaches for added color and taste. For a nutty version, incorporate chopped walnuts or pecans instead of almonds.

As for serving ideas, this parfait pairs beautifully with a side of scrambled eggs for a hearty breakfast or fresh fruit salad for a light lunch. You might also enjoy it alongside whole grain toast with almond butter for an energizing snack. The contrast of flavors and textures will elevate your meal experience!

Storage, Make-Ahead & Reheating

The Peach Yogurt Parfait is best enjoyed fresh, but you can prepare some components ahead of time. Store the layered parfait in an airtight container in the refrigerator for up to 24 hours. However, be cautious; the granola may lose its crunch if stored too long. You can freeze the yogurt and peach mixture for up to 2 months; just remember to thaw it in the refrigerator overnight before serving.

If you plan to enjoy this dish the next day, it can taste even better as the flavors meld together. Just remember to add the granola right before serving to keep its delightful crunch!

Frequently Asked Questions

Can I make Peach Yogurt Parfait With Honey And Granola ahead of time?

Yes — in fact, it tastes even better the next day as the flavors meld. However, I recommend waiting to add the granola until just before serving to maintain its crunch.

What can I substitute for Greek yogurt?

If you prefer a lighter option, you can substitute Greek yogurt with regular yogurt or a dairy-free alternative like coconut yogurt. Just remember that this may alter the creaminess and flavor profile slightly.

Can I use frozen peaches for this parfait?

Absolutely! Just make sure to thaw the frozen peaches before using them. They will still add great flavor, though the texture may be slightly softer than fresh peaches.

How do I make the parfait vegan?

To make a vegan version, substitute the Greek yogurt with a plant-based yogurt alternative, and replace honey with maple syrup or agave nectar. This keeps the parfait sweet while adhering to a vegan diet.

What other fruits can I use in this recipe?

You can mix and match fruits based on your preference. Try using strawberries, blueberries, raspberries, or even bananas. Just make sure to adjust the lemon juice as needed to prevent browning.

Sweet Peach Yogurt Parfait Delight

Final Thoughts

The Peach Yogurt Parfait with Honey and Granola is a delightful blend of creamy yogurt, sweet peaches, and crunchy granola that creates a satisfying and nourishing treat. Each layer bursts with flavor, making it a perfect choice for breakfast or a light dessert.

This is the kind of recipe I come back to again and again, especially when I want something refreshing and wholesome to start my day. The harmony of sweet and tart flavors, combined with the delightful crunch, never fails to lift my spirits!

I encourage you to give this parfait a try and indulge in its comforting goodness. Feel free to share your results or even add your own twist—perhaps a sprinkle of cinnamon or a handful of nuts. Enjoy creating your perfect parfait!

Print
clock clock iconcutlery cutlery iconflag flag iconfolder folder iconinstagram instagram iconpinterest pinterest iconfacebook facebook iconprint print iconsquares squares iconheart heart iconheart solid heart solid icon

Peach Yogurt Parfait


  • Author: Lily author
  • Total Time: 15 minutes
  • Yield: 4 servings 1x
Pin Recipe
Print Recipe

Description

This Peach Yogurt Parfait combines creamy Greek yogurt, juicy peaches, and crunchy granola for a delightful treat. It’s a perfect breakfast or snack that captures the essence of summer in every bite.


Ingredients

Scale
  • For the Parfait:
  • 2 cups plain Greek yogurt (or vanilla yogurt for a sweeter option)
  • 2 large ripe peaches, diced (about 2 cups)
  • 1 tablespoon fresh lemon juice (to prevent browning of peaches)
  • 2 tablespoons honey (plus more for drizzling)
  • 1 teaspoon vanilla extract (optional for extra flavor)
  • For the Granola:
  • 1 cup granola (store-bought or homemade; see notes for a simple granola recipe)
  • 1/4 cup sliced almonds (optional for added crunch)
  • 1/4 cup shredded coconut (optional for added flavor)

Instructions

  1. Start by preparing the peaches. Wash them thoroughly, then slice and dice them into bite-sized pieces. In a medium bowl, toss the diced peaches with 1 tablespoon of fresh lemon juice to prevent browning. Set aside for about 5 minutes while the lemon juice works its magic.
  2. In a separate bowl, combine the Greek yogurt, 2 tablespoons of honey, and 1 teaspoon of vanilla extract if using. Stir the mixture until smooth and thoroughly blended. This should take about a minute. Avoid overmixing to maintain the creaminess of the yogurt.
  3. Now it’s time to layer your parfait. Grab a clear glass or bowl to showcase your beautiful creation. Start with a generous spoonful of the yogurt mixture at the bottom—about 1/4 cup will do. Use a spoon to spread it evenly.
  4. Add a layer of the diced peaches over the yogurt, ensuring they cover the yogurt completely. You might want to use about half of what you have prepared—roughly 1 cup. This layer should be visually appealing, so arrange the peaches neatly.
  5. Sprinkle 1/4 cup of granola over the peaches. This adds a delightful crunch. Make sure to distribute it evenly to ensure every bite has that satisfying texture. Avoid packing it down too tightly, as you want it to maintain its crunch.
  6. Repeat the layers: spoon in another 1/4 cup of yogurt, followed by another cup of peaches, and another sprinkle of granola. You should have at least two layers, but feel free to add more depending on your glass size.
  7. Finish off your parfait with a drizzle of honey on top for added sweetness and a touch of elegance. If you’re using sliced almonds or shredded coconut, sprinkle them on top now. It adds a lovely visual contrast and extra flavor.
  8. Serve immediately or refrigerate for up to 30 minutes before serving to allow the flavors to meld together. However, I recommend enjoying it fresh to maintain the granola’s crunch.
  • Prep Time: 15 mins
  • Cook Time: 0 mins
  • Category: Breakfast
  • Method: No-cook
  • Cuisine: American

Nutrition

  • Serving Size: 1 parfait
  • Calories: 250
  • Sugar: 20 g
  • Sodium: 50 mg
  • Fat: 5 g
  • Saturated Fat: 2 g
  • Unsaturated Fat: 3 g
  • Trans Fat: 0 g
  • Carbohydrates: 40 g
  • Fiber: 3 g
  • Protein: 10 g
  • Cholesterol: 10 mg

Keywords: Choose ripe peaches for the best flavor and texture. Use a clear glass for a beautiful presentation. For creaminess, consider whipping the yogurt before layering. Be mindful of the granola-to-yogurt ratio. Prepare yogurt and peaches ahead of time for gatherings, layering just before serving.

Did you make this recipe?

Share a photo and tag us — we can't wait to see what you've made!

Sun-Kissed Frozen Orange Cream Slush

As a child, summer days felt like they lasted forever. I remember the sticky heat wrapping around me as I played outside, my laughter mingling with the sounds of the neighborhood. But nothing could cool me down quite like the moment I’d spot my grandmother, laboring over her blender, whipping up her famous Frozen Orange Creamsicle Slush. That vibrant orange treat, with its frosty texture and sweet citrus aroma, was like a burst of sunshine in a cup. Just one sip, and I could feel the coolness wash over me, sparking pure joy.

This Frozen Orange Creamsicle Slush has a way of making you feel like a kid again. Its creamy, dreamy consistency is a delightful balance of bright orange and soft vanilla, inviting you to dive right in. The refreshing tang of orange dances on your tongue, while the smooth creaminess envelops you in a comforting embrace. It’s a nostalgic treat that’s perfect for hot summer afternoons or anytime you need a little pick-me-up.

What makes my version of this slush stand out is the addition of a hint of vanilla bean, which elevates the flavor and adds an extra layer of richness. Plus, it’s super easy to whip up with just a few simple ingredients that you probably already have on hand! So, if you’re ready to relive those sun-soaked memories, let me show you exactly how to make it.

Sun-Kissed Frozen Orange Cream Slush

Why You’ll Love This Recipe

  • Each slush is a perfect blend of creamy vanilla and zesty orange, creating a nostalgic flavor reminiscent of summer days.
  • This refreshing treat is ready in under 15 minutes, making it an ideal quick dessert for unexpected guests or hot afternoons.
  • With just 8 simple ingredients, it’s budget-friendly, ensuring you don’t have to break the bank to enjoy a delicious slush.
  • The slush has a perfectly smooth texture, thanks to the combination of ice and ice cream, providing a delightful contrast to the bright citrus flavors.
  • It’s highly customizable; you can easily adjust the sweetness and add fresh herbs for a unique twist that suits your taste.

Ingredients

  • 2 cups orange juice (freshly squeezed or store-bought)
  • 1 cup vanilla ice cream
  • 1 cup crushed ice
  • 1/2 cup milk (whole or 2%)
  • 1/4 cup granulated sugar (adjust based on sweetness preference)
  • 1 teaspoon vanilla extract
  • Zest of 1 orange (for added flavor)
  • Fresh orange slices and mint leaves (for garnish)

The star of this Frozen Orange Creamsicle Slush is the orange juice, which provides the vibrant, citrusy base. Freshly squeezed juice will yield the brightest flavor, but store-bought options can be just as convenient. If you’re opting for store-bought, choose 100% pure juice with no added sugars for the best results. Another essential ingredient is the vanilla ice cream; it adds creaminess and sweetness. You can substitute it with dairy-free ice cream if you’re looking for a vegan option. Whole or 2% milk complements the ice cream, creating a smooth blend. If you want a lower-calorie version, almond or oat milk can be good alternatives.

Lastly, the granulated sugar can be adjusted based on your sweetness preference. If you prefer a more natural sweetener, consider using honey or agave syrup. The orange zest enhances the flavor profile, providing an aromatic pop that brings the whole slush together. Don’t skip it! It adds an extra layer of brightness that makes this slush truly special.

Step-by-Step Instructions

  1. Start by preparing your ingredients. Gather 2 cups of orange juice, 1 cup of vanilla ice cream, and 1 cup of crushed ice. Make sure the ice is finely crushed, as larger chunks can make blending difficult.
  2. In a blender, combine the orange juice, vanilla ice cream, crushed ice, and 1/2 cup of milk. Add 1/4 cup of granulated sugar and 1 teaspoon of vanilla extract. If you like a sweeter slush, consider adding a bit more sugar at this stage.
  3. Add the zest of 1 orange to the blender. This step is crucial for enhancing the citrus flavor of your slush. Make sure not to include the bitter white pith—only the flavorful zest.
  4. Blend the mixture on medium-high speed for about 30-45 seconds. Stop once the ingredients are fully combined and the slush has a smooth, even consistency. If you notice large chunks of ice, blend for an additional 10-15 seconds. Avoid over-blending, as this can make the slush too liquidy.
  5. Once blended, taste the slush. If it needs more sweetness, add a little more sugar and blend for a few more seconds. If it’s too thick, you can add a splash of milk to reach your desired consistency.
  6. Pour the slush into glasses. This recipe typically serves 4, but you can easily double it for larger gatherings. Use a spoon to help guide the slush into the glasses if needed.
  7. Garnish each serving with fresh orange slices and mint leaves. The mint not only adds a pop of color but also a refreshing aroma that complements the citrus flavors beautifully.
  8. Serve immediately and enjoy! If you’ve made extra, you can refrigerate it for a short time, but it’s best enjoyed fresh.

Pro Tips for the Best Frozen Orange Creamsicle Slush

  • Don’t skip the orange zest! It’s a game-changer for flavor. Always zest before juicing to make it easier.
  • Use a high-powered blender for the best texture. A standard blender may struggle with ice, leading to uneven consistency. If you have a food processor, that can work too, but ensure the ice is finely crushed.
  • Adjust the ice-to-liquid ratio carefully. If your slush is too thick, it won’t blend well. Start with less ice and add more until you reach your preferred texture.
  • Be cautious with the sugar! Always start with the lower amount, as you can easily add more, but it’s hard to fix an overly sweet slush.
  • For a fun twist, consider adding a splash of coconut milk or a handful of fresh fruit like strawberries or pineapple. This not only enhances the flavor but also adds a beautiful color contrast.

Variations & Serving Ideas

There are countless ways to put a spin on your Frozen Orange Creamsicle Slush. Consider making a tropical version by adding in some pineapple juice or coconut milk for a delightful tropical twist. If you’re feeling adventurous, try incorporating a handful of frozen mango or peach slices for added sweetness. For a lighter version, swap out the vanilla ice cream for Greek yogurt for a creamy yet tangy alternative.

As for serving ideas, this refreshing slush pairs wonderfully with light summer dishes like grilled chicken skewers, fish tacos, or a simple salad topped with citrus vinaigrette. The bright, zesty flavors of the slush complement these dishes perfectly, making them an ideal pairing for a sunny day.

Storage, Make-Ahead & Reheating

This Frozen Orange Creamsicle Slush is best enjoyed fresh, but if you have leftovers, you can store them in an airtight container in the fridge for up to 2 days. Just keep in mind that the slush may lose some of its texture over time as the ice melts. It doesn’t freeze well, as the ice will turn into a solid block. If you must freeze it, blend again after thawing to restore the slushy consistency. This treat is best the day you make it, as the flavors meld together beautifully overnight, enhancing its deliciousness.

Frequently Asked Questions

Can I make Frozen Orange Creamsicle Slush ahead of time?

Yes — in fact, it tastes even better the next day as the flavors meld. However, it’s best to enjoy it fresh, as the texture can change if stored for too long. If you need to prepare it ahead, keep it in the fridge and re-blend before serving.

What kind of orange juice should I use?

For the best flavor, use freshly squeezed orange juice. However, if you’re short on time, opt for 100% pure store-bought juice without added sugars. This will ensure that your slush remains flavorful and refreshing.

Can I substitute the vanilla ice cream?

Absolutely! If you’re looking for a dairy-free option, coconut milk ice cream or a non-dairy vanilla ice cream can work wonderfully. They will still provide the creamy texture and sweetness you desire.

How can I adjust the sweetness of my slush?

You can easily adjust the sweetness by modifying the amount of sugar added. Start with 1/4 cup and taste the mixture before blending. If you prefer it sweeter, add more sugar gradually until it reaches your desired level.

What should I do if my slush is too thick?

If your slush is too thick, simply add a splash of milk or orange juice and blend again. This will help achieve a more drinkable consistency while maintaining the slushy texture. Adjust gradually to reach your preferred thickness.

Sun-Kissed Frozen Orange Cream Slush

Final Thoughts

The Frozen Orange Creamsicle Slush is a delightful blend of refreshing citrus and creamy goodness, making it a perfect treat for warm days or any time you crave a taste of nostalgia. The way the bright orange flavor dances with the creamy texture truly elevates this slush, transforming it into a satisfying escape from the everyday.

This is the kind of recipe I come back to again and again, especially when I’m looking to cool down or impress guests at a summer gathering. It’s simple to make and always brings smiles all around! I encourage you to try this recipe for yourself—don’t hesitate to share your results or even put your own spin on it. Happy slushing!

Print
clock clock iconcutlery cutlery iconflag flag iconfolder folder iconinstagram instagram iconpinterest pinterest iconfacebook facebook iconprint print iconsquares squares iconheart heart iconheart solid heart solid icon

Frozen Orange Creamsicle Slush


  • Author: Lily author
  • Total Time: 15 minutes
  • Yield: 4 servings 1x
Pin Recipe
Print Recipe

Description

This Frozen Orange Creamsicle Slush is a refreshing treat that combines creamy vanilla and zesty orange flavors. Perfect for hot summer days, it brings back nostalgic memories with every sip.


Ingredients

Scale
  • 2 cups orange juice (freshly squeezed or store-bought)
  • 1 cup vanilla ice cream
  • 1 cup crushed ice
  • 1/2 cup milk (whole or 2%)
  • 1/4 cup granulated sugar (adjust based on sweetness preference)
  • 1 teaspoon vanilla extract
  • Zest of 1 orange (for added flavor)
  • Fresh orange slices and mint leaves (for garnish)

Instructions

  1. Start by preparing your ingredients. Gather 2 cups of orange juice, 1 cup of vanilla ice cream, and 1 cup of crushed ice. Make sure the ice is finely crushed, as larger chunks can make blending difficult.
  2. In a blender, combine the orange juice, vanilla ice cream, crushed ice, and 1/2 cup of milk. Add 1/4 cup of granulated sugar and 1 teaspoon of vanilla extract. If you like a sweeter slush, consider adding a bit more sugar at this stage.
  3. Add the zest of 1 orange to the blender. This step is crucial for enhancing the citrus flavor of your slush. Make sure not to include the bitter white pith—only the flavorful zest.
  4. Blend the mixture on medium-high speed for about 30-45 seconds. Stop once the ingredients are fully combined and the slush has a smooth, even consistency. If you notice large chunks of ice, blend for an additional 10-15 seconds. Avoid over-blending, as this can make the slush too liquidy.
  5. Once blended, taste the slush. If it needs more sweetness, add a little more sugar and blend for a few more seconds. If it’s too thick, you can add a splash of milk to reach your desired consistency.
  6. Pour the slush into glasses. This recipe typically serves 4, but you can easily double it for larger gatherings. Use a spoon to help guide the slush into the glasses if needed.
  7. Garnish each serving with fresh orange slices and mint leaves. The mint not only adds a pop of color but also a refreshing aroma that complements the citrus flavors beautifully.
  8. Serve immediately and enjoy! If you’ve made extra, you can refrigerate it for a short time, but it's best enjoyed fresh.
  • Prep Time: 15 min
  • Cook Time: 0 min
  • Category: Dessert
  • Method: Blending
  • Cuisine: American

Nutrition

  • Serving Size: 1 serving
  • Calories: 200
  • Sugar: 30 g
  • Sodium: 50 mg
  • Fat: 5 g
  • Saturated Fat: 3 g
  • Unsaturated Fat: 2 g
  • Trans Fat: 0 g
  • Carbohydrates: 40 g
  • Fiber: 1 g
  • Protein: 2 g
  • Cholesterol: 20 mg

Keywords: Don't skip the orange zest! It's a game-changer for flavor. Always zest before juicing to make it easier.

Did you make this recipe?

Share a photo and tag us — we can't wait to see what you've made!

Zesty Lemon Poppy Seed Delight

One rainy afternoon, I found myself in my grandmother’s cozy kitchen, the kind that always smelled like warmth and love. She was whipping up her famous Lemon Poppy Seed Loaf, a recipe that had been passed down through generations. As the batter came together, the zesty aroma of fresh lemons filled the air, mingling perfectly with the nutty fragrance of poppy seeds. I can still picture her, apron-clad, as she expertly drizzled a vibrant citrus icing over the loaf, creating a glossy, sun-kissed finish that beckoned us to dive in. It was a moment that sparked my own passion for baking, and this recipe has become a cherished staple in my home ever since.

When you take a bite of this Lemon Poppy Seed Loaf, it’s like a burst of sunshine on your palate. The loaf is beautifully golden, with a tender crumb that melts in your mouth. Each slice is speckled with tiny poppy seeds, adding a delightful crunch that contrasts beautifully with the tangy sweetness of the lemon. And that citrus icing? It’s the finishing touch that elevates this loaf from ordinary to extraordinary, with its bright, zesty flavor dancing on your taste buds.

This recipe stands out because it embraces simplicity while delivering on flavor. I’ve added a hint of vanilla to the batter, enhancing the overall taste and making it even more indulgent. Trust me, once you make this Lemon Poppy Seed Loaf With Citrus Icing, it’ll become a go-to in your baking repertoire.

So, let me show you exactly how to make it!

Zesty Lemon Poppy Seed Delight

Why You’ll Love This Recipe

  • Moist and tender crumb that melts in your mouth, thanks to the perfect balance of butter and buttermilk.
  • Bright, zesty lemon flavor paired with crunchy poppy seeds, creating a delightful texture and taste experience.
  • Easy to whip up in just about an hour, perfect for last-minute gatherings or a cozy afternoon treat.
  • Budget-friendly with everyday ingredients, making it an accessible option for all home bakers.
  • The citrus icing adds a sweet tang that elevates the loaf, turning a simple recipe into a showstopper!

Ingredients

  • 1 ½ cups (190g) all-purpose flour
  • 1 teaspoon baking powder
  • ½ teaspoon baking soda
  • ½ teaspoon salt
  • 3 tablespoons poppy seeds
  • ½ cup (115g) unsalted butter, softened to room temperature
  • 1 cup (200g) granulated sugar
  • 2 large eggs
  • 1 teaspoon vanilla extract
  • 1 teaspoon lemon zest (from about 1 medium lemon)
  • ½ cup (120ml) buttermilk
  • 2 tablespoons fresh lemon juice

For the Citrus Icing:

  • 1 cup (120g) powdered sugar
  • 2 tablespoons fresh lemon juice
  • 1 tablespoon orange juice
  • 1 teaspoon lemon zest (for garnish, optional)

Let’s dive into the key ingredients that make this Lemon Poppy Seed Loaf so special. The all-purpose flour provides the structure and base for the loaf, while the baking powder and baking soda ensure it rises perfectly, giving the loaf a light texture. For a gluten-free variation, you could substitute the flour with a gluten-free all-purpose blend. Poppy seeds not only add a delightful crunch but also contribute to the unique flavor profile that pairs well with the citrus notes.

Unsalted butter is crucial for achieving the buttery richness that makes this loaf so moist. If you’re looking for a dairy-free option, coconut oil or a vegan butter can be used instead. The buttermilk is another essential component, providing acidity that activates the baking soda for a fluffy texture. If you don’t have buttermilk on hand, you can easily make a substitute by mixing ½ cup of milk with 1 tablespoon of vinegar or lemon juice and letting it sit for about 5 minutes.

Step-by-Step Instructions

  1. Preheat your oven to 350°F (175°C). Grease a 9×5-inch loaf pan or line it with parchment paper for easy removal later.
  2. In a medium mixing bowl, whisk together 1 ½ cups of all-purpose flour, 1 teaspoon of baking powder, ½ teaspoon of baking soda, ½ teaspoon of salt, and 3 tablespoons of poppy seeds. This helps to evenly distribute the baking agents and ensures a uniform rise.
  3. In a large mixing bowl, cream together ½ cup of softened unsalted butter and 1 cup of granulated sugar using an electric mixer on medium speed for about 3-4 minutes, until the mixture is light and fluffy. Make sure to scrape down the sides of the bowl occasionally.
  4. Add 2 large eggs, 1 teaspoon of vanilla extract, and 1 teaspoon of lemon zest to the creamed butter and sugar, mixing until fully combined. You want a smooth consistency, so ensure there are no lumps of butter.
  5. In a small bowl, combine ½ cup of buttermilk and 2 tablespoons of fresh lemon juice. Alternately add the dry ingredients and buttermilk mixture to the butter mixture, starting and ending with the dry ingredients. Mix just until combined; do not overmix, as this can lead to a dense loaf.
  6. Pour the batter into the prepared loaf pan. Smooth the top with a spatula, ensuring it’s even. Bake in the preheated oven for 50-60 minutes, or until a toothpick inserted in the center comes out clean. The edges should be lightly golden brown, and the center should feel just set.
  7. Once baked, remove the loaf from the oven and allow it to cool in the pan for about 10 minutes. Then, transfer it to a wire rack to cool completely. Resist the urge to slice too soon, as it will be crumbly if it’s still warm.
  8. While the loaf is cooling, prepare the citrus icing. In a medium bowl, whisk together 1 cup of powdered sugar, 2 tablespoons of fresh lemon juice, and 1 tablespoon of orange juice until smooth. If the icing is too thick, you can add a little more juice to reach your desired consistency.
  9. Once the loaf is completely cool, drizzle the citrus icing over the top. If you like, sprinkle with an additional teaspoon of lemon zest for an extra pop of flavor and color.

Pro Tips for the Best Lemon Poppy Seed Loaf With Citrus Icing

  • Be careful not to overmix your batter; this is a common mistake that can lead to a dense loaf. Mix just until the dry ingredients are incorporated for a light and fluffy texture.
  • Use room temperature ingredients, especially the butter and eggs. This helps to create a smoother batter and ensures even baking. Take your eggs out of the fridge about 30 minutes before you start.
  • For a more pronounced lemon flavor, consider adding a little lemon extract in addition to the zest and juice. Just a half teaspoon can elevate the citrus notes significantly.
  • When measuring your flour, spoon it into the measuring cup and level it off with a knife instead of scooping directly from the bag. This prevents packing and ensures you don’t end up with a dry loaf.
  • Invest in a good quality loaf pan; it makes a difference in heat distribution, which ensures even baking. If your pan is dark-coated, reduce the oven temperature by 25°F to prevent over-browning.

Variations & Serving Ideas

For a delightful twist, consider adding blueberries or raspberries to the batter for a fruity burst of flavor. You can also experiment with different citrus fruits—try lime or grapefruit zest and juice for a refreshing change. For a healthier option, substitute half of the all-purpose flour with whole wheat flour for added fiber without compromising too much on texture.

This Lemon Poppy Seed Loaf pairs beautifully with a light salad, such as a mixed greens salad with a vinaigrette, or a cup of tea for a cozy afternoon treat. It also complements a creamy cheese platter, as the acidity of the loaf balances rich cheeses perfectly. Lastly, a scoop of vanilla ice cream on the side creates a delightful contrast of temperatures and flavors!

Storage, Make-Ahead & Reheating

This Lemon Poppy Seed Loaf can be stored at room temperature for up to 3 days if wrapped tightly in plastic wrap. If you want to keep it longer, it freezes well for up to 3 months. To freeze, wrap the loaf tightly in plastic wrap and then in aluminum foil to prevent freezer burn.

When you’re ready to enjoy it again, simply thaw it in the fridge overnight. Reheat individual slices in the microwave for 15-20 seconds or in a toaster oven until warmed through. Interestingly, many people find that this loaf tastes even better the next day, as the flavors have time to meld!

Frequently Asked Questions

Can I make Lemon Poppy Seed Loaf With Citrus Icing ahead of time?

Yes — in fact, it tastes even better the next day! You can make the loaf a day in advance, allowing the flavors to develop. Just be sure to store it in an airtight container to maintain its moisture.

Can I substitute the poppy seeds?

Absolutely! If you don’t have poppy seeds on hand or prefer an alternative, you can use sesame seeds for a similar crunch or omit them entirely for a smooth loaf.

What can I use instead of buttermilk?

If you don’t have buttermilk, you can easily create a substitute by mixing ½ cup of milk (dairy or plant-based) with 1 tablespoon of vinegar or lemon juice. Let it sit for 5 minutes before using in the recipe.

How can I make this recipe gluten-free?

To make a gluten-free version of this Lemon Poppy Seed Loaf, substitute the all-purpose flour with a gluten-free all-purpose flour blend. Just ensure that the blend contains a binding agent like xanthan gum for the best results.

What is the best way to store leftover loaf?

Leftover Lemon Poppy Seed Loaf should be stored in an airtight container at room temperature for up to 3 days. For longer storage, wrap it tightly and freeze for up to 3 months. Thaw it before serving for the best texture.

Zesty Lemon Poppy Seed Delight

Final Thoughts

The Lemon Poppy Seed Loaf with Citrus Icing is truly a delightful treat that brings a burst of brightness to any occasion. The zesty lemon flavor combined with the subtle crunch of poppy seeds creates a satisfying balance, while the citrus icing adds a touch of sweetness that perfectly complements the loaf’s tanginess.

This is the kind of recipe I come back to again and again, especially when I want to brighten up a gloomy day or celebrate a small victory. The aroma that fills the kitchen as it bakes is absolutely heavenly! I encourage you to give this recipe a try; you might just find it becoming a beloved staple in your home. Don’t forget to share your results or even add your own unique twist—I can’t wait to see what you create!

Print
clock clock iconcutlery cutlery iconflag flag iconfolder folder iconinstagram instagram iconpinterest pinterest iconfacebook facebook iconprint print iconsquares squares iconheart heart iconheart solid heart solid icon

Lemon Poppy Seed Loaf


  • Author: Lily author
  • Total Time: 25 minute
  • Yield: 1 loaf 1x
Pin Recipe
Print Recipe

Description

This Lemon Poppy Seed Loaf is a delightful treat that combines zesty lemon flavor with crunchy poppy seeds. Topped with a citrus icing, it’s perfect for any occasion.


Ingredients

Scale
  • 1 ½ cups (190g) all-purpose flour
  • 1 teaspoon baking powder
  • ½ teaspoon baking soda
  • ½ teaspoon salt
  • 3 tablespoons poppy seeds
  • ½ cup (115g) unsalted butter, softened to room temperature
  • 1 cup (200g) granulated sugar
  • 2 large eggs
  • 1 teaspoon vanilla extract
  • 1 teaspoon lemon zest (from about 1 medium lemon)
  • ½ cup (120ml) buttermilk
  • 2 tablespoons fresh lemon juice
  • 1 cup (120g) powdered sugar
  • 2 tablespoons fresh lemon juice
  • 1 tablespoon orange juice
  • 1 teaspoon lemon zest (for garnish, optional)

Instructions

  1. Preheat your oven to 350°F (175°C). Grease a 9×5-inch loaf pan or line it with parchment paper for easy removal later.
  2. In a medium mixing bowl, whisk together 1 ½ cups of all-purpose flour, 1 teaspoon of baking powder, ½ teaspoon of baking soda, ½ teaspoon of salt, and 3 tablespoons of poppy seeds. This helps to evenly distribute the baking agents and ensures a uniform rise.
  3. In a large mixing bowl, cream together ½ cup of softened unsalted butter and 1 cup of granulated sugar using an electric mixer on medium speed for about 3-4 minutes, until the mixture is light and fluffy. Make sure to scrape down the sides of the bowl occasionally.
  4. Add 2 large eggs, 1 teaspoon of vanilla extract, and 1 teaspoon of lemon zest to the creamed butter and sugar, mixing until fully combined. You want a smooth consistency, so ensure there are no lumps of butter.
  5. In a small bowl, combine ½ cup of buttermilk and 2 tablespoons of fresh lemon juice. Alternately add the dry ingredients and buttermilk mixture to the butter mixture, starting and ending with the dry ingredients. Mix just until combined; do not overmix, as this can lead to a dense loaf.
  6. Pour the batter into the prepared loaf pan. Smooth the top with a spatula, ensuring it’s even. Bake in the preheated oven for 50-60 minutes, or until a toothpick inserted in the center comes out clean. The edges should be lightly golden brown, and the center should feel just set.
  7. Once baked, remove the loaf from the oven and allow it to cool in the pan for about 10 minutes. Then, transfer it to a wire rack to cool completely. Resist the urge to slice too soon, as it will be crumbly if it’s still warm.
  8. While the loaf is cooling, prepare the citrus icing. In a medium bowl, whisk together 1 cup of powdered sugar, 2 tablespoons of fresh lemon juice, and 1 tablespoon of orange juice until smooth. If the icing is too thick, you can add a little more juice to reach your desired consistency.
  9. Once the loaf is completely cool, drizzle the citrus icing over the top. If you like, sprinkle with an additional teaspoon of lemon zest for an extra pop of flavor and color.
  • Prep Time: 15 mins
  • Cook Time: 50-60 mins
  • Category: Dessert
  • Method: Baking
  • Cuisine: American

Nutrition

  • Serving Size: 1 slice
  • Calories: 200
  • Sugar: 15 g
  • Sodium: 150 mg
  • Fat: 8 g
  • Saturated Fat: 5 g
  • Unsaturated Fat: 3 g
  • Trans Fat: 0 g
  • Carbohydrates: 30 g
  • Fiber: 1 g
  • Protein: 3 g
  • Cholesterol: 40 mg

Keywords: Be careful not to overmix your batter; this is a common mistake that can lead to a dense loaf. Use room temperature ingredients for a smoother batter and even baking.

Did you make this recipe?

Share a photo and tag us — we can't wait to see what you've made!

  • Privacy Policy
  • Terms Of Service
  • Contact
  • About
  • GDPR

Copyright © 2025 Homesmad