• Skip to primary navigation
  • Skip to main content
  • Skip to primary sidebar
Homesmad

Homesmad

  • Home
  • Breakfast & Brunch
  • Appetizers & Snacks
  • Dinner
  • Dessert
  • About
  • Privacy Policy
  • Contact
Homesmad
  • Home
  • Breakfast & Brunch
  • Appetizers & Snacks
  • Dinner
  • Dessert
  • About
  • Privacy Policy
  • Contact

Crispy Cinnamon Sugar Air Fryer Banana Chips Snack

October 19, 2025 by Lily author

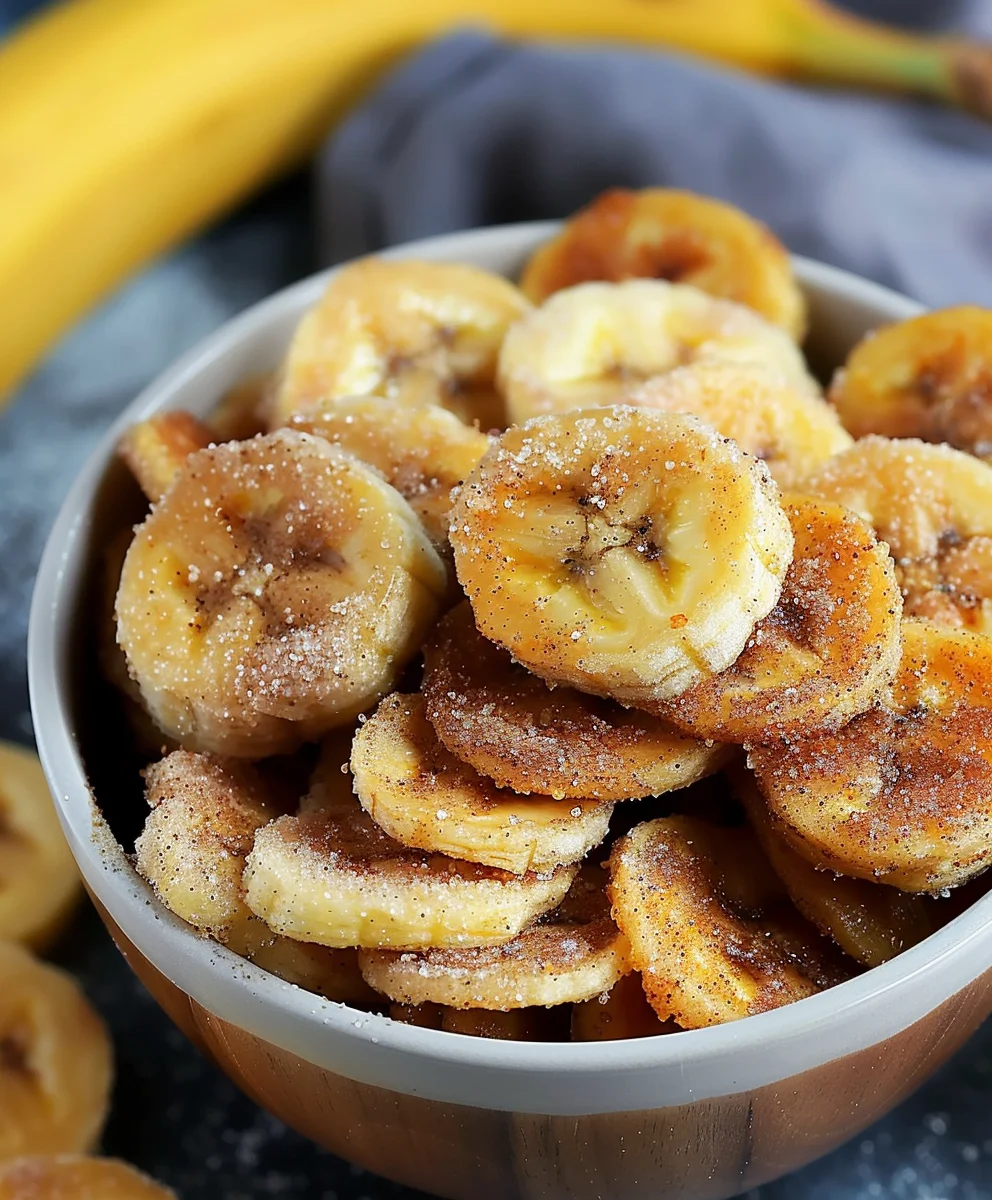
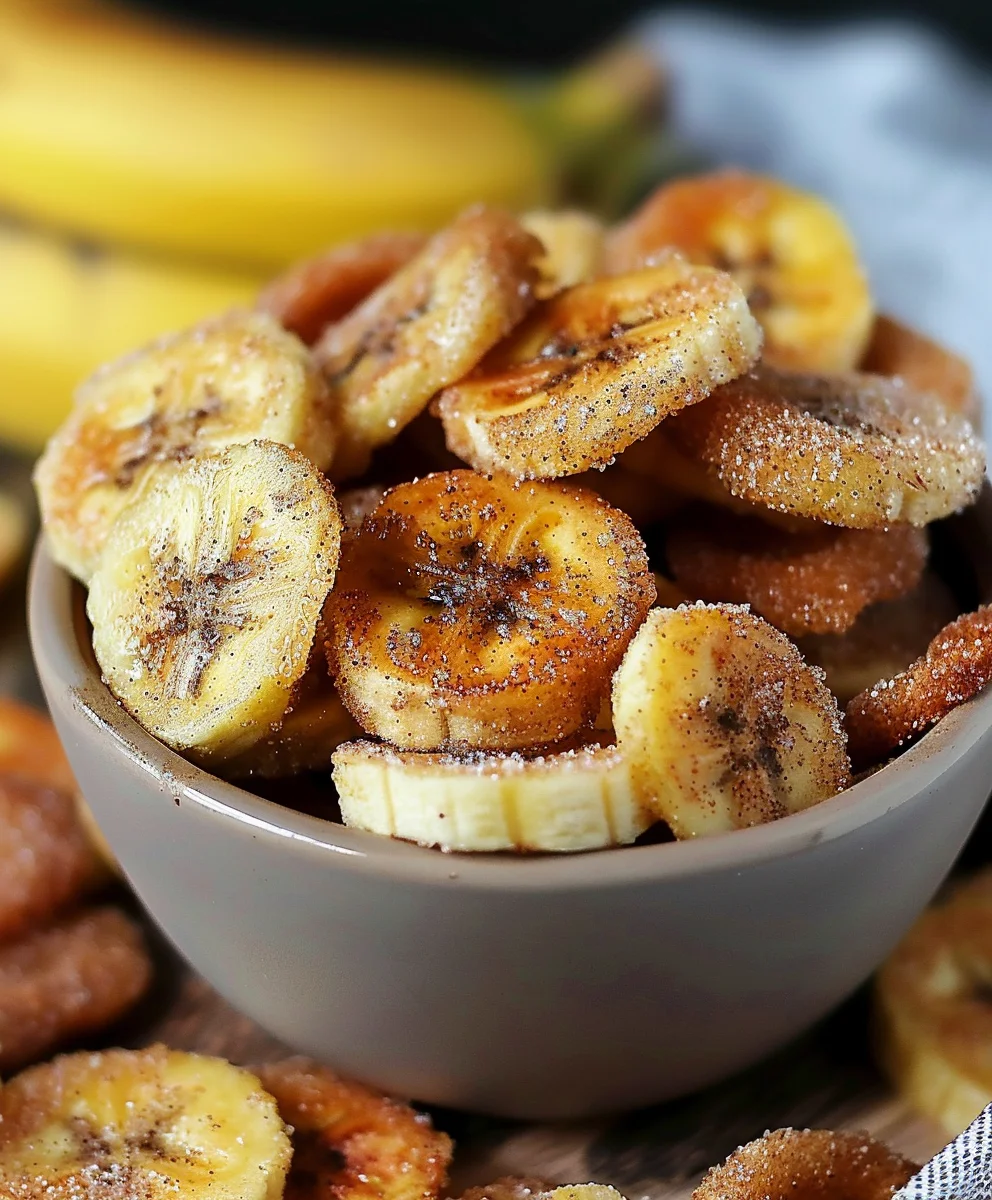
Cinnamon Sugar Air Fryer Banana Chips are about to become your new favorite snack, a delightful revelation for anyone craving a guilt-free treat! Imagine the perfect blend of sweet, spicy cinnamon and natural banana sweetness, all encapsulated in a gloriously crunchy chip. Traditionally, banana chips have been a beloved snack across various cultures, particularly in Southeast Asia and Latin America, where they are often deep-fried to achieve that irresistible crispness. While undeniably delicious, the deep-fried version isn’t always the healthiest option for daily snacking, often laden with excess oil.

This is precisely where our modern twist shines, offering a fantastic upgrade. We’ve harnessed the power of the air fryer to transform simple, ripe bananas into golden, crispy morsels without the need for excessive oil. People adore these Cinnamon Sugar Air Fryer Banana Chips not only for their incredibly satisfying crunch and perfectly balanced sweet-and-spicy flavor profile but also for their remarkable convenience and health benefits. They offer that coveted sweet and savory balance, making them an ideal choice for everything from a quick energy boost to a delightful topping for yogurt or oatmeal. Get ready to elevate your snack game with this easy, delicious, and significantly healthier alternative!

Crispy Cinnamon Sugar Air Fryer Banana Chips Snack this RECIPE

Ingredients:

  • 2-3 ripe, but firm bananas: Look for bananas that are mostly yellow with maybe just a few tiny specks of brown. They should be firm to the touch, not mushy. This ripeness level ensures sweetness without being overly soft, which can make slicing and air frying more challenging.
  • 1 tablespoon neutral oil: I often reach for coconut oil (melted), but olive oil or avocado oil work beautifully too. This small amount helps with crisping and ensures the seasoning sticks.
  • 2 tablespoons granulated sugar: You can adjust this to your personal preference. For a deeper flavor, a mix of 1 tablespoon granulated sugar and 1 tablespoon light brown sugar is also fantastic.
  • 1 teaspoon ground cinnamon: This is the star spice, giving our banana chips that signature warm, comforting flavor. Feel free to add a bit more if you’re a true cinnamon lover!
  • A tiny pinch of sea salt (optional, but highly recommended): Just a whisper of salt can really enhance the sweetness and overall flavor profile of the banana chips. Trust me on this one!

Preparing Your Bananas for Perfection

Okay, let’s get started on creating the most delicious Cinnamon Sugar Air Fryer Banana Chips you’ve ever tasted! The success of this recipe truly begins with the humble banana itself, and how we prepare it.

  1. Choose Your Bananas Wisely: First things first, selecting the right bananas is paramount. As I mentioned in the ingredients, you’ll want bananas that are ripe, but firm. What does this mean exactly? They should be vibrantly yellow, possibly with a few very small, faint brown spots, but not extensively speckled or overly soft. If they’re too green, they’ll be starchy and less sweet, and might not crisp up as nicely. If they’re too ripe and mushy, they’ll be incredibly difficult to slice thinly and consistently, and will likely stick to the air fryer basket or burn easily due to the higher sugar content. A perfectly ripe, firm banana offers the ideal balance of sweetness and structural integrity for beautiful chips.
  2. Peel and Slice with Precision: Gently peel your chosen bananas. Now, here’s where attention to detail truly pays off. We need to slice these bananas into very thin, uniform rounds. My recommendation for achieving consistent thickness is to use a mandoline slicer set to about 1/8 to 1/4 inch thick (approximately 3-6mm). If you don’t have a mandoline, a very sharp chef’s knife and a steady hand will work, but take your time to ensure each slice is as close to the same thickness as possible. Why is uniformity so important? Because uneven slices will cook unevenly – some will burn while others remain soft and chewy, and we’re aiming for that glorious, consistent crispness throughout every single chip. Thinner slices will yield a crispier chip, while slightly thicker ones might be a bit chewier in the center, which some people love. Experiment to find your personal preference, but generally, thinner is better for “chips.”
  3. Optional: Prevent Browning (for aesthetics): If you’re concerned about the banana slices browning before they even hit the air fryer, you can very quickly dip them in a bowl of water mixed with a tablespoon of lemon juice. This isn’t strictly necessary as they’ll brown beautifully during the air frying process anyway, but it can help keep them looking pristine if you’re working in batches or want to take your time. Just be sure to pat them very, very dry with a paper towel afterwards, as excess moisture will hinder crisping. I often skip this step myself because I find the natural browning adds to their charm and flavor, but it’s a good tip to have in your back pocket!

Flavoring and Seasoning Your Future Chips

This is where we infuse our plain banana slices with that irresistible cinnamon sugar goodness that makes these chips so addictive!

  1. Prepare Your Seasoning Blend: In a small bowl, combine your 2 tablespoons of granulated sugar (or your sugar mix) and 1 teaspoon of ground cinnamon. If you’re using that tiny pinch of sea salt, add it in here too. Whisk these together thoroughly until they are perfectly blended. You want to make sure the cinnamon is evenly distributed throughout the sugar so every chip gets a consistent coating of deliciousness. This blend is the heart of our Cinnamon Sugar Air Fryer Banana Chips!
  2. Lightly Oil the Banana Slices: In a large mixing bowl, gently place your sliced bananas. Drizzle the 1 tablespoon of neutral oil over the banana slices. Now, with clean hands or a spatula, very, very gently toss the slices to coat them evenly with the oil. The key here is to be incredibly gentle. Banana slices, especially when thin, can be fragile, and we don’t want to mash them. The oil serves a couple of crucial purposes: it helps the cinnamon sugar mixture adhere to the bananas, and it also contributes to that beautiful golden-brown color and crispy texture once they hit the air fryer. Ensure every slice has a light sheen of oil.
  3. Coat with Cinnamon Sugar: Once the banana slices are lightly oiled, sprinkle the prepared cinnamon sugar mixture over them. Again, with the utmost gentleness, toss the bananas again to evenly coat each slice. I find using my hands here is best, as it allows me to feel the coating and avoid breakage. You want every surface to have a lovely dusting of that aromatic cinnamon sugar. If you find some spots are bare, sprinkle a little more mixture on and gently toss again. This step is incredibly satisfying because the aroma of cinnamon immediately starts to fill your kitchen!

The Air Frying Process: Unlocking That Golden Crisp

Now for the main event – transforming these seasoned slices into gloriously crispy Cinnamon Sugar Air Fryer Banana Chips. This part requires a bit of patience and attention, but the reward is absolutely worth it.

  1. Preheat Your Air Fryer: Just like with a traditional oven, preheating your air fryer is a game-changer for even cooking. Preheat your air fryer to 350°F (175°C) for about 3-5 minutes. A preheated basket ensures that the bananas start cooking immediately and helps achieve that desired crisp exterior without over-drying the inside too quickly.
  2. Arrange in a Single Layer: This is arguably the most critical step for crispiness. Arrange your cinnamon-sugar-coated banana slices in a single layer in the air fryer basket. Do not, and I repeat, do not overcrowd the basket! Overcrowding will steam the bananas instead of air-frying them, resulting in soft, soggy, and disappointing chips. You’ll definitely need to cook these in multiple batches, likely 3-4 depending on the size of your air fryer. Give each slice its own little personal space to crisp up.
  3. Initial Air Frying: Cook the first batch for about 8-10 minutes at 350°F (175°C). Around the 4-5 minute mark, pause the air fryer, gently shake the basket, or use tongs to carefully flip each banana slice. This ensures even exposure to the circulating hot air and prevents sticking. You’ll notice them starting to dehydrate and become more golden around the edges.
  4. Continue Cooking Until Crispy: After flipping, continue air frying for another 3-7 minutes, or until the banana chips are beautifully golden brown and feel firm and crispy to the touch. The exact timing will vary significantly based on your air fryer model, the thickness of your banana slices, and the initial moisture content of your bananas. Keep a close eye on them during this second half of cooking, as they can go from perfectly golden to burnt very quickly. Look for a deep golden color and a noticeable crispness when you gently press on them. If they still feel soft, continue cooking in 1-2 minute increments, checking frequently.
  5. Repeat for Remaining Batches: Once a batch is done, carefully remove the crispy banana chips from the air fryer basket and place them on a wire rack to cool. Repeat the process with the remaining batches, making sure to arrange them in a single layer each time. It’s a bit of a process, but trust me, freshly made Cinnamon Sugar Air Fryer Banana Chips are worth every bit of effort!

The Final Touches: Cooling and Storage

You’re almost there! Don’t underestimate the importance of these final steps for achieving truly perfect banana chips.

  1. Cool Completely for Ultimate Crispness: This step is non-negotiable for crispy banana chips. As soon as you remove the hot chips from the air fryer, transfer them to a wire cooling rack. It’s perfectly normal for them to still feel slightly soft or pliable right out of the air fryer. The magic happens as they cool! As they cool down, they will crisp up considerably. Resist the urge to snack on them immediately (though a quality control taste test is definitely allowed!). Allow them to cool completely, which might take 15-30 minutes, depending on your kitchen’s humidity. This cooling period is absolutely essential for achieving that delightful, satisfying crunch. If you skip this step and store them while warm, they will become soggy.
  2. Storage for Continued Freshness: Once your Cinnamon Sugar Air Fryer Banana Chips are completely cool and crispy, transfer them to an airtight container. Store them at room temperature. They should remain wonderfully crispy for 3-5 days. If you live in a very humid environment, you might find their crispness diminishes a bit faster. If they do start to lose their crunch, you can often revive them by popping them back into the air fryer at 300°F (150°C) for a few minutes until re-crisped. Just be careful not to burn them!

Tips for Success, Troubleshooting, and Flavor Explorations

Making Cinnamon Sugar Air Fryer Banana Chips is generally straightforward, but like any cooking endeavor, a few insights can elevate your results from good to absolutely amazing. Plus, it’s fun to experiment with variations!

Troubleshooting Common Issues:

  • My Chips Aren’t Crispy!
    • Slice Thickness: This is the number one culprit. If your slices are too thick, they simply won’t crisp up properly. Aim for 1/8 to 1/4 inch. Thinner is always better for crispiness.
    • Overcrowding: Remember, a single layer is key. If you pile them up, they’ll steam rather than fry.
    • Not Enough Cooking Time/Too Low Temperature: Air fryers vary. If after the recommended time they’re still soft, increase the cooking time in 1-2 minute increments or slightly bump up the temperature (e.g., to 375°F/190°C, but watch carefully!).
    • Cooling: Did you let them cool completely on a wire rack? This step is crucial for crisping up.
  • My Chips Are Burning!
    • Too High Temperature: While some air fryers might need higher temps, starting at 350°F (175°C) is a safe bet. If they burn quickly, reduce the temperature slightly.
    • Uneven Slices: Again, uniformity matters. Thinner slices will cook (and burn) faster than thicker ones in the same batch.
    • Not Flipping/Shaking: Ensure you’re turning them halfway through to promote even browning.
    • Natural Sugars: Very ripe bananas have higher sugar content, making them more prone to caramelizing and burning quickly. Adjust cooking time accordingly.
  • My Chips Are Sticking to the Basket!
    • Not Enough Oil: Ensure your banana slices are lightly coated with oil before seasoning.
    • Not Preheated: A preheated basket helps prevent sticking.
    • Basket Condition: If your air fryer basket is older or scratched, food can stick more easily. A light spray with a non-aerosol cooking oil before each batch can help.

Enhancing the Flavor Profile:

While the classic Cinnamon Sugar Air Fryer Banana Chips are undeniably delicious, you can certainly get creative with your seasoning blends!

  • Spice It Up:
    • Nutmeg or Cardamom: A pinch of either of these can add a sophisticated warmth to your chips.
    • Ginger: Ground ginger brings a lovely subtle heat.
    • Pumpkin Pie Spice: Why not embrace seasonal flavors? This blend works wonderfully.
    • Cocoa Powder: Mix a teaspoon of unsweetened cocoa powder with your sugar and cinnamon for a chocolatey twist!
  • Different Sugars:
    • Maple Sugar: Offers a distinct, rich maple flavor that pairs beautifully with bananas.
    • Coconut Sugar: A less refined option that gives a lovely caramel note.
    • Powdered Sugar: While not ideal for baking on, a light dusting after cooling can add extra sweetness and a delicate texture.
  • Salty-Sweet Twist: Don’t forget that tiny pinch of sea salt I mentioned. It truly elevates the sweetness and depth of flavor. You could even use a very fine flaky sea salt for a beautiful finish.

Serving Suggestions:

These homemade Cinnamon Sugar Air Fryer Banana Chips are incredibly versatile!

  • Standalone Snack: They are perfect on their own for a quick, wholesome, and satisfying snack.
  • Breakfast Booster: Sprinkle them over your morning oatmeal, yogurt, or cereal for added crunch and flavor.
  • Dessert Topping: Crush them lightly and use them as a topping for vanilla ice cream, puddings, or even a banana cream pie.
  • Trail Mix Addition: Add them to your homemade trail mix for a naturally sweet and crunchy element.
  • Garnish: Use them as an edible garnish for smoothies or smoothie bowls.

I genuinely hope these detailed instructions and tips empower you to create the most incredible batch of Cinnamon Sugar Air Fryer Banana Chips. There’s something truly satisfying about transforming simple bananas into such a delightful and healthy snack right in your own kitchen!

Crispy Cinnamon Sugar Air Fryer Banana Chips Snack

Conclusion:

Well, my friends, we’ve journeyed through the simple magic of transforming humble bananas into something truly extraordinary. If there’s one recipe I insist you add to your immediate “must-try” list, it’s this one. Forget store-bought, heavily processed snacks that leave you feeling guilty; we’re talking about a homemade delight that’s not only incredibly easy and quick to prepare but also satisfies that craving for something sweet, crispy, and utterly delicious. This recipe for Cinnamon Sugar Air Fryer Banana Chips is a revelation. It takes the natural sweetness of ripe bananas, infuses them with the warm, comforting spice of cinnamon, and gives them an unbeatable crunch, all thanks to the marvel of the air fryer. Seriously, the speed at which these come together means you’re just minutes away from a guilt-free treat that will make your taste buds sing.

Why These Banana Chips Are an Absolute Game-Changer

What makes these Cinnamon Sugar Air Fryer Banana Chips such a phenomenal snack? Firstly, it’s the texture. That perfect, delicate crispness that shatters wonderfully with every bite is just something you can’t replicate with other methods as easily or as quickly. Secondly, the flavor profile is simply divine. The natural sugars in the banana caramelize beautifully, mingling with the aromatic cinnamon, creating a comforting yet vibrant taste. It’s a healthier alternative to many fried snacks, offering a good source of potassium and dietary fiber, making it a snack you can truly feel good about enjoying yourself or serving to your loved ones. I promise you, once you try them, you’ll be hooked. They’re ideal for those moments when you need a quick energy boost, a delightful accompaniment to your morning coffee, or even a healthier dessert option that doesn’t compromise on flavor.

Endless Ways to Enjoy Your Crispy Creation

The beauty of these homemade banana chips doesn’t stop at their standalone deliciousness. Oh no, the serving possibilities are practically endless! Of course, they are absolutely fantastic eaten straight from the bowl as a simple, satisfying snack. But let’s get creative, shall we?

  • Crush them slightly and sprinkle them over your morning oatmeal or yogurt parfait for an added layer of flavor and crunch. They add such a lovely texture!
  • Use them as a topping for ice cream, especially a creamy vanilla bean or even a rich chocolate. The contrast of cold and crispy is out of this world.
  • Mix them into your favorite trail mix for a natural sweetness boost, alongside nuts, seeds, and maybe some dark chocolate chips.
  • For a decadent treat, try dipping them partially into melted dark chocolate and letting them set. The combination of cinnamon, banana, and chocolate is simply divine.
  • They make a surprising and delightful addition to smoothie bowls, providing both texture and that wonderful banana flavor.

And don’t be afraid to experiment with variations! While cinnamon sugar is a classic for a reason, you could try adding a pinch of nutmeg, a dash of cardamom for an exotic twist, or even a sprinkle of pumpkin pie spice blend during the fall months. For those who prefer a less sweet snack, simply reduce the sugar or omit it entirely and let the natural sweetness of the banana shine, perhaps with a touch of sea salt for a sweet and savory sensation. You could also try different types of sugar, like coconut sugar for a deeper, more caramel-like note, or even a tiny drizzle of maple syrup before air frying.

Your Turn to Create and Share!

So, what are you waiting for? Grab those ripe bananas, dust off your air fryer, and treat yourself to this incredible snack. I genuinely believe that once you try making these, you’ll wonder how you ever lived without them. It’s a recipe that truly delivers on taste, health, and convenience. Don’t be shy; give it a go today! And when you do, I would absolutely love to hear about your experience. Did you add any fun variations? How did your family react? Did you find a new favorite way to serve them? Please, please, share your creations and thoughts! Your culinary adventures inspire me, and I can’t wait to hear all about your delicious Cinnamon Sugar Air Fryer Banana Chips. Happy snacking!


Crispy Cinnamon Sugar Air Fryer Banana Chips

Crispy Cinnamon Sugar Air Fryer Banana Chips

Transform simple, ripe bananas into golden, crispy, and guilt-free Cinnamon Sugar Air Fryer Banana Chips. This healthier snack offers a perfect blend of sweet, spicy cinnamon and natural banana sweetness, achieving an irresistible crunch without excessive oil. Ideal for a quick energy boost or a delightful topping for yogurt and oatmeal.

Prep Time
15 Minutes
Cook Time
45 Minutes
Total Time
1 Hours
Servings
4 servings

Ingredients

  • 2-3 ripe, but firm bananas
  • 1 tbsp neutral oil (e.g., coconut, olive, avocado)
  • 2 tbsp granulated sugar (or 1 tbsp granulated + 1 tbsp light brown sugar)
  • 1 tsp ground cinnamon
  • Pinch of sea salt (optional)

Instructions

  1. Step 1
    Peel and slice bananas very thinly and uniformly, about 1/8 to 1/4 inch thick. Use a mandoline for best results.
  2. Step 2
    In a large bowl, gently toss banana slices with the neutral oil until lightly coated. In a small separate bowl, mix granulated sugar, ground cinnamon, and optional sea salt until well combined. Sprinkle this seasoning over the oiled banana slices and gently toss to coat every piece evenly.
  3. Step 3
    Preheat your air fryer to 350°F (175°C) for 3-5 minutes.
  4. Step 4
    Arrange the seasoned banana slices in a single layer in the preheated air fryer basket, ensuring not to overcrowd (cook in multiple batches). Cook for 8-10 minutes, then pause, gently shake the basket or flip slices. Continue air frying for another 3-7 minutes, or until chips are golden brown and crispy. Watch carefully to prevent burning.
  5. Step 5
    Carefully remove crispy banana chips from the air fryer and transfer them to a wire rack to cool completely. They will crisp up further as they cool. Once fully cooled, store in an airtight container at room temperature for 3-5 days. If they lose crispness, re-crisp in the air fryer at 300°F (150°C) for a few minutes.

Important Information

Nutrition Facts (Per Serving)

It is important to consider this information as approximate and not to use it as definitive health advice.

Allergy Information

Please check ingredients for potential allergens and consult a health professional if in doubt.

« Previous Post
Honey Pepper Chicken Panini Pasta: Easy Dinner Recipe
Next Post »
Best Creamy Roasted Garlic Tomato Soup - Easy & Delicious

If you enjoyed this…

Cinnamon Rolo Cookies: A Delicious Twist on Classic Treats

Delicious Snowman Peanut Butter Cookies Recipe for Winter Fun!

Biscoff Truffles Delight: Indulge in the Ultimate Sweet Treat

Primary Sidebar

Browse by Diet

BreakfastDinnerLunchDessertAppetizer

Sweet Peach Yogurt Parfait Delight

One of my fondest memories is from a lazy summer afternoon spent at my grandmother’s house. The sun filtered through the kitchen window, casting a warm glow over the table where she would create her culinary magic. It was during one of those blissful moments that I first tasted her Peach Yogurt Parfait with Honey and Granola. The sweet aroma of ripe peaches mingling with creamy yogurt and the crunch of granola was nothing short of heavenly. It felt like summer captured in a bowl, and I still remember the joy of diving in with a spoon, each layer revealing a new burst of flavor.

When I think about that parfait, I can almost hear the gentle hum of the bees outside, reminding me of the floral notes that honey brings to every bite. The vibrant yellows and soft oranges of the peaches contrast beautifully with the creamy white yogurt and the golden crunch of granola. It’s a dish that not only looks delightful but also tastes like a celebration of fresh, wholesome ingredients.

What makes my version of this Peach Yogurt Parfait special is the careful balance of flavors and textures. I use ripe, juicy peaches, drizzled with locally sourced honey, and a homemade granola that’s bursting with nuts and seeds for an extra crunch. It’s a simple dish, but every layer is crafted with love and attention.

Let me show you exactly how to make this delightful parfait, so you can bring a bit of that summer magic into your kitchen!

Sweet Peach Yogurt Parfait Delight

Why You’ll Love This Recipe

  • Delightfully creamy texture from the Greek yogurt, paired with the juicy sweetness of fresh peaches.
  • Ready in under 20 minutes, making it a quick and satisfying breakfast or snack option.
  • Budget-friendly, using common ingredients that you may already have in your pantry.
  • Customizable with your favorite granola and nuts, allowing you to tailor each parfait to your taste.
  • Perfectly balanced flavors with the bright acidity of lemon juice and the sweetness of honey enhancing the peaches.

Ingredients

  • For the Parfait:
  • 2 cups plain Greek yogurt (or vanilla yogurt for a sweeter option)
  • 2 large ripe peaches, diced (about 2 cups)
  • 1 tablespoon fresh lemon juice (to prevent browning of peaches)
  • 2 tablespoons honey (plus more for drizzling)
  • 1 teaspoon vanilla extract (optional for extra flavor)
  • For the Granola:
  • 1 cup granola (store-bought or homemade; see notes for a simple granola recipe)
  • 1/4 cup sliced almonds (optional for added crunch)
  • 1/4 cup shredded coconut (optional for added flavor)

Let’s dive into some key ingredients that make this Peach Yogurt Parfait so delightful! First, the Greek yogurt is not only creamy but also packed with protein, making it a satisfying option for breakfast or a snack. If you’re looking for a sweeter option, you can easily substitute it with vanilla yogurt, though it may alter the overall flavor balance. Next, the ripe peaches are the star of the show; their natural sweetness shines through, so I recommend choosing peaches that yield slightly to pressure, indicating they’re perfectly ripe. If peaches aren’t in season, feel free to use nectarines or even frozen peaches—just thaw them before use. Finally, honey adds a lovely floral sweetness that ties everything together. If you prefer, maple syrup can serve as a delicious substitute.

Step-by-Step Instructions

  1. Start by preparing the peaches. Wash them thoroughly, then slice and dice them into bite-sized pieces. In a medium bowl, toss the diced peaches with 1 tablespoon of fresh lemon juice to prevent browning. Set aside for about 5 minutes while the lemon juice works its magic.
  2. In a separate bowl, combine the Greek yogurt, 2 tablespoons of honey, and 1 teaspoon of vanilla extract if using. Stir the mixture until smooth and thoroughly blended. This should take about a minute. Avoid overmixing to maintain the creaminess of the yogurt.
  3. Now it’s time to layer your parfait. Grab a clear glass or bowl to showcase your beautiful creation. Start with a generous spoonful of the yogurt mixture at the bottom—about 1/4 cup will do. Use a spoon to spread it evenly.
  4. Add a layer of the diced peaches over the yogurt, ensuring they cover the yogurt completely. You might want to use about half of what you have prepared—roughly 1 cup. This layer should be visually appealing, so arrange the peaches neatly.
  5. Sprinkle 1/4 cup of granola over the peaches. This adds a delightful crunch. Make sure to distribute it evenly to ensure every bite has that satisfying texture. Avoid packing it down too tightly, as you want it to maintain its crunch.
  6. Repeat the layers: spoon in another 1/4 cup of yogurt, followed by another cup of peaches, and another sprinkle of granola. You should have at least two layers, but feel free to add more depending on your glass size.
  7. Finish off your parfait with a drizzle of honey on top for added sweetness and a touch of elegance. If you’re using sliced almonds or shredded coconut, sprinkle them on top now. It adds a lovely visual contrast and extra flavor.
  8. Serve immediately or refrigerate for up to 30 minutes before serving to allow the flavors to meld together. However, I recommend enjoying it fresh to maintain the granola’s crunch.

Pro Tips for the Best Peach Yogurt Parfait With Honey And Granola

  • Make sure to choose ripe peaches for the best flavor and texture. A common mistake is using unripe fruit, which can lead to a less enjoyable parfait. Look for peaches that are fragrant and slightly soft to the touch.
  • Use a clear glass to assemble your parfait; this not only makes for a beautiful presentation but also allows you to see the colorful layers, which adds to the enjoyment of eating it.
  • For an even creamier texture, consider whipping the Greek yogurt with a hand mixer for a couple of minutes before layering. This small adjustment makes a huge difference in mouthfeel.
  • Be mindful of the granola-to-yogurt ratio. Too much granola can overwhelm the parfait, while too little can make it feel too creamy. Aim for about 1/4 cup of granola per layer for the perfect balance.
  • If you’re making this for a gathering, consider preparing the yogurt and peaches ahead of time and layering them just before serving. This ensures the granola stays crunchy!

Variations & Serving Ideas

There are so many ways to get creative with your Peach Yogurt Parfait! For a tropical twist, swap out the peaches for mangoes or pineapples and top with coconut flakes. If you prefer a berry flavor, mix in some blueberries or strawberries with the peaches for added color and taste. For a nutty version, incorporate chopped walnuts or pecans instead of almonds.

As for serving ideas, this parfait pairs beautifully with a side of scrambled eggs for a hearty breakfast or fresh fruit salad for a light lunch. You might also enjoy it alongside whole grain toast with almond butter for an energizing snack. The contrast of flavors and textures will elevate your meal experience!

Storage, Make-Ahead & Reheating

The Peach Yogurt Parfait is best enjoyed fresh, but you can prepare some components ahead of time. Store the layered parfait in an airtight container in the refrigerator for up to 24 hours. However, be cautious; the granola may lose its crunch if stored too long. You can freeze the yogurt and peach mixture for up to 2 months; just remember to thaw it in the refrigerator overnight before serving.

If you plan to enjoy this dish the next day, it can taste even better as the flavors meld together. Just remember to add the granola right before serving to keep its delightful crunch!

Frequently Asked Questions

Can I make Peach Yogurt Parfait With Honey And Granola ahead of time?

Yes — in fact, it tastes even better the next day as the flavors meld. However, I recommend waiting to add the granola until just before serving to maintain its crunch.

What can I substitute for Greek yogurt?

If you prefer a lighter option, you can substitute Greek yogurt with regular yogurt or a dairy-free alternative like coconut yogurt. Just remember that this may alter the creaminess and flavor profile slightly.

Can I use frozen peaches for this parfait?

Absolutely! Just make sure to thaw the frozen peaches before using them. They will still add great flavor, though the texture may be slightly softer than fresh peaches.

How do I make the parfait vegan?

To make a vegan version, substitute the Greek yogurt with a plant-based yogurt alternative, and replace honey with maple syrup or agave nectar. This keeps the parfait sweet while adhering to a vegan diet.

What other fruits can I use in this recipe?

You can mix and match fruits based on your preference. Try using strawberries, blueberries, raspberries, or even bananas. Just make sure to adjust the lemon juice as needed to prevent browning.

Sweet Peach Yogurt Parfait Delight

Final Thoughts

The Peach Yogurt Parfait with Honey and Granola is a delightful blend of creamy yogurt, sweet peaches, and crunchy granola that creates a satisfying and nourishing treat. Each layer bursts with flavor, making it a perfect choice for breakfast or a light dessert.

This is the kind of recipe I come back to again and again, especially when I want something refreshing and wholesome to start my day. The harmony of sweet and tart flavors, combined with the delightful crunch, never fails to lift my spirits!

I encourage you to give this parfait a try and indulge in its comforting goodness. Feel free to share your results or even add your own twist—perhaps a sprinkle of cinnamon or a handful of nuts. Enjoy creating your perfect parfait!

Print
clock clock iconcutlery cutlery iconflag flag iconfolder folder iconinstagram instagram iconpinterest pinterest iconfacebook facebook iconprint print iconsquares squares iconheart heart iconheart solid heart solid icon

Peach Yogurt Parfait


  • Author: Lily author
  • Total Time: 15 minutes
  • Yield: 4 servings 1x
Pin Recipe
Print Recipe

Description

This Peach Yogurt Parfait combines creamy Greek yogurt, juicy peaches, and crunchy granola for a delightful treat. It’s a perfect breakfast or snack that captures the essence of summer in every bite.


Ingredients

Scale
  • For the Parfait:
  • 2 cups plain Greek yogurt (or vanilla yogurt for a sweeter option)
  • 2 large ripe peaches, diced (about 2 cups)
  • 1 tablespoon fresh lemon juice (to prevent browning of peaches)
  • 2 tablespoons honey (plus more for drizzling)
  • 1 teaspoon vanilla extract (optional for extra flavor)
  • For the Granola:
  • 1 cup granola (store-bought or homemade; see notes for a simple granola recipe)
  • 1/4 cup sliced almonds (optional for added crunch)
  • 1/4 cup shredded coconut (optional for added flavor)

Instructions

  1. Start by preparing the peaches. Wash them thoroughly, then slice and dice them into bite-sized pieces. In a medium bowl, toss the diced peaches with 1 tablespoon of fresh lemon juice to prevent browning. Set aside for about 5 minutes while the lemon juice works its magic.
  2. In a separate bowl, combine the Greek yogurt, 2 tablespoons of honey, and 1 teaspoon of vanilla extract if using. Stir the mixture until smooth and thoroughly blended. This should take about a minute. Avoid overmixing to maintain the creaminess of the yogurt.
  3. Now it’s time to layer your parfait. Grab a clear glass or bowl to showcase your beautiful creation. Start with a generous spoonful of the yogurt mixture at the bottom—about 1/4 cup will do. Use a spoon to spread it evenly.
  4. Add a layer of the diced peaches over the yogurt, ensuring they cover the yogurt completely. You might want to use about half of what you have prepared—roughly 1 cup. This layer should be visually appealing, so arrange the peaches neatly.
  5. Sprinkle 1/4 cup of granola over the peaches. This adds a delightful crunch. Make sure to distribute it evenly to ensure every bite has that satisfying texture. Avoid packing it down too tightly, as you want it to maintain its crunch.
  6. Repeat the layers: spoon in another 1/4 cup of yogurt, followed by another cup of peaches, and another sprinkle of granola. You should have at least two layers, but feel free to add more depending on your glass size.
  7. Finish off your parfait with a drizzle of honey on top for added sweetness and a touch of elegance. If you’re using sliced almonds or shredded coconut, sprinkle them on top now. It adds a lovely visual contrast and extra flavor.
  8. Serve immediately or refrigerate for up to 30 minutes before serving to allow the flavors to meld together. However, I recommend enjoying it fresh to maintain the granola’s crunch.
  • Prep Time: 15 mins
  • Cook Time: 0 mins
  • Category: Breakfast
  • Method: No-cook
  • Cuisine: American

Nutrition

  • Serving Size: 1 parfait
  • Calories: 250
  • Sugar: 20 g
  • Sodium: 50 mg
  • Fat: 5 g
  • Saturated Fat: 2 g
  • Unsaturated Fat: 3 g
  • Trans Fat: 0 g
  • Carbohydrates: 40 g
  • Fiber: 3 g
  • Protein: 10 g
  • Cholesterol: 10 mg

Keywords: Choose ripe peaches for the best flavor and texture. Use a clear glass for a beautiful presentation. For creaminess, consider whipping the yogurt before layering. Be mindful of the granola-to-yogurt ratio. Prepare yogurt and peaches ahead of time for gatherings, layering just before serving.

Did you make this recipe?

Share a photo and tag us — we can't wait to see what you've made!

Sun-Kissed Frozen Orange Cream Slush

As a child, summer days felt like they lasted forever. I remember the sticky heat wrapping around me as I played outside, my laughter mingling with the sounds of the neighborhood. But nothing could cool me down quite like the moment I’d spot my grandmother, laboring over her blender, whipping up her famous Frozen Orange Creamsicle Slush. That vibrant orange treat, with its frosty texture and sweet citrus aroma, was like a burst of sunshine in a cup. Just one sip, and I could feel the coolness wash over me, sparking pure joy.

This Frozen Orange Creamsicle Slush has a way of making you feel like a kid again. Its creamy, dreamy consistency is a delightful balance of bright orange and soft vanilla, inviting you to dive right in. The refreshing tang of orange dances on your tongue, while the smooth creaminess envelops you in a comforting embrace. It’s a nostalgic treat that’s perfect for hot summer afternoons or anytime you need a little pick-me-up.

What makes my version of this slush stand out is the addition of a hint of vanilla bean, which elevates the flavor and adds an extra layer of richness. Plus, it’s super easy to whip up with just a few simple ingredients that you probably already have on hand! So, if you’re ready to relive those sun-soaked memories, let me show you exactly how to make it.

Sun-Kissed Frozen Orange Cream Slush

Why You’ll Love This Recipe

  • Each slush is a perfect blend of creamy vanilla and zesty orange, creating a nostalgic flavor reminiscent of summer days.
  • This refreshing treat is ready in under 15 minutes, making it an ideal quick dessert for unexpected guests or hot afternoons.
  • With just 8 simple ingredients, it’s budget-friendly, ensuring you don’t have to break the bank to enjoy a delicious slush.
  • The slush has a perfectly smooth texture, thanks to the combination of ice and ice cream, providing a delightful contrast to the bright citrus flavors.
  • It’s highly customizable; you can easily adjust the sweetness and add fresh herbs for a unique twist that suits your taste.

Ingredients

  • 2 cups orange juice (freshly squeezed or store-bought)
  • 1 cup vanilla ice cream
  • 1 cup crushed ice
  • 1/2 cup milk (whole or 2%)
  • 1/4 cup granulated sugar (adjust based on sweetness preference)
  • 1 teaspoon vanilla extract
  • Zest of 1 orange (for added flavor)
  • Fresh orange slices and mint leaves (for garnish)

The star of this Frozen Orange Creamsicle Slush is the orange juice, which provides the vibrant, citrusy base. Freshly squeezed juice will yield the brightest flavor, but store-bought options can be just as convenient. If you’re opting for store-bought, choose 100% pure juice with no added sugars for the best results. Another essential ingredient is the vanilla ice cream; it adds creaminess and sweetness. You can substitute it with dairy-free ice cream if you’re looking for a vegan option. Whole or 2% milk complements the ice cream, creating a smooth blend. If you want a lower-calorie version, almond or oat milk can be good alternatives.

Lastly, the granulated sugar can be adjusted based on your sweetness preference. If you prefer a more natural sweetener, consider using honey or agave syrup. The orange zest enhances the flavor profile, providing an aromatic pop that brings the whole slush together. Don’t skip it! It adds an extra layer of brightness that makes this slush truly special.

Step-by-Step Instructions

  1. Start by preparing your ingredients. Gather 2 cups of orange juice, 1 cup of vanilla ice cream, and 1 cup of crushed ice. Make sure the ice is finely crushed, as larger chunks can make blending difficult.
  2. In a blender, combine the orange juice, vanilla ice cream, crushed ice, and 1/2 cup of milk. Add 1/4 cup of granulated sugar and 1 teaspoon of vanilla extract. If you like a sweeter slush, consider adding a bit more sugar at this stage.
  3. Add the zest of 1 orange to the blender. This step is crucial for enhancing the citrus flavor of your slush. Make sure not to include the bitter white pith—only the flavorful zest.
  4. Blend the mixture on medium-high speed for about 30-45 seconds. Stop once the ingredients are fully combined and the slush has a smooth, even consistency. If you notice large chunks of ice, blend for an additional 10-15 seconds. Avoid over-blending, as this can make the slush too liquidy.
  5. Once blended, taste the slush. If it needs more sweetness, add a little more sugar and blend for a few more seconds. If it’s too thick, you can add a splash of milk to reach your desired consistency.
  6. Pour the slush into glasses. This recipe typically serves 4, but you can easily double it for larger gatherings. Use a spoon to help guide the slush into the glasses if needed.
  7. Garnish each serving with fresh orange slices and mint leaves. The mint not only adds a pop of color but also a refreshing aroma that complements the citrus flavors beautifully.
  8. Serve immediately and enjoy! If you’ve made extra, you can refrigerate it for a short time, but it’s best enjoyed fresh.

Pro Tips for the Best Frozen Orange Creamsicle Slush

  • Don’t skip the orange zest! It’s a game-changer for flavor. Always zest before juicing to make it easier.
  • Use a high-powered blender for the best texture. A standard blender may struggle with ice, leading to uneven consistency. If you have a food processor, that can work too, but ensure the ice is finely crushed.
  • Adjust the ice-to-liquid ratio carefully. If your slush is too thick, it won’t blend well. Start with less ice and add more until you reach your preferred texture.
  • Be cautious with the sugar! Always start with the lower amount, as you can easily add more, but it’s hard to fix an overly sweet slush.
  • For a fun twist, consider adding a splash of coconut milk or a handful of fresh fruit like strawberries or pineapple. This not only enhances the flavor but also adds a beautiful color contrast.

Variations & Serving Ideas

There are countless ways to put a spin on your Frozen Orange Creamsicle Slush. Consider making a tropical version by adding in some pineapple juice or coconut milk for a delightful tropical twist. If you’re feeling adventurous, try incorporating a handful of frozen mango or peach slices for added sweetness. For a lighter version, swap out the vanilla ice cream for Greek yogurt for a creamy yet tangy alternative.

As for serving ideas, this refreshing slush pairs wonderfully with light summer dishes like grilled chicken skewers, fish tacos, or a simple salad topped with citrus vinaigrette. The bright, zesty flavors of the slush complement these dishes perfectly, making them an ideal pairing for a sunny day.

Storage, Make-Ahead & Reheating

This Frozen Orange Creamsicle Slush is best enjoyed fresh, but if you have leftovers, you can store them in an airtight container in the fridge for up to 2 days. Just keep in mind that the slush may lose some of its texture over time as the ice melts. It doesn’t freeze well, as the ice will turn into a solid block. If you must freeze it, blend again after thawing to restore the slushy consistency. This treat is best the day you make it, as the flavors meld together beautifully overnight, enhancing its deliciousness.

Frequently Asked Questions

Can I make Frozen Orange Creamsicle Slush ahead of time?

Yes — in fact, it tastes even better the next day as the flavors meld. However, it’s best to enjoy it fresh, as the texture can change if stored for too long. If you need to prepare it ahead, keep it in the fridge and re-blend before serving.

What kind of orange juice should I use?

For the best flavor, use freshly squeezed orange juice. However, if you’re short on time, opt for 100% pure store-bought juice without added sugars. This will ensure that your slush remains flavorful and refreshing.

Can I substitute the vanilla ice cream?

Absolutely! If you’re looking for a dairy-free option, coconut milk ice cream or a non-dairy vanilla ice cream can work wonderfully. They will still provide the creamy texture and sweetness you desire.

How can I adjust the sweetness of my slush?

You can easily adjust the sweetness by modifying the amount of sugar added. Start with 1/4 cup and taste the mixture before blending. If you prefer it sweeter, add more sugar gradually until it reaches your desired level.

What should I do if my slush is too thick?

If your slush is too thick, simply add a splash of milk or orange juice and blend again. This will help achieve a more drinkable consistency while maintaining the slushy texture. Adjust gradually to reach your preferred thickness.

Sun-Kissed Frozen Orange Cream Slush

Final Thoughts

The Frozen Orange Creamsicle Slush is a delightful blend of refreshing citrus and creamy goodness, making it a perfect treat for warm days or any time you crave a taste of nostalgia. The way the bright orange flavor dances with the creamy texture truly elevates this slush, transforming it into a satisfying escape from the everyday.

This is the kind of recipe I come back to again and again, especially when I’m looking to cool down or impress guests at a summer gathering. It’s simple to make and always brings smiles all around! I encourage you to try this recipe for yourself—don’t hesitate to share your results or even put your own spin on it. Happy slushing!

Print
clock clock iconcutlery cutlery iconflag flag iconfolder folder iconinstagram instagram iconpinterest pinterest iconfacebook facebook iconprint print iconsquares squares iconheart heart iconheart solid heart solid icon

Frozen Orange Creamsicle Slush


  • Author: Lily author
  • Total Time: 15 minutes
  • Yield: 4 servings 1x
Pin Recipe
Print Recipe

Description

This Frozen Orange Creamsicle Slush is a refreshing treat that combines creamy vanilla and zesty orange flavors. Perfect for hot summer days, it brings back nostalgic memories with every sip.


Ingredients

Scale
  • 2 cups orange juice (freshly squeezed or store-bought)
  • 1 cup vanilla ice cream
  • 1 cup crushed ice
  • 1/2 cup milk (whole or 2%)
  • 1/4 cup granulated sugar (adjust based on sweetness preference)
  • 1 teaspoon vanilla extract
  • Zest of 1 orange (for added flavor)
  • Fresh orange slices and mint leaves (for garnish)

Instructions

  1. Start by preparing your ingredients. Gather 2 cups of orange juice, 1 cup of vanilla ice cream, and 1 cup of crushed ice. Make sure the ice is finely crushed, as larger chunks can make blending difficult.
  2. In a blender, combine the orange juice, vanilla ice cream, crushed ice, and 1/2 cup of milk. Add 1/4 cup of granulated sugar and 1 teaspoon of vanilla extract. If you like a sweeter slush, consider adding a bit more sugar at this stage.
  3. Add the zest of 1 orange to the blender. This step is crucial for enhancing the citrus flavor of your slush. Make sure not to include the bitter white pith—only the flavorful zest.
  4. Blend the mixture on medium-high speed for about 30-45 seconds. Stop once the ingredients are fully combined and the slush has a smooth, even consistency. If you notice large chunks of ice, blend for an additional 10-15 seconds. Avoid over-blending, as this can make the slush too liquidy.
  5. Once blended, taste the slush. If it needs more sweetness, add a little more sugar and blend for a few more seconds. If it’s too thick, you can add a splash of milk to reach your desired consistency.
  6. Pour the slush into glasses. This recipe typically serves 4, but you can easily double it for larger gatherings. Use a spoon to help guide the slush into the glasses if needed.
  7. Garnish each serving with fresh orange slices and mint leaves. The mint not only adds a pop of color but also a refreshing aroma that complements the citrus flavors beautifully.
  8. Serve immediately and enjoy! If you’ve made extra, you can refrigerate it for a short time, but it's best enjoyed fresh.
  • Prep Time: 15 min
  • Cook Time: 0 min
  • Category: Dessert
  • Method: Blending
  • Cuisine: American

Nutrition

  • Serving Size: 1 serving
  • Calories: 200
  • Sugar: 30 g
  • Sodium: 50 mg
  • Fat: 5 g
  • Saturated Fat: 3 g
  • Unsaturated Fat: 2 g
  • Trans Fat: 0 g
  • Carbohydrates: 40 g
  • Fiber: 1 g
  • Protein: 2 g
  • Cholesterol: 20 mg

Keywords: Don't skip the orange zest! It's a game-changer for flavor. Always zest before juicing to make it easier.

Did you make this recipe?

Share a photo and tag us — we can't wait to see what you've made!

Zesty Lemon Poppy Seed Delight

One rainy afternoon, I found myself in my grandmother’s cozy kitchen, the kind that always smelled like warmth and love. She was whipping up her famous Lemon Poppy Seed Loaf, a recipe that had been passed down through generations. As the batter came together, the zesty aroma of fresh lemons filled the air, mingling perfectly with the nutty fragrance of poppy seeds. I can still picture her, apron-clad, as she expertly drizzled a vibrant citrus icing over the loaf, creating a glossy, sun-kissed finish that beckoned us to dive in. It was a moment that sparked my own passion for baking, and this recipe has become a cherished staple in my home ever since.

When you take a bite of this Lemon Poppy Seed Loaf, it’s like a burst of sunshine on your palate. The loaf is beautifully golden, with a tender crumb that melts in your mouth. Each slice is speckled with tiny poppy seeds, adding a delightful crunch that contrasts beautifully with the tangy sweetness of the lemon. And that citrus icing? It’s the finishing touch that elevates this loaf from ordinary to extraordinary, with its bright, zesty flavor dancing on your taste buds.

This recipe stands out because it embraces simplicity while delivering on flavor. I’ve added a hint of vanilla to the batter, enhancing the overall taste and making it even more indulgent. Trust me, once you make this Lemon Poppy Seed Loaf With Citrus Icing, it’ll become a go-to in your baking repertoire.

So, let me show you exactly how to make it!

Zesty Lemon Poppy Seed Delight

Why You’ll Love This Recipe

  • Moist and tender crumb that melts in your mouth, thanks to the perfect balance of butter and buttermilk.
  • Bright, zesty lemon flavor paired with crunchy poppy seeds, creating a delightful texture and taste experience.
  • Easy to whip up in just about an hour, perfect for last-minute gatherings or a cozy afternoon treat.
  • Budget-friendly with everyday ingredients, making it an accessible option for all home bakers.
  • The citrus icing adds a sweet tang that elevates the loaf, turning a simple recipe into a showstopper!

Ingredients

  • 1 ½ cups (190g) all-purpose flour
  • 1 teaspoon baking powder
  • ½ teaspoon baking soda
  • ½ teaspoon salt
  • 3 tablespoons poppy seeds
  • ½ cup (115g) unsalted butter, softened to room temperature
  • 1 cup (200g) granulated sugar
  • 2 large eggs
  • 1 teaspoon vanilla extract
  • 1 teaspoon lemon zest (from about 1 medium lemon)
  • ½ cup (120ml) buttermilk
  • 2 tablespoons fresh lemon juice

For the Citrus Icing:

  • 1 cup (120g) powdered sugar
  • 2 tablespoons fresh lemon juice
  • 1 tablespoon orange juice
  • 1 teaspoon lemon zest (for garnish, optional)

Let’s dive into the key ingredients that make this Lemon Poppy Seed Loaf so special. The all-purpose flour provides the structure and base for the loaf, while the baking powder and baking soda ensure it rises perfectly, giving the loaf a light texture. For a gluten-free variation, you could substitute the flour with a gluten-free all-purpose blend. Poppy seeds not only add a delightful crunch but also contribute to the unique flavor profile that pairs well with the citrus notes.

Unsalted butter is crucial for achieving the buttery richness that makes this loaf so moist. If you’re looking for a dairy-free option, coconut oil or a vegan butter can be used instead. The buttermilk is another essential component, providing acidity that activates the baking soda for a fluffy texture. If you don’t have buttermilk on hand, you can easily make a substitute by mixing ½ cup of milk with 1 tablespoon of vinegar or lemon juice and letting it sit for about 5 minutes.

Step-by-Step Instructions

  1. Preheat your oven to 350°F (175°C). Grease a 9×5-inch loaf pan or line it with parchment paper for easy removal later.
  2. In a medium mixing bowl, whisk together 1 ½ cups of all-purpose flour, 1 teaspoon of baking powder, ½ teaspoon of baking soda, ½ teaspoon of salt, and 3 tablespoons of poppy seeds. This helps to evenly distribute the baking agents and ensures a uniform rise.
  3. In a large mixing bowl, cream together ½ cup of softened unsalted butter and 1 cup of granulated sugar using an electric mixer on medium speed for about 3-4 minutes, until the mixture is light and fluffy. Make sure to scrape down the sides of the bowl occasionally.
  4. Add 2 large eggs, 1 teaspoon of vanilla extract, and 1 teaspoon of lemon zest to the creamed butter and sugar, mixing until fully combined. You want a smooth consistency, so ensure there are no lumps of butter.
  5. In a small bowl, combine ½ cup of buttermilk and 2 tablespoons of fresh lemon juice. Alternately add the dry ingredients and buttermilk mixture to the butter mixture, starting and ending with the dry ingredients. Mix just until combined; do not overmix, as this can lead to a dense loaf.
  6. Pour the batter into the prepared loaf pan. Smooth the top with a spatula, ensuring it’s even. Bake in the preheated oven for 50-60 minutes, or until a toothpick inserted in the center comes out clean. The edges should be lightly golden brown, and the center should feel just set.
  7. Once baked, remove the loaf from the oven and allow it to cool in the pan for about 10 minutes. Then, transfer it to a wire rack to cool completely. Resist the urge to slice too soon, as it will be crumbly if it’s still warm.
  8. While the loaf is cooling, prepare the citrus icing. In a medium bowl, whisk together 1 cup of powdered sugar, 2 tablespoons of fresh lemon juice, and 1 tablespoon of orange juice until smooth. If the icing is too thick, you can add a little more juice to reach your desired consistency.
  9. Once the loaf is completely cool, drizzle the citrus icing over the top. If you like, sprinkle with an additional teaspoon of lemon zest for an extra pop of flavor and color.

Pro Tips for the Best Lemon Poppy Seed Loaf With Citrus Icing

  • Be careful not to overmix your batter; this is a common mistake that can lead to a dense loaf. Mix just until the dry ingredients are incorporated for a light and fluffy texture.
  • Use room temperature ingredients, especially the butter and eggs. This helps to create a smoother batter and ensures even baking. Take your eggs out of the fridge about 30 minutes before you start.
  • For a more pronounced lemon flavor, consider adding a little lemon extract in addition to the zest and juice. Just a half teaspoon can elevate the citrus notes significantly.
  • When measuring your flour, spoon it into the measuring cup and level it off with a knife instead of scooping directly from the bag. This prevents packing and ensures you don’t end up with a dry loaf.
  • Invest in a good quality loaf pan; it makes a difference in heat distribution, which ensures even baking. If your pan is dark-coated, reduce the oven temperature by 25°F to prevent over-browning.

Variations & Serving Ideas

For a delightful twist, consider adding blueberries or raspberries to the batter for a fruity burst of flavor. You can also experiment with different citrus fruits—try lime or grapefruit zest and juice for a refreshing change. For a healthier option, substitute half of the all-purpose flour with whole wheat flour for added fiber without compromising too much on texture.

This Lemon Poppy Seed Loaf pairs beautifully with a light salad, such as a mixed greens salad with a vinaigrette, or a cup of tea for a cozy afternoon treat. It also complements a creamy cheese platter, as the acidity of the loaf balances rich cheeses perfectly. Lastly, a scoop of vanilla ice cream on the side creates a delightful contrast of temperatures and flavors!

Storage, Make-Ahead & Reheating

This Lemon Poppy Seed Loaf can be stored at room temperature for up to 3 days if wrapped tightly in plastic wrap. If you want to keep it longer, it freezes well for up to 3 months. To freeze, wrap the loaf tightly in plastic wrap and then in aluminum foil to prevent freezer burn.

When you’re ready to enjoy it again, simply thaw it in the fridge overnight. Reheat individual slices in the microwave for 15-20 seconds or in a toaster oven until warmed through. Interestingly, many people find that this loaf tastes even better the next day, as the flavors have time to meld!

Frequently Asked Questions

Can I make Lemon Poppy Seed Loaf With Citrus Icing ahead of time?

Yes — in fact, it tastes even better the next day! You can make the loaf a day in advance, allowing the flavors to develop. Just be sure to store it in an airtight container to maintain its moisture.

Can I substitute the poppy seeds?

Absolutely! If you don’t have poppy seeds on hand or prefer an alternative, you can use sesame seeds for a similar crunch or omit them entirely for a smooth loaf.

What can I use instead of buttermilk?

If you don’t have buttermilk, you can easily create a substitute by mixing ½ cup of milk (dairy or plant-based) with 1 tablespoon of vinegar or lemon juice. Let it sit for 5 minutes before using in the recipe.

How can I make this recipe gluten-free?

To make a gluten-free version of this Lemon Poppy Seed Loaf, substitute the all-purpose flour with a gluten-free all-purpose flour blend. Just ensure that the blend contains a binding agent like xanthan gum for the best results.

What is the best way to store leftover loaf?

Leftover Lemon Poppy Seed Loaf should be stored in an airtight container at room temperature for up to 3 days. For longer storage, wrap it tightly and freeze for up to 3 months. Thaw it before serving for the best texture.

Zesty Lemon Poppy Seed Delight

Final Thoughts

The Lemon Poppy Seed Loaf with Citrus Icing is truly a delightful treat that brings a burst of brightness to any occasion. The zesty lemon flavor combined with the subtle crunch of poppy seeds creates a satisfying balance, while the citrus icing adds a touch of sweetness that perfectly complements the loaf’s tanginess.

This is the kind of recipe I come back to again and again, especially when I want to brighten up a gloomy day or celebrate a small victory. The aroma that fills the kitchen as it bakes is absolutely heavenly! I encourage you to give this recipe a try; you might just find it becoming a beloved staple in your home. Don’t forget to share your results or even add your own unique twist—I can’t wait to see what you create!

Print
clock clock iconcutlery cutlery iconflag flag iconfolder folder iconinstagram instagram iconpinterest pinterest iconfacebook facebook iconprint print iconsquares squares iconheart heart iconheart solid heart solid icon

Lemon Poppy Seed Loaf


  • Author: Lily author
  • Total Time: 25 minute
  • Yield: 1 loaf 1x
Pin Recipe
Print Recipe

Description

This Lemon Poppy Seed Loaf is a delightful treat that combines zesty lemon flavor with crunchy poppy seeds. Topped with a citrus icing, it’s perfect for any occasion.


Ingredients

Scale
  • 1 ½ cups (190g) all-purpose flour
  • 1 teaspoon baking powder
  • ½ teaspoon baking soda
  • ½ teaspoon salt
  • 3 tablespoons poppy seeds
  • ½ cup (115g) unsalted butter, softened to room temperature
  • 1 cup (200g) granulated sugar
  • 2 large eggs
  • 1 teaspoon vanilla extract
  • 1 teaspoon lemon zest (from about 1 medium lemon)
  • ½ cup (120ml) buttermilk
  • 2 tablespoons fresh lemon juice
  • 1 cup (120g) powdered sugar
  • 2 tablespoons fresh lemon juice
  • 1 tablespoon orange juice
  • 1 teaspoon lemon zest (for garnish, optional)

Instructions

  1. Preheat your oven to 350°F (175°C). Grease a 9×5-inch loaf pan or line it with parchment paper for easy removal later.
  2. In a medium mixing bowl, whisk together 1 ½ cups of all-purpose flour, 1 teaspoon of baking powder, ½ teaspoon of baking soda, ½ teaspoon of salt, and 3 tablespoons of poppy seeds. This helps to evenly distribute the baking agents and ensures a uniform rise.
  3. In a large mixing bowl, cream together ½ cup of softened unsalted butter and 1 cup of granulated sugar using an electric mixer on medium speed for about 3-4 minutes, until the mixture is light and fluffy. Make sure to scrape down the sides of the bowl occasionally.
  4. Add 2 large eggs, 1 teaspoon of vanilla extract, and 1 teaspoon of lemon zest to the creamed butter and sugar, mixing until fully combined. You want a smooth consistency, so ensure there are no lumps of butter.
  5. In a small bowl, combine ½ cup of buttermilk and 2 tablespoons of fresh lemon juice. Alternately add the dry ingredients and buttermilk mixture to the butter mixture, starting and ending with the dry ingredients. Mix just until combined; do not overmix, as this can lead to a dense loaf.
  6. Pour the batter into the prepared loaf pan. Smooth the top with a spatula, ensuring it’s even. Bake in the preheated oven for 50-60 minutes, or until a toothpick inserted in the center comes out clean. The edges should be lightly golden brown, and the center should feel just set.
  7. Once baked, remove the loaf from the oven and allow it to cool in the pan for about 10 minutes. Then, transfer it to a wire rack to cool completely. Resist the urge to slice too soon, as it will be crumbly if it’s still warm.
  8. While the loaf is cooling, prepare the citrus icing. In a medium bowl, whisk together 1 cup of powdered sugar, 2 tablespoons of fresh lemon juice, and 1 tablespoon of orange juice until smooth. If the icing is too thick, you can add a little more juice to reach your desired consistency.
  9. Once the loaf is completely cool, drizzle the citrus icing over the top. If you like, sprinkle with an additional teaspoon of lemon zest for an extra pop of flavor and color.
  • Prep Time: 15 mins
  • Cook Time: 50-60 mins
  • Category: Dessert
  • Method: Baking
  • Cuisine: American

Nutrition

  • Serving Size: 1 slice
  • Calories: 200
  • Sugar: 15 g
  • Sodium: 150 mg
  • Fat: 8 g
  • Saturated Fat: 5 g
  • Unsaturated Fat: 3 g
  • Trans Fat: 0 g
  • Carbohydrates: 30 g
  • Fiber: 1 g
  • Protein: 3 g
  • Cholesterol: 40 mg

Keywords: Be careful not to overmix your batter; this is a common mistake that can lead to a dense loaf. Use room temperature ingredients for a smoother batter and even baking.

Did you make this recipe?

Share a photo and tag us — we can't wait to see what you've made!

  • Privacy Policy
  • Terms Of Service
  • Contact
  • About
  • GDPR

Copyright © 2025 Homesmad