Easy No Bake Moose Farts – a name that invariably elicits a chuckle, a raised eyebrow, and ultimately, a curious smile. Don’t let the whimsical moniker fool you; these delightful little confections are anything but a joke. I’m absolutely thrilled to share with you a recipe that has become a staple in my kitchen, especially when I need a quick, satisfying treat that requires zero oven time. The charmingly peculiar name is thought to have originated from the playful, rustic spirit often found in Canadian or Northern American home baking, where simple ingredients are transformed into surprisingly delicious bites, often with equally memorable, quirky names. It’s a testament to how humble ingredients can create truly memorable and much-loved snacks.
What makes these “Moose Farts” so incredibly beloved? Firstly, the sheer convenience of a no-bake recipe is a true game-changer, especially during warm weather or when time is of the essence. No preheating, no monitoring, just mixing, chilling, and enjoying! Beyond the ease, it’s the irresistible combination of classic flavors – rich chocolate, creamy peanut butter, and hearty oats – that creates a harmonious symphony of taste and texture. Each bite offers a perfect balance of sweet, salty, and chewy goodness, making them an instant hit with children and adults alike. Whether you’re preparing for a potluck, a school snack, or simply craving a homemade treat without the fuss, this recipe for Easy No Bake Moose Farts is an absolute winner, promising pure, unadulterated joy in every single, perfectly spherical bite.

Ingredients:
- 1/2 cup (113g) unsalted butter, or margarine if you prefer – I find butter gives a richer flavor, but margarine works wonderfully too.
- 2 cups (400g) granulated sugar – Don’t skimp on this, it’s essential for that perfect sweetness and texture.
- 1/2 cup (120ml) milk – Whole milk or 2% works best for creaminess, but use what you have on hand.
- 1/2 cup (125g) creamy peanut butter – Make sure it’s creamy, not crunchy, for that smooth, melt-in-your-mouth texture that defines an Easy No Bake Moose Farts treat. You can use natural peanut butter, but sometimes the oils can separate a bit more, so be prepared for a very thorough stir!
- 1 teaspoon pure vanilla extract – A good quality vanilla makes all the difference, adding warmth and depth to the chocolate and peanut butter.
- 3 cups quick-cooking oats – This is crucial! Do not use old-fashioned rolled oats; they won’t absorb the liquid properly and your “Moose Farts” won’t set up right. Quick-cooking oats are smaller and more absorbent.
- 1/2 cup (45g) unsweetened cocoa powder – For that rich, deep chocolate flavor. Adjust slightly if you prefer a less intense chocolate.
- 1 cup (90g) shredded sweetened coconut (optional, but highly recommended) – I absolutely adore the texture and subtle sweetness this adds. It really elevates the classic Easy No Bake Moose Farts recipe.
- A pinch of salt (optional, but it enhances all the other flavors!)
Preparing the Chocolate Peanut Butter Base
- Gather Your Tools and Ingredients: Before you even think about turning on the stove, lay out all your ingredients and measure them out. This is what we call “mise en place” in the cooking world, and it makes the entire process of creating your Easy No Bake Moose Farts so much smoother and more enjoyable. Trust me, you don’t want to be scrambling for the peanut butter when your mixture is boiling! Prepare a large baking sheet (or two, if you think you’ll need the space) by lining it with parchment paper or wax paper. This is where your finished treats will cool and set without sticking.
- Combine Wet Ingredients for the Boiling Stage: In a medium to large heavy-bottomed saucepan, combine the butter (or margarine), granulated sugar, and milk. I always recommend a heavy-bottomed pot because it distributes heat more evenly, which helps prevent scorching the sugar mixture. Place the saucepan over medium heat. Stir these ingredients continuously as they heat up, encouraging the butter to melt and the sugar to dissolve. You’ll see the mixture start to bubble gently.
- Bring to a Rolling Boil: Continue to stir and cook the mixture until it reaches a full, rolling boil. What exactly is a “rolling boil”? It’s when the bubbles on the surface can’t be stirred down – they’re rapid, active, and persistent. This step is incredibly important for the texture of your Easy No Bake Moose Farts. Once it reaches this stage, let it boil for exactly one minute. No more, no less! If you boil it for too short a time, your “Moose Farts” might be too soft and won’t set properly. If you boil it for too long, they could end up hard and crumbly. Set a timer for this crucial minute!
-
Remove from Heat and Incorporate Key Flavors: As soon as that minute is up, immediately remove the saucepan from the heat. This quick removal prevents the sugar mixture from overcooking. Now, swiftly stir in the creamy peanut butter, vanilla extract, and cocoa powder. It’s important to do this off the heat because high temperatures can negatively affect the flavor of vanilla and cause the peanut butter to separate or become oily. Stir vigorously until all these ingredients are completely melted and smoothly incorporated into the hot sugar mixture. You’re looking for a uniform, glossy, and deeply chocolate-colored base. The aroma at this stage is absolutely heavenly – a warm, inviting blend of chocolate and peanut butter that signals deliciousness to come!
Why off-heat for peanut butter and vanilla?
Peanut butter, when exposed to high heat for too long, can release its oils and become greasy or even take on a slightly burnt flavor. Vanilla extract, being alcohol-based, can have its delicate flavor cooked off if added too early while the mixture is still boiling hot. Adding them after removing from heat ensures their full, rich flavors are preserved in your Easy No Bake Moose Farts.
Mixing in the Oats and Coconut
-
Add the Quick-Cooking Oats: Once your chocolate peanut butter base is perfectly smooth and aromatic, it’s time to add the star of the show: the quick-cooking oats. Gently pour the three cups of quick-cooking oats into the saucepan.
The Importance of Quick-Cooking Oats
I cannot stress enough the importance of using quick-cooking oats for this recipe. Unlike old-fashioned rolled oats, which are thicker and require more liquid and cooking time to soften, quick-cooking oats are thinner and more finely cut. This allows them to absorb the hot liquid quickly and thoroughly without needing to be cooked on the stove. If you use old-fashioned oats, your Easy No Bake Moose Farts might end up too chewy, dry, or simply won’t bind together properly. It’s a common mistake that can lead to disappointment, so double-check your oat package!
- Fold in the Shredded Coconut (If Using): If you’ve decided to include the shredded sweetened coconut (and I really hope you do!), now is the time to add it to the mixture along with the oats. The coconut adds a wonderful chewiness and a subtle tropical note that perfectly complements the chocolate and peanut butter. It gives these no-bake treats an extra layer of texture and flavor that truly sets them apart.
-
Mix Thoroughly Until Just Combined: Using a sturdy spoon or a rubber spatula, stir the oats and coconut (if added) into the chocolate peanut butter mixture. Stir gently but thoroughly, making sure every single oat flake and strand of coconut is evenly coated with the rich, warm base. You want to mix until everything is just combined and no dry pockets of oats or coconut remain. Be careful not to overmix! While you want everything incorporated, excessive stirring can sometimes lead to a tougher texture in the final product. The mixture should be thick, sticky, and uniform in color and consistency. It will look quite unappetizingly like, well, a “moose fart” at this stage, but trust the process! This consistency is key to perfectly formed Easy No Bake Moose Farts.
Achieving the Perfect Consistency
The mixture should be thick enough that it holds its shape when dropped from a spoon, but not so thick that it’s impossible to stir. If it seems a little too wet, it might be that your boil wasn’t vigorous enough for the full minute, or perhaps your measurements were slightly off. Don’t panic! It will firm up as it cools.
Forming and Setting Your Easy No Bake Moose Farts
-
Forming Your Treats: Now for the fun part – shaping your “Moose Farts”! Working relatively quickly, as the mixture will start to set as it cools, drop spoonfuls of the mixture onto your prepared baking sheets lined with parchment or wax paper. I like to use a small cookie scoop (about 1.5 to 2 tablespoons in size) to ensure uniform size, which helps them cool evenly and look professional. If you don’t have a scoop, two spoons work perfectly: use one spoon to scoop the mixture and the other to gently push it off onto the paper.
Tip for Perfectly Shaped Moose Farts:
If the mixture becomes too sticky or difficult to work with as it cools, you can lightly dampen your hands with a little water or butter them slightly before rolling the mixture into balls. This helps prevent sticking and gives you beautifully rounded treats. Aim for a size that’s a satisfying bite or two – remember, these are rich and decadent!
-
Let Them Set and Cool: Once all the mixture has been portioned onto the baking sheets, it’s time for the patience game! Let your Easy No Bake Moose Farts cool completely at room temperature for at least 30 minutes to an hour, or until they are fully set and firm to the touch. The cooling process allows the sugar and butter mixture to solidify, binding the oats and other ingredients into a delicious, stable treat.
Speeding Up the Setting Process:
If you’re in a hurry (and who isn’t when delicious treats are involved?), you can place the baking sheets in the refrigerator for about 15-20 minutes. Just be mindful not to leave them in the fridge for too long after they’ve set, as they can sometimes become a little too hard. They are best enjoyed at room temperature or slightly chilled.
-
Storage and Enjoyment: Once your Easy No Bake Moose Farts are completely set, gently transfer them to an airtight container. They will keep well at room temperature for up to a week, or in the refrigerator for up to two weeks. I find that the flavors tend to meld even more beautifully after a day or two, making them an excellent make-ahead treat for parties, lunchboxes, or just a sweet craving!
Serving Suggestions and Variations:
These delightful no-bake cookies are fantastic on their own, perhaps with a glass of cold milk or a hot cup of coffee. You can sprinkle a little sea salt on top before they set for a lovely sweet and salty contrast. For an extra touch of decadence, you could drizzle them with melted white chocolate or a bit of dark chocolate after they’ve set. Some people enjoy adding a few mini chocolate chips or chopped nuts (like pecans or walnuts) to the mixture along with the oats for added crunch and flavor. The possibilities are truly endless for customizing your perfect batch of Easy No Bake Moose Farts!
I truly hope you enjoy making and devouring these incredibly simple and delicious Easy No Bake Moose Farts. They’re a classic for a reason – quick to make, requiring no oven, and always a crowd-pleaser!
Conclusion:
Well, my friends, we’ve reached the sweet finale of our recipe journey, and I genuinely hope you’re feeling inspired to whip up a batch of these incredible treats! If there’s one thing I want you to take away from this, it’s that this recipe isn’t just another dessert; it’s a game-changer for anyone who loves deliciousness without the fuss. We’re talking about a delightful confection that requires absolutely no baking, minimal effort, and delivers maximum satisfaction. It’s perfect for those busy weeknights when you need a quick sweet fix, or for last-minute gatherings when you want to impress without breaking a sweat. The simplicity of gathering a few pantry staples and transforming them into something so utterly delectable is, frankly, pure magic.
Why is this recipe an absolute must-try? Beyond the obvious no-bake convenience, it’s the delightful chewiness, the rich blend of flavors, and the comforting sweetness that truly sets it apart. It’s a nostalgic bite that appeals to every age group, from the pickiest eaters to the most discerning dessert connoisseurs. Imagine a treat that melts in your mouth, leaving behind a delightful combination of textures and a lingering taste that begs for another bite. That’s precisely what you get with this recipe. It’s foolproof, meaning even if you’re a novice in the kitchen, you’re guaranteed a stellar outcome. Plus, let’s be honest, who doesn’t love a recipe that saves you time and keeps your kitchen cool, especially during warmer months?
Now, let’s talk about making these beauties your own, because the versatility of this recipe is truly remarkable. While they’re perfect as-is, I always encourage a little culinary creativity! For serving suggestions, consider arranging them artfully on a platter dusted with a little extra cocoa powder or powdered sugar for an elegant touch. They make fantastic additions to a dessert charcuterie board, nestled amongst fresh fruit, cheeses, and nuts. For an extra special presentation, you could even place them in mini paper liners. As for variations, the possibilities are practically endless! Instead of just rolling them in coconut, try a mixture of finely chopped toasted nuts like pecans or walnuts for an added crunch and earthy flavor. A dusting of sprinkles is always a hit, especially if you’re making them for kids or a festive occasion. Or, for a more sophisticated twist, roll them in a high-quality unsweetened cocoa powder for a rich, slightly bitter contrast to the sweetness within. I’ve even tried rolling some in a fine coating of crushed freeze-dried raspberries, which adds a beautiful color and a delightful tangy burst.
Don’t stop there with the external coatings! You can also play with the ingredients you mix into the base. Feel free to stir in a handful of mini chocolate chips, whether they’re milk, dark, or even white chocolate, for an extra layer of decadence. Dried cranberries or chopped dried apricots can introduce a lovely chewiness and a hint of fruity tartness that brightens the whole profile. A tiny dash of pure vanilla extract is always a good idea to enhance the overall flavor, and for those who enjoy a hint of warmth, a pinch of cinnamon or nutmeg can truly elevate the experience. Imagine a batch made with a touch of orange zest, offering a bright, citrusy note – it’s divine! They also make wonderful homemade gifts when packaged in a pretty box or cellophane bag, showing thoughtfulness and culinary flair without hours of effort.
So, there you have it – a truly adaptable and endlessly enjoyable recipe. I’m telling you, once you taste how effortless and delicious these treats are, you’ll find yourself making them again and again. They are the epitome of simple indulgence, and I genuinely believe that everyone should have this incredible recipe in their repertoire. It’s the kind of treat that brings smiles, satisfies cravings, and requires absolutely zero stress. Whether you’re a seasoned baker or someone who rarely steps into the kitchen, the process is so straightforward that success is virtually guaranteed. Trust me, the sheer joy of creating something so utterly delightful with such minimal fuss is incredibly rewarding.
Now, it’s your turn! I absolutely cannot wait for you to experience the magic of making these yourself. Dive into your kitchen, gather your ingredients, and prepare to be amazed by just how wonderful these treats are. Once you’ve whipped up your batch of Easy No Bake Moose Farts, please, please share your experience! Did you stick to the classic? Did you try any of my suggested variations, or perhaps invent some brilliant ones of your own? I’m genuinely excited to hear about your creations and see your photos. Sharing your journey not only inspires me but also helps other readers discover new ways to enjoy this fantastic recipe. So, go on, get cooking, and let’s spread the joy of these delightful, no-bake wonders!
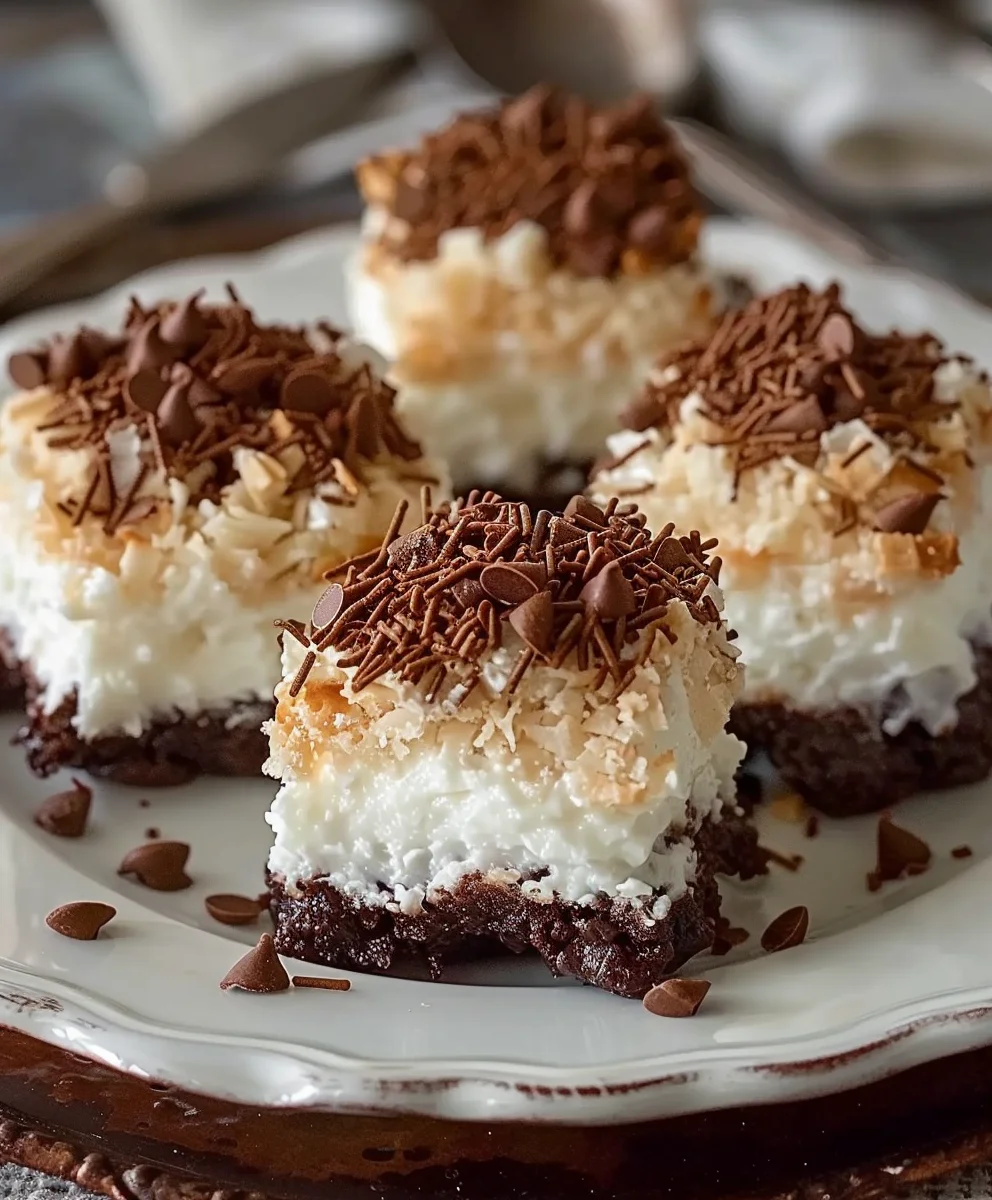
Easy No Bake Moose Farts: Decadent Chocolate Coconut Bites
Don’t let the whimsical moniker fool you; these delightful little no-bake confections are a quick, satisfying treat. Combining rich chocolate, creamy peanut butter, and graham cracker crumbs, these bites offer a perfect balance of sweet, salty, and chewy goodness without any oven time. Perfect for a quick snack or potluck!
Ingredients
-
1 cup graham cracker crumbs
-
1/2 cup unsweetened cocoa powder
-
1/2 cup powdered sugar
-
1/2 cup creamy peanut butter
-
1/2 cup softened cream cheese
-
1 teaspoon vanilla extract
-
1/4 cup mini chocolate chips
-
Whipped cream (optional, for serving)
Instructions
-
Step 1
In a medium bowl, whisk together the graham cracker crumbs, unsweetened cocoa powder, and powdered sugar. -
Step 2
Add the creamy peanut butter, softened cream cheese, and vanilla extract to the dry mixture. Mix thoroughly until all ingredients are well combined and a thick, dough-like consistency forms. -
Step 3
Gently fold in the mini chocolate chips until evenly distributed throughout the mixture. -
Step 4
Using a small cookie scoop or your hands, roll the mixture into 1.5-inch balls. Place them onto a baking sheet lined with parchment paper. -
Step 5
Chill the moose farts in the refrigerator for at least 30 minutes, or until firm. Serve as is, or topped with a dollop of whipped cream if desired. Store in an airtight container in the refrigerator for up to 2 weeks.
Important Information
Nutrition Facts (Per Serving)
It is important to consider this information as approximate and not to use it as definitive health advice.
Allergy Information
Please check ingredients for potential allergens and consult a health professional if in doubt.