• Skip to primary navigation
  • Skip to main content
  • Skip to primary sidebar
Homesmad

Homesmad

  • Home
  • Breakfast & Brunch
  • Appetizers & Snacks
  • Dinner
  • Dessert
  • About
  • Privacy Policy
  • Contact
Homesmad
  • Home
  • Breakfast & Brunch
  • Appetizers & Snacks
  • Dinner
  • Dessert
  • About
  • Privacy Policy
  • Contact

Easy Cheesy Cajun Garlic Chicken Rotini Skillet Dinner

October 29, 2025 by Lily author

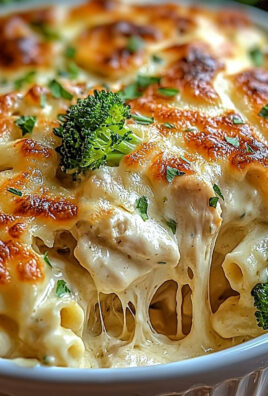
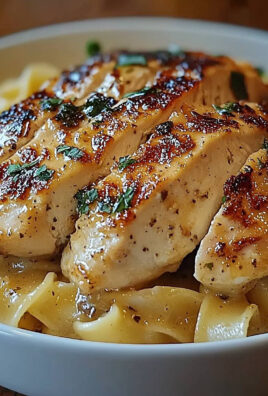
Cheesy Cajun Garlic Chicken Rotini Skillet – get ready to transform your weeknight dinner routine with a dish that promises an explosion of flavor! I absolutely adore how this recipe brings the vibrant spirit of Louisiana right into my kitchen, offering a delightful blend of rich, bold Cajun spices with comforting Italian-inspired pasta. While not steeped in ancient traditions, this modern skillet creation beautifully marries the zesty, aromatic essence of Cajun cooking – a cuisine born from French, Spanish, and African influences in the bayous – with universally loved ingredients like tender chicken, perfectly cooked rotini, and a generous blanket of cheese.

Why This Skillet Meal Will Become Your New Favorite!

People simply can’t get enough of this dish, and it’s easy to see why. The irresistible combination of succulent chicken, infused with robust garlic and fiery Cajun seasoning, all tossed with spiral pasta in a creamy, cheesy sauce, delivers an unparalleled sensory experience. It’s the ultimate comfort food that doesn’t compromise on taste or convenience. Preparing this Cheesy Cajun Garlic Chicken Rotini Skillet is not only incredibly straightforward, making it perfect for busy evenings, but it also offers a fantastic balance of creamy texture and a delightful kick that will have everyone reaching for seconds. Trust me, it’s a culinary journey you’ll want to take again and again!

Easy Cheesy Cajun Garlic Chicken Rotini Skillet Dinner this RECIPE

Ingredients:

  • For the Chicken:
    • 2 large (about 1.5 lbs) boneless, skinless chicken breasts, cut into 1-inch cubes
    • 2 tablespoons olive oil, plus extra if needed
    • 1 tablespoon Cajun seasoning blend (store-bought or your favorite homemade mix)
    • ½ teaspoon salt, or to taste
    • ¼ teaspoon black pepper, or to taste
  • For the Pasta:
    • 12 ounces (about 340g) rotini pasta (or your favorite short pasta like penne or fusilli)
    • Water for boiling pasta
    • 1 tablespoon salt for pasta water
  • For the Skillet Sauce and Veggies:
    • 2 tablespoons unsalted butter
    • 1 large yellow onion, finely chopped
    • 1 medium green bell pepper, cored, seeded, and diced
    • 1 medium red bell pepper, cored, seeded, and diced
    • 4-6 cloves garlic, minced (I love garlic, so I tend to go for 6!)
    • 1 tablespoon all-purpose flour (this helps thicken our sauce nicely)
    • 2 cups low-sodium chicken broth
    • 1 cup heavy cream
    • 4 ounces (½ block) cream cheese, softened and cut into cubes
    • 1 tablespoon Worcestershire sauce (optional, but it adds a wonderful depth of flavor!)
    • 1 teaspoon Cajun seasoning blend (adjust to your spice preference)
    • ½ teaspoon dried oregano
    • Salt and freshly ground black pepper to taste
  • For the Cheesy Finish:
    • 2 cups shredded sharp cheddar cheese
    • 1 cup shredded Monterey Jack cheese (or use a pre-shredded Colby Jack blend for convenience)
  • For Garnish (Optional):
    • ¼ cup fresh parsley, chopped
    • A pinch of red pepper flakes for extra heat

Preparing Our Cheesy Cajun Garlic Chicken Rotini Skillet: The Chicken

Let’s kick things off by getting our chicken prepped and beautifully browned. This first step is crucial for building a fantastic flavor base for our entire Cheesy Cajun Garlic Chicken Rotini Skillet.

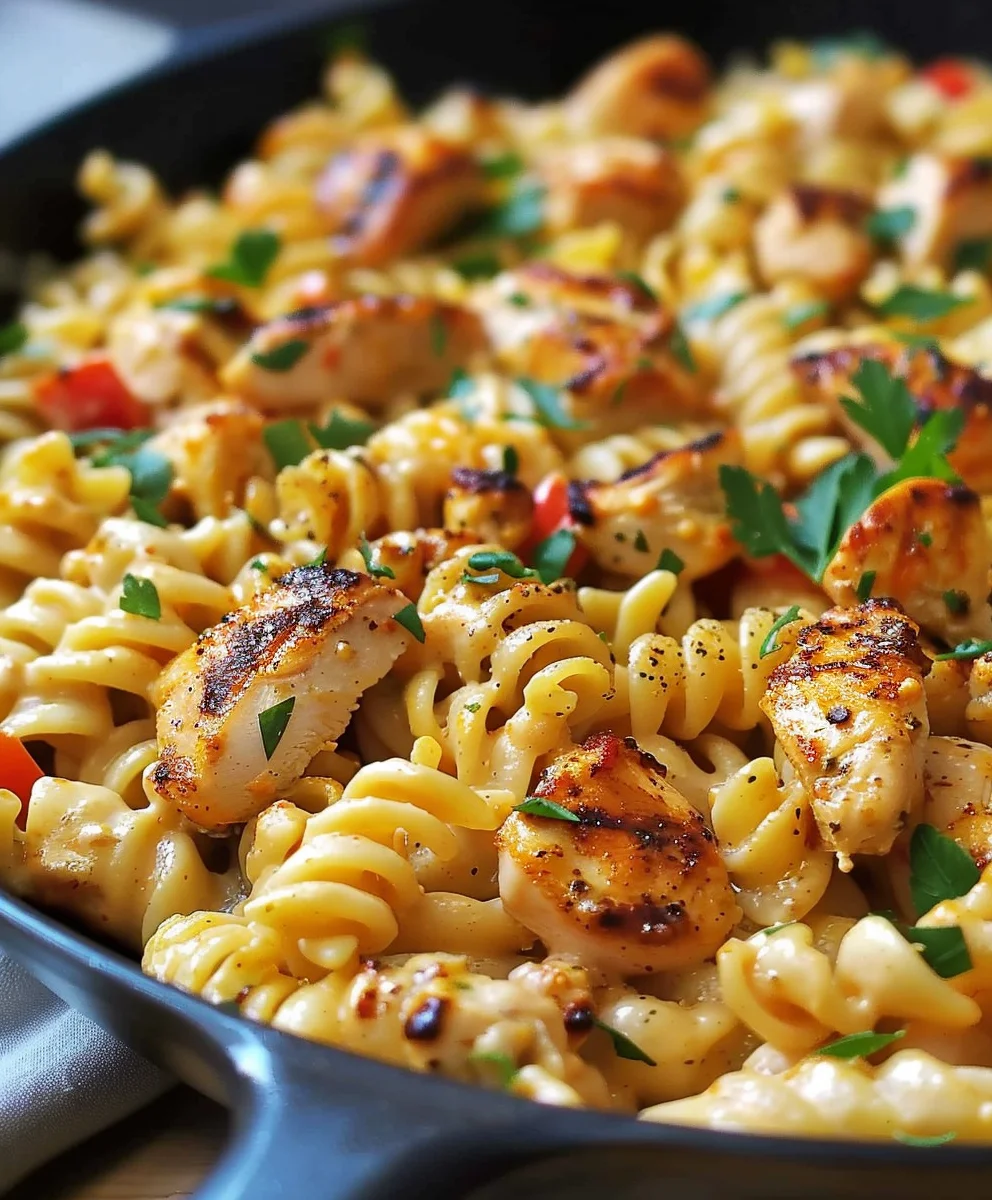
  1. First things first, grab your boneless, skinless chicken breasts. I like to cut mine into nice, even 1-inch cubes. This ensures they cook quickly and evenly, and you get a good piece of chicken in every bite of our delicious skillet.
  2. In a medium bowl, toss those chicken cubes with 1 tablespoon of Cajun seasoning, ½ teaspoon of salt, and ¼ teaspoon of black pepper. Make sure every piece is nicely coated – those seasonings are going to bring so much life to the chicken!
  3. Now, heat your large, heavy-bottomed skillet (a 12-inch skillet works perfectly for this recipe) over medium-high heat. Add 2 tablespoons of olive oil. You want the oil to shimmer, but not smoke, before adding the chicken.
  4. Once the oil is hot, carefully add the seasoned chicken to the skillet. Make sure not to overcrowd the pan; if necessary, cook the chicken in two batches. Overcrowding will steam the chicken instead of searing it, and we want a lovely golden-brown crust!
  5. Cook the chicken for about 4-6 minutes, stirring occasionally, until it’s beautifully browned on all sides and cooked through. It should no longer be pink in the center. Once done, remove the cooked chicken from the skillet and set it aside on a plate. Don’t worry about any browned bits left in the pan – those are pure flavor that we’ll incorporate into our sauce!

Building the Flavor Foundation: Veggies and Aromatics

With the chicken cooked and set aside, it’s time to build the heart of our Cheesy Cajun Garlic Chicken Rotini Skillet: the aromatic vegetable base and the rich, creamy Cajun sauce. This is where all the magic truly starts to happen!

  1. Reduce the heat in your skillet to medium. Add 2 tablespoons of unsalted butter to the same skillet where you cooked the chicken. Let it melt and sizzle gently, scraping up any delicious browned bits (fond) from the bottom of the pan as it melts. These bits are packed with flavor!
  2. Add the finely chopped yellow onion, diced green bell pepper, and diced red bell pepper to the skillet. Sauté them for about 5-7 minutes, stirring frequently, until they become tender and slightly softened. You’ll notice a wonderful aroma filling your kitchen – that’s a sign you’re on the right track!
  3. Now, it’s time for the superstar aromatic: garlic! Add the minced garlic to the skillet and cook for just 1 minute more, stirring constantly. Be careful not to let the garlic burn, as burnt garlic can taste bitter. We’re looking for fragrant, not toasted.
  4. Next, sprinkle 1 tablespoon of all-purpose flour over the sautéed vegetables. Stir it well for about 1-2 minutes, allowing the flour to cook out a bit. This step is crucial; the flour acts as a roux, helping to thicken our sauce later and ensuring it’s wonderfully creamy, not watery.

Crafting the Creamy Cajun Sauce for Our Cheesy Cajun Garlic Chicken Rotini Skillet

Now that our aromatics are fragrant and our flour is cooked, it’s time to transform this skillet into the incredibly rich and flavorful sauce that will envelop our chicken and rotini. This creamy Cajun sauce is what makes this Cheesy Cajun Garlic Chicken Rotini Skillet so irresistible!

  1. Pour in 2 cups of low-sodium chicken broth, stirring constantly to whisk away any lumps created by the flour. As you stir, you’ll notice the sauce starting to thicken beautifully. Bring it to a gentle simmer, allowing it to bubble for a couple of minutes until it’s slightly reduced.
  2. Next, stir in 1 cup of heavy cream. This is where our sauce really starts to get that luxurious, velvety texture. Continue to stir gently as the cream warms through and integrates with the broth.
  3. Add the cubes of softened cream cheese to the simmering sauce. Stir continuously until the cream cheese is fully melted and smoothly incorporated into the sauce. This adds an incredible tang and extra richness that sets our sauce apart.
  4. Now, let’s dial up that Cajun flavor! Stir in the additional 1 teaspoon of Cajun seasoning blend and ½ teaspoon of dried oregano. If you’re feeling adventurous or love a bit more spice, feel free to add a little extra Cajun seasoning here. This is also the perfect moment to add 1 tablespoon of Worcestershire sauce, if you’re using it. It truly adds a layer of savory depth that you won’t regret!
  5. Taste the sauce and adjust seasonings as needed. Add salt and freshly ground black pepper to your preference. Remember that the cheese we add later will contribute some saltiness, so be mindful not to over-salt at this stage. You want a sauce that’s vibrant and balanced.

Integrating the Pasta and Assembling Our Cheesy Cajun Garlic Chicken Rotini Skillet

We’re on the home stretch now! With our amazing Cajun cream sauce simmering, it’s time to bring in the starches and our glorious chicken, making this a truly complete and comforting Cheesy Cajun Garlic Chicken Rotini Skillet. The timing here is key to ensure everything comes together perfectly.

  1. While you are preparing the sauce, bring a large pot of heavily salted water to a rolling boil. Add your 12 ounces of rotini pasta and cook according to package directions until al dente. It’s crucial to cook the pasta just until al dente, meaning it’s still firm to the bite, as it will continue to cook slightly when added to our hot skillet sauce.
  2. Before draining the pasta, reserve about ½ cup of the starchy pasta water. This liquid is a secret weapon; it can be used to thin out the sauce if it becomes too thick, and the starch helps the sauce cling better to the pasta.
  3. Drain the pasta thoroughly. Immediately add the cooked and drained rotini pasta directly into the skillet with your simmering Cajun cream sauce. Toss everything together gently until the pasta is completely coated in the luscious sauce.
  4. Return the cooked chicken cubes to the skillet with the pasta and sauce. Stir everything together one last time, making sure the chicken is well distributed throughout the pasta and coated in the savory sauce. Allow it to heat through for about 1-2 minutes.

The Grand Finale: Cheesy Goodness and Serving Our Skillet

This is the moment we’ve all been waiting for – the ultimate cheesy finish! Adding the cheeses will transform our delicious chicken and pasta into a truly indulgent and comforting Cheesy Cajun Garlic Chicken Rotini Skillet that everyone will adore. Get ready for some serious stretch and ooey-gooey goodness!

  1. Remove the skillet from the heat. This is important because we want the cheese to melt into the sauce, not seize up or get oily from too much direct heat.
  2. Sprinkle in the 2 cups of shredded sharp cheddar cheese and 1 cup of shredded Monterey Jack cheese evenly over the pasta and chicken.
  3. Gently stir the cheeses into the hot pasta mixture. Stir continuously until all the cheese has completely melted, creating a wonderfully creamy, stretchy, and incredibly cheesy sauce that coats every single piece of rotini and chicken. If the sauce seems a little too thick, you can add a splash or two of that reserved pasta water to reach your desired consistency.
  4. Once the cheese is fully melted and incorporated, your Cheesy Cajun Garlic Chicken Rotini Skillet is ready to be devoured!
  5. Serve immediately while it’s warm and gooey. Garnish with fresh chopped parsley for a touch of freshness and color, and a sprinkle of red pepper flakes if you’d like a little extra kick. This dish is fantastic on its own, but a simple green salad or some crusty bread for soaking up every last bit of that amazing sauce would make it a complete meal. Enjoy every cheesy, flavorful bite!

Easy Cheesy Cajun Garlic Chicken Rotini Skillet Dinner

So, here we are at the end of our culinary journey, and I genuinely hope you’re feeling as excited as I am about this incredible recipe. This isn’t just another dish to add to your rotation; it’s truly a celebration of flavor, convenience, and pure comfort. If you’ve been searching for that perfect weeknight hero or an impressive meal to share with loved ones without spending hours in the kitchen, then look no further.

A Symphony of Flavors: Why This Recipe is a Must-Try

What makes this particular recipe so undeniably special? It’s the harmonious blend of robust, smoky Cajun spices with the luscious creaminess of melted cheese, all perfectly coating tender pieces of chicken and al dente rotini pasta. Then, add in the pungent warmth of garlic, which elevates every single bite, ensuring a truly unforgettable experience. Imagine sinking your fork into a swirl of pasta, embracing succulent chicken, all bathed in a rich, velvety sauce that offers a gentle kick, followed by a comforting, cheesy finish. It’s a dish that manages to be both deeply satisfying and surprisingly straightforward to prepare. The Cheesy Cajun Garlic Chicken Rotini Skillet is more than just a meal; it’s a moment of culinary bliss, designed to bring warmth and joy to your table with minimal fuss. It promises a dining experience that feels both indulgent and homey, striking that perfect balance between gourmet taste and everyday ease. For busy families, for dinner parties, or for a cozy night in, it consistently delivers on taste and simplicity, making it an absolute must-try for anyone who appreciates genuinely good food.

Make It Your Own! Serving Suggestions and Creative Variations

One of the many things I adore about this recipe is its incredible versatility. While it’s absolutely perfect as a stand-alone meal, there are countless ways to customize it and make it uniquely yours, catering to different tastes and dietary preferences. For a complete meal, I love serving this skillet dish alongside a crisp, refreshing side salad. A simple mixed green salad with a tangy vinaigrette offers a wonderful contrast to the richness of the pasta. Another fantastic accompaniment is a generous basket of crusty garlic bread or warm French baguette, perfect for soaking up every last drop of that delectable, cheesy sauce.

But don’t stop there! This recipe is a blank canvas for your culinary creativity:

  • Veggie Boost: Feel free to toss in some extra vegetables. Sautéed bell peppers (red, green, and yellow for a burst of color!), sliced mushrooms, or even a handful of fresh spinach (stirred in at the very end until wilted) would be fantastic additions. Corn kernels or diced tomatoes also blend beautifully with the Cajun flavors.
  • Protein Swap: While chicken is classic, don’t hesitate to experiment! Juicy shrimp would be an incredible addition, especially if added in the last few minutes of cooking to prevent overcooking. Sliced smoked sausage, particularly Andouille sausage, would amplify the Cajun authenticity and add another layer of smoky flavor. For a vegetarian twist, consider using hearty cannellini beans or chickpeas instead of meat.
  • Spice Level: If you’re a heat-seeker like me, feel free to amp up the spice! A pinch more cayenne pepper, a dash of your favorite hot sauce, or even a few finely diced jalapeños can take the heat up a notch. Conversely, if you prefer a milder flavor, simply reduce the amount of Cajun seasoning or choose a brand that’s less spicy.
  • Cheesy Choices: While cheddar and Monterey Jack are a fantastic combination, why not try other cheeses? Pepper Jack will give it an extra spicy kick, smoked Gouda will add depth, or a blend of Italian cheeses could offer a different character. A final sprinkle of freshly grated Parmesan cheese before serving is always a good idea too!
  • Pasta Alternatives: If rotini isn’t your preferred pasta shape, feel free to substitute with other short pasta varieties like penne, ziti, or cavatappi. For those with gluten sensitivities, a gluten-free pasta can be easily swapped in without compromising on flavor or texture.
  • Extra Creaminess: For an even richer, more decadent sauce, a splash of heavy cream or half-and-half can be stirred in at the end. Or, for a slightly lighter touch, you can always adjust the amount of chicken broth.
  • Fresh Herbs: A sprinkle of fresh parsley or cilantro just before serving adds a wonderful pop of color and a fresh, herbaceous note that brightens the entire dish.

Your Turn! Dive In and Share Your Culinary Journey!

Now that you have all the tips, tricks, and inspiration, it’s your turn to bring this magic to life in your own kitchen! I genuinely encourage you to roll up your sleeves, gather your ingredients, and give this recipe a try. I promise you won’t be disappointed. There’s something truly gratifying about creating a delicious, comforting meal from scratch, especially one that comes together with such ease and delivers on flavor every single time. Don’t just dream about it; make it!

And when you do, please, please, please come back and share your experience with me! I absolutely adore hearing from you and seeing your culinary creations. What did you love most about it? Did you make any amazing variations or discover a new favorite ingredient to add? Did your family rave about it? Leave a comment below, or better yet, share your photos on social media and tag me! Your feedback and shared experiences are what truly bring this community to life, inspiring us all to try new things and find joy in cooking. Happy cooking, my friends, and I can’t wait to hear all about your delicious Cheesy Cajun Garlic Chicken Rotini Skillet adventures!


Easy Cheesy Cajun Garlic Chicken Rotini Skillet Dinner

Easy Cheesy Cajun Garlic Chicken Rotini Skillet Dinner

Transform your weeknight dinner routine with this Cheesy Cajun Garlic Chicken Rotini Skillet, a dish that promises an explosion of flavor! This modern skillet creation marries the zesty, aromatic essence of Cajun cooking with universally loved ingredients like tender chicken, perfectly cooked rotini, and a generous blanket of cheese for the ultimate comfort food.

Prep Time
15 Minutes

Cook Time
30 Minutes

Total Time
45 Minutes

Servings
4 servings

Ingredients

  • 1 pound Chicken Breasts
  • 8 ounces Rotini Pasta
  • 2 tablespoons Olive Oil
  • 1 tablespoon Cajun Seasoning
  • 1 teaspoon Garlic Powder
  • 1 teaspoon Onion Powder
  • to taste Salt
  • to taste Pepper
  • 2 cloves Garlic, minced
  • 2 tablespoons Butter
  • 1 cup Heavy Cream
  • 1 cup Chicken Broth
  • 1 cup Mozzarella Cheese
  • ½ cup Parmesan Cheese
  • ½ cup Cheddar Cheese

Instructions

  1. Step 1
    Cut 1 pound chicken breasts into 1-inch cubes. In a bowl, toss chicken with 1 tablespoon Cajun seasoning, salt, and pepper to taste. Heat 2 tablespoons olive oil in a large skillet over medium-high heat. Cook chicken for 4-6 minutes until browned and cooked through. Remove chicken and set aside.
  2. Step 2
    Reduce skillet heat to medium. Add 2 tablespoons butter, scraping up any browned bits from the pan. Add 2 cloves minced garlic and cook for 1 minute until fragrant, stirring constantly.
  3. Step 3
    Pour in 1 cup chicken broth, stirring. Bring to a gentle simmer. Stir in 1 cup heavy cream. Season with salt and pepper to taste.
  4. Step 4
    While the sauce simmers, cook 8 ounces rotini pasta in heavily salted boiling water according to package directions until al dente. Reserve ½ cup pasta water, then drain. Add the cooked pasta and chicken to the skillet with the sauce. Toss to combine and heat through for 1-2 minutes. If the sauce is too thick, add a splash of reserved pasta water.
  5. Step 5
    Remove the skillet from heat. Add 1 cup Mozzarella Cheese, ½ cup Parmesan Cheese, and ½ cup Cheddar Cheese to the skillet. Stir gently and continuously until all the cheese has melted, creating a wonderfully creamy, stretchy sauce coating the chicken and pasta. Serve immediately.

Important Information

Nutrition Facts (Per Serving)

It is important to consider this information as approximate and not to use it as definitive health advice.

Allergy Information

Please check ingredients for potential allergens and consult a health professional if in doubt.

« Previous Post
Amazing Pretzel Chicken with Zesty Mustard Cheddar Sauce
Next Post »
Savory Garlic Parmesan Chicken Meatloaves: A Family Favorite

If you enjoyed this…

Chicken Alfredo Bake: A Creamy and Delicious Comfort Food Recipe

Chicken Buttered Noodles: A Quick and Delicious Recipe for Busy Weeknights

Cheesy Scalloped Potatoes: The Ultimate Comfort Food Recipe

Primary Sidebar

Browse by Diet

BreakfastDinnerLunchDessertAppetizer

Sweet Peach Yogurt Parfait Delight

One of my fondest memories is from a lazy summer afternoon spent at my grandmother’s house. The sun filtered through the kitchen window, casting a warm glow over the table where she would create her culinary magic. It was during one of those blissful moments that I first tasted her Peach Yogurt Parfait with Honey and Granola. The sweet aroma of ripe peaches mingling with creamy yogurt and the crunch of granola was nothing short of heavenly. It felt like summer captured in a bowl, and I still remember the joy of diving in with a spoon, each layer revealing a new burst of flavor.

When I think about that parfait, I can almost hear the gentle hum of the bees outside, reminding me of the floral notes that honey brings to every bite. The vibrant yellows and soft oranges of the peaches contrast beautifully with the creamy white yogurt and the golden crunch of granola. It’s a dish that not only looks delightful but also tastes like a celebration of fresh, wholesome ingredients.

What makes my version of this Peach Yogurt Parfait special is the careful balance of flavors and textures. I use ripe, juicy peaches, drizzled with locally sourced honey, and a homemade granola that’s bursting with nuts and seeds for an extra crunch. It’s a simple dish, but every layer is crafted with love and attention.

Let me show you exactly how to make this delightful parfait, so you can bring a bit of that summer magic into your kitchen!

Sweet Peach Yogurt Parfait Delight

Why You’ll Love This Recipe

  • Delightfully creamy texture from the Greek yogurt, paired with the juicy sweetness of fresh peaches.
  • Ready in under 20 minutes, making it a quick and satisfying breakfast or snack option.
  • Budget-friendly, using common ingredients that you may already have in your pantry.
  • Customizable with your favorite granola and nuts, allowing you to tailor each parfait to your taste.
  • Perfectly balanced flavors with the bright acidity of lemon juice and the sweetness of honey enhancing the peaches.

Ingredients

  • For the Parfait:
  • 2 cups plain Greek yogurt (or vanilla yogurt for a sweeter option)
  • 2 large ripe peaches, diced (about 2 cups)
  • 1 tablespoon fresh lemon juice (to prevent browning of peaches)
  • 2 tablespoons honey (plus more for drizzling)
  • 1 teaspoon vanilla extract (optional for extra flavor)
  • For the Granola:
  • 1 cup granola (store-bought or homemade; see notes for a simple granola recipe)
  • 1/4 cup sliced almonds (optional for added crunch)
  • 1/4 cup shredded coconut (optional for added flavor)

Let’s dive into some key ingredients that make this Peach Yogurt Parfait so delightful! First, the Greek yogurt is not only creamy but also packed with protein, making it a satisfying option for breakfast or a snack. If you’re looking for a sweeter option, you can easily substitute it with vanilla yogurt, though it may alter the overall flavor balance. Next, the ripe peaches are the star of the show; their natural sweetness shines through, so I recommend choosing peaches that yield slightly to pressure, indicating they’re perfectly ripe. If peaches aren’t in season, feel free to use nectarines or even frozen peaches—just thaw them before use. Finally, honey adds a lovely floral sweetness that ties everything together. If you prefer, maple syrup can serve as a delicious substitute.

Step-by-Step Instructions

  1. Start by preparing the peaches. Wash them thoroughly, then slice and dice them into bite-sized pieces. In a medium bowl, toss the diced peaches with 1 tablespoon of fresh lemon juice to prevent browning. Set aside for about 5 minutes while the lemon juice works its magic.
  2. In a separate bowl, combine the Greek yogurt, 2 tablespoons of honey, and 1 teaspoon of vanilla extract if using. Stir the mixture until smooth and thoroughly blended. This should take about a minute. Avoid overmixing to maintain the creaminess of the yogurt.
  3. Now it’s time to layer your parfait. Grab a clear glass or bowl to showcase your beautiful creation. Start with a generous spoonful of the yogurt mixture at the bottom—about 1/4 cup will do. Use a spoon to spread it evenly.
  4. Add a layer of the diced peaches over the yogurt, ensuring they cover the yogurt completely. You might want to use about half of what you have prepared—roughly 1 cup. This layer should be visually appealing, so arrange the peaches neatly.
  5. Sprinkle 1/4 cup of granola over the peaches. This adds a delightful crunch. Make sure to distribute it evenly to ensure every bite has that satisfying texture. Avoid packing it down too tightly, as you want it to maintain its crunch.
  6. Repeat the layers: spoon in another 1/4 cup of yogurt, followed by another cup of peaches, and another sprinkle of granola. You should have at least two layers, but feel free to add more depending on your glass size.
  7. Finish off your parfait with a drizzle of honey on top for added sweetness and a touch of elegance. If you’re using sliced almonds or shredded coconut, sprinkle them on top now. It adds a lovely visual contrast and extra flavor.
  8. Serve immediately or refrigerate for up to 30 minutes before serving to allow the flavors to meld together. However, I recommend enjoying it fresh to maintain the granola’s crunch.

Pro Tips for the Best Peach Yogurt Parfait With Honey And Granola

  • Make sure to choose ripe peaches for the best flavor and texture. A common mistake is using unripe fruit, which can lead to a less enjoyable parfait. Look for peaches that are fragrant and slightly soft to the touch.
  • Use a clear glass to assemble your parfait; this not only makes for a beautiful presentation but also allows you to see the colorful layers, which adds to the enjoyment of eating it.
  • For an even creamier texture, consider whipping the Greek yogurt with a hand mixer for a couple of minutes before layering. This small adjustment makes a huge difference in mouthfeel.
  • Be mindful of the granola-to-yogurt ratio. Too much granola can overwhelm the parfait, while too little can make it feel too creamy. Aim for about 1/4 cup of granola per layer for the perfect balance.
  • If you’re making this for a gathering, consider preparing the yogurt and peaches ahead of time and layering them just before serving. This ensures the granola stays crunchy!

Variations & Serving Ideas

There are so many ways to get creative with your Peach Yogurt Parfait! For a tropical twist, swap out the peaches for mangoes or pineapples and top with coconut flakes. If you prefer a berry flavor, mix in some blueberries or strawberries with the peaches for added color and taste. For a nutty version, incorporate chopped walnuts or pecans instead of almonds.

As for serving ideas, this parfait pairs beautifully with a side of scrambled eggs for a hearty breakfast or fresh fruit salad for a light lunch. You might also enjoy it alongside whole grain toast with almond butter for an energizing snack. The contrast of flavors and textures will elevate your meal experience!

Storage, Make-Ahead & Reheating

The Peach Yogurt Parfait is best enjoyed fresh, but you can prepare some components ahead of time. Store the layered parfait in an airtight container in the refrigerator for up to 24 hours. However, be cautious; the granola may lose its crunch if stored too long. You can freeze the yogurt and peach mixture for up to 2 months; just remember to thaw it in the refrigerator overnight before serving.

If you plan to enjoy this dish the next day, it can taste even better as the flavors meld together. Just remember to add the granola right before serving to keep its delightful crunch!

Frequently Asked Questions

Can I make Peach Yogurt Parfait With Honey And Granola ahead of time?

Yes — in fact, it tastes even better the next day as the flavors meld. However, I recommend waiting to add the granola until just before serving to maintain its crunch.

What can I substitute for Greek yogurt?

If you prefer a lighter option, you can substitute Greek yogurt with regular yogurt or a dairy-free alternative like coconut yogurt. Just remember that this may alter the creaminess and flavor profile slightly.

Can I use frozen peaches for this parfait?

Absolutely! Just make sure to thaw the frozen peaches before using them. They will still add great flavor, though the texture may be slightly softer than fresh peaches.

How do I make the parfait vegan?

To make a vegan version, substitute the Greek yogurt with a plant-based yogurt alternative, and replace honey with maple syrup or agave nectar. This keeps the parfait sweet while adhering to a vegan diet.

What other fruits can I use in this recipe?

You can mix and match fruits based on your preference. Try using strawberries, blueberries, raspberries, or even bananas. Just make sure to adjust the lemon juice as needed to prevent browning.

Sweet Peach Yogurt Parfait Delight

Final Thoughts

The Peach Yogurt Parfait with Honey and Granola is a delightful blend of creamy yogurt, sweet peaches, and crunchy granola that creates a satisfying and nourishing treat. Each layer bursts with flavor, making it a perfect choice for breakfast or a light dessert.

This is the kind of recipe I come back to again and again, especially when I want something refreshing and wholesome to start my day. The harmony of sweet and tart flavors, combined with the delightful crunch, never fails to lift my spirits!

I encourage you to give this parfait a try and indulge in its comforting goodness. Feel free to share your results or even add your own twist—perhaps a sprinkle of cinnamon or a handful of nuts. Enjoy creating your perfect parfait!

Print
clock clock iconcutlery cutlery iconflag flag iconfolder folder iconinstagram instagram iconpinterest pinterest iconfacebook facebook iconprint print iconsquares squares iconheart heart iconheart solid heart solid icon

Peach Yogurt Parfait


  • Author: Lily author
  • Total Time: 15 minutes
  • Yield: 4 servings 1x
Pin Recipe
Print Recipe

Description

This Peach Yogurt Parfait combines creamy Greek yogurt, juicy peaches, and crunchy granola for a delightful treat. It’s a perfect breakfast or snack that captures the essence of summer in every bite.


Ingredients

Scale
  • For the Parfait:
  • 2 cups plain Greek yogurt (or vanilla yogurt for a sweeter option)
  • 2 large ripe peaches, diced (about 2 cups)
  • 1 tablespoon fresh lemon juice (to prevent browning of peaches)
  • 2 tablespoons honey (plus more for drizzling)
  • 1 teaspoon vanilla extract (optional for extra flavor)
  • For the Granola:
  • 1 cup granola (store-bought or homemade; see notes for a simple granola recipe)
  • 1/4 cup sliced almonds (optional for added crunch)
  • 1/4 cup shredded coconut (optional for added flavor)

Instructions

  1. Start by preparing the peaches. Wash them thoroughly, then slice and dice them into bite-sized pieces. In a medium bowl, toss the diced peaches with 1 tablespoon of fresh lemon juice to prevent browning. Set aside for about 5 minutes while the lemon juice works its magic.
  2. In a separate bowl, combine the Greek yogurt, 2 tablespoons of honey, and 1 teaspoon of vanilla extract if using. Stir the mixture until smooth and thoroughly blended. This should take about a minute. Avoid overmixing to maintain the creaminess of the yogurt.
  3. Now it’s time to layer your parfait. Grab a clear glass or bowl to showcase your beautiful creation. Start with a generous spoonful of the yogurt mixture at the bottom—about 1/4 cup will do. Use a spoon to spread it evenly.
  4. Add a layer of the diced peaches over the yogurt, ensuring they cover the yogurt completely. You might want to use about half of what you have prepared—roughly 1 cup. This layer should be visually appealing, so arrange the peaches neatly.
  5. Sprinkle 1/4 cup of granola over the peaches. This adds a delightful crunch. Make sure to distribute it evenly to ensure every bite has that satisfying texture. Avoid packing it down too tightly, as you want it to maintain its crunch.
  6. Repeat the layers: spoon in another 1/4 cup of yogurt, followed by another cup of peaches, and another sprinkle of granola. You should have at least two layers, but feel free to add more depending on your glass size.
  7. Finish off your parfait with a drizzle of honey on top for added sweetness and a touch of elegance. If you’re using sliced almonds or shredded coconut, sprinkle them on top now. It adds a lovely visual contrast and extra flavor.
  8. Serve immediately or refrigerate for up to 30 minutes before serving to allow the flavors to meld together. However, I recommend enjoying it fresh to maintain the granola’s crunch.
  • Prep Time: 15 mins
  • Cook Time: 0 mins
  • Category: Breakfast
  • Method: No-cook
  • Cuisine: American

Nutrition

  • Serving Size: 1 parfait
  • Calories: 250
  • Sugar: 20 g
  • Sodium: 50 mg
  • Fat: 5 g
  • Saturated Fat: 2 g
  • Unsaturated Fat: 3 g
  • Trans Fat: 0 g
  • Carbohydrates: 40 g
  • Fiber: 3 g
  • Protein: 10 g
  • Cholesterol: 10 mg

Keywords: Choose ripe peaches for the best flavor and texture. Use a clear glass for a beautiful presentation. For creaminess, consider whipping the yogurt before layering. Be mindful of the granola-to-yogurt ratio. Prepare yogurt and peaches ahead of time for gatherings, layering just before serving.

Did you make this recipe?

Share a photo and tag us — we can't wait to see what you've made!

Sun-Kissed Frozen Orange Cream Slush

As a child, summer days felt like they lasted forever. I remember the sticky heat wrapping around me as I played outside, my laughter mingling with the sounds of the neighborhood. But nothing could cool me down quite like the moment I’d spot my grandmother, laboring over her blender, whipping up her famous Frozen Orange Creamsicle Slush. That vibrant orange treat, with its frosty texture and sweet citrus aroma, was like a burst of sunshine in a cup. Just one sip, and I could feel the coolness wash over me, sparking pure joy.

This Frozen Orange Creamsicle Slush has a way of making you feel like a kid again. Its creamy, dreamy consistency is a delightful balance of bright orange and soft vanilla, inviting you to dive right in. The refreshing tang of orange dances on your tongue, while the smooth creaminess envelops you in a comforting embrace. It’s a nostalgic treat that’s perfect for hot summer afternoons or anytime you need a little pick-me-up.

What makes my version of this slush stand out is the addition of a hint of vanilla bean, which elevates the flavor and adds an extra layer of richness. Plus, it’s super easy to whip up with just a few simple ingredients that you probably already have on hand! So, if you’re ready to relive those sun-soaked memories, let me show you exactly how to make it.

Sun-Kissed Frozen Orange Cream Slush

Why You’ll Love This Recipe

  • Each slush is a perfect blend of creamy vanilla and zesty orange, creating a nostalgic flavor reminiscent of summer days.
  • This refreshing treat is ready in under 15 minutes, making it an ideal quick dessert for unexpected guests or hot afternoons.
  • With just 8 simple ingredients, it’s budget-friendly, ensuring you don’t have to break the bank to enjoy a delicious slush.
  • The slush has a perfectly smooth texture, thanks to the combination of ice and ice cream, providing a delightful contrast to the bright citrus flavors.
  • It’s highly customizable; you can easily adjust the sweetness and add fresh herbs for a unique twist that suits your taste.

Ingredients

  • 2 cups orange juice (freshly squeezed or store-bought)
  • 1 cup vanilla ice cream
  • 1 cup crushed ice
  • 1/2 cup milk (whole or 2%)
  • 1/4 cup granulated sugar (adjust based on sweetness preference)
  • 1 teaspoon vanilla extract
  • Zest of 1 orange (for added flavor)
  • Fresh orange slices and mint leaves (for garnish)

The star of this Frozen Orange Creamsicle Slush is the orange juice, which provides the vibrant, citrusy base. Freshly squeezed juice will yield the brightest flavor, but store-bought options can be just as convenient. If you’re opting for store-bought, choose 100% pure juice with no added sugars for the best results. Another essential ingredient is the vanilla ice cream; it adds creaminess and sweetness. You can substitute it with dairy-free ice cream if you’re looking for a vegan option. Whole or 2% milk complements the ice cream, creating a smooth blend. If you want a lower-calorie version, almond or oat milk can be good alternatives.

Lastly, the granulated sugar can be adjusted based on your sweetness preference. If you prefer a more natural sweetener, consider using honey or agave syrup. The orange zest enhances the flavor profile, providing an aromatic pop that brings the whole slush together. Don’t skip it! It adds an extra layer of brightness that makes this slush truly special.

Step-by-Step Instructions

  1. Start by preparing your ingredients. Gather 2 cups of orange juice, 1 cup of vanilla ice cream, and 1 cup of crushed ice. Make sure the ice is finely crushed, as larger chunks can make blending difficult.
  2. In a blender, combine the orange juice, vanilla ice cream, crushed ice, and 1/2 cup of milk. Add 1/4 cup of granulated sugar and 1 teaspoon of vanilla extract. If you like a sweeter slush, consider adding a bit more sugar at this stage.
  3. Add the zest of 1 orange to the blender. This step is crucial for enhancing the citrus flavor of your slush. Make sure not to include the bitter white pith—only the flavorful zest.
  4. Blend the mixture on medium-high speed for about 30-45 seconds. Stop once the ingredients are fully combined and the slush has a smooth, even consistency. If you notice large chunks of ice, blend for an additional 10-15 seconds. Avoid over-blending, as this can make the slush too liquidy.
  5. Once blended, taste the slush. If it needs more sweetness, add a little more sugar and blend for a few more seconds. If it’s too thick, you can add a splash of milk to reach your desired consistency.
  6. Pour the slush into glasses. This recipe typically serves 4, but you can easily double it for larger gatherings. Use a spoon to help guide the slush into the glasses if needed.
  7. Garnish each serving with fresh orange slices and mint leaves. The mint not only adds a pop of color but also a refreshing aroma that complements the citrus flavors beautifully.
  8. Serve immediately and enjoy! If you’ve made extra, you can refrigerate it for a short time, but it’s best enjoyed fresh.

Pro Tips for the Best Frozen Orange Creamsicle Slush

  • Don’t skip the orange zest! It’s a game-changer for flavor. Always zest before juicing to make it easier.
  • Use a high-powered blender for the best texture. A standard blender may struggle with ice, leading to uneven consistency. If you have a food processor, that can work too, but ensure the ice is finely crushed.
  • Adjust the ice-to-liquid ratio carefully. If your slush is too thick, it won’t blend well. Start with less ice and add more until you reach your preferred texture.
  • Be cautious with the sugar! Always start with the lower amount, as you can easily add more, but it’s hard to fix an overly sweet slush.
  • For a fun twist, consider adding a splash of coconut milk or a handful of fresh fruit like strawberries or pineapple. This not only enhances the flavor but also adds a beautiful color contrast.

Variations & Serving Ideas

There are countless ways to put a spin on your Frozen Orange Creamsicle Slush. Consider making a tropical version by adding in some pineapple juice or coconut milk for a delightful tropical twist. If you’re feeling adventurous, try incorporating a handful of frozen mango or peach slices for added sweetness. For a lighter version, swap out the vanilla ice cream for Greek yogurt for a creamy yet tangy alternative.

As for serving ideas, this refreshing slush pairs wonderfully with light summer dishes like grilled chicken skewers, fish tacos, or a simple salad topped with citrus vinaigrette. The bright, zesty flavors of the slush complement these dishes perfectly, making them an ideal pairing for a sunny day.

Storage, Make-Ahead & Reheating

This Frozen Orange Creamsicle Slush is best enjoyed fresh, but if you have leftovers, you can store them in an airtight container in the fridge for up to 2 days. Just keep in mind that the slush may lose some of its texture over time as the ice melts. It doesn’t freeze well, as the ice will turn into a solid block. If you must freeze it, blend again after thawing to restore the slushy consistency. This treat is best the day you make it, as the flavors meld together beautifully overnight, enhancing its deliciousness.

Frequently Asked Questions

Can I make Frozen Orange Creamsicle Slush ahead of time?

Yes — in fact, it tastes even better the next day as the flavors meld. However, it’s best to enjoy it fresh, as the texture can change if stored for too long. If you need to prepare it ahead, keep it in the fridge and re-blend before serving.

What kind of orange juice should I use?

For the best flavor, use freshly squeezed orange juice. However, if you’re short on time, opt for 100% pure store-bought juice without added sugars. This will ensure that your slush remains flavorful and refreshing.

Can I substitute the vanilla ice cream?

Absolutely! If you’re looking for a dairy-free option, coconut milk ice cream or a non-dairy vanilla ice cream can work wonderfully. They will still provide the creamy texture and sweetness you desire.

How can I adjust the sweetness of my slush?

You can easily adjust the sweetness by modifying the amount of sugar added. Start with 1/4 cup and taste the mixture before blending. If you prefer it sweeter, add more sugar gradually until it reaches your desired level.

What should I do if my slush is too thick?

If your slush is too thick, simply add a splash of milk or orange juice and blend again. This will help achieve a more drinkable consistency while maintaining the slushy texture. Adjust gradually to reach your preferred thickness.

Sun-Kissed Frozen Orange Cream Slush

Final Thoughts

The Frozen Orange Creamsicle Slush is a delightful blend of refreshing citrus and creamy goodness, making it a perfect treat for warm days or any time you crave a taste of nostalgia. The way the bright orange flavor dances with the creamy texture truly elevates this slush, transforming it into a satisfying escape from the everyday.

This is the kind of recipe I come back to again and again, especially when I’m looking to cool down or impress guests at a summer gathering. It’s simple to make and always brings smiles all around! I encourage you to try this recipe for yourself—don’t hesitate to share your results or even put your own spin on it. Happy slushing!

Print
clock clock iconcutlery cutlery iconflag flag iconfolder folder iconinstagram instagram iconpinterest pinterest iconfacebook facebook iconprint print iconsquares squares iconheart heart iconheart solid heart solid icon

Frozen Orange Creamsicle Slush


  • Author: Lily author
  • Total Time: 15 minutes
  • Yield: 4 servings 1x
Pin Recipe
Print Recipe

Description

This Frozen Orange Creamsicle Slush is a refreshing treat that combines creamy vanilla and zesty orange flavors. Perfect for hot summer days, it brings back nostalgic memories with every sip.


Ingredients

Scale
  • 2 cups orange juice (freshly squeezed or store-bought)
  • 1 cup vanilla ice cream
  • 1 cup crushed ice
  • 1/2 cup milk (whole or 2%)
  • 1/4 cup granulated sugar (adjust based on sweetness preference)
  • 1 teaspoon vanilla extract
  • Zest of 1 orange (for added flavor)
  • Fresh orange slices and mint leaves (for garnish)

Instructions

  1. Start by preparing your ingredients. Gather 2 cups of orange juice, 1 cup of vanilla ice cream, and 1 cup of crushed ice. Make sure the ice is finely crushed, as larger chunks can make blending difficult.
  2. In a blender, combine the orange juice, vanilla ice cream, crushed ice, and 1/2 cup of milk. Add 1/4 cup of granulated sugar and 1 teaspoon of vanilla extract. If you like a sweeter slush, consider adding a bit more sugar at this stage.
  3. Add the zest of 1 orange to the blender. This step is crucial for enhancing the citrus flavor of your slush. Make sure not to include the bitter white pith—only the flavorful zest.
  4. Blend the mixture on medium-high speed for about 30-45 seconds. Stop once the ingredients are fully combined and the slush has a smooth, even consistency. If you notice large chunks of ice, blend for an additional 10-15 seconds. Avoid over-blending, as this can make the slush too liquidy.
  5. Once blended, taste the slush. If it needs more sweetness, add a little more sugar and blend for a few more seconds. If it’s too thick, you can add a splash of milk to reach your desired consistency.
  6. Pour the slush into glasses. This recipe typically serves 4, but you can easily double it for larger gatherings. Use a spoon to help guide the slush into the glasses if needed.
  7. Garnish each serving with fresh orange slices and mint leaves. The mint not only adds a pop of color but also a refreshing aroma that complements the citrus flavors beautifully.
  8. Serve immediately and enjoy! If you’ve made extra, you can refrigerate it for a short time, but it's best enjoyed fresh.
  • Prep Time: 15 min
  • Cook Time: 0 min
  • Category: Dessert
  • Method: Blending
  • Cuisine: American

Nutrition

  • Serving Size: 1 serving
  • Calories: 200
  • Sugar: 30 g
  • Sodium: 50 mg
  • Fat: 5 g
  • Saturated Fat: 3 g
  • Unsaturated Fat: 2 g
  • Trans Fat: 0 g
  • Carbohydrates: 40 g
  • Fiber: 1 g
  • Protein: 2 g
  • Cholesterol: 20 mg

Keywords: Don't skip the orange zest! It's a game-changer for flavor. Always zest before juicing to make it easier.

Did you make this recipe?

Share a photo and tag us — we can't wait to see what you've made!

Zesty Lemon Poppy Seed Delight

One rainy afternoon, I found myself in my grandmother’s cozy kitchen, the kind that always smelled like warmth and love. She was whipping up her famous Lemon Poppy Seed Loaf, a recipe that had been passed down through generations. As the batter came together, the zesty aroma of fresh lemons filled the air, mingling perfectly with the nutty fragrance of poppy seeds. I can still picture her, apron-clad, as she expertly drizzled a vibrant citrus icing over the loaf, creating a glossy, sun-kissed finish that beckoned us to dive in. It was a moment that sparked my own passion for baking, and this recipe has become a cherished staple in my home ever since.

When you take a bite of this Lemon Poppy Seed Loaf, it’s like a burst of sunshine on your palate. The loaf is beautifully golden, with a tender crumb that melts in your mouth. Each slice is speckled with tiny poppy seeds, adding a delightful crunch that contrasts beautifully with the tangy sweetness of the lemon. And that citrus icing? It’s the finishing touch that elevates this loaf from ordinary to extraordinary, with its bright, zesty flavor dancing on your taste buds.

This recipe stands out because it embraces simplicity while delivering on flavor. I’ve added a hint of vanilla to the batter, enhancing the overall taste and making it even more indulgent. Trust me, once you make this Lemon Poppy Seed Loaf With Citrus Icing, it’ll become a go-to in your baking repertoire.

So, let me show you exactly how to make it!

Zesty Lemon Poppy Seed Delight

Why You’ll Love This Recipe

  • Moist and tender crumb that melts in your mouth, thanks to the perfect balance of butter and buttermilk.
  • Bright, zesty lemon flavor paired with crunchy poppy seeds, creating a delightful texture and taste experience.
  • Easy to whip up in just about an hour, perfect for last-minute gatherings or a cozy afternoon treat.
  • Budget-friendly with everyday ingredients, making it an accessible option for all home bakers.
  • The citrus icing adds a sweet tang that elevates the loaf, turning a simple recipe into a showstopper!

Ingredients

  • 1 ½ cups (190g) all-purpose flour
  • 1 teaspoon baking powder
  • ½ teaspoon baking soda
  • ½ teaspoon salt
  • 3 tablespoons poppy seeds
  • ½ cup (115g) unsalted butter, softened to room temperature
  • 1 cup (200g) granulated sugar
  • 2 large eggs
  • 1 teaspoon vanilla extract
  • 1 teaspoon lemon zest (from about 1 medium lemon)
  • ½ cup (120ml) buttermilk
  • 2 tablespoons fresh lemon juice

For the Citrus Icing:

  • 1 cup (120g) powdered sugar
  • 2 tablespoons fresh lemon juice
  • 1 tablespoon orange juice
  • 1 teaspoon lemon zest (for garnish, optional)

Let’s dive into the key ingredients that make this Lemon Poppy Seed Loaf so special. The all-purpose flour provides the structure and base for the loaf, while the baking powder and baking soda ensure it rises perfectly, giving the loaf a light texture. For a gluten-free variation, you could substitute the flour with a gluten-free all-purpose blend. Poppy seeds not only add a delightful crunch but also contribute to the unique flavor profile that pairs well with the citrus notes.

Unsalted butter is crucial for achieving the buttery richness that makes this loaf so moist. If you’re looking for a dairy-free option, coconut oil or a vegan butter can be used instead. The buttermilk is another essential component, providing acidity that activates the baking soda for a fluffy texture. If you don’t have buttermilk on hand, you can easily make a substitute by mixing ½ cup of milk with 1 tablespoon of vinegar or lemon juice and letting it sit for about 5 minutes.

Step-by-Step Instructions

  1. Preheat your oven to 350°F (175°C). Grease a 9×5-inch loaf pan or line it with parchment paper for easy removal later.
  2. In a medium mixing bowl, whisk together 1 ½ cups of all-purpose flour, 1 teaspoon of baking powder, ½ teaspoon of baking soda, ½ teaspoon of salt, and 3 tablespoons of poppy seeds. This helps to evenly distribute the baking agents and ensures a uniform rise.
  3. In a large mixing bowl, cream together ½ cup of softened unsalted butter and 1 cup of granulated sugar using an electric mixer on medium speed for about 3-4 minutes, until the mixture is light and fluffy. Make sure to scrape down the sides of the bowl occasionally.
  4. Add 2 large eggs, 1 teaspoon of vanilla extract, and 1 teaspoon of lemon zest to the creamed butter and sugar, mixing until fully combined. You want a smooth consistency, so ensure there are no lumps of butter.
  5. In a small bowl, combine ½ cup of buttermilk and 2 tablespoons of fresh lemon juice. Alternately add the dry ingredients and buttermilk mixture to the butter mixture, starting and ending with the dry ingredients. Mix just until combined; do not overmix, as this can lead to a dense loaf.
  6. Pour the batter into the prepared loaf pan. Smooth the top with a spatula, ensuring it’s even. Bake in the preheated oven for 50-60 minutes, or until a toothpick inserted in the center comes out clean. The edges should be lightly golden brown, and the center should feel just set.
  7. Once baked, remove the loaf from the oven and allow it to cool in the pan for about 10 minutes. Then, transfer it to a wire rack to cool completely. Resist the urge to slice too soon, as it will be crumbly if it’s still warm.
  8. While the loaf is cooling, prepare the citrus icing. In a medium bowl, whisk together 1 cup of powdered sugar, 2 tablespoons of fresh lemon juice, and 1 tablespoon of orange juice until smooth. If the icing is too thick, you can add a little more juice to reach your desired consistency.
  9. Once the loaf is completely cool, drizzle the citrus icing over the top. If you like, sprinkle with an additional teaspoon of lemon zest for an extra pop of flavor and color.

Pro Tips for the Best Lemon Poppy Seed Loaf With Citrus Icing

  • Be careful not to overmix your batter; this is a common mistake that can lead to a dense loaf. Mix just until the dry ingredients are incorporated for a light and fluffy texture.
  • Use room temperature ingredients, especially the butter and eggs. This helps to create a smoother batter and ensures even baking. Take your eggs out of the fridge about 30 minutes before you start.
  • For a more pronounced lemon flavor, consider adding a little lemon extract in addition to the zest and juice. Just a half teaspoon can elevate the citrus notes significantly.
  • When measuring your flour, spoon it into the measuring cup and level it off with a knife instead of scooping directly from the bag. This prevents packing and ensures you don’t end up with a dry loaf.
  • Invest in a good quality loaf pan; it makes a difference in heat distribution, which ensures even baking. If your pan is dark-coated, reduce the oven temperature by 25°F to prevent over-browning.

Variations & Serving Ideas

For a delightful twist, consider adding blueberries or raspberries to the batter for a fruity burst of flavor. You can also experiment with different citrus fruits—try lime or grapefruit zest and juice for a refreshing change. For a healthier option, substitute half of the all-purpose flour with whole wheat flour for added fiber without compromising too much on texture.

This Lemon Poppy Seed Loaf pairs beautifully with a light salad, such as a mixed greens salad with a vinaigrette, or a cup of tea for a cozy afternoon treat. It also complements a creamy cheese platter, as the acidity of the loaf balances rich cheeses perfectly. Lastly, a scoop of vanilla ice cream on the side creates a delightful contrast of temperatures and flavors!

Storage, Make-Ahead & Reheating

This Lemon Poppy Seed Loaf can be stored at room temperature for up to 3 days if wrapped tightly in plastic wrap. If you want to keep it longer, it freezes well for up to 3 months. To freeze, wrap the loaf tightly in plastic wrap and then in aluminum foil to prevent freezer burn.

When you’re ready to enjoy it again, simply thaw it in the fridge overnight. Reheat individual slices in the microwave for 15-20 seconds or in a toaster oven until warmed through. Interestingly, many people find that this loaf tastes even better the next day, as the flavors have time to meld!

Frequently Asked Questions

Can I make Lemon Poppy Seed Loaf With Citrus Icing ahead of time?

Yes — in fact, it tastes even better the next day! You can make the loaf a day in advance, allowing the flavors to develop. Just be sure to store it in an airtight container to maintain its moisture.

Can I substitute the poppy seeds?

Absolutely! If you don’t have poppy seeds on hand or prefer an alternative, you can use sesame seeds for a similar crunch or omit them entirely for a smooth loaf.

What can I use instead of buttermilk?

If you don’t have buttermilk, you can easily create a substitute by mixing ½ cup of milk (dairy or plant-based) with 1 tablespoon of vinegar or lemon juice. Let it sit for 5 minutes before using in the recipe.

How can I make this recipe gluten-free?

To make a gluten-free version of this Lemon Poppy Seed Loaf, substitute the all-purpose flour with a gluten-free all-purpose flour blend. Just ensure that the blend contains a binding agent like xanthan gum for the best results.

What is the best way to store leftover loaf?

Leftover Lemon Poppy Seed Loaf should be stored in an airtight container at room temperature for up to 3 days. For longer storage, wrap it tightly and freeze for up to 3 months. Thaw it before serving for the best texture.

Zesty Lemon Poppy Seed Delight

Final Thoughts

The Lemon Poppy Seed Loaf with Citrus Icing is truly a delightful treat that brings a burst of brightness to any occasion. The zesty lemon flavor combined with the subtle crunch of poppy seeds creates a satisfying balance, while the citrus icing adds a touch of sweetness that perfectly complements the loaf’s tanginess.

This is the kind of recipe I come back to again and again, especially when I want to brighten up a gloomy day or celebrate a small victory. The aroma that fills the kitchen as it bakes is absolutely heavenly! I encourage you to give this recipe a try; you might just find it becoming a beloved staple in your home. Don’t forget to share your results or even add your own unique twist—I can’t wait to see what you create!

Print
clock clock iconcutlery cutlery iconflag flag iconfolder folder iconinstagram instagram iconpinterest pinterest iconfacebook facebook iconprint print iconsquares squares iconheart heart iconheart solid heart solid icon

Lemon Poppy Seed Loaf


  • Author: Lily author
  • Total Time: 29 minute
  • Yield: 1 loaf 1x
Pin Recipe
Print Recipe

Description

This Lemon Poppy Seed Loaf is a delightful treat that combines zesty lemon flavor with crunchy poppy seeds. Topped with a citrus icing, it’s perfect for any occasion.


Ingredients

Scale
  • 1 ½ cups (190g) all-purpose flour
  • 1 teaspoon baking powder
  • ½ teaspoon baking soda
  • ½ teaspoon salt
  • 3 tablespoons poppy seeds
  • ½ cup (115g) unsalted butter, softened to room temperature
  • 1 cup (200g) granulated sugar
  • 2 large eggs
  • 1 teaspoon vanilla extract
  • 1 teaspoon lemon zest (from about 1 medium lemon)
  • ½ cup (120ml) buttermilk
  • 2 tablespoons fresh lemon juice
  • 1 cup (120g) powdered sugar
  • 2 tablespoons fresh lemon juice
  • 1 tablespoon orange juice
  • 1 teaspoon lemon zest (for garnish, optional)

Instructions

  1. Preheat your oven to 350°F (175°C). Grease a 9×5-inch loaf pan or line it with parchment paper for easy removal later.
  2. In a medium mixing bowl, whisk together 1 ½ cups of all-purpose flour, 1 teaspoon of baking powder, ½ teaspoon of baking soda, ½ teaspoon of salt, and 3 tablespoons of poppy seeds. This helps to evenly distribute the baking agents and ensures a uniform rise.
  3. In a large mixing bowl, cream together ½ cup of softened unsalted butter and 1 cup of granulated sugar using an electric mixer on medium speed for about 3-4 minutes, until the mixture is light and fluffy. Make sure to scrape down the sides of the bowl occasionally.
  4. Add 2 large eggs, 1 teaspoon of vanilla extract, and 1 teaspoon of lemon zest to the creamed butter and sugar, mixing until fully combined. You want a smooth consistency, so ensure there are no lumps of butter.
  5. In a small bowl, combine ½ cup of buttermilk and 2 tablespoons of fresh lemon juice. Alternately add the dry ingredients and buttermilk mixture to the butter mixture, starting and ending with the dry ingredients. Mix just until combined; do not overmix, as this can lead to a dense loaf.
  6. Pour the batter into the prepared loaf pan. Smooth the top with a spatula, ensuring it’s even. Bake in the preheated oven for 50-60 minutes, or until a toothpick inserted in the center comes out clean. The edges should be lightly golden brown, and the center should feel just set.
  7. Once baked, remove the loaf from the oven and allow it to cool in the pan for about 10 minutes. Then, transfer it to a wire rack to cool completely. Resist the urge to slice too soon, as it will be crumbly if it’s still warm.
  8. While the loaf is cooling, prepare the citrus icing. In a medium bowl, whisk together 1 cup of powdered sugar, 2 tablespoons of fresh lemon juice, and 1 tablespoon of orange juice until smooth. If the icing is too thick, you can add a little more juice to reach your desired consistency.
  9. Once the loaf is completely cool, drizzle the citrus icing over the top. If you like, sprinkle with an additional teaspoon of lemon zest for an extra pop of flavor and color.
  • Prep Time: 15 mins
  • Cook Time: 50-60 mins
  • Category: Dessert
  • Method: Baking
  • Cuisine: American

Nutrition

  • Serving Size: 1 slice
  • Calories: 200
  • Sugar: 15 g
  • Sodium: 150 mg
  • Fat: 8 g
  • Saturated Fat: 5 g
  • Unsaturated Fat: 3 g
  • Trans Fat: 0 g
  • Carbohydrates: 30 g
  • Fiber: 1 g
  • Protein: 3 g
  • Cholesterol: 40 mg

Keywords: Be careful not to overmix your batter; this is a common mistake that can lead to a dense loaf. Use room temperature ingredients for a smoother batter and even baking.

Did you make this recipe?

Share a photo and tag us — we can't wait to see what you've made!

  • Privacy Policy
  • Terms Of Service
  • Contact
  • About
  • GDPR

Copyright © 2025 Homesmad