• Skip to primary navigation
  • Skip to main content
  • Skip to primary sidebar
Homesmad

Homesmad

  • Home
  • Breakfast & Brunch
  • Appetizers & Snacks
  • Dinner
  • Dessert
  • About
  • Privacy Policy
  • Contact
Homesmad
  • Home
  • Breakfast & Brunch
  • Appetizers & Snacks
  • Dinner
  • Dessert
  • About
  • Privacy Policy
  • Contact

Savory Garlic Parmesan Chicken Meatloaves: A Family Favorite

October 29, 2025 by Lily author

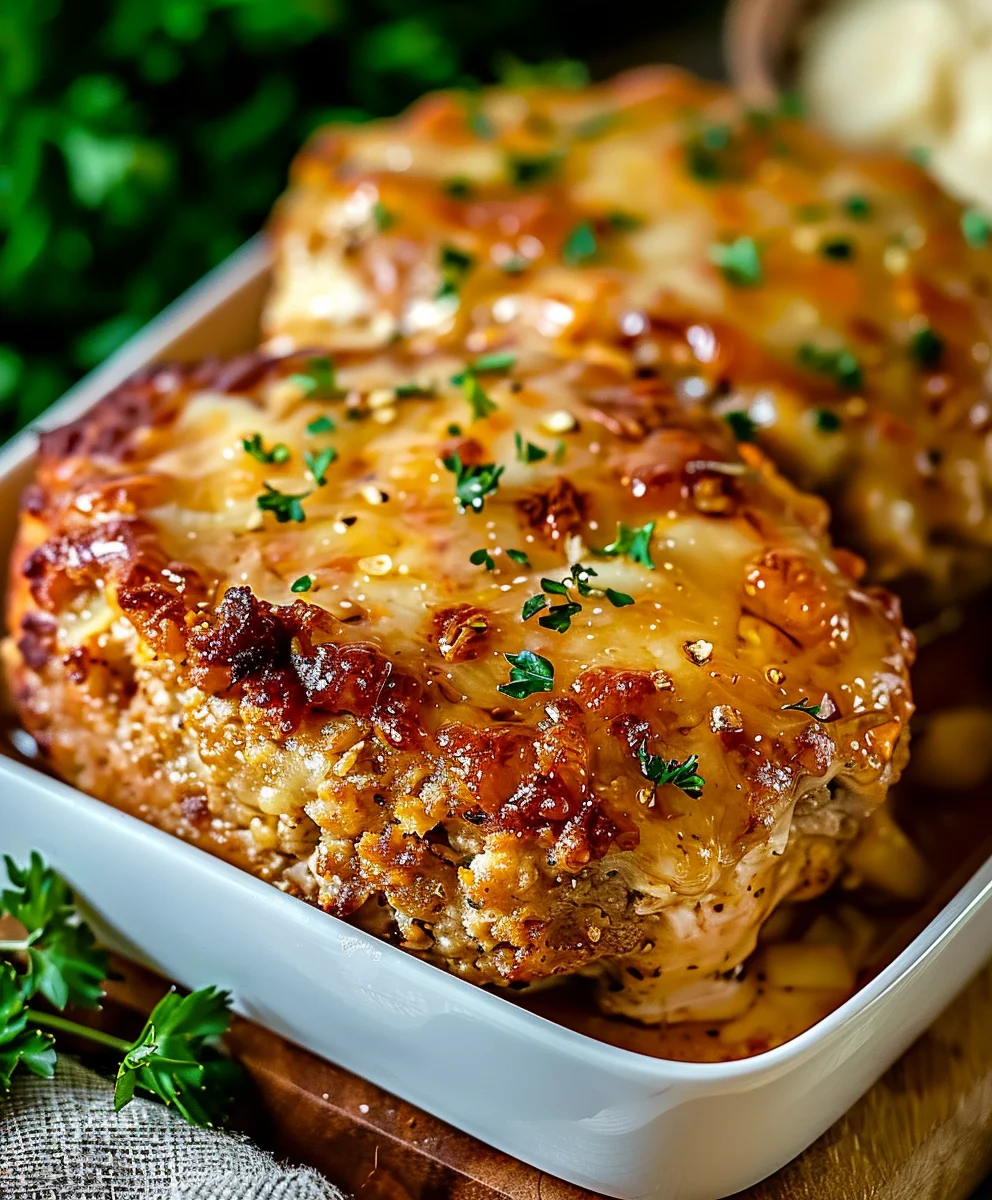
Garlic Parmesan Chicken Meatloaves are about to revolutionize your dinner routine, transforming a beloved classic into something truly spectacular and undeniably healthier. Have you ever wished for a comforting, savory meal that practically cooks itself, leaving your kitchen smelling divine and your family clamoring for more? Well, your wish is about to come true! While traditional meatloaf holds a special place in our culinary hearts, often rooted in European traditions and embraced as a staple American comfort food, this chicken rendition offers a delightful contemporary twist. It’s a dish that artfully blends the robust, aromatic kick of fresh garlic with the sharp, nutty notes of aged Parmesan cheese, all nestled within tender, moist ground chicken.

I find that people absolutely adore this recipe for its incredible versatility and the sheer depth of flavor it brings to the table. The combination of savory chicken, pungent garlic, and salty Parmesan creates a taste profile that is both familiar and excitingly fresh. Furthermore, these individual Garlic Parmesan Chicken Meatloaves are incredibly convenient, perfect for weeknight meals, fantastic for meal prepping, and an absolute crowd-pleaser for all ages. They offer all the hearty satisfaction of a classic meatloaf but with a lighter feel, making them an ideal choice for any season. Get ready to experience a new family favorite!

Savory Garlic Parmesan Chicken Meatloaves: A Family Favorite this RECIPE

Ingredients:

  • For the Garlic Parmesan Chicken Meatloaves:
    • 1 ½ pounds (approximately 680g) lean ground chicken, ideally 92-93% lean for the best balance of moisture and flavor.
    • ¾ cup (about 75g) panko breadcrumbs. I find panko breadcrumbs give a lighter, more tender texture compared to regular breadcrumbs, which is perfect for these chicken meatloaves.
    • ½ cup (about 50g) freshly grated Parmesan cheese, plus extra for serving. Please, please use fresh if you can; it makes all the difference for our Garlic Parmesan Chicken Meatloaves.
    • ½ cup milk (any kind you prefer; whole milk adds a touch more richness).
    • 2 large eggs, lightly beaten. These act as a fantastic binder and add to the moistness.
    • ¼ cup finely minced yellow onion (about half a small onion). Make sure it’s very finely minced so it blends seamlessly into the mixture.
    • 4 cloves garlic, minced (approximately 1 ½ tablespoons). Yes, we’re going big on garlic for these Garlic Parmesan Chicken Meatloaves – it’s a key player!
    • 2 tablespoons fresh parsley, finely chopped, plus extra for garnish. The fresh herbs really brighten up the flavor.
    • 1 teaspoon dried oregano.
    • ½ teaspoon dried thyme.
    • 1 teaspoon salt, or to taste.
    • ½ teaspoon freshly ground black pepper, or to taste.
    • 1 tablespoon olive oil, for sautéing the aromatics.
  • For the Tangy Glaze (Optional, but highly recommended for an extra burst of flavor and moisture):
    • ½ cup ketchup.
    • 2 tablespoons light brown sugar, packed. This provides a lovely sweetness to balance the tang.
    • 1 tablespoon Worcestershire sauce. It adds a wonderful umami depth.
    • 1 tablespoon apple cider vinegar. This is the secret to that perfectly balanced tang!
    • 1 clove garlic, minced very finely. More garlic, because we love garlic!

Preparing the Aromatic Base for Your Garlic Parmesan Chicken Meatloaves

  1. Prepare the Aromatics: Before we dive into mixing, let’s get our foundational flavors ready. Heat 1 tablespoon of olive oil in a small skillet over medium-low heat. Add your finely minced yellow onion and cook gently for about 5-7 minutes, stirring occasionally, until the onion becomes beautifully translucent and soft, but without any browning. This slow cooking coaxes out the natural sweetness of the onion, which is crucial for the delicate flavor profile of our Garlic Parmesan Chicken Meatloaves.
  2. Introduce the Garlic: Now, add the 4 cloves of minced garlic to the skillet with the softened onions. Continue to cook for another 1-2 minutes, stirring constantly, until the garlic becomes incredibly fragrant. Be very careful not to let the garlic brown, as burnt garlic can taste bitter and would detract from the deliciousness we’re building. Once fragrant, immediately remove the skillet from the heat and set it aside to cool slightly. Allowing it to cool ensures that it won’t cook the eggs prematurely when we combine all the ingredients.

Crafting the Perfect Garlic Parmesan Chicken Meatloaf Mixture

  1. Combine Wet Ingredients: In a truly spacious mixing bowl – one that gives you ample room to work your magic without spills – gently whisk together the ½ cup of milk and the 2 lightly beaten large eggs. Whisk them until they are just combined and have a uniform pale yellow color. This liquid base will ensure our chicken meatloaves are wonderfully moist.
  2. Introduce the Dry Binders and Flavor Enhancers: To the milk and egg mixture, add your ¾ cup of panko breadcrumbs, ½ cup of freshly grated Parmesan cheese (remember, fresh is best!), and the cooled, sautéed onion and garlic mixture. Next, incorporate the finely chopped fresh parsley, dried oregano, and dried thyme. Finally, season generously with 1 teaspoon of salt and ½ teaspoon of freshly ground black pepper. Give everything a good stir with a spatula or wooden spoon until all these ingredients are well-distributed and the breadcrumbs have started to absorb some of the liquid. Let this mixture sit for about 5 minutes; this brief resting period allows the panko to fully hydrate, contributing to an incredibly tender texture in your finished Garlic Parmesan Chicken Meatloaves.
  3. Incorporate the Ground Chicken: Now for the star of the show! Add the 1 ½ pounds of lean ground chicken to the bowl with the prepared mixture. This is where your hands truly come in handy. Using clean hands, gently mix all the ingredients together. Your goal here is to combine everything thoroughly without overmixing. Overmixing can lead to tough meatloaves, and we’re aiming for succulent, juicy Garlic Parmesan Chicken Meatloaves. Mix just until everything is evenly distributed and no streaks of plain ground chicken remain. The mixture should be cohesive and easy to form.
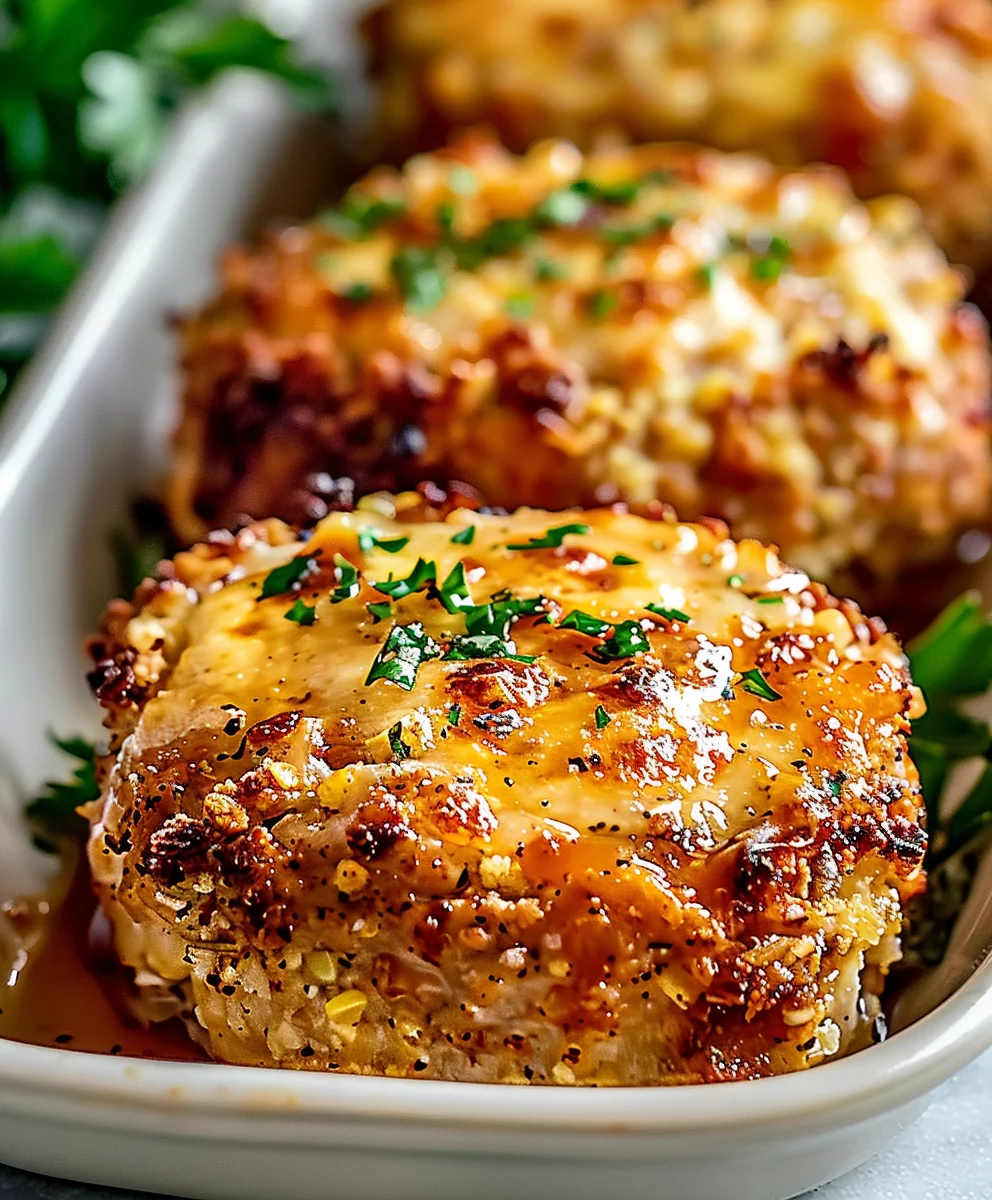
  4. Shape Your Meatloaves: Line a large baking sheet with parchment paper or a silicone baking mat for easy cleanup. Now, divide your chicken mixture into six equal portions. Gently form each portion into a mini loaf shape, approximately 4-5 inches long and 2-3 inches wide. You want them to be uniform in size so they cook evenly. Place them on your prepared baking sheet, ensuring there’s a little space between each one for proper air circulation during baking. These individual portions are perfect for quick weeknight meals and allow for a delightful crust on all sides of your Garlic Parmesan Chicken Meatloaves.

Crafting the Tangy Glaze (If Using)

  1. Prepare the Flavorful Glaze: If you’re opting for the glaze – and I wholeheartedly recommend it for an extra layer of deliciousness and moisture – combine all the glaze ingredients in a small bowl: ½ cup ketchup, 2 tablespoons light brown sugar, 1 tablespoon Worcestershire sauce, 1 tablespoon apple cider vinegar, and 1 very finely minced clove of garlic. Whisk everything together until the brown sugar is fully dissolved and the mixture is smooth and well-combined. This tangy-sweet glaze adds a beautiful sheen and an irresistible flavor boost to your Garlic Parmesan Chicken Meatloaves. Set this aside.

Baking Your Flavorful Garlic Parmesan Chicken Meatloaves

  1. Preheat the Oven: Preheat your oven to a comforting 375°F (190°C). Make sure your oven rack is positioned in the middle, ensuring even cooking for all your delightful Garlic Parmesan Chicken Meatloaves.
  2. Initial Bake: Carefully transfer the baking sheet with your shaped meatloaves into the preheated oven. Bake for an initial 20 minutes. During this time, the meatloaves will begin to firm up and the edges will start to lightly brown. The aroma that will start to fill your kitchen at this stage is absolutely intoxicating, a preview of the deliciousness to come!
  3. Apply the Glaze (If Using): After the initial 20 minutes of baking, carefully remove the baking sheet from the oven. Using a pastry brush, generously brush about half of your prepared tangy glaze over the top and sides of each individual chicken meatloaf. Ensure an even coating for that wonderful flavor and beautiful caramelized finish. If you’re not using the glaze, you can skip this step, but you’ll be missing out on a truly fantastic addition to your Garlic Parmesan Chicken Meatloaves!
  4. Final Bake and Glaze Setting: Return the glazed meatloaves to the oven and continue baking for another 15-20 minutes, or until the internal temperature of the thickest part of the meatloaves reaches 165°F (74°C) when checked with an instant-read thermometer. The glaze should appear beautifully caramelized and bubbly, and the meatloaves should be cooked through and golden brown. If you find the glaze is browning too quickly, you can loosely tent the meatloaves with a piece of foil, but typically it browns perfectly in the remaining time.

Resting and Serving Your Perfect Garlic Parmesan Chicken Meatloaves

  1. The All-Important Resting Period: Once your Garlic Parmesan Chicken Meatloaves have reached the proper internal temperature and look absolutely irresistible, carefully remove the baking sheet from the oven. This next step is incredibly important for juicy meatloaves: allow them to rest on the baking sheet for 5-10 minutes before serving. This resting period allows the meat juices to redistribute throughout the meatloaves, ensuring every bite is incredibly moist and flavorful. If you cut into them too soon, all those delicious juices will run out, leaving you with a drier meatloaf.
  2. Garnish and Serve: After the resting period, transfer your individual Garlic Parmesan Chicken Meatloaves to serving plates. You can drizzle them with any remaining glaze from the pan or offer extra glaze on the side. For an extra flourish and a burst of freshness, sprinkle with additional fresh chopped parsley and a final dusting of freshly grated Parmesan cheese. These savory and satisfying meatloaves pair wonderfully with mashed potatoes, roasted vegetables, or a simple green salad. Enjoy the fruits of your labor – these delicious and tender Garlic Parmesan Chicken Meatloaves are sure to become a family favorite!

Savory Garlic Parmesan Chicken Meatloaves: A Family Favorite

Conclusion:

Well, my friends, we’ve reached the delicious culmination of our culinary journey! I genuinely believe that if there’s one recipe you absolutely must add to your weekly rotation, it’s these incredible Garlic Parmesan Chicken Meatloaves. Why, you ask? Because they shatter every preconceived notion of what a meatloaf can be. Forget dry, bland, or boring; this recipe delivers a symphony of flavors that will have your taste buds singing. We’re talking about incredibly tender ground chicken, infused with the pungent warmth of fresh garlic, and elevated by the nutty, salty embrace of Parmesan cheese, all baked to golden perfection. It’s comfort food reimagined, offering a healthier twist on a classic without sacrificing an ounce of its satisfying appeal.

I find myself coming back to this recipe time and time again because of its unparalleled convenience and irresistible taste. It’s perfect for a bustling weeknight when you need something quick yet wholesome, but it’s equally impressive for a casual dinner party, making you look like a culinary superstar with minimal effort. The individual loaf format isn’t just charming; it ensures every single serving gets that coveted crispy exterior and moist, flavorful interior, a consistent perfection that’s hard to achieve with a larger, traditional meatloaf. Trust me, once you experience the juicy tenderness and the fragrant aroma filling your kitchen, you’ll understand why I’m so passionate about these chicken meatloaves.

Serving Suggestions to Elevate Your Meal:

The beauty of these Garlic Parmesan Chicken Meatloaves lies not only in their standalone deliciousness but also in their versatility when it comes to pairings. For a classic, comforting meal, I absolutely love serving them alongside a generous dollop of creamy garlic mashed potatoes or a silky smooth cauliflower puree – the flavors meld together beautifully. If you’re leaning towards a fresher, lighter side, a vibrant medley of roasted vegetables like asparagus, broccoli florets, or rainbow carrots would be absolutely divine, adding a pop of color and a boost of nutrients. A simple crisp green salad with a zesty vinaigrette also provides a wonderful counterpoint to the richness of the meatloaves.

Get Creative with Variations:

But don’t stop there! This recipe is a fantastic canvas for your own culinary creativity. Here are a few ideas that I’ve tried and loved, or variations that I’m eager for you to explore:

  • Herbaceous Boost: Fold in a tablespoon of finely chopped fresh herbs like thyme, rosemary, or oregano into the chicken mixture before baking. These herbs introduce an earthy, aromatic depth that complements the garlic and Parmesan beautifully.
  • Cheesy Swaps: While Parmesan is king here, feel free to experiment with other cheeses. A sprinkle of shredded mozzarella or provolone mixed in could create an even gooier, meltier interior, while a sharper aged cheddar would add a bolder, more piquant note.
  • Spice it Up: If you enjoy a bit of a kick, a pinch of red pepper flakes or a dash of your favorite hot sauce mixed into the meatloaf or brushed on as a glaze can add an exciting layer of heat.
  • Veggie Power: For an extra nutritional punch and added moisture, finely dice some bell peppers, zucchini, or even grated carrots and gently fold them into the chicken mixture. They blend seamlessly and add fantastic texture.
  • Glaze Alternatives: While the natural crust from the Parmesan is exquisite, you could also brush on a simple honey-mustard glaze, a tangy balsamic reduction, or even a light marinara sauce during the last 10-15 minutes of baking for an additional layer of flavor and shine.
  • Mini Bites: For appetizers or kid-friendly portions, consider baking the mixture in a muffin tin. These mini meatloaf muffins cook even faster and are perfectly portioned!
  • Protein Swap: While chicken is our star, this recipe works wonderfully with ground turkey as well, offering a similar lean protein option.

Your Culinary Adventure Awaits!

So, what are you waiting for? I’m genuinely thrilled for you to experience the magic of these Garlic Parmesan Chicken Meatloaves in your own kitchen. This isn’t just a meal; it’s an invitation to rediscover the joy of home cooking, to create something truly delicious and satisfying that everyone at your table will adore. I’m so confident that this recipe will become a cherished part of your culinary repertoire, just as it has in mine.

Please, please, please don’t hesitate to give this recipe a try! Once you’ve baked your own batch, I would absolutely love to hear all about your experience. Did you try any of the variations? What did you serve your meatloaves with? Did your family rave about them as much as mine does? Share your culinary triumphs, your serving ideas, and any delightful discoveries you made in the comments section below. Your feedback and creative twists inspire not only me but also our entire community of home cooks. Happy cooking, and I can’t wait to hear from you!


Garlic Parmesan Chicken Meatloaves

Garlic Parmesan Chicken Meatloaves

Tender and moist individual chicken meatloaves infused with the rich flavors of garlic and Parmesan cheese. Perfect for a healthier, delicious weeknight meal or meal prep, offering a comforting twist on a classic.

Prep Time
30 Minutes

Cook Time
25 Minutes

Total Time
5 Minutes

Servings
6 meatloaves

Ingredients

  • 1 ½ pounds (680g) lean ground chicken, 92-93% lean
  • ¾ cup (75g) panko breadcrumbs
  • ½ cup (50g) freshly grated Parmesan cheese, plus extra for serving
  • ½ cup milk
  • 2 large eggs, lightly beaten
  • ¼ cup finely minced yellow onion
  • 4 cloves garlic, minced (1 ½ tablespoons)
  • 2 tablespoons fresh parsley, finely chopped, plus extra for garnish
  • 1 teaspoon dried oregano
  • ½ teaspoon dried thyme
  • 1 teaspoon salt
  • ½ teaspoon freshly ground black pepper
  • 1 tablespoon olive oil
  • FOR THE TANGY GLAZE (OPTIONAL):
  • ½ cup ketchup
  • 2 tablespoons light brown sugar, packed
  • 1 tablespoon Worcestershire sauce
  • 1 tablespoon apple cider vinegar
  • 1 clove garlic, minced

Instructions

  1. Step 1
    Heat 1 tablespoon olive oil in a small skillet over medium-low heat. Sauté minced yellow onion for 5-7 minutes until translucent. Add 4 cloves minced garlic; cook 1-2 minutes until fragrant. Remove from heat and cool slightly.
  2. Step 2
    In a large mixing bowl, whisk together the milk and lightly beaten eggs. Stir in panko breadcrumbs, ½ cup Parmesan cheese, the cooled onion-garlic mixture, parsley, oregano, thyme, salt, and black pepper. Stir well and let the mixture sit for 5 minutes to allow panko to hydrate.
  3. Step 3
    Add the ground chicken to the bowl. Using clean hands, gently mix all ingredients until just combined, being careful not to overmix.
  4. Step 4
    Divide the mixture into 6 equal portions. Form each portion into a small meatloaf shape (approximately 4-5 inches long by 2-3 inches wide), or press into muffin cups. Place on a parchment-lined baking sheet.
  5. Step 5
    Preheat oven to 375°F (190°C). If using the glaze, whisk together ketchup, light brown sugar, Worcestershire sauce, apple cider vinegar, and 1 minced garlic clove in a small bowl until smooth.
  6. Step 6
    Bake the meatloaves for an initial 15 minutes.
  7. Step 7
    Carefully remove the baking sheet from the oven. If using, generously brush the prepared glaze over the top and sides of each meatloaf.
  8. Step 8
    Return the glazed meatloaves to the oven and continue baking for another 7-10 minutes, or until the internal temperature reaches 165°F (74°C) when checked with an instant-read thermometer. The glaze should appear beautifully caramelized.
  9. Step 9
    Once cooked, remove from the oven and allow the meatloaves to rest on the baking sheet for 5-10 minutes before serving. Garnish with extra fresh chopped parsley and a dusting of freshly grated Parmesan cheese. Serve with any remaining glaze on the side.

Important Information

Nutrition Facts (Per Serving)

It is important to consider this information as approximate and not to use it as definitive health advice.

Allergy Information

Please check ingredients for potential allergens and consult a health professional if in doubt.

« Previous Post
Easy Cheesy Cajun Garlic Chicken Rotini Skillet Dinner
Next Post »
Banana Bread Cookies Recipe: Soft, Chewy & Delicious!

If you enjoyed this…

Delicious Quick & Easy Homemade Butter Chicken Recipe

Spicy Korean Chicken Noodle Stir Fry: Quick & Flavorful Meal

Chicken Ramen Bowl

Spicy Chicken Ramen Bowl With Cream Sauce

Primary Sidebar

Browse by Diet

BreakfastDinnerLunchDessertAppetizer

Sweet Peach Yogurt Parfait Delight

One of my fondest memories is from a lazy summer afternoon spent at my grandmother’s house. The sun filtered through the kitchen window, casting a warm glow over the table where she would create her culinary magic. It was during one of those blissful moments that I first tasted her Peach Yogurt Parfait with Honey and Granola. The sweet aroma of ripe peaches mingling with creamy yogurt and the crunch of granola was nothing short of heavenly. It felt like summer captured in a bowl, and I still remember the joy of diving in with a spoon, each layer revealing a new burst of flavor.

When I think about that parfait, I can almost hear the gentle hum of the bees outside, reminding me of the floral notes that honey brings to every bite. The vibrant yellows and soft oranges of the peaches contrast beautifully with the creamy white yogurt and the golden crunch of granola. It’s a dish that not only looks delightful but also tastes like a celebration of fresh, wholesome ingredients.

What makes my version of this Peach Yogurt Parfait special is the careful balance of flavors and textures. I use ripe, juicy peaches, drizzled with locally sourced honey, and a homemade granola that’s bursting with nuts and seeds for an extra crunch. It’s a simple dish, but every layer is crafted with love and attention.

Let me show you exactly how to make this delightful parfait, so you can bring a bit of that summer magic into your kitchen!

Sweet Peach Yogurt Parfait Delight

Why You’ll Love This Recipe

  • Delightfully creamy texture from the Greek yogurt, paired with the juicy sweetness of fresh peaches.
  • Ready in under 20 minutes, making it a quick and satisfying breakfast or snack option.
  • Budget-friendly, using common ingredients that you may already have in your pantry.
  • Customizable with your favorite granola and nuts, allowing you to tailor each parfait to your taste.
  • Perfectly balanced flavors with the bright acidity of lemon juice and the sweetness of honey enhancing the peaches.

Ingredients

  • For the Parfait:
  • 2 cups plain Greek yogurt (or vanilla yogurt for a sweeter option)
  • 2 large ripe peaches, diced (about 2 cups)
  • 1 tablespoon fresh lemon juice (to prevent browning of peaches)
  • 2 tablespoons honey (plus more for drizzling)
  • 1 teaspoon vanilla extract (optional for extra flavor)
  • For the Granola:
  • 1 cup granola (store-bought or homemade; see notes for a simple granola recipe)
  • 1/4 cup sliced almonds (optional for added crunch)
  • 1/4 cup shredded coconut (optional for added flavor)

Let’s dive into some key ingredients that make this Peach Yogurt Parfait so delightful! First, the Greek yogurt is not only creamy but also packed with protein, making it a satisfying option for breakfast or a snack. If you’re looking for a sweeter option, you can easily substitute it with vanilla yogurt, though it may alter the overall flavor balance. Next, the ripe peaches are the star of the show; their natural sweetness shines through, so I recommend choosing peaches that yield slightly to pressure, indicating they’re perfectly ripe. If peaches aren’t in season, feel free to use nectarines or even frozen peaches—just thaw them before use. Finally, honey adds a lovely floral sweetness that ties everything together. If you prefer, maple syrup can serve as a delicious substitute.

Step-by-Step Instructions

  1. Start by preparing the peaches. Wash them thoroughly, then slice and dice them into bite-sized pieces. In a medium bowl, toss the diced peaches with 1 tablespoon of fresh lemon juice to prevent browning. Set aside for about 5 minutes while the lemon juice works its magic.
  2. In a separate bowl, combine the Greek yogurt, 2 tablespoons of honey, and 1 teaspoon of vanilla extract if using. Stir the mixture until smooth and thoroughly blended. This should take about a minute. Avoid overmixing to maintain the creaminess of the yogurt.
  3. Now it’s time to layer your parfait. Grab a clear glass or bowl to showcase your beautiful creation. Start with a generous spoonful of the yogurt mixture at the bottom—about 1/4 cup will do. Use a spoon to spread it evenly.
  4. Add a layer of the diced peaches over the yogurt, ensuring they cover the yogurt completely. You might want to use about half of what you have prepared—roughly 1 cup. This layer should be visually appealing, so arrange the peaches neatly.
  5. Sprinkle 1/4 cup of granola over the peaches. This adds a delightful crunch. Make sure to distribute it evenly to ensure every bite has that satisfying texture. Avoid packing it down too tightly, as you want it to maintain its crunch.
  6. Repeat the layers: spoon in another 1/4 cup of yogurt, followed by another cup of peaches, and another sprinkle of granola. You should have at least two layers, but feel free to add more depending on your glass size.
  7. Finish off your parfait with a drizzle of honey on top for added sweetness and a touch of elegance. If you’re using sliced almonds or shredded coconut, sprinkle them on top now. It adds a lovely visual contrast and extra flavor.
  8. Serve immediately or refrigerate for up to 30 minutes before serving to allow the flavors to meld together. However, I recommend enjoying it fresh to maintain the granola’s crunch.

Pro Tips for the Best Peach Yogurt Parfait With Honey And Granola

  • Make sure to choose ripe peaches for the best flavor and texture. A common mistake is using unripe fruit, which can lead to a less enjoyable parfait. Look for peaches that are fragrant and slightly soft to the touch.
  • Use a clear glass to assemble your parfait; this not only makes for a beautiful presentation but also allows you to see the colorful layers, which adds to the enjoyment of eating it.
  • For an even creamier texture, consider whipping the Greek yogurt with a hand mixer for a couple of minutes before layering. This small adjustment makes a huge difference in mouthfeel.
  • Be mindful of the granola-to-yogurt ratio. Too much granola can overwhelm the parfait, while too little can make it feel too creamy. Aim for about 1/4 cup of granola per layer for the perfect balance.
  • If you’re making this for a gathering, consider preparing the yogurt and peaches ahead of time and layering them just before serving. This ensures the granola stays crunchy!

Variations & Serving Ideas

There are so many ways to get creative with your Peach Yogurt Parfait! For a tropical twist, swap out the peaches for mangoes or pineapples and top with coconut flakes. If you prefer a berry flavor, mix in some blueberries or strawberries with the peaches for added color and taste. For a nutty version, incorporate chopped walnuts or pecans instead of almonds.

As for serving ideas, this parfait pairs beautifully with a side of scrambled eggs for a hearty breakfast or fresh fruit salad for a light lunch. You might also enjoy it alongside whole grain toast with almond butter for an energizing snack. The contrast of flavors and textures will elevate your meal experience!

Storage, Make-Ahead & Reheating

The Peach Yogurt Parfait is best enjoyed fresh, but you can prepare some components ahead of time. Store the layered parfait in an airtight container in the refrigerator for up to 24 hours. However, be cautious; the granola may lose its crunch if stored too long. You can freeze the yogurt and peach mixture for up to 2 months; just remember to thaw it in the refrigerator overnight before serving.

If you plan to enjoy this dish the next day, it can taste even better as the flavors meld together. Just remember to add the granola right before serving to keep its delightful crunch!

Frequently Asked Questions

Can I make Peach Yogurt Parfait With Honey And Granola ahead of time?

Yes — in fact, it tastes even better the next day as the flavors meld. However, I recommend waiting to add the granola until just before serving to maintain its crunch.

What can I substitute for Greek yogurt?

If you prefer a lighter option, you can substitute Greek yogurt with regular yogurt or a dairy-free alternative like coconut yogurt. Just remember that this may alter the creaminess and flavor profile slightly.

Can I use frozen peaches for this parfait?

Absolutely! Just make sure to thaw the frozen peaches before using them. They will still add great flavor, though the texture may be slightly softer than fresh peaches.

How do I make the parfait vegan?

To make a vegan version, substitute the Greek yogurt with a plant-based yogurt alternative, and replace honey with maple syrup or agave nectar. This keeps the parfait sweet while adhering to a vegan diet.

What other fruits can I use in this recipe?

You can mix and match fruits based on your preference. Try using strawberries, blueberries, raspberries, or even bananas. Just make sure to adjust the lemon juice as needed to prevent browning.

Sweet Peach Yogurt Parfait Delight

Final Thoughts

The Peach Yogurt Parfait with Honey and Granola is a delightful blend of creamy yogurt, sweet peaches, and crunchy granola that creates a satisfying and nourishing treat. Each layer bursts with flavor, making it a perfect choice for breakfast or a light dessert.

This is the kind of recipe I come back to again and again, especially when I want something refreshing and wholesome to start my day. The harmony of sweet and tart flavors, combined with the delightful crunch, never fails to lift my spirits!

I encourage you to give this parfait a try and indulge in its comforting goodness. Feel free to share your results or even add your own twist—perhaps a sprinkle of cinnamon or a handful of nuts. Enjoy creating your perfect parfait!

Print
clock clock iconcutlery cutlery iconflag flag iconfolder folder iconinstagram instagram iconpinterest pinterest iconfacebook facebook iconprint print iconsquares squares iconheart heart iconheart solid heart solid icon

Peach Yogurt Parfait


  • Author: Lily author
  • Total Time: 15 minutes
  • Yield: 4 servings 1x
Pin Recipe
Print Recipe

Description

This Peach Yogurt Parfait combines creamy Greek yogurt, juicy peaches, and crunchy granola for a delightful treat. It’s a perfect breakfast or snack that captures the essence of summer in every bite.


Ingredients

Scale
  • For the Parfait:
  • 2 cups plain Greek yogurt (or vanilla yogurt for a sweeter option)
  • 2 large ripe peaches, diced (about 2 cups)
  • 1 tablespoon fresh lemon juice (to prevent browning of peaches)
  • 2 tablespoons honey (plus more for drizzling)
  • 1 teaspoon vanilla extract (optional for extra flavor)
  • For the Granola:
  • 1 cup granola (store-bought or homemade; see notes for a simple granola recipe)
  • 1/4 cup sliced almonds (optional for added crunch)
  • 1/4 cup shredded coconut (optional for added flavor)

Instructions

  1. Start by preparing the peaches. Wash them thoroughly, then slice and dice them into bite-sized pieces. In a medium bowl, toss the diced peaches with 1 tablespoon of fresh lemon juice to prevent browning. Set aside for about 5 minutes while the lemon juice works its magic.
  2. In a separate bowl, combine the Greek yogurt, 2 tablespoons of honey, and 1 teaspoon of vanilla extract if using. Stir the mixture until smooth and thoroughly blended. This should take about a minute. Avoid overmixing to maintain the creaminess of the yogurt.
  3. Now it’s time to layer your parfait. Grab a clear glass or bowl to showcase your beautiful creation. Start with a generous spoonful of the yogurt mixture at the bottom—about 1/4 cup will do. Use a spoon to spread it evenly.
  4. Add a layer of the diced peaches over the yogurt, ensuring they cover the yogurt completely. You might want to use about half of what you have prepared—roughly 1 cup. This layer should be visually appealing, so arrange the peaches neatly.
  5. Sprinkle 1/4 cup of granola over the peaches. This adds a delightful crunch. Make sure to distribute it evenly to ensure every bite has that satisfying texture. Avoid packing it down too tightly, as you want it to maintain its crunch.
  6. Repeat the layers: spoon in another 1/4 cup of yogurt, followed by another cup of peaches, and another sprinkle of granola. You should have at least two layers, but feel free to add more depending on your glass size.
  7. Finish off your parfait with a drizzle of honey on top for added sweetness and a touch of elegance. If you’re using sliced almonds or shredded coconut, sprinkle them on top now. It adds a lovely visual contrast and extra flavor.
  8. Serve immediately or refrigerate for up to 30 minutes before serving to allow the flavors to meld together. However, I recommend enjoying it fresh to maintain the granola’s crunch.
  • Prep Time: 15 mins
  • Cook Time: 0 mins
  • Category: Breakfast
  • Method: No-cook
  • Cuisine: American

Nutrition

  • Serving Size: 1 parfait
  • Calories: 250
  • Sugar: 20 g
  • Sodium: 50 mg
  • Fat: 5 g
  • Saturated Fat: 2 g
  • Unsaturated Fat: 3 g
  • Trans Fat: 0 g
  • Carbohydrates: 40 g
  • Fiber: 3 g
  • Protein: 10 g
  • Cholesterol: 10 mg

Keywords: Choose ripe peaches for the best flavor and texture. Use a clear glass for a beautiful presentation. For creaminess, consider whipping the yogurt before layering. Be mindful of the granola-to-yogurt ratio. Prepare yogurt and peaches ahead of time for gatherings, layering just before serving.

Did you make this recipe?

Share a photo and tag us — we can't wait to see what you've made!

Sun-Kissed Frozen Orange Cream Slush

As a child, summer days felt like they lasted forever. I remember the sticky heat wrapping around me as I played outside, my laughter mingling with the sounds of the neighborhood. But nothing could cool me down quite like the moment I’d spot my grandmother, laboring over her blender, whipping up her famous Frozen Orange Creamsicle Slush. That vibrant orange treat, with its frosty texture and sweet citrus aroma, was like a burst of sunshine in a cup. Just one sip, and I could feel the coolness wash over me, sparking pure joy.

This Frozen Orange Creamsicle Slush has a way of making you feel like a kid again. Its creamy, dreamy consistency is a delightful balance of bright orange and soft vanilla, inviting you to dive right in. The refreshing tang of orange dances on your tongue, while the smooth creaminess envelops you in a comforting embrace. It’s a nostalgic treat that’s perfect for hot summer afternoons or anytime you need a little pick-me-up.

What makes my version of this slush stand out is the addition of a hint of vanilla bean, which elevates the flavor and adds an extra layer of richness. Plus, it’s super easy to whip up with just a few simple ingredients that you probably already have on hand! So, if you’re ready to relive those sun-soaked memories, let me show you exactly how to make it.

Sun-Kissed Frozen Orange Cream Slush

Why You’ll Love This Recipe

  • Each slush is a perfect blend of creamy vanilla and zesty orange, creating a nostalgic flavor reminiscent of summer days.
  • This refreshing treat is ready in under 15 minutes, making it an ideal quick dessert for unexpected guests or hot afternoons.
  • With just 8 simple ingredients, it’s budget-friendly, ensuring you don’t have to break the bank to enjoy a delicious slush.
  • The slush has a perfectly smooth texture, thanks to the combination of ice and ice cream, providing a delightful contrast to the bright citrus flavors.
  • It’s highly customizable; you can easily adjust the sweetness and add fresh herbs for a unique twist that suits your taste.

Ingredients

  • 2 cups orange juice (freshly squeezed or store-bought)
  • 1 cup vanilla ice cream
  • 1 cup crushed ice
  • 1/2 cup milk (whole or 2%)
  • 1/4 cup granulated sugar (adjust based on sweetness preference)
  • 1 teaspoon vanilla extract
  • Zest of 1 orange (for added flavor)
  • Fresh orange slices and mint leaves (for garnish)

The star of this Frozen Orange Creamsicle Slush is the orange juice, which provides the vibrant, citrusy base. Freshly squeezed juice will yield the brightest flavor, but store-bought options can be just as convenient. If you’re opting for store-bought, choose 100% pure juice with no added sugars for the best results. Another essential ingredient is the vanilla ice cream; it adds creaminess and sweetness. You can substitute it with dairy-free ice cream if you’re looking for a vegan option. Whole or 2% milk complements the ice cream, creating a smooth blend. If you want a lower-calorie version, almond or oat milk can be good alternatives.

Lastly, the granulated sugar can be adjusted based on your sweetness preference. If you prefer a more natural sweetener, consider using honey or agave syrup. The orange zest enhances the flavor profile, providing an aromatic pop that brings the whole slush together. Don’t skip it! It adds an extra layer of brightness that makes this slush truly special.

Step-by-Step Instructions

  1. Start by preparing your ingredients. Gather 2 cups of orange juice, 1 cup of vanilla ice cream, and 1 cup of crushed ice. Make sure the ice is finely crushed, as larger chunks can make blending difficult.
  2. In a blender, combine the orange juice, vanilla ice cream, crushed ice, and 1/2 cup of milk. Add 1/4 cup of granulated sugar and 1 teaspoon of vanilla extract. If you like a sweeter slush, consider adding a bit more sugar at this stage.
  3. Add the zest of 1 orange to the blender. This step is crucial for enhancing the citrus flavor of your slush. Make sure not to include the bitter white pith—only the flavorful zest.
  4. Blend the mixture on medium-high speed for about 30-45 seconds. Stop once the ingredients are fully combined and the slush has a smooth, even consistency. If you notice large chunks of ice, blend for an additional 10-15 seconds. Avoid over-blending, as this can make the slush too liquidy.
  5. Once blended, taste the slush. If it needs more sweetness, add a little more sugar and blend for a few more seconds. If it’s too thick, you can add a splash of milk to reach your desired consistency.
  6. Pour the slush into glasses. This recipe typically serves 4, but you can easily double it for larger gatherings. Use a spoon to help guide the slush into the glasses if needed.
  7. Garnish each serving with fresh orange slices and mint leaves. The mint not only adds a pop of color but also a refreshing aroma that complements the citrus flavors beautifully.
  8. Serve immediately and enjoy! If you’ve made extra, you can refrigerate it for a short time, but it’s best enjoyed fresh.

Pro Tips for the Best Frozen Orange Creamsicle Slush

  • Don’t skip the orange zest! It’s a game-changer for flavor. Always zest before juicing to make it easier.
  • Use a high-powered blender for the best texture. A standard blender may struggle with ice, leading to uneven consistency. If you have a food processor, that can work too, but ensure the ice is finely crushed.
  • Adjust the ice-to-liquid ratio carefully. If your slush is too thick, it won’t blend well. Start with less ice and add more until you reach your preferred texture.
  • Be cautious with the sugar! Always start with the lower amount, as you can easily add more, but it’s hard to fix an overly sweet slush.
  • For a fun twist, consider adding a splash of coconut milk or a handful of fresh fruit like strawberries or pineapple. This not only enhances the flavor but also adds a beautiful color contrast.

Variations & Serving Ideas

There are countless ways to put a spin on your Frozen Orange Creamsicle Slush. Consider making a tropical version by adding in some pineapple juice or coconut milk for a delightful tropical twist. If you’re feeling adventurous, try incorporating a handful of frozen mango or peach slices for added sweetness. For a lighter version, swap out the vanilla ice cream for Greek yogurt for a creamy yet tangy alternative.

As for serving ideas, this refreshing slush pairs wonderfully with light summer dishes like grilled chicken skewers, fish tacos, or a simple salad topped with citrus vinaigrette. The bright, zesty flavors of the slush complement these dishes perfectly, making them an ideal pairing for a sunny day.

Storage, Make-Ahead & Reheating

This Frozen Orange Creamsicle Slush is best enjoyed fresh, but if you have leftovers, you can store them in an airtight container in the fridge for up to 2 days. Just keep in mind that the slush may lose some of its texture over time as the ice melts. It doesn’t freeze well, as the ice will turn into a solid block. If you must freeze it, blend again after thawing to restore the slushy consistency. This treat is best the day you make it, as the flavors meld together beautifully overnight, enhancing its deliciousness.

Frequently Asked Questions

Can I make Frozen Orange Creamsicle Slush ahead of time?

Yes — in fact, it tastes even better the next day as the flavors meld. However, it’s best to enjoy it fresh, as the texture can change if stored for too long. If you need to prepare it ahead, keep it in the fridge and re-blend before serving.

What kind of orange juice should I use?

For the best flavor, use freshly squeezed orange juice. However, if you’re short on time, opt for 100% pure store-bought juice without added sugars. This will ensure that your slush remains flavorful and refreshing.

Can I substitute the vanilla ice cream?

Absolutely! If you’re looking for a dairy-free option, coconut milk ice cream or a non-dairy vanilla ice cream can work wonderfully. They will still provide the creamy texture and sweetness you desire.

How can I adjust the sweetness of my slush?

You can easily adjust the sweetness by modifying the amount of sugar added. Start with 1/4 cup and taste the mixture before blending. If you prefer it sweeter, add more sugar gradually until it reaches your desired level.

What should I do if my slush is too thick?

If your slush is too thick, simply add a splash of milk or orange juice and blend again. This will help achieve a more drinkable consistency while maintaining the slushy texture. Adjust gradually to reach your preferred thickness.

Sun-Kissed Frozen Orange Cream Slush

Final Thoughts

The Frozen Orange Creamsicle Slush is a delightful blend of refreshing citrus and creamy goodness, making it a perfect treat for warm days or any time you crave a taste of nostalgia. The way the bright orange flavor dances with the creamy texture truly elevates this slush, transforming it into a satisfying escape from the everyday.

This is the kind of recipe I come back to again and again, especially when I’m looking to cool down or impress guests at a summer gathering. It’s simple to make and always brings smiles all around! I encourage you to try this recipe for yourself—don’t hesitate to share your results or even put your own spin on it. Happy slushing!

Print
clock clock iconcutlery cutlery iconflag flag iconfolder folder iconinstagram instagram iconpinterest pinterest iconfacebook facebook iconprint print iconsquares squares iconheart heart iconheart solid heart solid icon

Frozen Orange Creamsicle Slush


  • Author: Lily author
  • Total Time: 15 minutes
  • Yield: 4 servings 1x
Pin Recipe
Print Recipe

Description

This Frozen Orange Creamsicle Slush is a refreshing treat that combines creamy vanilla and zesty orange flavors. Perfect for hot summer days, it brings back nostalgic memories with every sip.


Ingredients

Scale
  • 2 cups orange juice (freshly squeezed or store-bought)
  • 1 cup vanilla ice cream
  • 1 cup crushed ice
  • 1/2 cup milk (whole or 2%)
  • 1/4 cup granulated sugar (adjust based on sweetness preference)
  • 1 teaspoon vanilla extract
  • Zest of 1 orange (for added flavor)
  • Fresh orange slices and mint leaves (for garnish)

Instructions

  1. Start by preparing your ingredients. Gather 2 cups of orange juice, 1 cup of vanilla ice cream, and 1 cup of crushed ice. Make sure the ice is finely crushed, as larger chunks can make blending difficult.
  2. In a blender, combine the orange juice, vanilla ice cream, crushed ice, and 1/2 cup of milk. Add 1/4 cup of granulated sugar and 1 teaspoon of vanilla extract. If you like a sweeter slush, consider adding a bit more sugar at this stage.
  3. Add the zest of 1 orange to the blender. This step is crucial for enhancing the citrus flavor of your slush. Make sure not to include the bitter white pith—only the flavorful zest.
  4. Blend the mixture on medium-high speed for about 30-45 seconds. Stop once the ingredients are fully combined and the slush has a smooth, even consistency. If you notice large chunks of ice, blend for an additional 10-15 seconds. Avoid over-blending, as this can make the slush too liquidy.
  5. Once blended, taste the slush. If it needs more sweetness, add a little more sugar and blend for a few more seconds. If it’s too thick, you can add a splash of milk to reach your desired consistency.
  6. Pour the slush into glasses. This recipe typically serves 4, but you can easily double it for larger gatherings. Use a spoon to help guide the slush into the glasses if needed.
  7. Garnish each serving with fresh orange slices and mint leaves. The mint not only adds a pop of color but also a refreshing aroma that complements the citrus flavors beautifully.
  8. Serve immediately and enjoy! If you’ve made extra, you can refrigerate it for a short time, but it's best enjoyed fresh.
  • Prep Time: 15 min
  • Cook Time: 0 min
  • Category: Dessert
  • Method: Blending
  • Cuisine: American

Nutrition

  • Serving Size: 1 serving
  • Calories: 200
  • Sugar: 30 g
  • Sodium: 50 mg
  • Fat: 5 g
  • Saturated Fat: 3 g
  • Unsaturated Fat: 2 g
  • Trans Fat: 0 g
  • Carbohydrates: 40 g
  • Fiber: 1 g
  • Protein: 2 g
  • Cholesterol: 20 mg

Keywords: Don't skip the orange zest! It's a game-changer for flavor. Always zest before juicing to make it easier.

Did you make this recipe?

Share a photo and tag us — we can't wait to see what you've made!

Zesty Lemon Poppy Seed Delight

One rainy afternoon, I found myself in my grandmother’s cozy kitchen, the kind that always smelled like warmth and love. She was whipping up her famous Lemon Poppy Seed Loaf, a recipe that had been passed down through generations. As the batter came together, the zesty aroma of fresh lemons filled the air, mingling perfectly with the nutty fragrance of poppy seeds. I can still picture her, apron-clad, as she expertly drizzled a vibrant citrus icing over the loaf, creating a glossy, sun-kissed finish that beckoned us to dive in. It was a moment that sparked my own passion for baking, and this recipe has become a cherished staple in my home ever since.

When you take a bite of this Lemon Poppy Seed Loaf, it’s like a burst of sunshine on your palate. The loaf is beautifully golden, with a tender crumb that melts in your mouth. Each slice is speckled with tiny poppy seeds, adding a delightful crunch that contrasts beautifully with the tangy sweetness of the lemon. And that citrus icing? It’s the finishing touch that elevates this loaf from ordinary to extraordinary, with its bright, zesty flavor dancing on your taste buds.

This recipe stands out because it embraces simplicity while delivering on flavor. I’ve added a hint of vanilla to the batter, enhancing the overall taste and making it even more indulgent. Trust me, once you make this Lemon Poppy Seed Loaf With Citrus Icing, it’ll become a go-to in your baking repertoire.

So, let me show you exactly how to make it!

Zesty Lemon Poppy Seed Delight

Why You’ll Love This Recipe

  • Moist and tender crumb that melts in your mouth, thanks to the perfect balance of butter and buttermilk.
  • Bright, zesty lemon flavor paired with crunchy poppy seeds, creating a delightful texture and taste experience.
  • Easy to whip up in just about an hour, perfect for last-minute gatherings or a cozy afternoon treat.
  • Budget-friendly with everyday ingredients, making it an accessible option for all home bakers.
  • The citrus icing adds a sweet tang that elevates the loaf, turning a simple recipe into a showstopper!

Ingredients

  • 1 ½ cups (190g) all-purpose flour
  • 1 teaspoon baking powder
  • ½ teaspoon baking soda
  • ½ teaspoon salt
  • 3 tablespoons poppy seeds
  • ½ cup (115g) unsalted butter, softened to room temperature
  • 1 cup (200g) granulated sugar
  • 2 large eggs
  • 1 teaspoon vanilla extract
  • 1 teaspoon lemon zest (from about 1 medium lemon)
  • ½ cup (120ml) buttermilk
  • 2 tablespoons fresh lemon juice

For the Citrus Icing:

  • 1 cup (120g) powdered sugar
  • 2 tablespoons fresh lemon juice
  • 1 tablespoon orange juice
  • 1 teaspoon lemon zest (for garnish, optional)

Let’s dive into the key ingredients that make this Lemon Poppy Seed Loaf so special. The all-purpose flour provides the structure and base for the loaf, while the baking powder and baking soda ensure it rises perfectly, giving the loaf a light texture. For a gluten-free variation, you could substitute the flour with a gluten-free all-purpose blend. Poppy seeds not only add a delightful crunch but also contribute to the unique flavor profile that pairs well with the citrus notes.

Unsalted butter is crucial for achieving the buttery richness that makes this loaf so moist. If you’re looking for a dairy-free option, coconut oil or a vegan butter can be used instead. The buttermilk is another essential component, providing acidity that activates the baking soda for a fluffy texture. If you don’t have buttermilk on hand, you can easily make a substitute by mixing ½ cup of milk with 1 tablespoon of vinegar or lemon juice and letting it sit for about 5 minutes.

Step-by-Step Instructions

  1. Preheat your oven to 350°F (175°C). Grease a 9×5-inch loaf pan or line it with parchment paper for easy removal later.
  2. In a medium mixing bowl, whisk together 1 ½ cups of all-purpose flour, 1 teaspoon of baking powder, ½ teaspoon of baking soda, ½ teaspoon of salt, and 3 tablespoons of poppy seeds. This helps to evenly distribute the baking agents and ensures a uniform rise.
  3. In a large mixing bowl, cream together ½ cup of softened unsalted butter and 1 cup of granulated sugar using an electric mixer on medium speed for about 3-4 minutes, until the mixture is light and fluffy. Make sure to scrape down the sides of the bowl occasionally.
  4. Add 2 large eggs, 1 teaspoon of vanilla extract, and 1 teaspoon of lemon zest to the creamed butter and sugar, mixing until fully combined. You want a smooth consistency, so ensure there are no lumps of butter.
  5. In a small bowl, combine ½ cup of buttermilk and 2 tablespoons of fresh lemon juice. Alternately add the dry ingredients and buttermilk mixture to the butter mixture, starting and ending with the dry ingredients. Mix just until combined; do not overmix, as this can lead to a dense loaf.
  6. Pour the batter into the prepared loaf pan. Smooth the top with a spatula, ensuring it’s even. Bake in the preheated oven for 50-60 minutes, or until a toothpick inserted in the center comes out clean. The edges should be lightly golden brown, and the center should feel just set.
  7. Once baked, remove the loaf from the oven and allow it to cool in the pan for about 10 minutes. Then, transfer it to a wire rack to cool completely. Resist the urge to slice too soon, as it will be crumbly if it’s still warm.
  8. While the loaf is cooling, prepare the citrus icing. In a medium bowl, whisk together 1 cup of powdered sugar, 2 tablespoons of fresh lemon juice, and 1 tablespoon of orange juice until smooth. If the icing is too thick, you can add a little more juice to reach your desired consistency.
  9. Once the loaf is completely cool, drizzle the citrus icing over the top. If you like, sprinkle with an additional teaspoon of lemon zest for an extra pop of flavor and color.

Pro Tips for the Best Lemon Poppy Seed Loaf With Citrus Icing

  • Be careful not to overmix your batter; this is a common mistake that can lead to a dense loaf. Mix just until the dry ingredients are incorporated for a light and fluffy texture.
  • Use room temperature ingredients, especially the butter and eggs. This helps to create a smoother batter and ensures even baking. Take your eggs out of the fridge about 30 minutes before you start.
  • For a more pronounced lemon flavor, consider adding a little lemon extract in addition to the zest and juice. Just a half teaspoon can elevate the citrus notes significantly.
  • When measuring your flour, spoon it into the measuring cup and level it off with a knife instead of scooping directly from the bag. This prevents packing and ensures you don’t end up with a dry loaf.
  • Invest in a good quality loaf pan; it makes a difference in heat distribution, which ensures even baking. If your pan is dark-coated, reduce the oven temperature by 25°F to prevent over-browning.

Variations & Serving Ideas

For a delightful twist, consider adding blueberries or raspberries to the batter for a fruity burst of flavor. You can also experiment with different citrus fruits—try lime or grapefruit zest and juice for a refreshing change. For a healthier option, substitute half of the all-purpose flour with whole wheat flour for added fiber without compromising too much on texture.

This Lemon Poppy Seed Loaf pairs beautifully with a light salad, such as a mixed greens salad with a vinaigrette, or a cup of tea for a cozy afternoon treat. It also complements a creamy cheese platter, as the acidity of the loaf balances rich cheeses perfectly. Lastly, a scoop of vanilla ice cream on the side creates a delightful contrast of temperatures and flavors!

Storage, Make-Ahead & Reheating

This Lemon Poppy Seed Loaf can be stored at room temperature for up to 3 days if wrapped tightly in plastic wrap. If you want to keep it longer, it freezes well for up to 3 months. To freeze, wrap the loaf tightly in plastic wrap and then in aluminum foil to prevent freezer burn.

When you’re ready to enjoy it again, simply thaw it in the fridge overnight. Reheat individual slices in the microwave for 15-20 seconds or in a toaster oven until warmed through. Interestingly, many people find that this loaf tastes even better the next day, as the flavors have time to meld!

Frequently Asked Questions

Can I make Lemon Poppy Seed Loaf With Citrus Icing ahead of time?

Yes — in fact, it tastes even better the next day! You can make the loaf a day in advance, allowing the flavors to develop. Just be sure to store it in an airtight container to maintain its moisture.

Can I substitute the poppy seeds?

Absolutely! If you don’t have poppy seeds on hand or prefer an alternative, you can use sesame seeds for a similar crunch or omit them entirely for a smooth loaf.

What can I use instead of buttermilk?

If you don’t have buttermilk, you can easily create a substitute by mixing ½ cup of milk (dairy or plant-based) with 1 tablespoon of vinegar or lemon juice. Let it sit for 5 minutes before using in the recipe.

How can I make this recipe gluten-free?

To make a gluten-free version of this Lemon Poppy Seed Loaf, substitute the all-purpose flour with a gluten-free all-purpose flour blend. Just ensure that the blend contains a binding agent like xanthan gum for the best results.

What is the best way to store leftover loaf?

Leftover Lemon Poppy Seed Loaf should be stored in an airtight container at room temperature for up to 3 days. For longer storage, wrap it tightly and freeze for up to 3 months. Thaw it before serving for the best texture.

Zesty Lemon Poppy Seed Delight

Final Thoughts

The Lemon Poppy Seed Loaf with Citrus Icing is truly a delightful treat that brings a burst of brightness to any occasion. The zesty lemon flavor combined with the subtle crunch of poppy seeds creates a satisfying balance, while the citrus icing adds a touch of sweetness that perfectly complements the loaf’s tanginess.

This is the kind of recipe I come back to again and again, especially when I want to brighten up a gloomy day or celebrate a small victory. The aroma that fills the kitchen as it bakes is absolutely heavenly! I encourage you to give this recipe a try; you might just find it becoming a beloved staple in your home. Don’t forget to share your results or even add your own unique twist—I can’t wait to see what you create!

Print
clock clock iconcutlery cutlery iconflag flag iconfolder folder iconinstagram instagram iconpinterest pinterest iconfacebook facebook iconprint print iconsquares squares iconheart heart iconheart solid heart solid icon

Lemon Poppy Seed Loaf


  • Author: Lily author
  • Total Time: 17 minute
  • Yield: 1 loaf 1x
Pin Recipe
Print Recipe

Description

This Lemon Poppy Seed Loaf is a delightful treat that combines zesty lemon flavor with crunchy poppy seeds. Topped with a citrus icing, it’s perfect for any occasion.


Ingredients

Scale
  • 1 ½ cups (190g) all-purpose flour
  • 1 teaspoon baking powder
  • ½ teaspoon baking soda
  • ½ teaspoon salt
  • 3 tablespoons poppy seeds
  • ½ cup (115g) unsalted butter, softened to room temperature
  • 1 cup (200g) granulated sugar
  • 2 large eggs
  • 1 teaspoon vanilla extract
  • 1 teaspoon lemon zest (from about 1 medium lemon)
  • ½ cup (120ml) buttermilk
  • 2 tablespoons fresh lemon juice
  • 1 cup (120g) powdered sugar
  • 2 tablespoons fresh lemon juice
  • 1 tablespoon orange juice
  • 1 teaspoon lemon zest (for garnish, optional)

Instructions

  1. Preheat your oven to 350°F (175°C). Grease a 9×5-inch loaf pan or line it with parchment paper for easy removal later.
  2. In a medium mixing bowl, whisk together 1 ½ cups of all-purpose flour, 1 teaspoon of baking powder, ½ teaspoon of baking soda, ½ teaspoon of salt, and 3 tablespoons of poppy seeds. This helps to evenly distribute the baking agents and ensures a uniform rise.
  3. In a large mixing bowl, cream together ½ cup of softened unsalted butter and 1 cup of granulated sugar using an electric mixer on medium speed for about 3-4 minutes, until the mixture is light and fluffy. Make sure to scrape down the sides of the bowl occasionally.
  4. Add 2 large eggs, 1 teaspoon of vanilla extract, and 1 teaspoon of lemon zest to the creamed butter and sugar, mixing until fully combined. You want a smooth consistency, so ensure there are no lumps of butter.
  5. In a small bowl, combine ½ cup of buttermilk and 2 tablespoons of fresh lemon juice. Alternately add the dry ingredients and buttermilk mixture to the butter mixture, starting and ending with the dry ingredients. Mix just until combined; do not overmix, as this can lead to a dense loaf.
  6. Pour the batter into the prepared loaf pan. Smooth the top with a spatula, ensuring it’s even. Bake in the preheated oven for 50-60 minutes, or until a toothpick inserted in the center comes out clean. The edges should be lightly golden brown, and the center should feel just set.
  7. Once baked, remove the loaf from the oven and allow it to cool in the pan for about 10 minutes. Then, transfer it to a wire rack to cool completely. Resist the urge to slice too soon, as it will be crumbly if it’s still warm.
  8. While the loaf is cooling, prepare the citrus icing. In a medium bowl, whisk together 1 cup of powdered sugar, 2 tablespoons of fresh lemon juice, and 1 tablespoon of orange juice until smooth. If the icing is too thick, you can add a little more juice to reach your desired consistency.
  9. Once the loaf is completely cool, drizzle the citrus icing over the top. If you like, sprinkle with an additional teaspoon of lemon zest for an extra pop of flavor and color.
  • Prep Time: 15 mins
  • Cook Time: 50-60 mins
  • Category: Dessert
  • Method: Baking
  • Cuisine: American

Nutrition

  • Serving Size: 1 slice
  • Calories: 200
  • Sugar: 15 g
  • Sodium: 150 mg
  • Fat: 8 g
  • Saturated Fat: 5 g
  • Unsaturated Fat: 3 g
  • Trans Fat: 0 g
  • Carbohydrates: 30 g
  • Fiber: 1 g
  • Protein: 3 g
  • Cholesterol: 40 mg

Keywords: Be careful not to overmix your batter; this is a common mistake that can lead to a dense loaf. Use room temperature ingredients for a smoother batter and even baking.

Did you make this recipe?

Share a photo and tag us — we can't wait to see what you've made!

  • Privacy Policy
  • Terms Of Service
  • Contact
  • About
  • GDPR

Copyright © 2025 Homesmad