• Skip to primary navigation
  • Skip to main content
  • Skip to primary sidebar
Homesmad

Homesmad

  • Home
  • Breakfast & Brunch
  • Appetizers & Snacks
  • Dinner
  • Dessert
  • About
  • Privacy Policy
  • Contact
Homesmad
  • Home
  • Breakfast & Brunch
  • Appetizers & Snacks
  • Dinner
  • Dessert
  • About
  • Privacy Policy
  • Contact

Creamy Southern Spaghetti Bake: Irresistible Comfort Food

November 10, 2025 by Lily author

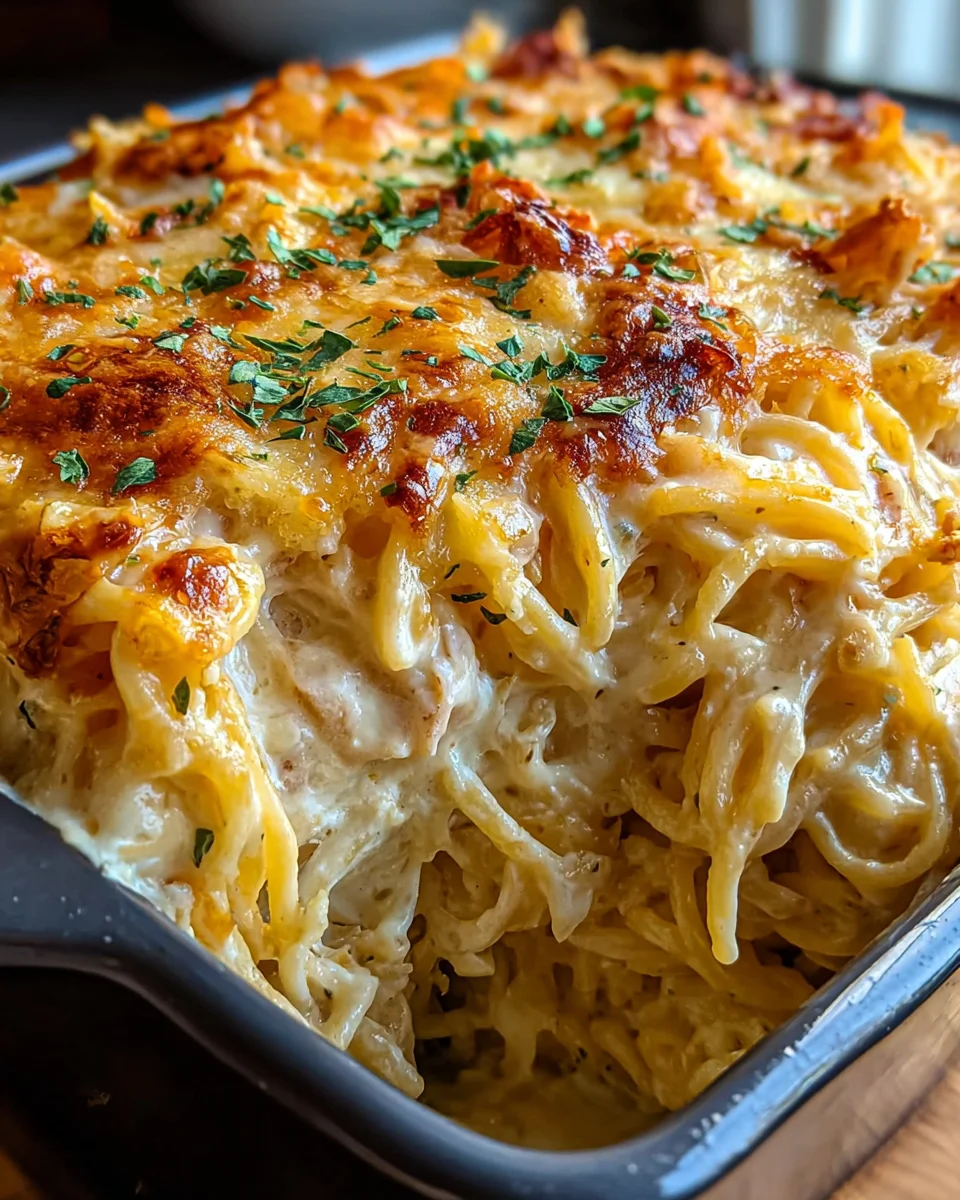
Creamy Southern Spaghetti Bake is more than just a meal; it’s a warm hug in a casserole dish, a culinary embrace that truly brings families together around the dinner table. Originating from the heart of Southern kitchens, this delightful dish takes the familiar comfort of spaghetti and elevates it with a rich, velvety sauce and a golden, bubbly cheese topping. It’s a beloved staple at potlucks, family reunions, and Sunday dinners, cherished for its ability to feed a crowd and satisfy every palate. While traditional spaghetti has Italian roots, this Southern interpretation transforms it into something uniquely comforting and distinctly American.

What truly sets this dish apart, making it an undeniable favorite, is its incredible texture and depth of flavor. The ‘creamy’ aspect, achieved through a blend of cheeses and a savory sauce, coats every strand of pasta, ensuring a luscious bite every time. Then there’s the ‘bake’ – a golden-brown crust of melted cheese that adds a delightful contrast to the tender noodles underneath. It’s this combination of rich, savory creaminess and a perfectly baked topping that makes Creamy Southern Spaghetti Bake so irresistible.

Whether you’re new to Southern cooking or a seasoned pro, you’ll soon understand why this dish holds such a special place in our hearts.

It’s convenient to prepare for busy weeknights, yet impressive enough for special occasions, promising a hearty and utterly satisfying experience with every forkful. I guarantee you’ll fall in love with its rich taste and comforting appeal.

Creamy Southern Spaghetti Bake: Irresistible Comfort Food this RECIPE

Ingredients:

  • For the Pasta:
    • 1 pound (450g) spaghetti, your preferred brand (I find a good quality durum wheat spaghetti holds up best).
    • 2 teaspoons salt, for pasta water.
    • 1 tablespoon olive oil (for tossing cooked pasta).
  • For the Meat Sauce:
    • 1.5-2 pounds (680-900g) lean ground beef (80/20 or 85/15 offers great flavor without being overly greasy), ground turkey, or a flavorful mix of both.
    • 2 tablespoons olive oil, for sautéing.
    • 1 large yellow onion, finely chopped.
    • 4-5 cloves garlic, minced (freshly minced makes all the difference!).
    • 1 (14.5 oz / 411g) can diced tomatoes, undrained (or crushed tomatoes if you prefer a smoother texture).
    • 2 tablespoons tomato paste (a flavor intensifier!).
    • 1 cup (240ml) low-sodium chicken broth (beef broth can be used if exclusively using ground beef).
    • 1 (8 oz / 226g) block full-fat cream cheese, softened to room temperature (essential for that signature creaminess).
    • 1 cup (240g) full-fat sour cream (adds tang and richness).
    • 1 (10.75 oz / 305g) can condensed cream of mushroom soup (cream of chicken also works beautifully).
    • 1/2 cup (120ml) whole milk, or more as needed to achieve desired sauce consistency.
    • 2 teaspoons Italian seasoning.
    • 1 teaspoon dried oregano.
    • 1 teaspoon smoked paprika (for a warm, subtle smokiness).
    • 1 teaspoon salt, or to taste.
    • 1/2 teaspoon black pepper, or to taste.
    • 1/2 teaspoon red pepper flakes, optional (for a hint of heat).
  • For the Cheese Layers:
    • 2 cups (220g) shredded sharp cheddar cheese, divided (freshly grated melts much better than pre-shredded!).
    • 1 cup (110g) shredded mozzarella cheese, divided.
    • 1/2 cup (55g) grated Parmesan cheese, divided (optional, but highly recommended for depth of flavor).
  • For Garnish (Optional):
    • 2 tablespoons fresh parsley, chopped.

Prep Work and Initial Steps

  1. Get Organized and Preheat: First things first, let’s get that oven warmed up. Preheat your oven to a comforting 375°F (190°C). This ensures it’s perfectly ready to receive our delicious Creamy Southern Spaghetti Bake when we’re finished assembling it. While the oven is preheating, take a few minutes to gather all your ingredients and measure them out. This practice, often referred to as “mise en place,” makes the entire cooking process smoother, less stressful, and much more enjoyable. Trust me, you don’t want to be hunting for the Italian seasoning while your sauce is simmering!
  2. Cook the Spaghetti: Grab your largest pot and fill it generously with water. Add about 2 teaspoons of salt to the water – this step is absolutely crucial because it seasons the pasta from the inside out. Without adequate salt, your pasta will taste bland, no matter how flavorful your sauce is! Bring the salted water to a rapid, rolling boil. Once boiling, add your pound of spaghetti. Cook the spaghetti according to the package directions, but aim for al dente. This means it should still have a slight bite to it, not be mushy. The reason for this is simple: the spaghetti will continue to cook and absorb moisture in the oven during baking, and we want it to finish perfectly, not become overcooked and soggy. Once it’s al dente, drain the spaghetti thoroughly in a colander. To prevent it from clumping together while you prepare the sauce, drizzle it with about a tablespoon of olive oil and toss gently. Set the spaghetti aside.
  3. Prepare Your Aromatics: While your spaghetti is cooking, let’s get our foundational flavors ready. Take your large yellow onion and finely chop it. The goal here is uniformity; smaller, evenly chopped pieces will cook down beautifully and disperse their flavor throughout the sauce without being overtly chunky. Next, prepare your garlic cloves by mincing them finely. Whether you prefer to use a garlic press, a microplane, or simply a sharp knife, make sure those cloves are thoroughly minced to release their maximum aromatic potential. Fresh garlic truly elevates the overall taste profile of this dish.

Building the Flavor Foundation: Meat and Sauce

  1. Brown the Ground Meat: Now, let’s start building the heart of our bake! In a large, deep skillet or a sturdy Dutch oven, heat the 2 tablespoons of olive oil over medium-high heat. Add your chosen ground meat – whether it’s lean ground beef, ground turkey, or a combination. Using a wooden spoon or a meat chopper, break the meat apart into crumbles. Cook, stirring occasionally, until the meat is completely browned and no pink remains. This browning step is incredibly important for developing deep, rich flavor in your sauce. As the meat browns, it also releases fat. If you’re using ground beef with a higher fat content (like 80/20), you’ll likely see a good amount of rendered fat in the pan. At this point, I highly recommend carefully draining off any excess grease. Too much residual fat can make your final bake feel oily rather than luxuriously creamy.
  2. Sauté the Aromatics: Once your meat is perfectly browned and any excess fat has been drained, reduce the heat to medium. Add your finely chopped onion to the skillet with the cooked meat. Sauté the onion for about 5-7 minutes, stirring occasionally, until it becomes wonderfully translucent and begins to soften. We’re looking for that sweet, mellow flavor to emerge. Next, add the minced garlic to the skillet and cook for just one more minute, stirring constantly, until it becomes fragrant. Exercise caution here: garlic burns quickly, and burnt garlic will impart a bitter, unpleasant taste to your entire sauce! Keep an eye on it and stir continuously.
  3. Build the Tomato Base: Stir the tomato paste into the meat and onion mixture. Cook it for 1-2 minutes, stirring constantly. This step, known as “pincage,” helps to deepen the flavor and color of the tomato paste, transforming it from a raw, acidic taste to a rich, concentrated sweetness. Next, pour in the undrained diced tomatoes (or crushed tomatoes, if that’s your preference) and the chicken broth. Give everything a good stir and bring the mixture to a gentle simmer. This initial liquid addition will start to meld the flavors together.
  4. Introduce the Creaminess: Now for the signature “creamy” aspect of our Creamy Southern Spaghetti Bake! Reduce the heat to low. Add your softened cream cheese to the skillet. It helps to break it into a few smaller chunks before adding it, as this will help it melt more quickly and smoothly. Stir constantly until the cream cheese is fully melted and completely incorporated into the sauce, creating a beautifully smooth and luscious base. There should be no visible lumps of cream cheese. Then, stir in the sour cream and the entire can of condensed cream of mushroom soup. Continue stirring until everything is thoroughly combined and the sauce has a wonderfully smooth, uniform texture. If, at this stage, the sauce appears too thick for your liking, you can gradually stir in about half a cup of whole milk (or a little more) to thin it out to your desired pouring consistency. I often find a little extra liquid ensures that perfect creamy flow throughout the bake.
  5. Season the Sauce to Perfection: This is where we truly bring our flavors to life and make this sauce sing! Stir in the Italian seasoning, dried oregano, smoked paprika, salt, black pepper, and if you’re a fan of a little warmth and subtle kick, the red pepper flakes. Give everything a thorough stir. Now, for the most important part of this step: taste the sauce! Seasoning to taste is paramount and truly elevates any dish. Don’t skip it! Adjust the salt, pepper, or any other spices as needed. The flavors should be bold, satisfying, and well-balanced. Remember, the spaghetti itself is relatively plain, so your sauce needs to carry the majority of the flavor for the entire dish. Once seasoned to your liking, let the sauce simmer gently on low heat for about 5-10 minutes. This gentle simmer allows all those wonderful flavors to meld, deepen, and truly marry together, creating an incredibly rich and cohesive sauce.

Assembling the Creamy Southern Spaghetti Bake

  1. Combine Spaghetti and Sauce: Grab a very large mixing bowl – or, if your spaghetti pot is empty and clean, you can use that. Add all of your cooked and thoroughly drained spaghetti to the bowl. Now, pour about two-thirds of the wonderfully creamy meat sauce directly over the spaghetti. Using a pair of tongs, gently but thoroughly toss the spaghetti until every single strand is evenly coated with the rich, flavorful sauce. This step is crucial because it ensures that every bite of the bake is imbued with that incredible flavor and luxurious creaminess right from the start, rather than just having sauce on top.
  2. Prepare Your Baking Dish: Lightly grease a 9×13-inch (23x33cm) baking dish. You can use cooking spray for convenience, or a thin layer of butter or olive oil. This simple step prevents the spaghetti from sticking to the bottom and sides of the dish, making for easier serving and much simpler cleanup later.
  3. Layer the Bake: Now for the fun part – assembling our masterpiece!

    • First Layer (Spaghetti): Carefully spread about half of the spaghetti that’s been coated in sauce evenly across the bottom of your prepared baking dish. Gently press it down with the back of a spoon to form a relatively compact and even layer.
    • Second Layer (Meat Sauce): Spoon about half of the remaining meat sauce (the portion you saved) evenly over the spaghetti layer. Spread it out so that it covers the spaghetti nicely.
    • Third Layer (Cheese Blend): Generously sprinkle half of the shredded sharp cheddar cheese, half of the shredded mozzarella cheese, and half of the grated Parmesan cheese (if you’re using it) over the sauce layer. This creates a delicious, melty cheese pocket in the middle.
    • Repeat Layers: Now, repeat these layers! Add the remaining coated spaghetti, spreading it out evenly. Then, spoon the rest of the meat sauce over this second layer of spaghetti.
    • Final Cheese Layer (The Golden Top): For the grand finale, generously sprinkle the remaining sharp cheddar cheese, mozzarella cheese, and Parmesan cheese (if using) evenly over the top. This final layer of cheese is what will melt into a glorious, bubbly, and golden-brown crust, adding both incredible flavor and a beautiful presentation to your bake.

Baking to Golden Perfection

  1. Bake Until Bubbly and Golden: Carefully take your assembled baking dish and cover it loosely with aluminum foil. The foil helps to prevent the top layer of cheese from browning too quickly and keeps the moisture locked in, ensuring the bake heats through evenly without drying out. Transfer the covered dish to your preheated 375°F (190°C) oven and bake for 20 minutes. After this initial 20 minutes, carefully remove the foil. Return the uncovered dish to the oven and continue baking for another 15-20 minutes. During this final stage, you’re looking for the cheese on top to be beautifully melted, bubbly, and a gorgeous golden brown. The edges of the bake should be gently simmering, indicating that it’s piping hot all the way through. You’ll absolutely know it’s ready when your kitchen is filled with the most heavenly, comforting aroma!
  2. Rest Before Serving: This step is just as important as the baking itself! Once you take your Creamy Southern Spaghetti Bake out of the oven, resist the urge to immediately dig in. Instead, place the hot dish on a wire rack and let it rest for a full 10-15 minutes. This resting period is crucial for several reasons: it allows the ingredients to settle, the cheese to firm up slightly, and the sauce to thicken and become more cohesive. If you cut into it immediately, the bake might be too loose and fall apart. Resting ensures cleaner slices and a much more enjoyable serving experience.

Serving Suggestions and Customizations

  1. Garnish and Serve: After its well-deserved rest, your Creamy Southern Spaghetti Bake is ready to be devoured! If you wish, sprinkle a handful of fresh chopped parsley over the top just before serving. This not only adds a lovely pop of color but also brings a touch of fresh, herbaceous brightness that beautifully complements the rich, savory flavors of the dish. Serve generous portions of this incredibly comforting bake hot, straight from the dish, and prepare for smiles all around.

    Wonderful Accompaniments:

    A light and crisp green salad, dressed with a simple vinaigrette, provides a refreshing counterpoint to the richness of the spaghetti bake. It helps to balance the meal beautifully. For those who love to soak up every last bit of delicious sauce, a side of warm garlic bread or some crusty artisan bread is an absolute must. And if you’re truly embracing the Southern spirit, a side of tender collard greens or perfectly cooked green beans would fit right in.

    Creative Customizations for Your Next Bake:

    This recipe is wonderfully versatile, allowing for endless delicious variations based on your preferences or what you have on hand.

    • Protein Power-Up: While classic ground beef is fantastic, don’t hesitate to experiment with different proteins. Ground Italian sausage (mild for a subtle flavor, or hot for a delightful kick!), ground chicken, or even a mix of ground beef and pork can all introduce unique and exciting flavor profiles.
    • Veggie Boost: Want to sneak in some extra vegetables? Sauté diced bell peppers (red, green, or yellow), sliced mushrooms, or even a handful of fresh spinach with the onion and garlic. The spinach will wilt beautifully into the sauce, adding nutrients without overpowering the flavor.
    • Cheese, Please! Beyond cheddar and mozzarella, feel free to get creative with your cheese choices. Monterey Jack melts incredibly well and adds extra creaminess, while a sharper aged white cheddar can contribute more tang and complexity. A little smoked gouda could even introduce an interesting smoky note, perfect for a hearty bake.
    • Spice it Up: If you’re a fan of heat, don’t be shy! Increase the amount of red pepper flakes in the sauce, or add a dash or two of cayenne pepper. A few dashes of your favorite hot sauce stirred into the sauce can also provide a delightful kick that elevates the whole dish.
    • Herb Variations: Fresh herbs always bring a vibrancy to a dish. Consider stirring in some fresh basil or thyme towards the end of the sauce-making process for maximum fragrance and a lovely aromatic touch.

    Make-Ahead and Freezing Tips:

    One of the best things about this Creamy Southern Spaghetti Bake is how well it lends itself to meal prep! You can easily assemble the entire dish up to the point of baking. Once assembled, cover it tightly with plastic wrap, then an additional layer of aluminum foil, and refrigerate it for up to 2-3 days. When you’re ready to bake, simply remove the plastic wrap and foil (if baking covered), and pop it into the preheated oven. You might need to add an extra 10-15 minutes to the initial covered baking time to ensure it heats through completely from the chilled state.

    For longer storage, this bake freezes beautifully! Assemble the dish in a freezer-safe baking dish (disposable aluminum foil pans are fantastic for this). Cover it tightly with a layer of foil, then an additional layer of plastic wrap or freezer-safe foil to prevent freezer burn. You can freeze it for up to 3 months. To bake from frozen, remove the plastic wrap, keep it covered with foil, and bake at 350°F (175°C) for about 1 hour and 15 minutes. Then, uncover and continue baking for another 20-30 minutes, or until it’s bubbly, golden, and completely heated through. Always ensure the internal temperature reaches a safe level before serving. For a quicker baking time from frozen, you can thaw the dish overnight in the refrigerator before baking, which will significantly reduce the required oven time.

Creamy Southern Spaghetti Bake: Irresistible Comfort Food

Conclusion:

And there you have it! We’ve reached the end of our culinary journey, but truly, it’s just the beginning of your own adventure with this incredible dish. I sincerely hope you’re as excited as I am about what you’ve learned today. What makes this recipe an absolute triumph, a true must-try for anyone seeking a hearty, satisfying, and deeply flavorful meal, is its sheer comfort factor combined with a symphony of classic tastes. This isn’t just another pasta dish; it’s a hug in a casserole, a nostalgic journey back to simpler, more delicious times, perfect for gathering friends and family around the table.

The magic truly lies in its perfect balance. You get that wonderfully tender spaghetti, embraced by a rich, savory sauce that’s been simmered to perfection, often featuring ground meat (whether it’s beef, turkey, or even a plant-based alternative) and a medley of aromatic vegetables. But what elevates it beyond the ordinary, what truly makes it sing, is that incredible creaminess. It’s not just cheesy; it’s luxuriously smooth, a testament to thoughtful preparation and the melding of ingredients that were simply destined to be together. Each forkful delivers a delightful textural contrast and an explosion of savory goodness that is both familiar and exciting. It’s the kind of dish that makes everyone ask for seconds, and then subtly inquire about the recipe. Trust me, it’s a showstopper that consistently delivers on its promise of deliciousness and warmth.

Now that you’re practically drooling, let’s talk about how to make your experience with this bake even better, or how to put your own unique spin on it. Serving the Creamy Southern Spaghetti Bake is an art in itself, or at least an opportunity to add more layers to your meal. For a classic, wholesome dinner, I always recommend pairing it with a crisp, refreshing green salad. Think mixed greens with a light vinaigrette – something to cut through the richness beautifully. A side of warm, buttery garlic bread or some homemade cornbread would also be an absolute dream, perfect for soaking up every last bit of that amazing sauce. Don’t underestimate the power of a simple side of steamed green beans or roasted asparagus to add color and nutrients to your plate.

Customizing Your Creamy Southern Spaghetti Bake: Endless Possibilities!

One of the things I adore most about this recipe is its incredible versatility. It’s a fantastic base for experimentation! If you’re looking to lighten things up a bit, consider swapping out the ground beef for ground turkey or even shredded rotisserie chicken for a different protein profile. For my vegetarian friends, a hearty blend of sautéed mushrooms, lentils, or a plant-based ground substitute works wonderfully. Don’t be shy about adding more vegetables either! Sautéed bell peppers, onions, zucchini, or even a handful of fresh spinach can easily be folded into the sauce for extra flavor and nutrients. For those who like a little kick, a pinch of red pepper flakes stirred into the sauce will certainly wake up your taste buds without overpowering the dish.

Cheese is another area where you can really play. While the recipe calls for specific cheeses to achieve that signature creaminess and flavor, feel free to experiment with your favorite blend. A mix of sharp cheddar and Monterey Jack can add extra zest, or a touch of smoked Gouda could introduce an unexpected depth of flavor. You can even prepare the entire bake ahead of time, refrigerate it unbaked, and then simply pop it into the oven when you’re ready to enjoy a fuss-free meal. It’s a fantastic option for busy weeknights or for feeding a crowd. And yes, it freezes beautifully too, making it an ideal candidate for meal prepping. Just thaw overnight in the fridge and bake as directed.

So, there you have it – all the reasons why this incredible dish deserves a place on your weekly menu rotation. I truly can’t emphasize enough how much joy and satisfaction this recipe brings, both in the cooking and the eating. It’s more than just food; it’s an experience, a memory in the making, and a guaranteed crowd-pleaser that will have everyone reaching for another serving. Please, don’t just read about it – gather your ingredients, fire up your oven, and dive into the delicious world of this extraordinary bake yourself. I promise you won’t regret it.

Once you’ve had the chance to whip up your own batch, I would absolutely love to hear about your experience! Did you stick to the recipe, or did you put your own unique spin on it? What were your favorite variations? Did your family rave about it as much as mine does? Share your triumphs, your tips, and even your kitchen mishaps in the comments below or on social media. Your insights and creativity inspire me and our entire community of food lovers. Let’s celebrate the joy of home cooking together. Happy cooking, my friends, and get ready to fall in love with your new favorite comfort food!


Creamy Southern Spaghetti Bake: Irresistible Comfort Food

Creamy Southern Spaghetti Bake is a warm hug in a casserole dish, taking familiar spaghetti and elevating it with a rich, velvety sauce and a golden, bubbly cheese topping. A beloved staple cherished for its ability to feed a crowd and satisfy every palate. Whether you’re feeding a crowd, prepping a make-ahead dinner, or just want something cozy for a Sunday afternoon, this recipe will become a favorite in your rotation.

Prep Time
30 Minutes
Cook Time
40 Minutes
Total Time
25 Minutes
Servings
8 servings

Ingredients


Instructions


Important Information

Nutrition Facts (Per Serving)

It is important to consider this information as approximate and not to use it as definitive health advice.

Allergy Information

Please check ingredients for potential allergens and consult a health professional if in doubt.

« Previous Post
Soft Baked Maple Donut Bars – Easy & Delicious Homemade Treat!
Next Post »
Magic Lemon Cobbler Delight: Your New Favorite Zesty Dessert

If you enjoyed this…

Honey Mustard Chicken

Honey Mustard Chicken – Sweet, Tangy & Absolutely Irresistible!

Cowboy Casserole: Hearty Ground Beef, Corn & Tots Recipe

High Protein Low Carb Cheeseburger Bowls – Beef Meal Prep!

Primary Sidebar

Browse by Diet

BreakfastDinnerLunchDessertAppetizer

Sweet Peach Yogurt Parfait Delight

One of my fondest memories is from a lazy summer afternoon spent at my grandmother’s house. The sun filtered through the kitchen window, casting a warm glow over the table where she would create her culinary magic. It was during one of those blissful moments that I first tasted her Peach Yogurt Parfait with Honey and Granola. The sweet aroma of ripe peaches mingling with creamy yogurt and the crunch of granola was nothing short of heavenly. It felt like summer captured in a bowl, and I still remember the joy of diving in with a spoon, each layer revealing a new burst of flavor.

When I think about that parfait, I can almost hear the gentle hum of the bees outside, reminding me of the floral notes that honey brings to every bite. The vibrant yellows and soft oranges of the peaches contrast beautifully with the creamy white yogurt and the golden crunch of granola. It’s a dish that not only looks delightful but also tastes like a celebration of fresh, wholesome ingredients.

What makes my version of this Peach Yogurt Parfait special is the careful balance of flavors and textures. I use ripe, juicy peaches, drizzled with locally sourced honey, and a homemade granola that’s bursting with nuts and seeds for an extra crunch. It’s a simple dish, but every layer is crafted with love and attention.

Let me show you exactly how to make this delightful parfait, so you can bring a bit of that summer magic into your kitchen!

Sweet Peach Yogurt Parfait Delight

Why You’ll Love This Recipe

  • Delightfully creamy texture from the Greek yogurt, paired with the juicy sweetness of fresh peaches.
  • Ready in under 20 minutes, making it a quick and satisfying breakfast or snack option.
  • Budget-friendly, using common ingredients that you may already have in your pantry.
  • Customizable with your favorite granola and nuts, allowing you to tailor each parfait to your taste.
  • Perfectly balanced flavors with the bright acidity of lemon juice and the sweetness of honey enhancing the peaches.

Ingredients

  • For the Parfait:
  • 2 cups plain Greek yogurt (or vanilla yogurt for a sweeter option)
  • 2 large ripe peaches, diced (about 2 cups)
  • 1 tablespoon fresh lemon juice (to prevent browning of peaches)
  • 2 tablespoons honey (plus more for drizzling)
  • 1 teaspoon vanilla extract (optional for extra flavor)
  • For the Granola:
  • 1 cup granola (store-bought or homemade; see notes for a simple granola recipe)
  • 1/4 cup sliced almonds (optional for added crunch)
  • 1/4 cup shredded coconut (optional for added flavor)

Let’s dive into some key ingredients that make this Peach Yogurt Parfait so delightful! First, the Greek yogurt is not only creamy but also packed with protein, making it a satisfying option for breakfast or a snack. If you’re looking for a sweeter option, you can easily substitute it with vanilla yogurt, though it may alter the overall flavor balance. Next, the ripe peaches are the star of the show; their natural sweetness shines through, so I recommend choosing peaches that yield slightly to pressure, indicating they’re perfectly ripe. If peaches aren’t in season, feel free to use nectarines or even frozen peaches—just thaw them before use. Finally, honey adds a lovely floral sweetness that ties everything together. If you prefer, maple syrup can serve as a delicious substitute.

Step-by-Step Instructions

  1. Start by preparing the peaches. Wash them thoroughly, then slice and dice them into bite-sized pieces. In a medium bowl, toss the diced peaches with 1 tablespoon of fresh lemon juice to prevent browning. Set aside for about 5 minutes while the lemon juice works its magic.
  2. In a separate bowl, combine the Greek yogurt, 2 tablespoons of honey, and 1 teaspoon of vanilla extract if using. Stir the mixture until smooth and thoroughly blended. This should take about a minute. Avoid overmixing to maintain the creaminess of the yogurt.
  3. Now it’s time to layer your parfait. Grab a clear glass or bowl to showcase your beautiful creation. Start with a generous spoonful of the yogurt mixture at the bottom—about 1/4 cup will do. Use a spoon to spread it evenly.
  4. Add a layer of the diced peaches over the yogurt, ensuring they cover the yogurt completely. You might want to use about half of what you have prepared—roughly 1 cup. This layer should be visually appealing, so arrange the peaches neatly.
  5. Sprinkle 1/4 cup of granola over the peaches. This adds a delightful crunch. Make sure to distribute it evenly to ensure every bite has that satisfying texture. Avoid packing it down too tightly, as you want it to maintain its crunch.
  6. Repeat the layers: spoon in another 1/4 cup of yogurt, followed by another cup of peaches, and another sprinkle of granola. You should have at least two layers, but feel free to add more depending on your glass size.
  7. Finish off your parfait with a drizzle of honey on top for added sweetness and a touch of elegance. If you’re using sliced almonds or shredded coconut, sprinkle them on top now. It adds a lovely visual contrast and extra flavor.
  8. Serve immediately or refrigerate for up to 30 minutes before serving to allow the flavors to meld together. However, I recommend enjoying it fresh to maintain the granola’s crunch.

Pro Tips for the Best Peach Yogurt Parfait With Honey And Granola

  • Make sure to choose ripe peaches for the best flavor and texture. A common mistake is using unripe fruit, which can lead to a less enjoyable parfait. Look for peaches that are fragrant and slightly soft to the touch.
  • Use a clear glass to assemble your parfait; this not only makes for a beautiful presentation but also allows you to see the colorful layers, which adds to the enjoyment of eating it.
  • For an even creamier texture, consider whipping the Greek yogurt with a hand mixer for a couple of minutes before layering. This small adjustment makes a huge difference in mouthfeel.
  • Be mindful of the granola-to-yogurt ratio. Too much granola can overwhelm the parfait, while too little can make it feel too creamy. Aim for about 1/4 cup of granola per layer for the perfect balance.
  • If you’re making this for a gathering, consider preparing the yogurt and peaches ahead of time and layering them just before serving. This ensures the granola stays crunchy!

Variations & Serving Ideas

There are so many ways to get creative with your Peach Yogurt Parfait! For a tropical twist, swap out the peaches for mangoes or pineapples and top with coconut flakes. If you prefer a berry flavor, mix in some blueberries or strawberries with the peaches for added color and taste. For a nutty version, incorporate chopped walnuts or pecans instead of almonds.

As for serving ideas, this parfait pairs beautifully with a side of scrambled eggs for a hearty breakfast or fresh fruit salad for a light lunch. You might also enjoy it alongside whole grain toast with almond butter for an energizing snack. The contrast of flavors and textures will elevate your meal experience!

Storage, Make-Ahead & Reheating

The Peach Yogurt Parfait is best enjoyed fresh, but you can prepare some components ahead of time. Store the layered parfait in an airtight container in the refrigerator for up to 24 hours. However, be cautious; the granola may lose its crunch if stored too long. You can freeze the yogurt and peach mixture for up to 2 months; just remember to thaw it in the refrigerator overnight before serving.

If you plan to enjoy this dish the next day, it can taste even better as the flavors meld together. Just remember to add the granola right before serving to keep its delightful crunch!

Frequently Asked Questions

Can I make Peach Yogurt Parfait With Honey And Granola ahead of time?

Yes — in fact, it tastes even better the next day as the flavors meld. However, I recommend waiting to add the granola until just before serving to maintain its crunch.

What can I substitute for Greek yogurt?

If you prefer a lighter option, you can substitute Greek yogurt with regular yogurt or a dairy-free alternative like coconut yogurt. Just remember that this may alter the creaminess and flavor profile slightly.

Can I use frozen peaches for this parfait?

Absolutely! Just make sure to thaw the frozen peaches before using them. They will still add great flavor, though the texture may be slightly softer than fresh peaches.

How do I make the parfait vegan?

To make a vegan version, substitute the Greek yogurt with a plant-based yogurt alternative, and replace honey with maple syrup or agave nectar. This keeps the parfait sweet while adhering to a vegan diet.

What other fruits can I use in this recipe?

You can mix and match fruits based on your preference. Try using strawberries, blueberries, raspberries, or even bananas. Just make sure to adjust the lemon juice as needed to prevent browning.

Sweet Peach Yogurt Parfait Delight

Final Thoughts

The Peach Yogurt Parfait with Honey and Granola is a delightful blend of creamy yogurt, sweet peaches, and crunchy granola that creates a satisfying and nourishing treat. Each layer bursts with flavor, making it a perfect choice for breakfast or a light dessert.

This is the kind of recipe I come back to again and again, especially when I want something refreshing and wholesome to start my day. The harmony of sweet and tart flavors, combined with the delightful crunch, never fails to lift my spirits!

I encourage you to give this parfait a try and indulge in its comforting goodness. Feel free to share your results or even add your own twist—perhaps a sprinkle of cinnamon or a handful of nuts. Enjoy creating your perfect parfait!

Print
clock clock iconcutlery cutlery iconflag flag iconfolder folder iconinstagram instagram iconpinterest pinterest iconfacebook facebook iconprint print iconsquares squares iconheart heart iconheart solid heart solid icon

Peach Yogurt Parfait


  • Author: Lily author
  • Total Time: 15 minutes
  • Yield: 4 servings 1x
Pin Recipe
Print Recipe

Description

This Peach Yogurt Parfait combines creamy Greek yogurt, juicy peaches, and crunchy granola for a delightful treat. It’s a perfect breakfast or snack that captures the essence of summer in every bite.


Ingredients

Scale
  • For the Parfait:
  • 2 cups plain Greek yogurt (or vanilla yogurt for a sweeter option)
  • 2 large ripe peaches, diced (about 2 cups)
  • 1 tablespoon fresh lemon juice (to prevent browning of peaches)
  • 2 tablespoons honey (plus more for drizzling)
  • 1 teaspoon vanilla extract (optional for extra flavor)
  • For the Granola:
  • 1 cup granola (store-bought or homemade; see notes for a simple granola recipe)
  • 1/4 cup sliced almonds (optional for added crunch)
  • 1/4 cup shredded coconut (optional for added flavor)

Instructions

  1. Start by preparing the peaches. Wash them thoroughly, then slice and dice them into bite-sized pieces. In a medium bowl, toss the diced peaches with 1 tablespoon of fresh lemon juice to prevent browning. Set aside for about 5 minutes while the lemon juice works its magic.
  2. In a separate bowl, combine the Greek yogurt, 2 tablespoons of honey, and 1 teaspoon of vanilla extract if using. Stir the mixture until smooth and thoroughly blended. This should take about a minute. Avoid overmixing to maintain the creaminess of the yogurt.
  3. Now it’s time to layer your parfait. Grab a clear glass or bowl to showcase your beautiful creation. Start with a generous spoonful of the yogurt mixture at the bottom—about 1/4 cup will do. Use a spoon to spread it evenly.
  4. Add a layer of the diced peaches over the yogurt, ensuring they cover the yogurt completely. You might want to use about half of what you have prepared—roughly 1 cup. This layer should be visually appealing, so arrange the peaches neatly.
  5. Sprinkle 1/4 cup of granola over the peaches. This adds a delightful crunch. Make sure to distribute it evenly to ensure every bite has that satisfying texture. Avoid packing it down too tightly, as you want it to maintain its crunch.
  6. Repeat the layers: spoon in another 1/4 cup of yogurt, followed by another cup of peaches, and another sprinkle of granola. You should have at least two layers, but feel free to add more depending on your glass size.
  7. Finish off your parfait with a drizzle of honey on top for added sweetness and a touch of elegance. If you’re using sliced almonds or shredded coconut, sprinkle them on top now. It adds a lovely visual contrast and extra flavor.
  8. Serve immediately or refrigerate for up to 30 minutes before serving to allow the flavors to meld together. However, I recommend enjoying it fresh to maintain the granola’s crunch.
  • Prep Time: 15 mins
  • Cook Time: 0 mins
  • Category: Breakfast
  • Method: No-cook
  • Cuisine: American

Nutrition

  • Serving Size: 1 parfait
  • Calories: 250
  • Sugar: 20 g
  • Sodium: 50 mg
  • Fat: 5 g
  • Saturated Fat: 2 g
  • Unsaturated Fat: 3 g
  • Trans Fat: 0 g
  • Carbohydrates: 40 g
  • Fiber: 3 g
  • Protein: 10 g
  • Cholesterol: 10 mg

Keywords: Choose ripe peaches for the best flavor and texture. Use a clear glass for a beautiful presentation. For creaminess, consider whipping the yogurt before layering. Be mindful of the granola-to-yogurt ratio. Prepare yogurt and peaches ahead of time for gatherings, layering just before serving.

Did you make this recipe?

Share a photo and tag us — we can't wait to see what you've made!

Sun-Kissed Frozen Orange Cream Slush

As a child, summer days felt like they lasted forever. I remember the sticky heat wrapping around me as I played outside, my laughter mingling with the sounds of the neighborhood. But nothing could cool me down quite like the moment I’d spot my grandmother, laboring over her blender, whipping up her famous Frozen Orange Creamsicle Slush. That vibrant orange treat, with its frosty texture and sweet citrus aroma, was like a burst of sunshine in a cup. Just one sip, and I could feel the coolness wash over me, sparking pure joy.

This Frozen Orange Creamsicle Slush has a way of making you feel like a kid again. Its creamy, dreamy consistency is a delightful balance of bright orange and soft vanilla, inviting you to dive right in. The refreshing tang of orange dances on your tongue, while the smooth creaminess envelops you in a comforting embrace. It’s a nostalgic treat that’s perfect for hot summer afternoons or anytime you need a little pick-me-up.

What makes my version of this slush stand out is the addition of a hint of vanilla bean, which elevates the flavor and adds an extra layer of richness. Plus, it’s super easy to whip up with just a few simple ingredients that you probably already have on hand! So, if you’re ready to relive those sun-soaked memories, let me show you exactly how to make it.

Sun-Kissed Frozen Orange Cream Slush

Why You’ll Love This Recipe

  • Each slush is a perfect blend of creamy vanilla and zesty orange, creating a nostalgic flavor reminiscent of summer days.
  • This refreshing treat is ready in under 15 minutes, making it an ideal quick dessert for unexpected guests or hot afternoons.
  • With just 8 simple ingredients, it’s budget-friendly, ensuring you don’t have to break the bank to enjoy a delicious slush.
  • The slush has a perfectly smooth texture, thanks to the combination of ice and ice cream, providing a delightful contrast to the bright citrus flavors.
  • It’s highly customizable; you can easily adjust the sweetness and add fresh herbs for a unique twist that suits your taste.

Ingredients

  • 2 cups orange juice (freshly squeezed or store-bought)
  • 1 cup vanilla ice cream
  • 1 cup crushed ice
  • 1/2 cup milk (whole or 2%)
  • 1/4 cup granulated sugar (adjust based on sweetness preference)
  • 1 teaspoon vanilla extract
  • Zest of 1 orange (for added flavor)
  • Fresh orange slices and mint leaves (for garnish)

The star of this Frozen Orange Creamsicle Slush is the orange juice, which provides the vibrant, citrusy base. Freshly squeezed juice will yield the brightest flavor, but store-bought options can be just as convenient. If you’re opting for store-bought, choose 100% pure juice with no added sugars for the best results. Another essential ingredient is the vanilla ice cream; it adds creaminess and sweetness. You can substitute it with dairy-free ice cream if you’re looking for a vegan option. Whole or 2% milk complements the ice cream, creating a smooth blend. If you want a lower-calorie version, almond or oat milk can be good alternatives.

Lastly, the granulated sugar can be adjusted based on your sweetness preference. If you prefer a more natural sweetener, consider using honey or agave syrup. The orange zest enhances the flavor profile, providing an aromatic pop that brings the whole slush together. Don’t skip it! It adds an extra layer of brightness that makes this slush truly special.

Step-by-Step Instructions

  1. Start by preparing your ingredients. Gather 2 cups of orange juice, 1 cup of vanilla ice cream, and 1 cup of crushed ice. Make sure the ice is finely crushed, as larger chunks can make blending difficult.
  2. In a blender, combine the orange juice, vanilla ice cream, crushed ice, and 1/2 cup of milk. Add 1/4 cup of granulated sugar and 1 teaspoon of vanilla extract. If you like a sweeter slush, consider adding a bit more sugar at this stage.
  3. Add the zest of 1 orange to the blender. This step is crucial for enhancing the citrus flavor of your slush. Make sure not to include the bitter white pith—only the flavorful zest.
  4. Blend the mixture on medium-high speed for about 30-45 seconds. Stop once the ingredients are fully combined and the slush has a smooth, even consistency. If you notice large chunks of ice, blend for an additional 10-15 seconds. Avoid over-blending, as this can make the slush too liquidy.
  5. Once blended, taste the slush. If it needs more sweetness, add a little more sugar and blend for a few more seconds. If it’s too thick, you can add a splash of milk to reach your desired consistency.
  6. Pour the slush into glasses. This recipe typically serves 4, but you can easily double it for larger gatherings. Use a spoon to help guide the slush into the glasses if needed.
  7. Garnish each serving with fresh orange slices and mint leaves. The mint not only adds a pop of color but also a refreshing aroma that complements the citrus flavors beautifully.
  8. Serve immediately and enjoy! If you’ve made extra, you can refrigerate it for a short time, but it’s best enjoyed fresh.

Pro Tips for the Best Frozen Orange Creamsicle Slush

  • Don’t skip the orange zest! It’s a game-changer for flavor. Always zest before juicing to make it easier.
  • Use a high-powered blender for the best texture. A standard blender may struggle with ice, leading to uneven consistency. If you have a food processor, that can work too, but ensure the ice is finely crushed.
  • Adjust the ice-to-liquid ratio carefully. If your slush is too thick, it won’t blend well. Start with less ice and add more until you reach your preferred texture.
  • Be cautious with the sugar! Always start with the lower amount, as you can easily add more, but it’s hard to fix an overly sweet slush.
  • For a fun twist, consider adding a splash of coconut milk or a handful of fresh fruit like strawberries or pineapple. This not only enhances the flavor but also adds a beautiful color contrast.

Variations & Serving Ideas

There are countless ways to put a spin on your Frozen Orange Creamsicle Slush. Consider making a tropical version by adding in some pineapple juice or coconut milk for a delightful tropical twist. If you’re feeling adventurous, try incorporating a handful of frozen mango or peach slices for added sweetness. For a lighter version, swap out the vanilla ice cream for Greek yogurt for a creamy yet tangy alternative.

As for serving ideas, this refreshing slush pairs wonderfully with light summer dishes like grilled chicken skewers, fish tacos, or a simple salad topped with citrus vinaigrette. The bright, zesty flavors of the slush complement these dishes perfectly, making them an ideal pairing for a sunny day.

Storage, Make-Ahead & Reheating

This Frozen Orange Creamsicle Slush is best enjoyed fresh, but if you have leftovers, you can store them in an airtight container in the fridge for up to 2 days. Just keep in mind that the slush may lose some of its texture over time as the ice melts. It doesn’t freeze well, as the ice will turn into a solid block. If you must freeze it, blend again after thawing to restore the slushy consistency. This treat is best the day you make it, as the flavors meld together beautifully overnight, enhancing its deliciousness.

Frequently Asked Questions

Can I make Frozen Orange Creamsicle Slush ahead of time?

Yes — in fact, it tastes even better the next day as the flavors meld. However, it’s best to enjoy it fresh, as the texture can change if stored for too long. If you need to prepare it ahead, keep it in the fridge and re-blend before serving.

What kind of orange juice should I use?

For the best flavor, use freshly squeezed orange juice. However, if you’re short on time, opt for 100% pure store-bought juice without added sugars. This will ensure that your slush remains flavorful and refreshing.

Can I substitute the vanilla ice cream?

Absolutely! If you’re looking for a dairy-free option, coconut milk ice cream or a non-dairy vanilla ice cream can work wonderfully. They will still provide the creamy texture and sweetness you desire.

How can I adjust the sweetness of my slush?

You can easily adjust the sweetness by modifying the amount of sugar added. Start with 1/4 cup and taste the mixture before blending. If you prefer it sweeter, add more sugar gradually until it reaches your desired level.

What should I do if my slush is too thick?

If your slush is too thick, simply add a splash of milk or orange juice and blend again. This will help achieve a more drinkable consistency while maintaining the slushy texture. Adjust gradually to reach your preferred thickness.

Sun-Kissed Frozen Orange Cream Slush

Final Thoughts

The Frozen Orange Creamsicle Slush is a delightful blend of refreshing citrus and creamy goodness, making it a perfect treat for warm days or any time you crave a taste of nostalgia. The way the bright orange flavor dances with the creamy texture truly elevates this slush, transforming it into a satisfying escape from the everyday.

This is the kind of recipe I come back to again and again, especially when I’m looking to cool down or impress guests at a summer gathering. It’s simple to make and always brings smiles all around! I encourage you to try this recipe for yourself—don’t hesitate to share your results or even put your own spin on it. Happy slushing!

Print
clock clock iconcutlery cutlery iconflag flag iconfolder folder iconinstagram instagram iconpinterest pinterest iconfacebook facebook iconprint print iconsquares squares iconheart heart iconheart solid heart solid icon

Frozen Orange Creamsicle Slush


  • Author: Lily author
  • Total Time: 15 minutes
  • Yield: 4 servings 1x
Pin Recipe
Print Recipe

Description

This Frozen Orange Creamsicle Slush is a refreshing treat that combines creamy vanilla and zesty orange flavors. Perfect for hot summer days, it brings back nostalgic memories with every sip.


Ingredients

Scale
  • 2 cups orange juice (freshly squeezed or store-bought)
  • 1 cup vanilla ice cream
  • 1 cup crushed ice
  • 1/2 cup milk (whole or 2%)
  • 1/4 cup granulated sugar (adjust based on sweetness preference)
  • 1 teaspoon vanilla extract
  • Zest of 1 orange (for added flavor)
  • Fresh orange slices and mint leaves (for garnish)

Instructions

  1. Start by preparing your ingredients. Gather 2 cups of orange juice, 1 cup of vanilla ice cream, and 1 cup of crushed ice. Make sure the ice is finely crushed, as larger chunks can make blending difficult.
  2. In a blender, combine the orange juice, vanilla ice cream, crushed ice, and 1/2 cup of milk. Add 1/4 cup of granulated sugar and 1 teaspoon of vanilla extract. If you like a sweeter slush, consider adding a bit more sugar at this stage.
  3. Add the zest of 1 orange to the blender. This step is crucial for enhancing the citrus flavor of your slush. Make sure not to include the bitter white pith—only the flavorful zest.
  4. Blend the mixture on medium-high speed for about 30-45 seconds. Stop once the ingredients are fully combined and the slush has a smooth, even consistency. If you notice large chunks of ice, blend for an additional 10-15 seconds. Avoid over-blending, as this can make the slush too liquidy.
  5. Once blended, taste the slush. If it needs more sweetness, add a little more sugar and blend for a few more seconds. If it’s too thick, you can add a splash of milk to reach your desired consistency.
  6. Pour the slush into glasses. This recipe typically serves 4, but you can easily double it for larger gatherings. Use a spoon to help guide the slush into the glasses if needed.
  7. Garnish each serving with fresh orange slices and mint leaves. The mint not only adds a pop of color but also a refreshing aroma that complements the citrus flavors beautifully.
  8. Serve immediately and enjoy! If you’ve made extra, you can refrigerate it for a short time, but it's best enjoyed fresh.
  • Prep Time: 15 min
  • Cook Time: 0 min
  • Category: Dessert
  • Method: Blending
  • Cuisine: American

Nutrition

  • Serving Size: 1 serving
  • Calories: 200
  • Sugar: 30 g
  • Sodium: 50 mg
  • Fat: 5 g
  • Saturated Fat: 3 g
  • Unsaturated Fat: 2 g
  • Trans Fat: 0 g
  • Carbohydrates: 40 g
  • Fiber: 1 g
  • Protein: 2 g
  • Cholesterol: 20 mg

Keywords: Don't skip the orange zest! It's a game-changer for flavor. Always zest before juicing to make it easier.

Did you make this recipe?

Share a photo and tag us — we can't wait to see what you've made!

Zesty Lemon Poppy Seed Delight

One rainy afternoon, I found myself in my grandmother’s cozy kitchen, the kind that always smelled like warmth and love. She was whipping up her famous Lemon Poppy Seed Loaf, a recipe that had been passed down through generations. As the batter came together, the zesty aroma of fresh lemons filled the air, mingling perfectly with the nutty fragrance of poppy seeds. I can still picture her, apron-clad, as she expertly drizzled a vibrant citrus icing over the loaf, creating a glossy, sun-kissed finish that beckoned us to dive in. It was a moment that sparked my own passion for baking, and this recipe has become a cherished staple in my home ever since.

When you take a bite of this Lemon Poppy Seed Loaf, it’s like a burst of sunshine on your palate. The loaf is beautifully golden, with a tender crumb that melts in your mouth. Each slice is speckled with tiny poppy seeds, adding a delightful crunch that contrasts beautifully with the tangy sweetness of the lemon. And that citrus icing? It’s the finishing touch that elevates this loaf from ordinary to extraordinary, with its bright, zesty flavor dancing on your taste buds.

This recipe stands out because it embraces simplicity while delivering on flavor. I’ve added a hint of vanilla to the batter, enhancing the overall taste and making it even more indulgent. Trust me, once you make this Lemon Poppy Seed Loaf With Citrus Icing, it’ll become a go-to in your baking repertoire.

So, let me show you exactly how to make it!

Zesty Lemon Poppy Seed Delight

Why You’ll Love This Recipe

  • Moist and tender crumb that melts in your mouth, thanks to the perfect balance of butter and buttermilk.
  • Bright, zesty lemon flavor paired with crunchy poppy seeds, creating a delightful texture and taste experience.
  • Easy to whip up in just about an hour, perfect for last-minute gatherings or a cozy afternoon treat.
  • Budget-friendly with everyday ingredients, making it an accessible option for all home bakers.
  • The citrus icing adds a sweet tang that elevates the loaf, turning a simple recipe into a showstopper!

Ingredients

  • 1 ½ cups (190g) all-purpose flour
  • 1 teaspoon baking powder
  • ½ teaspoon baking soda
  • ½ teaspoon salt
  • 3 tablespoons poppy seeds
  • ½ cup (115g) unsalted butter, softened to room temperature
  • 1 cup (200g) granulated sugar
  • 2 large eggs
  • 1 teaspoon vanilla extract
  • 1 teaspoon lemon zest (from about 1 medium lemon)
  • ½ cup (120ml) buttermilk
  • 2 tablespoons fresh lemon juice

For the Citrus Icing:

  • 1 cup (120g) powdered sugar
  • 2 tablespoons fresh lemon juice
  • 1 tablespoon orange juice
  • 1 teaspoon lemon zest (for garnish, optional)

Let’s dive into the key ingredients that make this Lemon Poppy Seed Loaf so special. The all-purpose flour provides the structure and base for the loaf, while the baking powder and baking soda ensure it rises perfectly, giving the loaf a light texture. For a gluten-free variation, you could substitute the flour with a gluten-free all-purpose blend. Poppy seeds not only add a delightful crunch but also contribute to the unique flavor profile that pairs well with the citrus notes.

Unsalted butter is crucial for achieving the buttery richness that makes this loaf so moist. If you’re looking for a dairy-free option, coconut oil or a vegan butter can be used instead. The buttermilk is another essential component, providing acidity that activates the baking soda for a fluffy texture. If you don’t have buttermilk on hand, you can easily make a substitute by mixing ½ cup of milk with 1 tablespoon of vinegar or lemon juice and letting it sit for about 5 minutes.

Step-by-Step Instructions

  1. Preheat your oven to 350°F (175°C). Grease a 9×5-inch loaf pan or line it with parchment paper for easy removal later.
  2. In a medium mixing bowl, whisk together 1 ½ cups of all-purpose flour, 1 teaspoon of baking powder, ½ teaspoon of baking soda, ½ teaspoon of salt, and 3 tablespoons of poppy seeds. This helps to evenly distribute the baking agents and ensures a uniform rise.
  3. In a large mixing bowl, cream together ½ cup of softened unsalted butter and 1 cup of granulated sugar using an electric mixer on medium speed for about 3-4 minutes, until the mixture is light and fluffy. Make sure to scrape down the sides of the bowl occasionally.
  4. Add 2 large eggs, 1 teaspoon of vanilla extract, and 1 teaspoon of lemon zest to the creamed butter and sugar, mixing until fully combined. You want a smooth consistency, so ensure there are no lumps of butter.
  5. In a small bowl, combine ½ cup of buttermilk and 2 tablespoons of fresh lemon juice. Alternately add the dry ingredients and buttermilk mixture to the butter mixture, starting and ending with the dry ingredients. Mix just until combined; do not overmix, as this can lead to a dense loaf.
  6. Pour the batter into the prepared loaf pan. Smooth the top with a spatula, ensuring it’s even. Bake in the preheated oven for 50-60 minutes, or until a toothpick inserted in the center comes out clean. The edges should be lightly golden brown, and the center should feel just set.
  7. Once baked, remove the loaf from the oven and allow it to cool in the pan for about 10 minutes. Then, transfer it to a wire rack to cool completely. Resist the urge to slice too soon, as it will be crumbly if it’s still warm.
  8. While the loaf is cooling, prepare the citrus icing. In a medium bowl, whisk together 1 cup of powdered sugar, 2 tablespoons of fresh lemon juice, and 1 tablespoon of orange juice until smooth. If the icing is too thick, you can add a little more juice to reach your desired consistency.
  9. Once the loaf is completely cool, drizzle the citrus icing over the top. If you like, sprinkle with an additional teaspoon of lemon zest for an extra pop of flavor and color.

Pro Tips for the Best Lemon Poppy Seed Loaf With Citrus Icing

  • Be careful not to overmix your batter; this is a common mistake that can lead to a dense loaf. Mix just until the dry ingredients are incorporated for a light and fluffy texture.
  • Use room temperature ingredients, especially the butter and eggs. This helps to create a smoother batter and ensures even baking. Take your eggs out of the fridge about 30 minutes before you start.
  • For a more pronounced lemon flavor, consider adding a little lemon extract in addition to the zest and juice. Just a half teaspoon can elevate the citrus notes significantly.
  • When measuring your flour, spoon it into the measuring cup and level it off with a knife instead of scooping directly from the bag. This prevents packing and ensures you don’t end up with a dry loaf.
  • Invest in a good quality loaf pan; it makes a difference in heat distribution, which ensures even baking. If your pan is dark-coated, reduce the oven temperature by 25°F to prevent over-browning.

Variations & Serving Ideas

For a delightful twist, consider adding blueberries or raspberries to the batter for a fruity burst of flavor. You can also experiment with different citrus fruits—try lime or grapefruit zest and juice for a refreshing change. For a healthier option, substitute half of the all-purpose flour with whole wheat flour for added fiber without compromising too much on texture.

This Lemon Poppy Seed Loaf pairs beautifully with a light salad, such as a mixed greens salad with a vinaigrette, or a cup of tea for a cozy afternoon treat. It also complements a creamy cheese platter, as the acidity of the loaf balances rich cheeses perfectly. Lastly, a scoop of vanilla ice cream on the side creates a delightful contrast of temperatures and flavors!

Storage, Make-Ahead & Reheating

This Lemon Poppy Seed Loaf can be stored at room temperature for up to 3 days if wrapped tightly in plastic wrap. If you want to keep it longer, it freezes well for up to 3 months. To freeze, wrap the loaf tightly in plastic wrap and then in aluminum foil to prevent freezer burn.

When you’re ready to enjoy it again, simply thaw it in the fridge overnight. Reheat individual slices in the microwave for 15-20 seconds or in a toaster oven until warmed through. Interestingly, many people find that this loaf tastes even better the next day, as the flavors have time to meld!

Frequently Asked Questions

Can I make Lemon Poppy Seed Loaf With Citrus Icing ahead of time?

Yes — in fact, it tastes even better the next day! You can make the loaf a day in advance, allowing the flavors to develop. Just be sure to store it in an airtight container to maintain its moisture.

Can I substitute the poppy seeds?

Absolutely! If you don’t have poppy seeds on hand or prefer an alternative, you can use sesame seeds for a similar crunch or omit them entirely for a smooth loaf.

What can I use instead of buttermilk?

If you don’t have buttermilk, you can easily create a substitute by mixing ½ cup of milk (dairy or plant-based) with 1 tablespoon of vinegar or lemon juice. Let it sit for 5 minutes before using in the recipe.

How can I make this recipe gluten-free?

To make a gluten-free version of this Lemon Poppy Seed Loaf, substitute the all-purpose flour with a gluten-free all-purpose flour blend. Just ensure that the blend contains a binding agent like xanthan gum for the best results.

What is the best way to store leftover loaf?

Leftover Lemon Poppy Seed Loaf should be stored in an airtight container at room temperature for up to 3 days. For longer storage, wrap it tightly and freeze for up to 3 months. Thaw it before serving for the best texture.

Zesty Lemon Poppy Seed Delight

Final Thoughts

The Lemon Poppy Seed Loaf with Citrus Icing is truly a delightful treat that brings a burst of brightness to any occasion. The zesty lemon flavor combined with the subtle crunch of poppy seeds creates a satisfying balance, while the citrus icing adds a touch of sweetness that perfectly complements the loaf’s tanginess.

This is the kind of recipe I come back to again and again, especially when I want to brighten up a gloomy day or celebrate a small victory. The aroma that fills the kitchen as it bakes is absolutely heavenly! I encourage you to give this recipe a try; you might just find it becoming a beloved staple in your home. Don’t forget to share your results or even add your own unique twist—I can’t wait to see what you create!

Print
clock clock iconcutlery cutlery iconflag flag iconfolder folder iconinstagram instagram iconpinterest pinterest iconfacebook facebook iconprint print iconsquares squares iconheart heart iconheart solid heart solid icon

Lemon Poppy Seed Loaf


  • Author: Lily author
  • Total Time: 22 minute
  • Yield: 1 loaf 1x
Pin Recipe
Print Recipe

Description

This Lemon Poppy Seed Loaf is a delightful treat that combines zesty lemon flavor with crunchy poppy seeds. Topped with a citrus icing, it’s perfect for any occasion.


Ingredients

Scale
  • 1 ½ cups (190g) all-purpose flour
  • 1 teaspoon baking powder
  • ½ teaspoon baking soda
  • ½ teaspoon salt
  • 3 tablespoons poppy seeds
  • ½ cup (115g) unsalted butter, softened to room temperature
  • 1 cup (200g) granulated sugar
  • 2 large eggs
  • 1 teaspoon vanilla extract
  • 1 teaspoon lemon zest (from about 1 medium lemon)
  • ½ cup (120ml) buttermilk
  • 2 tablespoons fresh lemon juice
  • 1 cup (120g) powdered sugar
  • 2 tablespoons fresh lemon juice
  • 1 tablespoon orange juice
  • 1 teaspoon lemon zest (for garnish, optional)

Instructions

  1. Preheat your oven to 350°F (175°C). Grease a 9×5-inch loaf pan or line it with parchment paper for easy removal later.
  2. In a medium mixing bowl, whisk together 1 ½ cups of all-purpose flour, 1 teaspoon of baking powder, ½ teaspoon of baking soda, ½ teaspoon of salt, and 3 tablespoons of poppy seeds. This helps to evenly distribute the baking agents and ensures a uniform rise.
  3. In a large mixing bowl, cream together ½ cup of softened unsalted butter and 1 cup of granulated sugar using an electric mixer on medium speed for about 3-4 minutes, until the mixture is light and fluffy. Make sure to scrape down the sides of the bowl occasionally.
  4. Add 2 large eggs, 1 teaspoon of vanilla extract, and 1 teaspoon of lemon zest to the creamed butter and sugar, mixing until fully combined. You want a smooth consistency, so ensure there are no lumps of butter.
  5. In a small bowl, combine ½ cup of buttermilk and 2 tablespoons of fresh lemon juice. Alternately add the dry ingredients and buttermilk mixture to the butter mixture, starting and ending with the dry ingredients. Mix just until combined; do not overmix, as this can lead to a dense loaf.
  6. Pour the batter into the prepared loaf pan. Smooth the top with a spatula, ensuring it’s even. Bake in the preheated oven for 50-60 minutes, or until a toothpick inserted in the center comes out clean. The edges should be lightly golden brown, and the center should feel just set.
  7. Once baked, remove the loaf from the oven and allow it to cool in the pan for about 10 minutes. Then, transfer it to a wire rack to cool completely. Resist the urge to slice too soon, as it will be crumbly if it’s still warm.
  8. While the loaf is cooling, prepare the citrus icing. In a medium bowl, whisk together 1 cup of powdered sugar, 2 tablespoons of fresh lemon juice, and 1 tablespoon of orange juice until smooth. If the icing is too thick, you can add a little more juice to reach your desired consistency.
  9. Once the loaf is completely cool, drizzle the citrus icing over the top. If you like, sprinkle with an additional teaspoon of lemon zest for an extra pop of flavor and color.
  • Prep Time: 15 mins
  • Cook Time: 50-60 mins
  • Category: Dessert
  • Method: Baking
  • Cuisine: American

Nutrition

  • Serving Size: 1 slice
  • Calories: 200
  • Sugar: 15 g
  • Sodium: 150 mg
  • Fat: 8 g
  • Saturated Fat: 5 g
  • Unsaturated Fat: 3 g
  • Trans Fat: 0 g
  • Carbohydrates: 30 g
  • Fiber: 1 g
  • Protein: 3 g
  • Cholesterol: 40 mg

Keywords: Be careful not to overmix your batter; this is a common mistake that can lead to a dense loaf. Use room temperature ingredients for a smoother batter and even baking.

Did you make this recipe?

Share a photo and tag us — we can't wait to see what you've made!

  • Privacy Policy
  • Terms Of Service
  • Contact
  • About
  • GDPR

Copyright © 2025 Homesmad