• Skip to primary navigation
  • Skip to main content
  • Skip to primary sidebar
Homesmad

Homesmad

  • Home
  • Breakfast & Brunch
  • Appetizers & Snacks
  • Dinner
  • Dessert
  • About
  • Privacy Policy
  • Contact
Homesmad
  • Home
  • Breakfast & Brunch
  • Appetizers & Snacks
  • Dinner
  • Dessert
  • About
  • Privacy Policy
  • Contact

Crave-Worthy Caramel Apple Puppy Chow – Ultimate Snack

November 12, 2025 by Lily author

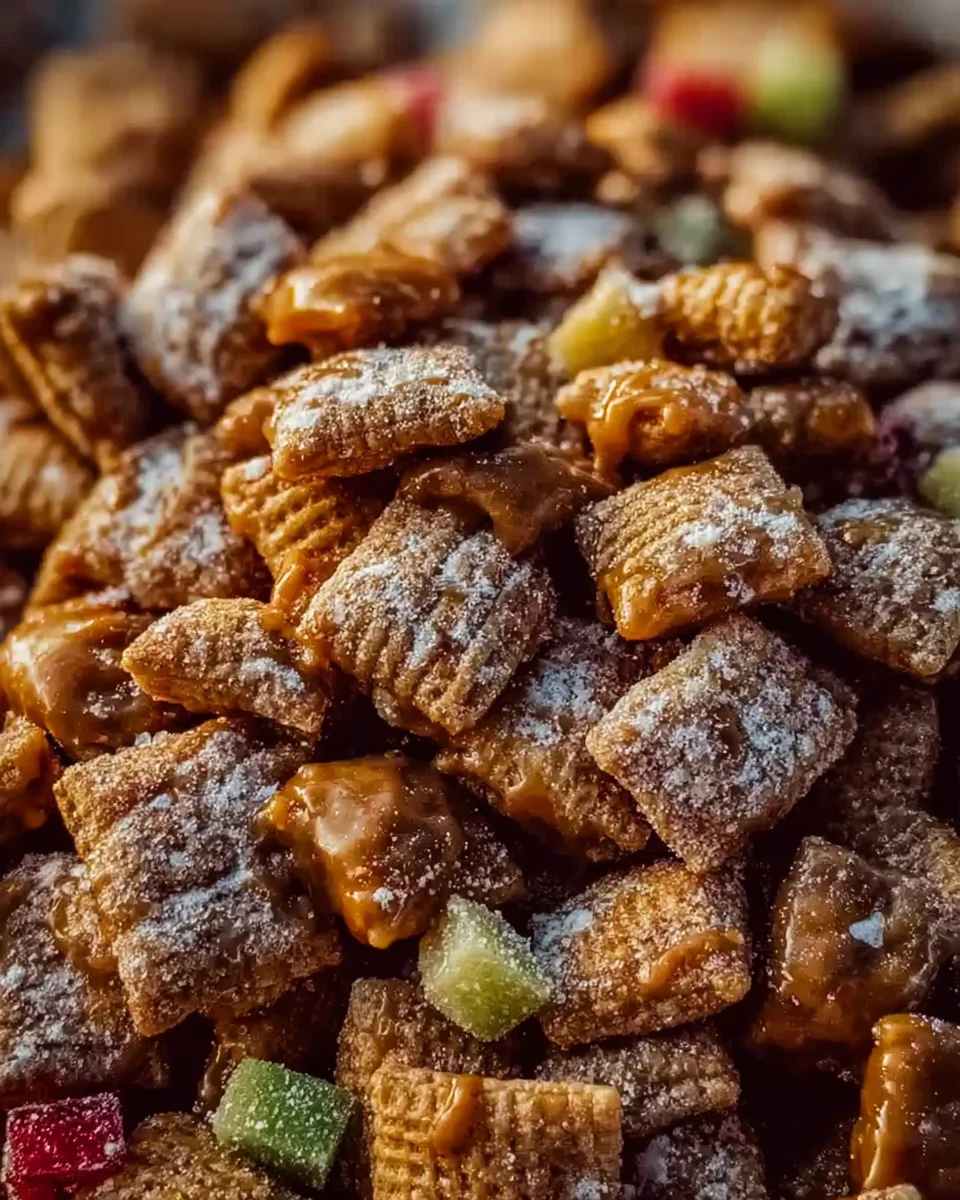
Caramel Apple Puppy Chow is not just a snack; it’s a nostalgic journey wrapped in a delightful, crunchy package, perfect for ushering in the cozy vibes of autumn. Imagine the irresistible taste of crisp, juicy apples coated in rich, buttery caramel, all transformed into a surprisingly easy, no-bake treat that will have everyone reaching for more. This isn’t your average dessert; it’s a celebration of seasonal flavors expertly blended with a beloved classic party mix that promises to be an instant hit.

The original “Puppy Chow,” also known as Muddy Buddies, has long been a staple at gatherings, adored for its simplicity and the satisfying crunch of cereal coated in chocolate and peanut butter, then dusted with powdered sugar. It’s a comfort food by definition, often made hastily for unexpected guests or spontaneous movie nights. Our variation elevates this concept by infusing the iconic flavors of caramel apples—a treat with roots in early 20th-century confectionary, traditionally enjoyed at fairs and harvest festivals—into that familiar, irresistible texture. It’s a truly magical fusion that captures the essence of fall in every single bite.

People absolutely adore this dish for its incredible balance of sweet and tangy, the satisfying crispiness of the cereal, and the luxurious chewiness from the caramel. It’s incredibly convenient to make, requiring no oven and minimal prep time, making it an ideal choice for last-minute parties, school treats, or simply a cozy evening snack. This particular Caramel Apple Puppy Chow offers a unique twist on a beloved classic, delivering all the comforting flavors of autumn in an incredibly addictive and approachable form. I am genuinely thrilled for you to experience this delightful creation!

Crave-Worthy Caramel Apple Puppy Chow - Ultimate Snack this RECIPE

Ingredients:

  • 9 cups crispy rice cereal (I always opt for a classic brand like Chex for that perfect light and crunchy base. The nooks and crannies of this cereal are just ideal for holding onto all that delicious coating!)
  • 1 cup semi-sweet chocolate chips (High-quality chips melt more smoothly and provide a richer chocolate flavor. You could also use milk chocolate for a sweeter profile, but I find semi-sweet balances the caramel and apple perfectly.)
  • ½ cup creamy peanut butter (Make sure it’s creamy, not crunchy, for a smooth coating. If you have nut allergies, you can substitute with sunflower seed butter or a similar allergy-friendly spread, ensuring it’s a smooth variety.)
  • ¼ cup unsalted butter (This helps achieve a wonderfully rich and pliable chocolate-caramel mixture. If you only have salted butter, reduce any added salt elsewhere in the recipe.)
  • 1 cup caramel bits (These small, soft caramels melt beautifully and evenly. Alternatively, you can use pre-made caramel sauce, but you might need to adjust the amount slightly to achieve the right consistency, starting with ¾ cup and adding more if needed.)
  • 2 teaspoons pure vanilla extract (A good quality vanilla extract enhances all the other flavors, adding a warm, aromatic depth.)
  • 1 teaspoon apple pie spice blend (This is where the distinct “apple” flavor truly shines! It typically includes cinnamon, nutmeg, and allspice, all working in harmony to evoke that classic apple dessert taste. If you don’t have a blend, use ¾ teaspoon ground cinnamon and ¼ teaspoon ground nutmeg.)
  • ½ teaspoon ground cinnamon (An extra sprinkle of cinnamon intensifies the cozy, autumnal notes. It pairs wonderfully with both apple and caramel.)
  • 4-5 cups powdered sugar (Also known as confectioners’ sugar. This is the magical ingredient that gives puppy chow its iconic, snowy coating. We’ll be using a generous amount to ensure full coverage and a delightful sweetness. It’s best to have extra on hand, just in case!)
  • Optional: ¼ teaspoon flaky sea salt (A pinch of flaky sea salt, added with the powdered sugar, can beautifully enhance the caramel notes and provide a delightful contrast. It’s a wonderful little secret ingredient for elevating sweet treats!)

Prepping Your Workspace: The Foundation for Success

Before we even think about melting chocolate or shaking cereal, taking a few moments to prepare your kitchen space will make the entire “Caramel Apple Puppy Chow” process smoother, more enjoyable, and ultimately more successful. Trust me on this one; a well-organized cook is a happy cook!

First things first, let’s gather all our ingredients. I like to lay everything out on the counter, almost like a little ingredient parade. This practice, known as “mise en place,” ensures you don’t miss anything crucial halfway through a step, like realizing you’re out of vanilla extract just when you need it most. Measure out your chocolate chips, peanut butter, butter, caramel bits, and spices into separate small bowls or ramekins. Have your vanilla extract bottle uncapped and ready. This seemingly small step significantly reduces stress during the cooking process, allowing you to focus on the textures and temperatures.

Next, we need to prepare our large mixing vessel for the cereal. I highly recommend using the absolute largest bowl you own for this step. Seriously, go big! We’re talking about 9 cups of crispy rice cereal, and it needs ample space to be gently tossed without crushing it. A large metal mixing bowl is ideal because it’s sturdy and easy to clean. If you don’t have a giant mixing bowl, a very large stockpot will also work in a pinch. The key here is room – lots of room – for gentle stirring and even coating. We want to coat every piece of cereal lovingly, not pulverize it.

Now, let’s talk about the powdered sugar coating. For this, I exclusively use two large, sturdy, sealable bags – gallon-sized freezer bags work wonderfully. While some recipes suggest a large lidded container, I find the bags offer superior control for shaking and ensure a more even coating with less mess. You’ll want two bags because we’ll be coating the cereal in batches, which prevents overcrowding and allows each piece to get thoroughly dusted. Make sure these bags are ready and waiting near your workspace.

Finally, we need a place for our finished Caramel Apple Puppy Chow to cool and set. Line a large baking sheet (or two, if you have them and space allows) with parchment paper or wax paper. This prevents sticking and makes cleanup an absolute breeze. Having this prepared ahead of time means you can transfer your delicious creation immediately once it’s coated, allowing it to cool without clumping together. A little forethought now saves a lot of scraping later! Ensure you have enough counter space or refrigerator space for these baking sheets to sit undisturbed for a bit. This preparation isn’t just about efficiency; it’s about setting the stage for a delightful culinary experience and ensuring your “Caramel Apple Puppy Chow” turns out perfectly textured and absolutely delicious.

Creating the Caramel Apple Chocolate Base

This is where the magic truly begins – we’re crafting the rich, aromatic coating that will transform our humble cereal into an irresistible “Caramel Apple Puppy Chow” treat. The key to a silky-smooth coating is gentle heat and constant attention. We want to melt our ingredients together until they are perfectly homogenous and glossy, without scorching or seizing any of the components.

Step 1: The Melt. In a large, microwave-safe bowl, combine your 1 cup of semi-sweet chocolate chips, ½ cup of creamy peanut butter, ¼ cup of unsalted butter, and 1 cup of caramel bits. Using a microwave is the quickest and easiest method for this step, but it requires vigilance. I recommend heating in short bursts, typically 30-second intervals, stirring thoroughly after each one. It’s important to stir even if the mixture doesn’t look fully melted, as residual heat will continue to melt the solids. This gentle approach prevents the chocolate from overheating and becoming grainy or seizing, which would be a disaster for our coating. Continue heating and stirring until the mixture is about 75% melted and you see only a few small lumps remaining.

Step 2: The Stirring Session. Once you reach that 75% melted stage, remove the bowl from the microwave. The remaining heat in the bowl and from the already melted ingredients will do the rest of the work. Continue stirring vigorously and patiently until the mixture is completely smooth, glossy, and uniform. There should be no visible lumps of chocolate, peanut butter, or caramel. This thorough stirring also helps to emulsify the ingredients, ensuring a stable and even coating consistency. You’ll notice the color deepen and the texture become wonderfully inviting. This careful stirring step is crucial; don’t rush it!

Step 3: Infusing the Caramel Apple Flavor. Now for the aromatic heart of our “Caramel Apple Puppy Chow.” Stir in your 2 teaspoons of pure vanilla extract, 1 teaspoon of apple pie spice blend, and ½ teaspoon of ground cinnamon. Fold these beautiful flavors into the warm chocolate-caramel mixture until they are thoroughly incorporated. You’ll immediately notice the intoxicating aroma filling your kitchen – that’s the smell of autumn and deliciousness! The warmth of the chocolate base will help the spices bloom, releasing their full fragrant potential. Ensure everything is fully mixed so that every piece of cereal gets a burst of that wonderful caramel apple goodness.

Why this method? Melting everything together ensures that the flavors are perfectly melded and that the consistency of the coating is ideal for adhering to the cereal. Overheating chocolate can cause it to “seize,” turning it stiff and crumbly, which would make coating impossible. By using short microwave bursts and relying on residual heat, we maintain control and achieve that perfectly smooth, pourable consistency we’re aiming for. This foundational step is paramount to achieving the delightful texture and flavor profile of our ultimate “Caramel Apple Puppy Chow.”

Coating the Cereal: The Initial Transformation

This phase is all about gently transforming plain crispy rice cereal into a sticky, flavor-packed base for our “Caramel Apple Puppy Chow.” It requires a delicate touch and patience to ensure every piece is coated without being crushed. Remember, we want crunchy, not pulverized!

Step 1: Introducing the Cereal. Carefully pour your 9 cups of crispy rice cereal into the largest mixing bowl you prepared earlier. The sheer volume might seem daunting, but having a large bowl is your friend here. We want plenty of room for the cereal to move around without being compressed at the bottom. This initial placement is important for minimizing breakage. Think of it as gently nestling the cereal, ready for its flavorful bath.

Step 2: The Pour. Now, take your warm, silky-smooth caramel apple chocolate mixture and drizzle it evenly over the cereal. Don’t just dump it all in one spot; try to spread the drizzle as much as possible over the surface of the cereal. This helps with more even distribution from the get-go, reducing the amount of intense mixing required later. You’ll see the rich brown coating start to cling to the pale cereal, a preview of the deliciousness to come.

Step 3: The Gentle Toss. This is perhaps the most crucial step for maintaining the integrity of your “Caramel Apple Puppy Chow.” Using a large rubber spatula or two wooden spoons, begin to gently fold and toss the cereal. The motion should be more like lifting and turning rather than stirring aggressively. Think of it as gently turning soil in a garden or folding whipped cream into a batter. The goal is to encourage the chocolate-caramel mixture to coat every piece of cereal, from top to bottom, without crushing the delicate cereal squares.

Continue this gentle folding and tossing for several minutes. You might think it’s taking a while, but patience here pays off. Keep going until almost every single piece of cereal appears to be coated. There might be a few stubborn uncoated pieces, but the majority should be covered in that delicious, sticky, aromatic mixture. I usually aim for about 95% coverage. As you mix, you’ll feel the mixture thicken slightly as it cools and adheres to the cereal. This is exactly what we want. Ensure you scrape the bottom and sides of the bowl to get any pooled chocolate mixture and bring it up to coat the cereal.

Why the gentle approach? Crispy rice cereal is delicate. Over-mixing or aggressive stirring will break down the cereal squares, turning your “Caramel Apple Puppy Chow” into a crumbly mess rather than distinct, coated pieces. The large surface area of the cereal makes it a perfect canvas for the coating, but it also makes it vulnerable to breakage. By being gentle, we preserve the satisfying crunch that is so characteristic of a great puppy chow. This step ensures that each bite delivers a delightful snap, perfectly complementing the rich caramel apple flavor.

A Quick Tip: If you find the mixture cooling too quickly and becoming difficult to work with, you can pop the bowl back into the microwave for a very short burst (10-15 seconds) to slightly re-warm and loosen the coating. However, this is rarely necessary if you work diligently and have your workspace prepped.

The Powdered Sugar Magic: Achieving the Iconic Puppy Chow Look

Now for the iconic “puppy chow” finish! This step is all about coating our sticky, caramel apple cereal with a generous blanket of powdered sugar, giving it that characteristic snowy appearance and adding a delightful sweetness. This is where the magic happens, and it’s surprisingly fun!

Step 1: Prepare the Powdered Sugar Station. Earlier, I mentioned having two large, sturdy, sealable bags ready. Now is their time to shine! Pour about 2 cups of your powdered sugar into each of the two gallon-sized freezer bags. If you’re opting for the optional flaky sea salt, add ¼ teaspoon to each bag with the powdered sugar. This ensures even distribution of the salt, enhancing those caramel notes beautifully. Make sure the sugar is spread out a bit at the bottom of the bags.

Step 2: Batch Coating. Divide your coated cereal evenly between the two bags. I find that working in two batches prevents overcrowding and allows for a much more thorough and even coating. If you try to do it all in one bag, the cereal tends to clump, and some pieces will inevitably miss out on their snowy blanket. Roughly half of the caramel apple coated cereal goes into one bag, and the other half into the second bag.

Step 3: The Shake-Shake-Shake! Seal the bags securely, ensuring there’s enough air inside to allow the cereal to tumble freely. Now, comes the fun part! Gently but firmly shake each bag. My preferred technique is an up-and-down, side-to-side motion, rotating the bag as you shake. The goal is to get the powdered sugar to adhere to every sticky surface of the cereal. Shake for a good 1-2 minutes per bag. You’ll see the cereal transform, going from a dark, glossy brown to a beautiful, snowy white.

Why shaking? Shaking, rather than stirring, is crucial here. Stirring would simply clump the powdered sugar onto the wet parts of the cereal and leave many pieces bare. Shaking creates a dynamic environment where the cereal pieces tumble and collide, picking up the fine sugar particles evenly. The air inside the bag acts as a cushion, preventing excessive breakage of the cereal.

Step 4: Assess and Adjust. After your initial shaking, open one of the bags and take a peek. Are the cereal pieces fully coated? Do they have that lovely “puppy chow” look? If you see patches of brown peeking through, or if you prefer an even thicker coating, feel free to add another ½ cup or so of powdered sugar to that bag, reseal, and shake again for another 30 seconds to a minute. Repeat this with the second bag. It’s always better to add sugar gradually than to add too much at once. Remember, you want a generous, almost fluffy coating.

Step 5: The Final Transfer. Once both batches of your “Caramel Apple Puppy Chow” are perfectly coated and looking delightfully snowy, carefully pour them out onto the prepared parchment-lined baking sheets. Spread the puppy chow into a single layer. This allows the pieces to cool and set individually, preventing them from clumping together as the chocolate-caramel mixture fully hardens. This step ensures that each piece is a distinct, bite-sized treat.

At this point, your kitchen will smell absolutely incredible, a true testament to the “Caramel Apple Puppy Chow” magic you’ve created!

The Finishing Touches and Storage

We’re in the home stretch! Your “Caramel Apple Puppy Chow” is looking magnificent, smelling divine, and almost ready to be devoured. This final phase ensures it sets perfectly and stays fresh for as long as it lasts (which, in my experience, isn’t very long!).

Step 1: The Cooling Period. Once your beautifully coated Caramel Apple Puppy Chow is spread out on the parchment-lined baking sheets, it needs some time to cool and set completely. The chocolate-caramel mixture needs to firm up, which will lock in the powdered sugar and prevent it from feeling sticky. I usually let it sit at room temperature for at least 30-60 minutes. If you’re eager to speed things up (and who isn’t when something this delicious is waiting?), you can place the baking sheets in the refrigerator for about 15-20 minutes. Just make sure the puppy chow is in a single layer to ensure even cooling.

Why cool? Cooling is essential for achieving the perfect “Caramel Apple Puppy Chow” texture. If you try to store or eat it while the chocolate-caramel mixture is still warm, it will be soft, sticky, and the pieces will clump together. Cooling allows the fats in the butter, chocolate, and peanut butter to solidify, creating that satisfying, non-sticky, crumbly coating that is characteristic of good puppy chow.

Step 2: Breaking it Apart (if needed). After cooling, your Caramel Apple Puppy Chow should be nicely set. Occasionally, a few pieces might have stuck together. Don’t worry, this is normal! Gently break apart any large clusters with your hands. You want distinct, individual pieces for easy snacking and serving. The goal is perfectly bite-sized morsels of “Caramel Apple Puppy Chow” goodness.

Step 3: Optional Enhancements. If you’re feeling extra fancy and want to elevate your “Caramel Apple Puppy Chow” even further, consider these optional garnishes:

  • A dusting of extra cinnamon: Just before serving, a very light dusting of ground cinnamon over the top can add an extra aromatic flourish and visual appeal.
  • A drizzle of caramel sauce: For an intensely caramel experience, gently warm some store-bought or homemade caramel sauce and drizzle it artfully over the cooled puppy chow. Be mindful not to oversaturate it, or it will become sticky again.
  • Chopped dried apples: Small pieces of finely chopped dried apple can be sprinkled in with the powdered sugar step or added as a garnish for extra apple flavor and texture.
  • Toasted pecans or walnuts: A sprinkle of lightly toasted, chopped nuts can add a lovely crunch and a complementary nutty flavor.

These additions are purely for personal preference but can make your “Caramel Apple Puppy Chow” truly spectacular for special occasions.

Step 4: Storing Your Masterpiece. The best way to store your “Caramel Apple Puppy Chow” is in an airtight container at room temperature. This will keep it fresh and delicious for up to 5-7 days. While it can be stored in the refrigerator, I find that sometimes the cold can make the chocolate coating a bit too firm, and it might develop some condensation when brought back to room temperature. However, if your kitchen is particularly warm, the fridge might be a better option to prevent stickiness.

Can you freeze it? Absolutely! “Caramel Apple Puppy Chow” freezes beautifully. Place it in a freezer-safe airtight container or heavy-duty freezer bags. It will stay fresh in the freezer for up to 2-3 months. When you’re ready to enjoy it, simply take it out and let it come to room temperature for about 15-20 minutes. It’s a fantastic make-ahead treat!

There you have it! Your homemade “Caramel Apple Puppy Chow” is now complete, perfectly flavored, and ready to be enjoyed. Whether you’re making it for a party, a cozy night in, or just to satisfy a craving, this recipe delivers on all fronts: flavor, texture, and pure autumnal delight. Happy snacking!

Crave-Worthy Caramel Apple Puppy Chow - Ultimate Snack

Conclusion:

Well, my friends, we’ve reached the sweet end of our journey through this incredible recipe, and I hope you’re as excited as I am about what we’ve discovered. If there’s one snack that truly encapsulates the magic of the autumn season, while being utterly irresistible year-round, it’s this delightful creation. I genuinely believe that once you whip up a batch of this Caramel Apple Puppy Chow, you’ll understand exactly why I call it a must-try masterpiece.

Why This Snack is an Absolute Must-Try:

What makes it so utterly compelling? It’s the harmonious dance of textures and flavors that sets it apart. Imagine the satisfying crunch of your favorite crisp cereal, perfectly coated in a velvety smooth blend of rich caramel and sweet, tangy apple. This isn’t just another snack; it’s an experience. The moment you take that first bite, you’re hit with a comforting sweetness, followed by a bright, refreshing apple note, all balanced by a subtle richness that just begs for another handful.

It’s comforting, it’s exciting, and it’s surprisingly easy to achieve, making it perfect for anyone, from seasoned bakers to kitchen novices.

You don’t need fancy equipment or advanced techniques – just a few simple ingredients and a desire for something truly delicious. This treat manages to hit all the right notes: it’s sweet, it’s a little bit tangy, it’s wonderfully crunchy, and it has that addictive quality that makes it disappear faster than you can say “another serving, please!” It’s also a fantastic way to bring the essence of classic fall desserts, like candied apples, into a fun, shareable, and much less messy format, making it an instant crowd-pleaser for any gathering or quiet evening in. The unique combination of fruity brightness with the deep, buttery notes of caramel truly elevates it beyond typical snack mixes.

Creative Serving Suggestions and Delicious Variations:

Now,

let’s talk about how you can enjoy this sensational treat, because the possibilities are as endless as your cravings!

Of course, it’s absolutely divine scooped straight from a big bowl during a casual get-together or a cozy movie night. But don’t stop there! I love packaging small portions in cute cellophane bags tied with a ribbon for thoughtful homemade gifts – they make wonderful hostess presents or festive party favors that everyone will adore. For a stunning dessert spread, consider arranging it in clear glass jars or rustic bowls alongside other autumnal delights like spiced nuts or mini muffins. You could even use it as a creative topping for vanilla ice cream, adding a delightful crunch and burst of seasonal flavor, or sprinkle it over a plain yogurt for an unexpected and indulgent breakfast twist. Think outside the box and let your culinary imagination soar!

Feeling adventurous and

want to put your own spin on it? I highly encourage it!

This recipe is incredibly adaptable. For an extra layer of flavor and texture, try adding a handful of chopped pecans or walnuts to the mix before coating; the nuttiness pairs beautifully with the caramel and apple, creating a more complex profile. If you’re a fan of the salted caramel trend (and who isn’t?), a tiny pinch of sea salt sprinkled over the Caramel Apple Puppy Chow before the powdered sugar dusting will elevate the flavors to a gourmet level, balancing the sweetness perfectly. You could also experiment with different types of dried fruit – perhaps dried cranberries for a tart counterpoint, or even mini dried pears for a subtly different fruity note. For a chocolate lover’s twist, drizzle a bit of melted white chocolate or dark chocolate over the finished puppy chow before it sets completely; the visual appeal and extra flavor dimension are fantastic. Another fun idea is to use different cereal bases, if you have a favorite, though the classic crisp squares work wonderfully to hold all that delicious coating. Don’t forget about presentation either; a simple bowl is great, but individual glass parfait dishes or even small paper cones can make it feel extra special, especially for gatherings where you want to impress your guests without a lot of fuss.

Your Turn to Create and Share!

So,

what are you waiting for? I’ve shared my love for this incredible snack, and now it’s your turn to experience the joy of making it yourself.

Trust me, the aroma alone as you mix everything together is enough to get your taste buds tingling! I am confident that once you take that first bite,

you’ll be completely hooked.

This isn’t just a recipe;

it’s an invitation to create, to share, and to savor truly delightful moments.

Please, don’t keep this deliciousness to yourself! I absolutely can’t wait to hear about your experience. Did you make any fun variations? How did your friends and family react to this autumnal delight? Head to the comments section or share your creations on social media because I genuinely love seeing your kitchen adventures come to life.

Go forth, get stirring, and prepare to fall in love with your new favorite seasonal treat!


Caramel Apple Puppy Chow

Caramel Apple Puppy Chow is a delightful, crunchy snack, perfect for cozy autumn vibes. This easy, no-bake treat captures the irresistible taste of crisp apples and rich, buttery caramel in every bite, offering a magical fusion of seasonal flavors.

Prep Time
15 Minutes
Cook Time
15 Minutes
Total Time
30 Minutes
Servings
12-16 servings

Ingredients


Instructions


Important Information

Nutrition Facts (Per Serving)

It is important to consider this information as approximate and not to use it as definitive health advice.

Allergy Information

Please check ingredients for potential allergens and consult a health professional if in doubt.

« Previous Post
Easy Mini Pumpkin Bread with Cinnamon Swirl Recipe
Next Post »
Delicious Baked Eggs Napoleon: Your New Easy Brunch Go-To

If you enjoyed this…

Cinnamon Donut Bread: The Ultimate Guide to Baking Deliciousness

Strawberry Dole Whip: The Ultimate Guide to Making It at Home

Heavenly New Orleans Beignets with Creamy Custard

Primary Sidebar

Browse by Diet

BreakfastDinnerLunchDessertAppetizer

Sweet Peach Yogurt Parfait Delight

One of my fondest memories is from a lazy summer afternoon spent at my grandmother’s house. The sun filtered through the kitchen window, casting a warm glow over the table where she would create her culinary magic. It was during one of those blissful moments that I first tasted her Peach Yogurt Parfait with Honey and Granola. The sweet aroma of ripe peaches mingling with creamy yogurt and the crunch of granola was nothing short of heavenly. It felt like summer captured in a bowl, and I still remember the joy of diving in with a spoon, each layer revealing a new burst of flavor.

When I think about that parfait, I can almost hear the gentle hum of the bees outside, reminding me of the floral notes that honey brings to every bite. The vibrant yellows and soft oranges of the peaches contrast beautifully with the creamy white yogurt and the golden crunch of granola. It’s a dish that not only looks delightful but also tastes like a celebration of fresh, wholesome ingredients.

What makes my version of this Peach Yogurt Parfait special is the careful balance of flavors and textures. I use ripe, juicy peaches, drizzled with locally sourced honey, and a homemade granola that’s bursting with nuts and seeds for an extra crunch. It’s a simple dish, but every layer is crafted with love and attention.

Let me show you exactly how to make this delightful parfait, so you can bring a bit of that summer magic into your kitchen!

Sweet Peach Yogurt Parfait Delight

Why You’ll Love This Recipe

  • Delightfully creamy texture from the Greek yogurt, paired with the juicy sweetness of fresh peaches.
  • Ready in under 20 minutes, making it a quick and satisfying breakfast or snack option.
  • Budget-friendly, using common ingredients that you may already have in your pantry.
  • Customizable with your favorite granola and nuts, allowing you to tailor each parfait to your taste.
  • Perfectly balanced flavors with the bright acidity of lemon juice and the sweetness of honey enhancing the peaches.

Ingredients

  • For the Parfait:
  • 2 cups plain Greek yogurt (or vanilla yogurt for a sweeter option)
  • 2 large ripe peaches, diced (about 2 cups)
  • 1 tablespoon fresh lemon juice (to prevent browning of peaches)
  • 2 tablespoons honey (plus more for drizzling)
  • 1 teaspoon vanilla extract (optional for extra flavor)
  • For the Granola:
  • 1 cup granola (store-bought or homemade; see notes for a simple granola recipe)
  • 1/4 cup sliced almonds (optional for added crunch)
  • 1/4 cup shredded coconut (optional for added flavor)

Let’s dive into some key ingredients that make this Peach Yogurt Parfait so delightful! First, the Greek yogurt is not only creamy but also packed with protein, making it a satisfying option for breakfast or a snack. If you’re looking for a sweeter option, you can easily substitute it with vanilla yogurt, though it may alter the overall flavor balance. Next, the ripe peaches are the star of the show; their natural sweetness shines through, so I recommend choosing peaches that yield slightly to pressure, indicating they’re perfectly ripe. If peaches aren’t in season, feel free to use nectarines or even frozen peaches—just thaw them before use. Finally, honey adds a lovely floral sweetness that ties everything together. If you prefer, maple syrup can serve as a delicious substitute.

Step-by-Step Instructions

  1. Start by preparing the peaches. Wash them thoroughly, then slice and dice them into bite-sized pieces. In a medium bowl, toss the diced peaches with 1 tablespoon of fresh lemon juice to prevent browning. Set aside for about 5 minutes while the lemon juice works its magic.
  2. In a separate bowl, combine the Greek yogurt, 2 tablespoons of honey, and 1 teaspoon of vanilla extract if using. Stir the mixture until smooth and thoroughly blended. This should take about a minute. Avoid overmixing to maintain the creaminess of the yogurt.
  3. Now it’s time to layer your parfait. Grab a clear glass or bowl to showcase your beautiful creation. Start with a generous spoonful of the yogurt mixture at the bottom—about 1/4 cup will do. Use a spoon to spread it evenly.
  4. Add a layer of the diced peaches over the yogurt, ensuring they cover the yogurt completely. You might want to use about half of what you have prepared—roughly 1 cup. This layer should be visually appealing, so arrange the peaches neatly.
  5. Sprinkle 1/4 cup of granola over the peaches. This adds a delightful crunch. Make sure to distribute it evenly to ensure every bite has that satisfying texture. Avoid packing it down too tightly, as you want it to maintain its crunch.
  6. Repeat the layers: spoon in another 1/4 cup of yogurt, followed by another cup of peaches, and another sprinkle of granola. You should have at least two layers, but feel free to add more depending on your glass size.
  7. Finish off your parfait with a drizzle of honey on top for added sweetness and a touch of elegance. If you’re using sliced almonds or shredded coconut, sprinkle them on top now. It adds a lovely visual contrast and extra flavor.
  8. Serve immediately or refrigerate for up to 30 minutes before serving to allow the flavors to meld together. However, I recommend enjoying it fresh to maintain the granola’s crunch.

Pro Tips for the Best Peach Yogurt Parfait With Honey And Granola

  • Make sure to choose ripe peaches for the best flavor and texture. A common mistake is using unripe fruit, which can lead to a less enjoyable parfait. Look for peaches that are fragrant and slightly soft to the touch.
  • Use a clear glass to assemble your parfait; this not only makes for a beautiful presentation but also allows you to see the colorful layers, which adds to the enjoyment of eating it.
  • For an even creamier texture, consider whipping the Greek yogurt with a hand mixer for a couple of minutes before layering. This small adjustment makes a huge difference in mouthfeel.
  • Be mindful of the granola-to-yogurt ratio. Too much granola can overwhelm the parfait, while too little can make it feel too creamy. Aim for about 1/4 cup of granola per layer for the perfect balance.
  • If you’re making this for a gathering, consider preparing the yogurt and peaches ahead of time and layering them just before serving. This ensures the granola stays crunchy!

Variations & Serving Ideas

There are so many ways to get creative with your Peach Yogurt Parfait! For a tropical twist, swap out the peaches for mangoes or pineapples and top with coconut flakes. If you prefer a berry flavor, mix in some blueberries or strawberries with the peaches for added color and taste. For a nutty version, incorporate chopped walnuts or pecans instead of almonds.

As for serving ideas, this parfait pairs beautifully with a side of scrambled eggs for a hearty breakfast or fresh fruit salad for a light lunch. You might also enjoy it alongside whole grain toast with almond butter for an energizing snack. The contrast of flavors and textures will elevate your meal experience!

Storage, Make-Ahead & Reheating

The Peach Yogurt Parfait is best enjoyed fresh, but you can prepare some components ahead of time. Store the layered parfait in an airtight container in the refrigerator for up to 24 hours. However, be cautious; the granola may lose its crunch if stored too long. You can freeze the yogurt and peach mixture for up to 2 months; just remember to thaw it in the refrigerator overnight before serving.

If you plan to enjoy this dish the next day, it can taste even better as the flavors meld together. Just remember to add the granola right before serving to keep its delightful crunch!

Frequently Asked Questions

Can I make Peach Yogurt Parfait With Honey And Granola ahead of time?

Yes — in fact, it tastes even better the next day as the flavors meld. However, I recommend waiting to add the granola until just before serving to maintain its crunch.

What can I substitute for Greek yogurt?

If you prefer a lighter option, you can substitute Greek yogurt with regular yogurt or a dairy-free alternative like coconut yogurt. Just remember that this may alter the creaminess and flavor profile slightly.

Can I use frozen peaches for this parfait?

Absolutely! Just make sure to thaw the frozen peaches before using them. They will still add great flavor, though the texture may be slightly softer than fresh peaches.

How do I make the parfait vegan?

To make a vegan version, substitute the Greek yogurt with a plant-based yogurt alternative, and replace honey with maple syrup or agave nectar. This keeps the parfait sweet while adhering to a vegan diet.

What other fruits can I use in this recipe?

You can mix and match fruits based on your preference. Try using strawberries, blueberries, raspberries, or even bananas. Just make sure to adjust the lemon juice as needed to prevent browning.

Sweet Peach Yogurt Parfait Delight

Final Thoughts

The Peach Yogurt Parfait with Honey and Granola is a delightful blend of creamy yogurt, sweet peaches, and crunchy granola that creates a satisfying and nourishing treat. Each layer bursts with flavor, making it a perfect choice for breakfast or a light dessert.

This is the kind of recipe I come back to again and again, especially when I want something refreshing and wholesome to start my day. The harmony of sweet and tart flavors, combined with the delightful crunch, never fails to lift my spirits!

I encourage you to give this parfait a try and indulge in its comforting goodness. Feel free to share your results or even add your own twist—perhaps a sprinkle of cinnamon or a handful of nuts. Enjoy creating your perfect parfait!

Print
clock clock iconcutlery cutlery iconflag flag iconfolder folder iconinstagram instagram iconpinterest pinterest iconfacebook facebook iconprint print iconsquares squares iconheart heart iconheart solid heart solid icon

Peach Yogurt Parfait


  • Author: Lily author
  • Total Time: 15 minutes
  • Yield: 4 servings 1x
Pin Recipe
Print Recipe

Description

This Peach Yogurt Parfait combines creamy Greek yogurt, juicy peaches, and crunchy granola for a delightful treat. It’s a perfect breakfast or snack that captures the essence of summer in every bite.


Ingredients

Scale
  • For the Parfait:
  • 2 cups plain Greek yogurt (or vanilla yogurt for a sweeter option)
  • 2 large ripe peaches, diced (about 2 cups)
  • 1 tablespoon fresh lemon juice (to prevent browning of peaches)
  • 2 tablespoons honey (plus more for drizzling)
  • 1 teaspoon vanilla extract (optional for extra flavor)
  • For the Granola:
  • 1 cup granola (store-bought or homemade; see notes for a simple granola recipe)
  • 1/4 cup sliced almonds (optional for added crunch)
  • 1/4 cup shredded coconut (optional for added flavor)

Instructions

  1. Start by preparing the peaches. Wash them thoroughly, then slice and dice them into bite-sized pieces. In a medium bowl, toss the diced peaches with 1 tablespoon of fresh lemon juice to prevent browning. Set aside for about 5 minutes while the lemon juice works its magic.
  2. In a separate bowl, combine the Greek yogurt, 2 tablespoons of honey, and 1 teaspoon of vanilla extract if using. Stir the mixture until smooth and thoroughly blended. This should take about a minute. Avoid overmixing to maintain the creaminess of the yogurt.
  3. Now it’s time to layer your parfait. Grab a clear glass or bowl to showcase your beautiful creation. Start with a generous spoonful of the yogurt mixture at the bottom—about 1/4 cup will do. Use a spoon to spread it evenly.
  4. Add a layer of the diced peaches over the yogurt, ensuring they cover the yogurt completely. You might want to use about half of what you have prepared—roughly 1 cup. This layer should be visually appealing, so arrange the peaches neatly.
  5. Sprinkle 1/4 cup of granola over the peaches. This adds a delightful crunch. Make sure to distribute it evenly to ensure every bite has that satisfying texture. Avoid packing it down too tightly, as you want it to maintain its crunch.
  6. Repeat the layers: spoon in another 1/4 cup of yogurt, followed by another cup of peaches, and another sprinkle of granola. You should have at least two layers, but feel free to add more depending on your glass size.
  7. Finish off your parfait with a drizzle of honey on top for added sweetness and a touch of elegance. If you’re using sliced almonds or shredded coconut, sprinkle them on top now. It adds a lovely visual contrast and extra flavor.
  8. Serve immediately or refrigerate for up to 30 minutes before serving to allow the flavors to meld together. However, I recommend enjoying it fresh to maintain the granola’s crunch.
  • Prep Time: 15 mins
  • Cook Time: 0 mins
  • Category: Breakfast
  • Method: No-cook
  • Cuisine: American

Nutrition

  • Serving Size: 1 parfait
  • Calories: 250
  • Sugar: 20 g
  • Sodium: 50 mg
  • Fat: 5 g
  • Saturated Fat: 2 g
  • Unsaturated Fat: 3 g
  • Trans Fat: 0 g
  • Carbohydrates: 40 g
  • Fiber: 3 g
  • Protein: 10 g
  • Cholesterol: 10 mg

Keywords: Choose ripe peaches for the best flavor and texture. Use a clear glass for a beautiful presentation. For creaminess, consider whipping the yogurt before layering. Be mindful of the granola-to-yogurt ratio. Prepare yogurt and peaches ahead of time for gatherings, layering just before serving.

Did you make this recipe?

Share a photo and tag us — we can't wait to see what you've made!

Sun-Kissed Frozen Orange Cream Slush

As a child, summer days felt like they lasted forever. I remember the sticky heat wrapping around me as I played outside, my laughter mingling with the sounds of the neighborhood. But nothing could cool me down quite like the moment I’d spot my grandmother, laboring over her blender, whipping up her famous Frozen Orange Creamsicle Slush. That vibrant orange treat, with its frosty texture and sweet citrus aroma, was like a burst of sunshine in a cup. Just one sip, and I could feel the coolness wash over me, sparking pure joy.

This Frozen Orange Creamsicle Slush has a way of making you feel like a kid again. Its creamy, dreamy consistency is a delightful balance of bright orange and soft vanilla, inviting you to dive right in. The refreshing tang of orange dances on your tongue, while the smooth creaminess envelops you in a comforting embrace. It’s a nostalgic treat that’s perfect for hot summer afternoons or anytime you need a little pick-me-up.

What makes my version of this slush stand out is the addition of a hint of vanilla bean, which elevates the flavor and adds an extra layer of richness. Plus, it’s super easy to whip up with just a few simple ingredients that you probably already have on hand! So, if you’re ready to relive those sun-soaked memories, let me show you exactly how to make it.

Sun-Kissed Frozen Orange Cream Slush

Why You’ll Love This Recipe

  • Each slush is a perfect blend of creamy vanilla and zesty orange, creating a nostalgic flavor reminiscent of summer days.
  • This refreshing treat is ready in under 15 minutes, making it an ideal quick dessert for unexpected guests or hot afternoons.
  • With just 8 simple ingredients, it’s budget-friendly, ensuring you don’t have to break the bank to enjoy a delicious slush.
  • The slush has a perfectly smooth texture, thanks to the combination of ice and ice cream, providing a delightful contrast to the bright citrus flavors.
  • It’s highly customizable; you can easily adjust the sweetness and add fresh herbs for a unique twist that suits your taste.

Ingredients

  • 2 cups orange juice (freshly squeezed or store-bought)
  • 1 cup vanilla ice cream
  • 1 cup crushed ice
  • 1/2 cup milk (whole or 2%)
  • 1/4 cup granulated sugar (adjust based on sweetness preference)
  • 1 teaspoon vanilla extract
  • Zest of 1 orange (for added flavor)
  • Fresh orange slices and mint leaves (for garnish)

The star of this Frozen Orange Creamsicle Slush is the orange juice, which provides the vibrant, citrusy base. Freshly squeezed juice will yield the brightest flavor, but store-bought options can be just as convenient. If you’re opting for store-bought, choose 100% pure juice with no added sugars for the best results. Another essential ingredient is the vanilla ice cream; it adds creaminess and sweetness. You can substitute it with dairy-free ice cream if you’re looking for a vegan option. Whole or 2% milk complements the ice cream, creating a smooth blend. If you want a lower-calorie version, almond or oat milk can be good alternatives.

Lastly, the granulated sugar can be adjusted based on your sweetness preference. If you prefer a more natural sweetener, consider using honey or agave syrup. The orange zest enhances the flavor profile, providing an aromatic pop that brings the whole slush together. Don’t skip it! It adds an extra layer of brightness that makes this slush truly special.

Step-by-Step Instructions

  1. Start by preparing your ingredients. Gather 2 cups of orange juice, 1 cup of vanilla ice cream, and 1 cup of crushed ice. Make sure the ice is finely crushed, as larger chunks can make blending difficult.
  2. In a blender, combine the orange juice, vanilla ice cream, crushed ice, and 1/2 cup of milk. Add 1/4 cup of granulated sugar and 1 teaspoon of vanilla extract. If you like a sweeter slush, consider adding a bit more sugar at this stage.
  3. Add the zest of 1 orange to the blender. This step is crucial for enhancing the citrus flavor of your slush. Make sure not to include the bitter white pith—only the flavorful zest.
  4. Blend the mixture on medium-high speed for about 30-45 seconds. Stop once the ingredients are fully combined and the slush has a smooth, even consistency. If you notice large chunks of ice, blend for an additional 10-15 seconds. Avoid over-blending, as this can make the slush too liquidy.
  5. Once blended, taste the slush. If it needs more sweetness, add a little more sugar and blend for a few more seconds. If it’s too thick, you can add a splash of milk to reach your desired consistency.
  6. Pour the slush into glasses. This recipe typically serves 4, but you can easily double it for larger gatherings. Use a spoon to help guide the slush into the glasses if needed.
  7. Garnish each serving with fresh orange slices and mint leaves. The mint not only adds a pop of color but also a refreshing aroma that complements the citrus flavors beautifully.
  8. Serve immediately and enjoy! If you’ve made extra, you can refrigerate it for a short time, but it’s best enjoyed fresh.

Pro Tips for the Best Frozen Orange Creamsicle Slush

  • Don’t skip the orange zest! It’s a game-changer for flavor. Always zest before juicing to make it easier.
  • Use a high-powered blender for the best texture. A standard blender may struggle with ice, leading to uneven consistency. If you have a food processor, that can work too, but ensure the ice is finely crushed.
  • Adjust the ice-to-liquid ratio carefully. If your slush is too thick, it won’t blend well. Start with less ice and add more until you reach your preferred texture.
  • Be cautious with the sugar! Always start with the lower amount, as you can easily add more, but it’s hard to fix an overly sweet slush.
  • For a fun twist, consider adding a splash of coconut milk or a handful of fresh fruit like strawberries or pineapple. This not only enhances the flavor but also adds a beautiful color contrast.

Variations & Serving Ideas

There are countless ways to put a spin on your Frozen Orange Creamsicle Slush. Consider making a tropical version by adding in some pineapple juice or coconut milk for a delightful tropical twist. If you’re feeling adventurous, try incorporating a handful of frozen mango or peach slices for added sweetness. For a lighter version, swap out the vanilla ice cream for Greek yogurt for a creamy yet tangy alternative.

As for serving ideas, this refreshing slush pairs wonderfully with light summer dishes like grilled chicken skewers, fish tacos, or a simple salad topped with citrus vinaigrette. The bright, zesty flavors of the slush complement these dishes perfectly, making them an ideal pairing for a sunny day.

Storage, Make-Ahead & Reheating

This Frozen Orange Creamsicle Slush is best enjoyed fresh, but if you have leftovers, you can store them in an airtight container in the fridge for up to 2 days. Just keep in mind that the slush may lose some of its texture over time as the ice melts. It doesn’t freeze well, as the ice will turn into a solid block. If you must freeze it, blend again after thawing to restore the slushy consistency. This treat is best the day you make it, as the flavors meld together beautifully overnight, enhancing its deliciousness.

Frequently Asked Questions

Can I make Frozen Orange Creamsicle Slush ahead of time?

Yes — in fact, it tastes even better the next day as the flavors meld. However, it’s best to enjoy it fresh, as the texture can change if stored for too long. If you need to prepare it ahead, keep it in the fridge and re-blend before serving.

What kind of orange juice should I use?

For the best flavor, use freshly squeezed orange juice. However, if you’re short on time, opt for 100% pure store-bought juice without added sugars. This will ensure that your slush remains flavorful and refreshing.

Can I substitute the vanilla ice cream?

Absolutely! If you’re looking for a dairy-free option, coconut milk ice cream or a non-dairy vanilla ice cream can work wonderfully. They will still provide the creamy texture and sweetness you desire.

How can I adjust the sweetness of my slush?

You can easily adjust the sweetness by modifying the amount of sugar added. Start with 1/4 cup and taste the mixture before blending. If you prefer it sweeter, add more sugar gradually until it reaches your desired level.

What should I do if my slush is too thick?

If your slush is too thick, simply add a splash of milk or orange juice and blend again. This will help achieve a more drinkable consistency while maintaining the slushy texture. Adjust gradually to reach your preferred thickness.

Sun-Kissed Frozen Orange Cream Slush

Final Thoughts

The Frozen Orange Creamsicle Slush is a delightful blend of refreshing citrus and creamy goodness, making it a perfect treat for warm days or any time you crave a taste of nostalgia. The way the bright orange flavor dances with the creamy texture truly elevates this slush, transforming it into a satisfying escape from the everyday.

This is the kind of recipe I come back to again and again, especially when I’m looking to cool down or impress guests at a summer gathering. It’s simple to make and always brings smiles all around! I encourage you to try this recipe for yourself—don’t hesitate to share your results or even put your own spin on it. Happy slushing!

Print
clock clock iconcutlery cutlery iconflag flag iconfolder folder iconinstagram instagram iconpinterest pinterest iconfacebook facebook iconprint print iconsquares squares iconheart heart iconheart solid heart solid icon

Frozen Orange Creamsicle Slush


  • Author: Lily author
  • Total Time: 15 minutes
  • Yield: 4 servings 1x
Pin Recipe
Print Recipe

Description

This Frozen Orange Creamsicle Slush is a refreshing treat that combines creamy vanilla and zesty orange flavors. Perfect for hot summer days, it brings back nostalgic memories with every sip.


Ingredients

Scale
  • 2 cups orange juice (freshly squeezed or store-bought)
  • 1 cup vanilla ice cream
  • 1 cup crushed ice
  • 1/2 cup milk (whole or 2%)
  • 1/4 cup granulated sugar (adjust based on sweetness preference)
  • 1 teaspoon vanilla extract
  • Zest of 1 orange (for added flavor)
  • Fresh orange slices and mint leaves (for garnish)

Instructions

  1. Start by preparing your ingredients. Gather 2 cups of orange juice, 1 cup of vanilla ice cream, and 1 cup of crushed ice. Make sure the ice is finely crushed, as larger chunks can make blending difficult.
  2. In a blender, combine the orange juice, vanilla ice cream, crushed ice, and 1/2 cup of milk. Add 1/4 cup of granulated sugar and 1 teaspoon of vanilla extract. If you like a sweeter slush, consider adding a bit more sugar at this stage.
  3. Add the zest of 1 orange to the blender. This step is crucial for enhancing the citrus flavor of your slush. Make sure not to include the bitter white pith—only the flavorful zest.
  4. Blend the mixture on medium-high speed for about 30-45 seconds. Stop once the ingredients are fully combined and the slush has a smooth, even consistency. If you notice large chunks of ice, blend for an additional 10-15 seconds. Avoid over-blending, as this can make the slush too liquidy.
  5. Once blended, taste the slush. If it needs more sweetness, add a little more sugar and blend for a few more seconds. If it’s too thick, you can add a splash of milk to reach your desired consistency.
  6. Pour the slush into glasses. This recipe typically serves 4, but you can easily double it for larger gatherings. Use a spoon to help guide the slush into the glasses if needed.
  7. Garnish each serving with fresh orange slices and mint leaves. The mint not only adds a pop of color but also a refreshing aroma that complements the citrus flavors beautifully.
  8. Serve immediately and enjoy! If you’ve made extra, you can refrigerate it for a short time, but it's best enjoyed fresh.
  • Prep Time: 15 min
  • Cook Time: 0 min
  • Category: Dessert
  • Method: Blending
  • Cuisine: American

Nutrition

  • Serving Size: 1 serving
  • Calories: 200
  • Sugar: 30 g
  • Sodium: 50 mg
  • Fat: 5 g
  • Saturated Fat: 3 g
  • Unsaturated Fat: 2 g
  • Trans Fat: 0 g
  • Carbohydrates: 40 g
  • Fiber: 1 g
  • Protein: 2 g
  • Cholesterol: 20 mg

Keywords: Don't skip the orange zest! It's a game-changer for flavor. Always zest before juicing to make it easier.

Did you make this recipe?

Share a photo and tag us — we can't wait to see what you've made!

Zesty Lemon Poppy Seed Delight

One rainy afternoon, I found myself in my grandmother’s cozy kitchen, the kind that always smelled like warmth and love. She was whipping up her famous Lemon Poppy Seed Loaf, a recipe that had been passed down through generations. As the batter came together, the zesty aroma of fresh lemons filled the air, mingling perfectly with the nutty fragrance of poppy seeds. I can still picture her, apron-clad, as she expertly drizzled a vibrant citrus icing over the loaf, creating a glossy, sun-kissed finish that beckoned us to dive in. It was a moment that sparked my own passion for baking, and this recipe has become a cherished staple in my home ever since.

When you take a bite of this Lemon Poppy Seed Loaf, it’s like a burst of sunshine on your palate. The loaf is beautifully golden, with a tender crumb that melts in your mouth. Each slice is speckled with tiny poppy seeds, adding a delightful crunch that contrasts beautifully with the tangy sweetness of the lemon. And that citrus icing? It’s the finishing touch that elevates this loaf from ordinary to extraordinary, with its bright, zesty flavor dancing on your taste buds.

This recipe stands out because it embraces simplicity while delivering on flavor. I’ve added a hint of vanilla to the batter, enhancing the overall taste and making it even more indulgent. Trust me, once you make this Lemon Poppy Seed Loaf With Citrus Icing, it’ll become a go-to in your baking repertoire.

So, let me show you exactly how to make it!

Zesty Lemon Poppy Seed Delight

Why You’ll Love This Recipe

  • Moist and tender crumb that melts in your mouth, thanks to the perfect balance of butter and buttermilk.
  • Bright, zesty lemon flavor paired with crunchy poppy seeds, creating a delightful texture and taste experience.
  • Easy to whip up in just about an hour, perfect for last-minute gatherings or a cozy afternoon treat.
  • Budget-friendly with everyday ingredients, making it an accessible option for all home bakers.
  • The citrus icing adds a sweet tang that elevates the loaf, turning a simple recipe into a showstopper!

Ingredients

  • 1 ½ cups (190g) all-purpose flour
  • 1 teaspoon baking powder
  • ½ teaspoon baking soda
  • ½ teaspoon salt
  • 3 tablespoons poppy seeds
  • ½ cup (115g) unsalted butter, softened to room temperature
  • 1 cup (200g) granulated sugar
  • 2 large eggs
  • 1 teaspoon vanilla extract
  • 1 teaspoon lemon zest (from about 1 medium lemon)
  • ½ cup (120ml) buttermilk
  • 2 tablespoons fresh lemon juice

For the Citrus Icing:

  • 1 cup (120g) powdered sugar
  • 2 tablespoons fresh lemon juice
  • 1 tablespoon orange juice
  • 1 teaspoon lemon zest (for garnish, optional)

Let’s dive into the key ingredients that make this Lemon Poppy Seed Loaf so special. The all-purpose flour provides the structure and base for the loaf, while the baking powder and baking soda ensure it rises perfectly, giving the loaf a light texture. For a gluten-free variation, you could substitute the flour with a gluten-free all-purpose blend. Poppy seeds not only add a delightful crunch but also contribute to the unique flavor profile that pairs well with the citrus notes.

Unsalted butter is crucial for achieving the buttery richness that makes this loaf so moist. If you’re looking for a dairy-free option, coconut oil or a vegan butter can be used instead. The buttermilk is another essential component, providing acidity that activates the baking soda for a fluffy texture. If you don’t have buttermilk on hand, you can easily make a substitute by mixing ½ cup of milk with 1 tablespoon of vinegar or lemon juice and letting it sit for about 5 minutes.

Step-by-Step Instructions

  1. Preheat your oven to 350°F (175°C). Grease a 9×5-inch loaf pan or line it with parchment paper for easy removal later.
  2. In a medium mixing bowl, whisk together 1 ½ cups of all-purpose flour, 1 teaspoon of baking powder, ½ teaspoon of baking soda, ½ teaspoon of salt, and 3 tablespoons of poppy seeds. This helps to evenly distribute the baking agents and ensures a uniform rise.
  3. In a large mixing bowl, cream together ½ cup of softened unsalted butter and 1 cup of granulated sugar using an electric mixer on medium speed for about 3-4 minutes, until the mixture is light and fluffy. Make sure to scrape down the sides of the bowl occasionally.
  4. Add 2 large eggs, 1 teaspoon of vanilla extract, and 1 teaspoon of lemon zest to the creamed butter and sugar, mixing until fully combined. You want a smooth consistency, so ensure there are no lumps of butter.
  5. In a small bowl, combine ½ cup of buttermilk and 2 tablespoons of fresh lemon juice. Alternately add the dry ingredients and buttermilk mixture to the butter mixture, starting and ending with the dry ingredients. Mix just until combined; do not overmix, as this can lead to a dense loaf.
  6. Pour the batter into the prepared loaf pan. Smooth the top with a spatula, ensuring it’s even. Bake in the preheated oven for 50-60 minutes, or until a toothpick inserted in the center comes out clean. The edges should be lightly golden brown, and the center should feel just set.
  7. Once baked, remove the loaf from the oven and allow it to cool in the pan for about 10 minutes. Then, transfer it to a wire rack to cool completely. Resist the urge to slice too soon, as it will be crumbly if it’s still warm.
  8. While the loaf is cooling, prepare the citrus icing. In a medium bowl, whisk together 1 cup of powdered sugar, 2 tablespoons of fresh lemon juice, and 1 tablespoon of orange juice until smooth. If the icing is too thick, you can add a little more juice to reach your desired consistency.
  9. Once the loaf is completely cool, drizzle the citrus icing over the top. If you like, sprinkle with an additional teaspoon of lemon zest for an extra pop of flavor and color.

Pro Tips for the Best Lemon Poppy Seed Loaf With Citrus Icing

  • Be careful not to overmix your batter; this is a common mistake that can lead to a dense loaf. Mix just until the dry ingredients are incorporated for a light and fluffy texture.
  • Use room temperature ingredients, especially the butter and eggs. This helps to create a smoother batter and ensures even baking. Take your eggs out of the fridge about 30 minutes before you start.
  • For a more pronounced lemon flavor, consider adding a little lemon extract in addition to the zest and juice. Just a half teaspoon can elevate the citrus notes significantly.
  • When measuring your flour, spoon it into the measuring cup and level it off with a knife instead of scooping directly from the bag. This prevents packing and ensures you don’t end up with a dry loaf.
  • Invest in a good quality loaf pan; it makes a difference in heat distribution, which ensures even baking. If your pan is dark-coated, reduce the oven temperature by 25°F to prevent over-browning.

Variations & Serving Ideas

For a delightful twist, consider adding blueberries or raspberries to the batter for a fruity burst of flavor. You can also experiment with different citrus fruits—try lime or grapefruit zest and juice for a refreshing change. For a healthier option, substitute half of the all-purpose flour with whole wheat flour for added fiber without compromising too much on texture.

This Lemon Poppy Seed Loaf pairs beautifully with a light salad, such as a mixed greens salad with a vinaigrette, or a cup of tea for a cozy afternoon treat. It also complements a creamy cheese platter, as the acidity of the loaf balances rich cheeses perfectly. Lastly, a scoop of vanilla ice cream on the side creates a delightful contrast of temperatures and flavors!

Storage, Make-Ahead & Reheating

This Lemon Poppy Seed Loaf can be stored at room temperature for up to 3 days if wrapped tightly in plastic wrap. If you want to keep it longer, it freezes well for up to 3 months. To freeze, wrap the loaf tightly in plastic wrap and then in aluminum foil to prevent freezer burn.

When you’re ready to enjoy it again, simply thaw it in the fridge overnight. Reheat individual slices in the microwave for 15-20 seconds or in a toaster oven until warmed through. Interestingly, many people find that this loaf tastes even better the next day, as the flavors have time to meld!

Frequently Asked Questions

Can I make Lemon Poppy Seed Loaf With Citrus Icing ahead of time?

Yes — in fact, it tastes even better the next day! You can make the loaf a day in advance, allowing the flavors to develop. Just be sure to store it in an airtight container to maintain its moisture.

Can I substitute the poppy seeds?

Absolutely! If you don’t have poppy seeds on hand or prefer an alternative, you can use sesame seeds for a similar crunch or omit them entirely for a smooth loaf.

What can I use instead of buttermilk?

If you don’t have buttermilk, you can easily create a substitute by mixing ½ cup of milk (dairy or plant-based) with 1 tablespoon of vinegar or lemon juice. Let it sit for 5 minutes before using in the recipe.

How can I make this recipe gluten-free?

To make a gluten-free version of this Lemon Poppy Seed Loaf, substitute the all-purpose flour with a gluten-free all-purpose flour blend. Just ensure that the blend contains a binding agent like xanthan gum for the best results.

What is the best way to store leftover loaf?

Leftover Lemon Poppy Seed Loaf should be stored in an airtight container at room temperature for up to 3 days. For longer storage, wrap it tightly and freeze for up to 3 months. Thaw it before serving for the best texture.

Zesty Lemon Poppy Seed Delight

Final Thoughts

The Lemon Poppy Seed Loaf with Citrus Icing is truly a delightful treat that brings a burst of brightness to any occasion. The zesty lemon flavor combined with the subtle crunch of poppy seeds creates a satisfying balance, while the citrus icing adds a touch of sweetness that perfectly complements the loaf’s tanginess.

This is the kind of recipe I come back to again and again, especially when I want to brighten up a gloomy day or celebrate a small victory. The aroma that fills the kitchen as it bakes is absolutely heavenly! I encourage you to give this recipe a try; you might just find it becoming a beloved staple in your home. Don’t forget to share your results or even add your own unique twist—I can’t wait to see what you create!

Print
clock clock iconcutlery cutlery iconflag flag iconfolder folder iconinstagram instagram iconpinterest pinterest iconfacebook facebook iconprint print iconsquares squares iconheart heart iconheart solid heart solid icon

Lemon Poppy Seed Loaf


  • Author: Lily author
  • Total Time: 25 minute
  • Yield: 1 loaf 1x
Pin Recipe
Print Recipe

Description

This Lemon Poppy Seed Loaf is a delightful treat that combines zesty lemon flavor with crunchy poppy seeds. Topped with a citrus icing, it’s perfect for any occasion.


Ingredients

Scale
  • 1 ½ cups (190g) all-purpose flour
  • 1 teaspoon baking powder
  • ½ teaspoon baking soda
  • ½ teaspoon salt
  • 3 tablespoons poppy seeds
  • ½ cup (115g) unsalted butter, softened to room temperature
  • 1 cup (200g) granulated sugar
  • 2 large eggs
  • 1 teaspoon vanilla extract
  • 1 teaspoon lemon zest (from about 1 medium lemon)
  • ½ cup (120ml) buttermilk
  • 2 tablespoons fresh lemon juice
  • 1 cup (120g) powdered sugar
  • 2 tablespoons fresh lemon juice
  • 1 tablespoon orange juice
  • 1 teaspoon lemon zest (for garnish, optional)

Instructions

  1. Preheat your oven to 350°F (175°C). Grease a 9×5-inch loaf pan or line it with parchment paper for easy removal later.
  2. In a medium mixing bowl, whisk together 1 ½ cups of all-purpose flour, 1 teaspoon of baking powder, ½ teaspoon of baking soda, ½ teaspoon of salt, and 3 tablespoons of poppy seeds. This helps to evenly distribute the baking agents and ensures a uniform rise.
  3. In a large mixing bowl, cream together ½ cup of softened unsalted butter and 1 cup of granulated sugar using an electric mixer on medium speed for about 3-4 minutes, until the mixture is light and fluffy. Make sure to scrape down the sides of the bowl occasionally.
  4. Add 2 large eggs, 1 teaspoon of vanilla extract, and 1 teaspoon of lemon zest to the creamed butter and sugar, mixing until fully combined. You want a smooth consistency, so ensure there are no lumps of butter.
  5. In a small bowl, combine ½ cup of buttermilk and 2 tablespoons of fresh lemon juice. Alternately add the dry ingredients and buttermilk mixture to the butter mixture, starting and ending with the dry ingredients. Mix just until combined; do not overmix, as this can lead to a dense loaf.
  6. Pour the batter into the prepared loaf pan. Smooth the top with a spatula, ensuring it’s even. Bake in the preheated oven for 50-60 minutes, or until a toothpick inserted in the center comes out clean. The edges should be lightly golden brown, and the center should feel just set.
  7. Once baked, remove the loaf from the oven and allow it to cool in the pan for about 10 minutes. Then, transfer it to a wire rack to cool completely. Resist the urge to slice too soon, as it will be crumbly if it’s still warm.
  8. While the loaf is cooling, prepare the citrus icing. In a medium bowl, whisk together 1 cup of powdered sugar, 2 tablespoons of fresh lemon juice, and 1 tablespoon of orange juice until smooth. If the icing is too thick, you can add a little more juice to reach your desired consistency.
  9. Once the loaf is completely cool, drizzle the citrus icing over the top. If you like, sprinkle with an additional teaspoon of lemon zest for an extra pop of flavor and color.
  • Prep Time: 15 mins
  • Cook Time: 50-60 mins
  • Category: Dessert
  • Method: Baking
  • Cuisine: American

Nutrition

  • Serving Size: 1 slice
  • Calories: 200
  • Sugar: 15 g
  • Sodium: 150 mg
  • Fat: 8 g
  • Saturated Fat: 5 g
  • Unsaturated Fat: 3 g
  • Trans Fat: 0 g
  • Carbohydrates: 30 g
  • Fiber: 1 g
  • Protein: 3 g
  • Cholesterol: 40 mg

Keywords: Be careful not to overmix your batter; this is a common mistake that can lead to a dense loaf. Use room temperature ingredients for a smoother batter and even baking.

Did you make this recipe?

Share a photo and tag us — we can't wait to see what you've made!

  • Privacy Policy
  • Terms Of Service
  • Contact
  • About
  • GDPR

Copyright © 2025 Homesmad