Classic Christmas Toffee. There’s a certain magic that fills the air during the holiday season, and for me, much of it revolves around the irresistible aroma and taste of homemade treats. Is there anything quite as satisfying as the buttery crunch of perfectly made toffee, especially when shared with loved ones? This beloved confection has graced festive tables for generations, a testament to its enduring appeal. While its origins can be traced back centuries, toffee truly shines during Christmas, becoming a cherished part of many families’ culinary traditions, often passed down through handwritten recipe cards.
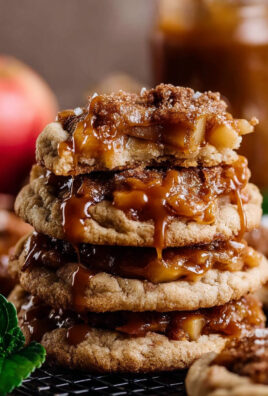
People adore Classic Christmas Toffee for so many reasons. It’s the harmonious blend of rich, caramelized butter and sugar, cooked to that ideal hard crack stage, that creates its signature snap. Then, imagine that crisp base generously coated with smooth, melted chocolate and sprinkled with toasted nuts – a symphony of textures and flavors in every single bite. It’s not just a candy; it’s a memory in the making, a sweet gesture of warmth and celebration. Its simple ingredients transform into something extraordinary, making it a perfect edible gift or a delightful indulgence for your own holiday merriment. I believe you’ll find this recipe brings that classic festive joy right into your home.

Welcome to the enchanting world of candy making, where a few simple ingredients transform into something truly magical. Today, we’re diving into the creation of a timeless treat that graces countless holiday tables: Classic Christmas Toffee. This recipe, perfected over years, promises a buttery, crisp, and utterly irresistible experience, crowned with rich chocolate and crunchy nuts. Get ready to impress your friends and family with this homemade delight!
Ingredients:
- 2 cups (4 sticks / 450g) unsalted butter: I always reach for good quality unsalted butter when making candy. It allows us to control the salt content precisely and really lets the rich, creamy butter flavor shine through, which is absolutely essential for a truly delectable toffee. Cold butter works just fine as it will melt down anyway.
- 2 cups (400g) granulated sugar: Regular white granulated sugar is perfect here. Its fine crystals dissolve beautifully, creating that smooth, glassy texture we crave in a good toffee.
- 1/2 cup (120ml) water: While some recipes opt for corn syrup, I find that a little bit of water helps dissolve the sugar crystals initially, preventing premature crystallization and ensuring a smooth, even cook for our toffee base.
- 1 teaspoon fine sea salt: Don’t skip the salt! It’s a secret weapon in candy making, brilliantly balancing the sweetness of the sugar and enhancing all the other flavors. A fine sea salt disperses evenly throughout the mixture.
- 2 teaspoons pure vanilla extract: This is added at the very end to preserve its delicate flavor. It infuses the toffee with that warm, inviting aroma and taste that is simply synonymous with holiday baking.
- 12 ounces (340g) semi-sweet chocolate chips or chopped chocolate bars: I prefer semi-sweet as it offers a lovely contrast to the buttery toffee without being overly sweet. You could also use milk chocolate for a sweeter profile or dark chocolate for a more intense flavor. Quality chocolate makes a noticeable difference.
- 1 1/2 cups (170g) finely chopped pecans or almonds: These add a delightful crunch and nutty flavor. I personally love pecans for a classic touch, but almonds are also fantastic. Make sure they are finely chopped so they adhere well to the chocolate and the toffee breaks cleanly. Lightly toasting them beforehand can also enhance their flavor significantly, though it’s an optional step.
Equipment You’ll Need:
Having the right tools ready before you begin is half the battle when making candy. Trust me, once that toffee hits its temperature, things move quickly!
- Heavy-Bottomed 3 or 4-Quart Saucepan: This is non-negotiable! A heavy-bottomed pan distributes heat evenly and prevents the sugar from scorching on the bottom, which can ruin your entire batch of toffee. I always reach for my stainless steel or enamel-coated cast iron pot for this task.
- Candy Thermometer: Absolutely essential for accuracy. There’s no guesswork involved when aiming for the hard crack stage (300-310°F). Make sure it’s properly calibrated and can clip securely to the side of your pan without touching the bottom.
- 9×13 Inch Baking Sheet: You’ll need this to spread your hot toffee. A standard metal baking sheet works perfectly.
- Parchment Paper or Silicone Baking Mat: Line your baking sheet with one of these. This prevents the toffee from sticking and makes for easy removal and cleanup. I’m a big fan of silicone mats for their reusability and perfect non-stick properties.
- Heat-Proof Rubber Spatula or Wooden Spoon: For stirring the initial mixture and later spreading the chocolate. Make sure it’s rated for high heat.
- Whisk (optional but helpful): For the initial dissolving of sugar.
- Offset Spatula or Butter Knife: For spreading the melted chocolate evenly.
- Sharp Knife or Kitchen Mallet: For breaking the cooled toffee into pieces.
Getting Ready: Preparing Your Workspace for Classic Christmas Toffee
Before you even think about turning on the stove, we need to set up our stage for success. Candy making is a precise art, and having everything prepped and ready will make the process much smoother and less stressful. This preparation is key to preventing common pitfalls like crystallization or uneven cooking.
- First things first, grab your 9×13 inch baking sheet. Line it generously with either parchment paper or a silicone baking mat. If you’re using parchment, I like to leave a little overhang on the sides – it creates helpful “handles” for lifting the toffee later. This step is crucial because hot toffee is incredibly sticky, and you want it to release effortlessly once cooled.
- Next, measure out all your ingredients. Seriously, every single one! Have your butter, sugar, water, and salt ready to go right by the stovetop. Measure your vanilla extract into a small bowl or spoon, ready to be added at the last moment.
- Chop your pecans or almonds (or whatever nut you’ve chosen) finely. The goal is small pieces that will adhere nicely to the chocolate and not create giant, awkward lumps when you break the toffee. Spread them out on a small plate or bowl so they’re easy to sprinkle.
- Have your chocolate chips or chopped chocolate ready in a bowl. You’ll be sprinkling this over the hot toffee, so you want it accessible.
- Attach your candy thermometer to the side of your heavy-bottomed saucepan. Make sure the tip of the thermometer is submerged in where the mixture will be but doesn’t touch the bottom of the pan. An accurate reading is everything for successful toffee.
- Lastly, clear your countertop. Candy making requires quick movements at certain stages, and you don’t want any clutter getting in your way. Make sure you have a clear, heat-safe spot to place your hot pan once it’s off the heat.
The Heart of the Toffee: Cooking the Base
This is where the magic truly happens! Making the toffee base is about patience, precise temperature control, and a little bit of watchful waiting. Don’t rush this process; a perfectly cooked toffee is worth every moment.
- In your prepared heavy-bottomed saucepan, combine the 2 cups of unsalted butter, 2 cups of granulated sugar, 1/2 cup of water, and 1 teaspoon of fine sea salt. Place the saucepan over medium heat.
- Stir the mixture constantly with your heat-proof rubber spatula or wooden spoon until the butter is fully melted and the sugar has completely dissolved. This initial stirring is very important to ensure all the sugar crystals dissolve into the liquid. You should be able to tell the sugar is dissolved when you no longer feel a gritty texture against the bottom of the pan when stirring. This usually takes about 5-8 minutes. If you don’t dissolve the sugar completely here, you risk a grainy toffee.
- Once the butter is melted and the sugar is dissolved, stop stirring. You can give the pan a gentle swirl occasionally if you feel the need, but try to resist stirring the mixture once it comes to a boil. Stirring after this point can encourage sugar crystals to form on the sides of the pan, which can then fall back into your toffee and cause it to crystallize, resulting in a gritty texture instead of smooth, glassy perfection.
- Bring the mixture to a rolling boil. Your candy thermometer should be clipped to the side of the pan, not touching the bottom, and giving you an accurate temperature reading.
- Continue to cook, undisturbed, as the temperature slowly rises. Watch the thermometer diligently. You’ll notice the mixture start to bubble more vigorously, and the color will begin to change. It will go from clear to a pale yellow, then to a beautiful golden amber. This process can take anywhere from 15 to 25 minutes, depending on your stove and pan.
- We are aiming for the “hard crack” stage, which is between 300°F and 310°F (149°C and 154°C). I usually pull mine off the heat right when it hits 300°F, knowing there will be a little residual cooking from the pan’s heat. Do not walk away from the stove during this critical phase! The temperature can climb very quickly in the last few degrees, and overcooked toffee will taste burnt and bitter. The color should be a rich, deep amber, similar to a penny or dark caramel.
- As soon as your toffee reaches 300-305°F (I personally aim for 300°F for a slightly softer but still crisp toffee, but 310°F will yield a very brittle result), immediately remove the saucepan from the heat.
- Carefully, but quickly, stir in the 2 teaspoons of pure vanilla extract. Be cautious, as the mixture will bubble up and release a lot of steam when the vanilla is added. Stir it in thoroughly to distribute that wonderful flavor throughout the hot toffee.
Adding the Festive Toppings: Chocolate and Nuts
Once your toffee base is cooked to perfection, it’s time to add the delicious layers of chocolate and nuts that make this a truly Classic Christmas Toffee. You’ll need to work relatively quickly here, as the toffee cools and sets fast.
- Immediately pour the hot toffee mixture evenly onto your prepared baking sheet with the parchment paper or silicone mat. Use your heat-proof spatula to help scrape out all the deliciousness from the pan, spreading it as evenly as possible into a thin layer. Don’t worry if it’s not perfectly uniform; a little rustic charm is part of homemade candy!
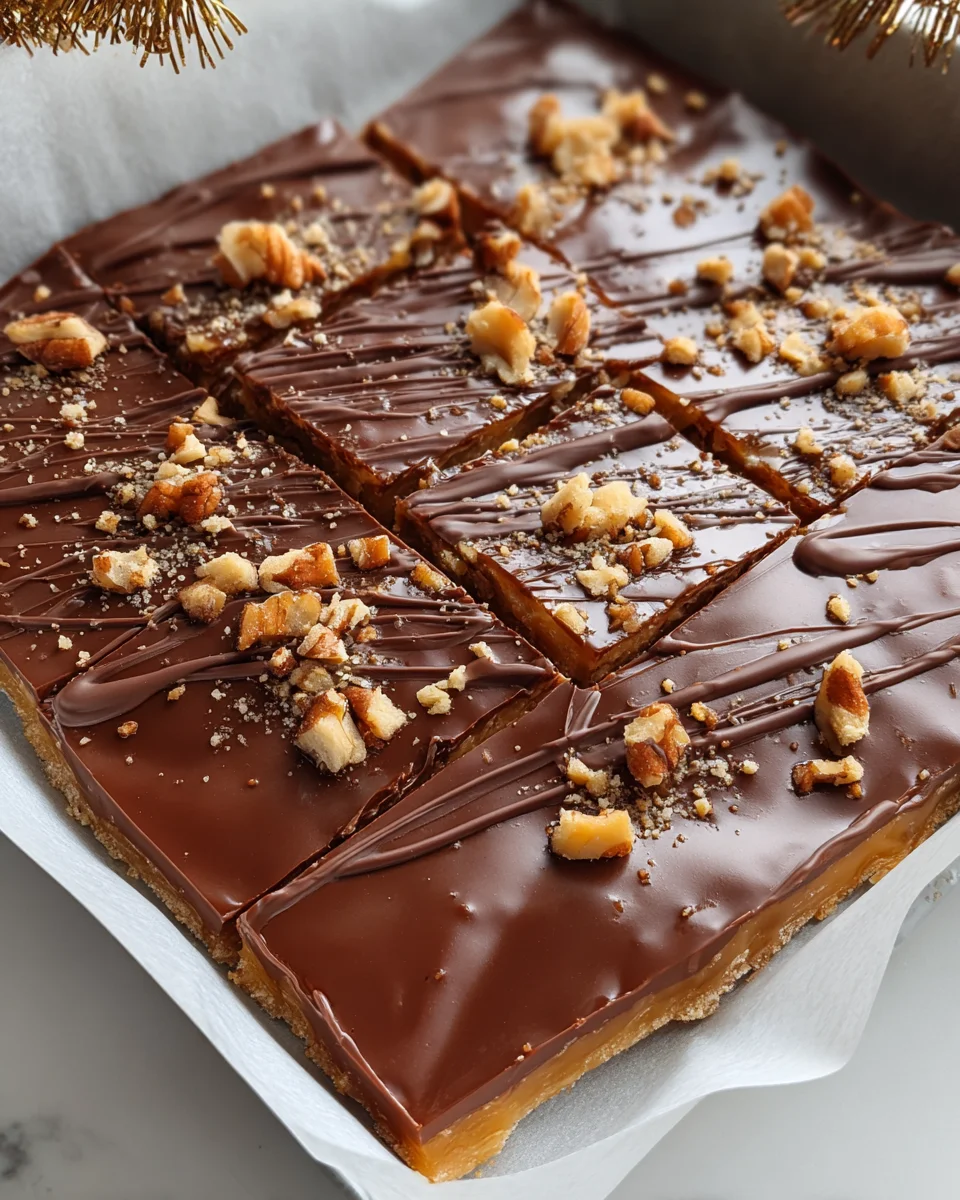
- Without delay, sprinkle your 12 ounces of semi-sweet chocolate chips or chopped chocolate bars evenly over the hot toffee. The residual heat from the toffee will begin to melt the chocolate. Allow the chocolate to sit for about 3-5 minutes. This gives it enough time to soften completely from the heat of the toffee, making it easy to spread.
- Once the chocolate has softened and looks glossy and melted, use an offset spatula or the back of a spoon to gently spread the melted chocolate evenly across the entire surface of the toffee. Work from the center outwards, ensuring every inch is covered in a smooth, delicious layer of chocolate.
- Now for the crunch! While the chocolate is still warm and wet, generously sprinkle your 1 1/2 cups of finely chopped pecans or almonds over the melted chocolate layer. Gently press them down with your hands or the back of your spatula to ensure they adhere well to the chocolate. This creates that beautiful, classic look and provides an irresistible texture contrast.
Cooling, Breaking, and Storing Your Classic Christmas Toffee
The hard part is over! Now comes the waiting game, which is arguably the hardest part when you’re anticipating a delicious treat. Proper cooling and storage will ensure your Classic Christmas Toffee stays crisp and delightful.
- Allow the toffee to cool completely. You can let it sit at room temperature for several hours (at least 2-3 hours) until it is firm and brittle. If you’re in a hurry or if your kitchen is particularly warm, you can carefully place the baking sheet in the refrigerator for about 30-60 minutes, or until it’s completely firm. Just be sure it’s entirely cooled and hardened before moving on to the next step; otherwise, it won’t break cleanly.
- Once the toffee is completely firm and hard, lift the parchment paper or silicone mat from the baking sheet. Transfer the slab of toffee to a clean, sturdy cutting board.
- Now for the fun part: breaking it! You can do this in a couple of ways. You can use a sharp, heavy knife to gently score and then press down to break the toffee into irregular pieces. Or, for a more rustic approach, cover the toffee with a clean kitchen towel and gently tap it with a kitchen mallet or the blunt side of a heavy knife. The toffee should shatter into beautiful, delicious shards of varying sizes. I love the rustic, imperfect look of broken toffee; it adds to its homemade charm.
- Taste test a piece (or two!) to ensure it’s absolutely perfect. The ideal piece of Classic Christmas Toffee should be crisp, buttery, with a satisfying snap, and not chewy. If it’s chewy, it might not have reached the full hard crack stage.
- Store your homemade Classic Christmas Toffee in an airtight container at room temperature. Layer the pieces with parchment paper to prevent them from sticking together. Stored properly, it will stay fresh and delicious for up to 2-3 weeks. For longer storage, you can keep it in the refrigerator, but allow it to come to room temperature for a few minutes before serving for the best texture and flavor.
- This Classic Christmas Toffee makes for an absolutely wonderful homemade gift. Pack it into festive tins or cellophane bags tied with a ribbon for a thoughtful, delicious present that everyone will adore during the holiday season. It’s a truly special treat that embodies the spirit of festive indulgence.
Conclusion:
Well, my friends, we’ve journeyed through the steps of creating something truly magical, a confection that transcends mere sweetness and becomes an experience in itself. This isn’t just another recipe to add to your ever-growing collection; it’s an invitation to craft moments of pure joy and indulgence right in your own kitchen. I truly believe that once you’ve tasted the incredible depth of flavor and the satisfying crunch of this homemade delight, you’ll understand exactly why it’s become such a cherished staple in my own home, especially during the festive season. The rich, buttery base, the perfect snap, and that glorious chocolatey topping come together in a symphony of textures and tastes that is simply irresistible. It’s a treat that promises to bring a smile to anyone who takes a bite, making it an absolute must-try for any occasion that calls for a touch of elegance and warmth. This particular rendition ensures that every piece is a miniature masterpiece, bursting with that homemade goodness we all crave.
What sets this specific recipe apart, you ask? It’s the meticulous balance, the carefully chosen ingredients, and the straightforward yet incredibly rewarding process that leads to unparalleled perfection. There’s a certain nostalgia wrapped up in making and enjoying such a classic sweet, and this recipe delivers on every front, evoking memories of cozy holidays and shared laughter. You’ll find yourself reaching for just one more piece, then another, captivated by its irresistible charm. Imagine presenting a platter of these golden beauties – the proud look on your guests’ faces, the delighted murmurs as they savor each bite. It truly elevates any dessert spread or casual get-together into something special. It’s more than just a treat; it’s a gesture, a labor of love that speaks volumes without a single word. Seriously, the satisfying crackle followed by the smooth melt-in-your-mouth sensation is something you have to experience firsthand.
Now that you’re ready to dive into this culinary adventure, let’s talk about how to best enjoy your magnificent creation. Of course, serving your finished toffee in a beautiful dish, perhaps alongside a freshly brewed cup of coffee or a steaming mug of herbal tea, is always a delightful option. The contrast between the rich sweetness of the toffee and the gentle bitterness of a good coffee is simply divine. But don’t stop there! I often love to crumble a few pieces over a scoop of vanilla bean ice cream for an instant upgrade to a simple dessert, adding a crunchy texture and an explosion of flavor. It also makes an incredible topping for cheesecakes or even stirred into a batch of homemade hot cocoa for a truly decadent treat. And, speaking of decadence, consider pairing it with a glass of robust port wine or a festive mulled cider for an adult twist. For gifting, there’s nothing quite like a homemade batch of this incredible Classic Christmas Toffee, elegantly packaged in a cellophane bag tied with a festive ribbon, or nestled in a charming tin. It’s a personal touch that genuinely warms the heart and makes for an unforgettable present that everyone appreciates.
While the recipe as written is pure perfection, part of the fun of cooking is making it your own! Feel free to experiment with different types of chocolate for the topping – a dark chocolate offers a sophisticated contrast, while a milk chocolate provides a creamier, sweeter finish. White chocolate, perhaps swirled with a touch of peppermint extract, can create a stunning visual and flavor profile, especially if you’re making this for the holidays. Don’t limit yourself to just pecans; slivered almonds, chopped walnuts, or even macadamia nuts can add their own unique crunch and flavor dimension. For a salty-sweet kick, a sprinkle of flaky sea salt over the melted chocolate before it sets is always a winner. You could also try adding a pinch of espresso powder to the chocolate for an underlying coffee note, or even a tiny hint of cayenne pepper for a subtle, unexpected warmth. My personal favorite variation for a truly festive touch is to sprinkle crushed candy canes over the chocolate before it hardens – it adds a beautiful pop of color and a delightful minty freshness that screams holiday cheer. The possibilities are truly endless, allowing you to tailor this treat to your exact preferences or to create a unique gift for a special someone.
So, what are you waiting for? I wholeheartedly encourage you to roll up your sleeves, gather your ingredients, and immerse yourself in the delightful process of creating this exceptional confection. There’s immense satisfaction in knowing you’ve crafted something so delicious from scratch, something that brings joy to everyone who tastes it. Trust me, the aroma alone as it cooks will make your kitchen feel like the happiest place on earth! Don’t be intimidated; the steps are straightforward, and the rewards are immeasurable. Once you’ve made your first batch, you’ll see just how simple and gratifying it is to produce such a high-quality, homemade treat. And please, I’d absolutely love to hear about your experience! Share your successes, your favorite variations, or even your tips and tricks in the comments below. Did you try a unique topping? Did you package it in a special way? Your culinary adventures inspire me, and I’m always eager to learn from your creativity. Let’s build a community of enthusiastic toffee makers!
Ultimately, this recipe isn’t just about making toffee; it’s about embracing the warmth, generosity, and pure delight that homemade treats bring into our lives. It’s about creating traditions and making memories, one sweet, crunchy, chocolate-covered piece at a time. I truly hope you enjoy every step of this delicious journey and that this Classic Christmas Toffee becomes a cherished part of your own culinary repertoire for many years to come. Happy baking, my friends!
Classic Christmas Toffee
A timeless holiday confection featuring a buttery, crisp toffee base coated with smooth melted chocolate and sprinkled with crunchy nuts. Perfect for sharing or gifting, this recipe promises an irresistible festive treat.
Ingredients
Instructions
Important Information
Nutrition Facts (Per Serving)
It is important to consider this information as approximate and not to use it as definitive health advice.
Allergy Information
Please check ingredients for potential allergens and consult a health professional if in doubt.