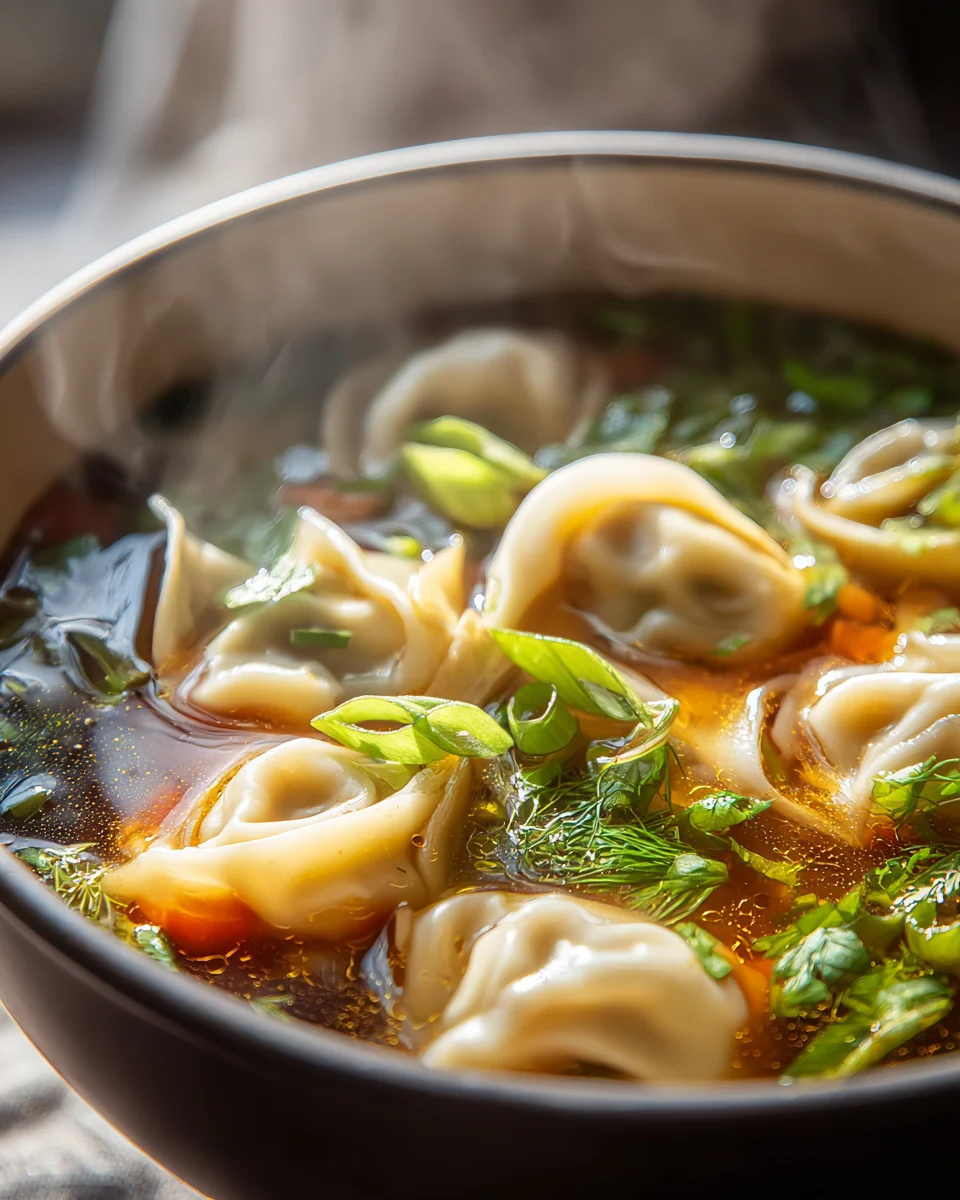
Comforting Potsticker Soup A Delicious Hug In A Bowl is more than just a dish; it’s an experience that wraps you in warmth and flavor from the very first spoonful. Have you ever craved something deeply satisfying, packed with savory goodness, yet surprisingly simple to prepare? That’s precisely what this incredible soup delivers. While potstickers themselves boast a fascinating history, tracing back to ancient China as a staple of celebratory meals and everyday comfort food, transforming them into a soup offers a modern twist that amplifies their inherent deliciousness. Traditionally, these pan-fried dumplings, known as guo tie, were prized for their crispy bottoms and tender, juicy fillings.
Now, imagine those beloved flavors swimming in a rich, aromatic broth, infused with fresh vegetables and perhaps a hint of ginger and garlic. People absolutely adore this dish because it combines the irresistible texture and taste of perfectly cooked potstickers with the soothing qualities of a hearty soup. It’s incredibly versatile, allowing you to use your favorite homemade or even store-bought potstickers, making it an ideal weeknight meal or a comforting weekend treat. This Comforting Potsticker Soup A Delicious Hug In A Bowl truly lives up to its name, offering a delightful blend of convenience, incredible taste, and pure culinary solace. Get ready to discover your new favorite go-to recipe!

Ingredients:
Creating a truly comforting potsticker soup begins with selecting the right ingredients. Think of this as building the foundation for a delicious hug in a bowl, each component playing a vital role in the final symphony of flavors and textures.
- For the Aromatic Base:
- 2 tablespoons neutral oil (like canola, vegetable, or grapeseed oil)
- 6 cloves garlic, finely minced (we want that robust garlic flavor to permeate the broth)
- 2-inch piece fresh ginger, grated or finely minced (the warm, spicy notes of ginger are essential for comfort)
- 4 green onions (scallions), white and light green parts thinly sliced, reserved green tops for garnish (these provide a delicate oniony kick)
- For the Flavorful Broth:
- 8 cups (2 quarts) good quality chicken broth or vegetable broth (choose low sodium to control seasoning later)
- 1/4 cup soy sauce (or tamari for a gluten-free option, this is our main salty umami component)
- 1 tablespoon rice vinegar (for a touch of acidity that brightens the whole dish)
- 1 teaspoon toasted sesame oil (added at the end, this provides an unmistakable nutty aroma)
- 1/2 teaspoon white pepper (a classic for Asian soups, offering a subtle heat without overwhelming)
- Pinch of sugar (optional, just a tiny bit to balance the savory notes, especially if using a very savory broth)
- For the Potstickers & Vegetables:
- 24-30 frozen potstickers (pork, chicken, or vegetable – choose your favorite! We’re aiming for about 4-5 potstickers per person)
- 8 ounces cremini mushrooms (baby bellas), thinly sliced (they absorb the broth wonderfully and add an earthy depth)
- 1 large head bok choy (about 1 pound), roughly chopped into 1-inch pieces, separating whites and greens (adds freshness and a delightful crunch)
- 1 large carrot, peeled and thinly sliced into rounds or julienned (for sweetness, color, and a bit of body)
- 2 cups fresh spinach, roughly chopped (wilts beautifully into the soup, adding nutrients and a vibrant green)
- For Garnish & Extra Flavor (Highly Recommended!):
- Reserved green tops of green onions, thinly sliced
- Fresh cilantro, roughly chopped
- Toasted sesame seeds
- Chili crisp or sriracha (for those who love a bit of heat and texture)
Part 1: Preparing Your Aromatic Base
- Gather and Prepare Your Aromatics: Before you even think about turning on the stove, let’s get all our aromatic components ready. This is a crucial step for building a deeply flavorful soup. Take your six cloves of garlic and mince them very finely. The smaller the pieces, the more evenly their pungent, warm flavor will infuse into our broth. Next, grab that 2-inch piece of fresh ginger. You can either grate it using a microplane for a very fine texture, which releases its juices beautifully, or mince it as finely as your garlic. Both methods are great, but grating often yields a more dispersed flavor. Finally, thinly slice the white and light green parts of your four green onions, setting aside the vibrant green tops for a fresh garnish later. This mise en place ensures a smooth cooking process and prevents anything from burning while you’re busy chopping.
- Sauté the Foundation: Place a large Dutch oven or a heavy-bottomed pot over medium heat. Add your 2 tablespoons of neutral oil and let it shimmering slightly. Once the oil is warm, add your minced garlic, grated ginger, and the sliced white and light green parts of your green onions. This is where the magic begins! Sauté these aromatics for about 2-3 minutes, stirring constantly. You’ll notice an incredibly fragrant aroma beginning to fill your kitchen – a warm, pungent, and slightly spicy scent that signals the start of something truly delicious. Be careful not to let them brown too much, especially the garlic, as burnt garlic can taste bitter. We’re aiming for softened, aromatic ingredients that have released their essential oils into the cooking fat, laying down the savory bedrock for our Comforting Potsticker Soup A Delicious Hug In A Bowl. This step is non-negotiable for a truly deep flavor profile.
Part 2: Building the Flavorful Broth
- Introduce the Liquid Gold: Once your aromatics are wonderfully fragrant and softened, it’s time to introduce the main liquid component. Pour in the 8 cups (2 quarts) of good quality chicken or vegetable broth. If you’re using chicken broth, I always recommend a low-sodium variety; this gives you full control over the final saltiness of your soup, allowing you to season to your exact preference without risking an overly salty dish from the start. Give everything a good stir, scraping up any delicious bits from the bottom of the pot with your spoon. These little caramelized bits are packed with flavor and will dissolve into your broth, adding extra depth.
- Season and Simmer for Depth: Now comes the part where we truly build the layers of flavor that make this a “delicious hug in a bowl.” Add the 1/4 cup of soy sauce (or tamari), the 1 tablespoon of rice vinegar, and the 1/2 teaspoon of white pepper. If you feel your broth could use a tiny bit of balance, you can add a pinch of sugar here; it’s optional but can really round out the umami and acidity without making the soup sweet. Bring the broth to a gentle simmer. Once simmering, reduce the heat to low, cover the pot, and let it gently cook for at least 15-20 minutes. This simmering time is critical! It allows all the flavors from the aromatics and seasonings to meld and deepen, creating a rich, complex broth that is the heart of our comforting potsticker soup. Take a moment to inhale the wonderful aromas rising from the pot – it’s a promise of the comforting meal to come.
- Taste and Adjust: After the simmering period, remove the lid and take a small taste of the broth. This is your chance to be the chef and make it perfectly suited to your palate. Does it need more salt? Add a bit more soy sauce. Does it need more brightness? A tiny splash more rice vinegar can work wonders. Perhaps a touch more white pepper for warmth? Remember, it’s easier to add more seasoning than to take it away. Adjust until you are happy with the foundational flavor profile. This broth should be savory, slightly tangy, and wonderfully aromatic – truly the base for a comforting experience.
Part 3: Cooking the Potstickers and Vegetables
- Introduce the Hearty Vegetables: With our broth perfectly seasoned and simmering gently, it’s time to add the vegetables that require a bit more cooking time. Start by adding the thinly sliced cremini mushrooms and the thinly sliced carrot rounds (or julienned carrots) to the pot. Stir them into the hot broth. The mushrooms will soak up the flavorful liquid and become wonderfully tender, while the carrots will soften slightly but still retain a pleasing bite and their natural sweetness. Allow these to simmer for about 5-7 minutes, giving them a head start before we add the potstickers.
- Add the Stars of the Show – The Potstickers: Increase the heat slightly to bring the broth back to a steady, gentle simmer. Carefully add your 24-30 frozen potstickers directly into the simmering broth. It’s perfectly fine to add them frozen; they will cook beautifully in the hot liquid. Make sure they are submerged as much as possible. Give them a gentle stir to prevent them from sticking to the bottom of the pot. Let the potstickers cook for about 8-10 minutes, or according to the package directions, until they are fully cooked through and float to the surface. Their wrappers should be tender and slightly translucent, and the filling piping hot. This step is where our “Comforting Potsticker Soup” truly comes together! As they cook, the potstickers will release some of their own savory essence into the broth, further enriching the soup’s flavor.
- Fold in the Quick-Cooking Greens: Once your potstickers are nearly done, it’s time for the remaining greens. Add the roughly chopped white parts of the bok choy first, as they are a bit sturdier and take slightly longer to soften than the green leafy parts. Let them cook for about 2 minutes. Then, add the green leafy parts of the bok choy and the roughly chopped fresh spinach. Gently push them down into the hot broth. They will wilt very quickly, usually within 1-2 minutes. The goal here is to cook them just until they are tender-crisp, maintaining their vibrant color and fresh texture, rather than overcooking them into a soggy mess.
- The Final Flavor Boost: Just before serving, turn off the heat and stir in the 1 teaspoon of toasted sesame oil. This is a finishing oil, so adding it at the very end preserves its delicate, nutty aroma, which would otherwise dissipate if cooked for too long. Give the soup one last gentle stir to ensure all the flavors are perfectly distributed. Take another sniff – the combination of ginger, garlic, soy, and now toasted sesame oil should be absolutely intoxicating and utterly comforting.
Part 4: Assembling and Serving Your Comforting Potsticker Soup
- Ladle and Garnish: Now for the grand finale! Carefully ladle generous portions of your steaming hot, Comforting Potsticker Soup A Delicious Hug In A Bowl into individual serving bowls. Make sure each bowl gets a good mix of tender potstickers, colorful vegetables, and plenty of that rich, aromatic broth. Don’t be shy! This is a meal meant to satisfy and warm you from the inside out.
- The Finishing Touches: This is where you elevate your soup from delicious to truly spectacular. Garnish each bowl generously with the reserved thinly sliced green tops of your green onions and a sprinkle of fresh, roughly chopped cilantro. The fresh herbs add a burst of color and a bright, herbaceous contrast to the rich soup. For an extra layer of texture and a subtle nutty note, sprinkle some toasted sesame seeds over the top.
- Optional Heat and Spice: For those who enjoy a bit of heat and an extra layer of flavor, offer chili crisp or sriracha on the side. A spoonful of chili crisp not only adds a wonderful spicy kick but also an incredible texture from the fried garlic and chili flakes, making each spoonful an adventure. This soup is wonderfully versatile and adaptable to individual preferences for spice.
- Savor the Comfort: Serve immediately and enjoy every spoonful of this incredibly satisfying and heartwarming soup. The combination of savory broth, tender potstickers, and fresh vegetables creates a symphony of flavors and textures that is truly unparalleled. It’s more than just a meal; it’s an experience designed to bring warmth and joy, a genuine delicious hug in a bowl that will leave you feeling nourished and content.
Conclusion:
Well, friends, we’ve reached the end of our culinary journey for today, but truly, this is just the beginning of your own adventure with this incredible recipe! I genuinely hope you’re feeling as inspired as I am about this dish, because it’s more than just a recipe; it’s an experience waiting to unfold in your kitchen. What we’ve crafted together is a testament to how simple ingredients can come together to create something truly extraordinary, a meal that effortlessly balances savory depths with vibrant freshness. This isn’t just another weeknight dinner solution; it’s a culinary hug, a warm embrace that makes everything feel a little bit better, a little more cozy. Imagine biting into those tender, flavorful potstickers, perfectly nestled in a rich, aromatic broth, brimming with crisp vegetables. That first spoonful is pure bliss, a harmonious blend that simply sings on your palate. It’s quick enough for those busy evenings when you crave something wholesome and homemade but are short on time, yet elegant enough to impress guests without breaking a sweat. The beauty of this recipe lies in its ability to deliver maximum comfort and flavor with minimal fuss, making it an absolute must-try for anyone seeking a delightful and satisfying meal that nourishes both body and soul.
Elevate Your Experience: Serving Suggestions & Creative Variations
Now that you’re armed with the know-how to create this masterpiece, let’s talk about how to truly make it your own and enhance the experience. While fantastic on its own, a few thoughtful additions can take your soup to the next level. For a delightful crunch and burst of color, I always recommend a generous sprinkle of freshly chopped green onions, toasted sesame seeds, and perhaps a few threads of red chili for a gentle kick. A drizzle of high-quality sesame oil or a dash of chili garlic sauce right before serving can also elevate the aroma and flavor profile beautifully. If you’re a fan of fresh herbs, a scattering of cilantro or Thai basil leaves can introduce another layer of complexity that is simply divine. To make it a more substantial meal, consider serving it alongside a small bowl of steamed jasmine rice, which can soak up all that wonderful broth, or a light, crisp cucumber salad dressed with a ginger-sesame vinaigrette to balance the richness. For a truly indulgent touch, a side of fluffy bao buns or crispy spring rolls would make it a restaurant-worthy feast right in your own home.
But don’t stop there! The beauty of this soup is its incredible versatility, inviting you to experiment and tailor it to your personal preferences or whatever fresh ingredients you have on hand. Feel free to swap out the type of potstickers; chicken, vegetable, or even shrimp dumplings would work wonderfully. Want to boost the greens? Wilt in some baby spinach, bok choy, or napa cabbage during the last few minutes of cooking. For an extra punch of umami, thinly sliced fresh shiitake mushrooms or rehydrated dried wood ear mushrooms are fantastic additions. If you’re looking to add more protein, consider stirring in some shredded rotisserie chicken, cubed firm tofu, or even a softly poached egg just before serving. For those who love a bit more heat, a generous swirl of Sriracha or a pinch of red pepper flakes in your bowl will definitely turn up the spice factor. And for our vegetarian and vegan friends, this recipe is incredibly adaptable! Simply opt for vegetable potstickers and use a quality vegetable broth, and you’ll have a hearty, flavorful meat-free meal that is just as satisfying. Remember, cooking should be an expression of your creativity, so don’t be afraid to play around!
Your Turn: Share the Warmth!
This truly is more than just soup; it’s an invitation to create, to savor, and to share. I can confidently say that you’ll find our Comforting Potsticker Soup A Delicious Hug In A Bowl to be an indispensable addition to your culinary repertoire. It delivers on every promise of warmth, satisfaction, and delightful flavor, making it a staple for cozy evenings and joyful gatherings alike. So, please, don’t just read about it – go ahead and dive into your kitchen! Gather your ingredients, follow these simple steps, and experience the magic for yourself. I’m genuinely excited for you to discover the incredible taste and comforting embrace that this soup offers. Once you’ve had a chance to whip up your own batch, I would absolutely love to hear about your experience. Did you add any unique twists? What were your favorite garnishes? Share your thoughts, your photos, and your modifications in the comments section below. Your feedback and creativity inspire not only me but also our entire community of food lovers. Let’s build a tapestry of shared culinary joy! Until next time, happy cooking, and may your bowls always be filled with deliciousness and warmth. I can’t wait to see what you create!
Comforting Potsticker Soup: Your Delicious Hug in a Bowl
Comforting Potsticker Soup A Delicious Hug In A Bowl is more than just a dish; it’s an experience that wraps you in warmth and flavor from the very first spoonful. While potstickers themselves boast a fascinating history, tracing back to ancient China as a staple of celebratory meals and everyday comfort food, transforming them into a soup offers a modern twist that amplifies their inherent deliciousness. This dish combines the irresistible texture and taste of perfectly cooked potstickers with the soothing qualities of a hearty soup, offering a delightful blend of convenience, incredible taste, and pure culinary solace.
Ingredients
Instructions
Important Information
Nutrition Facts (Per Serving)
It is important to consider this information as approximate and not to use it as definitive health advice.
Allergy Information
Please check ingredients for potential allergens and consult a health professional if in doubt.