• Skip to primary navigation
  • Skip to main content
  • Skip to primary sidebar
Homesmad

Homesmad

  • Home
  • Breakfast & Brunch
  • Appetizers & Snacks
  • Dinner
  • Dessert
  • About
  • Privacy Policy
  • Contact
Homesmad
  • Home
  • Breakfast & Brunch
  • Appetizers & Snacks
  • Dinner
  • Dessert
  • About
  • Privacy Policy
  • Contact

Quick & Easy Egg Drop Soup in Minutes – Perfect Comfort Food

November 15, 2025 by Lily author

Easy Minute Egg Drop Soup is more than just a quick meal; it’s a hug in a bowl, ready in mere minutes when you need it most. I’m absolutely delighted to share this incredibly simple yet profoundly satisfying recipe with you today. Originating from humble Chinese kitchens, this classic soup has transcended borders, becoming a beloved comfort food around the world, cherished for its elegant simplicity and comforting warmth. I often find myself turning to it on busy weeknights or when I’m feeling a little under the weather, as it truly is the ultimate fuss-free nourishment.

Why You’ll Love This Quick Comfort Soup

People adore egg drop soup for its delicate balance of savory broth and the mesmerising, silky ribbons of egg that dance within. The magic of this dish lies in its incredibly tender texture and the subtle, umami-rich flavors that soothe the soul with every spoonful. What makes this recipe particularly special is how quickly it comes together, proving that gourmet taste doesn’t require hours in the kitchen. Preparing this Easy Minute Egg Drop Soup is an experience in effortless culinary delight, promising a comforting, flavourful escape without any stress. You’ll be amazed at how such minimal effort can yield such a delightful and satisfying result.

Quick & Easy Egg Drop Soup in Minutes – Perfect Comfort Food this RECIPE

Ingredients:

  • 4 cups (960ml) Chicken Broth (or Vegetable Broth): I always recommend using a good quality broth here, as it forms the very foundation of your “Easy Minute Egg Drop Soup.” You can opt for low-sodium chicken broth if you’re watching your salt intake; this gives you more control over the final seasoning. A good homemade chicken broth is, of course, unparalleled, but for an “Easy Minute” recipe, a good store-bought brand works beautifully. Just make sure it’s something you enjoy drinking on its own.
  • 2 large Eggs: These are the stars of our egg drop soup! Fresh eggs will give you the best texture and flavor. I prefer large eggs for a good egg-to-broth ratio, ensuring plenty of delicate strands in every spoonful.
  • 2 tablespoons Cornstarch: This is our secret weapon for thickening the soup just slightly, giving it that classic silky texture. It helps suspend the egg ribbons and creates a more satisfying mouthfeel. Don’t skip this, but also don’t overdo it! Too much cornstarch can make the soup gummy.
  • 4 tablespoons Water (for cornstarch slurry): Cold water is essential for mixing the cornstarch into a smooth slurry, preventing lumps when it hits the hot broth.
  • 1-2 tablespoons Soy Sauce: I typically start with 1 tablespoon of regular soy sauce and taste, adding more if needed. For a lighter touch or dietary restrictions, low-sodium or tamari (for gluten-free) are excellent alternatives. This adds a crucial umami depth to our “Easy Minute Egg Drop Soup.”
  • 1/2 teaspoon White Pepper: White pepper has a more subtle, earthy heat than black pepper and is a traditional seasoning for many Asian soups. It blends seamlessly without leaving visible flecks, which I appreciate for the soup’s aesthetic. Feel free to adjust to your spice preference.
  • 1/2 teaspoon Sesame Oil (toasted): This is truly a finishing oil, added right at the end. Toasted sesame oil provides an incredible, nutty aroma that elevates the entire dish. A little goes a long way, so don’t be tempted to pour too much!
  • 2 Green Onions (scallions): For garnish and a burst of fresh, mild oniony flavor. Both the white and green parts are used. They add a lovely color contrast and a fresh element to the rich soup.
  • Optional additions:
    • 1 clove Garlic (minced) or 1/2 teaspoon Garlic Powder: For an extra layer of aromatic flavor.
    • 1/2 inch fresh Ginger (grated) or 1/4 teaspoon Ground Ginger: Adds a warm, zesty note that complements the chicken broth beautifully.
    • Pinch of Sugar: Sometimes a tiny pinch of sugar can help balance the savory flavors, especially if your broth is particularly salty or you use a lot of soy sauce.
    • Chili Oil or Sriracha: For those who love a bit of heat! Drizzle a few drops into your bowl just before serving.
    • Cooked protein (shredded chicken, tofu): While not traditional for an “Easy Minute Egg Drop Soup,” you can certainly bulk it up with leftover cooked protein if you wish.

Prepping Your Ingredients for an Easy Minute Egg Drop Soup

  1. Prepare Your Greens: First things first, let’s get those beautiful green onions ready. I like to thoroughly rinse them under cool water, making sure there’s no lingering dirt between the layers. Then, pat them dry with a paper towel. Using a sharp knife, trim off the very ends of the root and any bruised tips. Now, thinly slice the green onions, separating the white and light green parts from the darker green tops. The white and light green parts can go into the soup for a bit more flavor during cooking, while the darker green tops are best reserved as a fresh garnish at the very end. This separation isn’t strictly necessary for an “Easy Minute Egg Drop Soup,” but it does give a slightly more refined flavor profile. Set these aside in a small bowl.
  2. Mince Aromatics (if using): If you’ve decided to include fresh garlic and/or ginger, now is the time to mince them finely. Peel the garlic clove and press it through a garlic press or mince it very finely with your knife. For ginger, I find the easiest way to peel it is with the back of a spoon, then grate it using a microplane for the best texture and flavor dispersion. These fresh aromatics will add a wonderful depth to our “Easy Minute Egg Drop Soup” base, but remember, they are optional for truly minimal prep!
  3. Whisk the Eggs: In a medium bowl, crack open your two large eggs. Now, this is an important step for achieving those beautiful, delicate egg ribbons that define a classic egg drop soup. I whisk them gently with a fork or a small whisk, just enough to break up the yolks and whites and combine them into a uniform pale yellow liquid. You don’t want to beat them too vigorously until they’re foamy, as this can lead to tougher egg strands. We’re aiming for smooth, pourable liquid with no distinct streaks of white or yellow. Set the whisked eggs aside – they’ll be ready for their grand entrance later.
  4. Create the Cornstarch Slurry: In a small bowl, combine the 2 tablespoons of cornstarch with the 4 tablespoons of cold water. Whisk these together with a fork until you have a smooth, milky slurry with absolutely no lumps. This is crucial! Lumpy cornstarch will give you a clumpy, unappetizing soup. The cornstarch is what gives our “Easy Minute Egg Drop Soup” its characteristic silky body. Make sure it’s well combined and ready to go.
  5. Gather Your Seasonings: Have your soy sauce, white pepper, and sesame oil measured out and ready. This is part of what makes it an “Easy Minute” recipe – having everything within arm’s reach. I like to put the soy sauce and white pepper near the stove, and the sesame oil right next to the serving bowls, as it’s a finishing touch. Having everything prepped and organized is what we call “mise en place” in the culinary world, and it truly makes cooking this “Easy Minute Egg Drop Soup” a breeze.

Building the Flavor Base for Your Easy Minute Egg Drop Soup

  1. Bring Broth to a Simmer: Grab a medium saucepan or a small pot and pour in your 4 cups of chicken or vegetable broth. Place it over medium-high heat. If you’re using fresh garlic and/or ginger, this is the time to add them to the cold broth. This allows their flavors to gently infuse into the liquid as it heats up, creating a more mellow and integrated taste profile. If you’re using powdered garlic or ginger, you can add them along with the other seasonings later. Let the broth come to a gentle simmer – you’ll see small bubbles forming around the edges and a bit of steam rising. Avoid a rolling boil at this stage, as we want to control the temperature for the next steps.
  2. Season the Broth: Once your broth is at a gentle simmer, it’s time to build the core flavors of your “Easy Minute Egg Drop Soup.” Add the 1-2 tablespoons of soy sauce and the 1/2 teaspoon of white pepper. If you decided to add the white parts of the green onions, toss them in now as well. Give everything a good stir with a spoon or whisk to combine the seasonings thoroughly. Now, this is where your palate comes in: taste the broth. Does it need a little more soy sauce for depth? A touch more white pepper for a bit of warmth? Maybe a tiny pinch of sugar to balance it out if it tastes too salty or flat? Adjust to your personal preference. Remember, you’re building the flavor profile that will carry through the entire soup, so make sure it tastes good to you!
  3. Thicken the Soup with Cornstarch Slurry: Give your cornstarch slurry one last quick stir, as the cornstarch tends to settle at the bottom. Now, here’s a technique that’s essential for a perfectly smooth “Easy Minute Egg Drop Soup”: slowly pour the slurry into the simmering broth in a steady, thin stream while continuously stirring the broth with a whisk or spoon. It’s important to keep stirring vigorously as you pour to prevent the cornstarch from clumping and ensure even thickening. You’ll notice the broth will start to thicken almost immediately, transforming from a watery liquid into a slightly viscous, silky soup base. Continue to stir for about 30 seconds to a minute after adding all the slurry, allowing the cornstarch to fully cook out its raw taste and reach its maximum thickening potential. The goal is a light, silky consistency, not a thick gravy. If it feels too thick, you can always add a splash more broth or water. If it’s not quite thick enough, you can quickly mix another small slurry (e.g., 1 teaspoon cornstarch with 2 teaspoons cold water) and repeat the process.

Creating the Signature “Easy Minute Egg Drop Soup” Effect

  1. Prepare for the Egg Drop: Once your soup base is perfectly seasoned and thickened, remove the pot from the direct high heat or reduce the heat to its lowest setting. The key to delicate egg ribbons is to have the soup simmering gently, not boiling furiously. A gentle simmer ensures the eggs cook tenderly without becoming tough or breaking into too many tiny pieces. It also prevents the eggs from sinking to the bottom and sticking.
  2. The Art of the Egg Drop: Now for the star performance of our “Easy Minute Egg Drop Soup”! Take your bowl of whisked eggs. With one hand, hold the bowl of eggs just above the surface of the simmering soup. With your other hand, use a fork, chopsticks, or a whisk to gently stir the soup in a slow, continuous circular motion, creating a swirling vortex in the pot. As the soup swirls, slowly drizzle the whisked eggs into the soup in a very thin stream. This continuous stirring and slow pouring are critical. The swirling motion immediately breaks the eggs into delicate, beautiful ribbons as they hit the hot broth, rather than allowing them to clump together into large chunks. The heat of the soup will cook the thin egg strands almost instantly. Continue drizzling until all the egg mixture has been incorporated.
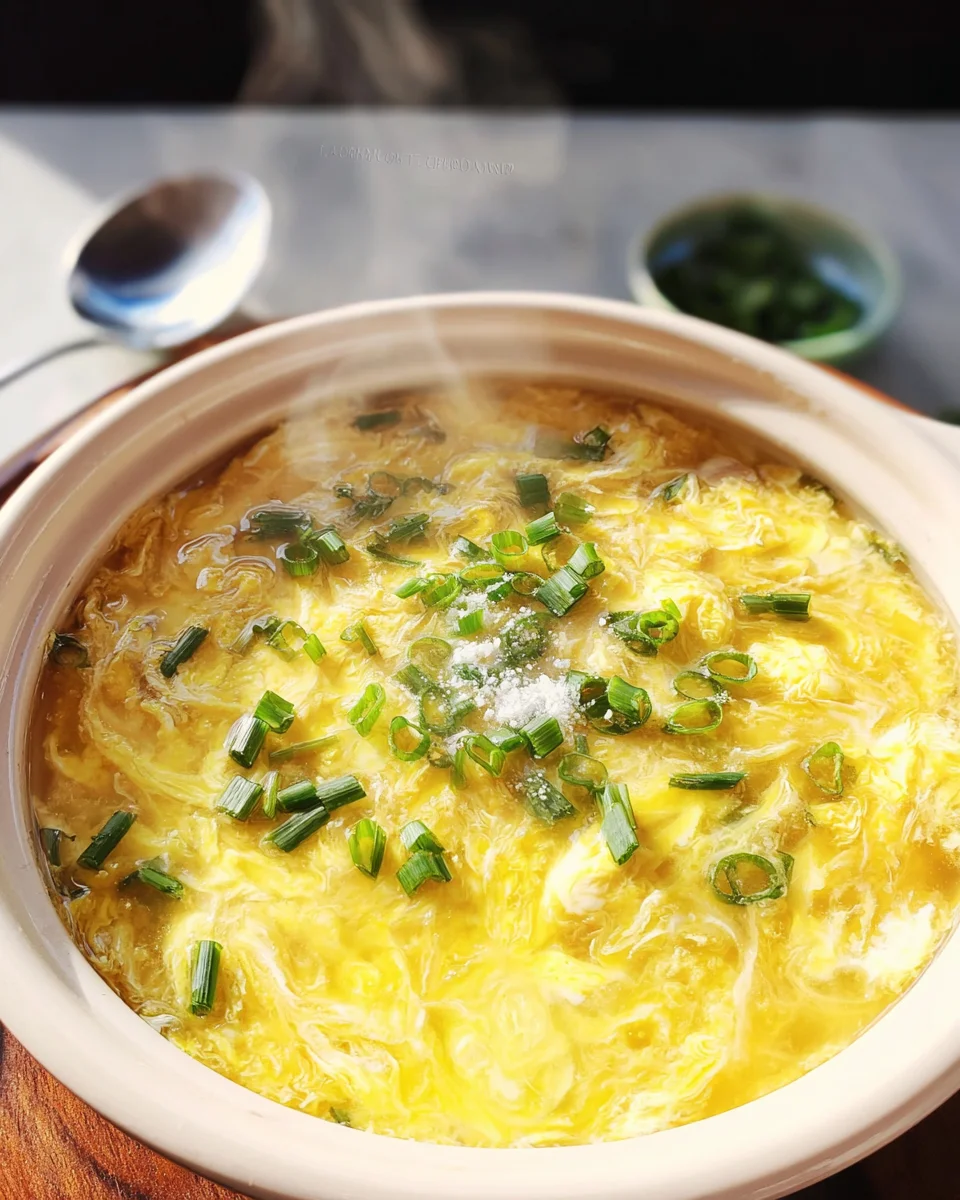
  3. Gentle Stirring Post-Egg Drop: After all the egg has been added, continue to stir gently for just another 10-15 seconds. This ensures the egg ribbons are evenly distributed throughout the soup and fully cooked. You’ll see those beautiful, cloudy, feather-light egg strands suspended in the clear, silky broth – the very essence of “Easy Minute Egg Drop Soup”! Over-stirring at this point can break up the delicate egg ribbons too much, so be gentle.

Finishing Touches and Serving Your Easy Minute Egg Drop Soup

  1. Final Seasoning Check and Sesame Oil: Take one last taste of your “Easy Minute Egg Drop Soup.” Does it need any final adjustments? Perhaps a tiny pinch more salt or white pepper? Once you’re satisfied with the flavor, remove the pot from the heat. Now, drizzle in the 1/2 teaspoon of toasted sesame oil. This is a finishing oil, so adding it at the very end preserves its potent, nutty aroma, which would dissipate if cooked for too long. Give it a quick, gentle stir to incorporate it. The sesame oil adds a wonderful layer of fragrance and depth that truly completes the dish.
  2. Garnish and Serve: Ladle your steaming hot “Easy Minute Egg Drop Soup” into individual serving bowls. Just before serving, sprinkle generously with the reserved dark green parts of the sliced green onions. The fresh green onion adds a burst of color, a hint of freshness, and a gentle bite that contrasts beautifully with the warm, savory soup. If you’re a fan of heat, a few drops of chili oil or a swirl of Sriracha can be added directly to your bowl for a personalized kick.
  3. Enjoy Immediately: This “Easy Minute Egg Drop Soup” is best enjoyed immediately while it’s piping hot and the egg ribbons are at their most delicate. It makes a fantastic light lunch, a comforting appetizer, or a simple, nourishing meal on its own. The beauty of this recipe is how quickly you can go from craving to indulging in a bowl of warm, flavorful goodness!

Tips for the Perfect Easy Minute Egg Drop Soup:

  • Quality Broth is Key: Since there are so few ingredients, the quality of your chicken or vegetable broth truly shines through. Invest in a good brand or use homemade for the best results.
  • Don’t Overcook the Eggs: The eggs cook very quickly. As soon as you see them form ribbons, they are done. Prolonged cooking can make them rubbery.
  • Adjust Thickness to Your Liking: If you prefer a thinner soup, use slightly less cornstarch. For a thicker consistency, you can always whisk up a little more slurry and add it in, remembering to stir constantly.
  • Customize Your Flavors: While this is an “Easy Minute Egg Drop Soup,” don’t hesitate to make it your own! A splash of rice vinegar can add a pleasant tang, or a dash of mushroom powder can deepen the umami.
Troubleshooting Common “Easy Minute Egg Drop Soup” Issues:
  • Lumpy Broth: This almost always means the cornstarch slurry wasn’t mixed thoroughly or wasn’t added slowly enough while stirring. Ensure your slurry is lump-free and pour in a thin stream while continuously whisking.
  • Clumped Eggs: If your eggs ended up as large chunks instead of delicate ribbons, it’s usually because the soup wasn’t swirling sufficiently when the eggs were added, or the heat was too high, cooking the eggs too fast before they could separate. A gentle simmer and consistent swirl are your friends.
  • Too Salty/Too Bland: Always taste and adjust! If it’s too salty, a splash of water or unsalted broth can help. If it’s too bland, a touch more soy sauce or a pinch of salt will bring it to life.

This “Easy Minute Egg Drop Soup” is a testament to how simple ingredients, handled with a little care, can create something truly satisfying and delicious in a flash. Enjoy!

Quick & Easy Egg Drop Soup in Minutes – Perfect Comfort Food

Conclusion:

So, there you have it! We’ve journeyed together through the remarkably simple steps to create a truly delightful dish, and I sincerely hope you’re as excited to try it as I am to share it. This isn’t just another recipe; it’s a revelation for anyone seeking comfort, flavor, and speed in their kitchen. I truly believe that once you experience the warmth and subtle complexities of this soup, it will become a cherished staple in your culinary repertoire. What makes this recipe a true gem is its incredible ability to deliver maximum satisfaction with minimal effort. Think about those evenings when you’re utterly exhausted but still crave something homemade and nourishing. This soup rises to the occasion every single time, offering a soothing embrace that feels both indulgent and wonderfully light. It’s a testament to the fact that incredibly delicious food doesn’t need to be complicated or time-consuming. From the moment the broth begins to simmer to the delicate swirl of the eggs, every step is designed for ease and enjoyment, culminating in a bowl that truly sings with fresh, clean flavors. It’s truly a must-try for its unparalleled combination of deliciousness, ease, and comforting warmth.

Your Bowl, Your Way: Serving Suggestions & Creative Twists

One of the many beautiful aspects of this incredible soup is its versatility. While it shines brightly all on its own as a light lunch or a comforting starter, there are countless ways to elevate your experience or adapt it to suit your cravings. For a more substantial meal, consider pairing it with a side of steamed jasmine rice; the subtle stickiness of the rice perfectly complements the delicate broth. Alternatively, if you’re a fan of noodles, a small nest of thin egg noodles or even vermicelli added directly to the broth during the last minute of cooking would transform it into a wonderfully satisfying noodle soup. For a complete Asian-inspired feast, serve it alongside some homemade or store-bought potstickers, spring rolls, or even a simple cucumber salad. The freshness of the salad or the crispness of fried appetizers provides a lovely textural contrast to the silky soup. Don’t hesitate to explore variations to truly make it your own. If you’re looking to boost the protein, a handful of finely shredded cooked chicken, some small cubes of silken tofu, or even thinly sliced mushrooms like shiitake or enoki would be fantastic additions. For those who enjoy a little extra greens, a handful of fresh spinach, baby bok choy, or even chopped scallions stirred in at the very end will wilt beautifully in the hot broth, adding both color and nutrients. A dash of toasted sesame oil drizzled over the top just before serving enhances its aromatic quality, while a pinch of red pepper flakes can introduce a gentle, warming heat for those who appreciate a spicy kick. Freshly grated ginger added to the broth at the beginning of cooking can also lend a wonderful, zesty depth. The possibilities are truly endless, allowing you to customize your bowl every single time.

Embark on Your Culinary Adventure and Share!

Now, I’ve given you all the tools and inspiration you need. It’s your turn to step into the kitchen and experience the magic for yourself. I genuinely encourage you to give this Easy Minute Egg Drop Soup a try. You’ll be amazed at how quickly you can whip up something so genuinely delicious and comforting. Forget about complicated recipes or long ingredient lists; this is about simple ingredients coming together in perfect harmony to create a truly memorable experience. There’s a unique satisfaction that comes from creating something wonderful with your own hands, and I promise this recipe delivers on that front. And once you’ve savored every last spoonful, I would absolutely love to hear about your experience! Did you stick to the original recipe, or did you venture into some of the variations I suggested? Did you discover a new favorite serving companion? Please don’t keep your culinary triumphs to yourself! Share your thoughts, your photos, and any creative twists you came up with in the comments section below, or even tag us on social media. Your feedback and personal touches inspire not just me, but a whole community of home cooks looking for their next delicious adventure. Happy cooking, my friends, and I can’t wait to see what wonderful bowls of soup you create!


Easy Minute Egg Drop Soup

A comforting and easy-to-make classic, this Easy Minute Egg Drop Soup is a hug in a bowl, ready in mere minutes with its delicate egg ribbons and savory broth.

Prep Time
7 Minutes
Cook Time
8 Minutes
Total Time
15 Minutes
Servings
2-4 servings

Ingredients


Instructions


Important Information

Nutrition Facts (Per Serving)

It is important to consider this information as approximate and not to use it as definitive health advice.

Allergy Information

Please check ingredients for potential allergens and consult a health professional if in doubt.

« Previous Post
Creamy Pumpkin Soup Recipe: Easy, Healthy & Delicious!
Next Post »
Mini Pecan Pies Recipe: Irresistible Bite-Sized Treats

If you enjoyed this…

Grilled Shrimp Bowl: The Ultimate Healthy & Delicious Recipe

Buffalo Chicken Cheesesteak: A Spicy Twist on a Classic Favorite

Sun Dried Tomato Grilled Cheese: A Delicious Twist on a Classic Favorite

Primary Sidebar

Browse by Diet

BreakfastDinnerLunchDessertAppetizer

Sweet Peach Yogurt Parfait Delight

One of my fondest memories is from a lazy summer afternoon spent at my grandmother’s house. The sun filtered through the kitchen window, casting a warm glow over the table where she would create her culinary magic. It was during one of those blissful moments that I first tasted her Peach Yogurt Parfait with Honey and Granola. The sweet aroma of ripe peaches mingling with creamy yogurt and the crunch of granola was nothing short of heavenly. It felt like summer captured in a bowl, and I still remember the joy of diving in with a spoon, each layer revealing a new burst of flavor.

When I think about that parfait, I can almost hear the gentle hum of the bees outside, reminding me of the floral notes that honey brings to every bite. The vibrant yellows and soft oranges of the peaches contrast beautifully with the creamy white yogurt and the golden crunch of granola. It’s a dish that not only looks delightful but also tastes like a celebration of fresh, wholesome ingredients.

What makes my version of this Peach Yogurt Parfait special is the careful balance of flavors and textures. I use ripe, juicy peaches, drizzled with locally sourced honey, and a homemade granola that’s bursting with nuts and seeds for an extra crunch. It’s a simple dish, but every layer is crafted with love and attention.

Let me show you exactly how to make this delightful parfait, so you can bring a bit of that summer magic into your kitchen!

Sweet Peach Yogurt Parfait Delight

Why You’ll Love This Recipe

  • Delightfully creamy texture from the Greek yogurt, paired with the juicy sweetness of fresh peaches.
  • Ready in under 20 minutes, making it a quick and satisfying breakfast or snack option.
  • Budget-friendly, using common ingredients that you may already have in your pantry.
  • Customizable with your favorite granola and nuts, allowing you to tailor each parfait to your taste.
  • Perfectly balanced flavors with the bright acidity of lemon juice and the sweetness of honey enhancing the peaches.

Ingredients

  • For the Parfait:
  • 2 cups plain Greek yogurt (or vanilla yogurt for a sweeter option)
  • 2 large ripe peaches, diced (about 2 cups)
  • 1 tablespoon fresh lemon juice (to prevent browning of peaches)
  • 2 tablespoons honey (plus more for drizzling)
  • 1 teaspoon vanilla extract (optional for extra flavor)
  • For the Granola:
  • 1 cup granola (store-bought or homemade; see notes for a simple granola recipe)
  • 1/4 cup sliced almonds (optional for added crunch)
  • 1/4 cup shredded coconut (optional for added flavor)

Let’s dive into some key ingredients that make this Peach Yogurt Parfait so delightful! First, the Greek yogurt is not only creamy but also packed with protein, making it a satisfying option for breakfast or a snack. If you’re looking for a sweeter option, you can easily substitute it with vanilla yogurt, though it may alter the overall flavor balance. Next, the ripe peaches are the star of the show; their natural sweetness shines through, so I recommend choosing peaches that yield slightly to pressure, indicating they’re perfectly ripe. If peaches aren’t in season, feel free to use nectarines or even frozen peaches—just thaw them before use. Finally, honey adds a lovely floral sweetness that ties everything together. If you prefer, maple syrup can serve as a delicious substitute.

Step-by-Step Instructions

  1. Start by preparing the peaches. Wash them thoroughly, then slice and dice them into bite-sized pieces. In a medium bowl, toss the diced peaches with 1 tablespoon of fresh lemon juice to prevent browning. Set aside for about 5 minutes while the lemon juice works its magic.
  2. In a separate bowl, combine the Greek yogurt, 2 tablespoons of honey, and 1 teaspoon of vanilla extract if using. Stir the mixture until smooth and thoroughly blended. This should take about a minute. Avoid overmixing to maintain the creaminess of the yogurt.
  3. Now it’s time to layer your parfait. Grab a clear glass or bowl to showcase your beautiful creation. Start with a generous spoonful of the yogurt mixture at the bottom—about 1/4 cup will do. Use a spoon to spread it evenly.
  4. Add a layer of the diced peaches over the yogurt, ensuring they cover the yogurt completely. You might want to use about half of what you have prepared—roughly 1 cup. This layer should be visually appealing, so arrange the peaches neatly.
  5. Sprinkle 1/4 cup of granola over the peaches. This adds a delightful crunch. Make sure to distribute it evenly to ensure every bite has that satisfying texture. Avoid packing it down too tightly, as you want it to maintain its crunch.
  6. Repeat the layers: spoon in another 1/4 cup of yogurt, followed by another cup of peaches, and another sprinkle of granola. You should have at least two layers, but feel free to add more depending on your glass size.
  7. Finish off your parfait with a drizzle of honey on top for added sweetness and a touch of elegance. If you’re using sliced almonds or shredded coconut, sprinkle them on top now. It adds a lovely visual contrast and extra flavor.
  8. Serve immediately or refrigerate for up to 30 minutes before serving to allow the flavors to meld together. However, I recommend enjoying it fresh to maintain the granola’s crunch.

Pro Tips for the Best Peach Yogurt Parfait With Honey And Granola

  • Make sure to choose ripe peaches for the best flavor and texture. A common mistake is using unripe fruit, which can lead to a less enjoyable parfait. Look for peaches that are fragrant and slightly soft to the touch.
  • Use a clear glass to assemble your parfait; this not only makes for a beautiful presentation but also allows you to see the colorful layers, which adds to the enjoyment of eating it.
  • For an even creamier texture, consider whipping the Greek yogurt with a hand mixer for a couple of minutes before layering. This small adjustment makes a huge difference in mouthfeel.
  • Be mindful of the granola-to-yogurt ratio. Too much granola can overwhelm the parfait, while too little can make it feel too creamy. Aim for about 1/4 cup of granola per layer for the perfect balance.
  • If you’re making this for a gathering, consider preparing the yogurt and peaches ahead of time and layering them just before serving. This ensures the granola stays crunchy!

Variations & Serving Ideas

There are so many ways to get creative with your Peach Yogurt Parfait! For a tropical twist, swap out the peaches for mangoes or pineapples and top with coconut flakes. If you prefer a berry flavor, mix in some blueberries or strawberries with the peaches for added color and taste. For a nutty version, incorporate chopped walnuts or pecans instead of almonds.

As for serving ideas, this parfait pairs beautifully with a side of scrambled eggs for a hearty breakfast or fresh fruit salad for a light lunch. You might also enjoy it alongside whole grain toast with almond butter for an energizing snack. The contrast of flavors and textures will elevate your meal experience!

Storage, Make-Ahead & Reheating

The Peach Yogurt Parfait is best enjoyed fresh, but you can prepare some components ahead of time. Store the layered parfait in an airtight container in the refrigerator for up to 24 hours. However, be cautious; the granola may lose its crunch if stored too long. You can freeze the yogurt and peach mixture for up to 2 months; just remember to thaw it in the refrigerator overnight before serving.

If you plan to enjoy this dish the next day, it can taste even better as the flavors meld together. Just remember to add the granola right before serving to keep its delightful crunch!

Frequently Asked Questions

Can I make Peach Yogurt Parfait With Honey And Granola ahead of time?

Yes — in fact, it tastes even better the next day as the flavors meld. However, I recommend waiting to add the granola until just before serving to maintain its crunch.

What can I substitute for Greek yogurt?

If you prefer a lighter option, you can substitute Greek yogurt with regular yogurt or a dairy-free alternative like coconut yogurt. Just remember that this may alter the creaminess and flavor profile slightly.

Can I use frozen peaches for this parfait?

Absolutely! Just make sure to thaw the frozen peaches before using them. They will still add great flavor, though the texture may be slightly softer than fresh peaches.

How do I make the parfait vegan?

To make a vegan version, substitute the Greek yogurt with a plant-based yogurt alternative, and replace honey with maple syrup or agave nectar. This keeps the parfait sweet while adhering to a vegan diet.

What other fruits can I use in this recipe?

You can mix and match fruits based on your preference. Try using strawberries, blueberries, raspberries, or even bananas. Just make sure to adjust the lemon juice as needed to prevent browning.

Sweet Peach Yogurt Parfait Delight

Final Thoughts

The Peach Yogurt Parfait with Honey and Granola is a delightful blend of creamy yogurt, sweet peaches, and crunchy granola that creates a satisfying and nourishing treat. Each layer bursts with flavor, making it a perfect choice for breakfast or a light dessert.

This is the kind of recipe I come back to again and again, especially when I want something refreshing and wholesome to start my day. The harmony of sweet and tart flavors, combined with the delightful crunch, never fails to lift my spirits!

I encourage you to give this parfait a try and indulge in its comforting goodness. Feel free to share your results or even add your own twist—perhaps a sprinkle of cinnamon or a handful of nuts. Enjoy creating your perfect parfait!

Print
clock clock iconcutlery cutlery iconflag flag iconfolder folder iconinstagram instagram iconpinterest pinterest iconfacebook facebook iconprint print iconsquares squares iconheart heart iconheart solid heart solid icon

Peach Yogurt Parfait


  • Author: Lily author
  • Total Time: 15 minutes
  • Yield: 4 servings 1x
Pin Recipe
Print Recipe

Description

This Peach Yogurt Parfait combines creamy Greek yogurt, juicy peaches, and crunchy granola for a delightful treat. It’s a perfect breakfast or snack that captures the essence of summer in every bite.


Ingredients

Scale
  • For the Parfait:
  • 2 cups plain Greek yogurt (or vanilla yogurt for a sweeter option)
  • 2 large ripe peaches, diced (about 2 cups)
  • 1 tablespoon fresh lemon juice (to prevent browning of peaches)
  • 2 tablespoons honey (plus more for drizzling)
  • 1 teaspoon vanilla extract (optional for extra flavor)
  • For the Granola:
  • 1 cup granola (store-bought or homemade; see notes for a simple granola recipe)
  • 1/4 cup sliced almonds (optional for added crunch)
  • 1/4 cup shredded coconut (optional for added flavor)

Instructions

  1. Start by preparing the peaches. Wash them thoroughly, then slice and dice them into bite-sized pieces. In a medium bowl, toss the diced peaches with 1 tablespoon of fresh lemon juice to prevent browning. Set aside for about 5 minutes while the lemon juice works its magic.
  2. In a separate bowl, combine the Greek yogurt, 2 tablespoons of honey, and 1 teaspoon of vanilla extract if using. Stir the mixture until smooth and thoroughly blended. This should take about a minute. Avoid overmixing to maintain the creaminess of the yogurt.
  3. Now it’s time to layer your parfait. Grab a clear glass or bowl to showcase your beautiful creation. Start with a generous spoonful of the yogurt mixture at the bottom—about 1/4 cup will do. Use a spoon to spread it evenly.
  4. Add a layer of the diced peaches over the yogurt, ensuring they cover the yogurt completely. You might want to use about half of what you have prepared—roughly 1 cup. This layer should be visually appealing, so arrange the peaches neatly.
  5. Sprinkle 1/4 cup of granola over the peaches. This adds a delightful crunch. Make sure to distribute it evenly to ensure every bite has that satisfying texture. Avoid packing it down too tightly, as you want it to maintain its crunch.
  6. Repeat the layers: spoon in another 1/4 cup of yogurt, followed by another cup of peaches, and another sprinkle of granola. You should have at least two layers, but feel free to add more depending on your glass size.
  7. Finish off your parfait with a drizzle of honey on top for added sweetness and a touch of elegance. If you’re using sliced almonds or shredded coconut, sprinkle them on top now. It adds a lovely visual contrast and extra flavor.
  8. Serve immediately or refrigerate for up to 30 minutes before serving to allow the flavors to meld together. However, I recommend enjoying it fresh to maintain the granola’s crunch.
  • Prep Time: 15 mins
  • Cook Time: 0 mins
  • Category: Breakfast
  • Method: No-cook
  • Cuisine: American

Nutrition

  • Serving Size: 1 parfait
  • Calories: 250
  • Sugar: 20 g
  • Sodium: 50 mg
  • Fat: 5 g
  • Saturated Fat: 2 g
  • Unsaturated Fat: 3 g
  • Trans Fat: 0 g
  • Carbohydrates: 40 g
  • Fiber: 3 g
  • Protein: 10 g
  • Cholesterol: 10 mg

Keywords: Choose ripe peaches for the best flavor and texture. Use a clear glass for a beautiful presentation. For creaminess, consider whipping the yogurt before layering. Be mindful of the granola-to-yogurt ratio. Prepare yogurt and peaches ahead of time for gatherings, layering just before serving.

Did you make this recipe?

Share a photo and tag us — we can't wait to see what you've made!

Sun-Kissed Frozen Orange Cream Slush

As a child, summer days felt like they lasted forever. I remember the sticky heat wrapping around me as I played outside, my laughter mingling with the sounds of the neighborhood. But nothing could cool me down quite like the moment I’d spot my grandmother, laboring over her blender, whipping up her famous Frozen Orange Creamsicle Slush. That vibrant orange treat, with its frosty texture and sweet citrus aroma, was like a burst of sunshine in a cup. Just one sip, and I could feel the coolness wash over me, sparking pure joy.

This Frozen Orange Creamsicle Slush has a way of making you feel like a kid again. Its creamy, dreamy consistency is a delightful balance of bright orange and soft vanilla, inviting you to dive right in. The refreshing tang of orange dances on your tongue, while the smooth creaminess envelops you in a comforting embrace. It’s a nostalgic treat that’s perfect for hot summer afternoons or anytime you need a little pick-me-up.

What makes my version of this slush stand out is the addition of a hint of vanilla bean, which elevates the flavor and adds an extra layer of richness. Plus, it’s super easy to whip up with just a few simple ingredients that you probably already have on hand! So, if you’re ready to relive those sun-soaked memories, let me show you exactly how to make it.

Sun-Kissed Frozen Orange Cream Slush

Why You’ll Love This Recipe

  • Each slush is a perfect blend of creamy vanilla and zesty orange, creating a nostalgic flavor reminiscent of summer days.
  • This refreshing treat is ready in under 15 minutes, making it an ideal quick dessert for unexpected guests or hot afternoons.
  • With just 8 simple ingredients, it’s budget-friendly, ensuring you don’t have to break the bank to enjoy a delicious slush.
  • The slush has a perfectly smooth texture, thanks to the combination of ice and ice cream, providing a delightful contrast to the bright citrus flavors.
  • It’s highly customizable; you can easily adjust the sweetness and add fresh herbs for a unique twist that suits your taste.

Ingredients

  • 2 cups orange juice (freshly squeezed or store-bought)
  • 1 cup vanilla ice cream
  • 1 cup crushed ice
  • 1/2 cup milk (whole or 2%)
  • 1/4 cup granulated sugar (adjust based on sweetness preference)
  • 1 teaspoon vanilla extract
  • Zest of 1 orange (for added flavor)
  • Fresh orange slices and mint leaves (for garnish)

The star of this Frozen Orange Creamsicle Slush is the orange juice, which provides the vibrant, citrusy base. Freshly squeezed juice will yield the brightest flavor, but store-bought options can be just as convenient. If you’re opting for store-bought, choose 100% pure juice with no added sugars for the best results. Another essential ingredient is the vanilla ice cream; it adds creaminess and sweetness. You can substitute it with dairy-free ice cream if you’re looking for a vegan option. Whole or 2% milk complements the ice cream, creating a smooth blend. If you want a lower-calorie version, almond or oat milk can be good alternatives.

Lastly, the granulated sugar can be adjusted based on your sweetness preference. If you prefer a more natural sweetener, consider using honey or agave syrup. The orange zest enhances the flavor profile, providing an aromatic pop that brings the whole slush together. Don’t skip it! It adds an extra layer of brightness that makes this slush truly special.

Step-by-Step Instructions

  1. Start by preparing your ingredients. Gather 2 cups of orange juice, 1 cup of vanilla ice cream, and 1 cup of crushed ice. Make sure the ice is finely crushed, as larger chunks can make blending difficult.
  2. In a blender, combine the orange juice, vanilla ice cream, crushed ice, and 1/2 cup of milk. Add 1/4 cup of granulated sugar and 1 teaspoon of vanilla extract. If you like a sweeter slush, consider adding a bit more sugar at this stage.
  3. Add the zest of 1 orange to the blender. This step is crucial for enhancing the citrus flavor of your slush. Make sure not to include the bitter white pith—only the flavorful zest.
  4. Blend the mixture on medium-high speed for about 30-45 seconds. Stop once the ingredients are fully combined and the slush has a smooth, even consistency. If you notice large chunks of ice, blend for an additional 10-15 seconds. Avoid over-blending, as this can make the slush too liquidy.
  5. Once blended, taste the slush. If it needs more sweetness, add a little more sugar and blend for a few more seconds. If it’s too thick, you can add a splash of milk to reach your desired consistency.
  6. Pour the slush into glasses. This recipe typically serves 4, but you can easily double it for larger gatherings. Use a spoon to help guide the slush into the glasses if needed.
  7. Garnish each serving with fresh orange slices and mint leaves. The mint not only adds a pop of color but also a refreshing aroma that complements the citrus flavors beautifully.
  8. Serve immediately and enjoy! If you’ve made extra, you can refrigerate it for a short time, but it’s best enjoyed fresh.

Pro Tips for the Best Frozen Orange Creamsicle Slush

  • Don’t skip the orange zest! It’s a game-changer for flavor. Always zest before juicing to make it easier.
  • Use a high-powered blender for the best texture. A standard blender may struggle with ice, leading to uneven consistency. If you have a food processor, that can work too, but ensure the ice is finely crushed.
  • Adjust the ice-to-liquid ratio carefully. If your slush is too thick, it won’t blend well. Start with less ice and add more until you reach your preferred texture.
  • Be cautious with the sugar! Always start with the lower amount, as you can easily add more, but it’s hard to fix an overly sweet slush.
  • For a fun twist, consider adding a splash of coconut milk or a handful of fresh fruit like strawberries or pineapple. This not only enhances the flavor but also adds a beautiful color contrast.

Variations & Serving Ideas

There are countless ways to put a spin on your Frozen Orange Creamsicle Slush. Consider making a tropical version by adding in some pineapple juice or coconut milk for a delightful tropical twist. If you’re feeling adventurous, try incorporating a handful of frozen mango or peach slices for added sweetness. For a lighter version, swap out the vanilla ice cream for Greek yogurt for a creamy yet tangy alternative.

As for serving ideas, this refreshing slush pairs wonderfully with light summer dishes like grilled chicken skewers, fish tacos, or a simple salad topped with citrus vinaigrette. The bright, zesty flavors of the slush complement these dishes perfectly, making them an ideal pairing for a sunny day.

Storage, Make-Ahead & Reheating

This Frozen Orange Creamsicle Slush is best enjoyed fresh, but if you have leftovers, you can store them in an airtight container in the fridge for up to 2 days. Just keep in mind that the slush may lose some of its texture over time as the ice melts. It doesn’t freeze well, as the ice will turn into a solid block. If you must freeze it, blend again after thawing to restore the slushy consistency. This treat is best the day you make it, as the flavors meld together beautifully overnight, enhancing its deliciousness.

Frequently Asked Questions

Can I make Frozen Orange Creamsicle Slush ahead of time?

Yes — in fact, it tastes even better the next day as the flavors meld. However, it’s best to enjoy it fresh, as the texture can change if stored for too long. If you need to prepare it ahead, keep it in the fridge and re-blend before serving.

What kind of orange juice should I use?

For the best flavor, use freshly squeezed orange juice. However, if you’re short on time, opt for 100% pure store-bought juice without added sugars. This will ensure that your slush remains flavorful and refreshing.

Can I substitute the vanilla ice cream?

Absolutely! If you’re looking for a dairy-free option, coconut milk ice cream or a non-dairy vanilla ice cream can work wonderfully. They will still provide the creamy texture and sweetness you desire.

How can I adjust the sweetness of my slush?

You can easily adjust the sweetness by modifying the amount of sugar added. Start with 1/4 cup and taste the mixture before blending. If you prefer it sweeter, add more sugar gradually until it reaches your desired level.

What should I do if my slush is too thick?

If your slush is too thick, simply add a splash of milk or orange juice and blend again. This will help achieve a more drinkable consistency while maintaining the slushy texture. Adjust gradually to reach your preferred thickness.

Sun-Kissed Frozen Orange Cream Slush

Final Thoughts

The Frozen Orange Creamsicle Slush is a delightful blend of refreshing citrus and creamy goodness, making it a perfect treat for warm days or any time you crave a taste of nostalgia. The way the bright orange flavor dances with the creamy texture truly elevates this slush, transforming it into a satisfying escape from the everyday.

This is the kind of recipe I come back to again and again, especially when I’m looking to cool down or impress guests at a summer gathering. It’s simple to make and always brings smiles all around! I encourage you to try this recipe for yourself—don’t hesitate to share your results or even put your own spin on it. Happy slushing!

Print
clock clock iconcutlery cutlery iconflag flag iconfolder folder iconinstagram instagram iconpinterest pinterest iconfacebook facebook iconprint print iconsquares squares iconheart heart iconheart solid heart solid icon

Frozen Orange Creamsicle Slush


  • Author: Lily author
  • Total Time: 15 minutes
  • Yield: 4 servings 1x
Pin Recipe
Print Recipe

Description

This Frozen Orange Creamsicle Slush is a refreshing treat that combines creamy vanilla and zesty orange flavors. Perfect for hot summer days, it brings back nostalgic memories with every sip.


Ingredients

Scale
  • 2 cups orange juice (freshly squeezed or store-bought)
  • 1 cup vanilla ice cream
  • 1 cup crushed ice
  • 1/2 cup milk (whole or 2%)
  • 1/4 cup granulated sugar (adjust based on sweetness preference)
  • 1 teaspoon vanilla extract
  • Zest of 1 orange (for added flavor)
  • Fresh orange slices and mint leaves (for garnish)

Instructions

  1. Start by preparing your ingredients. Gather 2 cups of orange juice, 1 cup of vanilla ice cream, and 1 cup of crushed ice. Make sure the ice is finely crushed, as larger chunks can make blending difficult.
  2. In a blender, combine the orange juice, vanilla ice cream, crushed ice, and 1/2 cup of milk. Add 1/4 cup of granulated sugar and 1 teaspoon of vanilla extract. If you like a sweeter slush, consider adding a bit more sugar at this stage.
  3. Add the zest of 1 orange to the blender. This step is crucial for enhancing the citrus flavor of your slush. Make sure not to include the bitter white pith—only the flavorful zest.
  4. Blend the mixture on medium-high speed for about 30-45 seconds. Stop once the ingredients are fully combined and the slush has a smooth, even consistency. If you notice large chunks of ice, blend for an additional 10-15 seconds. Avoid over-blending, as this can make the slush too liquidy.
  5. Once blended, taste the slush. If it needs more sweetness, add a little more sugar and blend for a few more seconds. If it’s too thick, you can add a splash of milk to reach your desired consistency.
  6. Pour the slush into glasses. This recipe typically serves 4, but you can easily double it for larger gatherings. Use a spoon to help guide the slush into the glasses if needed.
  7. Garnish each serving with fresh orange slices and mint leaves. The mint not only adds a pop of color but also a refreshing aroma that complements the citrus flavors beautifully.
  8. Serve immediately and enjoy! If you’ve made extra, you can refrigerate it for a short time, but it's best enjoyed fresh.
  • Prep Time: 15 min
  • Cook Time: 0 min
  • Category: Dessert
  • Method: Blending
  • Cuisine: American

Nutrition

  • Serving Size: 1 serving
  • Calories: 200
  • Sugar: 30 g
  • Sodium: 50 mg
  • Fat: 5 g
  • Saturated Fat: 3 g
  • Unsaturated Fat: 2 g
  • Trans Fat: 0 g
  • Carbohydrates: 40 g
  • Fiber: 1 g
  • Protein: 2 g
  • Cholesterol: 20 mg

Keywords: Don't skip the orange zest! It's a game-changer for flavor. Always zest before juicing to make it easier.

Did you make this recipe?

Share a photo and tag us — we can't wait to see what you've made!

Zesty Lemon Poppy Seed Delight

One rainy afternoon, I found myself in my grandmother’s cozy kitchen, the kind that always smelled like warmth and love. She was whipping up her famous Lemon Poppy Seed Loaf, a recipe that had been passed down through generations. As the batter came together, the zesty aroma of fresh lemons filled the air, mingling perfectly with the nutty fragrance of poppy seeds. I can still picture her, apron-clad, as she expertly drizzled a vibrant citrus icing over the loaf, creating a glossy, sun-kissed finish that beckoned us to dive in. It was a moment that sparked my own passion for baking, and this recipe has become a cherished staple in my home ever since.

When you take a bite of this Lemon Poppy Seed Loaf, it’s like a burst of sunshine on your palate. The loaf is beautifully golden, with a tender crumb that melts in your mouth. Each slice is speckled with tiny poppy seeds, adding a delightful crunch that contrasts beautifully with the tangy sweetness of the lemon. And that citrus icing? It’s the finishing touch that elevates this loaf from ordinary to extraordinary, with its bright, zesty flavor dancing on your taste buds.

This recipe stands out because it embraces simplicity while delivering on flavor. I’ve added a hint of vanilla to the batter, enhancing the overall taste and making it even more indulgent. Trust me, once you make this Lemon Poppy Seed Loaf With Citrus Icing, it’ll become a go-to in your baking repertoire.

So, let me show you exactly how to make it!

Zesty Lemon Poppy Seed Delight

Why You’ll Love This Recipe

  • Moist and tender crumb that melts in your mouth, thanks to the perfect balance of butter and buttermilk.
  • Bright, zesty lemon flavor paired with crunchy poppy seeds, creating a delightful texture and taste experience.
  • Easy to whip up in just about an hour, perfect for last-minute gatherings or a cozy afternoon treat.
  • Budget-friendly with everyday ingredients, making it an accessible option for all home bakers.
  • The citrus icing adds a sweet tang that elevates the loaf, turning a simple recipe into a showstopper!

Ingredients

  • 1 ½ cups (190g) all-purpose flour
  • 1 teaspoon baking powder
  • ½ teaspoon baking soda
  • ½ teaspoon salt
  • 3 tablespoons poppy seeds
  • ½ cup (115g) unsalted butter, softened to room temperature
  • 1 cup (200g) granulated sugar
  • 2 large eggs
  • 1 teaspoon vanilla extract
  • 1 teaspoon lemon zest (from about 1 medium lemon)
  • ½ cup (120ml) buttermilk
  • 2 tablespoons fresh lemon juice

For the Citrus Icing:

  • 1 cup (120g) powdered sugar
  • 2 tablespoons fresh lemon juice
  • 1 tablespoon orange juice
  • 1 teaspoon lemon zest (for garnish, optional)

Let’s dive into the key ingredients that make this Lemon Poppy Seed Loaf so special. The all-purpose flour provides the structure and base for the loaf, while the baking powder and baking soda ensure it rises perfectly, giving the loaf a light texture. For a gluten-free variation, you could substitute the flour with a gluten-free all-purpose blend. Poppy seeds not only add a delightful crunch but also contribute to the unique flavor profile that pairs well with the citrus notes.

Unsalted butter is crucial for achieving the buttery richness that makes this loaf so moist. If you’re looking for a dairy-free option, coconut oil or a vegan butter can be used instead. The buttermilk is another essential component, providing acidity that activates the baking soda for a fluffy texture. If you don’t have buttermilk on hand, you can easily make a substitute by mixing ½ cup of milk with 1 tablespoon of vinegar or lemon juice and letting it sit for about 5 minutes.

Step-by-Step Instructions

  1. Preheat your oven to 350°F (175°C). Grease a 9×5-inch loaf pan or line it with parchment paper for easy removal later.
  2. In a medium mixing bowl, whisk together 1 ½ cups of all-purpose flour, 1 teaspoon of baking powder, ½ teaspoon of baking soda, ½ teaspoon of salt, and 3 tablespoons of poppy seeds. This helps to evenly distribute the baking agents and ensures a uniform rise.
  3. In a large mixing bowl, cream together ½ cup of softened unsalted butter and 1 cup of granulated sugar using an electric mixer on medium speed for about 3-4 minutes, until the mixture is light and fluffy. Make sure to scrape down the sides of the bowl occasionally.
  4. Add 2 large eggs, 1 teaspoon of vanilla extract, and 1 teaspoon of lemon zest to the creamed butter and sugar, mixing until fully combined. You want a smooth consistency, so ensure there are no lumps of butter.
  5. In a small bowl, combine ½ cup of buttermilk and 2 tablespoons of fresh lemon juice. Alternately add the dry ingredients and buttermilk mixture to the butter mixture, starting and ending with the dry ingredients. Mix just until combined; do not overmix, as this can lead to a dense loaf.
  6. Pour the batter into the prepared loaf pan. Smooth the top with a spatula, ensuring it’s even. Bake in the preheated oven for 50-60 minutes, or until a toothpick inserted in the center comes out clean. The edges should be lightly golden brown, and the center should feel just set.
  7. Once baked, remove the loaf from the oven and allow it to cool in the pan for about 10 minutes. Then, transfer it to a wire rack to cool completely. Resist the urge to slice too soon, as it will be crumbly if it’s still warm.
  8. While the loaf is cooling, prepare the citrus icing. In a medium bowl, whisk together 1 cup of powdered sugar, 2 tablespoons of fresh lemon juice, and 1 tablespoon of orange juice until smooth. If the icing is too thick, you can add a little more juice to reach your desired consistency.
  9. Once the loaf is completely cool, drizzle the citrus icing over the top. If you like, sprinkle with an additional teaspoon of lemon zest for an extra pop of flavor and color.

Pro Tips for the Best Lemon Poppy Seed Loaf With Citrus Icing

  • Be careful not to overmix your batter; this is a common mistake that can lead to a dense loaf. Mix just until the dry ingredients are incorporated for a light and fluffy texture.
  • Use room temperature ingredients, especially the butter and eggs. This helps to create a smoother batter and ensures even baking. Take your eggs out of the fridge about 30 minutes before you start.
  • For a more pronounced lemon flavor, consider adding a little lemon extract in addition to the zest and juice. Just a half teaspoon can elevate the citrus notes significantly.
  • When measuring your flour, spoon it into the measuring cup and level it off with a knife instead of scooping directly from the bag. This prevents packing and ensures you don’t end up with a dry loaf.
  • Invest in a good quality loaf pan; it makes a difference in heat distribution, which ensures even baking. If your pan is dark-coated, reduce the oven temperature by 25°F to prevent over-browning.

Variations & Serving Ideas

For a delightful twist, consider adding blueberries or raspberries to the batter for a fruity burst of flavor. You can also experiment with different citrus fruits—try lime or grapefruit zest and juice for a refreshing change. For a healthier option, substitute half of the all-purpose flour with whole wheat flour for added fiber without compromising too much on texture.

This Lemon Poppy Seed Loaf pairs beautifully with a light salad, such as a mixed greens salad with a vinaigrette, or a cup of tea for a cozy afternoon treat. It also complements a creamy cheese platter, as the acidity of the loaf balances rich cheeses perfectly. Lastly, a scoop of vanilla ice cream on the side creates a delightful contrast of temperatures and flavors!

Storage, Make-Ahead & Reheating

This Lemon Poppy Seed Loaf can be stored at room temperature for up to 3 days if wrapped tightly in plastic wrap. If you want to keep it longer, it freezes well for up to 3 months. To freeze, wrap the loaf tightly in plastic wrap and then in aluminum foil to prevent freezer burn.

When you’re ready to enjoy it again, simply thaw it in the fridge overnight. Reheat individual slices in the microwave for 15-20 seconds or in a toaster oven until warmed through. Interestingly, many people find that this loaf tastes even better the next day, as the flavors have time to meld!

Frequently Asked Questions

Can I make Lemon Poppy Seed Loaf With Citrus Icing ahead of time?

Yes — in fact, it tastes even better the next day! You can make the loaf a day in advance, allowing the flavors to develop. Just be sure to store it in an airtight container to maintain its moisture.

Can I substitute the poppy seeds?

Absolutely! If you don’t have poppy seeds on hand or prefer an alternative, you can use sesame seeds for a similar crunch or omit them entirely for a smooth loaf.

What can I use instead of buttermilk?

If you don’t have buttermilk, you can easily create a substitute by mixing ½ cup of milk (dairy or plant-based) with 1 tablespoon of vinegar or lemon juice. Let it sit for 5 minutes before using in the recipe.

How can I make this recipe gluten-free?

To make a gluten-free version of this Lemon Poppy Seed Loaf, substitute the all-purpose flour with a gluten-free all-purpose flour blend. Just ensure that the blend contains a binding agent like xanthan gum for the best results.

What is the best way to store leftover loaf?

Leftover Lemon Poppy Seed Loaf should be stored in an airtight container at room temperature for up to 3 days. For longer storage, wrap it tightly and freeze for up to 3 months. Thaw it before serving for the best texture.

Zesty Lemon Poppy Seed Delight

Final Thoughts

The Lemon Poppy Seed Loaf with Citrus Icing is truly a delightful treat that brings a burst of brightness to any occasion. The zesty lemon flavor combined with the subtle crunch of poppy seeds creates a satisfying balance, while the citrus icing adds a touch of sweetness that perfectly complements the loaf’s tanginess.

This is the kind of recipe I come back to again and again, especially when I want to brighten up a gloomy day or celebrate a small victory. The aroma that fills the kitchen as it bakes is absolutely heavenly! I encourage you to give this recipe a try; you might just find it becoming a beloved staple in your home. Don’t forget to share your results or even add your own unique twist—I can’t wait to see what you create!

Print
clock clock iconcutlery cutlery iconflag flag iconfolder folder iconinstagram instagram iconpinterest pinterest iconfacebook facebook iconprint print iconsquares squares iconheart heart iconheart solid heart solid icon

Lemon Poppy Seed Loaf


  • Author: Lily author
  • Total Time: 34 minute
  • Yield: 1 loaf 1x
Pin Recipe
Print Recipe

Description

This Lemon Poppy Seed Loaf is a delightful treat that combines zesty lemon flavor with crunchy poppy seeds. Topped with a citrus icing, it’s perfect for any occasion.


Ingredients

Scale
  • 1 ½ cups (190g) all-purpose flour
  • 1 teaspoon baking powder
  • ½ teaspoon baking soda
  • ½ teaspoon salt
  • 3 tablespoons poppy seeds
  • ½ cup (115g) unsalted butter, softened to room temperature
  • 1 cup (200g) granulated sugar
  • 2 large eggs
  • 1 teaspoon vanilla extract
  • 1 teaspoon lemon zest (from about 1 medium lemon)
  • ½ cup (120ml) buttermilk
  • 2 tablespoons fresh lemon juice
  • 1 cup (120g) powdered sugar
  • 2 tablespoons fresh lemon juice
  • 1 tablespoon orange juice
  • 1 teaspoon lemon zest (for garnish, optional)

Instructions

  1. Preheat your oven to 350°F (175°C). Grease a 9×5-inch loaf pan or line it with parchment paper for easy removal later.
  2. In a medium mixing bowl, whisk together 1 ½ cups of all-purpose flour, 1 teaspoon of baking powder, ½ teaspoon of baking soda, ½ teaspoon of salt, and 3 tablespoons of poppy seeds. This helps to evenly distribute the baking agents and ensures a uniform rise.
  3. In a large mixing bowl, cream together ½ cup of softened unsalted butter and 1 cup of granulated sugar using an electric mixer on medium speed for about 3-4 minutes, until the mixture is light and fluffy. Make sure to scrape down the sides of the bowl occasionally.
  4. Add 2 large eggs, 1 teaspoon of vanilla extract, and 1 teaspoon of lemon zest to the creamed butter and sugar, mixing until fully combined. You want a smooth consistency, so ensure there are no lumps of butter.
  5. In a small bowl, combine ½ cup of buttermilk and 2 tablespoons of fresh lemon juice. Alternately add the dry ingredients and buttermilk mixture to the butter mixture, starting and ending with the dry ingredients. Mix just until combined; do not overmix, as this can lead to a dense loaf.
  6. Pour the batter into the prepared loaf pan. Smooth the top with a spatula, ensuring it’s even. Bake in the preheated oven for 50-60 minutes, or until a toothpick inserted in the center comes out clean. The edges should be lightly golden brown, and the center should feel just set.
  7. Once baked, remove the loaf from the oven and allow it to cool in the pan for about 10 minutes. Then, transfer it to a wire rack to cool completely. Resist the urge to slice too soon, as it will be crumbly if it’s still warm.
  8. While the loaf is cooling, prepare the citrus icing. In a medium bowl, whisk together 1 cup of powdered sugar, 2 tablespoons of fresh lemon juice, and 1 tablespoon of orange juice until smooth. If the icing is too thick, you can add a little more juice to reach your desired consistency.
  9. Once the loaf is completely cool, drizzle the citrus icing over the top. If you like, sprinkle with an additional teaspoon of lemon zest for an extra pop of flavor and color.
  • Prep Time: 15 mins
  • Cook Time: 50-60 mins
  • Category: Dessert
  • Method: Baking
  • Cuisine: American

Nutrition

  • Serving Size: 1 slice
  • Calories: 200
  • Sugar: 15 g
  • Sodium: 150 mg
  • Fat: 8 g
  • Saturated Fat: 5 g
  • Unsaturated Fat: 3 g
  • Trans Fat: 0 g
  • Carbohydrates: 30 g
  • Fiber: 1 g
  • Protein: 3 g
  • Cholesterol: 40 mg

Keywords: Be careful not to overmix your batter; this is a common mistake that can lead to a dense loaf. Use room temperature ingredients for a smoother batter and even baking.

Did you make this recipe?

Share a photo and tag us — we can't wait to see what you've made!

  • Privacy Policy
  • Terms Of Service
  • Contact
  • About
  • GDPR

Copyright © 2025 Homesmad