Spicy Korean Ramen With Grilled Beef Creamy Sauce isn’t just a meal; it’s an adventure for your taste buds, a symphony of flavors that promises to transform your perception of ramen forever. Are you ready to elevate your culinary experience and create a dish that’s both incredibly comforting and extraordinarily gourmet right in your own kitchen?
For decades, instant ramen has been a beloved staple worldwide, cherished for its convenience and satisfying warmth. In Korea, however, this humble dish has been reimagined countless times, evolving from a simple, quick fix into a vibrant canvas for incredible gastronomic creativity. My recipe takes this beloved tradition to exhilarating new heights, moving far beyond the simple packet to craft something truly special. We’re embracing the vibrant, fiery heart of authentic Korean spices, marrying it with the smoky succulence of perfectly grilled beef, all brought together by an unbelievably rich and smooth creamy sauce. This isn’t your average late-night snack; this is a restaurant-quality dish you can proudly create at home.
People absolutely adore this dish because it delivers on so many levels. The initial kick of spice awakens your palate, perfectly complemented by the tender, savory grilled beef. Then comes the luxurious, velvety embrace of the creamy sauce, softening the heat just enough while adding an unparalleled depth of flavor and a delightful texture that coats every chewy noodle. It’s the ultimate comfort food with an exciting, gourmet twist, making the Spicy Korean Ramen With Grilled Beef Creamy Sauce an unforgettable culinary masterpiece that you’ll want to make again and again. Get ready to impress yourself and anyone lucky enough to share this incredible meal!

Ingredients:
-
For the Grilled Beef:
- 1 lb (about 450g) beef ribeye, sirloin, or flank steak, thinly sliced against the grain (about 1/4 inch thick)
- 2 tablespoons soy sauce (I prefer low-sodium)
- 1 tablespoon sesame oil
- 1 tablespoon mirin (rice wine)
- 1 tablespoon brown sugar (or honey/maple syrup for a natural sweetness)
- 1 tablespoon gochujang (Korean chili paste)
- 1 teaspoon grated fresh ginger
- 2 cloves garlic, minced
- 1/2 teaspoon black pepper
-
For the Spicy Creamy Sauce:
- 1/2 cup mayonnaise (Japanese Kewpie mayo works wonderfully here for extra richness)
- 2 tablespoons gochujang
- 1 tablespoon sesame oil
- 1 tablespoon rice vinegar
- 1 tablespoon honey or maple syrup (adjust to your sweetness preference)
- 1 teaspoon gochugaru (Korean chili flakes, optional, for extra heat and color)
- 1 small clove garlic, minced very finely or grated
- 2-4 tablespoons warm water or milk, to achieve desired consistency
-
For the Ramen:
- 4 packages (approx. 4 x 4.2 oz/120g) Korean instant ramen noodles (I love Shin Ramyun or Neoguri for their chewiness and spice, but feel free to use your favorite!)
- 8 cups water (2 cups per ramen package, or according to package directions)
- 4 ramen seasoning packets (from your instant ramen)
- 4 ramen dried vegetable packets (from your instant ramen)
- Optional additions for an extra rich broth: 1 tablespoon soy sauce, 1/2 teaspoon gochugaru, a pinch of dashi powder (Japanese fish stock powder)
-
For Garnish and Toppings:
- 4 large eggs, soft-boiled or fried (one per serving)
- 2-3 green onions (scallions), thinly sliced
- 1 sheet roasted seaweed (nori), cut into thin strips or torn
- 1 tablespoon toasted sesame seeds
- Optional: kimchi, fresh jalapeño or serrano slices for extra heat, a drizzle of chili oil
Preparing the Grilled Beef
- Slice the Beef: If your beef isn’t already thinly sliced, place it in the freezer for about 20-30 minutes. This makes it much easier to slice very thinly against the grain. Aim for slices roughly 1/4 inch thick. Slicing against the grain is crucial for tender beef.
- Prepare the Marinade: In a medium-sized bowl, combine the soy sauce, sesame oil, mirin, brown sugar, gochujang, grated ginger, minced garlic, and black pepper. Whisk everything together until the brown sugar is dissolved and the marinade is well combined. This is a wonderfully balanced marinade that infuses the beef with savory, sweet, and spicy notes.
- Marinate the Beef: Add the thinly sliced beef to the marinade, ensuring every piece is thoroughly coated. For best results, I like to use my hands to really work the marinade into the meat. Cover the bowl with plastic wrap or transfer the beef and marinade to a zip-top bag.
- Chill and Marinate: Place the beef in the refrigerator to marinate for at least 30 minutes. For a deeper flavor, I highly recommend marinating for 2-4 hours, or even overnight. The longer it marinates, the more flavor the beef will absorb, making your “Spicy Korean Ramen With Grilled Beef Creamy Sauce” truly spectacular.
Crafting the Spicy Creamy Sauce
- Combine Ingredients: In a small bowl, combine the mayonnaise, gochujang, sesame oil, rice vinegar, honey (or maple syrup), gochugaru (if using), and finely minced garlic.
- Whisk Until Smooth: Whisk all the ingredients vigorously until the sauce is completely smooth and creamy. Make sure there are no lumps of gochujang or mayo remaining.
- Adjust Consistency: Gradually add warm water or milk, one tablespoon at a time, whisking well after each addition. You’re aiming for a pourable, drizzle-able consistency that isn’t too thick but also not too watery. It should coat the back of a spoon nicely. This creamy sauce is a star component of our Spicy Korean Ramen With Grilled Beef Creamy Sauce, so getting the texture right is key!
- Taste and Adjust: Give the sauce a taste. Do you want it spicier? Add a touch more gochugaru. Sweeter? A bit more honey. Tangier? A tiny splash more rice vinegar. The beauty of homemade sauces is that you can tailor them exactly to your palate. Once satisfied, cover the bowl and set aside at room temperature if using within an hour, or refrigerate if preparing further in advance.
Cooking the Grilled Beef
- Preheat Your Cooking Surface: Heat a grill pan or a large cast-iron skillet over medium-high heat until it’s smoking slightly. If you have an outdoor grill, preheat it to medium-high. You want a very hot surface to get a good sear on the beef quickly.
- Lightly Oil: Lightly brush the grill pan or skillet with a neutral oil (like vegetable or canola oil) to prevent sticking, or oil your grill grates. You don’t need much, just a thin layer.
- Grill the Beef in Batches: Place the marinated beef slices in a single layer on the hot cooking surface, making sure not to overcrowd the pan. Cook for 1-2 minutes per side, depending on the thickness of your slices and your desired doneness. Since the slices are thin, they will cook very quickly. You’re looking for beautiful char marks and a tender, juicy interior. Overcooking will make the beef tough, so keep a close eye on it!
- Rest the Beef: As each batch finishes cooking, transfer the grilled beef to a plate and loosely tent it with aluminum foil. Allowing the beef to rest for a few minutes helps the juices redistribute, ensuring every bite is moist and flavorful.
Preparing the Ramen Broth and Noodles
- Boil the Water: In a large pot, bring the 8 cups of water to a rolling boil. This is the base for your delicious “Spicy Korean Ramen With Grilled Beef Creamy Sauce.”
- Cook the Noodles: Carefully add the ramen noodles to the boiling water. Cook according to package directions, typically 3-5 minutes, until they are tender but still have a pleasant chew (al dente). Don’t overcook them; mushy noodles are nobody’s friend!
- Prepare the Broth: While the noodles are cooking, add the ramen seasoning packets and dried vegetable packets to the pot. Stir well to dissolve the seasonings. This is also the time to add any optional broth enhancers like an extra tablespoon of soy sauce, a pinch of gochugaru for an added kick, or a tiny bit of dashi powder to deepen the umami flavor. Taste the broth and adjust as needed – you might prefer it spicier or richer.
Assembling Your Spicy Korean Ramen With Grilled Beef Creamy Sauce
- Prepare the Eggs: While the ramen is cooking, quickly prepare your eggs. For soft-boiled eggs, drop them into boiling water for 6-7 minutes, then immediately transfer to an ice bath to stop cooking. Peel carefully. For fried eggs, simply fry them to your preferred doneness, ensuring a slightly runny yolk for extra richness.
- Portion the Ramen: Divide the cooked noodles and broth evenly among four large serving bowls. Make sure everyone gets a good share of the fragrant, spicy broth.
- Arrange the Grilled Beef: Artfully arrange a generous portion of the thinly sliced grilled beef on top of the ramen in each bowl. The savory, slightly sweet beef contrasts beautifully with the spicy broth.
- Add the Creamy Sauce: Now for the magic! Drizzle a generous amount of your prepared spicy creamy sauce over the grilled beef and noodles. Don’t be shy here; this creamy element is what truly ties the dish together and makes our “Spicy Korean Ramen With Grilled Beef Creamy Sauce” so unique and satisfying.
- Garnish and Serve: Top each bowl with half a soft-boiled egg (or a whole fried egg), a sprinkle of fresh green onions, a few strips of roasted nori, and a dusting of toasted sesame seeds. If you love extra heat, add a few slices of fresh chili or a swirl of chili oil.
- Enjoy Immediately: Serve your masterpiece piping hot! Encourage everyone to mix some of that incredible creamy sauce into their ramen as they eat, allowing it to emulsify slightly with the hot broth for an even richer experience. The combination of spicy broth, chewy noodles, tender grilled beef, and the unique creamy sauce creates an incredibly complex and utterly delicious meal that you’ll want to make again and again. The interplay of textures and flavors in this Spicy Korean Ramen With Grilled Beef Creamy Sauce is truly a delight for the senses.
Tips for the Ultimate Experience:
- Noodle Preference: While instant ramen is quick and easy, feel free to use fresh ramen noodles or even dried wheat noodles if you prefer. Just adjust cooking times accordingly.
- Vegetable Boost: Don’t hesitate to add fresh vegetables to your ramen broth while it cooks. Options like sliced mushrooms, baby spinach, bok choy, or even a handful of bean sprouts can elevate the nutritional value and texture. Add quick-cooking vegetables during the last minute or two of noodle cooking.
- Spice Control: The heat level of this dish is customizable. If you prefer less spice, reduce the amount of gochujang in both the beef marinade and the creamy sauce, and omit the gochugaru. If you crave more heat, feel free to add extra gochugaru, fresh chilies, or a dollop of chili oil.
- Make Ahead Components: The beef can be marinated overnight, and the creamy sauce can be prepared a day in advance and stored in the refrigerator. This makes assembly on a busy weeknight a breeze, allowing you to enjoy a gourmet meal with minimal fuss.
- Why this combination works so well: The robust, umami-rich instant ramen base provides a comforting and familiar foundation. The grilled beef, with its savory and slightly sweet Korean BBQ-inspired marinade, adds a hearty, smoky depth. But it’s the creamy, spicy sauce that truly transforms this dish into something extraordinary. It mellows the heat of the ramen while introducing a luxurious, tangy richness that coats every noodle and piece of beef, creating an unforgettable symphony of flavors and textures in every spoonful of your Spicy Korean Ramen With Grilled Beef Creamy Sauce.
Conclusion:
I’m absolutely thrilled that we’ve reached the end of this culinary journey together, and I truly hope you’re feeling as inspired as I am about this incredible dish! This isn’t just any ramen; it’s a transformative experience for your taste buds, a vibrant celebration of textures and robust flavors that come together in perfect harmony. What makes this recipe an absolute must-try, in my humble opinion, is the masterful balance it strikes: the exhilarating heat of Korean spices, the deeply savory, smoky char of perfectly grilled beef, and the velvety embrace of that decadent creamy sauce. Every element is designed to complement the other, creating a bowl that is simultaneously bold and comforting. The tender, chewy noodles, steeped in all that incredible flavor, ensure that each bite is an absolute revelation. It’s truly a dish that feels gourmet yet remains delightfully approachable to create in your own kitchen, promising an utterly satisfying and memorable meal that will surely impress.
Now, while the star of our show shines brightly on its own, I love thinking about all the little ways you can personalize and enhance this experience to make it uniquely yours. For a simple yet elegant finish, a sprinkle of toasted sesame seeds adds a lovely nutty crunch and visual appeal. Finely sliced green onions, scattered generously, provide a fresh, pungent counterpoint to the richness. And for those who truly embrace the heat, a drizzle of extra chili oil or a sprinkle of Gochugaru (Korean chili flakes) right before serving will certainly turn up the dial! If you’re looking to make it even heartier or just want to switch things up, consider adding a perfectly soft-boiled egg, its runny yolk adding another layer of creaminess to the sauce. You could also experiment with different proteins; succulent shrimp would be fantastic, or thinly sliced chicken breast could be marinated and grilled in the same way. For my vegetarian friends, pan-fried tofu or tempeh, marinated in a similar savory sauce, would be a delightful alternative, soaking up all the deliciousness. Don’t be shy about incorporating more vegetables either! Sautéed mushrooms, wilted spinach, or crisp bok choy would introduce even more texture and nutrition. Maybe you prefer thicker noodles like Udon, or perhaps a gluten-free ramen noodle alternative is more suitable for your dietary needs. The beauty of this recipe lies in its adaptability. You could even serve it alongside a simple, crisp cucumber salad to cut through the richness, or, of course, a generous helping of authentic kimchi for that extra fermented kick. Feel free to tweak the spice level to your preference; a little less gochujang for a milder touch, or crank it up for a truly fiery feast. This dish isn’t just about following instructions; it’s about making it your own.
Your Culinary Adventure Awaits!
This is truly a culinary adventure worth embarking on, and one I know you’ll cherish. I can’t emphasize enough how much joy you’ll find in preparing and, most importantly, devouring your very own Spicy Korean Ramen With Grilled Beef Creamy Sauce. The incredible aroma alone as it cooks is enough to get your mouth watering, filling your kitchen with anticipation, and that very first spoonful is pure, unadulterated bliss. It’s an experience that transcends a simple meal, becoming a moment of comfort and indulgence. So please, don’t hesitate to gather your ingredients, fire up the grill (or a trusty grill pan!), and dive into creating this absolute masterpiece. It might look and taste incredibly sophisticated, but I promise you, the process is wonderfully rewarding and well within your grasp, regardless of your cooking experience. Once you’ve savored the rich, layered flavors and felt the comforting satisfaction of this truly unique dish, I guarantee it will become a new, highly requested favorite in your personal recipe rotation.
Share Your Delicious Journey!
And when you do try it, please, please share your experience with me! I absolutely adore hearing about your kitchen escapades and seeing your culinary creations. Did you add a special twist of your own? Did you adjust the spice level perfectly to your liking, perhaps making it extra fiery or wonderfully mild? Did you discover a new favorite garnish that elevated the dish even further? Snap a picture, tell us about your cooking journey, and let’s celebrate the joy of delicious food together. Your insights, your tips, and your beautiful creations inspire not just me, but countless other home cooks who are always looking for that next exciting, flavorful meal. Go on, challenge yourself, embrace the deliciousness, and give it a try – your taste buds, and your family and friends, will undoubtedly thank you for it!
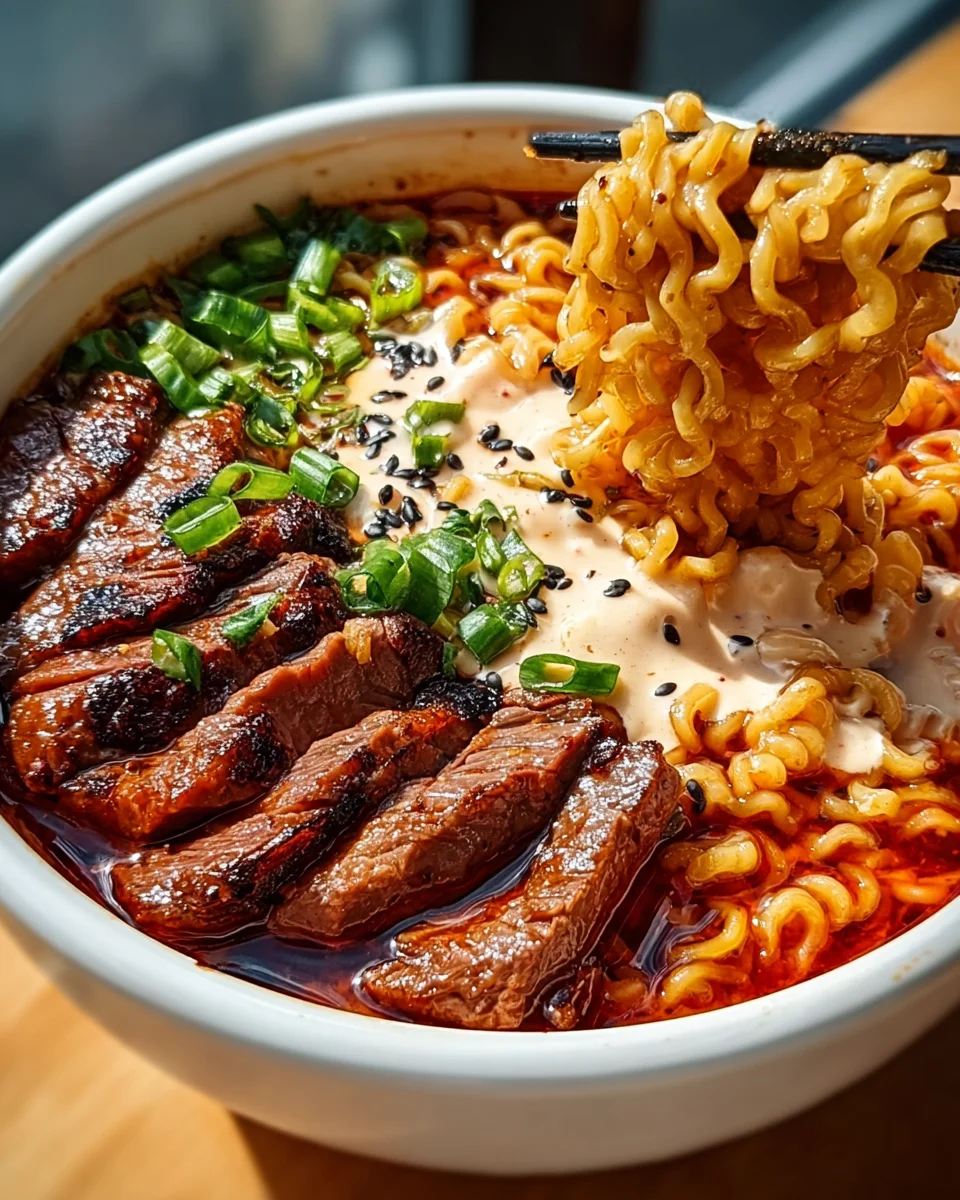
Spicy Korean Ramen with Grilled Beef Creamy Sauce
An adventurous culinary journey, this dish elevates instant ramen into a gourmet meal. It combines the vibrant heat of Korean spices with tender, smoky grilled beef, all brought together by a rich, creamy element. This is a comforting, restaurant-quality dish perfect for an unforgettable meal.
Ingredients
Instructions
Important Information
Nutrition Facts (Per Serving)
It is important to consider this information as approximate and not to use it as definitive health advice.
Allergy Information
Please check ingredients for potential allergens and consult a health professional if in doubt.