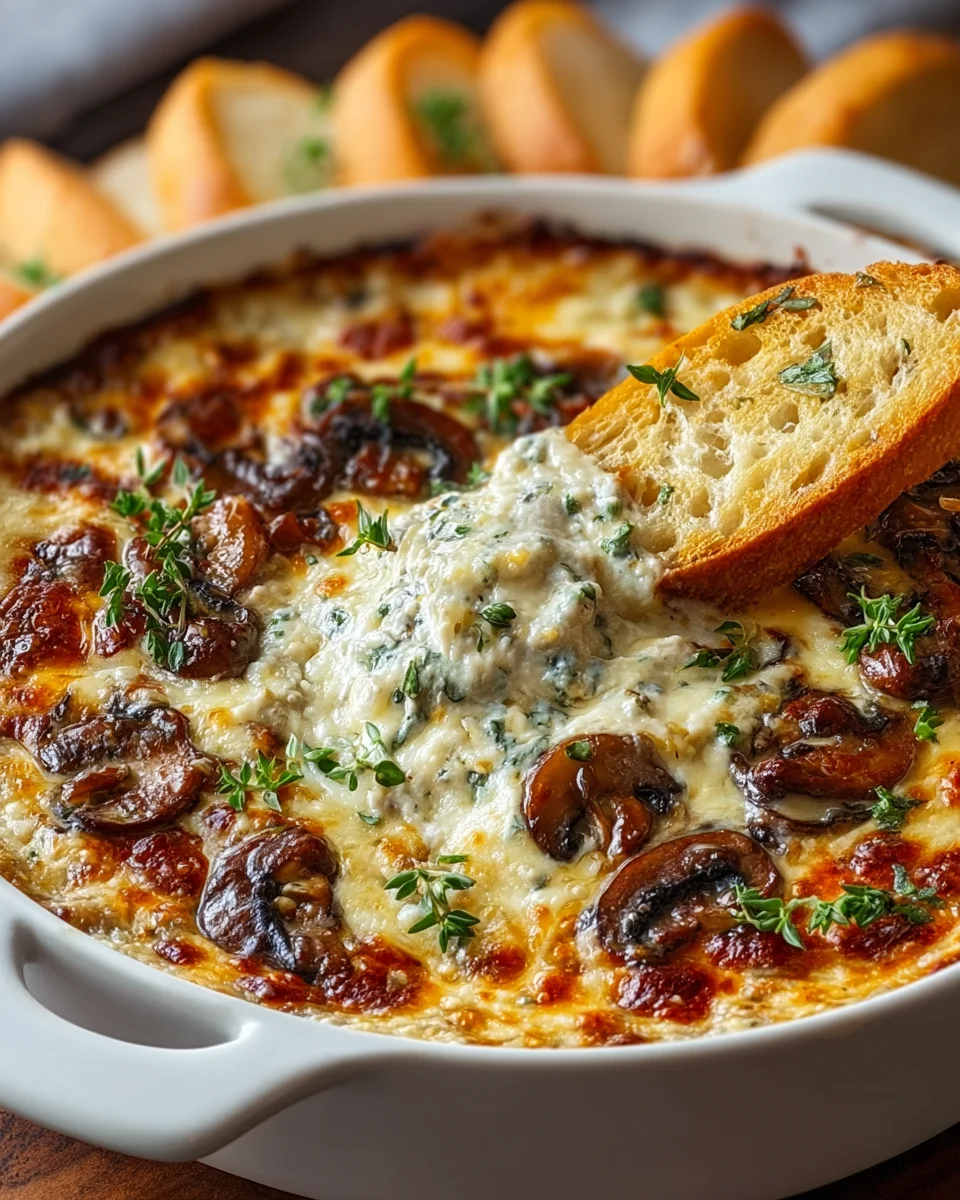
Stuffed Mushroom Dip
Oh boy, have I got a treat for you today! When I first thought about making a dip that captured all the deliciousness of classic stuffed mushrooms, I knew I was onto something truly special. This isn’t just any dip; this Stuffed Mushroom Dip is a creamy, savory, cheesy, and utterly irresistible celebration of everything we adore about those bite-sized appetizers, but in a wonderfully scoopable, shareable format. What makes it so special is how it takes all the best parts – the earthy mushrooms, the rich, savory filling (think a delightful blend of beef, herbs, and breadcrumbs), and that golden, bubbly cheese topping – and turns them into an effortless crowd-pleaser. You’re going to love how easily it comes together, creating a warm, comforting bowl of pure joy that’s perfect for parties, game nights, or just a cozy evening in. It’s basically a deconstructed stuffed mushroom, reimagined as the ultimate dippable indulgence. Get ready to impress your taste buds and everyone around you – this dip is a guaranteed hit!

Ingredient Notes
Creating the perfect Stuffed Mushroom Dip starts with understanding the role each ingredient plays. This isn’t just a recipe; it’s a guide to building layers of flavor and texture that will make your dip irresistible. I’ve chosen ingredients that deliver maximum impact, and I’ll share my favorite substitutions too, so you can tailor it to your pantry or dietary needs.
The Mushrooms
- What I use: I always reach for cremini (baby bella) mushrooms. Their earthy, robust flavor truly shines in this dip and gives it that authentic “stuffed mushroom” taste. White button mushrooms are a perfectly fine alternative if that’s what you have on hand, but you might find the flavor slightly milder.
- Preparation is key: Unlike traditional stuffed mushrooms, for this dip, we’re going to finely chop them. This ensures they integrate beautifully into the creamy base and you get a bit of mushroom in every bite.
- Pro Tip: Don’t wash your mushrooms under running water! They’re like sponges and will absorb too much moisture, making your dip watery. Instead, gently wipe them clean with a damp paper towel.
The Creamy Base
- Cream Cheese: This is the backbone of our dip, providing that rich, tangy, and incredibly smooth texture. I recommend using full-fat cream cheese for the best results and decadence, but a reduced-fat version will also work. Just make sure it’s softened to room temperature for easy mixing.
- Sour Cream (or Mayonnaise): A dollop of sour cream adds another layer of tanginess and helps to loosen the dip to a perfectly scoopable consistency. If you’re not a fan of sour cream, good quality mayonnaise is a fantastic substitute, offering a slightly different richness. For a lighter option, plain Greek yogurt can be used, but note it might add a bit more tang.
- Substitutions: For a dairy-free version, look for plant-based cream cheese and sour cream alternatives. There are some excellent options on the market now that mimic the texture and flavor surprisingly well.
The Beefy Heart
- Ground Beef: To truly capture that “stuffed mushroom” essence, I incorporate lean ground beef. It adds a savory depth and heartiness that makes this dip substantial and satisfying.
- Seasoning: A simple seasoning with salt, black pepper, and perhaps a touch of garlic powder or onion powder is all it needs. You can also add a splash of non-alcoholic cooking wine alternative or a dash of Worcestershire sauce (ensure it’s alcohol-free if you’re avoiding it, or use a mushroom broth for umami) to deepen the flavor as the beef cooks.
- Alternatives: While I love the beef, you could certainly substitute it with a plant-based ground crumble for a vegetarian option.
Cheesy Goodness
- Parmesan Cheese: Freshly grated Parmesan is a must for its sharp, salty, umami kick. It melts beautifully and provides that signature nutty flavor.
- Mozzarella Cheese: This is our melting queen! Shredded mozzarella adds that glorious, stretchy, bubbly top we all adore in a hot dip. I prefer a low-moisture, part-skim mozzarella.
- Other Cheeses: Feel free to experiment! A little smoked gouda or sharp white cheddar could add an interesting twist to the flavor profile.
Aromatics & Flavor Boosters
- Garlic & Onion: These are non-negotiable! Freshly minced garlic and finely chopped onion provide the foundational aromatic flavors that tie everything together.
- Fresh Herbs: Chopped fresh parsley is my go-to for brightness and a pop of color. Fresh chives or even a touch of thyme would also be lovely additions.
- Breadcrumbs (optional): Sometimes, if I want to add a little more texture or ensure the dip is extra cohesive, I’ll mix in a tablespoon or two of plain breadcrumbs, especially if my mushrooms were particularly moist.
Step-by-Step Instructions
Making Stuffed Mushroom Dip is incredibly straightforward, but following these steps in order will ensure you get a perfectly creamy, flavorful, and wonderfully baked dip every time. Get ready to impress your guests (or just yourself!) with this delightful appetizer.
Step 1: Prep & Preheat
First things first, let’s get organized! Preheat your oven to 375°F (190°C). While the oven heats up, lightly grease an 8×8 inch baking dish or a similar-sized oven-safe dish. Now, take your cream cheese out of the fridge so it can soften – this makes mixing so much easier.
Step 2: Cook the Beef
In a large skillet, brown your ground beef over medium-high heat. Break it up with a spoon as it cooks. Once it’s fully cooked and no pink remains, drain off any excess grease. This is crucial to prevent your dip from becoming oily. Set the cooked beef aside.
Step 3: Sauté the Aromatics & Mushrooms
Using the same skillet (you can wipe it out briefly if there’s a lot of residual fat, or just leave a little for flavor), add a tablespoon of olive oil or butter. Toss in your finely chopped onion and cook until it’s softened and translucent, about 3-5 minutes. Next, add your minced garlic and cook for just another minute until fragrant – be careful not to burn it!
Now, add your finely chopped mushrooms to the skillet. This is a very important step: cook the mushrooms, stirring occasionally, until they release their liquid and that liquid completely evaporates. This might take 8-10 minutes. If you skip this, your dip will be watery. Once they’re nicely softened and dry, remove the skillet from the heat.
Step 4: Create the Creamy Base
In a large mixing bowl, combine the softened cream cheese, sour cream (or mayonnaise), and any seasoning you like – I usually go for a pinch of salt, a good grind of black pepper, and sometimes a dash of garlic powder. Mix these together until they are smooth and well combined. A sturdy spatula or a hand mixer on low speed works great here.
Step 5: Assemble the Dip
To your creamy base in the bowl, add the cooked ground beef, the sautéed mushroom and onion mixture, most of your grated Parmesan cheese (reserve about 1/4 cup for the topping), and about half of your shredded mozzarella cheese. Stir everything together until all the ingredients are evenly distributed throughout the creamy mixture. If you’re using fresh parsley or other herbs, stir those in now too.
Step 6: Bake to Perfection
Spoon the glorious dip mixture into your prepared baking dish, spreading it out evenly. Sprinkle the remaining mozzarella cheese and the reserved Parmesan cheese over the top. This will create that lovely bubbly, golden crust we’re aiming for.
Bake in your preheated oven for 20-25 minutes, or until the dip is bubbly around the edges and the cheese on top is melted and lightly golden brown. If you want a more deeply golden top, you can briefly switch to the broiler for the last minute or two, but watch it very carefully to prevent burning!
Step 7: Serve Hot!
Remove the dip from the oven and let it cool for a few minutes before serving. It will be piping hot! Garnish with a sprinkle of fresh parsley or chives, if desired. Serve with your favorite dippers – crackers, baguette slices, pita chips, or even some crisp vegetable sticks like celery or bell pepper. Enjoy!
Tips & Suggestions
I’ve made this Stuffed Mushroom Dip countless times, and over the years, I’ve picked up a few tricks and learned some lessons that really elevate it. Here are my top tips and suggestions to ensure your dip is always a showstopper!
Preventing a Watery Dip
- Sauté Those Mushrooms Properly: This is, hands down, the most important tip. Mushrooms release a lot of water as they cook. You MUST cook them down until all that liquid has evaporated. If you rush this step, your dip will be loose and watery, no matter how much cheese you add. Patience here pays off!
- Drain the Beef: Similarly, ensure you thoroughly drain any excess grease from your cooked ground beef. Too much fat can also make the dip oily and less pleasant.
Boosting Flavor Depth
- Fresh is Best: While garlic powder and onion powder have their place, using fresh minced garlic and chopped onion makes a noticeable difference in the overall flavor complexity.
- Umami Boost: A splash of non-alcoholic cooking wine alternative (like a rich mushroom broth or a non-alcoholic red wine substitute) added to the mushrooms or beef while cooking can deepen the umami notes. A dash of alcohol-free Worcestershire sauce can also work wonders.
- Don’t Skimp on Cheese Quality: Good quality Parmesan (freshly grated from a block, if possible) makes a huge difference compared to pre-grated varieties.
Serving Suggestions
- Classic Dippers: Think sturdy crackers (like Ritz or Triscuits), toasted baguette slices, pita chips, or crusty bread.
- Healthy Options: For a lighter accompaniment, serve with crisp bell pepper strips, celery sticks, cucumber slices, or carrot sticks.
- Beyond an Appetizer: This dip is so hearty, it can almost be a light meal! Try spooning it over a baked potato or even mixing it into pasta for a quick weeknight dinner.
Make-Ahead & Customization
- Prep Ahead: You can assemble the entire dip (up to the point of baking) and store it covered in the refrigerator for up to 24 hours. When you’re ready to bake, let it sit out at room temperature for about 15-20 minutes before popping it into the oven, and you might need to add a few extra minutes to the baking time.
- Spice it Up: For a little kick, add a pinch of red pepper flakes to the dip mixture.
- Add Veggies: Sautéed spinach (ensure it’s well-drained) or finely chopped bell peppers could be lovely additions if you want to sneak in more vegetables.
Storage
Once you’ve whipped up a batch of my Stuffed Mushroom Dip, you might find yourself with leftovers – though honestly, that’s a rare occurrence in my house! Here’s how to properly store and reheat any delicious remnants to keep them tasting great.
Refrigeration
- How Long: Any leftover Stuffed Mushroom Dip should be transferred to an airtight container and stored in the refrigerator. It will stay fresh and delicious for 3 to 4 days. Beyond that, the quality and safety start to decline, so it’s best to consume it within that window.
- Containers: Make sure your container is truly airtight. This helps prevent the dip from absorbing any odors from other foods in your fridge and keeps it from drying out.
Freezing
- Is it Recommended? This is where things get a little tricky with cream cheese-based dips. While technically possible, freezing is generally not recommended for the best texture. Cream cheese, when frozen and then thawed, can sometimes separate or become a bit grainy or watery, losing its signature smooth and creamy consistency.
- If You Must: If you absolutely have to freeze it, I’d suggest doing so before baking. Assemble the dip, cover it tightly with plastic wrap and then foil, and freeze for up to 1 month. When you’re ready to eat, thaw it overnight in the refrigerator, then bake as directed, possibly adding a few extra minutes to the baking time. If freezing a baked dip, be prepared for a potential slight change in texture upon reheating.
Reheating
- Oven is Best: For the best results and to restore that bubbly, golden crust, I always recommend reheating Stuffed Mushroom Dip in the oven. Transfer the desired amount to an oven-safe dish, cover it loosely with foil (to prevent the top from over-browning), and bake at 350°F (175°C) for about 15-20 minutes, or until heated through and bubbly. Remove the foil for the last few minutes if you want to crisp up the top again.
- Microwave Option: If you’re in a hurry and just want a quick warm-up for a small portion, the microwave works. Place a serving in a microwave-safe bowl and heat in 30-second intervals, stirring in between, until it’s hot. Be aware that the texture might not be quite as good as oven-reheated, and it won’t get that lovely crisp topping.
- Stir Well: Regardless of your reheating method, give the dip a good stir before serving to redistribute any separated liquid and revive its creaminess.
Final Thoughts
I truly believe this Stuffed Mushroom Dip is a game-changer for any gathering. It takes all the incredible, savory flavors you love about classic stuffed mushrooms and transforms them into an irresistible, creamy dip that’s just begging to be scooped up. The rich blend of ingredients, perfectly balanced and comforting, makes this Stuffed Mushroom Dip more than just an appetizer; it’s a memorable experience.
Whether you’re hosting a party, looking for a comforting snack, or simply want to impress your taste buds, this Stuffed Mushroom Dip delivers every single time. It’s incredibly satisfying, packed with that umami goodness, and wonderfully easy to share. Give it a try – I promise you, this Stuffed Mushroom Dip will quickly become a cherished favorite in your recipe collection!

Stuffed Mushroom Dip: Easy, Cheesy Party Appetizer
- Total Time: 45 minutes
- Yield: 8 servings 1x
Description
This Stuffed Mushroom Dip is a creamy, savory, cheesy delight that captures all the flavors of classic stuffed mushrooms in a dippable format. Perfect for parties or cozy evenings, it’s a guaranteed crowd-pleaser!
Ingredients
- 8 oz cremini (baby bella) mushrooms, finely chopped
- 8 oz cream cheese, softened
- 1/2 cup sour cream (or mayonnaise)
- 1 lb lean ground beef
- 1/2 tsp salt
- 1/4 tsp black pepper
- 1/2 tsp garlic powder (optional)
- 1/2 tsp onion powder (optional)
- 1 tbsp olive oil or butter
- 1/2 cup freshly grated Parmesan cheese, plus 1/4 cup for topping
- 1 cup shredded mozzarella cheese, plus 1/2 cup for topping
- 2 cloves garlic, minced
- 1 small onion, finely chopped
- 1/4 cup chopped fresh parsley (optional)
- 1/4 cup chopped fresh chives (optional)
- 1 tbsp plain breadcrumbs (optional)
Instructions
- Preheat your oven to 375°F (190°C) and lightly grease an 8×8 inch baking dish.
- In a large skillet, brown the ground beef over medium-high heat, breaking it up as it cooks. Drain off any excess grease and set aside.
- In the same skillet, add olive oil or butter and sauté the finely chopped onion until softened, about 3-5 minutes. Add minced garlic and cook for another minute until fragrant.
- Add the finely chopped mushrooms to the skillet and cook until they release their liquid and it evaporates, about 8-10 minutes. Remove from heat.
- In a large mixing bowl, combine softened cream cheese, sour cream (or mayonnaise), salt, black pepper, and optional garlic and onion powder. Mix until smooth.
- Add the cooked ground beef, sautéed mushroom and onion mixture, most of the grated Parmesan cheese, and half of the shredded mozzarella cheese to the bowl. Stir until evenly combined.
- Spoon the dip mixture into the prepared baking dish, spreading it evenly. Sprinkle the remaining mozzarella and reserved Parmesan cheese on top.
- Bake for 20-25 minutes until bubbly and lightly golden brown. Optionally, broil for the last minute for a deeper golden crust.
- Let cool for a few minutes before serving. Garnish with fresh parsley or chives and serve with dippers like crackers, baguette slices, or vegetable sticks.
- Prep Time: 15 mins
- Cook Time: 30 mins
- Category: Appetizer
- Method: Baking
- Cuisine: American
Nutrition
- Serving Size: 1/2 cup
- Calories: 250
- Sugar: 2 g
- Sodium: 400 mg
- Fat: 18 g
- Saturated Fat: 10 g
- Unsaturated Fat: 6 g
- Trans Fat: 0 g
- Carbohydrates: 8 g
- Fiber: 1 g
- Protein: 15 g
- Cholesterol: 50 mg
Keywords: Ensure mushrooms are sautéed properly to prevent a watery dip. You can substitute ground beef with plant-based crumbles for a vegetarian option.