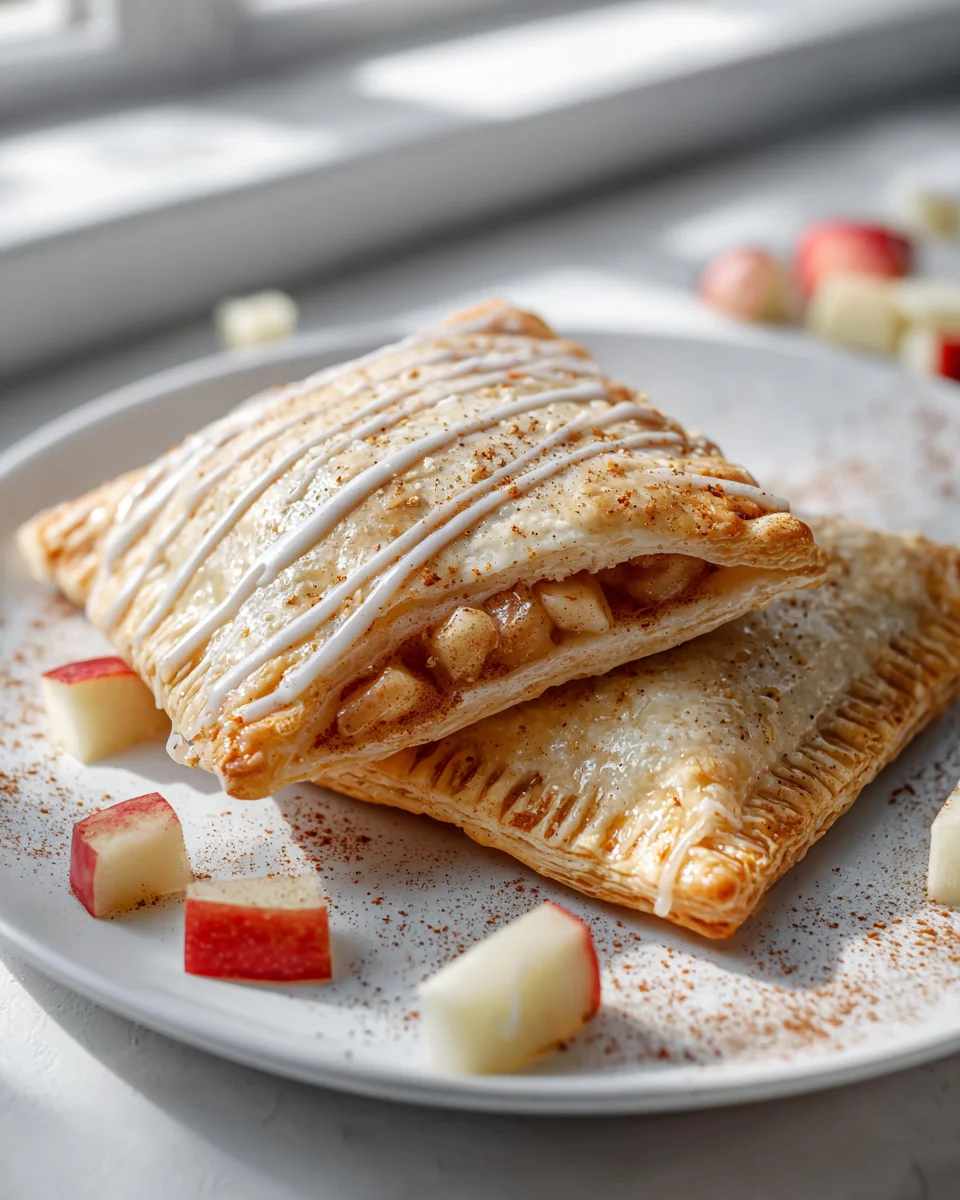
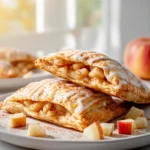
Apple Cinnamon Breakfast Pop Tarts
Hello, wonderful bakers! Get ready to elevate your breakfast game because today, I’m bringing you the recipe for my beloved Apple Cinnamon Breakfast Pop Tarts. This isn’t just any breakfast pastry; it’s a nostalgic hug in food form, reimagined and made absolutely irresistible right in your own kitchen. What makes these so incredibly special is the perfect marriage of a tender, flaky pastry shell with a warm, bubbling filling of sweet, spiced apples and aromatic cinnamon. Every single bite is pure bliss, far surpassing anything you’d ever find in a box!
You are going to absolutely adore making – and devouring – these homemade gems. There’s something truly magical about pulling a tray of golden-brown Pop Tarts from the oven, filling your home with the intoxicating scent of baked apples and cinnamon. Plus, knowing exactly what goes into each delicious bite makes them even better. This dish, at its heart, is a delightful handheld pastry, essentially a mini apple pie disguised as a breakfast tart, often finished with a simple, sweet glaze. It’s comforting, satisfying, and perfect for a cozy morning or a delightful snack any time of day!

Ingredient Notes
Creating these delightful Apple Cinnamon Breakfast Pop Tarts starts with a few key ingredients, and understanding them will help you achieve the best results. I’ve found that using quality components truly makes a difference, turning a simple breakfast into something special!
For the Pastry:
- Refrigerated Pie Crusts: My absolute go-to for convenience! Two sheets of store-bought, refrigerated pie crusts are perfect. They save a ton of time and yield a wonderfully flaky result. If you’re feeling ambitious, a homemade pie dough (pâte brisée) will also work beautifully, just ensure it’s well-chilled and easy to roll. You’ll want a neutral-flavored crust that complements the apple filling rather than overpowering it.
- Egg Wash: A simple mix of one egg beaten with a tablespoon of water or milk. This is crucial for giving your pop tarts that beautiful golden-brown finish and helping to seal the edges securely.
For the Apple Cinnamon Filling:
- Apples: The stars of the show! I highly recommend using firm, tart-sweet apples like Honeycrisp, Granny Smith, Fuji, or Braeburn. They hold their shape well when cooked and offer a lovely balance to the sweetness. Avoid overly soft or mealy apples, as they can turn to mush. You’ll need about 2 medium apples, peeled, cored, and finely diced. A fine dice ensures they cook quickly and distribute evenly within the pastry.
- Brown Sugar: Light brown sugar is my preference here. Its subtle molasses notes perfectly complement the apples and cinnamon, adding a depth of flavor that granulated sugar alone can’t quite achieve. If you only have granulated sugar, that’s perfectly fine too, it just might result in a slightly less complex flavor profile.
- Ground Cinnamon: Essential for that classic apple pie flavor! I typically use about a teaspoon, but feel free to adjust to your personal preference. A pinch of ground nutmeg is also a wonderful addition for extra warmth, though entirely optional.
- Lemon Juice: Just a small squeeze (about 1 teaspoon) helps brighten the apple flavor and prevents them from browning too much during cooking. It’s a little secret weapon that makes a big difference!
- Cornstarch: A crucial ingredient for thickening the filling. About 1 tablespoon, mixed with a little cold water to form a slurry, will ensure your filling isn’t too watery, preventing soggy bottoms and leaks from your pop tarts. Nobody wants a leaky pop tart!
For the Simple Glaze:
- Powdered Sugar (Confectioners’ Sugar): This forms the base of our quick and easy glaze. Sifted powdered sugar will give you the smoothest glaze.
- Milk or Cream: Just a tablespoon or two, to thin the glaze to your desired consistency. You can use any milk you prefer – dairy or a non-dairy alternative like almond or oat milk work equally well.
- Vanilla Extract: A splash (about 1/2 teaspoon) adds a lovely aroma and enhances the sweetness of the glaze.
Step-by-Step Instructions
Let’s get cooking! Making these Apple Cinnamon Breakfast Pop Tarts is a rewarding process, and I’ll walk you through each step to ensure you get perfect, delicious results every time.
- Prepare the Apple Filling:
- First, peel, core, and finely dice your two medium apples. Aim for pieces about 1/4-inch to 1/2-inch.
- In a medium saucepan, combine the diced apples, light brown sugar, ground cinnamon, and lemon juice.
- Cook over medium heat for about 5-7 minutes, stirring occasionally, until the apples start to soften but still retain some bite. We want them tender, not mushy!
- While the apples are cooking, in a small bowl, whisk together the cornstarch with 1 tablespoon of cold water until smooth. This is your cornstarch slurry.
- Pour the cornstarch slurry into the apple mixture, stirring constantly. Continue to cook for another 1-2 minutes, until the filling thickens. It should resemble a thick, jam-like consistency.
- Remove the apple filling from the heat and transfer it to a separate bowl. Let it cool completely to room temperature. This step is critical; a warm filling will make your pastry soggy and hard to work with. I often make the filling an hour or two ahead of time, or even the day before, to ensure it’s perfectly cool.
- Preheat Oven and Prep Workstation:
- Preheat your oven to 375°F (190°C).
- Line a large baking sheet with parchment paper. This prevents sticking and makes cleanup a breeze.
- In a small bowl, whisk together the egg and 1 tablespoon of water or milk for your egg wash. Set aside.
- Assemble the Pop Tarts:
- Carefully unroll one sheet of refrigerated pie crust onto a lightly floured surface or directly onto your parchment-lined baking sheet. Gently roll it out slightly to smooth any creases and create a more even surface.
- Using a sharp knife or a pizza cutter, cut the pie crust into 6 equal rectangles. I usually aim for rectangles that are roughly 3×4 inches. Repeat this process with the second sheet of pie crust, yielding 12 rectangles in total.
- On 6 of the pastry rectangles, spoon about 1-2 tablespoons of the cooled apple cinnamon filling onto the center of each, leaving a clear 1/2-inch border around the edges. Don’t overfill, as this can lead to leaks during baking.
- Lightly brush the edges of the filled rectangles with the egg wash. This acts as your “glue” to seal the pop tarts.
- Carefully place the remaining 6 plain pastry rectangles on top of the filled ones, aligning the edges.
- Gently press down around the edges of each pop tart to seal them. Then, using the tines of a fork, crimp all around the edges to create a decorative seal and further secure the filling.
- Using a small knife or a toothpick, poke 3-4 small vent holes on the top of each pop tart. This allows steam to escape during baking, preventing the pastry from puffing up excessively.
- Brush the tops of all the assembled pop tarts generously with the remaining egg wash. This gives them that beautiful golden sheen.
- Bake the Pop Tarts:
- Carefully transfer the baking sheet with the assembled pop tarts to the preheated oven.
- Bake for 15-20 minutes, or until the pastry is golden brown and looks cooked through. Baking times can vary depending on your oven, so keep an eye on them!
- Once baked, remove the pop tarts from the oven and transfer them to a wire rack to cool completely before glazing.
- Prepare and Apply the Glaze:
- While the pop tarts are cooling, prepare the glaze. In a small bowl, whisk together the powdered sugar, milk (start with 1 tablespoon and add more drop by drop if needed), and vanilla extract until smooth and free of lumps. You want a consistency that’s thick enough to coat a spoon but thin enough to drizzle.
- Once the pop tarts are completely cool (this prevents the glaze from melting off), drizzle or spread the glaze evenly over the tops of each pop tart.
- Let the glaze set for about 10-15 minutes before serving.
Tips & Suggestions
Making these Apple Cinnamon Breakfast Pop Tarts is already a treat, but I’ve got a few tricks up my sleeve to help you make them absolutely perfect and customize them to your liking.
- Don’t Overfill: This is probably my number one tip! Too much filling, and your pop tarts are prone to bursting, leading to a sticky, messy situation. A tablespoon or two per pop tart is generally ideal. Resist the urge to heap it high!
- Ensure the Filling is COLD: Seriously, I can’t stress this enough. If your apple filling is even slightly warm, it will melt the butter in your pie crust, making it difficult to seal and resulting in a less flaky pastry. Pop it in the fridge for a bit if you’re in a hurry.
- Seal Those Edges: A good seal is key to preventing leaks. After pressing the edges together, take the extra minute to crimp them firmly with a fork. It not only looks pretty but also creates a more secure barrier.
- Ventilation is Vital: Remember those little holes on top? They’re not just for show! They allow steam to escape during baking, preventing your pop tarts from puffing up unevenly or creating air pockets that can push the filling out.
- Vary the Fruit: While apple cinnamon is divine, don’t be afraid to experiment! Peach, blueberry, or mixed berry fillings would also be fantastic. Just remember to cook down any fruit to thicken it and remove excess moisture, similar to the apple filling process.
- Add a Crunchy Topping: Before baking, after applying the egg wash, you could sprinkle a little turbinado sugar (raw sugar) on top for an extra crunch and sparkle.
- Spice It Up: Feel free to add a tiny pinch of cardamom or a touch of allspice to your apple filling for a slightly different flavor profile.
- Make Ahead: You can assemble the unbaked pop tarts and refrigerate them on a parchment-lined baking sheet for up to 24 hours. Just cover them loosely with plastic wrap. You might need to add a couple of extra minutes to the baking time if baking from cold.
- For a Healthier Glaze: If you prefer less sugar for breakfast, you can omit the glaze entirely or make a very simple drizzle of just a tiny bit of milk with a drop of vanilla, or even just a sprinkle of cinnamon sugar on the unglazed tops.
- Serving Suggestions: These are amazing warm from the oven, perhaps with a mug of coffee or tea. They’re also perfect for a grab-and-go breakfast or a delightful afternoon snack.
Storage
Once you’ve baked a batch of these glorious Apple Cinnamon Breakfast Pop Tarts, you’ll want to know how to keep them fresh so you can enjoy them for as long as possible. Here’s what I recommend:
- At Room Temperature: If your pop tarts are glazed, allow the glaze to set completely before storing. You can store them in an airtight container at room temperature for up to 2-3 days. They’re best enjoyed within the first day or two for optimal freshness and texture.
- Refrigeration: If you want to extend their shelf life slightly, or if your kitchen is particularly warm, you can store them in an airtight container in the refrigerator for up to 4-5 days. Be aware that the pastry might lose a little bit of its crispness when chilled.
- Freezing (Baked): These pop tarts freeze beautifully! Once completely cooled (and glazed, if desired, though I sometimes prefer to glaze after reheating from frozen), wrap each pop tart individually in plastic wrap, then place them in a freezer-safe bag or container. They will keep well in the freezer for up to 1 month.
- Freezing (Unbaked): If you want to prep ahead, you can freeze the assembled, unbaked pop tarts. Place them on a parchment-lined baking sheet and freeze until solid. Once solid, transfer them to a freezer-safe bag or container. When ready to bake, you can bake them from frozen, adding about 5-10 minutes to the baking time. Brush with egg wash before baking.
- Reheating:
- From Room Temperature or Refrigerator: My favorite way to reheat them is in a toaster oven or conventional oven at 300-325°F (150-160°C) for about 5-10 minutes, until warmed through and the pastry is slightly crisp again. You can also pop them in a regular toaster (if they fit) for a minute or two on a low setting, but watch them carefully to prevent burning the glaze.
- From Frozen (Baked): Reheat in a preheated oven at 350°F (175°C) for 15-20 minutes, or until warmed through. If unglazed, you can glaze them after reheating.
Final Thoughts
And just like that, you’ve unlocked the secret to a truly delightful morning with these incredible Apple Cinnamon Breakfast Pop Tarts. Forget the bland, overly sweet store-bought versions; these homemade treats are a game-changer. I truly believe this recipe is a must-try because it brings together the comforting warmth of spiced apples with a tender, flaky crust, delivering a breakfast experience that’s both nostalgic and incredibly satisfying.
The aroma alone as they bake is enough to pull anyone out of bed, but the taste – that perfect balance of sweet, tart, and cinnamon spice – is what makes these Apple Cinnamon Breakfast Pop Tarts truly shine. They’re not just a meal; they’re a moment of cozy indulgence, a burst of homemade happiness that can brighten any day. I encourage you to whip up a batch; your taste buds will thank you for this wonderfully comforting start to your day!
Best Apple Cinnamon Breakfast Pop Tarts Recipe Ever
- Total Time: 50 minutes
- Yield: 12 pop tarts 1x
Description
Elevate your breakfast with these delightful Apple Cinnamon Breakfast Pop Tarts, featuring a flaky pastry shell and a warm, spiced apple filling. Homemade and irresistibly delicious, they are the perfect start to your day!
Ingredients
- 2 sheets of refrigerated pie crusts
- 1 egg (for egg wash)
- 1 tablespoon water or milk (for egg wash)
- 2 medium apples, peeled, cored, and finely diced
- 1/4 cup light brown sugar
- 1 teaspoon ground cinnamon
- 1 teaspoon lemon juice
- 1 tablespoon cornstarch
- 1 tablespoon cold water (for cornstarch slurry)
- 1 cup powdered sugar (confectioners' sugar)
- 1–2 tablespoons milk or cream
- 1/2 teaspoon vanilla extract
Instructions
- Prepare the Apple Filling: First, peel, core, and finely dice your two medium apples. Aim for pieces about 1/4-inch to 1/2-inch.
- In a medium saucepan, combine the diced apples, light brown sugar, ground cinnamon, and lemon juice.
- Cook over medium heat for about 5-7 minutes, stirring occasionally, until the apples start to soften but still retain some bite.
- While the apples are cooking, in a small bowl, whisk together the cornstarch with 1 tablespoon of cold water until smooth.
- Pour the cornstarch slurry into the apple mixture, stirring constantly. Continue to cook for another 1-2 minutes, until the filling thickens.
- Remove the apple filling from the heat and transfer it to a separate bowl. Let it cool completely to room temperature.
- Preheat Oven and Prep Workstation: Preheat your oven to 375°F (190°C).
- Line a large baking sheet with parchment paper.
- In a small bowl, whisk together the egg and 1 tablespoon of water or milk for your egg wash. Set aside.
- Assemble the Pop Tarts: Carefully unroll one sheet of refrigerated pie crust onto a lightly floured surface or directly onto your parchment-lined baking sheet.
- Using a sharp knife or a pizza cutter, cut the pie crust into 6 equal rectangles. Repeat this process with the second sheet of pie crust, yielding 12 rectangles in total.
- On 6 of the pastry rectangles, spoon about 1-2 tablespoons of the cooled apple cinnamon filling onto the center of each, leaving a clear 1/2-inch border around the edges.
- Lightly brush the edges of the filled rectangles with the egg wash.
- Carefully place the remaining 6 plain pastry rectangles on top of the filled ones, aligning the edges.
- Gently press down around the edges of each pop tart to seal them. Then, using the tines of a fork, crimp all around the edges.
- Using a small knife or a toothpick, poke 3-4 small vent holes on the top of each pop tart.
- Brush the tops of all the assembled pop tarts generously with the remaining egg wash.
- Bake the Pop Tarts: Carefully transfer the baking sheet with the assembled pop tarts to the preheated oven.
- Bake for 15-20 minutes, or until the pastry is golden brown and looks cooked through.
- Once baked, remove the pop tarts from the oven and transfer them to a wire rack to cool completely before glazing.
- Prepare and Apply the Glaze: While the pop tarts are cooling, prepare the glaze. In a small bowl, whisk together the powdered sugar, milk, and vanilla extract until smooth and free of lumps.
- Once the pop tarts are completely cool, drizzle or spread the glaze evenly over the tops of each pop tart.
- Let the glaze set for about 10-15 minutes before serving.
- Prep Time: 30 mins
- Cook Time: 20 mins
- Category: Breakfast
- Method: Baking
- Cuisine: American
Nutrition
- Serving Size: 1 pop tart
- Calories: 200
- Sugar: 10 g
- Sodium: 150 mg
- Fat: 8 g
- Saturated Fat: 2 g
- Unsaturated Fat: 5 g
- Trans Fat: 0 g
- Carbohydrates: 30 g
- Fiber: 1 g
- Protein: 2 g
- Cholesterol: 25 mg
Keywords: Don't overfill the pop tarts to prevent bursting. Ensure the apple filling is cold before sealing the pastry to maintain flakiness. You can experiment with different fruits for the filling.