Sourdough Cinnamon Rolls: The Overnight Method That Works
Oh, prepare yourselves! If you’re anything like me, the thought of warm, gooey cinnamon rolls on a lazy weekend morning is pure bliss. But what if I told you we could take that experience and elevate it to something truly extraordinary, all while making your morning routine surprisingly chill? Well, that’s exactly what we’re doing with this incredible recipe for Sourdough Cinnamon Rolls: The Overnight Method That Works.
What makes these particular cinnamon rolls so special, you ask? It’s the magical combination of three things: the irresistible tang and depth of flavor from your active sourdough starter, the unbelievably soft and fluffy texture that sourdough brings, and the genius “overnight method.” This isn’t just another sourdough recipe; it’s the method that truly works, reliably delivering bakery-worthy results right in your own kitchen. You get all the complex, nuanced flavor of sourdough without any of the denseness or chewiness you might expect. Instead, prepare for rolls that practically melt in your mouth!
You are going to absolutely adore these. Imagine waking up, popping your prepped rolls into the oven, and letting the aroma of sweet cinnamon and warm dough fill your home. No frantic kneading or waiting for rises on the morning of; the sourdough takes care of developing incredible flavor and texture overnight in the fridge, making your morning assembly a breeze. Each roll is a masterpiece: a tender, slightly tangy brioche-like dough swirled with a rich, buttery cinnamon-sugar filling, all crowned with a luscious, tangy cream cheese frosting. It’s the perfect blend of comforting classic and sophisticated sourdough, making it an absolute showstopper for breakfast, brunch, or any time you need a truly special treat. Trust me, these will become a new favorite in your sourdough repertoire!

Hello, fellow baking enthusiasts! If you’re anything like me, you adore the rich flavor and tender texture of homemade cinnamon rolls, but sometimes the process can feel daunting. That’s where my “Sourdough Cinnamon Rolls: The Overnight Method That Works” recipe comes in. This method allows you to break up the work, letting time and your sourdough starter do most of the heavy lifting while you sleep. The result? Deeply flavorful, incredibly soft cinnamon rolls with that signature sourdough tang, ready to bake and enjoy for a leisurely morning.
Ingredient Notes
Crafting these delectable sourdough cinnamon rolls starts with understanding the role each ingredient plays, especially with the overnight method. Using quality ingredients will truly elevate your final product.
- Active Sourdough Starter: This is the heart of our recipe! For the overnight method, your starter needs to be truly active and bubbly, fed 4-8 hours before you plan to mix your dough. An active starter ensures a good rise during the slow, cold fermentation and contributes that wonderful sourdough flavor. If your starter isn’t robust, your rolls might be dense.
- Strong Bread Flour: I prefer bread flour because its higher protein content develops more gluten, giving our rolls a chewy yet tender texture and the structure needed to hold up to the long proof. All-purpose flour can work in a pinch, but your rolls might be a bit softer and less resilient.
- Whole Milk: Whole milk adds richness and moisture to the dough, contributing to a wonderfully tender crumb. You can substitute with a non-dairy milk alternative (like oat or almond milk) for a dairy-free option, though the texture might vary slightly.
- Granulated Sugar: Beyond sweetness, sugar provides food for your sourdough starter, encouraging its activity. It also helps with browning and keeps the rolls soft. You can slightly reduce the amount if you prefer less sweet rolls, but avoid drastic changes.
- Unsalted Butter: Melted butter enriches the dough, making it incredibly tender and flavorful. For the filling, softened butter helps create that gooey, spiced center. If using salted butter, reduce the added salt in the dough by about a quarter teaspoon. For a dairy-free option, use a good quality plant-based butter substitute.
- Large Egg: Eggs add richness, color, and structure to the dough. They contribute to a softer crumb and a beautiful golden crust.
- Salt: Essential for balancing the flavors and controlling the yeast activity in your starter. Don’t skip it!
- Brown Sugar & Cinnamon (for filling): These two are the dynamic duo for our classic cinnamon roll filling. Dark brown sugar adds a deeper molasses note, but light brown sugar works just fine. Feel free to add a pinch of nutmeg or cardamom for extra spice complexity.
- Cream Cheese, Powdered Sugar, Vanilla Extract (for frosting): A classic cream cheese frosting is the perfect tangy counterpoint to the sweet rolls. Ensure your cream cheese and butter are softened for a smooth, lump-free frosting. For a non-alcohol alternative for vanilla, you can use vanilla bean paste or a non-alcohol vanilla flavoring.
Step-by-Step Instructions
Here’s how I break down the process for my sourdough cinnamon rolls using the overnight method, making it manageable and enjoyable:
Day 1: Evening Prep
- Activate Your Starter: Around 4-8 hours before you plan to mix, feed your sourdough starter. You want it bubbly, active, and at its peak for best results.
- Mix the Dough: In the bowl of a stand mixer, combine the warmed milk, active sourdough starter, granulated sugar, and egg. Mix until well combined.
- Add Dry Ingredients: Add the bread flour and salt. Mix on low speed with the dough hook until a shaggy dough forms. Let it rest for 10-15 minutes (this is a brief autolyse, helping the flour absorb the liquid).
- Knead in Butter: With the mixer on low, gradually add the softened butter, one tablespoon at a time, allowing each piece to incorporate before adding the next. Once all the butter is in, increase the speed to medium and knead for 8-10 minutes, or until the dough is smooth, elastic, and passes the windowpane test (you should be able to stretch a small piece thin enough to see light through it without tearing).
- First Bulk Fermentation (Room Temperature): Transfer the dough to a lightly oiled bowl, turning once to coat. Cover tightly with plastic wrap or a damp towel. Let it bulk ferment at room temperature for 1-2 hours. You might see it start to swell slightly.
- Overnight Cold Fermentation: After the initial room temperature bulk fermentation, transfer the covered bowl directly to the refrigerator. Let it chill and slowly ferment overnight, or for at least 8-12 hours, and up to 24 hours. This slow, cold proof develops incredible flavor and makes the dough much easier to handle the next day.
Day 2: Morning Bake
- Remove from Fridge & Warm Up: In the morning, take the dough out of the refrigerator. It will have expanded significantly. Let it sit on the counter for 30-60 minutes to take off the chill slightly, making it easier to roll.
- Prepare the Filling: While the dough is warming, prepare your filling. In a small bowl, whisk together the brown sugar and ground cinnamon.
- Roll Out the Dough: Lightly flour a clean surface. Gently turn the dough out onto the floured surface. Roll the dough into a large rectangle, approximately 12×18 inches and about ¼ inch thick. Try to keep the edges as straight as possible.
- Spread the Filling: Evenly spread the softened butter over the entire surface of the dough, leaving a small ½-inch border along one of the long edges. Sprinkle the brown sugar and cinnamon mixture evenly over the butter.
- Roll and Slice: Starting from the long edge opposite the ½-inch border, tightly roll the dough into a log. Once rolled, trim off the uneven ends. Using a sharp, un-serrated knife or dental floss, cut the log into 12 equal rolls, each about 1½ inches thick.
- Second Proof (Room Temperature): Arrange the cut rolls in a lightly greased 9×13 inch baking dish, leaving a little space between them (they will expand). Cover the dish loosely with plastic wrap or a clean towel. Let them proof in a warm spot for 2-4 hours, or until they are visibly puffy, almost doubled in size, and gently jiggle when the pan is lightly shaken. The exact time depends on your kitchen temperature and the strength of your starter.
- Preheat Oven & Bake: Towards the end of the proofing time, preheat your oven to 375°F (190°C). Once preheated, remove the cover from the rolls and bake for 25-30 minutes, or until they are golden brown on top and cooked through. If they start to brown too quickly, you can loosely tent them with foil.
- Prepare Frosting: While the rolls are baking, make the cream cheese frosting. In a medium bowl, beat together the softened cream cheese and softened butter until smooth. Gradually add the powdered sugar, mixing until fully incorporated. Stir in the non-alcohol vanilla flavoring until smooth.
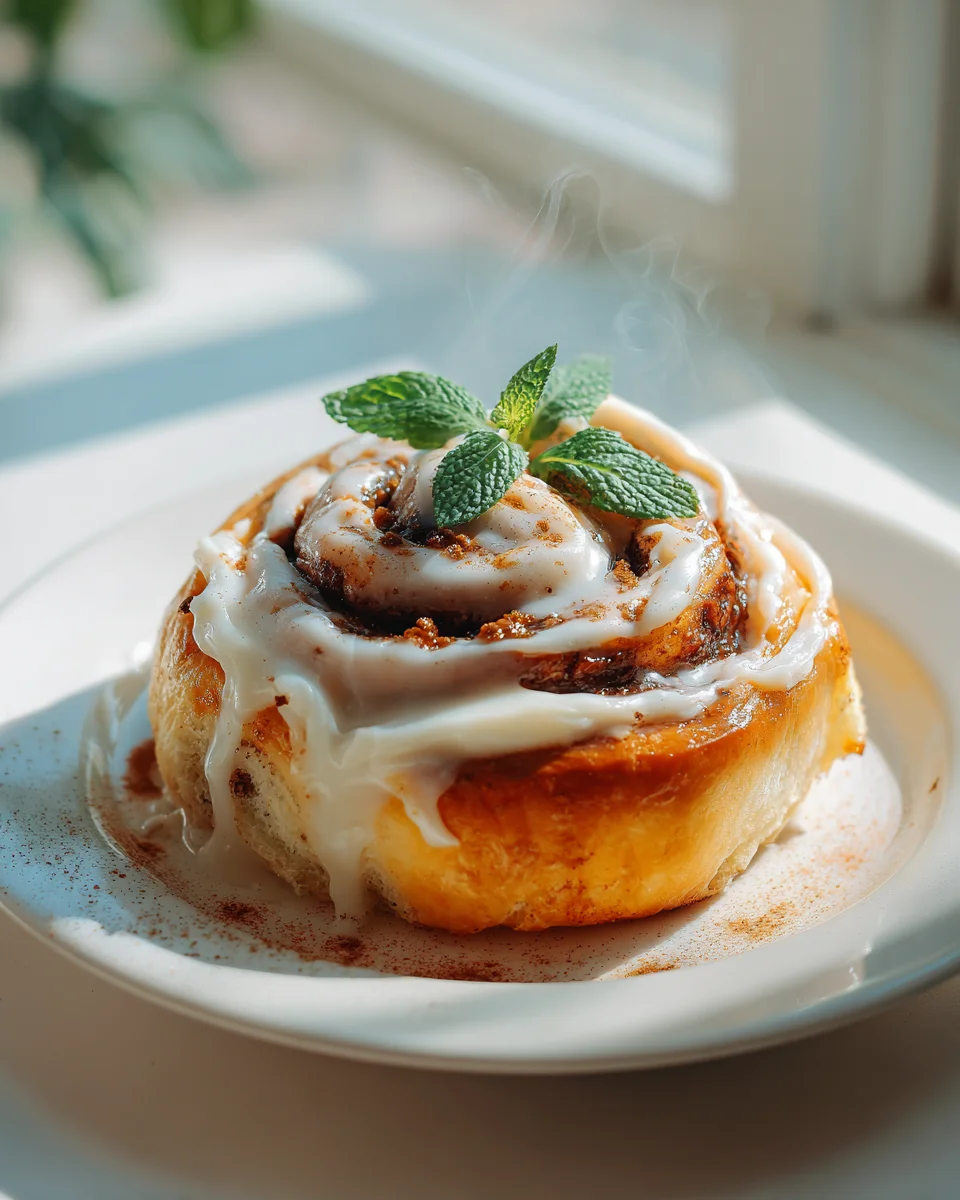
- Frost and Serve: Let the baked cinnamon rolls cool in the pan for about 10-15 minutes before spreading the frosting generously over them. Serve warm and enjoy!
Tips & Suggestions
Achieving bakery-worthy sourdough cinnamon rolls with the overnight method takes a little patience and a few tricks up your sleeve. Here are my top tips:
- Active Starter is Non-Negotiable: I cannot stress this enough. If your starter isn’t at its peak activity, your rolls won’t rise properly, even with the extended proof. Feed it well and wait for those abundant bubbles!
- Don’t Rush the Cold Proof: The overnight cold fermentation is your secret weapon. It develops fantastic complex flavors, makes the dough incredibly easy to handle the next morning (it’s less sticky and more firm), and fits perfectly into a busy schedule.
- Judging the Second Proof: This is often the trickiest part of baking with sourdough. Your rolls should look significantly puffy and feel light. To check, gently poke a roll with a floured finger; if the indentation slowly springs back halfway, they are ready. If it springs back immediately, they need more time. If it collapses, they are overproofed (but still bake them!).
- Keep Your Rolling Surface Floured (But Not Too Much): A lightly floured surface prevents sticking without incorporating too much extra flour into your dough, which could make your rolls tough.
- Cutting Even Rolls: For perfectly uniform rolls, use a piece of unflavored dental floss or strong thread. Slide it under the log, cross the ends over the top, and pull to slice cleanly. This prevents squishing the dough, which can happen with a knife.
- Temperature Matters: Ensure your milk is lukewarm (around 90-100°F / 32-38°C) when mixing the dough, as extreme temperatures can harm your starter. For the second proof, a slightly warm spot (like a sunny window or an oven with just the light on) can speed things up, but avoid anything too hot.
- Flavor Variations: Feel free to experiment with the filling! Add a sprinkle of chopped pecans or walnuts, a touch of orange zest, or even a mix of spices like cardamom or nutmeg for an extra layer of flavor.
- Prevent Sticking: Generously grease your baking dish. You can also line the bottom with parchment paper for extra insurance against sticking, especially if your frosting tends to be very gooey.
Storage
Once you’ve gone through the effort of making these delicious sourdough cinnamon rolls, you’ll want to ensure they stay fresh and tasty. Here’s how I store mine:
- At Room Temperature: Freshly baked and frosted cinnamon rolls are best enjoyed the day they are made. However, you can store them in an airtight container at room temperature for up to 1-2 days. If your kitchen is particularly warm, or if you’ve added a lot of cream cheese frosting, I recommend refrigerating them.
- In the Refrigerator: For longer storage, place any leftover frosted rolls in an airtight container in the refrigerator for up to 3-5 days. The frosting will firm up, but the rolls will remain soft. To reheat, microwave a roll for 20-30 seconds, or warm in a low oven (300°F / 150°C) for 10-15 minutes until heated through.
- Freezing Baked Rolls: If you want to savor your sourdough cinnamon rolls for longer, they freeze beautifully! Once completely cooled, you can freeze them individually (frosted or unfrosted) wrapped tightly in plastic wrap, then placed in a freezer-safe bag or container for up to 2-3 months. Thaw at room temperature or reheat directly from frozen in the microwave or oven.
- Freezing Unbaked Rolls (After Shaping): This is a fantastic option for having fresh rolls anytime. After shaping and placing them in your baking dish (before the second proof), cover the dish tightly with plastic wrap and foil. Freeze for up to 1 month. When ready to bake, transfer the frozen rolls to the refrigerator overnight to thaw and proof slowly, or leave them at room temperature for 4-6 hours (or more, depending on warmth) until they have proofed sufficiently before baking as directed.
Final Thoughts
Well, there you have it! My hope is that you’ve discovered the joy and ease of creating truly spectacular cinnamon rolls. These Sourdough Cinnamon Rolls: The Overnight Method That Works aren’t just any rolls; they’re a testament to the magic of sourdough combined with a smart, make-ahead approach. The deep, tangy flavor from the sourdough starter, the unbelievably soft texture, and that rich, gooey filling – all made accessible with an overnight method that truly works for your schedule. Imagine waking up to that incredible aroma, knowing most of the work was done while you slept! I genuinely believe this recipe will become a cherished part of your baking repertoire, bringing warmth and deliciousness to your mornings. Go ahead, give these a try; I promise you won’t be disappointed.

Sourdough Cinnamon Rolls: Overnight Perfection Guaranteed
- Total Time: 1 hour
- Yield: 12 rolls
Description
Indulge in the soft, fluffy texture and tangy flavor of these overnight sourdough cinnamon rolls. Perfect for a leisurely morning, they require minimal effort on the day of baking.
Ingredients
- Active Sourdough Starter
- Strong Bread Flour
- Whole Milk
- Granulated Sugar
- Unsalted Butter
- Large Egg
- Salt
- Brown Sugar
- Cinnamon
- Cream Cheese
- Powdered Sugar
- Vanilla Extract
Instructions
- Day 1: Evening Prep
- 1. Activate Your Starter: Around 4-8 hours before you plan to mix, feed your sourdough starter. You want it bubbly, active, and at its peak for best results.
- 2. Mix the Dough: In the bowl of a stand mixer, combine the warmed milk, active sourdough starter, granulated sugar, and egg. Mix until well combined.
- 3. Add Dry Ingredients: Add the bread flour and salt. Mix on low speed with the dough hook until a shaggy dough forms. Let it rest for 10-15 minutes.
- 4. Knead in Butter: With the mixer on low, gradually add the softened butter, one tablespoon at a time. Once all the butter is in, increase the speed to medium and knead for 8-10 minutes.
- 5. First Bulk Fermentation (Room Temperature): Transfer the dough to a lightly oiled bowl, cover tightly, and let it bulk ferment at room temperature for 1-2 hours.
- 6. Overnight Cold Fermentation: After the initial room temperature bulk fermentation, transfer the covered bowl directly to the refrigerator for at least 8-12 hours.
- Day 2: Morning Bake
- 7. Remove from Fridge & Warm Up: Take the dough out of the refrigerator and let it sit on the counter for 30-60 minutes.
- 8. Prepare the Filling: In a small bowl, whisk together the brown sugar and ground cinnamon.
- 9. Roll Out the Dough: Lightly flour a clean surface and roll the dough into a large rectangle, approximately 12×18 inches and about ¼ inch thick.
- 10. Spread the Filling: Evenly spread the softened butter over the dough, leaving a small ½-inch border along one of the long edges. Sprinkle the brown sugar and cinnamon mixture evenly over the butter.
- 11. Roll and Slice: Starting from the long edge opposite the ½-inch border, tightly roll the dough into a log. Trim off the uneven ends and cut the log into 12 equal rolls.
- 12. Second Proof (Room Temperature): Arrange the cut rolls in a lightly greased 9×13 inch baking dish. Cover loosely and let them proof in a warm spot for 2-4 hours.
- 13. Preheat Oven & Bake: Preheat your oven to 375°F (190°C). Once preheated, remove the cover from the rolls and bake for 25-30 minutes.
- 14. Prepare Frosting: In a medium bowl, beat together the softened cream cheese and softened butter until smooth. Gradually add the powdered sugar and stir in the vanilla extract.
- 15. Frost and Serve: Let the baked cinnamon rolls cool in the pan for about 10-15 minutes before spreading the frosting generously over them.
- Prep Time: 30 mins
- Cook Time: 30 mins
- Category: Breakfast
- Method: Baking
- Cuisine: American
Nutrition
- Serving Size: 1 roll
- Calories: 300
- Sugar: 10 g
- Sodium: 200 mg
- Fat: 12 g
- Saturated Fat: 7 g
- Unsaturated Fat: 3 g
- Trans Fat: 0 g
- Carbohydrates: 40 g
- Fiber: 2 g
- Protein: 5 g
- Cholesterol: 50 mg
Keywords: Ensure your sourdough starter is active for best results. You can substitute whole milk with a non-dairy alternative, and for a dairy-free option, use a plant-based butter substitute.