Southern Breakfast Enchiladas With Sausage Gravy
Oh my goodness, get ready to experience a breakfast revelation! I’ve taken two of my absolute favorite comfort food concepts – classic Southern breakfast and the irresistible appeal of enchiladas – and merged them into one spectacular dish. This isn’t just breakfast; it’s a full-on culinary hug that promises to make any morning feel like a special occasion.
Imagine all the warmth and heartiness of a Southern diner, but with a fun, Tex-Mex inspired twist that will have everyone asking for seconds. It’s perfect for a lazy weekend brunch, a holiday feast, or anytime you want to impress without overwhelming yourself in the kitchen. Here’s the magic: fluffy scrambled eggs, melty cheese, and savory beef sausage are lovingly wrapped in soft tortillas. But wait, there’s more! These delicious bundles are then drowned (in the best possible way) in a ridiculously rich and creamy homemade beef sausage gravy. It’s hearty, it’s cheesy, it’s unbelievably flavorful, and it brings a unique twist to your breakfast table that you won’t soon forget. Trust me, you’re going to absolutely adore these Southern Breakfast Enchiladas With Sausage Gravy!
Hey there, fellow food lover! Get ready for a dish that’s going to redefine your breakfast game. My Southern Breakfast Enchiladas with Sausage Gravy are a hearty, comforting, and absolutely delicious twist on two classics. Imagine fluffy scrambled eggs and melted cheese rolled in soft flour tortillas, all smothered in a rich, savory beef sausage gravy. It’s pure comfort food perfection, ideal for a weekend brunch or a special morning meal. Trust me, once you try these, you’ll be making them again and again!
Ingredient Notes
Crafting these delicious enchiladas starts with understanding a few key ingredients. Here’s what you’ll need and some thoughts on making them perfect:
- Beef Breakfast Sausage: This is the star of our gravy, so choose a high-quality ground beef breakfast sausage. Look for one with a good flavor profile, as it will infuse the entire gravy. Since we’re keeping it Southern, a classic savory beef sausage blend works best.
- All-Purpose Flour: Essential for building the roux that thickens our gravy. Don’t skimp on cooking it down for a couple of minutes to get rid of that raw flour taste.
- Whole Milk: For a truly creamy, rich gravy, whole milk is your best friend. You can use 2% if you prefer, but whole milk yields the best texture and flavor.
- Large Eggs: We’re talking about a breakfast dish, so eggs are crucial! I like to use about a dozen for a substantial filling that won’t get lost. Scramble them lightly so they stay fluffy.
- Shredded Cheese: A combination of sharp cheddar and Monterey Jack works wonders for both the filling and the topping. The cheddar brings tang, and the Monterey Jack melts beautifully, offering that desirable gooey factor. You could also use a Mexican blend if you prefer.
- Flour Tortillas: For this Southern take, soft, pliable flour tortillas are the way to go. They roll beautifully and soak up the gravy without becoming too chewy. I recommend 8-10 inch tortillas for a good size enchilada. Corn tortillas tend to have a stronger flavor that might clash with our Southern gravy.
- Canned Diced Green Chiles: These add a mild, earthy warmth to the filling without overpowering the breakfast flavors. Just drain them well before adding.
- Onion & Bell Pepper: (Optional but recommended!) A finely diced small onion and half a bell pepper, sautéed until tender, add a lovely aromatic depth to the egg filling.
- Seasonings: Salt, freshly ground black pepper, and a pinch of cayenne pepper or red pepper flakes are crucial for both the eggs and the gravy. Don’t be shy, but taste as you go!
- Butter or Oil: For sautéing and scrambling.
Step-by-Step Instructions
Let’s get cooking! These steps will guide you to a perfect pan of Southern Breakfast Enchiladas:
-
Prep Your Oven & Dish:
Preheat your oven to 375°F (190°C). Lightly grease a 9×13-inch baking dish. Set aside.
-
Make the Sausage Gravy:
In a large skillet over medium-high heat, crumble and cook the ground beef breakfast sausage until it’s fully browned and no pink remains. Drain off most of the rendered fat, leaving about 2-3 tablespoons in the skillet.
- Reduce the heat to medium. Sprinkle the all-purpose flour over the cooked sausage and fat. Cook, stirring constantly, for 2-3 minutes, creating a roux. This step is important to cook out the raw flour taste.
- Gradually whisk in the whole milk (and an optional splash of low-sodium chicken broth for extra richness, if using) until smooth. Continue whisking as the gravy comes to a simmer and thickens, about 5-7 minutes. Season generously with salt, black pepper, and a pinch of cayenne pepper if you like a little heat. Taste and adjust seasonings. Keep warm over very low heat while you prepare the rest.
-
Prepare the Enchilada Filling:
In a separate large skillet, melt 1 tablespoon of butter or oil over medium heat. If using, add the diced onion and bell pepper and sauté until softened, about 5 minutes.
- Crack the eggs into a bowl and whisk them lightly with a pinch of salt and pepper. Pour the eggs into the skillet with the sautéed vegetables (if using). Scramble the eggs until they are just set but still moist. Remove from heat.
- In a large mixing bowl, combine the scrambled eggs, about 1 cup of the shredded cheese, and the well-drained green chiles. Stir gently to combine.
-
Assemble the Enchiladas:
Warm the flour tortillas slightly to make them more pliable. You can do this by wrapping them in a damp paper towel and microwaving for 30 seconds, or by heating them briefly in a dry skillet.
- Lay a warm tortilla flat. Spoon about 1/2 cup of the egg and cheese filling down the center. Roll the tortilla up tightly and place it seam-side down in your prepared baking dish. Repeat with the remaining tortillas and filling, arranging them snugly in the dish.
-
Gravy & Bake:
Generously spoon the warm beef sausage gravy over the rolled enchiladas, ensuring they are well-covered.
- Sprinkle the remaining shredded cheese evenly over the top of the gravy.
- Bake for 20-25 minutes, or until the gravy is bubbly, the cheese is melted and lightly golden, and the enchiladas are heated through.
-
Serve:
Remove from the oven and let rest for a few minutes before serving. Garnish with fresh chopped green onions or a dash of your favorite hot sauce, if desired. Enjoy!
Tips & Suggestions
To make sure your Southern Breakfast Enchiladas are always a hit, here are some of my go-to tips and suggestions:
- Gravy Consistency is Key: If your gravy gets too thick, you can thin it out with a little extra warm milk or low-sodium chicken broth until it reaches your desired consistency. If it’s too thin, let it simmer gently for a few more minutes, stirring, to reduce. Just be patient and whisk frequently to avoid lumps!
- Don’t Skip Warming the Tortillas: This step is super important! Warm tortillas are much more flexible and less likely to crack when you roll them, making assembly a breeze.
- Make-Ahead Components: You can definitely prep parts of this dish in advance. The beef sausage gravy can be made a day ahead and stored in the refrigerator; gently reheat it with a splash of milk before assembling. The egg filling can also be cooked ahead of time. Just make sure everything is at least room temperature before assembly to ensure even baking.
- Spice It Up: If you love heat, feel free to add a bit more cayenne pepper or red pepper flakes to the gravy. You could also mix finely diced jalapeños into the egg filling for an extra kick.
- Customize Your Filling: Feel free to get creative with your enchilada filling! Crispy beef bacon bits are a fantastic addition, or even some diced, cooked potatoes for extra heartiness. Just make sure any additions are pre-cooked.
- For the Crispiest Edges: If you like a slightly crispier top, you can turn on the broiler for the last 1-2 minutes of baking. Watch it very closely to prevent burning!
- Serving Suggestions: While these enchiladas are a complete meal on their own, they pair wonderfully with a side of fresh fruit or a simple green salad for balance. Don’t forget the hot sauce on the side for those who like an extra kick!
Storage
These Southern Breakfast Enchiladas are so good, you might not have leftovers! But if you do, here’s how to store them:
- Refrigerating Leftovers: Any leftover baked enchiladas should be stored in an airtight container in the refrigerator. They will keep well for up to 3-4 days.
- Reheating: For the best results, reheat individual portions in the microwave until warmed through, or place the entire dish (covered with foil) in an oven preheated to 350°F (175°C) for 20-30 minutes, or until bubbly and hot. Adding a splash of milk or broth to the gravy before reheating can help restore its creamy texture.
- Freezing: You can freeze baked enchiladas, though the gravy might change texture slightly upon thawing and reheating (it can become a little grainier). To freeze, allow the baked enchiladas to cool completely. Wrap individual portions or the entire dish tightly with plastic wrap, then foil, and freeze for up to 2-3 months. Thaw overnight in the refrigerator before reheating in the oven as directed above.

Final Thoughts
So there you have it! We’ve journeyed through creating a truly unforgettable breakfast dish. I absolutely love how Southern Breakfast Enchiladas With Sausage Gravy takes everything we adore about a classic Southern breakfast and wraps it up into a comforting, exciting new experience. That rich, savory beef sausage gravy, generously poured over perfectly cooked eggs, cheese, and your choice of beef sausage or a delicious non-alcohol alternative, all nestled in warm tortillas… it’s pure magic.
It’s more than just a meal; it’s an invitation to gather, share, and savor. This isn’t your everyday breakfast, it’s an event! Trust me when I say that making and sharing Southern Breakfast Enchiladas With Sausage Gravy will bring warmth, flavor, and a whole lot of happy smiles to your table. I truly hope you enjoy creating and devouring this incredible dish as much as I do!

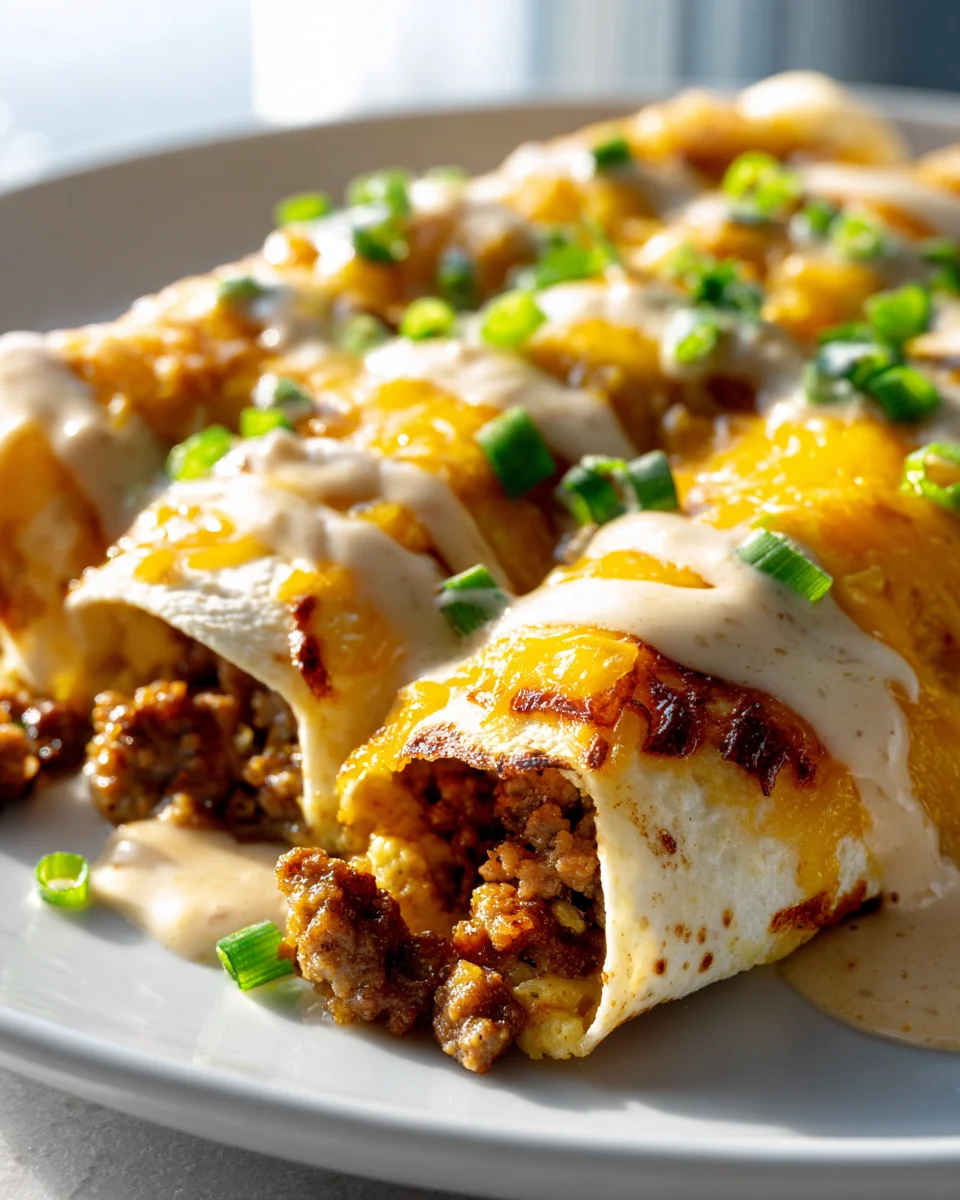
Southern Breakfast Enchiladas with Beef Sausage Gravy
- Total Time: 1 hour
- Yield: 6 servings 1x
Description
Experience a breakfast revelation with these Southern Breakfast Enchiladas, combining the heartiness of a classic Southern breakfast with the fun of enchiladas. Fluffy scrambled eggs, melty cheese, and savory beef sausage are wrapped in soft tortillas and smothered in rich homemade gravy.
Ingredients
- 1 pound Beef Breakfast Sausage
- 1/4 cup All-Purpose Flour
- 2 cups Whole Milk
- 12 Large Eggs
- 2 cups Shredded Cheese (sharp cheddar and Monterey Jack)
- 8–10 Flour Tortillas (8–10 inch)
- 1 can Canned Diced Green Chiles (drained)
- 1 small Onion (finely diced, optional)
- 1/2 Bell Pepper (finely diced, optional)
- Salt (to taste)
- Freshly ground black pepper (to taste)
- Pinch of cayenne pepper or red pepper flakes (to taste)
- 1 tablespoon Butter or Oil (for sautéing)
Instructions
- Preheat your oven to 375°F (190°C). Lightly grease a 9×13-inch baking dish. Set aside.
- In a large skillet over medium-high heat, crumble and cook the ground beef breakfast sausage until it's fully browned and no pink remains. Drain off most of the rendered fat, leaving about 2-3 tablespoons in the skillet.
- Reduce the heat to medium. Sprinkle the all-purpose flour over the cooked sausage and fat. Cook, stirring constantly, for 2-3 minutes, creating a roux.
- Gradually whisk in the whole milk (and an optional splash of low-sodium chicken broth for extra richness, if using) until smooth. Continue whisking as the gravy comes to a simmer and thickens, about 5-7 minutes. Season generously with salt, black pepper, and a pinch of cayenne pepper if desired. Keep warm over very low heat.
- In a separate large skillet, melt 1 tablespoon of butter or oil over medium heat. If using, add the diced onion and bell pepper and sauté until softened, about 5 minutes.
- Crack the eggs into a bowl and whisk them lightly with a pinch of salt and pepper. Pour the eggs into the skillet with the sautéed vegetables (if using). Scramble the eggs until they are just set but still moist. Remove from heat.
- In a large mixing bowl, combine the scrambled eggs, about 1 cup of the shredded cheese, and the well-drained green chiles. Stir gently to combine.
- Warm the flour tortillas slightly to make them more pliable. You can do this by wrapping them in a damp paper towel and microwaving for 30 seconds, or by heating them briefly in a dry skillet.
- Lay a warm tortilla flat. Spoon about 1/2 cup of the egg and cheese filling down the center. Roll the tortilla up tightly and place it seam-side down in your prepared baking dish. Repeat with the remaining tortillas and filling.
- Generously spoon the warm beef sausage gravy over the rolled enchiladas, ensuring they are well-covered.
- Sprinkle the remaining shredded cheese evenly over the top of the gravy.
- Bake for 20-25 minutes, or until the gravy is bubbly, the cheese is melted and lightly golden, and the enchiladas are heated through.
- Remove from the oven and let rest for a few minutes before serving. Garnish with fresh chopped green onions or a dash of your favorite hot sauce, if desired.
- Prep Time: 30 mins
- Cook Time: 30 mins
- Category: Breakfast
- Method: Baking
- Cuisine: Southern
Nutrition
- Serving Size: 1 enchilada
- Calories: 450
- Sugar: 2 g
- Sodium: 800 mg
- Fat: 30 g
- Saturated Fat: 12 g
- Unsaturated Fat: 15 g
- Trans Fat: 0 g
- Carbohydrates: 30 g
- Fiber: 2 g
- Protein: 20 g
- Cholesterol: 200 mg
Keywords: If your gravy gets too thick, you can thin it out with a little extra warm milk or low-sodium chicken broth. Warm tortillas are much more flexible and less likely to crack when you roll them. You can prep parts of this dish in advance; the beef sausage gravy can be made a day ahead and stored in the refrigerator.