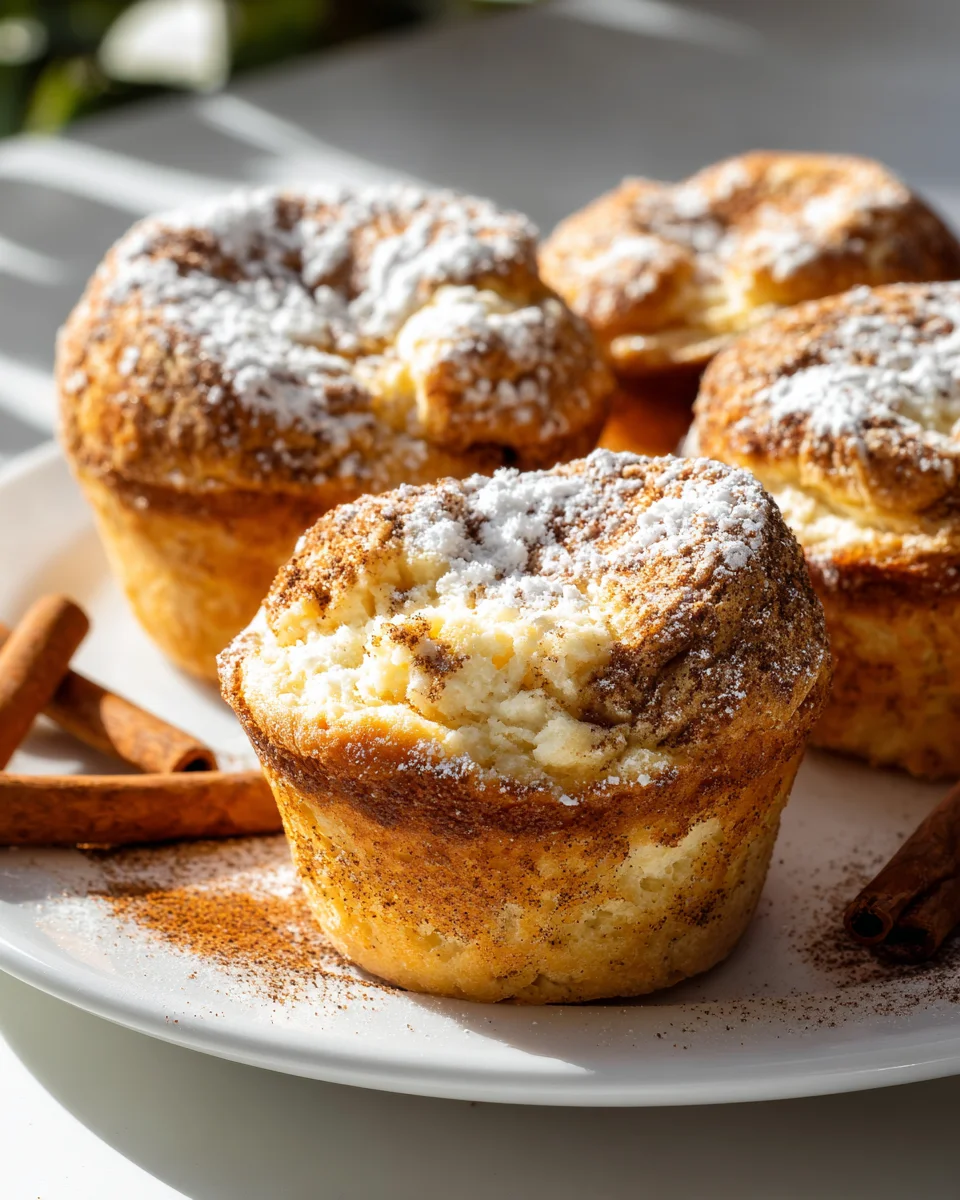
Cheesecake Stuffed Cinnamon Muffins
Cheesecake Stuffed Cinnamon Muffins. Oh my goodness, where do I even begin with these little bites of heaven? If you’re anything like me, you adore the warm, comforting embrace of a freshly baked cinnamon muffin, but also can’t resist the creamy, dreamy indulgence of a slice of cheesecake. Well, what if I told you that you don’t have to choose? I’ve taken two of my absolute favorite treats and combined them into one truly spectacular creation.
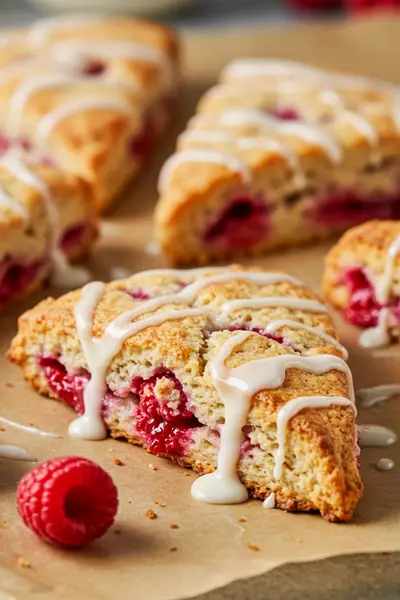
What makes these muffins so incredibly special is that delightful surprise hidden right in the center. Imagine biting into a fluffy, perfectly spiced cinnamon muffin, only to discover a rich, tangy, and impossibly creamy cheesecake filling waiting inside. It’s a moment of pure bliss, an unexpected explosion of flavors and textures that simply makes your taste buds sing. This isn’t just a muffin; it’s an experience, a miniature dessert masterpiece that’s designed to impress and satisfy.
You are absolutely going to adore these for so many reasons! They’re the ultimate comfort food with a gourmet twist, perfect for brightening up any breakfast, elevating your brunch spread, or simply treating yourself to an afternoon pick-me-up. Plus, they look incredibly fancy, but I promise you, they are totally achievable in your own kitchen. My aim with this recipe was to create something truly memorable – a moist, tender cinnamon muffin that plays host to a luscious cheesecake core, often crowned with an irresistible crumb topping or a sweet vanilla glaze. Get ready to fall head over heels for your new favorite baked good!
Ingredient Notes
Creating delicious Cheesecake Stuffed Cinnamon Muffins starts with understanding the role each ingredient plays. This isn’t just a simple muffin; it’s a delightful combination of three distinct elements: a fluffy cinnamon muffin, a creamy cheesecake center, and a sweet, crunchy streusel topping. Getting these components right is key!
For the Cheesecake Filling:
- Cream Cheese: This is the star of our filling! Always use full-fat cream cheese, softened to room temperature. This ensures a smooth, lump-free filling that bakes up perfectly creamy. Low-fat cream cheese might result in a more watery or grainy texture.
- Granulated Sugar: Just a touch to sweeten the tangy cream cheese.
- Egg Yolk: A single egg yolk adds richness and helps stabilize the filling, preventing it from running too much during baking. No substitutions recommended here for the best results.
- Vanilla Extract: Pure vanilla extract enhances the overall flavor profile. You could experiment with a hint of lemon zest if you want to brighten the cheesecake flavor further.
For the Cinnamon Muffins:
- All-Purpose Flour: The foundation of our muffins. I find all-purpose flour provides the perfect tender crumb. For a slightly healthier twist, you could try substituting up to half of it with white whole wheat flour, though it might change the texture slightly.
- Granulated Sugar & Brown Sugar: A mix of both offers sweetness and moisture. Brown sugar contributes to a chewier, more flavorful muffin. If you only have one, you can use all granulated sugar, but I highly recommend the mix for depth of flavor.
- Baking Powder & Baking Soda: Our leavening agents! They work together to give these muffins their beautiful rise and light texture. Ensure they are fresh for optimal results.
- Ground Cinnamon: This is a “cinnamon muffin,” so don’t be shy! I like to use a generous amount for that warm, comforting spice. You could add a pinch of nutmeg or allspice for extra complexity if you like.
- Salt: A crucial flavor enhancer that balances the sweetness. Don’t skip it!
- Milk: Any milk will work here – whole milk, 2%, or even a non-dairy alternative like almond or oat milk will contribute moisture to the batter.
- Large Egg: Binds the ingredients and adds structure. Make sure it’s at room temperature for better incorporation into the batter.
- Melted Unsalted Butter or Vegetable Oil: Both work beautifully. Butter lends a richer flavor, while oil makes for a very moist muffin. Feel free to use whichever you prefer or have on hand.
- Vanilla Extract: Again, for a boost of delicious aroma and flavor in the muffin itself.
For the Streusel Topping:
- All-Purpose Flour: Provides the structure for the crumbly topping.
- Brown Sugar: Adds a rich, molasses-like sweetness and helps create that desirable crunchy texture.
- Ground Cinnamon: To tie the topping perfectly into the cinnamon muffin theme.
- Cold Unsalted Butter: The key to a good streusel! Using cold, diced butter ensures the topping remains crumbly and doesn’t melt into the muffin during baking.
Step-by-Step Instructions
Let’s get baking! Don’t be intimidated by the multiple components; each step is straightforward, and the result is incredibly rewarding. I always find it helpful to prepare the filling and streusel first, then tackle the muffin batter.
- Prepare the Cheesecake Filling (First!):
- In a medium bowl, combine the softened full-fat cream cheese, granulated sugar, egg yolk, and vanilla extract.
- Using an electric mixer or a sturdy whisk, beat on low speed until the mixture is completely smooth and creamy. Be careful not to overmix, as too much air can cause the filling to puff up excessively and then sink.
- Cover the bowl and refrigerate the filling for at least 30 minutes. Chilling helps the filling firm up, making it easier to handle and ensuring it holds its shape better inside the muffins.
- Make the Streusel Topping:
- In a separate small bowl, whisk together the all-purpose flour, brown sugar, and ground cinnamon until well combined.
- Add the cold, diced unsalted butter to the dry ingredients.
- Using your fingertips, a pastry blender, or a fork, cut the butter into the flour mixture until coarse crumbs form. I like a mix of pea-sized and smaller crumbs for a varied texture. Set aside.
- Preheat Oven & Prepare Muffin Tin:
- Preheat your oven to 400°F (200°C).
- Line a standard 12-cup muffin tin with paper liners. Alternatively, grease and flour the cavities thoroughly. I find liners make for easier cleanup and removal.
- Whisk Dry Muffin Ingredients:
- In a large bowl, whisk together the all-purpose flour, granulated sugar, brown sugar, baking powder, baking soda, ground cinnamon, and salt. Make sure there are no lumps, especially from the brown sugar.
- Combine Wet Muffin Ingredients:
- In a separate medium bowl, whisk together the milk, large egg, melted unsalted butter (or vegetable oil), and vanilla extract until well combined and smooth.
- Combine Wet and Dry & Form Muffin Batter:
- Pour the wet ingredients into the dry ingredients.
- Stir gently with a spatula or wooden spoon until just combined. A few lumps are perfectly fine and even desirable; overmixing will lead to tough muffins. Stop stirring as soon as most of the flour streaks disappear.
- Assemble the Muffins:
- Divide about half of the muffin batter evenly among the prepared muffin cups, filling each about one-third full.
- Spoon about 1 heaping teaspoon of the chilled cheesecake filling onto the center of the batter in each cup. Don’t press it down too hard; let it rest on top.
- Spoon the remaining muffin batter over the cheesecake filling, covering it completely. Fill each cup to about two-thirds full.
- Generously sprinkle the reserved streusel topping over the top of each muffin.
- Bake:
- Bake the muffins for an initial 5 minutes at 400°F (200°C). This high heat helps create that beautiful domed top.
- After 5 minutes, without opening the oven door, reduce the oven temperature to 375°F (190°C). Continue baking for another 15-20 minutes, or until the tops are golden brown, and a toothpick inserted into the muffin (avoiding the cheesecake center) comes out with moist crumbs, not wet batter.
- Cool:
- Once baked, remove the muffin tin from the oven and let the muffins cool in the tin for about 5 minutes.
- Then, carefully transfer the muffins to a wire rack to cool completely. This is important for the cheesecake filling to fully set and for the muffins to retain their moisture.
Tips & Suggestions
To truly master these Cheesecake Stuffed Cinnamon Muffins and make them uniquely yours, I have a few extra insights for you. These tips come from my own baking adventures and are specifically geared towards getting the best out of this specific recipe.
- Don’t Overmix the Muffin Batter: This is arguably the most crucial tip for any muffin recipe! Overmixing develops the gluten in the flour too much, resulting in tough, dry muffins. A few lumps are absolutely fine – even desired – as they’ll disappear during baking and contribute to a tender crumb.
- Room Temperature Ingredients for Cheesecake: Ensure your cream cheese and egg yolk for the filling are at room temperature. This makes for a super smooth, lump-free filling that incorporates beautifully. Cold cream cheese will be chunky and hard to mix.
- Chill the Cheesecake Filling: I can’t stress this enough! Refrigerating the cheesecake filling for at least 30 minutes (or even longer) before assembly helps it firm up. This makes it much easier to spoon into the muffins and helps it hold its shape during baking, preventing it from spreading too thin or sinking too much into the muffin batter.
- High Heat Start for Domed Tops: The initial 5 minutes at a higher temperature (400°F/200°C) is a fantastic trick. The sudden burst of heat helps the muffins rise quickly and develop those beautiful, bakery-style domed tops before the temperature is reduced to ensure even cooking through the center.
- The Perfect Filling Technique: When spooning the cheesecake filling, try to center it as much as possible on top of the first layer of muffin batter. When you add the second layer of batter, ensure it completely covers the cheesecake. This helps encapsulate the creamy center and prevents it from directly touching the hot muffin liner or pan, which could cause it to dry out.
- Flavor Variations:
- Citrus Zest: Add a teaspoon of orange or lemon zest to either the cheesecake filling or the muffin batter for a bright, refreshing lift.
- Spices: A pinch of nutmeg or cardamom can be a wonderful addition to the cinnamon in the muffin batter or streusel.
- Mini Chocolate Chips: Fold a quarter cup of mini chocolate chips into the muffin batter or sprinkle a few over the cheesecake filling before covering.
- Avoid Opening the Oven Door: Especially during the initial high-heat phase, try not to open the oven door. This can cause the temperature to drop, impacting the muffins’ rise and making them sink. Peek through the oven window instead!
- Serving Suggestions: These muffins are absolutely delightful on their own, perhaps with a cup of coffee or tea. For an extra treat, a light dusting of powdered sugar or a simple vanilla glaze drizzled over the cooled muffins can elevate them further.
Storage
Since these Cheesecake Stuffed Cinnamon Muffins contain a cream cheese filling, proper storage is essential to maintain their freshness, flavor, and food safety. You’ll want to enjoy these delicious treats at their best!
- Room Temperature (Short Term): If you plan to eat them within a day, you can store them in an airtight container at cool room temperature. However, due to the cream cheese, I personally recommend refrigerating them for safety and extended freshness.
- Refrigeration (Recommended): For optimal freshness and safety, store these muffins in an airtight container in the refrigerator. The cream cheese filling will stay fresh and creamy. They will last wonderfully for up to 3-4 days when properly chilled.
- Freezing: These muffins freeze beautifully!
- Once completely cooled, place the muffins in a single layer on a baking sheet and freeze for about an hour until firm. This prevents them from sticking together.
- Transfer the frozen muffins to a freezer-safe airtight container or a heavy-duty freezer bag. Squeeze out as much air as possible to prevent freezer burn.
- They can be stored in the freezer for up to 2-3 months.
- When ready to enjoy, thaw them overnight in the refrigerator or on the counter for a few hours.
- Reheating:
- From Refrigerator: You can enjoy them cold, but I find them even better gently warmed. Pop a muffin into the microwave for 15-30 seconds, or until the cheesecake center is slightly warm and gooey.
- From Frozen: Thaw the muffin first. Then, microwave for 30-60 seconds, or until warmed through. Alternatively, you can warm them in a preheated oven at 300°F (150°C) for about 5-10 minutes, which will help crisp up the streusel topping again. Be careful not to overheat, as this can dry out the muffin.
Always remember, because of that wonderful creamy center, these aren’t your typical long-lasting, countertop muffins. A little refrigeration goes a long way to keep them delightful!

Final Thoughts
And there you have it, my friends! I truly believe these Cheesecake Stuffed Cinnamon Muffins are more than just a recipe; they’re an experience waiting to happen. There’s something magical about biting into a warm, spiced cinnamon muffin, only to discover that luxurious, creamy cheesecake core nestled within.
This isn’t just another muffin recipe; it’s a delightful fusion, marrying the comforting embrace of cinnamon with the tangy, rich surprise of cheesecake. Each bite offers the perfect balance of soft crumb, aromatic spice, and that irresistible, smooth filling. Trust me when I say, once you try these Cheesecake Stuffed Cinnamon Muffins, you’ll understand why they’re destined to become a beloved staple in your baking repertoire. Don’t hesitate to give them a try – your taste buds will thank you!
Decadent Cheesecake Stuffed Cinnamon Muffins Recipe
- Total Time: 55 minutes
- Yield: 12 muffins 1x
Description
Indulge in the delightful combination of warm cinnamon muffins and creamy cheesecake filling with these decadent treats. Perfect for breakfast or as a sweet afternoon snack, these muffins are sure to impress.
Ingredients
- For the Cheesecake Filling:
- 8 oz full-fat Cream Cheese, softened
- 2 tbsp Granulated Sugar
- 1 Egg Yolk
- 1 tsp Vanilla Extract
- For the Cinnamon Muffins:
- 2 cups All-Purpose Flour
- 1/2 cup Granulated Sugar
- 1/2 cup Brown Sugar
- 2 tsp Baking Powder
- 1/2 tsp Baking Soda
- 2 tsp Ground Cinnamon
- 1/2 tsp Salt
- 1 cup Milk
- 1 Large Egg, at room temperature
- 1/2 cup Melted Unsalted Butter or Vegetable Oil
- 1 tsp Vanilla Extract
- For the Streusel Topping:
- 1/2 cup All-Purpose Flour
- 1/4 cup Brown Sugar
- 1 tsp Ground Cinnamon
- 1/4 cup Cold Unsalted Butter, diced
Instructions
- Prepare the Cheesecake Filling (First!):
- In a medium bowl, combine the softened full-fat cream cheese, granulated sugar, egg yolk, and vanilla extract.
- Using an electric mixer or a sturdy whisk, beat on low speed until the mixture is completely smooth and creamy. Be careful not to overmix.
- Cover the bowl and refrigerate the filling for at least 30 minutes.
- Make the Streusel Topping:
- In a separate small bowl, whisk together the all-purpose flour, brown sugar, and ground cinnamon until well combined.
- Add the cold, diced unsalted butter to the dry ingredients.
- Using your fingertips, a pastry blender, or a fork, cut the butter into the flour mixture until coarse crumbs form. Set aside.
- Preheat Oven & Prepare Muffin Tin:
- Preheat your oven to 400°F (200°C).
- Line a standard 12-cup muffin tin with paper liners or grease and flour the cavities thoroughly.
- Whisk Dry Muffin Ingredients:
- In a large bowl, whisk together the all-purpose flour, granulated sugar, brown sugar, baking powder, baking soda, ground cinnamon, and salt.
- Combine Wet Muffin Ingredients:
- In a separate medium bowl, whisk together the milk, large egg, melted unsalted butter (or vegetable oil), and vanilla extract until well combined and smooth.
- Combine Wet and Dry & Form Muffin Batter:
- Pour the wet ingredients into the dry ingredients.
- Stir gently with a spatula or wooden spoon until just combined. A few lumps are perfectly fine.
- Assemble the Muffins:
- Divide about half of the muffin batter evenly among the prepared muffin cups, filling each about one-third full.
- Spoon about 1 heaping teaspoon of the chilled cheesecake filling onto the center of the batter in each cup.
- Spoon the remaining muffin batter over the cheesecake filling, covering it completely.
- Generously sprinkle the reserved streusel topping over the top of each muffin.
- Bake:
- Bake the muffins for an initial 5 minutes at 400°F (200°C).
- After 5 minutes, reduce the oven temperature to 375°F (190°C) and continue baking for another 15-20 minutes.
- Cool:
- Once baked, remove the muffin tin from the oven and let the muffins cool in the tin for about 5 minutes.
- Then, carefully transfer the muffins to a wire rack to cool completely.
- Prep Time: 30 mins
- Cook Time: 25 mins
- Category: Breakfast
- Method: Baking
- Cuisine: American
Nutrition
- Serving Size: 1 muffin
- Calories: 250
- Sugar: 15 g
- Sodium: 180 mg
- Fat: 10 g
- Saturated Fat: 5 g
- Unsaturated Fat: 4 g
- Trans Fat: 0 g
- Carbohydrates: 35 g
- Fiber: 1 g
- Protein: 4 g
- Cholesterol: 40 mg
Keywords: Don't overmix the muffin batter to avoid tough muffins. Ensure your cream cheese and egg yolk for the filling are at room temperature for a smooth mixture. Chill the cheesecake filling for at least 30 minutes before assembly to help it hold its shape.