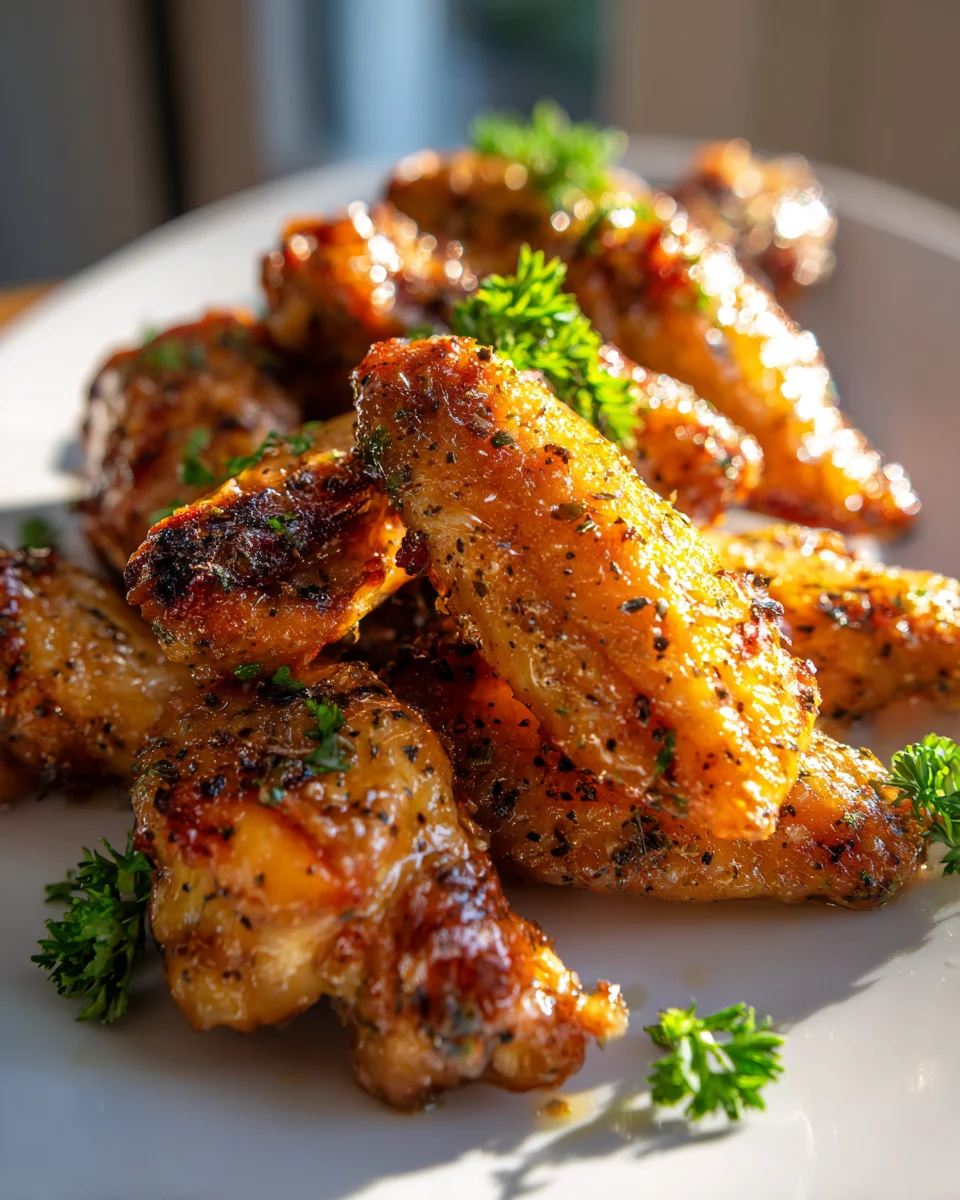
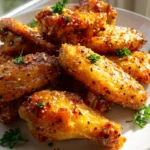
Honey Lemon Pepper Wings
Oh boy, have I got a treat for you! Honey Lemon Pepper Wings are about to become your new obsession, trust me. You know those moments when you crave something that’s got it all – sweet, tangy, a little bit spicy, and utterly delicious? Well, these wings hit every single one of those notes with a delicious symphony of flavor!
What makes these Honey Lemon Pepper Wings so special, you ask? It’s the magical trifecta of golden honey, bright, zesty lemon, and a kick of freshly ground black pepper that come together in a sticky, glaze-like sauce that coats every perfectly crispy wing. Forget boring, one-note wings! This recipe is a flavor explosion that will have everyone reaching for more.
You’re going to absolutely love making (and devouring!) these because they’re surprisingly simple to prepare but deliver maximum impact. Imagine perfectly cooked chicken wings, tender on the inside and delightfully crisp on the outside, bathed in that incredible sweet-and-sour-with-a-kick sauce. They’re perfect for game nights, backyard barbecues, or just a really indulgent dinner. Get ready to impress your taste buds and your friends!

Ingredient Notes
Hey there, fellow wing lover! Let’s talk about the stars of our show for these irresistible Honey Lemon Pepper Wings. Getting the right ingredients is half the battle, and I promise you, a little attention to detail here will pay off big time in flavor and texture.
Chicken Wings
- The Foundation: I always recommend using fresh, high-quality chicken wings. You can buy them whole (flats and drumettes still attached), or already separated. For convenience, I often grab a pack of pre-separated flats and drumettes. Aim for about 2-3 pounds for a good batch. The skin is critical here for that desired crispiness, so don’t trim too much!
- Substitutions: While the name clearly states “wings,” if you’re looking for a similar flavor profile on a different cut, boneless chicken thighs or even chicken tenders would work, though the cooking times and the overall eating experience will, of course, be different from a classic wing.
Honey
- Sweet Gold: This is a key player in our sticky, sweet-and-savory sauce. I prefer using a good quality, runny honey – something like clover, wildflower, or even a local varietal if you have access to it. It blends beautifully into the sauce.
- Substitutions: If you’re out of honey, pure maple syrup could offer a different but equally delicious sweetness. Just be aware its flavor profile is distinct, adding a slightly more earthy note.
Lemon
- Zing and Brightness: You absolutely need fresh lemons for this recipe. We’ll be using both the zest and the juice. The zest carries intense lemon oil, providing a deeper citrus aroma, while the juice offers that essential tangy brightness that cuts through the richness of the wings and the sweetness of the honey.
- Substitutions: Bottled lemon juice can be used in a pinch, but I find it lacks the vibrant, fresh punch of real lemons. If you really can’t get fresh lemons, consider adding a touch more zest from another citrus if you have it (like lime), but the classic “lemon pepper” flavor will be altered.
Black Pepper
- The “Pepper” in Lemon Pepper: This isn’t just a sprinkle; it’s a generous seasoning! Freshly ground black pepper is non-negotiable for me. The aroma and robust flavor of freshly cracked peppercorns are far superior to pre-ground pepper. I usually use a coarse grind for texture and intense flavor.
- Substitutions: While white pepper could be used for a milder heat, it won’t give you the same classic “lemon pepper” depth. If you like a little extra kick, a pinch of cayenne pepper or red pepper flakes can be a wonderful addition to the sauce or even tossed with the wings before cooking.
Other Essential Ingredients
- Butter: Unsalted butter forms the base of our luscious sauce, adding richness and helping to emulsify the honey and lemon. If using salted butter, just be mindful of how much additional salt you add.
- Garlic Powder & Onion Powder: These dry seasonings are fantastic for giving our wings an initial savory base before they even hit the sauce. They provide a foundational flavor that complements the lemon pepper perfectly.
- Salt: Kosher salt or sea salt is my choice for seasoning the wings. It enhances all the other flavors.
- Neutral Oil: For frying (if you choose that method) or for coating the wings before baking/air frying. Canola, vegetable, or avocado oil work great as they have a high smoke point and neutral flavor.
- Baking Powder (Optional): If you’re baking or air frying, a little bit of aluminum-free baking powder tossed with the wings can work wonders for an extra crispy skin.
Step-by-Step Instructions
Alright, let’s get down to business and make these Honey Lemon Pepper Wings come alive! I’ll guide you through my tried-and-true method for getting them perfectly crispy and coated in that amazing sauce.
Step 1: Prep the Wings for Perfection
- Pat Them Dry: This is arguably the most crucial step for crispy wings! Get out some paper towels and thoroughly pat every single wing dry. I mean, REALLY dry. Moisture on the skin prevents crisping.
- Season Generously: In a large bowl, toss your dried wings with a tablespoon of neutral oil (like canola or vegetable oil). Then, season them generously with about 1 teaspoon of kosher salt, 1 teaspoon of garlic powder, 1/2 teaspoon of onion powder, and 1/2 teaspoon of freshly ground black pepper. If you’re going for extra crispiness in the oven or air fryer, now is the time to add 1 teaspoon of aluminum-free baking powder and toss to coat evenly.
Step 2: Cook the Wings to Crispy Perfection (Choose Your Method!)
Here are my favorite ways to get those wings wonderfully crispy:
- Oven Baking (My Go-To for Less Mess):
- Preheat your oven to a scorching 400°F (200°C).
- Arrange the seasoned wings in a single layer on a wire rack set over a baking sheet (this allows air to circulate for even crisping).
- Bake for 45-60 minutes, flipping them halfway through, until they are golden brown, crispy, and cooked through (internal temperature of 165°F / 74°C). For extra crispiness, I sometimes crank the heat to 425°F (220°C) for the last 10-15 minutes.
- Air Frying (Quick & Crispy):
- Preheat your air fryer to 380°F (190°C).
- Place the wings in a single layer in the air fryer basket, ensuring not to overcrowd it (work in batches if necessary).
- Air fry for 20-25 minutes, flipping them every 7-8 minutes, until they are incredibly crispy and golden.
- Deep Frying (Classic & Ultimate Crisp):
- Pour about 2-3 inches of neutral oil into a heavy-bottomed pot or Dutch oven. Heat the oil to 350°F (175°C). Use a thermometer for accuracy!
- Carefully add a single layer of wings to the hot oil, being careful not to overcrowd the pot. Fry for about 8-10 minutes, or until cooked through and golden brown.
- For an extra crispy “double fry” effect, remove the wings to a wire rack. Once all wings are fried once, increase the oil temperature to 375°F (190°C) and fry them again for 2-4 minutes until they reach that perfect, shatteringly crisp exterior.
Step 3: Whip Up the Honey Lemon Pepper Sauce
- Melt the Butter: While the wings are cooking, melt 1/2 cup (1 stick) of unsalted butter in a medium saucepan over medium heat.
- Build the Flavor: Once melted, stir in 1/2 cup of honey, the juice of 2-3 fresh lemons (about 1/4 – 1/3 cup), the zest of 1-2 lemons, and a generous 2-3 tablespoons of freshly ground black pepper. I like to add a pinch of salt here too, to balance the sweetness.
- Simmer and Thicken: Bring the sauce to a gentle simmer, stirring occasionally. Let it simmer for about 3-5 minutes, allowing it to slightly thicken and the flavors to meld beautifully. Taste and adjust! Do you want more lemon? More pepper? A touch more honey? This is your chance!
Step 4: Toss and Serve!
- Coat Those Wings: Once your wings are perfectly cooked and crispy, transfer them to a large bowl.
- Sauce It Up: Pour the warm honey lemon pepper sauce over the wings.
- Toss to Coat: Use tongs to toss the wings until every single piece is glistening and thoroughly coated in that amazing sauce.
- Serve Immediately: Transfer to a serving platter and garnish with extra lemon wedges, a sprinkle of fresh parsley, and a final crack of fresh black pepper. Dig in!
Tips & Suggestions
Making Honey Lemon Pepper Wings is an art, and I’ve picked up a few tricks over the years to really elevate them. Here are my top tips and suggestions to ensure your wings are always a showstopper!
Achieving Maximum Crispiness
- Pat, Pat, Pat: I cannot stress this enough – dry wings are crispy wings. After rinsing, lay them out on paper towels and pat them until they are as dry as possible. Any residual moisture will steam the skin rather than crisp it.
- Baking Powder Trick: If you’re baking or air frying, tossing the wings with a teaspoon of aluminum-free baking powder along with your dry seasonings is a game-changer. It helps to break down the proteins in the skin, leading to a much crispier result without any metallic taste.
- Don’t Crowd the Pan/Basket: Whether you’re baking, air frying, or deep frying, ensure the wings are in a single layer and have plenty of space. Overcrowding lowers the temperature and causes steaming, preventing that coveted crispy skin. Work in batches if necessary.
- High Heat Finish: For oven-baked wings, a final blast at a slightly higher temperature (e.g., 425-450°F or 220-230°C) for the last 10 minutes can really push them over the edge into crispiness.
Flavor Adjustments and Enhancements
- Lemon Power: For an extra citrusy kick, I love to add a tiny splash of fresh lemon juice and a pinch of fresh lemon zest right after tossing the wings in the sauce, just before serving. It brightens everything up.
- Pepper Precision: Don’t be shy with the black pepper in the sauce. The “pepper” in “lemon pepper” needs to shine! I sometimes use a mix of finely ground pepper in the sauce and then a coarser grind for garnish, adding both depth and textural interest.
- Heat It Up: If you enjoy a little heat, consider adding a pinch of cayenne pepper or a teaspoon of red pepper flakes to the sauce along with the other ingredients. It provides a lovely warmth that complements the sweet and tangy notes.
- Garlic Lover’s Delight: For an even deeper savory base, you could add 1-2 cloves of minced fresh garlic to the butter just before adding the honey and lemon juice for the sauce. Cook for 30 seconds until fragrant.
- Sweetness Balance: Taste your sauce! If your lemons are particularly tart, you might want to add another tablespoon of honey to achieve the perfect sweet-tart balance.
Serving Suggestions
- Dipping Sauces: These wings are fantastic on their own, but they also pair wonderfully with a cool, creamy dipping sauce. My favorites include a classic homemade blue cheese dressing or a ranch dressing.
- Cooling Veggies: Celery sticks and carrot sticks are a must for that classic wing experience. They offer a refreshing crunch and a nice counterpoint to the rich, flavorful wings.
- Garnish for Impact: A sprinkle of fresh chopped parsley and a few extra lemon wedges on the side not only look appealing but also offer fresh flavors for those who want an extra squeeze of lemon.
Make-Ahead Tips
- Sauce Ahead: The honey lemon pepper sauce can be made a day or two in advance and stored in an airtight container in the refrigerator. Gently reheat it on the stovetop over low heat, stirring frequently, before tossing with freshly cooked wings.
Storage
You’ve made a delicious batch of Honey Lemon Pepper Wings, but sometimes there are leftovers (a rare occurrence in my house!). Here’s how I handle storing and reheating them to keep them as delicious as possible.
Storing Cooked Honey Lemon Pepper Wings
- Refrigeration: Once the wings have cooled completely to room temperature (this usually takes about 30-60 minutes, but don’t leave them out for more than 2 hours), transfer them to an airtight container. I usually layer them with parchment paper if I have a lot, to prevent them from sticking together too much.
- Shelf Life: Stored properly in the refrigerator, your Honey Lemon Pepper Wings will keep well for 3-4 days.
Reheating for Best Results
The goal when reheating is always to get that crispy skin back without drying out the meat. The microwave is generally not your friend here if you want crispiness!
- Oven (My Top Choice): This is my preferred method for reheating.
- Preheat your oven to 350°F (175°C).
- Place the leftover wings in a single layer on a wire rack set over a baking sheet. This allows for even air circulation.
- Heat for 10-15 minutes, or until they are heated through and the skin has crisped up again. Keep an eye on them to prevent over-drying.
- Air Fryer (Also Excellent!): If you have an air fryer, it’s fantastic for reheating wings.
- Preheat your air fryer to 350°F (175°C).
- Arrange the wings in a single layer in the basket, ensuring not to overcrowd.
- Air fry for 5-8 minutes, flipping halfway through, until they are hot and crispy.
- Microwave (Use with Caution): While quick, the microwave will make your wings soft and potentially rubbery, and you’ll lose all that wonderful crispiness. I only recommend this if you absolutely must, and don’t care about the texture. Heat in 30-second intervals until warmed through.
Freezing Cooked Honey Lemon Pepper Wings
- Can You Freeze Them? Yes, you can freeze cooked Honey Lemon Pepper Wings, but be aware that the texture, especially the crispiness of the skin, will likely suffer after thawing and reheating. The sauce can also become a bit thinner.
- How to Freeze: Arrange the completely cooled wings in a single layer on a baking sheet and freeze until solid (this prevents them from clumping together). Once frozen, transfer them to a freezer-safe bag or airtight container.
- Freezer Life: They can be stored in the freezer for up to 2-3 months.
- Thawing and Reheating Frozen Wings: Thaw the wings overnight in the refrigerator. Then, reheat using the oven or air fryer method described above, adding a few extra minutes to ensure they are heated through and crisped up.
Storing Leftover Sauce
- Refrigeration: If you have any leftover Honey Lemon Pepper sauce, transfer it to an airtight container and store it in the refrigerator.
- Shelf Life: It will keep well for up to a week. Gently reheat on the stovetop over low heat before using.
Final Thoughts
Well, there you have it! I truly believe these Honey Lemon Pepper Wings are a culinary delight you simply have to experience for yourself. The beautiful golden crispiness, combined with that irresistible sticky-sweet honey glaze, the bright, zesty zing of fresh lemon, and the subtle, peppery warmth creates an unforgettable flavor profile. It’s a perfect harmony that makes every bite incredibly satisfying.
These Honey Lemon Pepper Wings are more than just a dish; they’re an absolute crowd-pleaser, whether you’re bringing them to a gathering or simply enjoying a fantastic meal at home. They’re perfectly balanced, delivering a taste experience that’s both comforting and excitingly fresh. I promise you, once you taste the magic of this combination, they’ll quickly become a cherished recipe in your repertoire.
So go ahead, give these spectacular Honey Lemon Pepper Wings a try. You deserve to savor something truly special!
Best Honey Lemon Pepper Wings – Sweet, Zesty & Crispy!
- Total Time: 16 minute
- Yield: 4 servings 1x
Description
These Honey Lemon Pepper Wings are a delightful combination of sweet, tangy, and spicy flavors that will leave you craving more. Perfectly crispy on the outside and tender on the inside, they are a must-try for any wing lover!
Ingredients
- 2–3 pounds fresh chicken wings
- 1 tablespoon neutral oil (canola or vegetable)
- 1 teaspoon kosher salt
- 1 teaspoon garlic powder
- 1/2 teaspoon onion powder
- 1/2 teaspoon freshly ground black pepper
- 1 teaspoon aluminum-free baking powder (optional)
- 1/2 cup unsalted butter
- 1/2 cup honey
- Juice of 2–3 fresh lemons (about 1/4 – 1/3 cup)
- Zest of 1–2 lemons
- 2–3 tablespoons freshly ground black pepper
- Pinch of salt (for sauce)
Instructions
- Step 1: Prep the Wings for Perfection
- Pat Them Dry: Thoroughly pat every single wing dry with paper towels.
- Season Generously: In a large bowl, toss your dried wings with neutral oil, kosher salt, garlic powder, onion powder, and freshly ground black pepper. If desired, add baking powder for extra crispiness.
- Step 2: Cook the Wings to Crispy Perfection (Choose Your Method!)
- Oven Baking: Preheat your oven to 400°F (200°C). Arrange the seasoned wings in a single layer on a wire rack set over a baking sheet. Bake for 45-60 minutes, flipping halfway through, until golden brown and crispy.
- Air Frying: Preheat your air fryer to 380°F (190°C). Place the wings in a single layer in the air fryer basket. Air fry for 20-25 minutes, flipping every 7-8 minutes.
- Deep Frying: Heat 2-3 inches of neutral oil in a pot to 350°F (175°C). Fry wings in a single layer for 8-10 minutes until golden brown. For extra crispiness, double fry at 375°F (190°C) for 2-4 minutes.
- Step 3: Whip Up the Honey Lemon Pepper Sauce
- Melt the Butter: Melt 1/2 cup of unsalted butter in a medium saucepan over medium heat.
- Build the Flavor: Stir in honey, lemon juice, lemon zest, and freshly ground black pepper. Add a pinch of salt to balance the sweetness.
- Simmer and Thicken: Bring the sauce to a gentle simmer for 3-5 minutes, stirring occasionally.
- Step 4: Toss and Serve!
- Coat Those Wings: Transfer cooked wings to a large bowl.
- Sauce It Up: Pour the warm honey lemon pepper sauce over the wings.
- Toss to Coat: Use tongs to toss the wings until thoroughly coated.
- Serve Immediately: Transfer to a serving platter, garnish with lemon wedges and parsley, and enjoy!
- Prep Time: 15 mins
- Cook Time: 45-60 mins
- Category: Appetizer
- Method: Baking, Air Frying, Deep Frying
- Cuisine: American
Nutrition
- Serving Size: 1 serving
- Calories: 400
- Sugar: 10 g
- Sodium: 600 mg
- Fat: 25 g
- Saturated Fat: 10 g
- Unsaturated Fat: 15 g
- Trans Fat: 0 g
- Carbohydrates: 20 g
- Fiber: 0 g
- Protein: 30 g
- Cholesterol: 100 mg
Keywords: Ensure wings are patted dry for maximum crispiness. You can substitute honey with pure maple syrup and use bottled lemon juice in a pinch, though fresh is preferred.