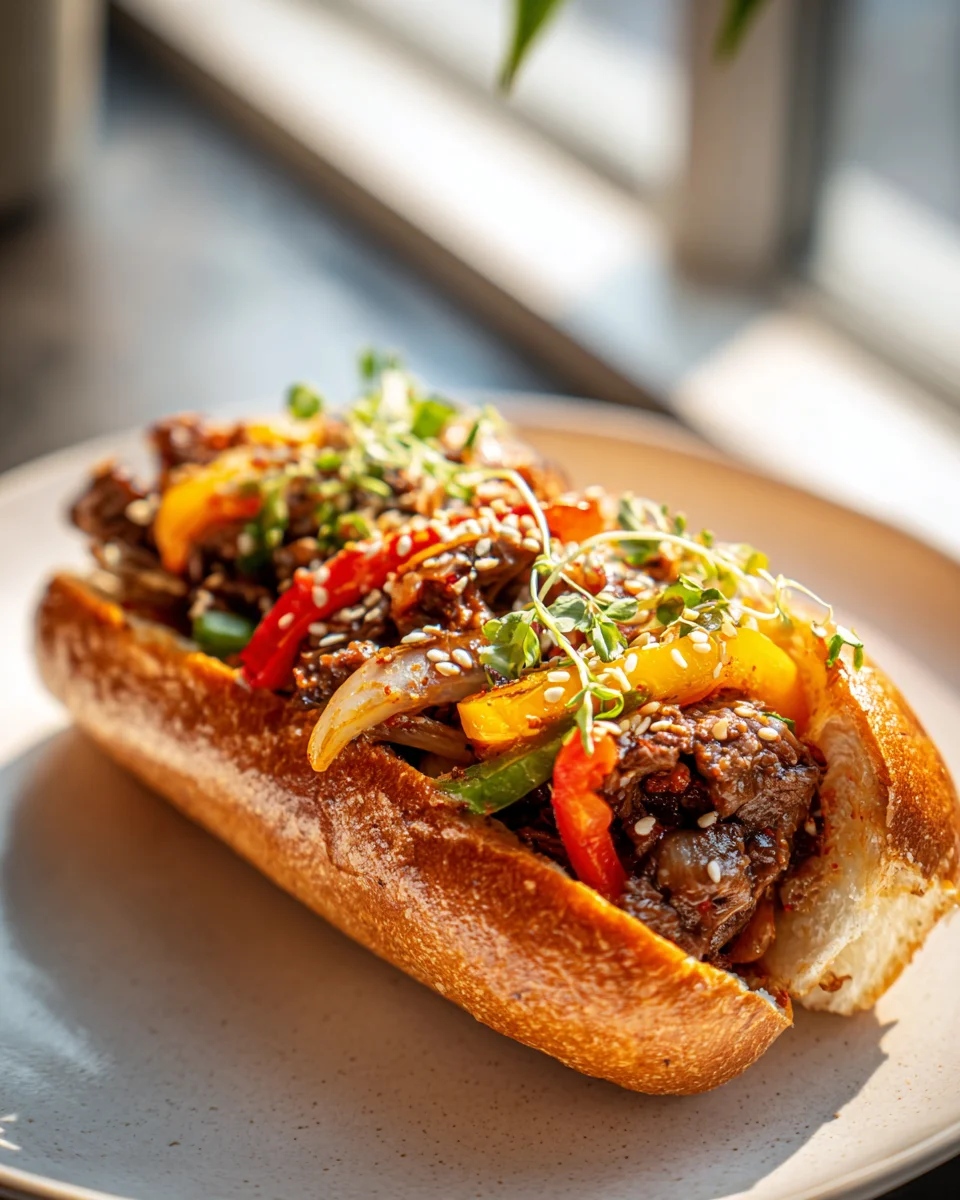
Irresistible Korean Inspired Kimchi Bulgogi Cheesesteak
Get ready for a flavor explosion! Here it is: the Irresistible Korean Inspired Kimchi Bulgogi Cheesesteak. I’m absolutely thrilled to share this recipe with you because it’s more than just a meal – it’s a culinary adventure that takes two iconic comfort foods and marries them into something truly extraordinary. What makes this recipe so special, you ask? It’s the ultimate fusion dish, bringing together the savory, tender sweetness of classic Korean bulgogi with the beloved, gooey, cheesy heartiness of an American cheesesteak, all amplified by the incredible zing and spice of vibrant kimchi. This isn’t just any sandwich; it’s a bold statement that promises an unforgettable experience!
You are going to absolutely love this. Seriously, prepare for your taste buds to sing! Readers adore this recipe because it delivers an unbelievably satisfying combination of textures and flavors that you simply won’t find anywhere else. It’s comforting, exciting, and packed with so much deliciousness that every bite is an experience. Imagine sinking your teeth into tender, thinly sliced beef, marinated in a rich, savory-sweet bulgogi sauce (achieving that depth of flavor with fantastic non-alcohol alternatives, of course!), perfectly seared until caramelized. Now, picture that incredible beef nestled with luscious, melted cheese, piled high with vibrant, tangy, and slightly spicy kimchi, all tucked into a perfectly toasted, soft hoagie roll. It’s the perfect harmony of savory, sweet, tangy, and utterly cheesy goodness, making it an unforgettable lunch or dinner that will have everyone asking for more!

Ingredient Notes
Crafting an “Irresistible Korean Inspired Kimchi Bulgogi Cheesesteak” starts with selecting the right ingredients. This isn’t just any cheesesteak; it’s a symphony of savory bulgogi, tangy kimchi, and gooey cheese, all nestled in a perfect roll. Here’s what you’ll need to make this culinary masterpiece:
- For the Bulgogi Beef:
- Beef: I always go for about 1.5 lbs of thinly sliced ribeye or sirloin. The thinner, the better! You can ask your butcher to thinly slice it for you, or partially freeze it at home for 30-40 minutes before slicing against the grain yourself. This cut provides the perfect balance of tenderness and flavor that’s crucial for both bulgogi and a classic cheesesteak.
- Soy Sauce: About 1/4 cup. Low sodium is my preference to control saltiness.
- Brown Sugar: 2 tablespoons. This gives the bulgogi its signature sweetness and helps with caramelization.
- Toasted Sesame Oil: 1 tablespoon. Essential for that distinct nutty Korean flavor.
- Garlic: 4-5 cloves, minced. Don’t skimp here; garlic is a cornerstone of Korean cuisine.
- Ginger: 1 tablespoon, grated. Fresh ginger adds a wonderful zing and warmth.
- Pear Juice: 2 tablespoons. I love using pear juice; it’s a fantastic non-alcohol alternative to traditional mirin or rice wine, and it naturally tenderizes the beef while adding a subtle sweetness. You can often find small cans of Asian pear juice in international markets.
- Black Pepper: 1/2 teaspoon. Freshly ground makes a difference.
- For the Kimchi & Assembly:
- Kimchi: 1.5-2 cups of well-fermented napa cabbage kimchi. This is the heart of the “kimchi” in our cheesesteak! Mature kimchi provides the best tangy, spicy, and umami-rich flavor that truly stands out. If yours is very watery, gently squeeze out some excess liquid.
- Onion: 1 large yellow onion, thinly sliced. A classic cheesesteak component that adds sweetness and depth when caramelized.
- Cooking Oil: 2 tablespoons (e.g., vegetable, canola, or grapeseed oil) for sautéing.
- Provolone Cheese: 8-12 slices (or 1 cup shredded) or white American cheese. I find provolone melts beautifully and has a mild, creamy flavor that complements the bulgogi and kimchi without overpowering them. Some purists might even consider a mild cheddar or Monterey Jack blend.
- Hoagie Rolls: 4-6 good quality, soft yet sturdy hoagie or sub rolls. A fresh, slightly crusty roll that can hold up to the juicy fillings without getting soggy is non-negotiable.
- Optional Garnishes & Sauce:
- Gochujang Mayo: Mix 1/2 cup mayonnaise with 1-2 tablespoons gochujang (Korean chili paste), a teaspoon of rice vinegar, and a dash of sesame oil for an extra layer of creamy, spicy goodness.
- Scallions: Sliced for freshness and color.
- Toasted Sesame Seeds: For a final touch of nutty aroma.
Substitutions I’ve Tried:
- Beef: If ribeye or sirloin isn’t available, thinly sliced top round or chuck eye will work in a pinch, though they might be slightly less tender. Always remember the thin slicing!
- Pear Juice: Apple juice or even a touch of brown sugar water can replace pear juice if you can’t find it, but the pear really does add that special touch.
- Cheese: Feel free to experiment with your favorite melting cheese. Mozzarella could work for stretchiness, but I prefer something with a bit more flavor.
- Kimchi: While napa cabbage kimchi is traditional, you could try radish kimchi for a different texture and zing, though it will change the profile slightly.
Step-by-Step Instructions
Alright, let’s get cooking! This “Irresistible Korean Inspired Kimchi Bulgogi Cheesesteak” might sound complex, but I promise the steps are straightforward and the reward is absolutely worth it.
- Marinate the Beef (The longer, the better!):
- In a large bowl, combine the thinly sliced beef with the soy sauce, brown sugar, sesame oil, minced garlic, grated ginger, pear juice, and black pepper.
- Mix everything thoroughly by hand, ensuring each slice of beef is coated.
- Cover the bowl and refrigerate for at least 30 minutes. Ideally, I let it marinate for 2-4 hours, or even overnight for the best flavor penetration and tenderness.
- Prep Your Veggies & Kimchi:
- Thinly slice your yellow onion.
- If your kimchi pieces are very large, give them a rough chop to make them more manageable for the cheesesteak. If your kimchi is quite wet, you can gently press out some of the excess liquid with your hands or a paper towel to prevent a soggy sandwich.
- Sauté the Onions:
- Heat 1 tablespoon of cooking oil in a large skillet or griddle over medium heat.
- Add the sliced onions and cook, stirring occasionally, until they are softened and lightly caramelized, about 8-10 minutes. They should be sweet and translucent.
- Remove the onions from the skillet and set them aside.
- Sauté the Kimchi:
- Add another tablespoon of cooking oil (if needed) to the same skillet over medium-high heat.
- Add the chopped kimchi and sauté for 5-7 minutes. This step is crucial! Cooking the kimchi mellows its intense tanginess and brings out its savory, umami notes, integrating it beautifully into the dish. It also prevents the kimchi from being too cold or harsh against the warm beef.
- Once softened and fragrant, remove the kimchi from the skillet and set it aside with the onions.
- Cook the Bulgogi Beef:
- Increase the skillet heat to high. You want it hot to get a good sear.
- Working in batches if necessary (to avoid overcrowding, which steams the beef instead of searing it), add the marinated beef to the hot skillet. Spread it out in a single layer.
- Cook for 2-3 minutes per side, stirring and chopping the beef with your spatula as it cooks, just like a classic cheesesteak. You want some nice browned edges and for the beef to be fully cooked through.
- Once cooked, push the beef to one side of the skillet.
- Combine & Cheese it Up!:
- Add the sautéed onions and kimchi back into the skillet with the cooked bulgogi beef. Mix everything together thoroughly.
- Divide the mixture into portions (one for each roll) directly on the skillet.
- Lay 2-3 slices of provolone cheese over each portion of the beef mixture. If using shredded cheese, sprinkle generously.
- Cover the skillet with a lid or another large pan for 1-2 minutes, or until the cheese is beautifully melted and gooey.
- Prepare the Rolls & Assemble:
- While the cheese is melting, lightly toast your hoagie rolls. You can do this by slicing them open and placing them cut-side down on the hot skillet for a minute, or under a broiler. A slightly toasted roll holds up much better to the juicy filling.
- Once the cheese is melted, carefully scoop each cheesy bulgogi-kimchi portion into a toasted hoagie roll using your spatula.
- Serve & Enjoy:
- If using, drizzle generously with gochujang mayo, sprinkle with sliced scallions and toasted sesame seeds.
- Serve immediately and prepare for an explosion of flavors!
Tips & Suggestions
To truly elevate your “Irresistible Korean Inspired Kimchi Bulgogi Cheesesteak” from great to unforgettable, I’ve learned a few tricks along the way:
- Achieving Thin Beef Slices: If you’re slicing your own beef, a crucial tip is to partially freeze the beef for about 30-40 minutes before slicing. This firms it up, making it much easier to achieve those super thin, consistent slices that are ideal for both bulgogi and a proper cheesesteak. Use a very sharp knife and slice against the grain.
- Don’t Rush the Marinade: While 30 minutes is the minimum, I find that letting the beef marinate for 2-4 hours, or even overnight, makes a significant difference. The pear juice and other marinade components have more time to tenderize the meat and infuse it with deep, complex flavors.
- Hot Skillet, Happy Beef: When cooking the bulgogi, make sure your skillet is screaming hot. This allows the beef to sear quickly, locking in juices and developing those delicious caramelized edges, rather than steaming and becoming tough. Cook in batches if necessary to avoid overcrowding the pan.
- The Kimchi’s Role: Don’t skip sautéing the kimchi! This step is key to mellowing its raw tang and integrating its flavor more harmoniously with the beef and cheese. It brings out a sweeter, more nuanced umami note that uncooked kimchi can’t offer in this context. If your kimchi is very sour, you can rinse it briefly under cold water before cooking, but I prefer its full flavor.
- The Right Roll Matters: A good quality roll is paramount. You want something that’s soft enough on the inside to meld with the filling but sturdy enough on the outside to maintain its integrity without becoming a soggy mess. Toasting the roll also creates a protective barrier and adds a lovely textural contrast.
- Customize Your Spice: If you love heat, feel free to add a pinch of gochugaru (Korean chili flakes) to your bulgogi marinade or sprinkle some on the beef as it cooks. The gochujang mayo is also a fantastic way to control the overall spiciness of your cheesesteak.
- Add-ins for Extra Flair: While the core recipe is perfect, sometimes I like to experiment. Sautéed mushrooms or thinly sliced green bell peppers could be a nice addition for those who love classic cheesesteak elements. A fried egg on top? Absolutely decadent!
Storage
While the “Irresistible Korean Inspired Kimchi Bulgogi Cheesesteak” is undeniably best enjoyed fresh off the skillet, sometimes you might have leftovers or want to prep components ahead of time. Here’s my advice for storage:
- Best Eaten Fresh: Seriously, this sandwich is a symphony of warm, melty, juicy goodness that really shines when served immediately. The textures and temperatures are at their peak right after assembly.
- Storing Cooked Components Separately:
- Bulgogi Beef & Kimchi/Onion Mixture: If you have leftover cooked bulgogi, kimchi, and onion mixture (before it’s assembled into a roll with cheese), you can store it in an airtight container in the refrigerator for up to 2-3 days.
- Rolls & Cheese: Keep your rolls and any uncooked cheese separate.
- Gochujang Mayo: The homemade gochujang mayo can be stored in an airtight container in the refrigerator for up to 5-7 days.
- Reheating the Mixture:
- Skillet Method (Recommended): This is my preferred way to reheat the beef, kimchi, and onion mixture. Heat a non-stick skillet over medium-high heat. Add the mixture and stir occasionally until heated through. Once hot, divide into portions, top with fresh cheese slices, and cover the skillet to melt the cheese before scooping into a freshly toasted roll. This method helps maintain texture and flavor.
- Oven Method: You can also spread the mixture on a baking sheet and heat in a preheated oven at 350°F (175°C) for about 10-15 minutes, adding cheese during the last few minutes. This can dry out the meat a bit more, so keep an eye on it.
- Microwave (Last Resort): While convenient, the microwave will likely compromise the texture of the beef and cheese. It will heat it, but don’t expect the same “irresistible” quality.
- Freezing: I generally don’t recommend freezing the assembled cheesesteak or even the cooked bulgogi mixture. The kimchi and the beef can become watery or rubbery upon thawing, and the rolls will definitely suffer in texture. For this dish, fresh is truly best!
Final Thoughts
And there you have it! We’ve created something truly extraordinary together. I honestly believe that the Irresistible Korean Inspired Kimchi Bulgogi Cheesesteak is more than just a meal; it’s a flavorful adventure that brings the best of two worlds right to your plate. The succulent, savory beef bulgogi, perfectly marinated and cooked, finds its ideal partner in the vibrant, tangy kick of kimchi, all brought together by gooey, melted cheese on a soft roll. It’s a combination that sounds bold, but trust me, it’s a symphony of textures and tastes that just works incredibly well.
If you’ve been searching for a dish that offers a unique twist on a classic, a guaranteed conversation starter, or simply something spectacularly delicious to satisfy your cravings, then the Irresistible Korean Inspired Kimchi Bulgogi Cheesesteak is an absolute must-try. It promises a burst of Korean-inspired deliciousness with every single bite. Go ahead, gather your ingredients, follow these steps, and prepare to fall in love with your new favorite fusion creation. I’m certain you’ll agree that the Irresistible Korean Inspired Kimchi Bulgogi Cheesesteak lives up to its name!

Irresistible Korean Kimchi Bulgogi Cheesesteak Delight
- Total Time: 1 hour
- Yield: 4-6 servings 1x
Description
Experience a flavor explosion with this Irresistible Korean Kimchi Bulgogi Cheesesteak Delight, where savory bulgogi meets gooey cheese and vibrant kimchi. It’s a culinary adventure that promises an unforgettable taste sensation in every bite!
Ingredients
- 1.5 lbs thinly sliced ribeye or sirloin beef
- 1/4 cup low sodium soy sauce
- 2 tablespoons brown sugar
- 1 tablespoon toasted sesame oil
- 4–5 cloves garlic, minced
- 1 tablespoon grated ginger
- 2 tablespoons pear juice
- 1/2 teaspoon black pepper
- 1.5–2 cups well-fermented napa cabbage kimchi
- 1 large yellow onion, thinly sliced
- 2 tablespoons cooking oil (e.g., vegetable, canola, or grapeseed oil)
- 8–12 slices provolone cheese (or 1 cup shredded) or white American cheese
- 4–6 good quality hoagie or sub rolls
- 1/2 cup mayonnaise (for gochujang mayo)
- 1–2 tablespoons gochujang (Korean chili paste)
- 1 teaspoon rice vinegar
- dash of sesame oil
- sliced scallions (optional)
- toasted sesame seeds (optional)
Instructions
- In a large bowl, combine the thinly sliced beef with the soy sauce, brown sugar, sesame oil, minced garlic, grated ginger, pear juice, and black pepper. Mix everything thoroughly by hand, ensuring each slice of beef is coated. Cover the bowl and refrigerate for at least 30 minutes, ideally for 2-4 hours or overnight.
- Thinly slice your yellow onion. If your kimchi pieces are very large, give them a rough chop to make them more manageable for the cheesesteak. If your kimchi is quite wet, gently press out some of the excess liquid.
- Heat 1 tablespoon of cooking oil in a large skillet or griddle over medium heat. Add the sliced onions and cook, stirring occasionally, until they are softened and lightly caramelized, about 8-10 minutes. Remove the onions from the skillet and set them aside.
- Add another tablespoon of cooking oil (if needed) to the same skillet over medium-high heat. Add the chopped kimchi and sauté for 5-7 minutes. Once softened and fragrant, remove the kimchi from the skillet and set it aside with the onions.
- Increase the skillet heat to high. Working in batches if necessary, add the marinated beef to the hot skillet. Cook for 2-3 minutes per side, stirring and chopping the beef with your spatula as it cooks. Once cooked, push the beef to one side of the skillet.
- Add the sautéed onions and kimchi back into the skillet with the cooked bulgogi beef. Mix everything together thoroughly. Divide the mixture into portions directly on the skillet. Lay 2-3 slices of provolone cheese over each portion. Cover the skillet with a lid for 1-2 minutes, or until the cheese is melted.
- While the cheese is melting, lightly toast your hoagie rolls. Once the cheese is melted, carefully scoop each cheesy bulgogi-kimchi portion into a toasted hoagie roll using your spatula.
- If using, drizzle generously with gochujang mayo, sprinkle with sliced scallions and toasted sesame seeds. Serve immediately.
- Prep Time: 30 mins
- Cook Time: 30 mins
- Category: Dinner
- Method: Sautéing
- Cuisine: Korean-American
Nutrition
- Serving Size: 1 sandwich
- Calories: 600
- Sugar: 10 g
- Sodium: 1200 mg
- Fat: 30 g
- Saturated Fat: 10 g
- Unsaturated Fat: 15 g
- Trans Fat: 0 g
- Carbohydrates: 50 g
- Fiber: 3 g
- Protein: 35 g
- Cholesterol: 80 mg
Keywords: For best results, marinate the beef for at least 2-4 hours or overnight. Use a hot skillet for searing the beef to lock in juices. A good quality roll is essential to hold up to the juicy filling. Customize your spice level with gochugaru or additional gochujang.