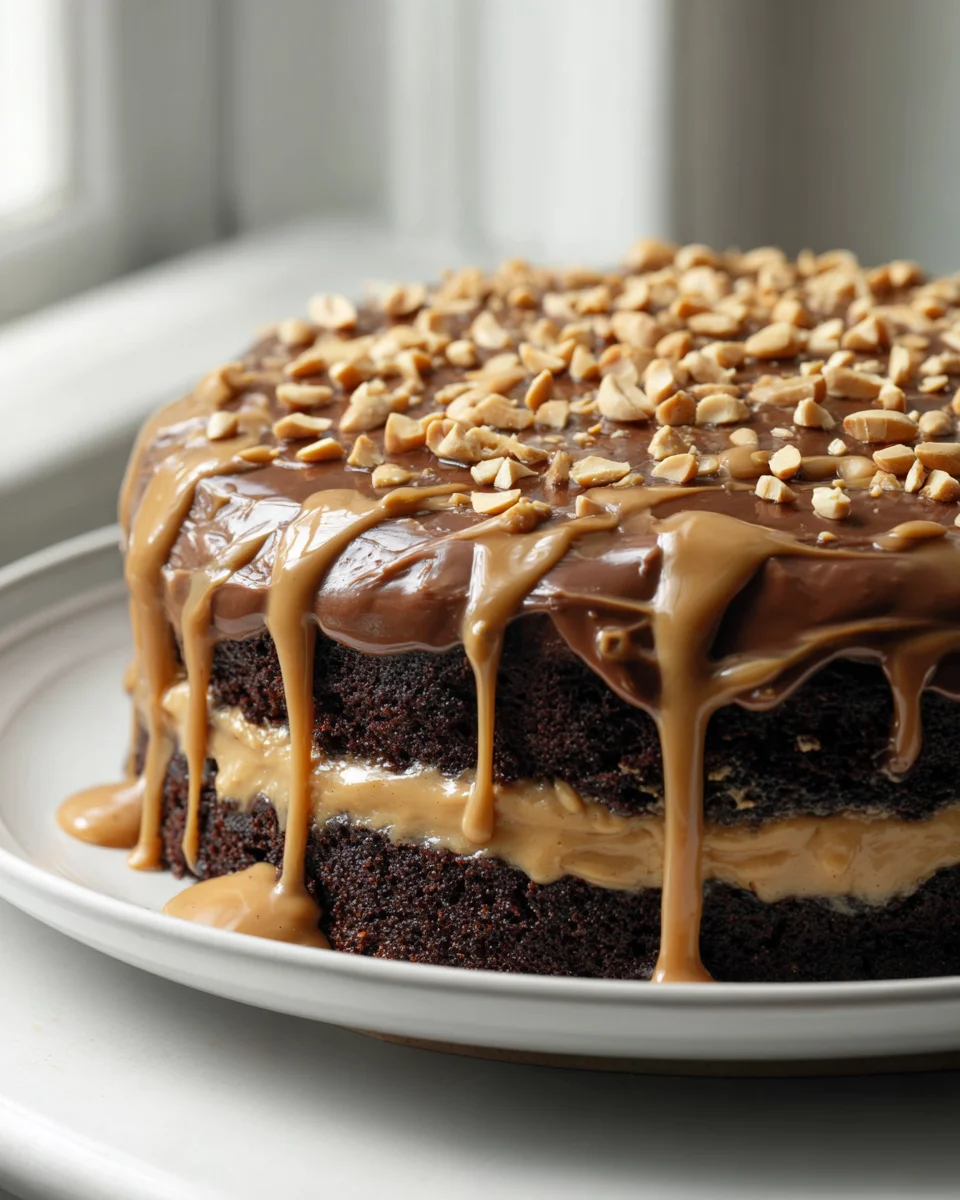
Chocolate Peanut Butter Poke Cake
Oh my goodness, get ready to experience a dessert that’s about to become your new obsession! I’m talking about the legendary Chocolate Peanut Butter Poke Cake. If you’re anything like me, the mere mention of chocolate and peanut butter together makes your heart sing, and this cake delivers that iconic duo in the most delightful way imaginable.
What makes this particular recipe so incredibly special, you ask? It’s all in the “poke”! We start with a rich, moist chocolate cake base, and once it’s baked, we lovingly poke holes all over its surface. These aren’t just any holes; they’re tiny tunnels designed to soak up a luscious, creamy peanut butter mixture, infusing every single bite with an explosion of flavor and an unbelievably tender texture. It’s like the cake is giving itself a self-saucing hug from the inside out!
You are absolutely going to adore this Chocolate Peanut Butter Poke Cake because it hits all the right notes. It’s incredibly decadent without being overly complicated to make, making it perfect for both seasoned bakers and beginners. Plus, it’s a total crowd-pleaser – trust me, there won’t be a single crumb left! Each slice offers that perfect balance of deep chocolate and salty-sweet peanut butter, topped off with even more creamy frosting and often, some fun crunch from chopped peanut butter cups or peanuts. It’s pure nostalgic bliss in cake form.
So, what exactly are we diving into? Imagine a super-moist chocolate cake, infused with a dreamy peanut butter filling, generously frosted with a rich chocolate peanut butter topping, and often garnished with delicious treats. It’s a symphony of textures and flavors that will have everyone begging for the recipe. Let’s get baking!

Ingredient Notes
Crafting the perfect Chocolate Peanut Butter Poke Cake starts with understanding its core components. The beauty of this recipe lies in its approachable ingredients, many of which you might already have on hand, or are easily found at any grocery store. Let’s dive into what makes this cake sing and how you can tailor it to your preferences.
- Chocolate Cake Base: For convenience, I often reach for a boxed chocolate cake mix – a devil’s food or dark chocolate variety works wonderfully to give us that rich, deep chocolate flavor. If you’re feeling ambitious, a homemade chocolate cake recipe is always a fantastic option, just ensure it’s baked in a 9×13 inch pan.
- Sweetened Condensed Milk: This is the magic ingredient that gives our poke cake its signature moistness and sweetness. As it seeps into the cake’s holes, it creates a luscious, almost pudding-like texture. There aren’t many direct substitutions for its unique viscosity and sweetness, but if you’re looking for a dairy-free alternative, coconut sweetened condensed milk is an excellent choice, though it will impart a subtle coconut flavor.
- Peanut Butter: Creamy peanut butter is my go-to for the peanut butter frosting and filling, as it creates a smooth, velvety texture. However, if you love a bit of crunch, feel free to use crunchy peanut butter, especially if you’re making a simple peanut butter drizzle instead of a full frosting. For those with peanut allergies, sunflower seed butter (like SunButter) is a fantastic and widely available alternative that mimics the texture and savory-sweet profile surprisingly well. Almond butter could also work, but the flavor profile will obviously shift.
- Powdered Sugar: Essential for our smooth, no-grainy peanut butter frosting. Always sift your powdered sugar if it looks clumpy to ensure the silkiest frosting possible.
- Heavy Cream (or Milk): For both the peanut butter frosting and any optional chocolate ganache drizzle, heavy cream provides richness and structure. If you need a dairy-free option, full-fat coconut milk (from a can, chilled, using only the thick cream part) or a good quality plant-based milk (like oat or almond milk) can be used, though you might need to adjust the quantities slightly to achieve the desired consistency.
- Butter: Unsalted butter is preferred for the frosting, allowing you to control the saltiness. If using salted butter, simply reduce or omit any added salt in the frosting recipe. For a dairy-free option, a good quality vegan butter substitute will work perfectly.
- Chocolate Chips or Baking Chocolate: For the top layer, whether it’s a chocolate ganache or a simple melted chocolate drizzle, quality matters. Semi-sweet chocolate chips are a classic choice, but dark chocolate chips will give you a more intense chocolate experience, which pairs beautifully with the sweet peanut butter. Milk chocolate chips are also an option if you prefer a sweeter, milder chocolate finish.
Step-by-Step Instructions
Let’s get down to the delicious details of assembling your Chocolate Peanut Butter Poke Cake. This process is designed to be straightforward, ensuring you achieve that perfect balance of moist cake, creamy filling, and rich topping.
- Bake the Chocolate Cake: First things first, prepare your chocolate cake mix according to the package directions, or follow your favorite homemade chocolate cake recipe. Pour the batter into a greased 9×13 inch baking pan and bake until a toothpick inserted into the center comes out clean. Once baked, remove the cake from the oven and let it cool on a wire rack for about 10-15 minutes. It should still be warm, but not piping hot, when you move to the next step.
- Poke Away!: Now for the fun part that gives this cake its name! Using the handle of a wooden spoon, a sturdy chopstick, or even the blunt end of a skewer, poke holes all over the warm cake. Aim for holes that are about 1-inch apart and go almost all the way to the bottom. Don’t be shy – these holes are crucial for soaking up all that deliciousness!
- Pour the Sweetened Condensed Milk: Evenly pour the can of sweetened condensed milk over the entire surface of the poked cake, making sure it seeps into all the holes. Use an offset spatula or the back of a spoon to gently spread it if needed, ensuring every part of the cake gets a share. Let the cake sit at room temperature for at least 30 minutes, or even an hour, to allow the condensed milk to fully absorb.
- Prepare the Peanut Butter Frosting: While the cake is absorbing the condensed milk, let’s make our glorious peanut butter frosting. In a large mixing bowl, beat softened unsalted butter and creamy peanut butter together until light and fluffy. Gradually add the powdered sugar, one cup at a time, beating well after each addition. Pour in the heavy cream (or milk alternative) a tablespoon at a time, continuing to beat until the frosting is smooth, creamy, and reaches your desired consistency. You might also add a pinch of salt to balance the sweetness.
- Frost the Cake: Once the sweetened condensed milk has fully absorbed and the cake is cool, spread the peanut butter frosting evenly over the top. You can make it smooth and neat, or create fun swirls with the back of your spoon or an offset spatula.
- Add the Chocolate Topping (Optional but Recommended!): For an extra layer of chocolatey goodness, you can melt chocolate chips with a bit of heavy cream to make a quick ganache, or simply melt chocolate chips in the microwave with a touch of neutral oil. Drizzle this melted chocolate over the peanut butter frosting in a decorative pattern. If you like, sprinkle some chopped peanuts or mini chocolate chips on top for added texture and visual appeal.
- Chill Time is Crucial: This is a cake that truly benefits from a good chill. Cover the cake loosely with plastic wrap and refrigerate for at least 4 hours, or preferably overnight. This allows the sweetened condensed milk to set, the flavors to meld, and the cake to become wonderfully moist and firm enough to slice beautifully.
Tips & Suggestions
To ensure your Chocolate Peanut Butter Poke Cake is nothing short of spectacular, I’ve gathered some of my favorite tips and suggestions. These little insights can make a big difference in the final taste and presentation of your dessert!
- Don’t Rush the Poke: When poking your cake, ensure the holes are deep enough to really allow that sweetened condensed milk to soak through. The handle of a wooden spoon is ideal as it creates wider holes, maximizing absorption. Also, try to make the holes somewhat evenly spaced so every slice gets a good dose of that sweet, milky goodness.
- Warm Cake, Not Hot: It’s important for the cake to be warm when you pour the sweetened condensed milk. This helps the liquid absorb more effectively into the cake’s pores. However, don’t pour it over a scorching hot cake straight out of the oven, as it might make the cake too fragile or melt it too much. 10-15 minutes of cooling is usually the sweet spot.
- Chill for Success: I cannot stress enough how vital chilling is for this cake. A minimum of 4 hours is necessary, but an overnight chill truly transforms it. The time in the refrigerator allows the condensed milk to thicken and fully infuse the cake, resulting in an incredibly moist and flavorful dessert that holds its shape beautifully when sliced.
- Flavor Boosters: For an even deeper chocolate flavor in the cake base, you can substitute hot coffee (or a non-alcohol coffee alternative) for some or all of the water called for in your boxed cake mix. The coffee enhances chocolate without making the cake taste like coffee. Also, a tiny pinch of sea salt in the peanut butter frosting can really make the peanut butter flavor pop and balance the sweetness.
- Vary Your Toppings: While a chocolate drizzle is classic, feel free to get creative! You could sprinkle chopped roasted peanuts, mini chocolate chips, or even some crushed peanut butter cups over the top for extra texture and flavor. A light dusting of cocoa powder before serving also looks elegant.
- Serving Suggestions: This cake is phenomenal on its own, but for an extra treat, serve it slightly chilled with a scoop of vanilla bean ice cream or a dollop of fresh whipped cream. It’s also fantastic with a cold glass of milk.
- Make it Gluten-Free: Many excellent gluten-free chocolate cake mixes are available today. Simply use one of these as your base, and ensure your other ingredients (like sweetened condensed milk and peanut butter) are certified gluten-free, if necessary for dietary restrictions.
- Dairy-Free Option: As mentioned in the ingredient notes, using a dairy-free chocolate cake mix, coconut sweetened condensed milk, vegan butter, and plant-based milk for the frosting will allow you to enjoy this delicious cake without dairy.
Storage
Proper storage is key to keeping your Chocolate Peanut Butter Poke Cake delicious and fresh. Because of its moist ingredients and creamy frosting, it needs a little special attention to ensure it stays in peak condition for as long as possible.
- Refrigeration is a Must: Due to the sweetened condensed milk and the creamy peanut butter frosting, this cake must be stored in the refrigerator. Cover the cake pan tightly with plastic wrap or aluminum foil to prevent it from drying out or absorbing any refrigerator odors.
- Shelf Life: When properly stored in the refrigerator, your Chocolate Peanut Butter Poke Cake will remain fresh and delicious for 3-5 days. In fact, many people find that the flavors deepen and the cake becomes even moister on the second and third days, making leftovers a real treat!
- Serving Temperature: While the cake needs to be stored in the fridge, I often find that letting a slice sit at room temperature for about 15-20 minutes before serving enhances the flavors and softens the frosting to a more palatable texture. This is entirely optional, but something I personally enjoy.
- Freezing for Later: Yes, you can freeze Chocolate Peanut Butter Poke Cake! This is great if you want to make it ahead or save some for a later craving.
- To Freeze an Entire Cake: If freezing the whole cake, make sure it is completely chilled first. Wrap the entire cake (still in its pan) tightly with several layers of plastic wrap, then an outer layer of aluminum foil.
- To Freeze Individual Slices: For easier portioning, you can cut the cake into individual slices. Wrap each slice tightly in plastic wrap, then place them in an airtight freezer-safe container or a freezer bag.
- Thawing Frozen Cake: When you’re ready to enjoy your frozen cake, transfer it (either whole or individual slices) to the refrigerator and let it thaw overnight. If thawing individual slices, they might thaw quicker on the counter for an hour or two. Once thawed, you can either serve it immediately or allow it to come to room temperature for a short while, as mentioned above, for optimal enjoyment. The texture and flavor will remain remarkably good after freezing.
Final Thoughts
And there you have it, my friends! We’ve reached the sweet finale of our journey with the truly irresistible Chocolate Peanut Butter Poke Cake. I genuinely believe this isn’t just another dessert; it’s an experience waiting to happen.
Why is this Chocolate Peanut Butter Poke Cake a must-try, you ask? Because it brings together that iconic, beloved duo of rich chocolate and creamy peanut butter in the most delightful way, ensuring every single forkful is moist, decadent, and utterly satisfying. The magic of the “poke” method means deep, comforting flavors are infused throughout, creating a cake that’s effortlessly impressive yet incredibly simple to make.
Whether you’re looking to wow guests at a potluck, celebrate a special occasion, or simply treat yourself to something extraordinary, this Chocolate Peanut Butter Poke Cake delivers pure joy. I encourage you to whip up this masterpiece; your taste buds (and anyone you share it with!) will absolutely thank you for indulging in such a perfect harmony of flavors and textures. Enjoy every glorious bite!
Irresistible Chocolate Peanut Butter Poke Cake Recipe
- Total Time: 1 hour
- Yield: 12 servings 1x
Description
Indulge in the decadent flavors of this Chocolate Peanut Butter Poke Cake, where rich chocolate meets creamy peanut butter in a moist, self-saucing dessert. Perfect for any occasion, this cake will leave everyone asking for seconds!
Ingredients
- 1 boxed chocolate cake mix (devil's food or dark chocolate variety)
- 1 can sweetened condensed milk
- 1 cup creamy peanut butter (or crunchy peanut butter)
- 2 cups powdered sugar
- 1/2 cup heavy cream (or milk alternative)
- 1/2 cup unsalted butter (softened)
- 1 cup chocolate chips or baking chocolate (semi-sweet or dark chocolate)
Instructions
- Bake the Chocolate Cake: Prepare your chocolate cake mix according to the package directions, or follow your favorite homemade chocolate cake recipe. Pour the batter into a greased 9×13 inch baking pan and bake until a toothpick inserted into the center comes out clean. Once baked, remove the cake from the oven and let it cool on a wire rack for about 10-15 minutes.
- Poke Away!: Using the handle of a wooden spoon, poke holes all over the warm cake, aiming for holes that are about 1-inch apart and going almost all the way to the bottom.
- Pour the Sweetened Condensed Milk: Evenly pour the can of sweetened condensed milk over the entire surface of the poked cake, ensuring it seeps into all the holes. Let the cake sit at room temperature for at least 30 minutes.
- Prepare the Peanut Butter Frosting: In a large mixing bowl, beat softened unsalted butter and creamy peanut butter together until light and fluffy. Gradually add the powdered sugar, one cup at a time, beating well after each addition. Pour in the heavy cream a tablespoon at a time, continuing to beat until the frosting is smooth.
- Frost the Cake: Once the sweetened condensed milk has fully absorbed and the cake is cool, spread the peanut butter frosting evenly over the top.
- Add the Chocolate Topping (Optional but Recommended!): Melt chocolate chips with a bit of heavy cream to make a quick ganache or simply melt chocolate chips in the microwave. Drizzle this melted chocolate over the peanut butter frosting.
- Chill Time is Crucial: Cover the cake loosely with plastic wrap and refrigerate for at least 4 hours, or preferably overnight.
- Prep Time: 30 mins
- Cook Time: 30 mins
- Category: Dessert
- Method: Baking
- Cuisine: American
Nutrition
- Serving Size: 1 slice
- Calories: 350
- Sugar: 30 g
- Sodium: 200 mg
- Fat: 18 g
- Saturated Fat: 8 g
- Unsaturated Fat: 10 g
- Trans Fat: 0 g
- Carbohydrates: 40 g
- Fiber: 2 g
- Protein: 6 g
- Cholesterol: 30 mg
Keywords: Ensure the holes in the cake are deep enough for the sweetened condensed milk to soak through. Chill the cake for at least 4 hours for optimal flavor and texture. You can use dairy-free alternatives for a vegan version.