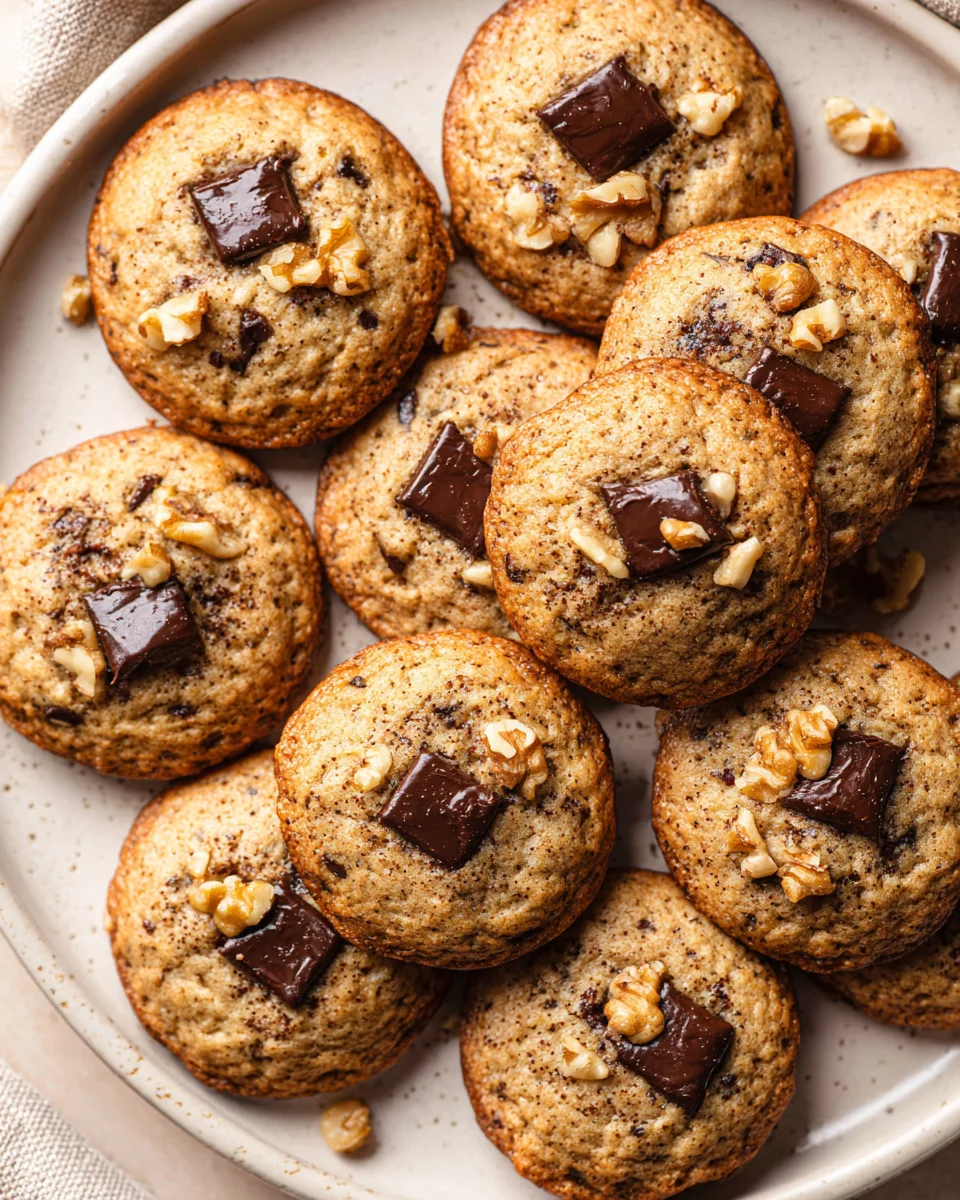
Chewy Banana Bread Chocolate Chip Cookies
Oh my goodness, I am so excited to share these Chewy Banana Bread Chocolate Chip Cookies with you! If you, like me, often find yourself with a few too many spotty bananas on the counter and can’t decide between baking a comforting loaf of banana bread or a batch of classic chocolate chip cookies, then you are in for a serious treat. This recipe is truly special because it brilliantly brings the best of both beloved worlds together into one irresistible bite. We’re talking about all the warm, cozy, spiced banana goodness of your favorite banana bread, but in a perfectly chewy, handheld cookie, studded generously with melty chocolate chips. Trust me, once you taste these, you’ll wonder why you ever settled for just one or the other!
You’re going to absolutely adore these because they’re incredibly easy to whip up and deliver on that ultimate comfort food promise. Imagine sinking your teeth into a soft, chewy cookie that tastes exactly like a moist slice of banana bread, but with that added burst of gooey chocolate in every single mouthful. It’s pure magic! They’re fantastic for a quick snack, a delightful dessert, or a wonderful addition to any gathering. Get ready to fall in love with your new favorite way to enjoy bananas and chocolate!

Ingredient Notes
Oh, these Chewy Banana Bread Chocolate Chip Cookies are truly a dream come true for anyone who loves the comforting flavor of banana bread but craves the convenience and delightful chew of a chocolate chip cookie! Getting the ingredients right is key to achieving that perfect balance of textures and flavors. Here’s what you’ll need and why:
- Very Ripe Bananas: This is non-negotiable! You need at least 1 cup of mashed bananas, which usually means 2-3 medium-sized bananas that are heavily spotted or even mostly brown. The riper they are, the sweeter and more flavorful your cookies will be, contributing significantly to the signature banana bread taste and the moist, chewy texture. Green or slightly yellow bananas won’t give you the same depth of flavor or natural sweetness.
- All-Purpose Flour: Standard all-purpose flour works perfectly here to give the cookies their structure. I haven’t experimented extensively with gluten-free flour blends for this specific recipe, but if you do, look for a blend that’s designed for baking and perhaps include a touch of xanthan gum if it’s not already in the mix to maintain some chewiness.
- Unsalted Butter: Using melted unsalted butter is crucial for chewiness. Melted butter creates a chewier cookie by allowing the ingredients to combine differently than with softened butter. If you only have salted butter, simply reduce the added salt in the recipe by about ¼ teaspoon. For a dairy-free option, a good quality vegan butter alternative that melts well would be a suitable substitution.
- Brown Sugar (Light or Dark): This is your secret weapon for chewiness! Brown sugar, with its molasses content, contributes moisture and that wonderful soft, chewy texture. I usually use light brown sugar, but dark brown sugar would lend an even richer, deeper flavor.
- Granulated Sugar: A bit of white granulated sugar helps with spread and tenderness, balancing the chewiness from the brown sugar.
- Egg: A single large egg acts as a binder, adding structure and richness to the dough. Make sure it’s at room temperature for better incorporation with the other ingredients.
- Vanilla Extract: Essential for enhancing all the other flavors. Use a good quality pure vanilla extract for the best results.
- Baking Soda: This leavening agent reacts with the acids in the brown sugar and bananas to give the cookies a beautiful rise and slightly cakey yet chewy crumb.
- Salt: A pinch of salt balances the sweetness and brings out the flavors of the banana and chocolate. Don’t skip it!
- Ground Cinnamon (Optional but Recommended): This is where the “banana bread” really shines! A teaspoon of ground cinnamon truly elevates the flavor, making these cookies taste even more like your favorite banana bread. If you’re not a fan, you can certainly leave it out, but I highly recommend it.
- Chocolate Chips: Semi-sweet chocolate chips are my go-to for their classic flavor and melting qualities, but feel free to use milk chocolate chips for a sweeter cookie or dark chocolate chips for a more intense chocolate flavor. You could also mix in chopped walnuts or pecans for an extra textural element, just like in traditional banana bread.
Step-by-Step Instructions
Let’s get baking! Following these steps will help you achieve those perfectly chewy, banana bread-flavored delights. Trust me, it’s worth every single step.
- Prep Your Bananas: First things first, mash your very ripe bananas in a medium bowl until mostly smooth with a few small lumps remaining (that’s character!). You want about 1 cup of mashed banana. Set this aside.
- Melt the Butter: In a large microwave-safe bowl or a saucepan on the stovetop, melt your unsalted butter until just melted. Let it cool for a minute or two – you don’t want it sizzling hot when you add other ingredients.
- Combine Wet Ingredients: To the melted butter, add both the brown sugar and granulated sugar. Whisk them together vigorously until well combined and smooth. This step helps to dissolve the sugars and ensure a good texture. Next, beat in the room-temperature egg until fully incorporated. Then, stir in the mashed banana and vanilla extract until everything is evenly combined. You should have a lovely, fragrant, wet mixture.
- Mix Dry Ingredients: In a separate medium bowl, whisk together the all-purpose flour, baking soda, salt, and ground cinnamon (if using) until there are no clumps and everything is evenly distributed.
- Combine Wet and Dry: Gradually add the dry ingredient mixture to the wet ingredient mixture. Mix on low speed with an electric mixer or by hand with a spatula until just combined. Be careful not to overmix! Overmixing develops the gluten in the flour too much, which can lead to tough cookies instead of chewy ones. A few streaks of flour are perfectly fine.
- Fold in Chocolate Chips: Gently fold in your chocolate chips (and any nuts, if you’re adding them) until they are evenly distributed throughout the dough.
- Chill the Dough (CRITICAL STEP!): This is perhaps the most important step for achieving that incredible chewiness and preventing your cookies from spreading too much. Cover the bowl with plastic wrap and refrigerate the dough for at least 1 hour, or preferably 2-3 hours. If you can chill it overnight, even better! Chilling allows the flour to fully hydrate, the butter to solidify, and the flavors to meld beautifully.
- Preheat and Prep: When you’re ready to bake, preheat your oven to 350°F (175°C). Line two baking sheets with parchment paper or silicone baking mats.
- Scoop and Bake: Using a 1.5-2 tablespoon cookie scoop, scoop uniform balls of dough onto the prepared baking sheets, leaving about 2 inches between each cookie. This recipe usually yields about 18-24 cookies, depending on scoop size.
- Bake to Perfection: Bake for 10-13 minutes, or until the edges are lightly golden brown and set, but the centers still look slightly soft and gooey. This slight underbaking is key to their chewiness!
- Cool: Let the cookies cool on the baking sheets for about 5 minutes before transferring them to a wire rack to cool completely. This helps them firm up without becoming brittle.
Tips & Suggestions
To really nail these Chewy Banana Bread Chocolate Chip Cookies, here are some insider tips and suggestions I’ve gathered along the way:
- Embrace the Brown Bananas: I can’t stress this enough! The browner, the better. If your bananas aren’t quite ripe enough, you can speed up the process by baking them on a baking sheet at 300°F (150°C) for 15-30 minutes until their skins are completely black and shiny. Let them cool before mashing. This concentrates their sugars and intensifies their flavor.
- Don’t Skip the Chill Time: Seriously, this step is non-negotiable for that perfect chewy texture and minimal spreading. If you’re in a rush, a minimum of 30 minutes in the freezer can work, but for the best results, stick to the refrigerator chill time.
- Room Temperature Egg: A room temperature egg incorporates more smoothly into the other ingredients, creating a more uniform dough and better texture in the final cookie. If you forget to take it out ahead of time, place it in a bowl of warm (not hot!) water for 5-10 minutes.
- Slightly Underbake: For peak chewiness, pull the cookies out of the oven when the edges are set and lightly golden, but the centers still look a little soft and underbaked. They will continue to set up as they cool on the hot baking sheet.
- Cookie Scoop for Uniformity: Using a cookie scoop ensures all your cookies are the same size, which means they’ll bake evenly. Plus, it makes portioning so much faster and cleaner.
- Add a Pinch of Sea Salt: A sprinkle of flaky sea salt on top of the warm cookies right after they come out of the oven really enhances the chocolate and banana flavors, adding a sophisticated touch and cutting through the sweetness.
- Mix-ins Galore: While chocolate chips are classic, feel free to experiment! Chopped walnuts or pecans are a natural fit, adding a lovely crunch that complements the chewy cookie. Toffee bits, butterscotch chips, or even a swirl of cream cheese frosting (after baking, of course!) could also be fun additions.
- Avoid Overmixing: Mix the dry ingredients into the wet until just combined. Overmixing develops the gluten, leading to tougher cookies. A light hand here pays off in chewiness.
Storage
These Chewy Banana Bread Chocolate Chip Cookies are best enjoyed fresh, but they store beautifully, allowing you to savor that banana bread goodness for days or even weeks!
- At Room Temperature: Once completely cooled, store the cookies in an airtight container at room temperature for up to 3-4 days. I often place a half-slice of bread in the container with them; the bread releases its moisture, helping to keep the cookies soft and chewy.
- In the Refrigerator: While you can store them in the fridge, I generally don’t recommend it unless you live in a very humid environment. The cold can make the cookies a bit firmer, altering that perfect chewy texture. If you do refrigerate them, bring them back to room temperature or warm them slightly in the microwave for a few seconds before serving. They’ll last about a week this way.
- Freezing Baked Cookies: These cookies freeze exceptionally well! Once completely cool, place them in a single layer on a baking sheet and freeze for about an hour until solid. Then, transfer the frozen cookies to a freezer-safe airtight container or a heavy-duty freezer bag. They’ll keep well for up to 2-3 months. To enjoy, simply thaw them at room temperature for an hour or so, or pop them in the microwave for 10-20 seconds for a warm, fresh-baked feel.
- Freezing Cookie Dough: This is a fantastic option for having fresh-baked cookies whenever a craving strikes! Scoop the chilled cookie dough into balls and place them on a parchment-lined baking sheet. Freeze until solid, then transfer the frozen dough balls to a freezer-safe airtight container or bag. They can be stored for up to 3 months. When you’re ready to bake, you can bake them directly from frozen. Just add an extra 2-4 minutes to the baking time (about 12-16 minutes total) and keep an eye on them until the edges are golden.
Final Thoughts
And there you have it! My hope is that you’re now ready to bake a batch of these truly special Chewy Banana Bread Chocolate Chip Cookies. What makes them an absolute must-try isn’t just the perfect blend of soft chewiness and melty chocolate chips, but that unmistakable, comforting hug of banana bread flavor baked into every bite. They’re more than just a cookie; they’re a delightful fusion, offering all the joy of your favorite quick bread in a conveniently handheld form. I promise, once you experience the unique magic of these Chewy Banana Bread Chocolate Chip Cookies – perhaps with a cup of coffee or a glass of milk – you’ll understand why they’ve become such a cherished treat in my kitchen. Go ahead, give them a try; your taste buds will thank you!

Irresistible Chewy Banana Bread Chocolate Chip Cookies
- Total Time: 28 minutes
- Yield: 18-24 cookies 1x
Description
These Chewy Banana Bread Chocolate Chip Cookies combine the comforting flavors of banana bread with the delightful chewiness of chocolate chip cookies. Perfect for a snack or dessert, they are sure to become your new favorite treat!
Ingredients
- 1 cup very ripe bananas (about 2–3 medium-sized bananas)
- 1 1/2 cups all-purpose flour
- 1/2 cup unsalted butter, melted
- 1/2 cup brown sugar (light or dark)
- 1/4 cup granulated sugar
- 1 large egg, at room temperature
- 1 teaspoon vanilla extract
- 1 teaspoon baking soda
- 1/4 teaspoon salt
- 1 teaspoon ground cinnamon (optional but recommended)
- 1 cup semi-sweet chocolate chips
Instructions
- Mash your very ripe bananas in a medium bowl until mostly smooth with a few small lumps remaining. You want about 1 cup of mashed banana. Set this aside.
- In a large microwave-safe bowl or a saucepan on the stovetop, melt your unsalted butter until just melted. Let it cool for a minute or two.
- To the melted butter, add both the brown sugar and granulated sugar. Whisk them together vigorously until well combined and smooth. Beat in the room-temperature egg until fully incorporated. Then, stir in the mashed banana and vanilla extract until everything is evenly combined.
- In a separate medium bowl, whisk together the all-purpose flour, baking soda, salt, and ground cinnamon (if using) until there are no clumps.
- Gradually add the dry ingredient mixture to the wet ingredient mixture. Mix on low speed with an electric mixer or by hand with a spatula until just combined.
- Gently fold in your chocolate chips (and any nuts, if you're adding them) until they are evenly distributed throughout the dough.
- Cover the bowl with plastic wrap and refrigerate the dough for at least 1 hour, or preferably 2-3 hours.
- Preheat your oven to 350°F (175°C). Line two baking sheets with parchment paper or silicone baking mats.
- Using a 1.5-2 tablespoon cookie scoop, scoop uniform balls of dough onto the prepared baking sheets, leaving about 2 inches between each cookie.
- Bake for 10-13 minutes, or until the edges are lightly golden brown and set, but the centers still look slightly soft and gooey.
- Let the cookies cool on the baking sheets for about 5 minutes before transferring them to a wire rack to cool completely.
- Prep Time: 15 mins
- Cook Time: 13 mins
- Category: Dessert
- Method: Baking
- Cuisine: American
Nutrition
- Serving Size: 1 cookie
- Calories: 150
- Sugar: 10 g
- Sodium: 100 mg
- Fat: 7 g
- Saturated Fat: 4 g
- Unsaturated Fat: 2 g
- Trans Fat: 0 g
- Carbohydrates: 20 g
- Fiber: 1 g
- Protein: 2 g
- Cholesterol: 20 mg
Keywords: For best results, use very ripe bananas and do not skip the chilling time for the dough. A sprinkle of flaky sea salt on top of the warm cookies enhances the flavors beautifully.