• Skip to primary navigation
  • Skip to main content
  • Skip to primary sidebar
Homesmad

Homesmad

  • Home
  • Breakfast & Brunch
  • Appetizers & Snacks
  • Dinner
  • Dessert
  • About
  • Privacy Policy
  • Contact
Homesmad
  • Home
  • Breakfast & Brunch
  • Appetizers & Snacks
  • Dinner
  • Dessert
  • About
  • Privacy Policy
  • Contact

Roasted Tomato Caprese Salad: Easy & Delicious Recipe

March 25, 2026 by Lily author

Roasted Tomato Caprese Salad A Delicious Easy Recipe

Oh, prepare yourselves for a truly delightful culinary experience because I’m about to share one of my absolute favorite go-to recipes: Roasted Tomato Caprese Salad A Delicious Easy Recipe! You know how much I adore a classic Caprese salad, with its vibrant colors and fresh flavors. But what if I told you we could take that simple perfection and elevate it to a whole new level of deliciousness with just one extra step? That’s exactly what we’re doing here!

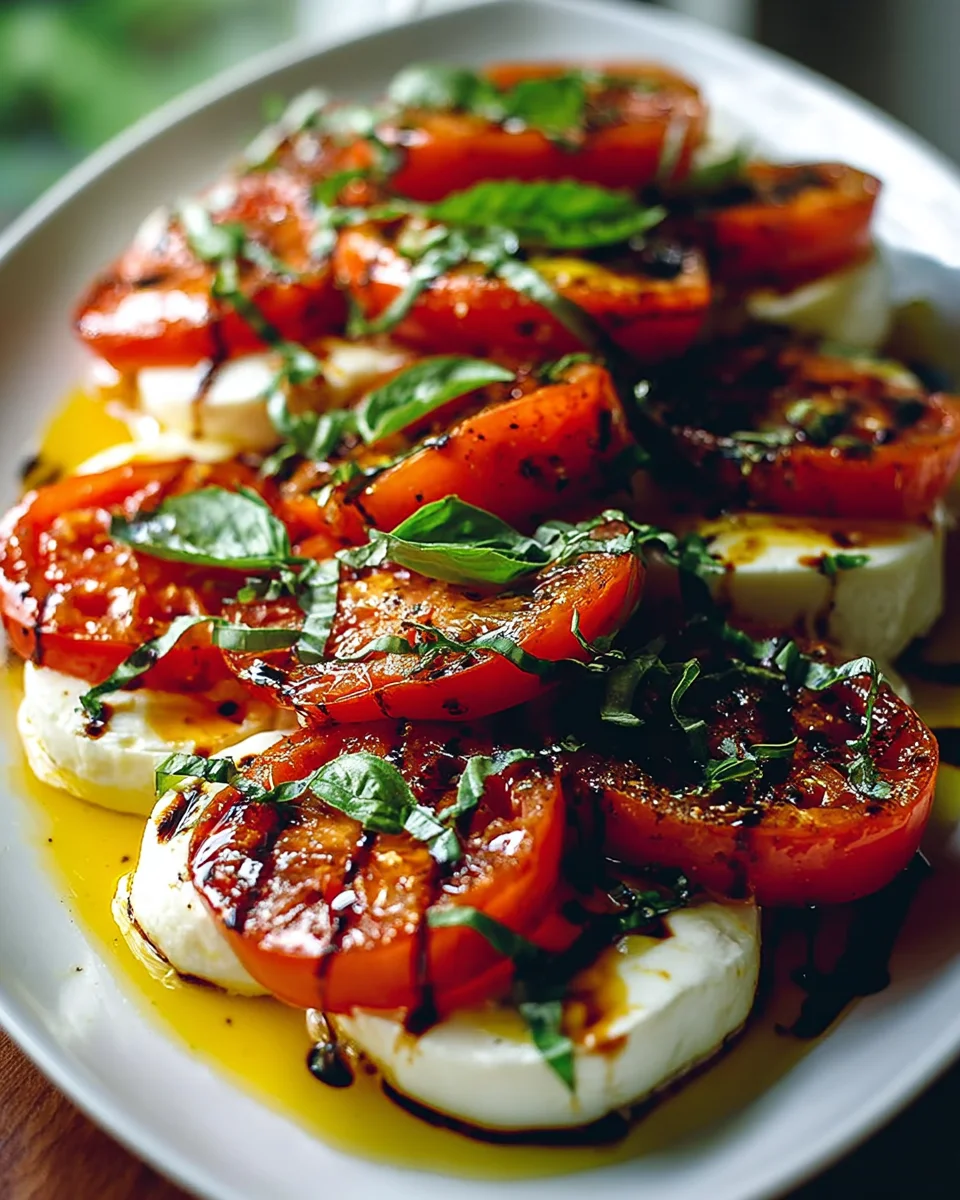
What makes this particular Caprese salad so incredibly special, you ask? It’s all about the glorious transformation of the humble tomato. By gently roasting those sweet, juicy tomatoes, we unlock an incredible depth of flavor. They become tender, slightly caramelized, and bursting with an intensified sweetness that perfectly complements the creamy fresh mozzarella and aromatic basil. It’s a little trick that takes a familiar dish from great to absolutely unforgettable, making it feel wonderfully gourmet without any extra fuss.

I promise you, readers, you are going to fall head over heels for this recipe! Not only is it unbelievably delicious, with that perfect balance of sweet, savory, and fresh, but it’s also ridiculously easy to whip up. Seriously, the effort-to-wow factor ratio is off the charts! It’s the kind of dish that looks impressive on any table, whether you’re serving it as a stunning appetizer, a vibrant side dish, or even a light, satisfying lunch. This beautiful medley of roasted tomatoes, luscious mozzarella, and fragrant basil, lightly drizzled with a simple dressing, is a feast for both the eyes and the palate. Get ready to impress yourself and everyone else with this incredibly simple, yet profoundly flavorful salad!

Roasted Tomato Caprese Salad: Easy & Delicious Recipe this RECIPE

Ingredient Notes

Crafting the perfect Roasted Tomato Caprese Salad starts with understanding the stars of the show. While the recipe itself is wonderfully simple, choosing quality ingredients truly elevates this dish from good to unforgettable. I always say, a few excellent ingredients shine brighter than many mediocre ones!

Tomatoes

  • Cherry or Grape Tomatoes: These are my absolute go-to for roasting. Their small size means they roast quickly and caramelize beautifully, concentrating their natural sugars into sweet, juicy bursts of flavor. You want them to soften, slightly wrinkle, and maybe even burst a little in the oven. Look for ripe, firm tomatoes without blemishes.
  • Substitutions: If you can’t find cherry or grape tomatoes, you can use larger varieties like Roma or even beefsteak tomatoes, but you’ll need to cut them into 1-inch chunks or wedges. Be aware that larger tomatoes might release more water during roasting, so arrange them in a single layer to ensure proper caramelization rather than steaming.

Fresh Mozzarella

  • Fresh Mozzarella Balls (Bocconcini or Ciliegine): This is non-negotiable for an authentic Caprese. The soft, milky texture and delicate flavor of fresh mozzarella are a perfect counterpoint to the sweet roasted tomatoes and fragrant basil. Bocconcini (small, egg-sized balls) or ciliegine (cherry-sized balls) are ideal as they can be halved or kept whole, mirroring the size of the tomatoes.
  • Substitutions: A larger ball of fresh mozzarella can be used, simply slice or tear it into bite-sized pieces. Avoid the pre-shredded, low-moisture mozzarella typically used for pizzas; its texture and flavor profile are entirely different and won’t give you that classic Caprese experience.

Fresh Basil

  • Fresh Basil Leaves: The aromatic heart of any Caprese salad! Its peppery, slightly sweet, and minty notes are essential. I recommend using fresh, vibrant green leaves – avoid any that are wilted or discolored. The aroma it brings is simply heavenly.
  • Substitutions: There isn’t a true substitute for fresh basil in a Caprese salad. Dried basil will not yield the same fresh, vibrant flavor and aroma. If you absolutely cannot find fresh basil, you might consider skipping it and calling it a “Roasted Tomato and Mozzarella Salad” instead, as it’s such a defining element.

Olive Oil

  • Extra Virgin Olive Oil: Use a good quality extra virgin olive oil. You’ll be using it to coat the tomatoes before roasting, and a final drizzle over the assembled salad. Its fruity, sometimes peppery notes tie all the flavors together beautifully.

Balsamic Glaze

  • Balsamic Glaze: This concentrated, sweet-tart syrup adds a beautiful depth of flavor and a visually appealing finish. It complements the sweetness of the roasted tomatoes and the richness of the mozzarella perfectly. You can buy it pre-made or easily make your own by gently simmering balsamic vinegar until it reduces and thickens.

Seasoning

  • Salt and Freshly Ground Black Pepper: Simple, yet crucial. Seasoning the tomatoes before roasting helps draw out their flavors and ensures they caramelize well. A final pinch of salt and pepper over the assembled salad enhances all the other ingredients.

Optional Additions

  • Garlic: A clove or two, thinly sliced or minced, tossed with the tomatoes before roasting adds a wonderful savory depth.
  • Red Pepper Flakes: A small pinch added to the tomatoes before roasting, or sprinkled over the finished salad, provides a subtle, warm kick.

Step-by-Step Instructions

Making this Roasted Tomato Caprese Salad is genuinely a breeze, but following these steps will ensure you get the most flavorful results every time. I love how the oven does most of the work for this one!

Step 1: Preheat and Prep Your Tomatoes

  • First things first, let’s get that oven ready! Preheat your oven to 400°F (200°C).
  • While the oven is heating, wash your cherry or grape tomatoes thoroughly. If they are on the larger side, I like to halve them to expose more surface area for caramelization. Otherwise, you can leave them whole.
  • Place the prepared tomatoes in a medium-sized mixing bowl. Drizzle generously with about 2 tablespoons of your good quality extra virgin olive oil. Season with about 1/2 teaspoon of salt and 1/4 teaspoon of freshly ground black pepper. If you’re using garlic or red pepper flakes, add them now too.
  • Toss everything gently with your hands or a spoon until the tomatoes are evenly coated.

Step 2: Roast the Tomatoes to Perfection

  • Line a baking sheet with parchment paper for easy cleanup – trust me, it’s a lifesaver!
  • Spread the seasoned tomatoes in a single layer on the prepared baking sheet. It’s important not to overcrowd the pan; this ensures they roast and caramelize rather than steam. If necessary, use two baking sheets.
  • Transfer the baking sheet to the preheated oven and roast for 20-25 minutes. You’re looking for the tomatoes to soften, wrinkle slightly, and some might even burst, releasing their sweet juices. They should also develop some lovely caramelization around the edges. This roasting process really intensifies their sweetness!
  • Once roasted, carefully remove the baking sheet from the oven. Let the tomatoes cool on the baking sheet for about 10-15 minutes. This cooling period is important as you don’t want to melt your fresh mozzarella immediately.

Step 3: Prepare the Mozzarella and Basil

  • While the tomatoes are cooling, prepare your fresh mozzarella. If you’re using bocconcini or ciliegine, you can halve them or leave them whole, depending on your preference and the size of your tomatoes. If you have a larger ball of fresh mozzarella, tear or slice it into bite-sized pieces. Drain any excess liquid from the mozzarella.
  • Wash and gently pat dry your fresh basil leaves. I usually tear larger leaves into smaller pieces just before assembling to help release their aromatic oils, but smaller leaves can be left whole.

Step 4: Assemble Your Delicious Salad

  • Now for the fun part – assembling! In a shallow serving dish or platter, artfully arrange the slightly cooled roasted tomatoes. I like to spread them out a bit to create a nice base.
  • Intersperse the fresh mozzarella pieces among the tomatoes.
  • Scatter the fresh basil leaves generously over the tomatoes and mozzarella. Don’t be shy with the basil; it’s a crucial flavor component!

Step 5: The Finishing Touches

  • Drizzle the assembled salad with an additional tablespoon or two of extra virgin olive oil.
  • Finally, zigzag a beautiful pattern of balsamic glaze over the entire salad. This adds both visual appeal and a wonderful sweet-tart punch.
  • Give it a final sprinkle of sea salt and freshly ground black pepper to taste.
  • Serve immediately and enjoy the delightful combination of warm, sweet roasted tomatoes, creamy mozzarella, and fragrant basil!

Tips & Suggestions

I’ve made this Roasted Tomato Caprese Salad countless times, and over the years, I’ve picked up a few tricks that truly elevate it. These tips aren’t just about following instructions; they’re about embracing the art of simple, fresh ingredients!

  • Don’t Rush the Roast: The magic of this salad lies in those roasted tomatoes. Give them the time they need in the oven. You want them to soften, slightly collapse, and develop that beautiful concentrated sweetness and a hint of caramelization. If they look merely warmed, give them a few more minutes.
  • Room Temperature Mozzarella: For the absolute best flavor and texture, I always recommend letting your fresh mozzarella come to room temperature for about 15-30 minutes before assembling the salad. Cold mozzarella can taste a little muted, but at room temperature, its creamy, milky notes really shine.
  • Tear, Don’t Cut, the Basil: While not a hard and fast rule, I find that gently tearing the basil leaves by hand rather than cutting them with a knife helps to release their aromatic oils more effectively and prevents bruising, which can sometimes lead to discolored edges. Plus, it looks more rustic and appealing!
  • Make Your Own Balsamic Glaze: Store-bought balsamic glaze is convenient, but making your own is incredibly easy and often tastes even better. Simply simmer good quality balsamic vinegar in a small saucepan over medium-low heat, stirring occasionally, until it reduces by about half and coats the back of a spoon. Be patient, it takes about 10-15 minutes and thickens more as it cools.
  • Seasoning in Layers: Don’t just season the tomatoes before roasting. A final sprinkle of flaky sea salt and freshly cracked black pepper over the assembled salad can really brighten all the flavors just before serving. Taste and adjust!
  • Serving Suggestion – A Crusty Companion: This salad is fantastic on its own as a light lunch or appetizer, but it truly shines when served alongside some warm, crusty bread. The bread is perfect for soaking up those delicious juices from the roasted tomatoes and any extra olive oil and balsamic glaze.
  • Add a Savory Kick: If you enjoy a bit of garlic, mince a clove or two and toss it with the tomatoes before roasting. It adds a wonderful depth of flavor that complements the sweetness of the tomatoes beautifully. A pinch of red pepper flakes also adds a very subtle warmth.
  • Consider Other Additions: While traditional Caprese is simple, if you want to make it a more substantial meal, grilled chicken or flaky white fish (like cod or halibut) would pair wonderfully.
  • Make-Ahead Elements: While I always recommend serving this salad fresh for the best experience, you can roast the tomatoes a few hours in advance and let them cool. Store them at room temperature. Then, just before serving, assemble with the fresh mozzarella, basil, and drizzles.

Storage

When it comes to Caprese salad, especially one with roasted tomatoes, freshness is truly king! I always recommend enjoying this dish shortly after it’s assembled to savor the vibrant flavors and textures at their peak.

  • Assembled Salad: This Roasted Tomato Caprese Salad is best served immediately after assembly. Unfortunately, it doesn’t store well once everything is combined. The fresh basil can wilt and darken, the mozzarella can begin to firm up and lose its creamy texture, and the tomatoes might release more liquid, making the salad watery. If you have leftovers, they can be stored in an airtight container in the refrigerator for up to 1 day, but be aware that the quality will diminish. It’s not a dish I’d suggest packing for lunch the next day.
  • Individual Components (Best Option): If you want to prepare ahead or have leftover components, it’s best to store them separately:
    • Roasted Tomatoes: Store the cooled roasted tomatoes in an airtight container in the refrigerator for up to 3-4 days. You can gently warm them up if you plan to use them in another dish, or serve them at room temperature for another salad or even tossed with pasta.
    • Fresh Mozzarella: Keep the fresh mozzarella in its original liquid (brine or water) in an airtight container in the refrigerator. It usually lasts for several days this way, or until the “best by” date on the package.
    • Fresh Basil: Store fresh basil leaves between slightly damp paper towels in a zip-top bag in the refrigerator for up to a week. Avoid washing it until just before use to prolong its freshness.
    • Balsamic Glaze: Store any leftover balsamic glaze in an airtight container at room temperature. It will keep well for weeks, even months.
  • Reheating: I do not recommend reheating the assembled salad. The textures of the mozzarella and basil would be compromised. However, the roasted tomatoes themselves can be gently reheated in a microwave or a warm oven if you wish to enjoy them warm for a different purpose, but not as part of the Caprese salad.

Roasted Tomato Caprese Salad: Easy & Delicious Recipe

Final Thoughts

Well, my friends, I truly hope you’re as excited as I am about this incredible dish! Trying the Roasted Tomato Caprese Salad A Delicious Easy Recipe is an absolute must. What makes it truly special is how the simple act of roasting the tomatoes transforms them into sweet, bursting jewels, adding an unexpected depth of flavor that elevates every bite. Paired with creamy mozzarella, fragrant fresh basil, and a drizzle of balsamic glaze, it’s a symphony of tastes and textures that is both comforting and sophisticated.

I promise you, whether you’re looking for an impressive appetizer, a light lunch, or a vibrant side dish, this recipe delivers on all fronts. It’s incredibly straightforward to prepare, making it perfect for busy weeknights, yet elegant enough for entertaining. Go ahead, give the Roasted Tomato Caprese Salad A Delicious Easy Recipe a try – I just know it will become a new favorite in your kitchen!

Print
clock clock iconcutlery cutlery iconflag flag iconfolder folder iconinstagram instagram iconpinterest pinterest iconfacebook facebook iconprint print iconsquares squares iconheart heart iconheart solid heart solid icon

Roasted Tomato Caprese Salad: Easy & Delicious Recipe


  • Author: Lily author
  • Total Time: 40 minutes
  • Yield: 4 servings
Pin Recipe
Print Recipe

Description

Elevate your classic Caprese salad with roasted tomatoes that bring an incredible depth of flavor. This vibrant dish is perfect as an appetizer, side, or light lunch.


Ingredients

  • Cherry or Grape Tomatoes
  • Fresh Mozzarella Balls (Bocconcini or Ciliegine)
  • Fresh Basil Leaves
  • Extra Virgin Olive Oil
  • Balsamic Glaze
  • Salt
  • Freshly Ground Black Pepper
  • Garlic (optional)
  • Red Pepper Flakes (optional)

Instructions

  1. Preheat your oven to 400°F (200°C).
  2. Wash your cherry or grape tomatoes thoroughly. If they are larger, halve them to expose more surface area for caramelization.
  3. Place the prepared tomatoes in a mixing bowl. Drizzle with about 2 tablespoons of extra virgin olive oil. Season with about 1/2 teaspoon of salt and 1/4 teaspoon of freshly ground black pepper. If using garlic or red pepper flakes, add them now.
  4. Toss everything gently until the tomatoes are evenly coated.
  5. Line a baking sheet with parchment paper. Spread the seasoned tomatoes in a single layer on the baking sheet.
  6. Transfer the baking sheet to the preheated oven and roast for 20-25 minutes until the tomatoes soften, wrinkle, and some burst.
  7. Once roasted, remove the baking sheet from the oven and let the tomatoes cool for about 10-15 minutes.
  8. Prepare your fresh mozzarella by halving bocconcini or ciliegine, or tearing/slicing a larger ball into bite-sized pieces. Drain any excess liquid.
  9. Wash and pat dry your fresh basil leaves, tearing larger leaves into smaller pieces just before assembling.
  10. In a shallow serving dish, artfully arrange the slightly cooled roasted tomatoes. Intersperse the fresh mozzarella pieces among the tomatoes.
  11. Scatter the fresh basil leaves generously over the tomatoes and mozzarella.
  12. Drizzle the salad with an additional tablespoon or two of extra virgin olive oil.
  13. Zigzag a pattern of balsamic glaze over the salad. Sprinkle with sea salt and freshly ground black pepper to taste.
  14. Serve immediately and enjoy!
  • Prep Time: 15 mins
  • Cook Time: 25 mins
  • Category: Salad
  • Method: Roasting
  • Cuisine: Italian

Nutrition

  • Serving Size: 1 bowl
  • Calories: 250
  • Sugar: 5 g
  • Sodium: 300 mg
  • Fat: 20 g
  • Saturated Fat: 5 g
  • Unsaturated Fat: 15 g
  • Trans Fat: 0 g
  • Carbohydrates: 10 g
  • Fiber: 2 g
  • Protein: 10 g
  • Cholesterol: 20 mg

Keywords: For the best flavor, let the fresh mozzarella come to room temperature before serving. Consider making your own balsamic glaze by simmering balsamic vinegar until it thickens.

Did you make this recipe?

Share a photo and tag us — we can't wait to see what you've made!

« Previous Post
Banana Pudding Cheesecake: The Ultimate Southern Dessert
Next Post »
Creamy Beef Stuffed Shells Recipe with Ricotta Filling

If you enjoyed this…

Potato Cheese Sticks: Crispy, Tasty Homemade Snack!

Turkey Cheese Sliders: A Delicious & Easy Recipe

Air Fryer Smashed Potatoes: Crispy & Delicious Recipe

Primary Sidebar

Browse by Diet

BreakfastDinnerLunchDessertAppetizer

Sweet Peach Yogurt Parfait Delight

One of my fondest memories is from a lazy summer afternoon spent at my grandmother’s house. The sun filtered through the kitchen window, casting a warm glow over the table where she would create her culinary magic. It was during one of those blissful moments that I first tasted her Peach Yogurt Parfait with Honey and Granola. The sweet aroma of ripe peaches mingling with creamy yogurt and the crunch of granola was nothing short of heavenly. It felt like summer captured in a bowl, and I still remember the joy of diving in with a spoon, each layer revealing a new burst of flavor.

When I think about that parfait, I can almost hear the gentle hum of the bees outside, reminding me of the floral notes that honey brings to every bite. The vibrant yellows and soft oranges of the peaches contrast beautifully with the creamy white yogurt and the golden crunch of granola. It’s a dish that not only looks delightful but also tastes like a celebration of fresh, wholesome ingredients.

What makes my version of this Peach Yogurt Parfait special is the careful balance of flavors and textures. I use ripe, juicy peaches, drizzled with locally sourced honey, and a homemade granola that’s bursting with nuts and seeds for an extra crunch. It’s a simple dish, but every layer is crafted with love and attention.

Let me show you exactly how to make this delightful parfait, so you can bring a bit of that summer magic into your kitchen!

Sweet Peach Yogurt Parfait Delight

Why You’ll Love This Recipe

  • Delightfully creamy texture from the Greek yogurt, paired with the juicy sweetness of fresh peaches.
  • Ready in under 20 minutes, making it a quick and satisfying breakfast or snack option.
  • Budget-friendly, using common ingredients that you may already have in your pantry.
  • Customizable with your favorite granola and nuts, allowing you to tailor each parfait to your taste.
  • Perfectly balanced flavors with the bright acidity of lemon juice and the sweetness of honey enhancing the peaches.

Ingredients

  • For the Parfait:
  • 2 cups plain Greek yogurt (or vanilla yogurt for a sweeter option)
  • 2 large ripe peaches, diced (about 2 cups)
  • 1 tablespoon fresh lemon juice (to prevent browning of peaches)
  • 2 tablespoons honey (plus more for drizzling)
  • 1 teaspoon vanilla extract (optional for extra flavor)
  • For the Granola:
  • 1 cup granola (store-bought or homemade; see notes for a simple granola recipe)
  • 1/4 cup sliced almonds (optional for added crunch)
  • 1/4 cup shredded coconut (optional for added flavor)

Let’s dive into some key ingredients that make this Peach Yogurt Parfait so delightful! First, the Greek yogurt is not only creamy but also packed with protein, making it a satisfying option for breakfast or a snack. If you’re looking for a sweeter option, you can easily substitute it with vanilla yogurt, though it may alter the overall flavor balance. Next, the ripe peaches are the star of the show; their natural sweetness shines through, so I recommend choosing peaches that yield slightly to pressure, indicating they’re perfectly ripe. If peaches aren’t in season, feel free to use nectarines or even frozen peaches—just thaw them before use. Finally, honey adds a lovely floral sweetness that ties everything together. If you prefer, maple syrup can serve as a delicious substitute.

Step-by-Step Instructions

  1. Start by preparing the peaches. Wash them thoroughly, then slice and dice them into bite-sized pieces. In a medium bowl, toss the diced peaches with 1 tablespoon of fresh lemon juice to prevent browning. Set aside for about 5 minutes while the lemon juice works its magic.
  2. In a separate bowl, combine the Greek yogurt, 2 tablespoons of honey, and 1 teaspoon of vanilla extract if using. Stir the mixture until smooth and thoroughly blended. This should take about a minute. Avoid overmixing to maintain the creaminess of the yogurt.
  3. Now it’s time to layer your parfait. Grab a clear glass or bowl to showcase your beautiful creation. Start with a generous spoonful of the yogurt mixture at the bottom—about 1/4 cup will do. Use a spoon to spread it evenly.
  4. Add a layer of the diced peaches over the yogurt, ensuring they cover the yogurt completely. You might want to use about half of what you have prepared—roughly 1 cup. This layer should be visually appealing, so arrange the peaches neatly.
  5. Sprinkle 1/4 cup of granola over the peaches. This adds a delightful crunch. Make sure to distribute it evenly to ensure every bite has that satisfying texture. Avoid packing it down too tightly, as you want it to maintain its crunch.
  6. Repeat the layers: spoon in another 1/4 cup of yogurt, followed by another cup of peaches, and another sprinkle of granola. You should have at least two layers, but feel free to add more depending on your glass size.
  7. Finish off your parfait with a drizzle of honey on top for added sweetness and a touch of elegance. If you’re using sliced almonds or shredded coconut, sprinkle them on top now. It adds a lovely visual contrast and extra flavor.
  8. Serve immediately or refrigerate for up to 30 minutes before serving to allow the flavors to meld together. However, I recommend enjoying it fresh to maintain the granola’s crunch.

Pro Tips for the Best Peach Yogurt Parfait With Honey And Granola

  • Make sure to choose ripe peaches for the best flavor and texture. A common mistake is using unripe fruit, which can lead to a less enjoyable parfait. Look for peaches that are fragrant and slightly soft to the touch.
  • Use a clear glass to assemble your parfait; this not only makes for a beautiful presentation but also allows you to see the colorful layers, which adds to the enjoyment of eating it.
  • For an even creamier texture, consider whipping the Greek yogurt with a hand mixer for a couple of minutes before layering. This small adjustment makes a huge difference in mouthfeel.
  • Be mindful of the granola-to-yogurt ratio. Too much granola can overwhelm the parfait, while too little can make it feel too creamy. Aim for about 1/4 cup of granola per layer for the perfect balance.
  • If you’re making this for a gathering, consider preparing the yogurt and peaches ahead of time and layering them just before serving. This ensures the granola stays crunchy!

Variations & Serving Ideas

There are so many ways to get creative with your Peach Yogurt Parfait! For a tropical twist, swap out the peaches for mangoes or pineapples and top with coconut flakes. If you prefer a berry flavor, mix in some blueberries or strawberries with the peaches for added color and taste. For a nutty version, incorporate chopped walnuts or pecans instead of almonds.

As for serving ideas, this parfait pairs beautifully with a side of scrambled eggs for a hearty breakfast or fresh fruit salad for a light lunch. You might also enjoy it alongside whole grain toast with almond butter for an energizing snack. The contrast of flavors and textures will elevate your meal experience!

Storage, Make-Ahead & Reheating

The Peach Yogurt Parfait is best enjoyed fresh, but you can prepare some components ahead of time. Store the layered parfait in an airtight container in the refrigerator for up to 24 hours. However, be cautious; the granola may lose its crunch if stored too long. You can freeze the yogurt and peach mixture for up to 2 months; just remember to thaw it in the refrigerator overnight before serving.

If you plan to enjoy this dish the next day, it can taste even better as the flavors meld together. Just remember to add the granola right before serving to keep its delightful crunch!

Frequently Asked Questions

Can I make Peach Yogurt Parfait With Honey And Granola ahead of time?

Yes — in fact, it tastes even better the next day as the flavors meld. However, I recommend waiting to add the granola until just before serving to maintain its crunch.

What can I substitute for Greek yogurt?

If you prefer a lighter option, you can substitute Greek yogurt with regular yogurt or a dairy-free alternative like coconut yogurt. Just remember that this may alter the creaminess and flavor profile slightly.

Can I use frozen peaches for this parfait?

Absolutely! Just make sure to thaw the frozen peaches before using them. They will still add great flavor, though the texture may be slightly softer than fresh peaches.

How do I make the parfait vegan?

To make a vegan version, substitute the Greek yogurt with a plant-based yogurt alternative, and replace honey with maple syrup or agave nectar. This keeps the parfait sweet while adhering to a vegan diet.

What other fruits can I use in this recipe?

You can mix and match fruits based on your preference. Try using strawberries, blueberries, raspberries, or even bananas. Just make sure to adjust the lemon juice as needed to prevent browning.

Sweet Peach Yogurt Parfait Delight

Final Thoughts

The Peach Yogurt Parfait with Honey and Granola is a delightful blend of creamy yogurt, sweet peaches, and crunchy granola that creates a satisfying and nourishing treat. Each layer bursts with flavor, making it a perfect choice for breakfast or a light dessert.

This is the kind of recipe I come back to again and again, especially when I want something refreshing and wholesome to start my day. The harmony of sweet and tart flavors, combined with the delightful crunch, never fails to lift my spirits!

I encourage you to give this parfait a try and indulge in its comforting goodness. Feel free to share your results or even add your own twist—perhaps a sprinkle of cinnamon or a handful of nuts. Enjoy creating your perfect parfait!

Print
clock clock iconcutlery cutlery iconflag flag iconfolder folder iconinstagram instagram iconpinterest pinterest iconfacebook facebook iconprint print iconsquares squares iconheart heart iconheart solid heart solid icon

Peach Yogurt Parfait


  • Author: Lily author
  • Total Time: 15 minutes
  • Yield: 4 servings 1x
Pin Recipe
Print Recipe

Description

This Peach Yogurt Parfait combines creamy Greek yogurt, juicy peaches, and crunchy granola for a delightful treat. It’s a perfect breakfast or snack that captures the essence of summer in every bite.


Ingredients

Scale
  • For the Parfait:
  • 2 cups plain Greek yogurt (or vanilla yogurt for a sweeter option)
  • 2 large ripe peaches, diced (about 2 cups)
  • 1 tablespoon fresh lemon juice (to prevent browning of peaches)
  • 2 tablespoons honey (plus more for drizzling)
  • 1 teaspoon vanilla extract (optional for extra flavor)
  • For the Granola:
  • 1 cup granola (store-bought or homemade; see notes for a simple granola recipe)
  • 1/4 cup sliced almonds (optional for added crunch)
  • 1/4 cup shredded coconut (optional for added flavor)

Instructions

  1. Start by preparing the peaches. Wash them thoroughly, then slice and dice them into bite-sized pieces. In a medium bowl, toss the diced peaches with 1 tablespoon of fresh lemon juice to prevent browning. Set aside for about 5 minutes while the lemon juice works its magic.
  2. In a separate bowl, combine the Greek yogurt, 2 tablespoons of honey, and 1 teaspoon of vanilla extract if using. Stir the mixture until smooth and thoroughly blended. This should take about a minute. Avoid overmixing to maintain the creaminess of the yogurt.
  3. Now it’s time to layer your parfait. Grab a clear glass or bowl to showcase your beautiful creation. Start with a generous spoonful of the yogurt mixture at the bottom—about 1/4 cup will do. Use a spoon to spread it evenly.
  4. Add a layer of the diced peaches over the yogurt, ensuring they cover the yogurt completely. You might want to use about half of what you have prepared—roughly 1 cup. This layer should be visually appealing, so arrange the peaches neatly.
  5. Sprinkle 1/4 cup of granola over the peaches. This adds a delightful crunch. Make sure to distribute it evenly to ensure every bite has that satisfying texture. Avoid packing it down too tightly, as you want it to maintain its crunch.
  6. Repeat the layers: spoon in another 1/4 cup of yogurt, followed by another cup of peaches, and another sprinkle of granola. You should have at least two layers, but feel free to add more depending on your glass size.
  7. Finish off your parfait with a drizzle of honey on top for added sweetness and a touch of elegance. If you’re using sliced almonds or shredded coconut, sprinkle them on top now. It adds a lovely visual contrast and extra flavor.
  8. Serve immediately or refrigerate for up to 30 minutes before serving to allow the flavors to meld together. However, I recommend enjoying it fresh to maintain the granola’s crunch.
  • Prep Time: 15 mins
  • Cook Time: 0 mins
  • Category: Breakfast
  • Method: No-cook
  • Cuisine: American

Nutrition

  • Serving Size: 1 parfait
  • Calories: 250
  • Sugar: 20 g
  • Sodium: 50 mg
  • Fat: 5 g
  • Saturated Fat: 2 g
  • Unsaturated Fat: 3 g
  • Trans Fat: 0 g
  • Carbohydrates: 40 g
  • Fiber: 3 g
  • Protein: 10 g
  • Cholesterol: 10 mg

Keywords: Choose ripe peaches for the best flavor and texture. Use a clear glass for a beautiful presentation. For creaminess, consider whipping the yogurt before layering. Be mindful of the granola-to-yogurt ratio. Prepare yogurt and peaches ahead of time for gatherings, layering just before serving.

Did you make this recipe?

Share a photo and tag us — we can't wait to see what you've made!

Sun-Kissed Frozen Orange Cream Slush

As a child, summer days felt like they lasted forever. I remember the sticky heat wrapping around me as I played outside, my laughter mingling with the sounds of the neighborhood. But nothing could cool me down quite like the moment I’d spot my grandmother, laboring over her blender, whipping up her famous Frozen Orange Creamsicle Slush. That vibrant orange treat, with its frosty texture and sweet citrus aroma, was like a burst of sunshine in a cup. Just one sip, and I could feel the coolness wash over me, sparking pure joy.

This Frozen Orange Creamsicle Slush has a way of making you feel like a kid again. Its creamy, dreamy consistency is a delightful balance of bright orange and soft vanilla, inviting you to dive right in. The refreshing tang of orange dances on your tongue, while the smooth creaminess envelops you in a comforting embrace. It’s a nostalgic treat that’s perfect for hot summer afternoons or anytime you need a little pick-me-up.

What makes my version of this slush stand out is the addition of a hint of vanilla bean, which elevates the flavor and adds an extra layer of richness. Plus, it’s super easy to whip up with just a few simple ingredients that you probably already have on hand! So, if you’re ready to relive those sun-soaked memories, let me show you exactly how to make it.

Sun-Kissed Frozen Orange Cream Slush

Why You’ll Love This Recipe

  • Each slush is a perfect blend of creamy vanilla and zesty orange, creating a nostalgic flavor reminiscent of summer days.
  • This refreshing treat is ready in under 15 minutes, making it an ideal quick dessert for unexpected guests or hot afternoons.
  • With just 8 simple ingredients, it’s budget-friendly, ensuring you don’t have to break the bank to enjoy a delicious slush.
  • The slush has a perfectly smooth texture, thanks to the combination of ice and ice cream, providing a delightful contrast to the bright citrus flavors.
  • It’s highly customizable; you can easily adjust the sweetness and add fresh herbs for a unique twist that suits your taste.

Ingredients

  • 2 cups orange juice (freshly squeezed or store-bought)
  • 1 cup vanilla ice cream
  • 1 cup crushed ice
  • 1/2 cup milk (whole or 2%)
  • 1/4 cup granulated sugar (adjust based on sweetness preference)
  • 1 teaspoon vanilla extract
  • Zest of 1 orange (for added flavor)
  • Fresh orange slices and mint leaves (for garnish)

The star of this Frozen Orange Creamsicle Slush is the orange juice, which provides the vibrant, citrusy base. Freshly squeezed juice will yield the brightest flavor, but store-bought options can be just as convenient. If you’re opting for store-bought, choose 100% pure juice with no added sugars for the best results. Another essential ingredient is the vanilla ice cream; it adds creaminess and sweetness. You can substitute it with dairy-free ice cream if you’re looking for a vegan option. Whole or 2% milk complements the ice cream, creating a smooth blend. If you want a lower-calorie version, almond or oat milk can be good alternatives.

Lastly, the granulated sugar can be adjusted based on your sweetness preference. If you prefer a more natural sweetener, consider using honey or agave syrup. The orange zest enhances the flavor profile, providing an aromatic pop that brings the whole slush together. Don’t skip it! It adds an extra layer of brightness that makes this slush truly special.

Step-by-Step Instructions

  1. Start by preparing your ingredients. Gather 2 cups of orange juice, 1 cup of vanilla ice cream, and 1 cup of crushed ice. Make sure the ice is finely crushed, as larger chunks can make blending difficult.
  2. In a blender, combine the orange juice, vanilla ice cream, crushed ice, and 1/2 cup of milk. Add 1/4 cup of granulated sugar and 1 teaspoon of vanilla extract. If you like a sweeter slush, consider adding a bit more sugar at this stage.
  3. Add the zest of 1 orange to the blender. This step is crucial for enhancing the citrus flavor of your slush. Make sure not to include the bitter white pith—only the flavorful zest.
  4. Blend the mixture on medium-high speed for about 30-45 seconds. Stop once the ingredients are fully combined and the slush has a smooth, even consistency. If you notice large chunks of ice, blend for an additional 10-15 seconds. Avoid over-blending, as this can make the slush too liquidy.
  5. Once blended, taste the slush. If it needs more sweetness, add a little more sugar and blend for a few more seconds. If it’s too thick, you can add a splash of milk to reach your desired consistency.
  6. Pour the slush into glasses. This recipe typically serves 4, but you can easily double it for larger gatherings. Use a spoon to help guide the slush into the glasses if needed.
  7. Garnish each serving with fresh orange slices and mint leaves. The mint not only adds a pop of color but also a refreshing aroma that complements the citrus flavors beautifully.
  8. Serve immediately and enjoy! If you’ve made extra, you can refrigerate it for a short time, but it’s best enjoyed fresh.

Pro Tips for the Best Frozen Orange Creamsicle Slush

  • Don’t skip the orange zest! It’s a game-changer for flavor. Always zest before juicing to make it easier.
  • Use a high-powered blender for the best texture. A standard blender may struggle with ice, leading to uneven consistency. If you have a food processor, that can work too, but ensure the ice is finely crushed.
  • Adjust the ice-to-liquid ratio carefully. If your slush is too thick, it won’t blend well. Start with less ice and add more until you reach your preferred texture.
  • Be cautious with the sugar! Always start with the lower amount, as you can easily add more, but it’s hard to fix an overly sweet slush.
  • For a fun twist, consider adding a splash of coconut milk or a handful of fresh fruit like strawberries or pineapple. This not only enhances the flavor but also adds a beautiful color contrast.

Variations & Serving Ideas

There are countless ways to put a spin on your Frozen Orange Creamsicle Slush. Consider making a tropical version by adding in some pineapple juice or coconut milk for a delightful tropical twist. If you’re feeling adventurous, try incorporating a handful of frozen mango or peach slices for added sweetness. For a lighter version, swap out the vanilla ice cream for Greek yogurt for a creamy yet tangy alternative.

As for serving ideas, this refreshing slush pairs wonderfully with light summer dishes like grilled chicken skewers, fish tacos, or a simple salad topped with citrus vinaigrette. The bright, zesty flavors of the slush complement these dishes perfectly, making them an ideal pairing for a sunny day.

Storage, Make-Ahead & Reheating

This Frozen Orange Creamsicle Slush is best enjoyed fresh, but if you have leftovers, you can store them in an airtight container in the fridge for up to 2 days. Just keep in mind that the slush may lose some of its texture over time as the ice melts. It doesn’t freeze well, as the ice will turn into a solid block. If you must freeze it, blend again after thawing to restore the slushy consistency. This treat is best the day you make it, as the flavors meld together beautifully overnight, enhancing its deliciousness.

Frequently Asked Questions

Can I make Frozen Orange Creamsicle Slush ahead of time?

Yes — in fact, it tastes even better the next day as the flavors meld. However, it’s best to enjoy it fresh, as the texture can change if stored for too long. If you need to prepare it ahead, keep it in the fridge and re-blend before serving.

What kind of orange juice should I use?

For the best flavor, use freshly squeezed orange juice. However, if you’re short on time, opt for 100% pure store-bought juice without added sugars. This will ensure that your slush remains flavorful and refreshing.

Can I substitute the vanilla ice cream?

Absolutely! If you’re looking for a dairy-free option, coconut milk ice cream or a non-dairy vanilla ice cream can work wonderfully. They will still provide the creamy texture and sweetness you desire.

How can I adjust the sweetness of my slush?

You can easily adjust the sweetness by modifying the amount of sugar added. Start with 1/4 cup and taste the mixture before blending. If you prefer it sweeter, add more sugar gradually until it reaches your desired level.

What should I do if my slush is too thick?

If your slush is too thick, simply add a splash of milk or orange juice and blend again. This will help achieve a more drinkable consistency while maintaining the slushy texture. Adjust gradually to reach your preferred thickness.

Sun-Kissed Frozen Orange Cream Slush

Final Thoughts

The Frozen Orange Creamsicle Slush is a delightful blend of refreshing citrus and creamy goodness, making it a perfect treat for warm days or any time you crave a taste of nostalgia. The way the bright orange flavor dances with the creamy texture truly elevates this slush, transforming it into a satisfying escape from the everyday.

This is the kind of recipe I come back to again and again, especially when I’m looking to cool down or impress guests at a summer gathering. It’s simple to make and always brings smiles all around! I encourage you to try this recipe for yourself—don’t hesitate to share your results or even put your own spin on it. Happy slushing!

Print
clock clock iconcutlery cutlery iconflag flag iconfolder folder iconinstagram instagram iconpinterest pinterest iconfacebook facebook iconprint print iconsquares squares iconheart heart iconheart solid heart solid icon

Frozen Orange Creamsicle Slush


  • Author: Lily author
  • Total Time: 15 minutes
  • Yield: 4 servings 1x
Pin Recipe
Print Recipe

Description

This Frozen Orange Creamsicle Slush is a refreshing treat that combines creamy vanilla and zesty orange flavors. Perfect for hot summer days, it brings back nostalgic memories with every sip.


Ingredients

Scale
  • 2 cups orange juice (freshly squeezed or store-bought)
  • 1 cup vanilla ice cream
  • 1 cup crushed ice
  • 1/2 cup milk (whole or 2%)
  • 1/4 cup granulated sugar (adjust based on sweetness preference)
  • 1 teaspoon vanilla extract
  • Zest of 1 orange (for added flavor)
  • Fresh orange slices and mint leaves (for garnish)

Instructions

  1. Start by preparing your ingredients. Gather 2 cups of orange juice, 1 cup of vanilla ice cream, and 1 cup of crushed ice. Make sure the ice is finely crushed, as larger chunks can make blending difficult.
  2. In a blender, combine the orange juice, vanilla ice cream, crushed ice, and 1/2 cup of milk. Add 1/4 cup of granulated sugar and 1 teaspoon of vanilla extract. If you like a sweeter slush, consider adding a bit more sugar at this stage.
  3. Add the zest of 1 orange to the blender. This step is crucial for enhancing the citrus flavor of your slush. Make sure not to include the bitter white pith—only the flavorful zest.
  4. Blend the mixture on medium-high speed for about 30-45 seconds. Stop once the ingredients are fully combined and the slush has a smooth, even consistency. If you notice large chunks of ice, blend for an additional 10-15 seconds. Avoid over-blending, as this can make the slush too liquidy.
  5. Once blended, taste the slush. If it needs more sweetness, add a little more sugar and blend for a few more seconds. If it’s too thick, you can add a splash of milk to reach your desired consistency.
  6. Pour the slush into glasses. This recipe typically serves 4, but you can easily double it for larger gatherings. Use a spoon to help guide the slush into the glasses if needed.
  7. Garnish each serving with fresh orange slices and mint leaves. The mint not only adds a pop of color but also a refreshing aroma that complements the citrus flavors beautifully.
  8. Serve immediately and enjoy! If you’ve made extra, you can refrigerate it for a short time, but it's best enjoyed fresh.
  • Prep Time: 15 min
  • Cook Time: 0 min
  • Category: Dessert
  • Method: Blending
  • Cuisine: American

Nutrition

  • Serving Size: 1 serving
  • Calories: 200
  • Sugar: 30 g
  • Sodium: 50 mg
  • Fat: 5 g
  • Saturated Fat: 3 g
  • Unsaturated Fat: 2 g
  • Trans Fat: 0 g
  • Carbohydrates: 40 g
  • Fiber: 1 g
  • Protein: 2 g
  • Cholesterol: 20 mg

Keywords: Don't skip the orange zest! It's a game-changer for flavor. Always zest before juicing to make it easier.

Did you make this recipe?

Share a photo and tag us — we can't wait to see what you've made!

Zesty Lemon Poppy Seed Delight

One rainy afternoon, I found myself in my grandmother’s cozy kitchen, the kind that always smelled like warmth and love. She was whipping up her famous Lemon Poppy Seed Loaf, a recipe that had been passed down through generations. As the batter came together, the zesty aroma of fresh lemons filled the air, mingling perfectly with the nutty fragrance of poppy seeds. I can still picture her, apron-clad, as she expertly drizzled a vibrant citrus icing over the loaf, creating a glossy, sun-kissed finish that beckoned us to dive in. It was a moment that sparked my own passion for baking, and this recipe has become a cherished staple in my home ever since.

When you take a bite of this Lemon Poppy Seed Loaf, it’s like a burst of sunshine on your palate. The loaf is beautifully golden, with a tender crumb that melts in your mouth. Each slice is speckled with tiny poppy seeds, adding a delightful crunch that contrasts beautifully with the tangy sweetness of the lemon. And that citrus icing? It’s the finishing touch that elevates this loaf from ordinary to extraordinary, with its bright, zesty flavor dancing on your taste buds.

This recipe stands out because it embraces simplicity while delivering on flavor. I’ve added a hint of vanilla to the batter, enhancing the overall taste and making it even more indulgent. Trust me, once you make this Lemon Poppy Seed Loaf With Citrus Icing, it’ll become a go-to in your baking repertoire.

So, let me show you exactly how to make it!

Zesty Lemon Poppy Seed Delight

Why You’ll Love This Recipe

  • Moist and tender crumb that melts in your mouth, thanks to the perfect balance of butter and buttermilk.
  • Bright, zesty lemon flavor paired with crunchy poppy seeds, creating a delightful texture and taste experience.
  • Easy to whip up in just about an hour, perfect for last-minute gatherings or a cozy afternoon treat.
  • Budget-friendly with everyday ingredients, making it an accessible option for all home bakers.
  • The citrus icing adds a sweet tang that elevates the loaf, turning a simple recipe into a showstopper!

Ingredients

  • 1 ½ cups (190g) all-purpose flour
  • 1 teaspoon baking powder
  • ½ teaspoon baking soda
  • ½ teaspoon salt
  • 3 tablespoons poppy seeds
  • ½ cup (115g) unsalted butter, softened to room temperature
  • 1 cup (200g) granulated sugar
  • 2 large eggs
  • 1 teaspoon vanilla extract
  • 1 teaspoon lemon zest (from about 1 medium lemon)
  • ½ cup (120ml) buttermilk
  • 2 tablespoons fresh lemon juice

For the Citrus Icing:

  • 1 cup (120g) powdered sugar
  • 2 tablespoons fresh lemon juice
  • 1 tablespoon orange juice
  • 1 teaspoon lemon zest (for garnish, optional)

Let’s dive into the key ingredients that make this Lemon Poppy Seed Loaf so special. The all-purpose flour provides the structure and base for the loaf, while the baking powder and baking soda ensure it rises perfectly, giving the loaf a light texture. For a gluten-free variation, you could substitute the flour with a gluten-free all-purpose blend. Poppy seeds not only add a delightful crunch but also contribute to the unique flavor profile that pairs well with the citrus notes.

Unsalted butter is crucial for achieving the buttery richness that makes this loaf so moist. If you’re looking for a dairy-free option, coconut oil or a vegan butter can be used instead. The buttermilk is another essential component, providing acidity that activates the baking soda for a fluffy texture. If you don’t have buttermilk on hand, you can easily make a substitute by mixing ½ cup of milk with 1 tablespoon of vinegar or lemon juice and letting it sit for about 5 minutes.

Step-by-Step Instructions

  1. Preheat your oven to 350°F (175°C). Grease a 9×5-inch loaf pan or line it with parchment paper for easy removal later.
  2. In a medium mixing bowl, whisk together 1 ½ cups of all-purpose flour, 1 teaspoon of baking powder, ½ teaspoon of baking soda, ½ teaspoon of salt, and 3 tablespoons of poppy seeds. This helps to evenly distribute the baking agents and ensures a uniform rise.
  3. In a large mixing bowl, cream together ½ cup of softened unsalted butter and 1 cup of granulated sugar using an electric mixer on medium speed for about 3-4 minutes, until the mixture is light and fluffy. Make sure to scrape down the sides of the bowl occasionally.
  4. Add 2 large eggs, 1 teaspoon of vanilla extract, and 1 teaspoon of lemon zest to the creamed butter and sugar, mixing until fully combined. You want a smooth consistency, so ensure there are no lumps of butter.
  5. In a small bowl, combine ½ cup of buttermilk and 2 tablespoons of fresh lemon juice. Alternately add the dry ingredients and buttermilk mixture to the butter mixture, starting and ending with the dry ingredients. Mix just until combined; do not overmix, as this can lead to a dense loaf.
  6. Pour the batter into the prepared loaf pan. Smooth the top with a spatula, ensuring it’s even. Bake in the preheated oven for 50-60 minutes, or until a toothpick inserted in the center comes out clean. The edges should be lightly golden brown, and the center should feel just set.
  7. Once baked, remove the loaf from the oven and allow it to cool in the pan for about 10 minutes. Then, transfer it to a wire rack to cool completely. Resist the urge to slice too soon, as it will be crumbly if it’s still warm.
  8. While the loaf is cooling, prepare the citrus icing. In a medium bowl, whisk together 1 cup of powdered sugar, 2 tablespoons of fresh lemon juice, and 1 tablespoon of orange juice until smooth. If the icing is too thick, you can add a little more juice to reach your desired consistency.
  9. Once the loaf is completely cool, drizzle the citrus icing over the top. If you like, sprinkle with an additional teaspoon of lemon zest for an extra pop of flavor and color.

Pro Tips for the Best Lemon Poppy Seed Loaf With Citrus Icing

  • Be careful not to overmix your batter; this is a common mistake that can lead to a dense loaf. Mix just until the dry ingredients are incorporated for a light and fluffy texture.
  • Use room temperature ingredients, especially the butter and eggs. This helps to create a smoother batter and ensures even baking. Take your eggs out of the fridge about 30 minutes before you start.
  • For a more pronounced lemon flavor, consider adding a little lemon extract in addition to the zest and juice. Just a half teaspoon can elevate the citrus notes significantly.
  • When measuring your flour, spoon it into the measuring cup and level it off with a knife instead of scooping directly from the bag. This prevents packing and ensures you don’t end up with a dry loaf.
  • Invest in a good quality loaf pan; it makes a difference in heat distribution, which ensures even baking. If your pan is dark-coated, reduce the oven temperature by 25°F to prevent over-browning.

Variations & Serving Ideas

For a delightful twist, consider adding blueberries or raspberries to the batter for a fruity burst of flavor. You can also experiment with different citrus fruits—try lime or grapefruit zest and juice for a refreshing change. For a healthier option, substitute half of the all-purpose flour with whole wheat flour for added fiber without compromising too much on texture.

This Lemon Poppy Seed Loaf pairs beautifully with a light salad, such as a mixed greens salad with a vinaigrette, or a cup of tea for a cozy afternoon treat. It also complements a creamy cheese platter, as the acidity of the loaf balances rich cheeses perfectly. Lastly, a scoop of vanilla ice cream on the side creates a delightful contrast of temperatures and flavors!

Storage, Make-Ahead & Reheating

This Lemon Poppy Seed Loaf can be stored at room temperature for up to 3 days if wrapped tightly in plastic wrap. If you want to keep it longer, it freezes well for up to 3 months. To freeze, wrap the loaf tightly in plastic wrap and then in aluminum foil to prevent freezer burn.

When you’re ready to enjoy it again, simply thaw it in the fridge overnight. Reheat individual slices in the microwave for 15-20 seconds or in a toaster oven until warmed through. Interestingly, many people find that this loaf tastes even better the next day, as the flavors have time to meld!

Frequently Asked Questions

Can I make Lemon Poppy Seed Loaf With Citrus Icing ahead of time?

Yes — in fact, it tastes even better the next day! You can make the loaf a day in advance, allowing the flavors to develop. Just be sure to store it in an airtight container to maintain its moisture.

Can I substitute the poppy seeds?

Absolutely! If you don’t have poppy seeds on hand or prefer an alternative, you can use sesame seeds for a similar crunch or omit them entirely for a smooth loaf.

What can I use instead of buttermilk?

If you don’t have buttermilk, you can easily create a substitute by mixing ½ cup of milk (dairy or plant-based) with 1 tablespoon of vinegar or lemon juice. Let it sit for 5 minutes before using in the recipe.

How can I make this recipe gluten-free?

To make a gluten-free version of this Lemon Poppy Seed Loaf, substitute the all-purpose flour with a gluten-free all-purpose flour blend. Just ensure that the blend contains a binding agent like xanthan gum for the best results.

What is the best way to store leftover loaf?

Leftover Lemon Poppy Seed Loaf should be stored in an airtight container at room temperature for up to 3 days. For longer storage, wrap it tightly and freeze for up to 3 months. Thaw it before serving for the best texture.

Zesty Lemon Poppy Seed Delight

Final Thoughts

The Lemon Poppy Seed Loaf with Citrus Icing is truly a delightful treat that brings a burst of brightness to any occasion. The zesty lemon flavor combined with the subtle crunch of poppy seeds creates a satisfying balance, while the citrus icing adds a touch of sweetness that perfectly complements the loaf’s tanginess.

This is the kind of recipe I come back to again and again, especially when I want to brighten up a gloomy day or celebrate a small victory. The aroma that fills the kitchen as it bakes is absolutely heavenly! I encourage you to give this recipe a try; you might just find it becoming a beloved staple in your home. Don’t forget to share your results or even add your own unique twist—I can’t wait to see what you create!

Print
clock clock iconcutlery cutlery iconflag flag iconfolder folder iconinstagram instagram iconpinterest pinterest iconfacebook facebook iconprint print iconsquares squares iconheart heart iconheart solid heart solid icon

Lemon Poppy Seed Loaf


  • Author: Lily author
  • Total Time: 14 minute
  • Yield: 1 loaf 1x
Pin Recipe
Print Recipe

Description

This Lemon Poppy Seed Loaf is a delightful treat that combines zesty lemon flavor with crunchy poppy seeds. Topped with a citrus icing, it’s perfect for any occasion.


Ingredients

Scale
  • 1 ½ cups (190g) all-purpose flour
  • 1 teaspoon baking powder
  • ½ teaspoon baking soda
  • ½ teaspoon salt
  • 3 tablespoons poppy seeds
  • ½ cup (115g) unsalted butter, softened to room temperature
  • 1 cup (200g) granulated sugar
  • 2 large eggs
  • 1 teaspoon vanilla extract
  • 1 teaspoon lemon zest (from about 1 medium lemon)
  • ½ cup (120ml) buttermilk
  • 2 tablespoons fresh lemon juice
  • 1 cup (120g) powdered sugar
  • 2 tablespoons fresh lemon juice
  • 1 tablespoon orange juice
  • 1 teaspoon lemon zest (for garnish, optional)

Instructions

  1. Preheat your oven to 350°F (175°C). Grease a 9×5-inch loaf pan or line it with parchment paper for easy removal later.
  2. In a medium mixing bowl, whisk together 1 ½ cups of all-purpose flour, 1 teaspoon of baking powder, ½ teaspoon of baking soda, ½ teaspoon of salt, and 3 tablespoons of poppy seeds. This helps to evenly distribute the baking agents and ensures a uniform rise.
  3. In a large mixing bowl, cream together ½ cup of softened unsalted butter and 1 cup of granulated sugar using an electric mixer on medium speed for about 3-4 minutes, until the mixture is light and fluffy. Make sure to scrape down the sides of the bowl occasionally.
  4. Add 2 large eggs, 1 teaspoon of vanilla extract, and 1 teaspoon of lemon zest to the creamed butter and sugar, mixing until fully combined. You want a smooth consistency, so ensure there are no lumps of butter.
  5. In a small bowl, combine ½ cup of buttermilk and 2 tablespoons of fresh lemon juice. Alternately add the dry ingredients and buttermilk mixture to the butter mixture, starting and ending with the dry ingredients. Mix just until combined; do not overmix, as this can lead to a dense loaf.
  6. Pour the batter into the prepared loaf pan. Smooth the top with a spatula, ensuring it’s even. Bake in the preheated oven for 50-60 minutes, or until a toothpick inserted in the center comes out clean. The edges should be lightly golden brown, and the center should feel just set.
  7. Once baked, remove the loaf from the oven and allow it to cool in the pan for about 10 minutes. Then, transfer it to a wire rack to cool completely. Resist the urge to slice too soon, as it will be crumbly if it’s still warm.
  8. While the loaf is cooling, prepare the citrus icing. In a medium bowl, whisk together 1 cup of powdered sugar, 2 tablespoons of fresh lemon juice, and 1 tablespoon of orange juice until smooth. If the icing is too thick, you can add a little more juice to reach your desired consistency.
  9. Once the loaf is completely cool, drizzle the citrus icing over the top. If you like, sprinkle with an additional teaspoon of lemon zest for an extra pop of flavor and color.
  • Prep Time: 15 mins
  • Cook Time: 50-60 mins
  • Category: Dessert
  • Method: Baking
  • Cuisine: American

Nutrition

  • Serving Size: 1 slice
  • Calories: 200
  • Sugar: 15 g
  • Sodium: 150 mg
  • Fat: 8 g
  • Saturated Fat: 5 g
  • Unsaturated Fat: 3 g
  • Trans Fat: 0 g
  • Carbohydrates: 30 g
  • Fiber: 1 g
  • Protein: 3 g
  • Cholesterol: 40 mg

Keywords: Be careful not to overmix your batter; this is a common mistake that can lead to a dense loaf. Use room temperature ingredients for a smoother batter and even baking.

Did you make this recipe?

Share a photo and tag us — we can't wait to see what you've made!

  • Privacy Policy
  • Terms Of Service
  • Contact
  • About
  • GDPR

Copyright © 2025 Homesmad