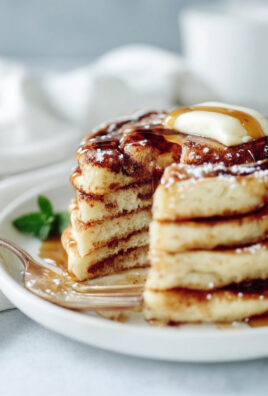
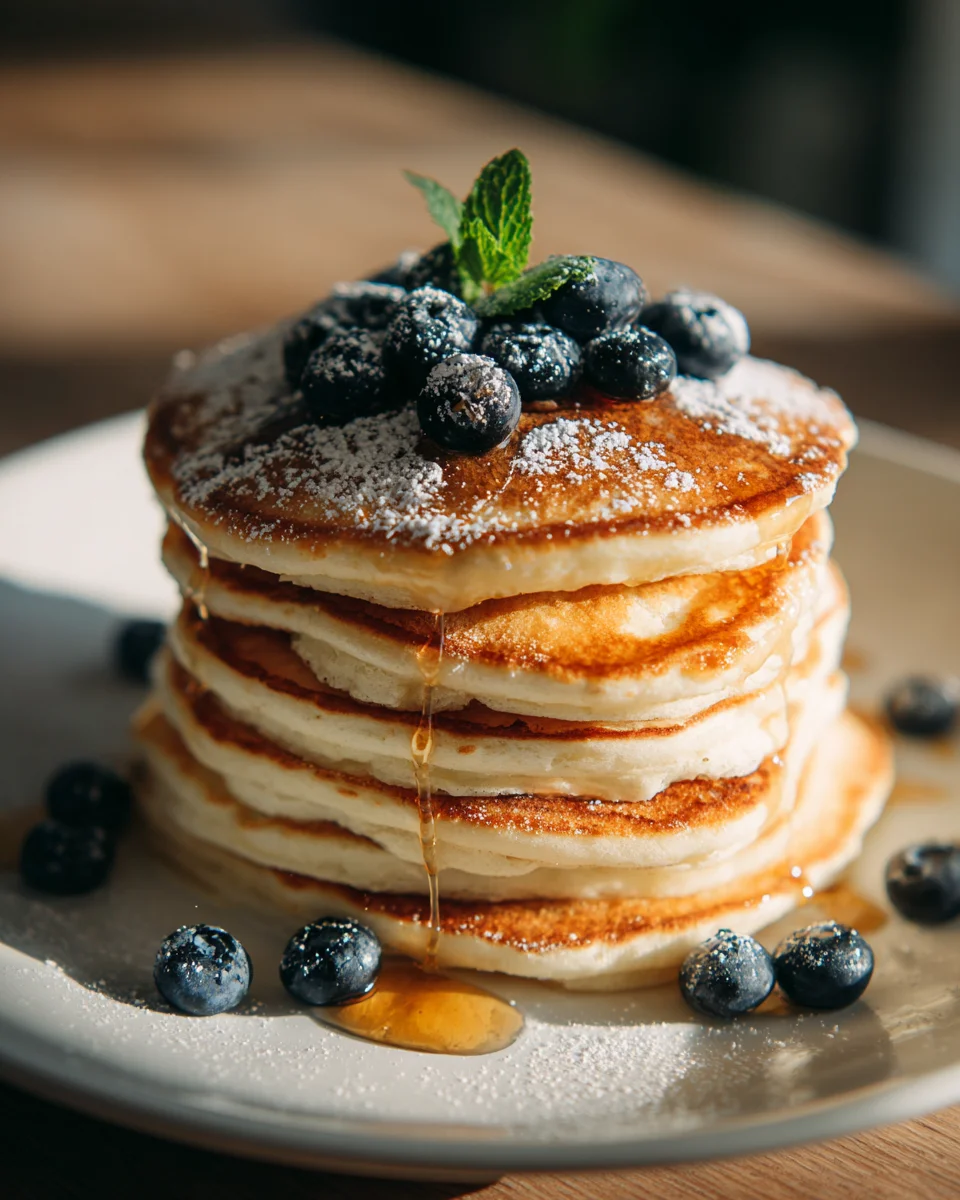
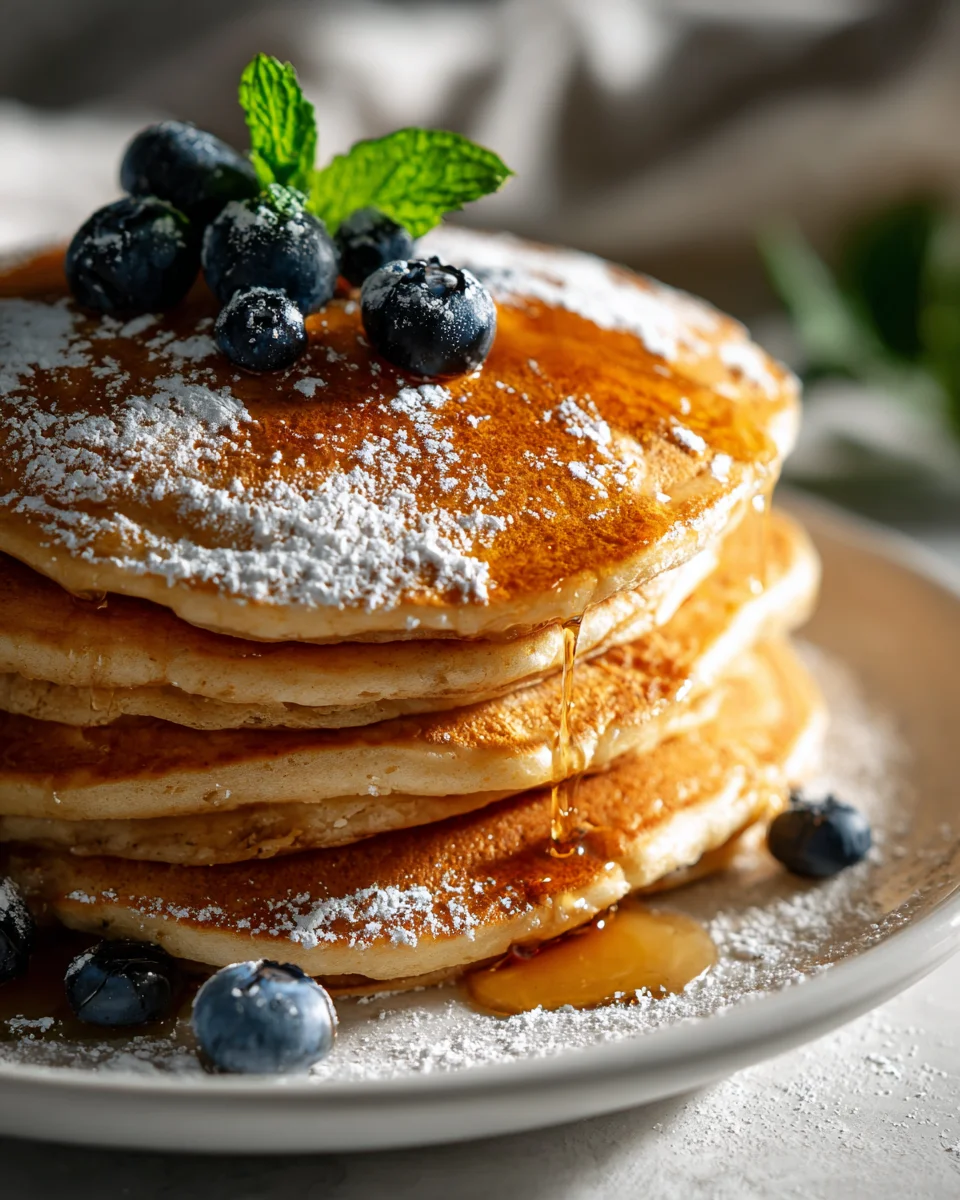
Whole Wheat Old Fashioned Pancakes
Hey there, fellow breakfast enthusiasts! If you’re anything like me, there’s nothing quite like the smell of fresh pancakes sizzling on a griddle to kickstart a cozy morning. But these aren’t just any pancakes; we’re talking about my absolute favorite, Whole Wheat Old Fashioned Pancakes. What makes them so special, you ask? Well, it’s that perfect blend of wholesome goodness from the whole wheat flour, giving them a delightful nutty depth and a slightly heartier texture, combined with the pure, unadulterated comfort of a truly old-fashioned recipe. It’s a nostalgic hug in every single bite!
I promise you, these aren’t those dense, cardboard-like whole wheat pancakes you might dread. Oh no! We’re talking golden-brown beauties, wonderfully fluffy and tender, that manage to be satisfyingly substantial without ever feeling heavy. They strike that sweet spot between rustic charm and classic breakfast perfection. You’ll love how easy they are to whip up, turning simple ingredients into a breakfast masterpiece that your family will rave about. Drizzle them with your favorite non-alcohol syrup, pile on some fresh berries, or simply enjoy them plain – however you top them, these pancakes are destined to become a weekend (or even weekday!) tradition in your home.
Ingredient Notes
Crafting the perfect batch of Whole Wheat Old Fashioned Pancakes starts with understanding the stars of the show – our ingredients. Each one plays a crucial role in achieving that hearty, wholesome, yet delightfully fluffy texture and classic taste we’re aiming for.
- Whole Wheat Flour: This is the foundation of our ‘old-fashioned’ twist. I opt for regular whole wheat flour for its robust, nutty flavor and a satisfyingly chewy, dense texture. It offers more fiber and nutrients than all-purpose flour, making these pancakes a heartier choice. If you prefer a lighter, more delicate pancake, you could try using whole wheat pastry flour, which has a lower protein content and will result in a slightly softer crumb. However, for a truly old-fashioned, substantial pancake, I stick with the standard whole wheat.
- Buttermilk: The secret to that tangy flavor and incredibly tender texture! Buttermilk reacts beautifully with baking soda to create lift and aeration in the batter. If you don’t have buttermilk on hand, don’t worry! You can easily make your own by adding 1 tablespoon of white vinegar or lemon juice to a liquid measuring cup, then filling it up to 1 cup with regular milk (dairy or non-dairy works). Let it sit for 5-10 minutes until it curdles slightly.
- Leavening Agents (Baking Powder & Baking Soda): We use both for optimal lift. Baking soda needs an acid (like buttermilk) to activate, while baking powder is double-acting, meaning it reacts once when wet and again with heat. Together, they ensure our whole wheat pancakes rise beautifully and aren’t too dense. Always check the expiration dates on your leavening agents – old ones won’t give you the fluffy results you desire!
- Sweetener (Brown Sugar): For that distinctly ‘old-fashioned’ sweetness and a touch of molasses flavor, I prefer light brown sugar. It caramelizes nicely on the griddle, giving the pancakes lovely golden edges. You could substitute granulated sugar if that’s all you have, but the brown sugar truly adds to the depth of flavor. Maple syrup or honey can also work as liquid sweeteners, though you might need to slightly adjust the liquid content in the recipe.
- Eggs: Large eggs act as a binder, provide richness, and help with the structure of our pancakes. They contribute to the overall tenderness and ensure the pancakes hold together well.
- Melted Butter: A touch of melted butter adds incredible flavor and moisture, making the pancakes more tender. For a dairy-free option, you can easily substitute with a neutral-flavored oil like canola, vegetable, or melted coconut oil.
- Salt: A pinch of salt is essential for balancing the sweetness and enhancing all the other flavors in the batter. Don’t skip it!
Step-by-Step Instructions
Making these Whole Wheat Old Fashioned Pancakes is a straightforward process, but paying attention to a few details will ensure you get perfectly fluffy, golden-brown results every time. Here’s how I do it:
- Get Your Griddle Ready: First things first, I like to preheat my griddle or a large non-stick skillet over medium heat. You want it hot enough to cook quickly and give those beautiful golden-brown spots, but not so hot that it burns the outside before the inside is cooked. I usually test it by flicking a few drops of water onto the surface; they should sizzle and evaporate within a couple of seconds. Once it’s heated, I lightly grease it with a little butter or oil – just enough to prevent sticking.
- Combine Dry Ingredients: In a large mixing bowl, I whisk together the whole wheat flour, light brown sugar, baking powder, baking soda, and salt. It’s really important to whisk them thoroughly. This isn’t just about mixing them; it’s about aerating the flour and ensuring that the leavening agents and salt are evenly distributed. This step guarantees consistent rise and flavor in every pancake.
- Whisk Wet Ingredients: In a separate medium bowl, I whisk together the buttermilk, the large egg, and the melted butter (or oil). I make sure everything is well combined and smooth. It’s a good idea to ensure your melted butter isn’t too hot, otherwise, it could start to cook the egg. If it’s too hot, let it cool for a minute or two.
- Gently Combine Wet and Dry: Now for the crucial part! I pour the wet ingredient mixture into the dry ingredient mixture. With a wooden spoon or spatula, I gently fold and stir until just combined. This is where patience is key. I absolutely do not overmix! Whole wheat flour can develop gluten quickly, and overmixing will lead to tough, rubbery pancakes. A few lumps in the batter are perfectly fine and actually desirable; they indicate you haven’t overmixed. The batter should be thick, but pourable.
- Rest the Batter (Optional, but Recommended): For the best results, especially with whole wheat flour, I like to let the batter rest for 5 to 10 minutes. This allows the flour to fully hydrate and the leavening agents to begin their work, resulting in a slightly thicker batter and noticeably fluffier pancakes.
- Cook the Pancakes: Using a ladle or a 1/4-cup measuring cup, I pour the batter onto the hot, lightly greased griddle. I try to make them fairly uniform in size, usually about 3-4 inches in diameter. I typically cook 3-4 pancakes at a time, depending on the size of my griddle, making sure not to overcrowd it.
- Flip and Finish: I let the pancakes cook for about 2-3 minutes per side. You’ll know they’re ready to flip when you see bubbles appearing on the surface, the edges look set and slightly dry, and the underside is golden brown. Once flipped, I cook them for another 1-2 minutes until the other side is also golden brown and the pancake is cooked through.
- Serve Warm: As I cook the pancakes, I like to transfer them to a plate and keep them warm in a low oven (around 200°F or 90°C) while I finish the rest of the batch. This ensures everyone gets to enjoy warm, fresh pancakes!
Tips & Suggestions
Making delicious Whole Wheat Old Fashioned Pancakes is already a treat, but with a few extra tips and tricks, you can elevate your pancake game and ensure every batch is perfect. Here’s what I’ve learned along the way:
- Don’t Overmix the Batter (Seriously!): This is the golden rule for any pancake, but it’s especially critical when working with whole wheat flour. Whole wheat flour has more gluten-forming proteins than all-purpose flour. Overmixing develops this gluten too much, leading to tough, chewy pancakes rather than the light, tender ones we crave. A few lumps are perfectly normal and preferred! Just mix until the wet and dry ingredients are just combined.
- Give Your Batter a Rest: I always recommend letting your pancake batter rest for at least 5-10 minutes, or even up to 30 minutes, before cooking. This allows the whole wheat flour to fully hydrate, absorbing the liquid and becoming more tender. It also gives the leavening agents a head start, resulting in fluffier, more evenly cooked pancakes. You’ll notice the batter thickens slightly during this rest period.
- Master the Griddle Temperature: Consistent medium heat is crucial. Too low, and your pancakes will take forever to cook and be dry; too high, and they’ll burn on the outside while remaining raw in the middle. I test my griddle by dropping a tiny bit of batter or a few drops of water on it; it should sizzle gently. Adjust your heat as you go, as griddles can have hot spots.
- Fresh Leavening is Key: Ensure your baking powder and baking soda are fresh and active. Old leavening agents won’t provide the necessary lift, leading to flat, dense pancakes. I typically replace mine every 6 months to a year.
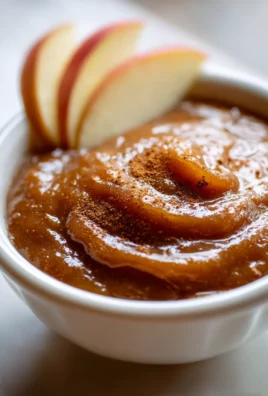
- Serving Suggestions: These Whole Wheat Old Fashioned Pancakes are absolutely divine with a drizzle of pure maple syrup, but don’t stop there! I love them with fresh berries (blueberries, raspberries, or sliced strawberries), a dollop of Greek yogurt or homemade whipped cream, or a sprinkle of chopped nuts. For an extra old-fashioned touch, try a warm apple compote or a homemade berry sauce. Sometimes, I even add a pat of butter that melts right into the warm stack.
- Add-ins for Flavor: While these are fantastic plain, feel free to customize! A teaspoon of cinnamon or a pinch of nutmeg mixed into the dry ingredients adds a wonderful warmth. For a touch of citrus, a teaspoon of orange or lemon zest can brighten the flavor profile beautifully.
- Don’t Overcrowd the Griddle: Cooking too many pancakes at once lowers the griddle temperature and can lead to uneven cooking. I stick to cooking 3-4 at a time, allowing plenty of space for easy flipping.
Storage
Sometimes you make a big batch, or perhaps you just want to prepare ahead for busy mornings. These Whole Wheat Old Fashioned Pancakes store surprisingly well, allowing you to enjoy a quick, wholesome breakfast any day of the week.
- Cool Completely: Before storing any pancakes, it’s absolutely essential to let them cool down to room temperature. Stacking warm pancakes in an airtight container will create condensation, making them soggy and prone to spoilage more quickly. I usually lay them out in a single layer on a wire rack for about 15-20 minutes until they are no longer warm to the touch.
- Refrigeration:
- Method: Once cooled, stack the pancakes with small squares of parchment paper or wax paper in between each one. This prevents them from sticking together and makes it easier to grab just one or two at a time. Place the stack in an airtight container or a large zip-top bag.
- Duration: Stored properly in the refrigerator, these pancakes will stay fresh for up to 3-4 days.
- Freezing: Freezing is my favorite way to store pancakes for longer periods, ensuring I always have a quick breakfast option ready to go.
- Method: After they’ve cooled completely, again, place a piece of parchment or wax paper between each pancake. This step is even more critical for freezing! Stack them up and then place the stack into a freezer-safe zip-top bag or an airtight freezer container. Make sure to press out as much air as possible from the bag before sealing to prevent freezer burn.
- Duration: Whole Wheat Old Fashioned Pancakes can be frozen for up to 2-3 months without a significant loss in quality.
- Reheating: Reheating frozen or refrigerated pancakes is super easy and quick!
- Toaster/Toaster Oven: For individual pancakes, this is my preferred method. Pop them directly into a toaster or toaster oven until they are warmed through and slightly crispy on the edges, usually 1-2 minutes from refrigerated or 3-4 minutes from frozen.
- Microwave: If you’re in a hurry, the microwave works. Place 1-2 pancakes on a microwave-safe plate. Heat for 30-60 seconds from refrigerated, or 1-2 minutes from frozen (flipping halfway through), until heated through. Be careful not to overcook, or they can become tough.
- Oven: For reheating a larger batch, preheat your oven to 350°F (175°C). Place the pancakes in a single layer on a baking sheet. Heat for about 5-10 minutes (from refrigerated) or 10-15 minutes (from frozen), until warmed through.
- Griddle: You can also reheat them on a lightly greased griddle over medium heat for a minute or two per side, until hot. This can help restore a bit of crispiness.
Final Thoughts
And there you have it! I truly hope you give these Whole Wheat Old Fashioned Pancakes a try. They are more than just a breakfast item; they’re a warm, comforting hug on a plate, reminding us of simpler times while nourishing us with wholesome whole wheat goodness. I love how easy they are to whip up, transforming a basic morning into something truly special. There’s just something incredibly satisfying about biting into their fluffy, slightly nutty texture. I promise, once you experience the heartwarming deliciousness of these Whole Wheat Old Fashioned Pancakes, you’ll find yourself reaching for this recipe again and again. Get ready to create some delicious memories!
Whole Wheat Old Fashioned Pancakes Recipe – Healthy Breakfast
- Total Time: 25 minutes
- Yield: 4 servings 1x
Description
These Whole Wheat Old Fashioned Pancakes are fluffy, tender, and packed with wholesome goodness. Enjoy a delightful breakfast that combines rustic charm with classic flavors!
Ingredients
- 1 cup Whole Wheat Flour
- 2 tablespoons Light Brown Sugar
- 1 teaspoon Baking Powder
- 1/2 teaspoon Baking Soda
- 1/4 teaspoon Salt
- 1 cup Buttermilk
- 1 Large Egg
- 2 tablespoons Melted Butter
- Butter or Oil for greasing the griddle
Instructions
- Preheat your griddle or a large non-stick skillet over medium heat.
- In a large mixing bowl, whisk together the whole wheat flour, light brown sugar, baking powder, baking soda, and salt until well combined.
- In a separate medium bowl, whisk together the buttermilk, large egg, and melted butter until smooth.
- Pour the wet ingredient mixture into the dry ingredient mixture and gently fold until just combined, being careful not to overmix.
- Let the batter rest for 5 to 10 minutes to allow the flour to hydrate.
- Using a ladle or a 1/4-cup measuring cup, pour the batter onto the hot, lightly greased griddle.
- Cook the pancakes for about 2-3 minutes per side, flipping when bubbles appear on the surface.
- Transfer cooked pancakes to a plate and keep warm in a low oven while finishing the rest of the batch.
- Prep Time: 10 mins
- Cook Time: 15 mins
- Category: Breakfast
- Method: Griddling
- Cuisine: American
Nutrition
- Serving Size: 1 pancake
- Calories: 150
- Sugar: 4 g
- Sodium: 200 mg
- Fat: 5 g
- Saturated Fat: 2 g
- Unsaturated Fat: 3 g
- Trans Fat: 0 g
- Carbohydrates: 22 g
- Fiber: 3 g
- Protein: 5 g
- Cholesterol: 30 mg
Keywords: Avoid overmixing the batter to ensure fluffy pancakes. Letting the batter rest enhances the texture, and using fresh leavening agents is crucial for optimal rise.