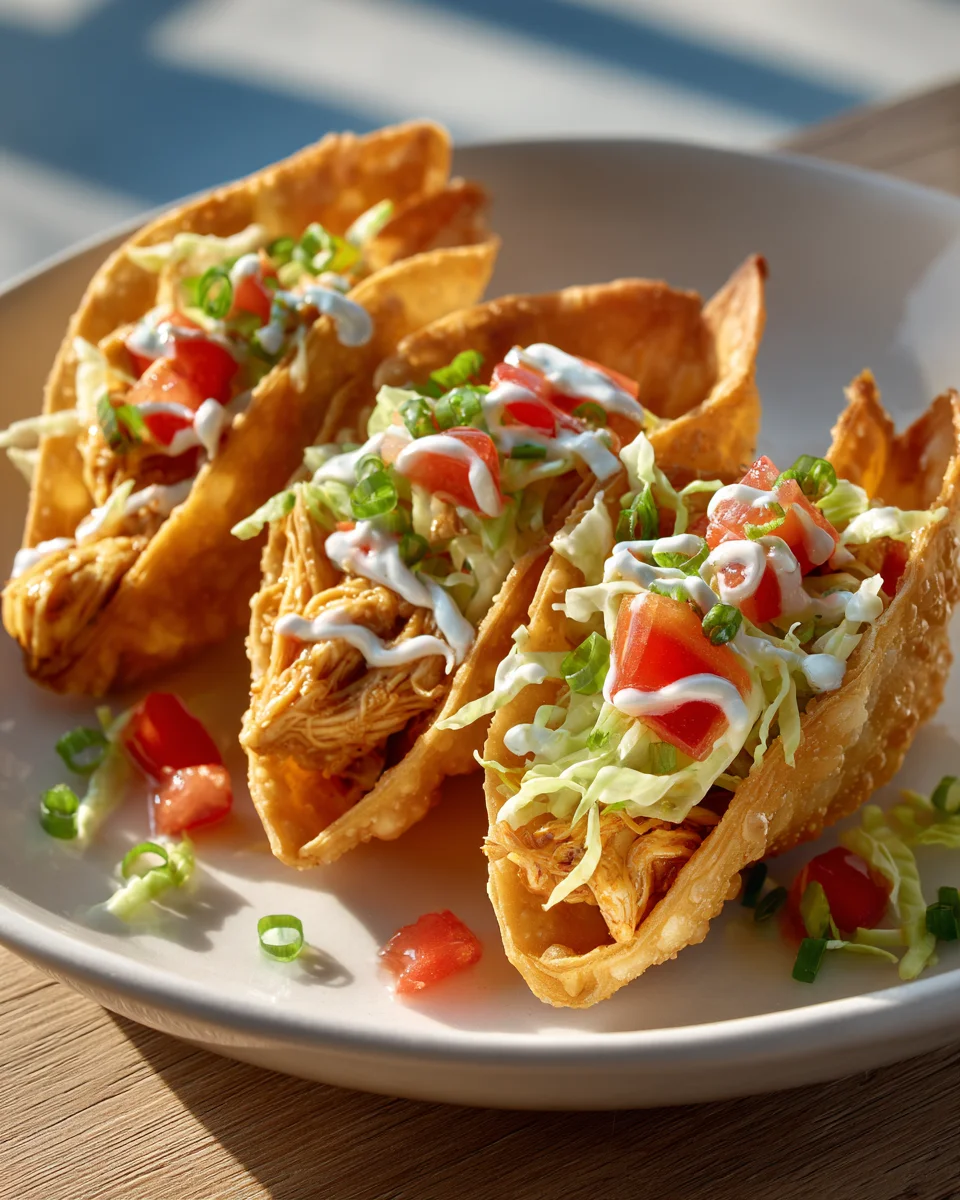
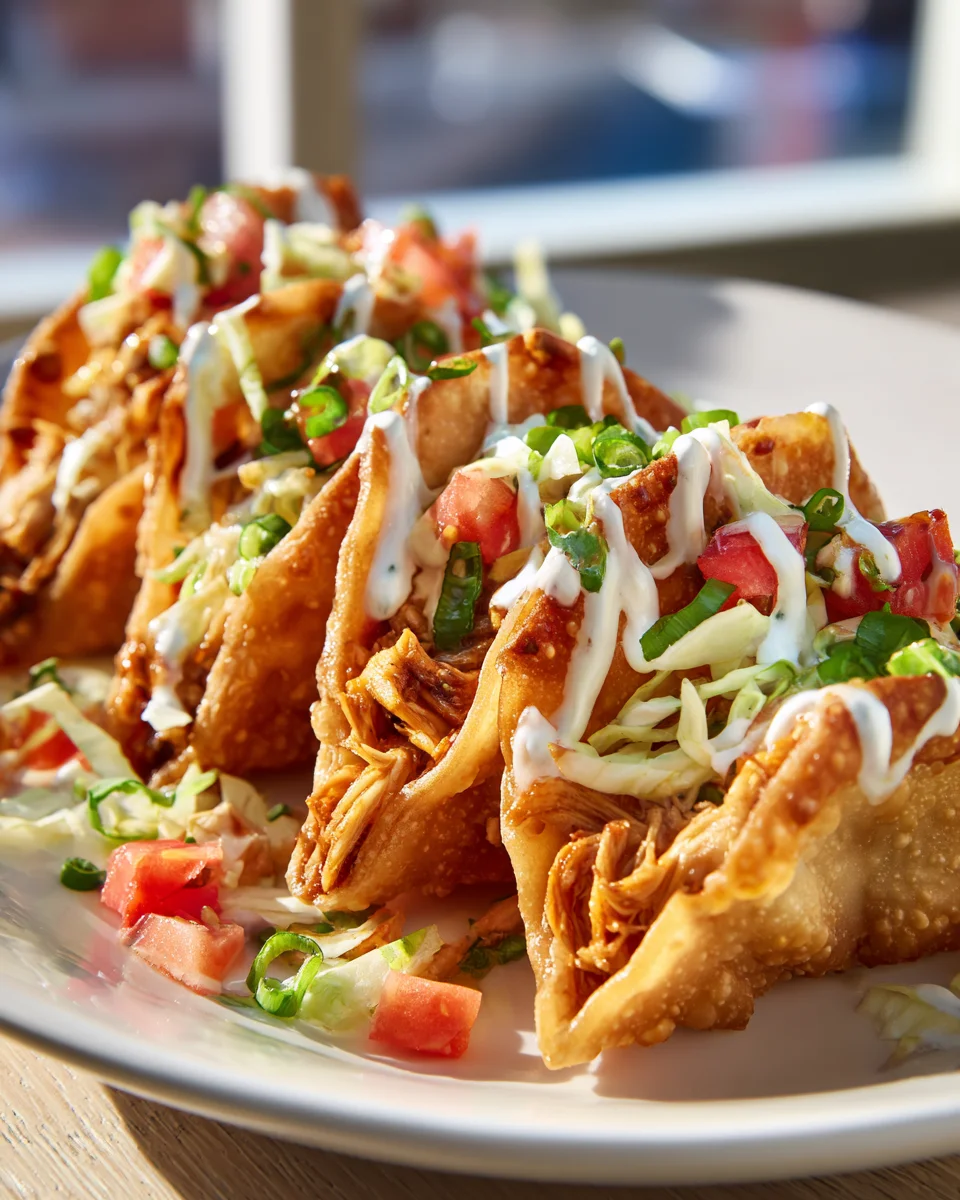
Applebee’s Chicken Wonton Tacos
Oh my goodness, where do I even begin with this absolute flavor sensation? I remember the first time I tried Applebee’s Chicken Wonton Tacos, and honestly, my mind was blown. It’s not just a taco; it’s an experience! What makes these so special, you ask? Well, it’s the brilliant fusion of crispy, delicate wonton wrappers taking the place of a traditional taco shell, filled with tender, juicy chicken, a vibrant and creamy slaw, and that irresistible tangy sauce that just ties everything together. This isn’t just a meal; it’s a creative twist that brings an explosion of textures and tastes to your table.
You are absolutely going to love making these at home because it means bringing that beloved restaurant magic right into your kitchen, without the wait or the bill! This dish is a perfect example of unexpected harmony – the fantastic crunch of the wonton, the savory chicken, and the refreshing slaw create a symphony of flavors that’s truly unforgettable. Get ready to impress yourself and everyone around you with this incredible copycat recipe that combines Asian-inspired crispiness with delicious taco fillings. It’s an appetizer that could easily become your new favorite main course!
Ingredient Notes
Creating these Copycat Applebee’s Chicken Wonton Tacos at home is surprisingly straightforward, and the key lies in a few star ingredients. When I set out to recreate this dish, I realized how much the quality of each component contributes to that signature flavor and texture. Here’s a breakdown of what you’ll need and some clever substitutions I’ve found work well.
The Wonton Shells
- Wonton Wrappers: These are non-negotiable for the “taco” part of this recipe! Look for square wonton wrappers in the refrigerated section of your grocery store, usually near the tofu or fresh pasta. They fry up beautifully crisp and hold their shape once cooled.
- Substitution: While not a direct substitute for the wonton experience, if you’re in a pinch and can’t find them, very thin spring roll wrappers cut into smaller squares could work, but the texture will be different. For the true Applebee’s experience, stick to wontons!
The Chicken Filling
- Cooked Shredded Chicken: This is the heart of our filling. I often use leftover roasted chicken, boiled chicken breasts, or even a rotisserie chicken from the store for ultimate convenience. Shredding it finely ensures it absorbs all that delicious sauce.
- Substitution: If you prefer to cook from scratch, two boneless, skinless chicken breasts or thighs, boiled and then shredded, work perfectly. You could also use ground chicken or even ground beef, cooked and crumbled, though the texture would be less like the original.
The Signature Sauce
- Sweet Chili Sauce: This is a crucial flavor base. I use a good quality store-bought sweet chili sauce – it provides that perfect balance of sweet and a little kick.
- Soy Sauce: I always opt for low-sodium soy sauce to control the overall saltiness.
- Rice Vinegar: Adds a lovely tang that brightens up the whole sauce. If you don’t have rice vinegar, apple cider vinegar can be used in a pinch, though it has a slightly different flavor profile.
- Fresh Ginger: Grated fresh ginger is a game-changer. It adds a wonderful aromatic warmth. Powdered ginger can be used, but fresh is superior here.
- Garlic: Minced fresh garlic, of course! Garlic powder is an alternative if fresh isn’t available, but I find fresh offers a more pungent and robust flavor.
- Toasted Sesame Oil: A tiny drizzle adds a deep, nutty aroma that ties all the Asian-inspired flavors together. A little goes a long way!
- Honey or Brown Sugar: For that extra touch of sweetness and to balance the savory and tangy notes.
- Sriracha or Chili Garlic Sauce: Optional, but I love adding a bit of this for an extra layer of heat if I’m feeling adventurous.
- Non-Alcoholic Sherry/Mirin Alternative: If a recipe traditionally calls for sherry or mirin for depth, I like to use a non-alcoholic cooking sherry or a mixture of rice vinegar with a pinch of sugar as an alternative. For this particular recipe, the rice vinegar already provides the tang, so adding a non-alcoholic cooking sherry can just deepen the umami if you wish, but it’s not strictly necessary with all the other robust flavors.
The Slaw & Garnish
- Coleslaw Mix: A bag of pre-shredded cabbage and carrots is a lifesaver for convenience. Otherwise, finely shred fresh green cabbage and a few carrots yourself.
- Fresh Cilantro: Chopped fresh cilantro adds a burst of freshness and a beautiful pop of color. If you’re not a fan of cilantro, chopped green onions make a great alternative.
- Lime Wedges: A squeeze of fresh lime juice just before serving brightens everything up.
Step-by-Step Instructions
Alright, let’s get those Applebee’s Chicken Wonton Tacos assembled! Follow these steps, and you’ll be enjoying a plate of crispy, saucy goodness in no time. I’ve refined this process to be as efficient and delicious as possible.
-
Prepare the Chicken Filling:
- If you don’t have pre-cooked chicken, start by boiling or poaching your chicken breasts until cooked through. Once cooled slightly, shred the chicken finely using two forks or a stand mixer with the paddle attachment.
- In a medium bowl, combine your cooked shredded chicken with about half of the sweet chili sauce, soy sauce, rice vinegar, minced fresh ginger, minced garlic, and a tiny drizzle of toasted sesame oil. Mix well until the chicken is thoroughly coated. At this point, I like to let it sit for at least 15-20 minutes, or even longer in the fridge, to really let those flavors meld.
-
Make the Crispy Wonton Taco Shells:
- Frying Method (My Preference for Crispiness): Heat about 1-2 inches of neutral oil (like canola or vegetable oil) in a heavy-bottomed pot or deep skillet to 350-375°F (175-190°C). Carefully lower one wonton wrapper into the hot oil. As it begins to cook, use tongs to gently fold it in half, creating a taco shape. Hold it in place for a few seconds until it sets, then allow it to fry until golden brown and crispy, about 30-60 seconds per side. Don’t overcrowd the pot; fry them in batches. Transfer fried shells to a wire rack lined with paper towels to drain excess oil.
- Baking Method (Healthier Alternative): Preheat your oven to 375°F (190°C). Lightly spray both sides of each wonton wrapper with cooking spray. Drape each wrapper over two rungs of an upside-down wire cooling rack, which should be placed over a baking sheet. This will help them form a taco shape as they bake. Bake for 5-8 minutes, or until golden brown and crispy. Keep a close eye on them, as they can burn quickly.
-
Prepare the Slaw Topping:
- In a small bowl, combine your shredded coleslaw mix (cabbage and carrots) with the chopped fresh cilantro. You can dress this simply with a tiny squeeze of lime juice, a dash of rice vinegar, or leave it plain, as the chicken filling is quite flavorful.
-
Assemble the Tacos:
- Once your wonton shells are cooled and crispy, it’s time to build! Take a crispy wonton shell and spoon a generous amount of the saucy chicken filling into the center.
- Top the chicken with a handful of the fresh coleslaw and cilantro mixture.
- For an extra flourish, drizzle a little more of the sweet chili sauce over the top, or a dash of Sriracha if you like some heat.
- Serve immediately with lime wedges on the side for an optional squeeze of freshness.
Tips & Suggestions
I’ve made these Chicken Wonton Tacos quite a few times, and I’ve picked up some tricks along the way that really elevate the experience. Here are my top tips and suggestions to help you nail this recipe and truly capture that Applebee’s magic at home:
- Achieving the Perfect Wonton Shell:
- Oil Temperature is Key: Whether frying or baking, temperature matters. For frying, aim for 350-375°F (175-190°C). Too low, and they’ll be greasy; too high, and they’ll burn before crisping. A candy thermometer is your friend here!
- Don’t Overcrowd: Fry or bake your wonton wrappers in small batches. Overcrowding drops the oil temperature and leads to soggy, not crispy, shells.
- Shape While Frying: If you’re frying, gently use tongs to fold the wonton wrapper into a taco shape as soon as you put it in the hot oil. Hold it for a few seconds until it sets, then let it cook fully. This ensures a perfect “taco” structure.
- Flavor Boost for the Chicken:
- Marinate Ahead: If time allows, mix your shredded chicken with the sauce ingredients an hour or two (or even overnight) before assembling. This really lets the flavors penetrate the chicken, making it even more delicious.
- Adjust Spice Level: Feel free to customize the heat! Add more Sriracha or a pinch of red pepper flakes to the chicken mixture or drizzle extra on top if you love a spicy kick.
- The Slaw’s Role:
- Freshness is Best: The crisp, cool slaw provides a fantastic contrast to the warm, saucy chicken. Don’t dress the slaw too far in advance, or it will become soggy.
- Slaw Variations: While a simple cabbage and carrot mix with cilantro is classic, you can get creative. Add thinly sliced bell peppers, a sprinkle of toasted sesame seeds, or even a tiny splash of a light vinaigrette (like a ginger-sesame dressing) to your slaw for extra flavor.
- Assembly Line Efficiency:
- Have all your components ready before you start assembling: crispy wonton shells, warm chicken filling, and fresh slaw. This makes the assembly quick and ensures you serve them at their best.
- Serve Immediately:
- These tacos are best enjoyed right after assembly. The crispy wonton shells can start to soften once they come into contact with the moist chicken filling, so get them to the table as soon as they’re built!
Storage
When it comes to storing leftovers of these Applebee’s Chicken Wonton Tacos, the key is to keep the components separate to maintain optimal texture and flavor. The crispy wonton shells are especially prone to getting soggy if stored with the moist chicken filling.
-
Storing Individual Components:
- Crispy Wonton Shells: Once completely cooled, store the fried or baked wonton shells in an airtight container at room temperature for up to 2-3 days. To revive their crispiness, you can briefly reheat them in a toaster oven or air fryer at around 300°F (150°C) for a few minutes until crisp again. Avoid refrigerating, as this tends to make them soft.
- Chicken Filling: Store the cooked and sauced chicken filling in an airtight container in the refrigerator for up to 3-4 days. When ready to eat, reheat gently in a microwave or a small saucepan over low heat until warmed through.
- Coleslaw Mixture: Keep the undressed coleslaw mix (cabbage, carrots, cilantro) in a separate airtight container in the refrigerator for up to 2-3 days. If you’ve already dressed it, it’s best consumed within 1 day as it can become watery and limp.
-
Reassembling Leftovers:
- When you’re ready for another round of tacos, simply reheat the chicken filling, grab your crispy wonton shells, and prepare a fresh batch of slaw or use your stored mixture. Assemble just before serving to ensure the best texture and taste.
-
Freezing:
- I generally do not recommend freezing the assembled tacos or the wonton shells, as they lose their crispness and desirable texture upon thawing. However, the cooked chicken filling, if frozen separately in an airtight, freezer-safe container, can be kept for up to 2-3 months. Thaw overnight in the refrigerator before reheating and assembling your fresh tacos.
Final Thoughts
Well, there you have it! I truly hope you’re as excited as I am about bringing the magic of Applebee’s right into your own kitchen. After trying this recipe, I can confidently say that making your own Applebee’s Chicken Wonton Tacos is an absolute game-changer. There’s something incredibly satisfying about creating those perfectly crispy wonton shells, filled with the tender, flavorful chicken (or even beef, if you prefer a different savory twist!) and topped with all those fresh, vibrant ingredients.
This isn’t just another taco recipe; it’s a delightful fusion of textures and tastes that hits all the right notes. From the first satisfying crunch to the savory goodness of the filling and the refreshing pop of the slaw, every bite of these Applebee’s Chicken Wonton Tacos is a little celebration. You’ll love how simple it is to achieve that signature taste without even having to leave your house. So go ahead, gather your ingredients, and prepare to impress yourself and your loved ones with this unforgettable appetizer or light meal. Trust me, once you try them, they’ll quickly become a favorite!

Applebee’s Chicken Wonton Tacos Recipe: Easy Homemade Copycat
- Total Time: 45 minutes
- Yield: 4 servings
Description
Experience the delightful fusion of crispy wonton wrappers filled with tender chicken and vibrant slaw, all drizzled with a tangy sauce. This easy homemade copycat recipe brings the magic of Applebee’s right into your kitchen!
Ingredients
- Wonton Wrappers
- Cooked Shredded Chicken
- Sweet Chili Sauce
- Soy Sauce
- Rice Vinegar
- Fresh Ginger
- Garlic
- Toasted Sesame Oil
- Honey or Brown Sugar
- Sriracha or Chili Garlic Sauce (optional)
- Non-Alcoholic Sherry/Mirin Alternative (optional)
- Coleslaw Mix (pre-shredded cabbage and carrots)
- Fresh Cilantro
- Lime Wedges
Instructions
- Prepare the Chicken Filling: If you don't have pre-cooked chicken, start by boiling or poaching your chicken breasts until cooked through. Once cooled slightly, shred the chicken finely using two forks or a stand mixer with the paddle attachment.
- In a medium bowl, combine your cooked shredded chicken with about half of the sweet chili sauce, soy sauce, rice vinegar, minced fresh ginger, minced garlic, and a tiny drizzle of toasted sesame oil. Mix well until the chicken is thoroughly coated. Let it sit for at least 15-20 minutes, or even longer in the fridge, to let those flavors meld.
- Make the Crispy Wonton Taco Shells: For frying, heat about 1-2 inches of neutral oil in a heavy-bottomed pot or deep skillet to 350-375°F (175-190°C). Carefully lower one wonton wrapper into the hot oil. As it begins to cook, use tongs to gently fold it in half, creating a taco shape. Hold it in place for a few seconds until it sets, then allow it to fry until golden brown and crispy, about 30-60 seconds per side. Transfer fried shells to a wire rack lined with paper towels to drain excess oil.
- For baking, preheat your oven to 375°F (190°C). Lightly spray both sides of each wonton wrapper with cooking spray. Drape each wrapper over two rungs of an upside-down wire cooling rack, which should be placed over a baking sheet. Bake for 5-8 minutes, or until golden brown and crispy.
- Prepare the Slaw Topping: In a small bowl, combine your shredded coleslaw mix with the chopped fresh cilantro. Dress with a squeeze of lime juice or leave it plain.
- Assemble the Tacos: Take a crispy wonton shell and spoon a generous amount of the saucy chicken filling into the center. Top with a handful of the fresh coleslaw and cilantro mixture. Drizzle more sweet chili sauce over the top, or Sriracha for heat. Serve immediately with lime wedges on the side.
- Prep Time: 30 mins
- Cook Time: 15 mins
- Category: Appetizer
- Method: Frying or Baking
- Cuisine: Asian-American
Nutrition
- Serving Size: 1 taco
- Calories: 250
- Sugar: 5 g
- Sodium: 500 mg
- Fat: 10 g
- Saturated Fat: 1 g
- Unsaturated Fat: 8 g
- Trans Fat: 0 g
- Carbohydrates: 30 g
- Fiber: 2 g
- Protein: 15 g
- Cholesterol: 40 mg
Keywords: For the best texture, store the components separately. Crispy wonton shells should be kept at room temperature, while the chicken filling and slaw should be refrigerated. Reassemble just before serving for optimal freshness.