
Banana Bread Sweet Rolls
Oh my goodness, friends, if you’re anything like me, you adore classic banana bread. It’s comforting, it’s nostalgic, and it’s the perfect way to use up those super ripe bananas sitting on your counter. But what if I told you we could take that beloved flavor profile and transform it into something even more utterly irresistible? Enter: Banana Bread Sweet Rolls! This isn’t just your average loaf; it’s a glorious fusion that brings the best of both worlds right to your breakfast table or dessert plate.
What makes these so incredibly special? Imagine the warm, sweet, banana-infused goodness of your favorite quick bread, but baked into tender, pillowy yeast rolls, swirled with a rich, spiced banana filling, and then generously slathered with a luscious cream cheese glaze. Yes, you read that right! It’s the ultimate cozy mashup that’s guaranteed to become your new favorite treat. You’ll love how these rolls deliver all that comforting banana bread flavor in a soft, pull-apart sweet roll format that’s just begging to be devoured. Get ready for your kitchen to smell absolutely divine, and for everyone who tries them to ask for the recipe!
Ingredient Notes
Making delicious Banana Bread Sweet Rolls starts with understanding the role each ingredient plays. I’ve found that a few key components truly make these rolls shine, transforming classic banana bread into a delightful, soft pastry.
- Very Ripe Bananas: This is non-negotiable for that signature banana bread flavor and moisture! Look for bananas that are heavily speckled with brown, or even mostly brown. They’re much sweeter and easier to mash. If your bananas aren’t quite ripe enough, you can speed up the process by baking them on a baking sheet at 300°F (150°C) for 15-20 minutes until their peels are shiny black.
- Active Dry Yeast: This is what gives our rolls their incredible light and fluffy texture. Make sure your yeast is fresh and active. I always like to “proof” it first in warm milk to ensure it’s alive and ready to work its magic.
- Warm Milk: Not too hot, not too cold! The ideal temperature for activating yeast is between 105-115°F (40-46°C). If it’s too hot, it will kill the yeast; too cold, and it won’t activate properly. Any dairy or non-dairy milk (like almond or oat milk) works wonderfully here.
- All-Purpose Flour: This is my go-to for its versatility, yielding a tender yet structured roll. If you prefer a chewier texture, you can substitute a portion (up to half) with bread flour. For gluten-free rolls, a good quality 1:1 gluten-free baking blend designed for yeast baking can often be used, though results may vary slightly.
- Unsalted Butter: Used in both the dough and the filling, butter adds richness and tenderness. Make sure it’s softened for the dough and melted for the filling. For a dairy-free option, a plant-based butter substitute works perfectly.
- Brown Sugar: It lends a deeper, molasses-rich sweetness to the filling that complements the banana beautifully. Light or dark brown sugar will both work.
- Cream Cheese: The star of our glaze! Use full-fat cream cheese for the creamiest, most luxurious frosting. Make sure it’s softened to room temperature for a smooth, lump-free glaze.
Step-by-Step Instructions
Get ready to transform simple ingredients into the most irresistible Banana Bread Sweet Rolls! Here’s how I make them, step-by-step, ensuring a perfect batch every time.
For the Dough:
- Activate the Yeast: In the bowl of your stand mixer (or a large mixing bowl if kneading by hand), gently warm your milk to 105-115°F (40-46°C). Sprinkle the active dry yeast and a teaspoon of granulated sugar over the warm milk. Stir gently, then let it sit for 5-10 minutes until it becomes foamy. This confirms your yeast is active!
- Mix the Dough: To the foamy yeast mixture, add the remaining granulated sugar, softened unsalted butter (cut into pieces), large egg, and salt. Mix briefly with the dough hook attachment (or a spoon). Gradually add 3 cups of the all-purpose flour, mixing on low speed until a shaggy dough forms.
- Knead the Dough: Continue adding the remaining 1/2 cup of flour, a little at a time, until the dough comes together and pulls away from the sides of the bowl. Increase the mixer speed to medium-low and knead for 8-10 minutes, or until the dough is smooth, elastic, and passes the windowpane test (you should be able to stretch a small piece thin enough to see light through it without tearing). If kneading by hand, knead on a lightly floured surface for 10-15 minutes.
- First Rise (Bulk Fermentation): Lightly grease a large bowl with a little oil. Transfer the kneaded dough to the bowl, turning it once to coat. Cover the bowl tightly with plastic wrap or a clean kitchen towel. Let the dough rise in a warm, draft-free place for 1-1.5 hours, or until it has doubled in size.
For the Banana Filling:
- While the dough is rising, prepare your filling. In a medium bowl, thoroughly mash your very ripe bananas until mostly smooth. A few small lumps are fine for texture!
- Stir in the melted unsalted butter, light brown sugar, ground cinnamon, and a pinch of salt until well combined. Set aside.
Assembly:
- Prepare your Surface: Once the dough has doubled, gently punch it down to release the air. Turn the dough out onto a lightly floured surface.
- Roll it Out: Using a rolling pin, roll the dough into a large rectangle, approximately 12×18 inches (30×45 cm) and about 1/4 inch thick. Try to keep the edges as straight as possible.
- Spread the Filling: Evenly spread the banana filling over the entire surface of the rolled-out dough, leaving a small 1/2-inch border along one of the long edges (this helps seal the roll).
- Roll it Up: Starting from the long edge opposite the bare border, carefully and tightly roll the dough into a log. Once rolled, pinch the seam closed to seal.
- Slice the Rolls: Using a sharp, un-serrated knife or, even better, unflavored dental floss, gently slice the log into 12 equal rolls, each about 1.5 inches thick. To use floss, slide it under the log, cross the ends over the top, and pull to slice cleanly.
- Arrange for Second Rise: Lightly grease a 9×13 inch (23×33 cm) baking dish. Arrange the sliced rolls cut-side up in the prepared dish, leaving a little space between each roll for them to expand.
Second Rise & Baking:
- Second Rise (Proofing): Cover the baking dish loosely with plastic wrap or a clean kitchen towel. Let the rolls rise again in a warm, draft-free place for another 30-45 minutes, or until they look visibly puffy and have nearly doubled in size.
- Preheat Oven: While the rolls are proofing, preheat your oven to 375°F (190°C).
- Bake: Bake the Banana Bread Sweet Rolls for 20-25 minutes, or until they are golden brown on top and cooked through. If they start to brown too quickly, you can loosely tent them with aluminum foil.
- Cool: Remove the rolls from the oven and let them cool in the baking dish for about 5-10 minutes while you prepare the glaze.
For the Cream Cheese Glaze:
- In a medium bowl, beat the softened cream cheese with softened unsalted butter until smooth and creamy.
- Gradually beat in the powdered sugar until fully incorporated and smooth.
- Add the vanilla extract and 1 tablespoon of milk (or cream). Beat until the glaze reaches a smooth, spreadable consistency. If it’s too thick, add more milk, a teaspoon at a time, until desired consistency is reached.
Glaze & Serve:
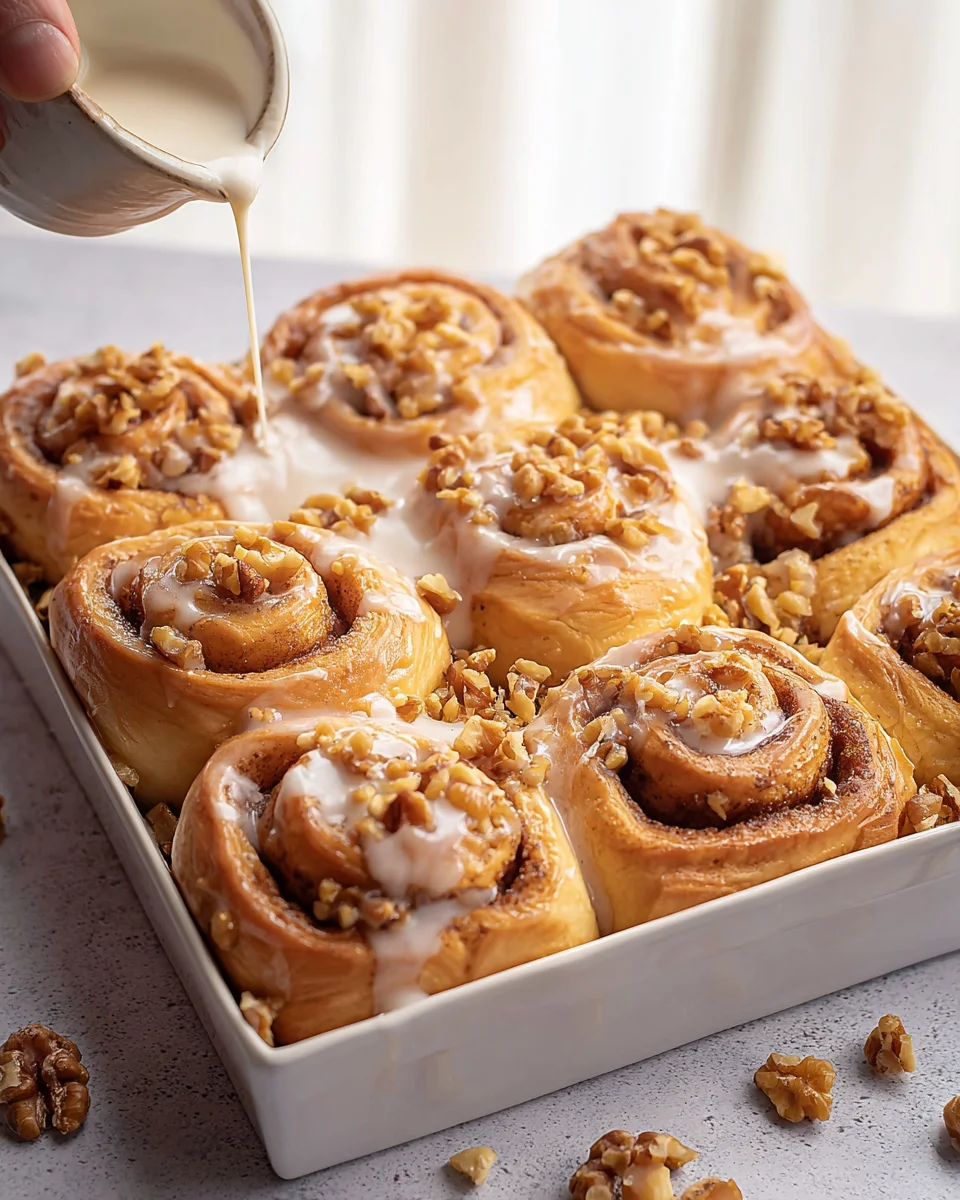
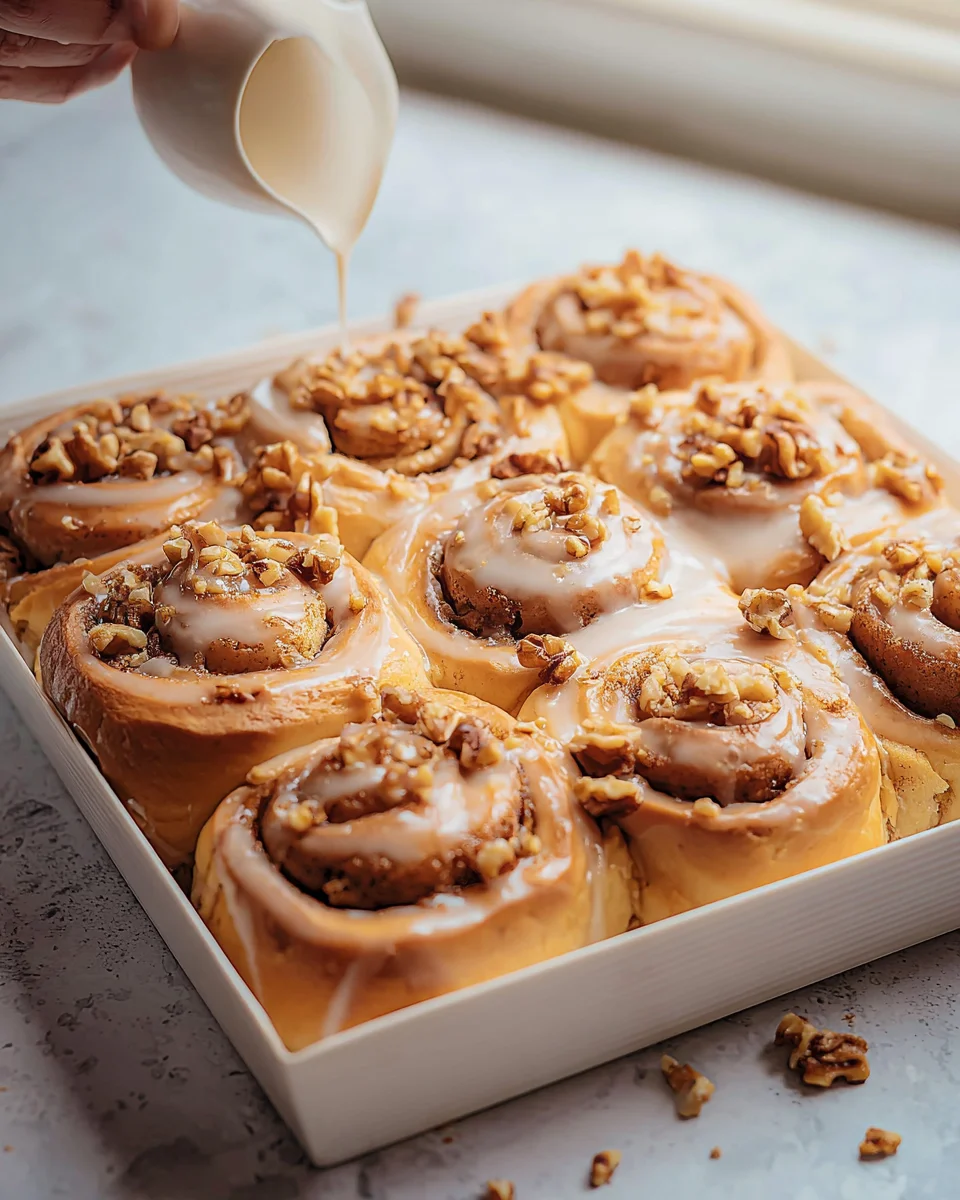
Once the rolls have cooled slightly, generously spread or drizzle the cream cheese glaze over the warm rolls. Serve immediately and enjoy the magic!
Tips & Suggestions
To ensure your Banana Bread Sweet Rolls are nothing short of spectacular, I’ve gathered a few of my favorite tips and tricks:
- Don’t Skimp on Ripeness: I cannot stress this enough – use very ripe bananas! They provide the best flavor, sweetness, and moisture. Under-ripe bananas will result in a less flavorful and potentially drier roll.
- Perfect Proofing Environment: Yeast loves warmth! If your kitchen is cool, you can proof your dough in a slightly warmed (but turned off) oven or microwave, or near a sunny window. A warm spot helps the dough rise beautifully.
- Avoid Over-Flouring: When kneading or rolling out the dough, resist the urge to add too much extra flour. A sticky dough is often a well-hydrated, tender dough. Just use enough to prevent sticking.
- Tight Roll is Key: When rolling the dough into a log, try to keep it as tight as possible. This prevents gaps in the final baked rolls and ensures a nice, swirly appearance.
- Floss for Flawless Slices: For perfectly clean, un-squashed rolls, dental floss (unflavored!) is your best friend. It slices through the dough without distorting its shape, unlike a knife which can sometimes drag and flatten the rolls.
- Don’t Overbake: Sweet rolls are best when they’re soft and tender. Bake until golden brown, but don’t let them get too dark or dry. A quick peek with a thermometer should show an internal temperature of around 190-200°F (88-93°C) if you’re unsure.
- Add Extras: Feel free to customize! A sprinkle of chopped walnuts or pecans, or even a few chocolate chips, can be added to the banana filling for extra texture and flavor.
Storage
These Banana Bread Sweet Rolls are best enjoyed fresh from the oven, but I understand leftovers happen!
- Room Temperature: Store any leftover rolls, covered loosely, at room temperature for up to 1-2 days.
- Refrigeration: Due to the cream cheese glaze, I recommend refrigerating them if keeping for longer. Store in an airtight container for up to 4-5 days.
- Reheating: To reheat, simply microwave individual rolls for 15-30 seconds, or warm them in a preheated oven at 300°F (150°C) for 5-10 minutes until warmed through and soft.
- Freezing: You can freeze baked and glazed rolls in an airtight container for up to 1 month. Thaw at room temperature or reheat from frozen. You can also freeze the unbaked rolls after the second proof. Place the pan in the freezer until solid, then transfer rolls to a freezer bag for up to 2-3 weeks. Thaw overnight in the fridge, then let rise at room temperature for an hour before baking as directed.
Final Thoughts
And there you have it! I truly hope you’re as excited as I am about these incredible Banana Bread Sweet Rolls. There’s something magical about taking the comforting flavors of homemade banana bread and transforming them into a warm, gooey, cinnamon-swirled sweet roll. The aroma alone as they bake is enough to make anyone’s day brighter!
These aren’t just any sweet rolls; they’re an experience. Imagine sinking your teeth into a tender, fluffy roll, bursting with the sweet, ripe banana flavor you love, complemented by a hint of cinnamon and a decadent glaze. They’re perfect for a leisurely weekend breakfast, a special brunch, or even an indulgent dessert. Trust me, every bit of effort you put into making these will be repaid tenfold by the sheer delight they bring.
So, please, give these Banana Bread Sweet Rolls a try! I promise you won’t regret it. They’re a delightful twist on a classic, creating a treat that’s utterly irresistible and sure to become a new favorite in your kitchen. Happy baking!

Banana Bread Sweet Rolls: Irresistible Breakfast Treat
- Total Time: 55 minutes
- Yield: 12 rolls
Description
These Banana Bread Sweet Rolls combine the comforting flavors of classic banana bread with the soft, pillowy texture of yeast rolls, all topped with a luscious cream cheese glaze. Perfect for breakfast or dessert, they are sure to become a new favorite!
Ingredients
- Very Ripe Bananas
- Active Dry Yeast
- Warm Milk
- All-Purpose Flour
- Unsalted Butter
- Brown Sugar
- Ground Cinnamon
- Salt
- Large Egg
- Granulated Sugar
- Cream Cheese
- Powdered Sugar
- Vanilla Extract
- Milk or Cream
Instructions
- In the bowl of your stand mixer (or a large mixing bowl if kneading by hand), gently warm your milk to 105-115°F (40-46°C). Sprinkle the active dry yeast and a teaspoon of granulated sugar over the warm milk. Stir gently, then let it sit for 5-10 minutes until it becomes foamy.
- To the foamy yeast mixture, add the remaining granulated sugar, softened unsalted butter (cut into pieces), large egg, and salt. Mix briefly with the dough hook attachment (or a spoon). Gradually add 3 cups of the all-purpose flour, mixing on low speed until a shaggy dough forms.
- Continue adding the remaining 1/2 cup of flour, a little at a time, until the dough comes together and pulls away from the sides of the bowl. Increase the mixer speed to medium-low and knead for 8-10 minutes, or until the dough is smooth, elastic, and passes the windowpane test.
- Lightly grease a large bowl with a little oil. Transfer the kneaded dough to the bowl, turning it once to coat. Cover the bowl tightly with plastic wrap or a clean kitchen towel. Let the dough rise in a warm, draft-free place for 1-1.5 hours, or until it has doubled in size.
- While the dough is rising, prepare your filling. In a medium bowl, thoroughly mash your very ripe bananas until mostly smooth. Stir in the melted unsalted butter, light brown sugar, ground cinnamon, and a pinch of salt until well combined. Set aside.
- Once the dough has doubled, gently punch it down to release the air. Turn the dough out onto a lightly floured surface.
- Using a rolling pin, roll the dough into a large rectangle, approximately 12×18 inches (30×45 cm) and about 1/4 inch thick.
- Evenly spread the banana filling over the entire surface of the rolled-out dough, leaving a small 1/2-inch border along one of the long edges.
- Starting from the long edge opposite the bare border, carefully and tightly roll the dough into a log. Pinch the seam closed to seal.
- Using a sharp, un-serrated knife or unflavored dental floss, gently slice the log into 12 equal rolls, each about 1.5 inches thick.
- Lightly grease a 9×13 inch (23×33 cm) baking dish. Arrange the sliced rolls cut-side up in the prepared dish, leaving a little space between each roll for them to expand.
- Cover the baking dish loosely with plastic wrap or a clean kitchen towel. Let the rolls rise again in a warm, draft-free place for another 30-45 minutes.
- While the rolls are proofing, preheat your oven to 375°F (190°C).
- Bake the Banana Bread Sweet Rolls for 20-25 minutes, or until they are golden brown on top and cooked through.
- Remove the rolls from the oven and let them cool in the baking dish for about 5-10 minutes while you prepare the glaze.
- In a medium bowl, beat the softened cream cheese with softened unsalted butter until smooth and creamy. Gradually beat in the powdered sugar until fully incorporated and smooth. Add the vanilla extract and 1 tablespoon of milk (or cream). Beat until the glaze reaches a smooth, spreadable consistency.
- Once the rolls have cooled slightly, generously spread or drizzle the cream cheese glaze over the warm rolls. Serve immediately.
- Prep Time: 30 mins
- Cook Time: 25 mins
- Category: Breakfast
- Method: Baking
- Cuisine: American
Nutrition
- Serving Size: 1 roll
- Calories: 250
- Sugar: 12 g
- Sodium: 150 mg
- Fat: 9 g
- Saturated Fat: 5 g
- Unsaturated Fat: 3 g
- Trans Fat: 0 g
- Carbohydrates: 38 g
- Fiber: 1 g
- Protein: 3 g
- Cholesterol: 30 mg
Keywords: Use very ripe bananas for the best flavor and moisture. Ensure your yeast is fresh and active for optimal rise.