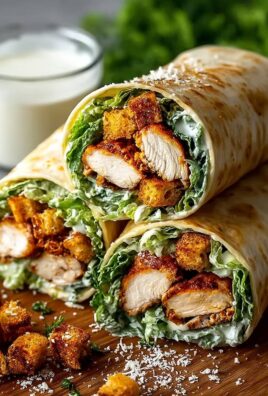
Beef Bacon Chicken Ranch Wraps Recipe
Oh my goodness, get ready to meet your new favorite quick meal or party snack! I’m so excited to share this Beef Bacon Chicken Ranch Wraps Recipe with you because it perfectly marries all those amazing flavors we crave – smoky beef bacon, juicy chicken, and a creamy, tangy ranch dressing – all wrapped up in a soft tortilla.
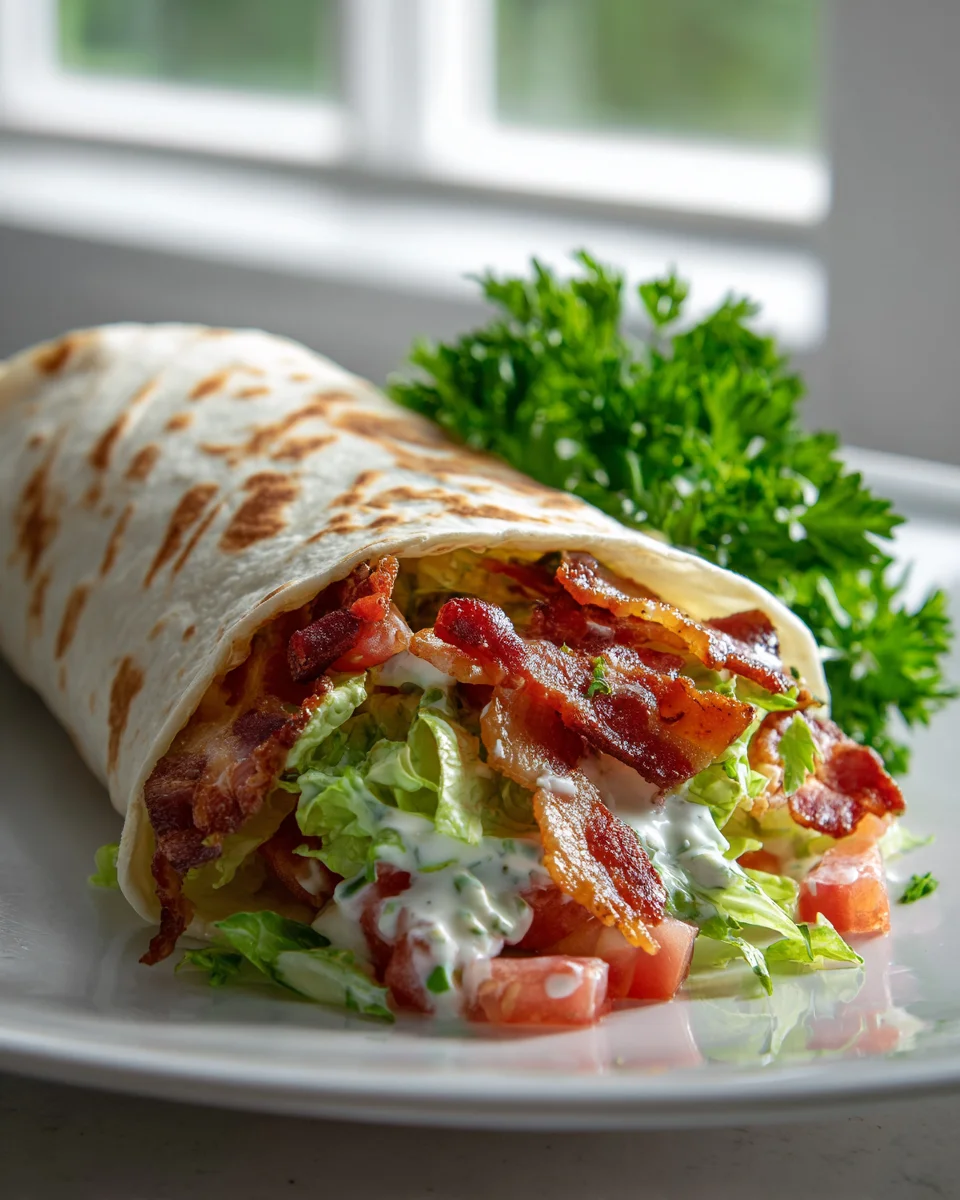
What makes these wraps truly special, you ask? It’s that irresistible combination of textures and tastes: the crispy, savory bite of beef bacon, the tender chicken, and that cool, refreshing kick of ranch, often paired with crisp lettuce or other fresh veggies. I absolutely adore how easily these come together, making them an ideal solution for a busy weeknight dinner, a fantastic lunchbox hero, or even a super popular appetizer for gatherings. Everyone, from the pickiest eaters to the most discerning foodies, seems to fall head over heels for these.
So, in a nutshell, we’re talking about incredibly satisfying wraps bursting with flavor. Imagine warm tortillas generously filled with perfectly cooked chicken, those irresistible strips of beef bacon, a generous swirl of your favorite ranch dressing, and whatever fresh additions your heart desires. Trust me, once you try these, you’ll be adding them to your regular rotation!
Ingredient Notes
Crafting the perfect Beef Bacon Chicken Ranch Wrap starts with understanding the star ingredients. Here, I’ll walk you through what you’ll need and some handy substitutions to keep things flexible and delicious!
- Cooked Chicken: This is the hearty base of our wraps. I prefer using boneless, skinless chicken breast, either shredded or diced into small, manageable pieces. You can cook it yourself by pan-frying, baking, or even poaching, then shredding it with two forks. For a super quick option, grab a rotisserie chicken from your local grocery store – it’s a fantastic time-saver and adds wonderful flavor. If chicken isn’t your preference, cooked turkey breast, a plant-based chicken alternative, or even leftover grilled steak can make for a delicious substitute.
- Beef Bacon: Now for the distinctive twist! We’re using beef bacon, which offers a robust, savory flavor and a delightful crispiness that complements the chicken perfectly. You’ll want to cook your beef bacon until it’s nice and crispy, then crumble it into small pieces. This ensures you get that fantastic smoky crunch in every bite. If you can’t find beef bacon, or prefer another option, turkey bacon is a good lean alternative, or even a plant-based bacon can work if you’re looking for a meat-free option.
- Ranch Dressing: What’s a Ranch Wrap without the ranch? This creamy, herby dressing is the glue that brings all the flavors together. Feel free to use your favorite store-bought brand, or if you’re feeling ambitious, whip up a batch of homemade ranch for an extra fresh taste. You can also experiment with different ranch variations, like a spicy chipotle ranch, a lighter low-fat ranch, or even a zesty dill ranch. If ranch isn’t quite your thing, a creamy Caesar dressing or even a blue cheese dressing could be interesting alternatives, though it would change the classic “ranch” profile.
- Large Flour Tortillas: For wraps, you need tortillas that are sturdy enough to hold all the delicious fillings without tearing. I always recommend using large, soft flour tortillas, typically 10-12 inches in diameter. These are easy to roll and fold. For a healthier option, whole wheat tortillas work wonderfully, or if you’re watching your carbs, there are many low-carb tortilla options available that are just as flexible.
- Shredded Lettuce: For that essential crunch and freshness, shredded lettuce is a must. I usually go for crisp romaine or iceberg lettuce. They both provide a great texture contrast to the creamy filling. You can also use baby spinach, mixed greens, or even finely shredded kale if you prefer a different green.
- Shredded Cheese: A generous sprinkle of cheese adds extra flavor and helps bind everything together. A sharp cheddar, Monterey Jack, or a blend like a Mexican four-cheese mix are all excellent choices. Feel free to use your favorite cheese or whatever you have on hand. Pepper Jack would also add a nice, subtle kick!
- Optional Add-ins: This is where you can truly customize your wraps! Some of my favorite additions include diced ripe tomatoes for a burst of freshness, thinly sliced red onion for a bit of sharp tang, or creamy avocado for extra richness. Diced bell peppers, corn kernels, or even a sprinkle of chopped fresh chives can also elevate the flavors.
Step-by-Step Instructions
Making these Beef Bacon Chicken Ranch Wraps is incredibly straightforward. Once you have all your ingredients prepped, it’s just a matter of assembling them. Here’s how I put mine together for maximum deliciousness:
- Prepare Your Chicken (if not pre-cooked): If you’re starting with raw chicken, cook your boneless, skinless chicken breast until it’s thoroughly done. You can pan-fry it, bake it, or poach it. Once cooked, let it cool slightly, then shred it with two forks or dice it into small, uniform pieces. Set aside.
- Cook the Beef Bacon: Place your beef bacon strips in a large skillet over medium heat. Cook, turning occasionally, until it’s deliciously crispy and golden brown. This usually takes about 5-8 minutes. Once crispy, remove the bacon to a plate lined with paper towels to drain any excess grease. Let it cool, then crumble it into small pieces.
- Warm Your Tortillas (Optional but Recommended): While not strictly necessary, gently warming your tortillas makes them more pliable and easier to roll without cracking. You can do this quickly in a dry skillet over medium heat for about 15-20 seconds per side, in the microwave for 10-15 seconds, or even briefly over an open gas flame.
- Assemble Your Wraps: Lay one warm tortilla flat on a clean surface or cutting board. I find it easiest to start by spreading a generous amount of ranch dressing evenly over the entire surface of the tortilla, leaving about an inch clear around the edges. This helps prevent filling overflow when rolling.
- Layer the Fillings: Now, it’s time to build your masterpiece! Arrange a line of shredded chicken just below the center of the tortilla. Don’t overfill, or it will be hard to roll. Next, sprinkle a good amount of your crumbled beef bacon over the chicken. Follow that with a layer of shredded cheese and then a handful of shredded lettuce. If you’re using any optional add-ins like diced tomatoes or avocado, layer them in now.
- Roll ’em Up: This is the crucial part! To roll, first fold in the left and right sides of the tortilla over the filling, just enough to cover the ends. Then, starting from the bottom edge (the one closest to you), tightly roll the tortilla upwards, tucking in the filling as you go. Keep it snug and secure to ensure everything stays inside.
- Serve Immediately: You can either serve your wraps whole or, for a more appealing presentation, slice them in half diagonally with a sharp knife. Enjoy your delicious Beef Bacon Chicken Ranch Wraps right away!
Tips & Suggestions
I’ve learned a few tricks over time that make these Beef Bacon Chicken Ranch Wraps even better. Here are my favorite tips and suggestions to help you get the most out of your wrap-making experience:
- Prep Ahead for Quick Meals: If you’re looking for a speedy lunch or dinner, do some prep work in advance. Cook and shred your chicken, cook and crumble your beef bacon, and chop any vegetables like lettuce, tomatoes, or onions a day or two beforehand. Store them in separate airtight containers in the refrigerator. When it’s mealtime, all you have to do is assemble!
- Don’t Overfill: It’s tempting to cram as much deliciousness as possible into your wrap, but resist the urge! Overfilling makes the wraps difficult to roll and prone to bursting. Aim for a balanced amount of each ingredient so you can achieve a nice, tight roll.
- Toast for Extra Crunch: For an extra layer of texture, you can lightly toast your assembled wrap. After rolling, place the wrap in a dry skillet over medium heat for 1-2 minutes per side, until the tortilla is golden brown and slightly crispy. This also helps seal the wrap and warms the fillings slightly.
- Customize Your Flavor Profile: Don’t be afraid to experiment with different flavors!
- For Heat Lovers: Drizzle a little hot sauce over the chicken, add some sliced jalapeños, or mix a pinch of cayenne pepper into your ranch dressing.
- Extra Veggies: Add thinly sliced bell peppers (red, yellow, or orange), shredded carrots, or even some finely chopped broccoli for more nutrients and crunch.
- Herbaceous Touch: A sprinkle of fresh dill, chives, or parsley can brighten up the flavors.
- Serving Suggestions: These wraps are quite filling on their own, but they pair wonderfully with a simple side.
- Serve them alongside a bowl of tomato soup or a light vegetable soup.
- A small side salad with a light vinaigrette makes for a complete and balanced meal.
- Crispy potato chips or sweet potato fries are also a popular choice for a more indulgent side.
- A bowl of fresh fruit provides a refreshing contrast.
- Kid-Friendly Adjustments: If you’re making these for children, you might want to adjust the ingredients. Keep the ranch mild, omit any spicy elements, and ensure the chicken pieces are small enough for easy chewing. Kids often love the interactive aspect of building their own wraps too!
Storage
When it comes to storing these Beef Bacon Chicken Ranch Wraps, I have a few pointers to ensure freshness and prevent sogginess. Generally, wraps are best enjoyed fresh, but you can certainly prepare components ahead of time.
- Assembled Wraps: I strongly recommend eating your Beef Bacon Chicken Ranch Wraps as soon as they are assembled. The moisture from the ranch dressing and other ingredients, especially the lettuce and tomatoes, can make the tortillas soggy over time. If you absolutely must store an assembled wrap for a short period (e.g., a few hours for a packed lunch), wrap it very tightly in plastic wrap or aluminum foil. Store it in the refrigerator. However, be aware that the texture will likely be softer than freshly made. Try to eat it within 2-3 hours for the best quality.
- Storing Individual Components (Best Option): For maximum freshness and convenience, I always prefer to store the cooked ingredients separately. This way, you can assemble a fresh wrap whenever you like, and everything will maintain its optimal texture.
- Cooked Chicken: Store shredded or diced cooked chicken in an airtight container in the refrigerator for up to 3-4 days.
- Cooked Beef Bacon: Crispy crumbled beef bacon can be stored in an airtight container in the refrigerator for up to 3-4 days. You can quickly reheat it in a dry skillet or microwave for a few seconds to crisp it up again if desired, though it’s perfectly fine cold in a wrap.
- Ranch Dressing: Keep your ranch dressing in a sealed container in the refrigerator according to its package instructions, typically for several weeks if store-bought, or 5-7 days if homemade.
- Vegetables: Store washed and shredded lettuce, diced tomatoes, and other chopped vegetables in separate airtight containers in the refrigerator. Lettuce will stay crisp for 3-5 days, while tomatoes are best used within 2-3 days.
- Shredded Cheese: Keep shredded cheese in a sealed bag or container in the refrigerator, where it will last for several weeks.
- Freezing: These wraps, or their components, are generally not suitable for freezing. The texture of the tortilla, lettuce, and ranch dressing will suffer significantly upon thawing, becoming watery and unappetizing. It’s always best to enjoy this recipe fresh or with prepped, refrigerated components.
Final Thoughts
And there you have it! I truly hope you’re feeling inspired to whip up a batch of these incredible Beef Bacon Chicken Ranch Wraps Recipe. What I love most about the Beef Bacon Chicken Ranch Wraps Recipe is how it masterfully brings together so many fantastic flavors into one satisfying, easy-to-handle package. The smoky richness of the beef bacon, the tender chicken, and that cool, creamy ranch dressing, all nestled in a soft tortilla – it’s a delightful symphony for your taste buds that you won’t want to miss.
This isn’t just another meal; it’s a go-to solution for busy weeknights when you need something quick and delicious, a perfect lunchbox hero that stands out from the crowd, or even a fun, easy option for entertaining friends. Trust me, once you experience the unique and satisfying combination of the Beef Bacon Chicken Ranch Wraps Recipe, you’ll find yourself coming back to it again and again. So, gather your ingredients and get ready to enjoy a truly delightful and unforgettable meal!

Delicious Beef Bacon Chicken Ranch Wraps Recipe
- Total Time: 30 minutes
- Yield: 4 servings
Description
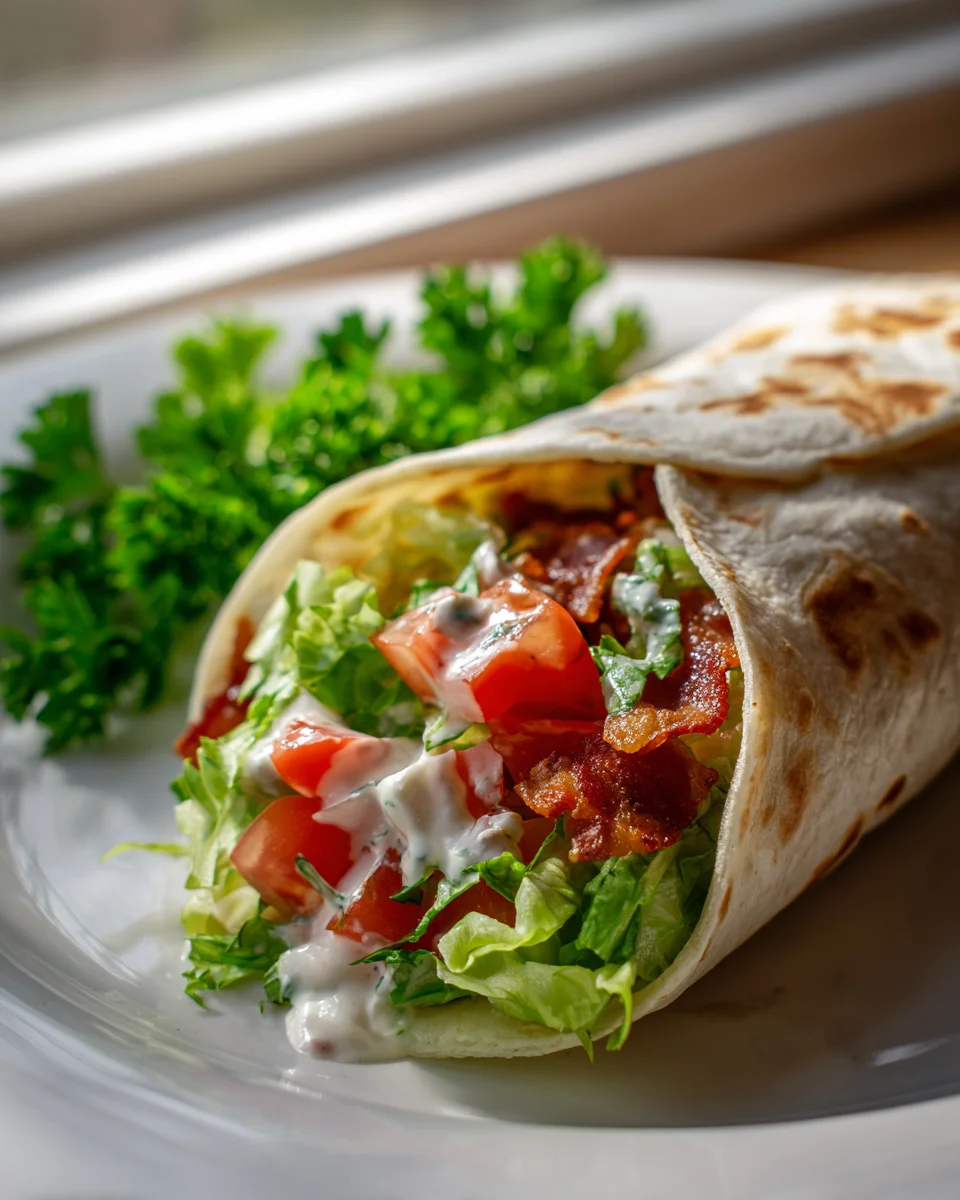
These Beef Bacon Chicken Ranch Wraps are a perfect blend of smoky beef bacon, juicy chicken, and creamy ranch dressing, all wrapped in a soft tortilla. Ideal for a quick meal or a party snack, they are sure to please everyone!
Ingredients
- Cooked Chicken (boneless, skinless chicken breast, shredded or diced)
- Beef Bacon (cooked until crispy and crumbled)
- Ranch Dressing
- Large Flour Tortillas (10-12 inches in diameter)
- Shredded Lettuce (romaine or iceberg)
- Shredded Cheese (sharp cheddar, Monterey Jack, or a Mexican four-cheese blend)
- Optional Add-ins (diced ripe tomatoes, thinly sliced red onion, creamy avocado, diced bell peppers, corn kernels, chopped fresh chives)
Instructions
- Prepare Your Chicken (if not pre-cooked): Cook your boneless, skinless chicken breast until thoroughly done. Let it cool slightly, then shred it with two forks or dice it into small, uniform pieces. Set aside.
- Cook the Beef Bacon: Place beef bacon strips in a large skillet over medium heat. Cook until crispy and golden brown, about 5-8 minutes. Remove to a plate lined with paper towels to drain excess grease and crumble into small pieces.
- Warm Your Tortillas (Optional but Recommended): Gently warm your tortillas in a dry skillet over medium heat for about 15-20 seconds per side, in the microwave for 10-15 seconds, or briefly over an open gas flame.
- Assemble Your Wraps: Lay one warm tortilla flat on a clean surface. Spread a generous amount of ranch dressing evenly over the tortilla, leaving about an inch clear around the edges.
- Layer the Fillings: Arrange a line of shredded chicken just below the center of the tortilla. Sprinkle crumbled beef bacon over the chicken, then add shredded cheese and a handful of shredded lettuce. Add any optional add-ins now.
- Roll 'em Up: Fold in the left and right sides of the tortilla over the filling, then tightly roll the tortilla upwards, tucking in the filling as you go.
- Serve Immediately: Serve your wraps whole or slice them in half diagonally with a sharp knife.
- Prep Time: 15 mins
- Cook Time: 15 mins
- Category: Dinner
- Method: Cooking
- Cuisine: American
Nutrition
- Serving Size: 1 wrap
- Calories: 450
- Sugar: 2 g
- Sodium: 800 mg
- Fat: 25 g
- Saturated Fat: 10 g
- Unsaturated Fat: 10 g
- Trans Fat: 0 g
- Carbohydrates: 35 g
- Fiber: 3 g
- Protein: 30 g
- Cholesterol: 90 mg
Keywords: Prep ahead by cooking and shredding chicken, crumbling beef bacon, and chopping vegetables in advance. Don't overfill the wraps to avoid bursting. Optionally, toast the assembled wrap for extra crunch.