• Skip to primary navigation
  • Skip to main content
  • Skip to primary sidebar
Homesmad

Homesmad

  • Home
  • Breakfast & Brunch
  • Appetizers & Snacks
  • Dinner
  • Dessert
  • About
  • Privacy Policy
  • Contact
Homesmad
  • Home
  • Breakfast & Brunch
  • Appetizers & Snacks
  • Dinner
  • Dessert
  • About
  • Privacy Policy
  • Contact

Best Banana Cake Recipe: Incredibly Moist & Easy to Bake!

December 4, 2025 by Lily author

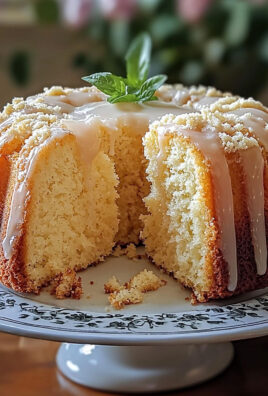
Best Banana Cake – that’s a bold claim, isn’t it? But allow me to convince you that the recipe I am about to share truly delivers on this promise. Imagine walking into your kitchen, greeted by the warm, sweet aroma of ripe bananas baking, mingled with hints of cinnamon and vanilla. Picture a slice so incredibly moist it practically melts in your mouth, its rich, comforting flavor perfectly balanced, perhaps crowned with a tangy, luscious cream cheese frosting. It’s a sensory experience that promises pure delight with every single bite.

This beloved dessert has a fascinating, humble origin, often credited with finding its stride during the Great Depression in America. Resourceful home bakers, faced with the need to prevent food waste, discovered that overripe bananas, otherwise destined for the compost bin, lent incredible moisture and natural sweetness to baked goods. What began as a practical solution evolved into a timeless classic, a staple in homes and bakeries alike, cherished for its simplicity and unparalleled deliciousness.

People adore banana cake for countless reasons. It’s not just the irresistible taste, the dense yet tender crumb, or the unparalleled convenience of transforming humble, overlooked fruit into something extraordinary. It’s also the nostalgia it evokes, a taste of home and comfort that transcends generations. When you seek that ultimate balance of sweetness, moisture, and pure banana goodness, you are truly looking for the

Best Banana Cake recipe.

And I am delighted to guide you towards making it your new signature dessert!

Best Banana Cake Recipe: Incredibly Moist & Easy to Bake! this RECIPE

Ingredients:

  • For the Best Banana Cake:
    • 2 ½ cups (300g) all-purpose flour
    • 1 ½ teaspoons baking soda
    • ½ teaspoon salt
    • 1 teaspoon ground cinnamon (optional, but highly recommended for depth)
    • ½ teaspoon ground nutmeg (optional, enhances the banana flavor beautifully)
    • 1 cup (226g) unsalted butter, softened to room temperature
    • 1 ¾ cups (350g) granulated sugar
    • 2 large eggs, at room temperature
    • 1 teaspoon pure vanilla extract
    • 1 cup (240g) full-fat sour cream, at room temperature (or plain Greek yogurt for a slightly tangier result)
    • 1 ½ cups (about 3-4 medium) very ripe bananas, mashed (ensure they are very spotty and brown for maximum sweetness and flavor)
    • ½ cup (60g) chopped walnuts or pecans (optional, but adds a delightful crunch)
  • For the Tangy Cream Cheese Frosting:
    • 8 oz (226g) full-fat cream cheese, softened to room temperature
    • ½ cup (113g) unsalted butter, softened to room temperature
    • 4 cups (480g) powdered sugar (confectioners’ sugar), sifted
    • 1 teaspoon pure vanilla extract
    • 2-3 tablespoons whole milk or heavy cream (adjust as needed for desired consistency)
    • Pinch of salt (balances the sweetness)

Prepping Your Workspace & Ingredients for the Best Banana Cake

  1. Prepare Your Baking Pans: Before you even think about mixing, it’s crucial to get your pans ready. I always use two 9-inch round cake pans for this recipe, but you could also opt for a 9×13 inch pan or even a bundt pan, adjusting baking time accordingly. Generously grease your chosen pans with butter or baking spray. Then, flour them by adding a tablespoon or two of flour, tilting and tapping the pan to coat all surfaces evenly, then tapping out any excess. For an extra layer of non-stick insurance and easy removal, you can also line the bottoms with parchment paper after greasing and before flouring. This meticulous preparation is a small but mighty step towards ensuring your beautiful Best Banana Cake layers come out perfectly every single time, without sticking or tearing. This careful approach sets the stage for a truly delightful baking experience and helps achieve the ideal texture and rise, making the final cake utterly irresistible.
  2. Preheat Your Oven: Set your oven temperature to 350°F (175°C). Allowing your oven to fully preheat before placing the cake batter in is essential for proper leavening and even baking. Placing batter into a cold oven can result in a dense, unevenly cooked cake that doesn’t rise as well. Give your oven at least 15-20 minutes to reach and stabilize at the desired temperature. An accurately preheated oven ensures that the leavening agents in the batter activate correctly from the moment the cake enters, contributing to that perfectly moist and fluffy texture we’re aiming for in the Best Banana Cake.
  3. Gather and Measure Everything: This is a golden rule in baking, often called “mise en place.” Take out all your ingredients and measure them precisely. Ensure your butter, eggs, and sour cream are at room temperature. This is not just a suggestion; it’s vital. Room temperature ingredients emulsify much better, meaning they combine more smoothly and evenly, leading to a lighter, more uniform cake texture. Cold ingredients can cause your batter to curdle and affect the final rise, resulting in a less tender cake. Mash your very ripe bananas now; the riper they are, the sweeter and more flavorful your cake will be, contributing significantly to the reputation of this being the Best Banana Cake. Overly green or firm bananas won’t yield the same depth of flavor or moisture. The natural sugars in very ripe bananas caramelize beautifully during baking, deepening the flavor profile.

Mixing the Cake Batter for Your Best Banana Cake

  1. Whisk Dry Ingredients: In a medium bowl, combine your all-purpose flour, baking soda, salt, ground cinnamon (if using), and ground nutmeg (if using). Use a whisk to thoroughly combine these ingredients for about 30 seconds to a minute. This step isn’t just about mixing; it’s about aerating the flour and ensuring that the leavening agents (baking soda) and spices are evenly distributed throughout. This prevents pockets of unmixed ingredients, which could lead to an uneven rise or concentrated pockets of leavener, and contributes to an even rise and consistent flavor in your finished cake. Set this bowl aside for a moment, ready for integration into the wet ingredients.
  2. Cream Butter and Sugar: In the large bowl of a stand mixer fitted with the paddle attachment (or using a hand mixer), add your softened unsalted butter and granulated sugar. Beat them together on medium-high speed for about 3 to 5 minutes. You’re looking for a transformation here: the mixture should become noticeably light, fluffy, and pale in color. This process, known as creaming, incorporates air into the butter and sugar crystals, which creates tiny air pockets that expand during baking, making your cake wonderfully light, tender, and airy. Don’t rush this step; it’s fundamental to the light, moist texture of the Best Banana Cake. Scrape down the sides of the bowl occasionally with a rubber spatula to ensure everything is evenly creamed and no butter or sugar remains stuck to the bottom or sides.
  3. Add Eggs and Vanilla: With the mixer still running on medium speed, add the two large eggs one at a time, beating well after each addition. Allow each egg to be fully incorporated into the butter and sugar mixture before adding the next. This ensures maximum emulsification, where the fat and liquid combine smoothly. Once both eggs are in and combined, stir in the pure vanilla extract. The mixture might look a little curdled at this point, which is perfectly normal due to the addition of liquid from the eggs to the creamed butter and sugar; don’t worry, it will come together beautifully as you add the dry and wet ingredients in the next steps. Continue mixing until the vanilla is fully incorporated and the mixture is well blended.
  4. Incorporate Wet and Dry Ingredients Alternately: This is a crucial technique for a perfectly structured cake that is both moist and tender.

    The Alternating Method for a Tender Crumb:

    Start by adding about one-third of the dry ingredient mixture to the wet ingredients in the mixer bowl. Mix on low speed just until barely combined, no longer than 15-20 seconds. Then, add half of the sour cream (or Greek yogurt) and mix on low speed until just incorporated. Repeat this process: add another third of the dry ingredients, mix briefly, then the remaining half of the sour cream, mix, and finally the last third of the dry ingredients.
    A key tip here: Do not overmix! Overmixing develops the gluten in the flour, which can lead to a tough, dense, and dry cake, diminishing the desired tenderness. Mix only until the streaks of flour disappear, usually stopping the mixer when a few streaks are still visible and finishing by hand. The final mixture should be just combined, not vigorously beaten. This gentle approach helps maintain the tender crumb that makes this truly the Best Banana Cake. Scrape down the bowl between additions to ensure homogeneity.

  5. Fold in Bananas and Optional Nuts: Remove the bowl from the mixer. With a rubber spatula, gently fold in your mashed ripe bananas. This ensures they are evenly distributed throughout the batter without overworking the mixture, which is critical for maintaining tenderness. If you’re using chopped walnuts or pecans, now is the time to fold those in as well. The nuts add a lovely textural contrast, a subtle nutty flavor, and a delightful crunch that complements the sweet, moist banana perfectly. Continue folding until everything is just incorporated, taking care not to crush the nuts too much or mash the bananas excessively at this stage, as they are already soft. A few gentle folds are all it takes to integrate them seamlessly.
  6. Divide Batter: Divide the luscious cake batter evenly between your two prepared 9-inch round cake pans. You can eyeball it, or for precise layers, use a kitchen scale to ensure each pan has the exact same weight of batter. This helps ensure even baking, consistent rise, and layers that stack beautifully without one being significantly thicker or thinner than the other. Gently tap the pans on the counter a couple of times to release any large air bubbles that might be trapped within the batter, which can lead to large holes in your finished cake.

Baking Your Best Banana Cake

  1. Bake the Cake Layers: Carefully transfer the cake pans to your preheated oven. Bake for approximately 28-35 minutes for round layers, or until a wooden skewer or toothpick inserted into the center of the cakes comes out clean or with only a few moist crumbs attached. Baking times can vary based on your oven’s calibration, the specific pans you used, and even the humidity in your kitchen, so start checking at the 28-minute mark. The tops should be golden brown, lightly domed, and spring back lightly when gently pressed in the center. The aroma filling your kitchen at this stage is truly heavenly – a sure sign you’re creating the Best Banana Cake. Avoid opening the oven door too frequently during baking, especially in the first 20 minutes, as this can cause the cakes to fall.
  2. Cool the Cakes: Once baked, remove the cakes from the oven and let them cool in their pans on a wire rack for about 10-15 minutes. This initial cooling period allows the cakes to firm up slightly and finish cooking internally, making them less fragile and easier to handle. Attempting to remove them too soon can cause them to break apart. This slight resting period helps them settle and release from the pan more cleanly.
  3. Invert and Fully Cool: After the initial cooling, carefully invert the cakes onto the wire rack. If you used parchment paper, peel it off gently now. Allow the cakes to cool completely to room temperature before frosting them. This step is critical! Attempting to frost warm cakes will cause your frosting to melt and slide right off, creating a messy situation and potentially ruining your beautiful presentation. Patience is a virtue here, and a fully cooled cake is key to a professional-looking and tasting Best Banana Cake. You can even wrap cooled layers tightly in plastic wrap and refrigerate them for a few hours or overnight; chilling makes them even firmer and easier to handle and frost, and some bakers believe it can even enhance the cake’s flavor.

Preparing the Tangy Cream Cheese Frosting

  1. Cream Cheese and Butter: In the clean bowl of your stand mixer (or using a hand mixer), combine the softened cream cheese and softened unsalted butter. Beat them together on medium speed for 2-3 minutes until the mixture is completely smooth, light, and free of any lumps. It’s absolutely essential that both the cream cheese and butter are at room temperature to achieve this silky smooth texture. Cold ingredients will result in a lumpy, inconsistent frosting that is difficult to spread. Stop and scrape down the sides and bottom of the bowl frequently with a rubber spatula to ensure everything is uniformly incorporated and no unmixed bits remain. This forms the creamy, rich base for our delightful frosting.
  2. Add Vanilla and Salt: Stir in the pure vanilla extract and the pinch of salt. Mix on low speed until just combined. The vanilla adds warmth and depth to the flavor, while the salt is a secret weapon that helps to cut through the richness and sweetness of the sugar, creating a more balanced and palatable frosting that perfectly complements the rich banana cake. It brightens all the flavors.
  3. Gradually Add Powdered Sugar: With the mixer on low speed, gradually add the sifted powdered sugar, about a cup at a time. Mixing on low speed helps prevent a cloud of sugar dust from coating your kitchen and yourself! Once all the sugar has been added, increase the speed to medium-high and beat for another 2-3 minutes. The frosting should become wonderfully fluffy, smooth, and noticeably lighter in texture. Again, remember to scrape down the sides of the bowl periodically to ensure all the sugar is incorporated and no dry spots remain. Beat until the frosting is light and airy.
  4. Adjust Consistency with Milk/Cream: If your frosting appears too thick, or if you prefer a softer, more spreadable consistency, add the whole milk or heavy cream one tablespoon at a time, beating after each addition, until you reach your desired spreading consistency. Some prefer a very thick, pipeable frosting, while others like it a bit softer and easier to spread over the cake layers. Be careful not to add too much liquid too quickly, as it can make the frosting too thin and runny. This rich, tangy, and sweet frosting is the perfect counterpart to our moist and flavorful Best Banana Cake, adding a delightful creamy finish.

Assembling and Decorating Your Best Banana Cake

  1. Level the Cake Layers (Optional but Recommended): If your cake layers have domed tops, you might want to level them using a long, serrated knife or a specialized cake leveling tool. This creates flat surfaces, making your cake much easier to stack and frost evenly, resulting in a more professional and visually appealing appearance for your homemade Best Banana Cake. Save the trimmed scraps for a little chef’s snack – they’re delicious!
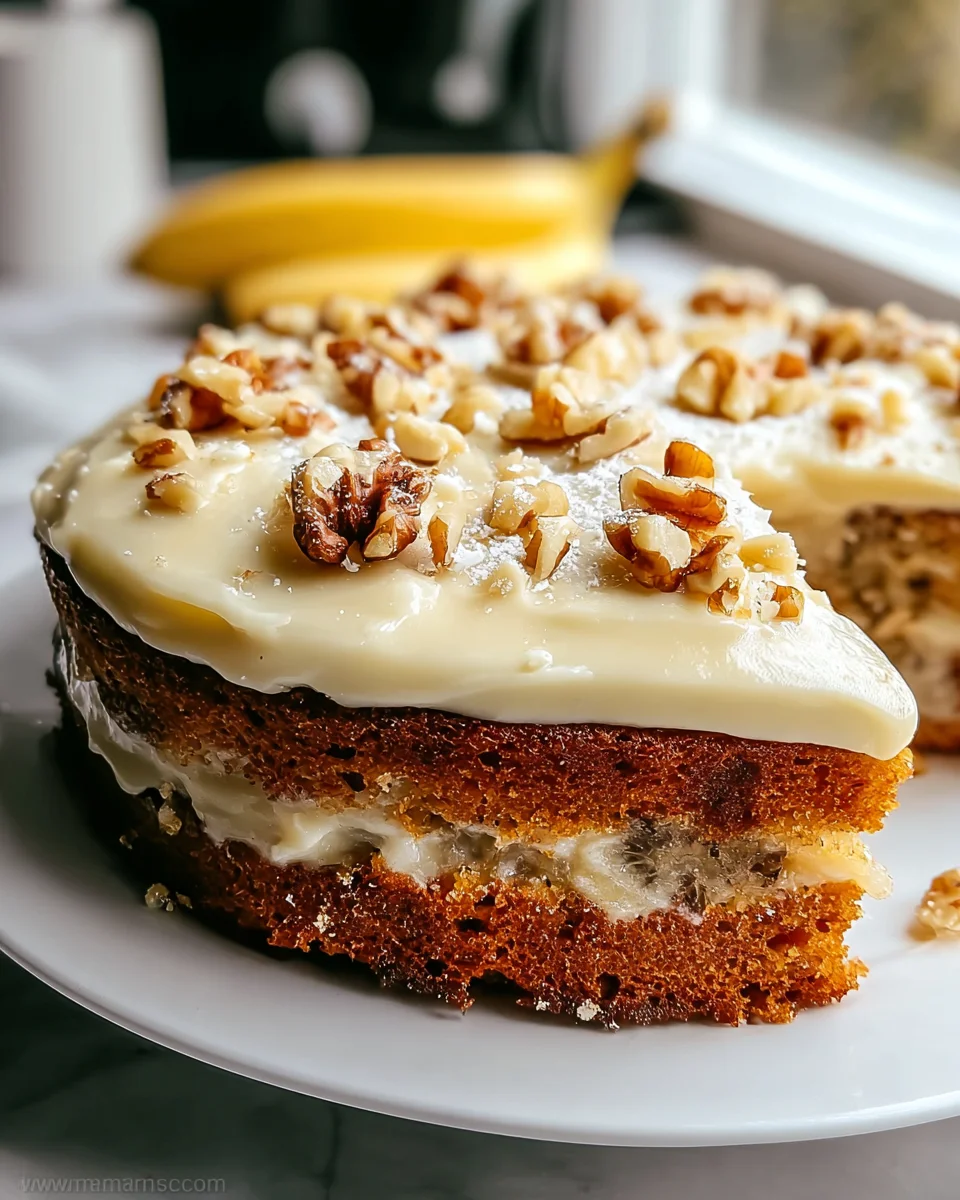
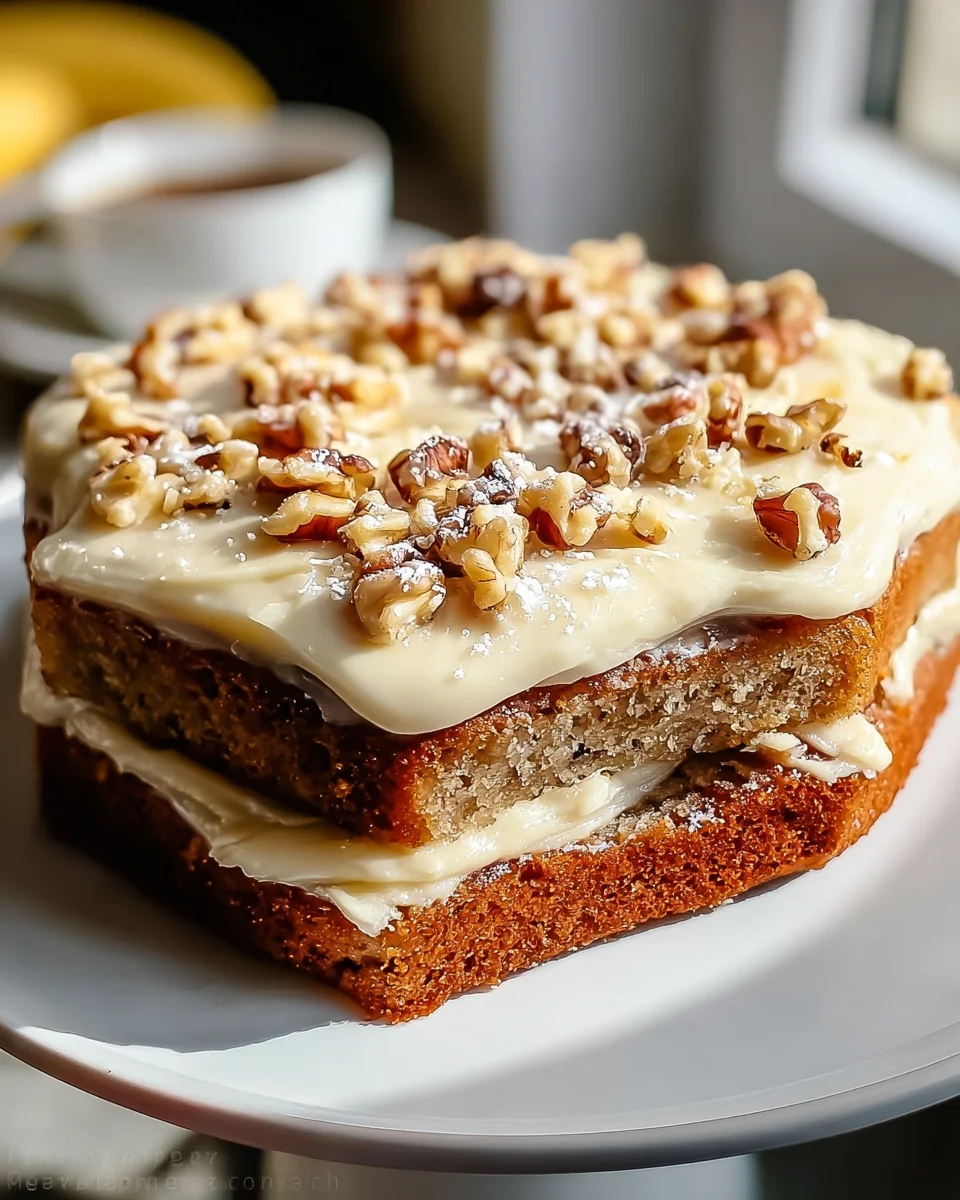
  2. First Layer and Frosting: Place one completely cooled cake layer on your serving platter, cake stand, or a turntable if you have one. Spread about one-third to half of the prepared cream cheese frosting evenly over the top of this layer, extending almost to the edges. Use an offset spatula or the back of a spoon to create a smooth surface.
  3. Stack Second Layer: Carefully place the second cake layer directly on top of the first, aligning it as best as possible. Gently press down to secure it and ensure the layers are level. If the top layer seems a bit wobbly, you can trim a tiny bit off the bottom for a more stable base.
  4. Crumb Coat (Optional but Highly Recommended): Apply a very thin layer of frosting all over the top and sides of the entire stacked cake. This “crumb coat” is essential for trapping any loose crumbs that might come off the cake, preventing them from mixing into your final, pristine decorative layer of frosting. It’s a game-changer for achieving a clean, professional-looking finish. Once applied, refrigerate the cake for 15-20 minutes to allow the crumb coat to set and firm up. This step, though seemingly minor and requiring a little extra patience, significantly elevates the presentation of your Best Banana Cake.
  5. Final Frosting Layer: Once the crumb coat is set and firm to the touch, remove the cake from the refrigerator. Use the remaining frosting to generously cover the top and sides of the cake. Use an offset spatula, a bench scraper, or a butter knife to spread the frosting smoothly and evenly around the cake, or create decorative swirls and patterns. Feel free to be creative with your design! You can make smooth sides, textured swirls, or even pipe decorative borders if you’re feeling ambitious.
  6. Garnish and Serve: For an extra touch of elegance and flavor, you can garnish the top of your Best Banana Cake. A sprinkle of extra chopped walnuts or pecans, a dusting of cinnamon, or even some thinly sliced fresh banana rounds (tossed in a little lemon juice to prevent browning) make beautiful additions. You could also shave a bit of dark chocolate over the top. Serve slices at room temperature to fully appreciate the moistness and flavors, and enjoy the fruits of your labor! This cake is incredibly moist, flavorful, and perfectly balanced, truly living up to its name as the Best Banana Cake you’ll ever bake.

Best Banana Cake Recipe: Incredibly Moist & Easy to Bake!

Conclusion:

If there’s one recipe I urge you to add to your baking repertoire, it’s this one. We’ve talked through the process, and I truly believe that the result is nothing short of spectacular. This isn’t just another banana cake recipe; it’s a revelation of flavor and texture, a perfect storm of moist crumb, rich banana essence, and subtle sweetness that will utterly captivate anyone who takes a bite. It’s a recipe designed to be effortlessly delicious, yielding consistent results every single time, making it truly the Best Banana Cake you will ever bake. From the moment those ripe bananas hit the batter, you’re on a journey to a profoundly satisfying dessert that feels both familiar and extraordinary. The incredible aroma that fills your kitchen as it bakes is merely a prelude to the delightful experience waiting for you. It’s that comforting scent of home, warmth, and delicious anticipation all rolled into one. I know you’re going to love how wonderfully easy it is to bring such a magnificent treat to life, transforming humble ingredients into something truly special.

The sheer simplicity of the ingredients, combined with straightforward steps, ensures that even novice bakers can achieve bakery-quality results. There’s an undeniable joy in creating something so utterly delicious from scratch, and this cake delivers that joy in spades. Imagine the satisfaction of serving a slice of this heavenly creation to your loved ones, watching their faces light up with pure delight. It’s more than just a cake; it’s an edible hug, a slice of happiness that brightens any day. Whether you’re celebrating a special occasion, hosting friends for a casual get-together, or simply treating yourself to a well-deserved moment of indulgence, this banana cake fits every scenario perfectly. Its robust flavor profile holds up beautifully, whether served warm from the oven or enjoyed chilled the next day, making it an incredibly versatile dessert.

Now, let’s talk about enhancing this masterpiece. While this cake is absolutely divine on its own, there are myriad ways to serve it that elevate the experience even further. My personal favorite is a generous dollop of homemade cream cheese frosting, its tangy sweetness providing the perfect counterpoint to the cake’s richness. Alternatively, a simple dusting of powdered sugar offers an elegant presentation, allowing the cake’s inherent deliciousness to shine through unimpeded. For a touch of decadence, try drizzling it with a warm caramel sauce or a scoop of vanilla bean ice cream that slowly melts into the moist cake. It’s also fantastic paired with your morning coffee or afternoon tea, transforming a simple beverage break into a luxurious treat. Don’t shy away from serving it alongside a handful of fresh berries like raspberries or blueberries; their slight tartness offers a refreshing contrast.

Furthermore, feel free to experiment with variations to make this recipe uniquely your own. For those who love a bit of crunch, folding in a cup of chopped walnuts or pecans into the batter before baking adds a wonderful textural dimension. Chocolate lovers will be thrilled by the addition of milk, dark, or even white chocolate chips, which melt into gooey pockets of joy. A dash of cinnamon or nutmeg can enhance the warm, inviting spices already present in the cake, deepening its comforting flavor. If you’re feeling adventurous, you could even try incorporating a handful of shredded coconut for a tropical twist, or some dried cranberries for a touch of tartness and chewiness. This recipe is incredibly forgiving and adaptable, so let your culinary creativity take the reins! You can bake it in a loaf pan for easy slicing, or as cupcakes for individual portions, adjusting baking times accordingly.

So, I implore you: don’t just read about this incredible cake; go ahead and bake it! Gather your ingredients, put on your apron, and prepare to create something truly magical. I have full confidence that you will fall in love with this recipe just as much as I have. It’s an experience from start to finish, culminating in a dessert that will earn you rave reviews and requests for more. Once you’ve baked your batch of this glorious banana cake, I would absolutely love to hear about your experience. Did you add any unique twists? How did your family and friends react? Please share your stories, your triumphs, and even your photos! Baking is about connection and sharing, and I can’t wait to see how this wonderful recipe becomes a cherished favorite in your home. Happy baking, my friends!


Best Banana Cake Recipe: Incredibly Moist & Easy to Bake!

Discover how to bake the best banana cake, celebrated for its incredible moisture and rich, comforting flavor. This recipe transforms overripe bananas into a tender, delightful dessert, perfectly complemented by a tangy cream cheese frosting.

Prep Time
45 Minutes
Cook Time
35 Minutes
Total Time
20 Minutes
Servings
12-16 servings

Ingredients


Instructions


Important Information

Nutrition Facts (Per Serving)

It is important to consider this information as approximate and not to use it as definitive health advice.

Allergy Information

Please check ingredients for potential allergens and consult a health professional if in doubt.

« Previous Post
Crispy Angel Cake Churro Bites: A Sweet Twist on Dessert
Next Post »
Crispy Deep Fried Strawberry Cheesecake Wonton Bites

If you enjoyed this…

Irresistibly Tender Festive Candy Cane Cookies Recipe

Christmas Sugar Cookie Shots Recipe – Perfect Holiday Treat!

Peanut Butter Chocolate Pie: The Ultimate Decadent Dessert

Primary Sidebar

Browse by Diet

BreakfastDinnerLunchDessertAppetizer

Sweet Peach Yogurt Parfait Delight

One of my fondest memories is from a lazy summer afternoon spent at my grandmother’s house. The sun filtered through the kitchen window, casting a warm glow over the table where she would create her culinary magic. It was during one of those blissful moments that I first tasted her Peach Yogurt Parfait with Honey and Granola. The sweet aroma of ripe peaches mingling with creamy yogurt and the crunch of granola was nothing short of heavenly. It felt like summer captured in a bowl, and I still remember the joy of diving in with a spoon, each layer revealing a new burst of flavor.

When I think about that parfait, I can almost hear the gentle hum of the bees outside, reminding me of the floral notes that honey brings to every bite. The vibrant yellows and soft oranges of the peaches contrast beautifully with the creamy white yogurt and the golden crunch of granola. It’s a dish that not only looks delightful but also tastes like a celebration of fresh, wholesome ingredients.

What makes my version of this Peach Yogurt Parfait special is the careful balance of flavors and textures. I use ripe, juicy peaches, drizzled with locally sourced honey, and a homemade granola that’s bursting with nuts and seeds for an extra crunch. It’s a simple dish, but every layer is crafted with love and attention.

Let me show you exactly how to make this delightful parfait, so you can bring a bit of that summer magic into your kitchen!

Sweet Peach Yogurt Parfait Delight

Why You’ll Love This Recipe

  • Delightfully creamy texture from the Greek yogurt, paired with the juicy sweetness of fresh peaches.
  • Ready in under 20 minutes, making it a quick and satisfying breakfast or snack option.
  • Budget-friendly, using common ingredients that you may already have in your pantry.
  • Customizable with your favorite granola and nuts, allowing you to tailor each parfait to your taste.
  • Perfectly balanced flavors with the bright acidity of lemon juice and the sweetness of honey enhancing the peaches.

Ingredients

  • For the Parfait:
  • 2 cups plain Greek yogurt (or vanilla yogurt for a sweeter option)
  • 2 large ripe peaches, diced (about 2 cups)
  • 1 tablespoon fresh lemon juice (to prevent browning of peaches)
  • 2 tablespoons honey (plus more for drizzling)
  • 1 teaspoon vanilla extract (optional for extra flavor)
  • For the Granola:
  • 1 cup granola (store-bought or homemade; see notes for a simple granola recipe)
  • 1/4 cup sliced almonds (optional for added crunch)
  • 1/4 cup shredded coconut (optional for added flavor)

Let’s dive into some key ingredients that make this Peach Yogurt Parfait so delightful! First, the Greek yogurt is not only creamy but also packed with protein, making it a satisfying option for breakfast or a snack. If you’re looking for a sweeter option, you can easily substitute it with vanilla yogurt, though it may alter the overall flavor balance. Next, the ripe peaches are the star of the show; their natural sweetness shines through, so I recommend choosing peaches that yield slightly to pressure, indicating they’re perfectly ripe. If peaches aren’t in season, feel free to use nectarines or even frozen peaches—just thaw them before use. Finally, honey adds a lovely floral sweetness that ties everything together. If you prefer, maple syrup can serve as a delicious substitute.

Step-by-Step Instructions

  1. Start by preparing the peaches. Wash them thoroughly, then slice and dice them into bite-sized pieces. In a medium bowl, toss the diced peaches with 1 tablespoon of fresh lemon juice to prevent browning. Set aside for about 5 minutes while the lemon juice works its magic.
  2. In a separate bowl, combine the Greek yogurt, 2 tablespoons of honey, and 1 teaspoon of vanilla extract if using. Stir the mixture until smooth and thoroughly blended. This should take about a minute. Avoid overmixing to maintain the creaminess of the yogurt.
  3. Now it’s time to layer your parfait. Grab a clear glass or bowl to showcase your beautiful creation. Start with a generous spoonful of the yogurt mixture at the bottom—about 1/4 cup will do. Use a spoon to spread it evenly.
  4. Add a layer of the diced peaches over the yogurt, ensuring they cover the yogurt completely. You might want to use about half of what you have prepared—roughly 1 cup. This layer should be visually appealing, so arrange the peaches neatly.
  5. Sprinkle 1/4 cup of granola over the peaches. This adds a delightful crunch. Make sure to distribute it evenly to ensure every bite has that satisfying texture. Avoid packing it down too tightly, as you want it to maintain its crunch.
  6. Repeat the layers: spoon in another 1/4 cup of yogurt, followed by another cup of peaches, and another sprinkle of granola. You should have at least two layers, but feel free to add more depending on your glass size.
  7. Finish off your parfait with a drizzle of honey on top for added sweetness and a touch of elegance. If you’re using sliced almonds or shredded coconut, sprinkle them on top now. It adds a lovely visual contrast and extra flavor.
  8. Serve immediately or refrigerate for up to 30 minutes before serving to allow the flavors to meld together. However, I recommend enjoying it fresh to maintain the granola’s crunch.

Pro Tips for the Best Peach Yogurt Parfait With Honey And Granola

  • Make sure to choose ripe peaches for the best flavor and texture. A common mistake is using unripe fruit, which can lead to a less enjoyable parfait. Look for peaches that are fragrant and slightly soft to the touch.
  • Use a clear glass to assemble your parfait; this not only makes for a beautiful presentation but also allows you to see the colorful layers, which adds to the enjoyment of eating it.
  • For an even creamier texture, consider whipping the Greek yogurt with a hand mixer for a couple of minutes before layering. This small adjustment makes a huge difference in mouthfeel.
  • Be mindful of the granola-to-yogurt ratio. Too much granola can overwhelm the parfait, while too little can make it feel too creamy. Aim for about 1/4 cup of granola per layer for the perfect balance.
  • If you’re making this for a gathering, consider preparing the yogurt and peaches ahead of time and layering them just before serving. This ensures the granola stays crunchy!

Variations & Serving Ideas

There are so many ways to get creative with your Peach Yogurt Parfait! For a tropical twist, swap out the peaches for mangoes or pineapples and top with coconut flakes. If you prefer a berry flavor, mix in some blueberries or strawberries with the peaches for added color and taste. For a nutty version, incorporate chopped walnuts or pecans instead of almonds.

As for serving ideas, this parfait pairs beautifully with a side of scrambled eggs for a hearty breakfast or fresh fruit salad for a light lunch. You might also enjoy it alongside whole grain toast with almond butter for an energizing snack. The contrast of flavors and textures will elevate your meal experience!

Storage, Make-Ahead & Reheating

The Peach Yogurt Parfait is best enjoyed fresh, but you can prepare some components ahead of time. Store the layered parfait in an airtight container in the refrigerator for up to 24 hours. However, be cautious; the granola may lose its crunch if stored too long. You can freeze the yogurt and peach mixture for up to 2 months; just remember to thaw it in the refrigerator overnight before serving.

If you plan to enjoy this dish the next day, it can taste even better as the flavors meld together. Just remember to add the granola right before serving to keep its delightful crunch!

Frequently Asked Questions

Can I make Peach Yogurt Parfait With Honey And Granola ahead of time?

Yes — in fact, it tastes even better the next day as the flavors meld. However, I recommend waiting to add the granola until just before serving to maintain its crunch.

What can I substitute for Greek yogurt?

If you prefer a lighter option, you can substitute Greek yogurt with regular yogurt or a dairy-free alternative like coconut yogurt. Just remember that this may alter the creaminess and flavor profile slightly.

Can I use frozen peaches for this parfait?

Absolutely! Just make sure to thaw the frozen peaches before using them. They will still add great flavor, though the texture may be slightly softer than fresh peaches.

How do I make the parfait vegan?

To make a vegan version, substitute the Greek yogurt with a plant-based yogurt alternative, and replace honey with maple syrup or agave nectar. This keeps the parfait sweet while adhering to a vegan diet.

What other fruits can I use in this recipe?

You can mix and match fruits based on your preference. Try using strawberries, blueberries, raspberries, or even bananas. Just make sure to adjust the lemon juice as needed to prevent browning.

Sweet Peach Yogurt Parfait Delight

Final Thoughts

The Peach Yogurt Parfait with Honey and Granola is a delightful blend of creamy yogurt, sweet peaches, and crunchy granola that creates a satisfying and nourishing treat. Each layer bursts with flavor, making it a perfect choice for breakfast or a light dessert.

This is the kind of recipe I come back to again and again, especially when I want something refreshing and wholesome to start my day. The harmony of sweet and tart flavors, combined with the delightful crunch, never fails to lift my spirits!

I encourage you to give this parfait a try and indulge in its comforting goodness. Feel free to share your results or even add your own twist—perhaps a sprinkle of cinnamon or a handful of nuts. Enjoy creating your perfect parfait!

Print
clock clock iconcutlery cutlery iconflag flag iconfolder folder iconinstagram instagram iconpinterest pinterest iconfacebook facebook iconprint print iconsquares squares iconheart heart iconheart solid heart solid icon

Peach Yogurt Parfait


  • Author: Lily author
  • Total Time: 15 minutes
  • Yield: 4 servings 1x
Pin Recipe
Print Recipe

Description

This Peach Yogurt Parfait combines creamy Greek yogurt, juicy peaches, and crunchy granola for a delightful treat. It’s a perfect breakfast or snack that captures the essence of summer in every bite.


Ingredients

Scale
  • For the Parfait:
  • 2 cups plain Greek yogurt (or vanilla yogurt for a sweeter option)
  • 2 large ripe peaches, diced (about 2 cups)
  • 1 tablespoon fresh lemon juice (to prevent browning of peaches)
  • 2 tablespoons honey (plus more for drizzling)
  • 1 teaspoon vanilla extract (optional for extra flavor)
  • For the Granola:
  • 1 cup granola (store-bought or homemade; see notes for a simple granola recipe)
  • 1/4 cup sliced almonds (optional for added crunch)
  • 1/4 cup shredded coconut (optional for added flavor)

Instructions

  1. Start by preparing the peaches. Wash them thoroughly, then slice and dice them into bite-sized pieces. In a medium bowl, toss the diced peaches with 1 tablespoon of fresh lemon juice to prevent browning. Set aside for about 5 minutes while the lemon juice works its magic.
  2. In a separate bowl, combine the Greek yogurt, 2 tablespoons of honey, and 1 teaspoon of vanilla extract if using. Stir the mixture until smooth and thoroughly blended. This should take about a minute. Avoid overmixing to maintain the creaminess of the yogurt.
  3. Now it’s time to layer your parfait. Grab a clear glass or bowl to showcase your beautiful creation. Start with a generous spoonful of the yogurt mixture at the bottom—about 1/4 cup will do. Use a spoon to spread it evenly.
  4. Add a layer of the diced peaches over the yogurt, ensuring they cover the yogurt completely. You might want to use about half of what you have prepared—roughly 1 cup. This layer should be visually appealing, so arrange the peaches neatly.
  5. Sprinkle 1/4 cup of granola over the peaches. This adds a delightful crunch. Make sure to distribute it evenly to ensure every bite has that satisfying texture. Avoid packing it down too tightly, as you want it to maintain its crunch.
  6. Repeat the layers: spoon in another 1/4 cup of yogurt, followed by another cup of peaches, and another sprinkle of granola. You should have at least two layers, but feel free to add more depending on your glass size.
  7. Finish off your parfait with a drizzle of honey on top for added sweetness and a touch of elegance. If you’re using sliced almonds or shredded coconut, sprinkle them on top now. It adds a lovely visual contrast and extra flavor.
  8. Serve immediately or refrigerate for up to 30 minutes before serving to allow the flavors to meld together. However, I recommend enjoying it fresh to maintain the granola’s crunch.
  • Prep Time: 15 mins
  • Cook Time: 0 mins
  • Category: Breakfast
  • Method: No-cook
  • Cuisine: American

Nutrition

  • Serving Size: 1 parfait
  • Calories: 250
  • Sugar: 20 g
  • Sodium: 50 mg
  • Fat: 5 g
  • Saturated Fat: 2 g
  • Unsaturated Fat: 3 g
  • Trans Fat: 0 g
  • Carbohydrates: 40 g
  • Fiber: 3 g
  • Protein: 10 g
  • Cholesterol: 10 mg

Keywords: Choose ripe peaches for the best flavor and texture. Use a clear glass for a beautiful presentation. For creaminess, consider whipping the yogurt before layering. Be mindful of the granola-to-yogurt ratio. Prepare yogurt and peaches ahead of time for gatherings, layering just before serving.

Did you make this recipe?

Share a photo and tag us — we can't wait to see what you've made!

Sun-Kissed Frozen Orange Cream Slush

As a child, summer days felt like they lasted forever. I remember the sticky heat wrapping around me as I played outside, my laughter mingling with the sounds of the neighborhood. But nothing could cool me down quite like the moment I’d spot my grandmother, laboring over her blender, whipping up her famous Frozen Orange Creamsicle Slush. That vibrant orange treat, with its frosty texture and sweet citrus aroma, was like a burst of sunshine in a cup. Just one sip, and I could feel the coolness wash over me, sparking pure joy.

This Frozen Orange Creamsicle Slush has a way of making you feel like a kid again. Its creamy, dreamy consistency is a delightful balance of bright orange and soft vanilla, inviting you to dive right in. The refreshing tang of orange dances on your tongue, while the smooth creaminess envelops you in a comforting embrace. It’s a nostalgic treat that’s perfect for hot summer afternoons or anytime you need a little pick-me-up.

What makes my version of this slush stand out is the addition of a hint of vanilla bean, which elevates the flavor and adds an extra layer of richness. Plus, it’s super easy to whip up with just a few simple ingredients that you probably already have on hand! So, if you’re ready to relive those sun-soaked memories, let me show you exactly how to make it.

Sun-Kissed Frozen Orange Cream Slush

Why You’ll Love This Recipe

  • Each slush is a perfect blend of creamy vanilla and zesty orange, creating a nostalgic flavor reminiscent of summer days.
  • This refreshing treat is ready in under 15 minutes, making it an ideal quick dessert for unexpected guests or hot afternoons.
  • With just 8 simple ingredients, it’s budget-friendly, ensuring you don’t have to break the bank to enjoy a delicious slush.
  • The slush has a perfectly smooth texture, thanks to the combination of ice and ice cream, providing a delightful contrast to the bright citrus flavors.
  • It’s highly customizable; you can easily adjust the sweetness and add fresh herbs for a unique twist that suits your taste.

Ingredients

  • 2 cups orange juice (freshly squeezed or store-bought)
  • 1 cup vanilla ice cream
  • 1 cup crushed ice
  • 1/2 cup milk (whole or 2%)
  • 1/4 cup granulated sugar (adjust based on sweetness preference)
  • 1 teaspoon vanilla extract
  • Zest of 1 orange (for added flavor)
  • Fresh orange slices and mint leaves (for garnish)

The star of this Frozen Orange Creamsicle Slush is the orange juice, which provides the vibrant, citrusy base. Freshly squeezed juice will yield the brightest flavor, but store-bought options can be just as convenient. If you’re opting for store-bought, choose 100% pure juice with no added sugars for the best results. Another essential ingredient is the vanilla ice cream; it adds creaminess and sweetness. You can substitute it with dairy-free ice cream if you’re looking for a vegan option. Whole or 2% milk complements the ice cream, creating a smooth blend. If you want a lower-calorie version, almond or oat milk can be good alternatives.

Lastly, the granulated sugar can be adjusted based on your sweetness preference. If you prefer a more natural sweetener, consider using honey or agave syrup. The orange zest enhances the flavor profile, providing an aromatic pop that brings the whole slush together. Don’t skip it! It adds an extra layer of brightness that makes this slush truly special.

Step-by-Step Instructions

  1. Start by preparing your ingredients. Gather 2 cups of orange juice, 1 cup of vanilla ice cream, and 1 cup of crushed ice. Make sure the ice is finely crushed, as larger chunks can make blending difficult.
  2. In a blender, combine the orange juice, vanilla ice cream, crushed ice, and 1/2 cup of milk. Add 1/4 cup of granulated sugar and 1 teaspoon of vanilla extract. If you like a sweeter slush, consider adding a bit more sugar at this stage.
  3. Add the zest of 1 orange to the blender. This step is crucial for enhancing the citrus flavor of your slush. Make sure not to include the bitter white pith—only the flavorful zest.
  4. Blend the mixture on medium-high speed for about 30-45 seconds. Stop once the ingredients are fully combined and the slush has a smooth, even consistency. If you notice large chunks of ice, blend for an additional 10-15 seconds. Avoid over-blending, as this can make the slush too liquidy.
  5. Once blended, taste the slush. If it needs more sweetness, add a little more sugar and blend for a few more seconds. If it’s too thick, you can add a splash of milk to reach your desired consistency.
  6. Pour the slush into glasses. This recipe typically serves 4, but you can easily double it for larger gatherings. Use a spoon to help guide the slush into the glasses if needed.
  7. Garnish each serving with fresh orange slices and mint leaves. The mint not only adds a pop of color but also a refreshing aroma that complements the citrus flavors beautifully.
  8. Serve immediately and enjoy! If you’ve made extra, you can refrigerate it for a short time, but it’s best enjoyed fresh.

Pro Tips for the Best Frozen Orange Creamsicle Slush

  • Don’t skip the orange zest! It’s a game-changer for flavor. Always zest before juicing to make it easier.
  • Use a high-powered blender for the best texture. A standard blender may struggle with ice, leading to uneven consistency. If you have a food processor, that can work too, but ensure the ice is finely crushed.
  • Adjust the ice-to-liquid ratio carefully. If your slush is too thick, it won’t blend well. Start with less ice and add more until you reach your preferred texture.
  • Be cautious with the sugar! Always start with the lower amount, as you can easily add more, but it’s hard to fix an overly sweet slush.
  • For a fun twist, consider adding a splash of coconut milk or a handful of fresh fruit like strawberries or pineapple. This not only enhances the flavor but also adds a beautiful color contrast.

Variations & Serving Ideas

There are countless ways to put a spin on your Frozen Orange Creamsicle Slush. Consider making a tropical version by adding in some pineapple juice or coconut milk for a delightful tropical twist. If you’re feeling adventurous, try incorporating a handful of frozen mango or peach slices for added sweetness. For a lighter version, swap out the vanilla ice cream for Greek yogurt for a creamy yet tangy alternative.

As for serving ideas, this refreshing slush pairs wonderfully with light summer dishes like grilled chicken skewers, fish tacos, or a simple salad topped with citrus vinaigrette. The bright, zesty flavors of the slush complement these dishes perfectly, making them an ideal pairing for a sunny day.

Storage, Make-Ahead & Reheating

This Frozen Orange Creamsicle Slush is best enjoyed fresh, but if you have leftovers, you can store them in an airtight container in the fridge for up to 2 days. Just keep in mind that the slush may lose some of its texture over time as the ice melts. It doesn’t freeze well, as the ice will turn into a solid block. If you must freeze it, blend again after thawing to restore the slushy consistency. This treat is best the day you make it, as the flavors meld together beautifully overnight, enhancing its deliciousness.

Frequently Asked Questions

Can I make Frozen Orange Creamsicle Slush ahead of time?

Yes — in fact, it tastes even better the next day as the flavors meld. However, it’s best to enjoy it fresh, as the texture can change if stored for too long. If you need to prepare it ahead, keep it in the fridge and re-blend before serving.

What kind of orange juice should I use?

For the best flavor, use freshly squeezed orange juice. However, if you’re short on time, opt for 100% pure store-bought juice without added sugars. This will ensure that your slush remains flavorful and refreshing.

Can I substitute the vanilla ice cream?

Absolutely! If you’re looking for a dairy-free option, coconut milk ice cream or a non-dairy vanilla ice cream can work wonderfully. They will still provide the creamy texture and sweetness you desire.

How can I adjust the sweetness of my slush?

You can easily adjust the sweetness by modifying the amount of sugar added. Start with 1/4 cup and taste the mixture before blending. If you prefer it sweeter, add more sugar gradually until it reaches your desired level.

What should I do if my slush is too thick?

If your slush is too thick, simply add a splash of milk or orange juice and blend again. This will help achieve a more drinkable consistency while maintaining the slushy texture. Adjust gradually to reach your preferred thickness.

Sun-Kissed Frozen Orange Cream Slush

Final Thoughts

The Frozen Orange Creamsicle Slush is a delightful blend of refreshing citrus and creamy goodness, making it a perfect treat for warm days or any time you crave a taste of nostalgia. The way the bright orange flavor dances with the creamy texture truly elevates this slush, transforming it into a satisfying escape from the everyday.

This is the kind of recipe I come back to again and again, especially when I’m looking to cool down or impress guests at a summer gathering. It’s simple to make and always brings smiles all around! I encourage you to try this recipe for yourself—don’t hesitate to share your results or even put your own spin on it. Happy slushing!

Print
clock clock iconcutlery cutlery iconflag flag iconfolder folder iconinstagram instagram iconpinterest pinterest iconfacebook facebook iconprint print iconsquares squares iconheart heart iconheart solid heart solid icon

Frozen Orange Creamsicle Slush


  • Author: Lily author
  • Total Time: 15 minutes
  • Yield: 4 servings 1x
Pin Recipe
Print Recipe

Description

This Frozen Orange Creamsicle Slush is a refreshing treat that combines creamy vanilla and zesty orange flavors. Perfect for hot summer days, it brings back nostalgic memories with every sip.


Ingredients

Scale
  • 2 cups orange juice (freshly squeezed or store-bought)
  • 1 cup vanilla ice cream
  • 1 cup crushed ice
  • 1/2 cup milk (whole or 2%)
  • 1/4 cup granulated sugar (adjust based on sweetness preference)
  • 1 teaspoon vanilla extract
  • Zest of 1 orange (for added flavor)
  • Fresh orange slices and mint leaves (for garnish)

Instructions

  1. Start by preparing your ingredients. Gather 2 cups of orange juice, 1 cup of vanilla ice cream, and 1 cup of crushed ice. Make sure the ice is finely crushed, as larger chunks can make blending difficult.
  2. In a blender, combine the orange juice, vanilla ice cream, crushed ice, and 1/2 cup of milk. Add 1/4 cup of granulated sugar and 1 teaspoon of vanilla extract. If you like a sweeter slush, consider adding a bit more sugar at this stage.
  3. Add the zest of 1 orange to the blender. This step is crucial for enhancing the citrus flavor of your slush. Make sure not to include the bitter white pith—only the flavorful zest.
  4. Blend the mixture on medium-high speed for about 30-45 seconds. Stop once the ingredients are fully combined and the slush has a smooth, even consistency. If you notice large chunks of ice, blend for an additional 10-15 seconds. Avoid over-blending, as this can make the slush too liquidy.
  5. Once blended, taste the slush. If it needs more sweetness, add a little more sugar and blend for a few more seconds. If it’s too thick, you can add a splash of milk to reach your desired consistency.
  6. Pour the slush into glasses. This recipe typically serves 4, but you can easily double it for larger gatherings. Use a spoon to help guide the slush into the glasses if needed.
  7. Garnish each serving with fresh orange slices and mint leaves. The mint not only adds a pop of color but also a refreshing aroma that complements the citrus flavors beautifully.
  8. Serve immediately and enjoy! If you’ve made extra, you can refrigerate it for a short time, but it's best enjoyed fresh.
  • Prep Time: 15 min
  • Cook Time: 0 min
  • Category: Dessert
  • Method: Blending
  • Cuisine: American

Nutrition

  • Serving Size: 1 serving
  • Calories: 200
  • Sugar: 30 g
  • Sodium: 50 mg
  • Fat: 5 g
  • Saturated Fat: 3 g
  • Unsaturated Fat: 2 g
  • Trans Fat: 0 g
  • Carbohydrates: 40 g
  • Fiber: 1 g
  • Protein: 2 g
  • Cholesterol: 20 mg

Keywords: Don't skip the orange zest! It's a game-changer for flavor. Always zest before juicing to make it easier.

Did you make this recipe?

Share a photo and tag us — we can't wait to see what you've made!

Zesty Lemon Poppy Seed Delight

One rainy afternoon, I found myself in my grandmother’s cozy kitchen, the kind that always smelled like warmth and love. She was whipping up her famous Lemon Poppy Seed Loaf, a recipe that had been passed down through generations. As the batter came together, the zesty aroma of fresh lemons filled the air, mingling perfectly with the nutty fragrance of poppy seeds. I can still picture her, apron-clad, as she expertly drizzled a vibrant citrus icing over the loaf, creating a glossy, sun-kissed finish that beckoned us to dive in. It was a moment that sparked my own passion for baking, and this recipe has become a cherished staple in my home ever since.

When you take a bite of this Lemon Poppy Seed Loaf, it’s like a burst of sunshine on your palate. The loaf is beautifully golden, with a tender crumb that melts in your mouth. Each slice is speckled with tiny poppy seeds, adding a delightful crunch that contrasts beautifully with the tangy sweetness of the lemon. And that citrus icing? It’s the finishing touch that elevates this loaf from ordinary to extraordinary, with its bright, zesty flavor dancing on your taste buds.

This recipe stands out because it embraces simplicity while delivering on flavor. I’ve added a hint of vanilla to the batter, enhancing the overall taste and making it even more indulgent. Trust me, once you make this Lemon Poppy Seed Loaf With Citrus Icing, it’ll become a go-to in your baking repertoire.

So, let me show you exactly how to make it!

Zesty Lemon Poppy Seed Delight

Why You’ll Love This Recipe

  • Moist and tender crumb that melts in your mouth, thanks to the perfect balance of butter and buttermilk.
  • Bright, zesty lemon flavor paired with crunchy poppy seeds, creating a delightful texture and taste experience.
  • Easy to whip up in just about an hour, perfect for last-minute gatherings or a cozy afternoon treat.
  • Budget-friendly with everyday ingredients, making it an accessible option for all home bakers.
  • The citrus icing adds a sweet tang that elevates the loaf, turning a simple recipe into a showstopper!

Ingredients

  • 1 ½ cups (190g) all-purpose flour
  • 1 teaspoon baking powder
  • ½ teaspoon baking soda
  • ½ teaspoon salt
  • 3 tablespoons poppy seeds
  • ½ cup (115g) unsalted butter, softened to room temperature
  • 1 cup (200g) granulated sugar
  • 2 large eggs
  • 1 teaspoon vanilla extract
  • 1 teaspoon lemon zest (from about 1 medium lemon)
  • ½ cup (120ml) buttermilk
  • 2 tablespoons fresh lemon juice

For the Citrus Icing:

  • 1 cup (120g) powdered sugar
  • 2 tablespoons fresh lemon juice
  • 1 tablespoon orange juice
  • 1 teaspoon lemon zest (for garnish, optional)

Let’s dive into the key ingredients that make this Lemon Poppy Seed Loaf so special. The all-purpose flour provides the structure and base for the loaf, while the baking powder and baking soda ensure it rises perfectly, giving the loaf a light texture. For a gluten-free variation, you could substitute the flour with a gluten-free all-purpose blend. Poppy seeds not only add a delightful crunch but also contribute to the unique flavor profile that pairs well with the citrus notes.

Unsalted butter is crucial for achieving the buttery richness that makes this loaf so moist. If you’re looking for a dairy-free option, coconut oil or a vegan butter can be used instead. The buttermilk is another essential component, providing acidity that activates the baking soda for a fluffy texture. If you don’t have buttermilk on hand, you can easily make a substitute by mixing ½ cup of milk with 1 tablespoon of vinegar or lemon juice and letting it sit for about 5 minutes.

Step-by-Step Instructions

  1. Preheat your oven to 350°F (175°C). Grease a 9×5-inch loaf pan or line it with parchment paper for easy removal later.
  2. In a medium mixing bowl, whisk together 1 ½ cups of all-purpose flour, 1 teaspoon of baking powder, ½ teaspoon of baking soda, ½ teaspoon of salt, and 3 tablespoons of poppy seeds. This helps to evenly distribute the baking agents and ensures a uniform rise.
  3. In a large mixing bowl, cream together ½ cup of softened unsalted butter and 1 cup of granulated sugar using an electric mixer on medium speed for about 3-4 minutes, until the mixture is light and fluffy. Make sure to scrape down the sides of the bowl occasionally.
  4. Add 2 large eggs, 1 teaspoon of vanilla extract, and 1 teaspoon of lemon zest to the creamed butter and sugar, mixing until fully combined. You want a smooth consistency, so ensure there are no lumps of butter.
  5. In a small bowl, combine ½ cup of buttermilk and 2 tablespoons of fresh lemon juice. Alternately add the dry ingredients and buttermilk mixture to the butter mixture, starting and ending with the dry ingredients. Mix just until combined; do not overmix, as this can lead to a dense loaf.
  6. Pour the batter into the prepared loaf pan. Smooth the top with a spatula, ensuring it’s even. Bake in the preheated oven for 50-60 minutes, or until a toothpick inserted in the center comes out clean. The edges should be lightly golden brown, and the center should feel just set.
  7. Once baked, remove the loaf from the oven and allow it to cool in the pan for about 10 minutes. Then, transfer it to a wire rack to cool completely. Resist the urge to slice too soon, as it will be crumbly if it’s still warm.
  8. While the loaf is cooling, prepare the citrus icing. In a medium bowl, whisk together 1 cup of powdered sugar, 2 tablespoons of fresh lemon juice, and 1 tablespoon of orange juice until smooth. If the icing is too thick, you can add a little more juice to reach your desired consistency.
  9. Once the loaf is completely cool, drizzle the citrus icing over the top. If you like, sprinkle with an additional teaspoon of lemon zest for an extra pop of flavor and color.

Pro Tips for the Best Lemon Poppy Seed Loaf With Citrus Icing

  • Be careful not to overmix your batter; this is a common mistake that can lead to a dense loaf. Mix just until the dry ingredients are incorporated for a light and fluffy texture.
  • Use room temperature ingredients, especially the butter and eggs. This helps to create a smoother batter and ensures even baking. Take your eggs out of the fridge about 30 minutes before you start.
  • For a more pronounced lemon flavor, consider adding a little lemon extract in addition to the zest and juice. Just a half teaspoon can elevate the citrus notes significantly.
  • When measuring your flour, spoon it into the measuring cup and level it off with a knife instead of scooping directly from the bag. This prevents packing and ensures you don’t end up with a dry loaf.
  • Invest in a good quality loaf pan; it makes a difference in heat distribution, which ensures even baking. If your pan is dark-coated, reduce the oven temperature by 25°F to prevent over-browning.

Variations & Serving Ideas

For a delightful twist, consider adding blueberries or raspberries to the batter for a fruity burst of flavor. You can also experiment with different citrus fruits—try lime or grapefruit zest and juice for a refreshing change. For a healthier option, substitute half of the all-purpose flour with whole wheat flour for added fiber without compromising too much on texture.

This Lemon Poppy Seed Loaf pairs beautifully with a light salad, such as a mixed greens salad with a vinaigrette, or a cup of tea for a cozy afternoon treat. It also complements a creamy cheese platter, as the acidity of the loaf balances rich cheeses perfectly. Lastly, a scoop of vanilla ice cream on the side creates a delightful contrast of temperatures and flavors!

Storage, Make-Ahead & Reheating

This Lemon Poppy Seed Loaf can be stored at room temperature for up to 3 days if wrapped tightly in plastic wrap. If you want to keep it longer, it freezes well for up to 3 months. To freeze, wrap the loaf tightly in plastic wrap and then in aluminum foil to prevent freezer burn.

When you’re ready to enjoy it again, simply thaw it in the fridge overnight. Reheat individual slices in the microwave for 15-20 seconds or in a toaster oven until warmed through. Interestingly, many people find that this loaf tastes even better the next day, as the flavors have time to meld!

Frequently Asked Questions

Can I make Lemon Poppy Seed Loaf With Citrus Icing ahead of time?

Yes — in fact, it tastes even better the next day! You can make the loaf a day in advance, allowing the flavors to develop. Just be sure to store it in an airtight container to maintain its moisture.

Can I substitute the poppy seeds?

Absolutely! If you don’t have poppy seeds on hand or prefer an alternative, you can use sesame seeds for a similar crunch or omit them entirely for a smooth loaf.

What can I use instead of buttermilk?

If you don’t have buttermilk, you can easily create a substitute by mixing ½ cup of milk (dairy or plant-based) with 1 tablespoon of vinegar or lemon juice. Let it sit for 5 minutes before using in the recipe.

How can I make this recipe gluten-free?

To make a gluten-free version of this Lemon Poppy Seed Loaf, substitute the all-purpose flour with a gluten-free all-purpose flour blend. Just ensure that the blend contains a binding agent like xanthan gum for the best results.

What is the best way to store leftover loaf?

Leftover Lemon Poppy Seed Loaf should be stored in an airtight container at room temperature for up to 3 days. For longer storage, wrap it tightly and freeze for up to 3 months. Thaw it before serving for the best texture.

Zesty Lemon Poppy Seed Delight

Final Thoughts

The Lemon Poppy Seed Loaf with Citrus Icing is truly a delightful treat that brings a burst of brightness to any occasion. The zesty lemon flavor combined with the subtle crunch of poppy seeds creates a satisfying balance, while the citrus icing adds a touch of sweetness that perfectly complements the loaf’s tanginess.

This is the kind of recipe I come back to again and again, especially when I want to brighten up a gloomy day or celebrate a small victory. The aroma that fills the kitchen as it bakes is absolutely heavenly! I encourage you to give this recipe a try; you might just find it becoming a beloved staple in your home. Don’t forget to share your results or even add your own unique twist—I can’t wait to see what you create!

Print
clock clock iconcutlery cutlery iconflag flag iconfolder folder iconinstagram instagram iconpinterest pinterest iconfacebook facebook iconprint print iconsquares squares iconheart heart iconheart solid heart solid icon

Lemon Poppy Seed Loaf


  • Author: Lily author
  • Total Time: 30 minute
  • Yield: 1 loaf 1x
Pin Recipe
Print Recipe

Description

This Lemon Poppy Seed Loaf is a delightful treat that combines zesty lemon flavor with crunchy poppy seeds. Topped with a citrus icing, it’s perfect for any occasion.


Ingredients

Scale
  • 1 ½ cups (190g) all-purpose flour
  • 1 teaspoon baking powder
  • ½ teaspoon baking soda
  • ½ teaspoon salt
  • 3 tablespoons poppy seeds
  • ½ cup (115g) unsalted butter, softened to room temperature
  • 1 cup (200g) granulated sugar
  • 2 large eggs
  • 1 teaspoon vanilla extract
  • 1 teaspoon lemon zest (from about 1 medium lemon)
  • ½ cup (120ml) buttermilk
  • 2 tablespoons fresh lemon juice
  • 1 cup (120g) powdered sugar
  • 2 tablespoons fresh lemon juice
  • 1 tablespoon orange juice
  • 1 teaspoon lemon zest (for garnish, optional)

Instructions

  1. Preheat your oven to 350°F (175°C). Grease a 9×5-inch loaf pan or line it with parchment paper for easy removal later.
  2. In a medium mixing bowl, whisk together 1 ½ cups of all-purpose flour, 1 teaspoon of baking powder, ½ teaspoon of baking soda, ½ teaspoon of salt, and 3 tablespoons of poppy seeds. This helps to evenly distribute the baking agents and ensures a uniform rise.
  3. In a large mixing bowl, cream together ½ cup of softened unsalted butter and 1 cup of granulated sugar using an electric mixer on medium speed for about 3-4 minutes, until the mixture is light and fluffy. Make sure to scrape down the sides of the bowl occasionally.
  4. Add 2 large eggs, 1 teaspoon of vanilla extract, and 1 teaspoon of lemon zest to the creamed butter and sugar, mixing until fully combined. You want a smooth consistency, so ensure there are no lumps of butter.
  5. In a small bowl, combine ½ cup of buttermilk and 2 tablespoons of fresh lemon juice. Alternately add the dry ingredients and buttermilk mixture to the butter mixture, starting and ending with the dry ingredients. Mix just until combined; do not overmix, as this can lead to a dense loaf.
  6. Pour the batter into the prepared loaf pan. Smooth the top with a spatula, ensuring it’s even. Bake in the preheated oven for 50-60 minutes, or until a toothpick inserted in the center comes out clean. The edges should be lightly golden brown, and the center should feel just set.
  7. Once baked, remove the loaf from the oven and allow it to cool in the pan for about 10 minutes. Then, transfer it to a wire rack to cool completely. Resist the urge to slice too soon, as it will be crumbly if it’s still warm.
  8. While the loaf is cooling, prepare the citrus icing. In a medium bowl, whisk together 1 cup of powdered sugar, 2 tablespoons of fresh lemon juice, and 1 tablespoon of orange juice until smooth. If the icing is too thick, you can add a little more juice to reach your desired consistency.
  9. Once the loaf is completely cool, drizzle the citrus icing over the top. If you like, sprinkle with an additional teaspoon of lemon zest for an extra pop of flavor and color.
  • Prep Time: 15 mins
  • Cook Time: 50-60 mins
  • Category: Dessert
  • Method: Baking
  • Cuisine: American

Nutrition

  • Serving Size: 1 slice
  • Calories: 200
  • Sugar: 15 g
  • Sodium: 150 mg
  • Fat: 8 g
  • Saturated Fat: 5 g
  • Unsaturated Fat: 3 g
  • Trans Fat: 0 g
  • Carbohydrates: 30 g
  • Fiber: 1 g
  • Protein: 3 g
  • Cholesterol: 40 mg

Keywords: Be careful not to overmix your batter; this is a common mistake that can lead to a dense loaf. Use room temperature ingredients for a smoother batter and even baking.

Did you make this recipe?

Share a photo and tag us — we can't wait to see what you've made!

  • Privacy Policy
  • Terms Of Service
  • Contact
  • About
  • GDPR

Copyright © 2025 Homesmad