• Skip to primary navigation
  • Skip to main content
  • Skip to primary sidebar
Homesmad

Homesmad

  • Home
  • Breakfast & Brunch
  • Appetizers & Snacks
  • Dinner
  • Dessert
  • About
  • Privacy Policy
  • Contact
Homesmad
  • Home
  • Breakfast & Brunch
  • Appetizers & Snacks
  • Dinner
  • Dessert
  • About
  • Privacy Policy
  • Contact

Crispy Angel Cake Churro Bites: A Sweet Twist on Dessert

December 4, 2025 by Lily author

Crispy Angel Cake Churro Bites A Sweet Twist On A Classic Treat – aren’t those words music to a dessert lover’s ears?

I am absolutely thrilled to introduce you to a creation that takes two beloved desserts and marries them into something truly extraordinary. Imagine the airy, delicate crumb of an angel food cake, transformed into perfectly bite-sized pieces, then given the golden, crispy exterior and signature cinnamon-sugar coating of a traditional churro. While churros trace their delightful origins back to Spanish and Portuguese shepherds, evolving into a beloved street food across the globe, and angel cake has been a quintessential American dessert for generations, this recipe brings them together in a spectacularly innovative way.

You see, I’ve found that people fall head over heels for this dish not just because of its novelty, but because it delivers an irresistible combination of textures and flavors. The initial crunch gives way to a surprisingly light and fluffy center, all enveloped in that warm, aromatic spice and sweetness. It’s a delightful experience that’s both comforting and excitingly new, offering the perfect solution when you crave something special but perhaps a little less heavy than a full churro or a whole cake. These Crispy Angel Cake Churro Bites A Sweet Twist On A Classic Treat are surprisingly simple to prepare, making them an ideal treat for any occasion, from casual gatherings to elegant dessert platters. Get ready to embark on a taste adventure that will undoubtedly become a new favorite!

Crispy Angel Cake Churro Bites: A Sweet Twist on Dessert this RECIPE

Ingredients:

Hello there, fellow sweet tooth! Get ready to dive into the delightful world of Crispy Angel Cake Churro Bites, a truly inspired sweet twist on a classic treat. Crafting these crispy, airy delights is an adventure in texture and flavor, and it all starts with gathering your fresh, high-quality ingredients. Trust me, a little care in selecting your components goes a long way in creating an unforgettable dessert experience.

  • For the Angel Cake Churro Bites:
    • One (1) 13-ounce store-bought Angel Food Cake, or a freshly baked homemade one, fully cooled. Choosing a good quality, moist angel food cake is key here, as it forms the delightful base for our churro bites.
    • 6 tablespoons (85g) unsalted butter, melted. This will give our cake pieces a rich base for the cinnamon sugar to cling to.
    • 6 cups (1.4L) neutral oil for frying, such as vegetable oil, canola oil, or sunflower oil. The amount might vary slightly depending on the size of your pot, but ensure you have enough for proper deep frying.
  • For the Cinnamon Sugar Coating:
    • 1 cup (200g) granulated sugar.
    • 2 tablespoons ground cinnamon. Freshly ground cinnamon will always offer the best aroma and flavor.
  • For the Decadent Chocolate Ganache Dipping Sauce (Optional, but highly recommended!):
    • 1 cup (240ml) heavy cream (also known as whipping cream), at least 36% milk fat.
    • 6 ounces (170g) good quality dark chocolate (60-70% cocoa solids), finely chopped or in chip form. Using a high-quality chocolate makes all the difference in the richness and smoothness of your ganache.
    • 1 tablespoon unsalted butter, softened (optional, for extra sheen and richness).

Preparing the Angel Cake Bites for Their Churro Transformation

Alright, let’s get started on transforming that light and airy angel food cake into the perfect foundation for our Crispy Angel Cake Churro Bites. This initial step is super straightforward, but paying attention to a few details will ensure your bites fry evenly and turn out beautifully golden and crisp. Precision here sets the stage for perfection!

  1. Unpack and Assess Your Angel Food Cake: First things first, carefully remove your angel food cake from its packaging. If you’ve baked it yourself, make absolutely sure it’s completely cooled to room temperature. A warm cake will be too soft and might crumble when cut. A store-bought cake is perfectly fine and often preferred for this recipe due to its consistent texture and density, which holds up well to frying.
  2. Prepare Your Cutting Surface: Lay down a large cutting board. I often place a damp paper towel underneath my cutting board to keep it from slipping around, which is a small but mighty tip for safety and stability.
  3. Slice the Cake into Manageable Sections: Using a long serrated knife (a bread knife works wonderfully here), gently slice the entire angel food cake horizontally into 3 or 4 uniform rounds, about 1-inch thick. Angel food cake is delicate, so use a gentle sawing motion rather than pressing down hard, which can compress the airy texture. We want to maintain that beautiful fluffiness!
  4. Cut into Even Cubes: Once you have your rounds, stack them carefully, or work with one round at a time. Now, cut these rounds into bite-sized cubes. I aim for pieces roughly 1 to 1.5 inches in size. This usually means cutting each round into a grid of 4×4 or 5×5 cubes, depending on the diameter of your cake. The key here is uniformity. Why is uniformity so important, you ask? Well, evenly sized pieces will fry at the same rate, ensuring every single bite is perfectly crispy on the outside and wonderfully soft on the inside. No one wants an undercooked or overcooked churro bite in the mix!
  5. Set Aside: Once all your angel food cake is cubed, gently transfer the pieces to a large plate or baking sheet. Handle them with care to avoid crushing their delicate structure. They’re now ready for their delightful coating.

Crafting the Cinnamon Sugar Coating

This is where the magic really starts to happen, transforming plain angel food cake into something reminiscent of a churro. The cinnamon sugar coating is the heart of the “churro” experience for our Crispy Angel Cake Churro Bites, providing that iconic flavor and irresistible texture. It’s a simple step, but so impactful!

  1. Melt the Butter: In a small, microwave-safe bowl or a small saucepan over low heat, melt the 6 tablespoons of unsalted butter. You want it fully melted, but not sizzling hot. If it’s too hot, let it cool for a minute or two. We’ll be using this as an adhesive for our cinnamon sugar mixture, ensuring it sticks beautifully to every nook and cranny of our angel cake bites.
  2. Prepare the Cinnamon Sugar Blend: In a shallow dish or a medium-sized bowl (one that’s wide enough to easily roll your cake pieces in later), combine the 1 cup of granulated sugar and 2 tablespoons of ground cinnamon. Whisk them together thoroughly until the cinnamon is evenly distributed throughout the sugar. Don’t skimp on the cinnamon here; it’s crucial for that authentic churro taste! I love inhaling the fragrant aroma at this stage – it always gets me excited for the final product.
  3. Coat the Angel Cake Bites with Butter: Now, for coating our cake cubes. You have a couple of options here.
    • Method A (Brushing – my preferred method for delicate cakes): Take a pastry brush and gently brush all sides of each angel food cake cube with the melted butter. This method allows for precise coating without oversaturating the cake, which could lead to sogginess. It also helps maintain the cake’s integrity.
    • Method B (Dipping – quicker, but be gentle!): You can also carefully dip each cube into the melted butter, turning to coat all sides. If you choose this method, be very quick and gentle to avoid letting the cake absorb too much butter. You’re just looking for a light film on the surface.

    As you coat each piece with butter, immediately transfer it to the cinnamon sugar mixture. This is important because the butter will start to solidify as it cools, making it harder for the sugar to adhere. Work in small batches if necessary to manage this.

  4. Roll in Cinnamon Sugar: Once the buttered cake piece is in the cinnamon sugar mixture, gently roll it around, ensuring all sides are thoroughly coated. Press lightly if needed to help the sugar adhere. You want a generous layer of that sweet, spicy goodness.
  5. Set Aside for Frying: Place the fully coated angel cake churro bites on a clean plate or baking sheet. Repeat this process until all your cake cubes are coated. At this point, they might look a little messy, but trust me, they’re on their way to becoming a magnificent treat!

Frying Your Crispy Angel Cake Churro Bites to Golden Perfection

This is the most exciting part, and arguably the most crucial for achieving those coveted “Crispy Angel Cake Churro Bites.” Frying properly will give them that irresistible golden-brown crust and a delightfully warm, soft interior. Safety first when deep frying, always!

  1. Set Up Your Frying Station:
    • Choose the Right Pot: Select a heavy-bottomed pot or a Dutch oven that is at least 4-quart capacity. A heavy pot distributes heat more evenly and maintains oil temperature better.
    • Add the Oil: Pour in your neutral oil. You’ll need about 2-3 inches of oil in the pot. Ensure there’s plenty of headroom – at least 3-4 inches from the top of the oil to the rim of the pot – to prevent oil from overflowing when adding the cake pieces.
    • Prepare a Cooling Rack: Set up a wire rack over a baking sheet lined with several layers of paper towels. This will be where your freshly fried churro bites drain, allowing excess oil to drip away and keeping them crisp.
  2. Heat the Oil to the Perfect Temperature:
    • Place your pot of oil over medium-high heat. Attach a deep-fry thermometer to the side of the pot, making sure the tip is submerged in the oil but not touching the bottom.
    • Heat the oil gradually to 350°F (175°C). This temperature is ideal for frying these delicate bites. If the oil is too cool, the cake will absorb too much oil and become greasy. If it’s too hot, the outside will burn before the inside warms through properly.

    • Important Safety Note:

      Never leave hot oil unattended. Have a lid nearby to smother any potential oil fires (never use water!).

  3. Fry in Batches for Optimal Crispy Angel Cake Churro Bites:
    • Once your oil reaches 350°F (175°C), it’s time to fry! Gently drop 4-6 coated angel cake bites into the hot oil. Do not overcrowd the pot. Overcrowding will drastically lower the oil temperature, leading to greasy, less crispy results.
    • Fry for about 1 to 2 minutes per batch. You’ll notice them quickly puffing up slightly and turning golden brown. Use a slotted spoon or spider skimmer to gently turn the bites every 30 seconds or so to ensure even browning on all sides. They cook very quickly due to their airy texture!
    • Visual Cue: Look for a beautiful deep golden-brown color. This indicates they are perfectly crispy on the outside.
  4. Drain and Re-Coat Immediately:
    • As each batch achieves that perfect golden crisp, carefully lift them out of the oil with your slotted spoon or spider skimmer. Allow any excess oil to drip back into the pot for a few seconds.
    • Immediately transfer the hot fried bites to the wire rack set over paper towels to drain for another 30 seconds to a minute.
    • Quick Tip: While still warm, you can give them another light sprinkle of fresh cinnamon sugar if desired, or even roll them quickly again in any remaining cinnamon sugar mixture you have left. The heat helps the sugar adhere beautifully, reinforcing that authentic churro flavor.
  5. Maintain Oil Temperature and Repeat:
    • Between batches, always check your oil temperature. It might drop slightly after adding a batch of cool cake pieces. Allow it to come back up to 350°F (175°C) before adding the next batch. This consistency is key for evenly cooked and crispy results.
    • Continue this process until all your angel cake churro bites are fried to perfection.

Whipping Up a Silky Chocolate Ganache Dipping Sauce

While your Crispy Angel Cake Churro Bites are cooling just slightly (they’re best served warm!), let’s quickly whip up an incredibly easy, yet utterly luxurious, chocolate ganache. This velvety sauce is the perfect companion, adding a rich, deep chocolate contrast to the sweet crunch of the churro bites. It’s the ultimate indulgence!

  1. Prepare Your Chocolate: If your dark chocolate isn’t already in chip form, make sure it’s finely chopped. Smaller pieces will melt more quickly and evenly, leading to a smoother ganache. Place the chopped chocolate in a medium heatproof bowl.
  2. Heat the Heavy Cream: Pour the heavy cream into a small saucepan. Place it over medium heat and bring it just to a simmer. You’ll see tiny bubbles forming around the edges of the pan, and the cream might start to steam slightly. Do not let it boil vigorously, as this can scorch the cream and affect the flavor.
  3. Pour and Rest: As soon as the cream is simmering, remove it from the heat and immediately pour it evenly over the chopped chocolate in the bowl. Do not stir yet! Let the hot cream sit over the chocolate for 5 minutes. This allows the heat from the cream to gently melt the chocolate, ensuring a smooth, lump-free ganache.
  4. Stir to Emulsify: After 5 minutes, begin stirring gently from the center of the bowl, slowly working your way outwards. Use a whisk or a rubber spatula. Continue stirring until the mixture is completely smooth, glossy, and all the chocolate has fully melted and incorporated into the cream. This process of emulsification creates that beautiful, stable ganache texture.
  5. Add Butter (Optional): If you’re using the optional tablespoon of unsalted butter, add it now and stir until it melts and is fully incorporated. The butter adds an extra layer of richness and a beautiful, professional sheen to your ganache.
  6. Adjust Consistency (if needed):
    • If your ganache seems too thick, you can add another tablespoon of warm heavy cream and stir until combined.
    • If it’s too thin for your liking, let it sit at room temperature for 15-30 minutes, stirring occasionally, until it thickens to your desired dipping consistency.

    For dipping, a consistency that coats the back of a spoon nicely is usually perfect.

  7. Serve Warm: The ganache is best served warm, alongside your freshly fried churro bites. It will thicken as it cools, but can easily be gently reheated in the microwave for 15-20 second intervals, stirring in between, until it reaches the desired consistency again.

Assembling and Serving Your Sweet Churro Masterpiece

You’ve done all the hard work, and now it’s time to truly enjoy the fruits of your labor! Presenting your Crispy Angel Cake Churro Bites beautifully is the final touch to an already magnificent dessert. These treats are best served fresh and warm, when their contrasting textures are at their peak.

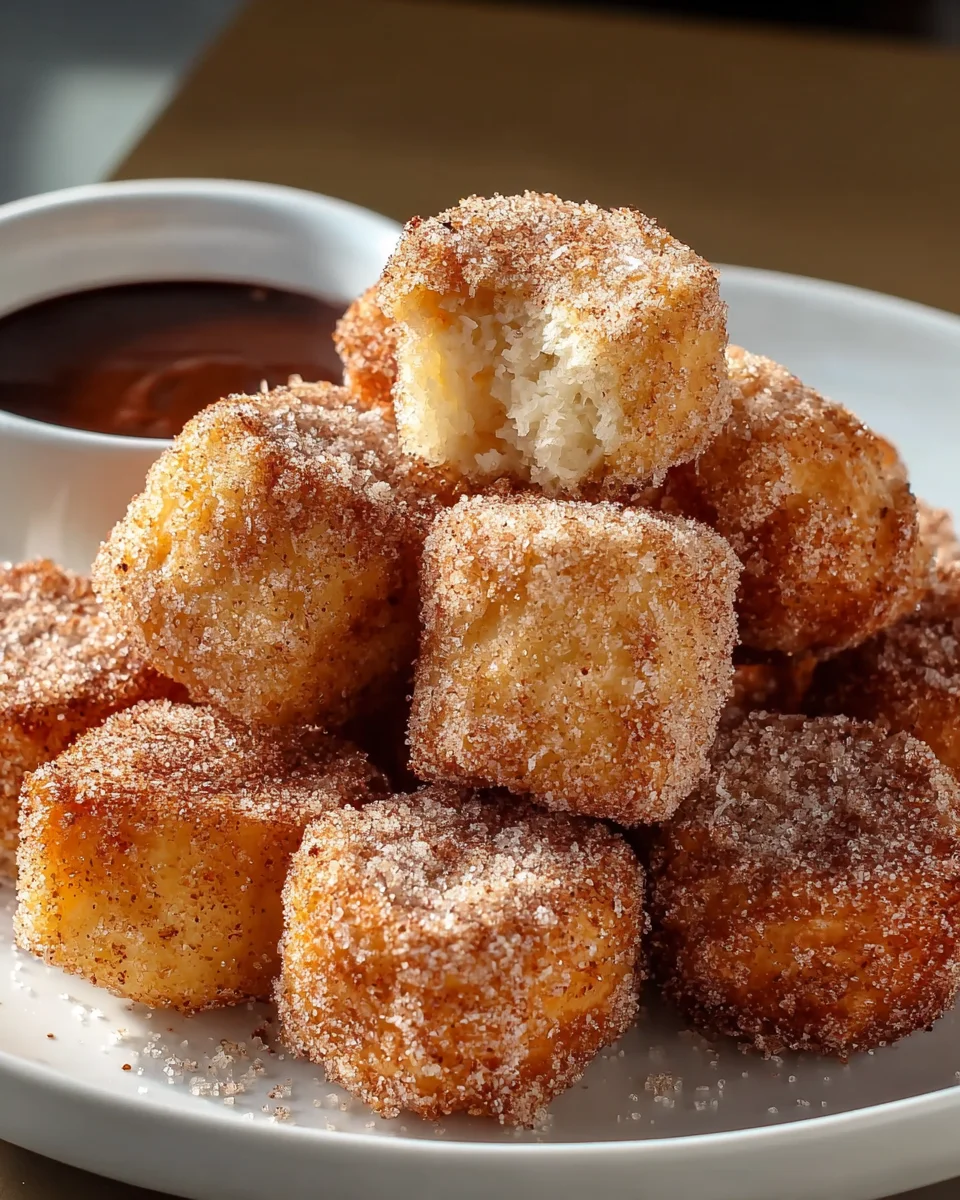
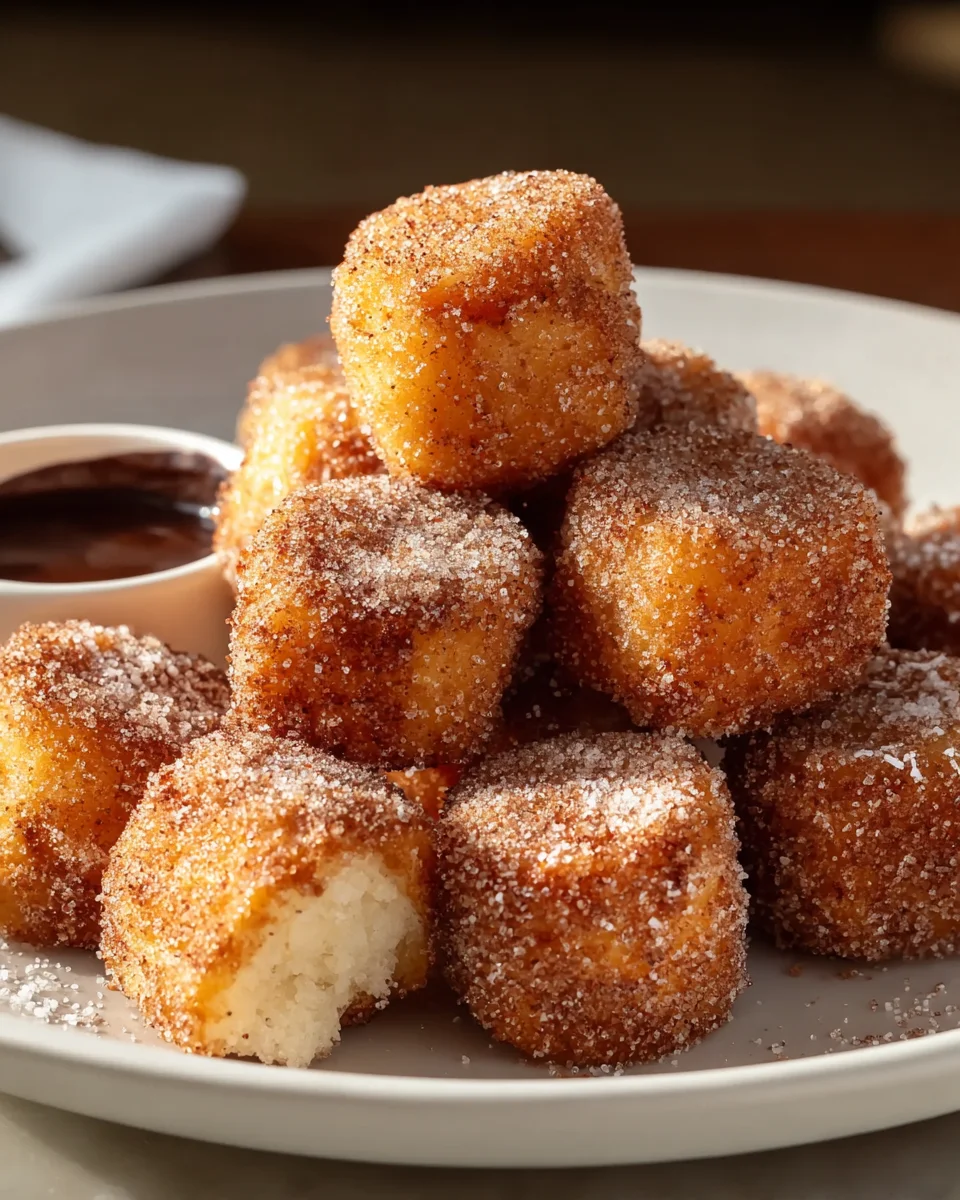
  1. Arrange for Presentation: Artfully arrange your warm, crispy angel cake churro bites on a serving platter. You can stack them pyramid-style, line them up neatly, or simply scatter them invitingly. Their golden-brown hue and cinnamon-sugar sparkle already make them look incredibly appetizing.
  2. Serve with Dipping Sauce: Pour your warm chocolate ganache into a small, attractive serving bowl. Place it right in the center of your platter of churro bites, or alongside. The visual contrast between the light-colored bites and the dark ganache is simply stunning.
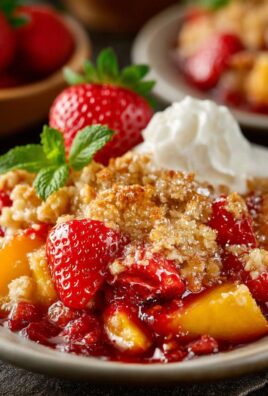
  3. Optional Garnishes: For an extra flourish, you could dust the churro bites lightly with a sprinkle of powdered sugar just before serving. A few fresh raspberries or strawberries on the platter can also add a pop of color and a touch of freshness that complements the rich flavors.
  4. Enjoy Immediately: These Crispy Angel Cake Churro Bites are truly at their best when served warm, almost immediately after frying. The exterior will be wonderfully crisp, giving way to an incredibly soft, airy interior. Dipping them into the warm, silky chocolate ganache creates a symphony of textures and flavors that is utterly irresistible. Trust me, these won’t last long!
  5. Storage (if there are any left!): If by some miracle you have any leftover churro bites, store them in an airtight container at room temperature for up to 1 day. They will lose some of their crispness, but can be gently reheated in a toaster oven or air fryer for a few minutes to regain some of their crunch. The chocolate ganache can be stored in an airtight container in the refrigerator for up to 5-7 days. Reheat gently in the microwave or a double boiler, stirring until smooth, before serving.

There you have it! A delightful, creative, and utterly delicious way to enjoy a classic cake with a fun, churro-inspired twist. These Crispy Angel Cake Churro Bites are perfect for parties, dessert nights, or simply as a special treat for yourself and your loved ones. Happy baking (and frying!)!

Crispy Angel Cake Churro Bites: A Sweet Twist on Dessert

Conclusion:

And there you have it! We’ve journeyed through what I truly believe is one of the most exciting and delightful dessert recipes I’ve had the pleasure of perfecting. If you’ve been searching for that perfect treat to impress guests, bring to a potluck, or simply indulge yourself on a cozy evening, then look no further. This recipe for Crispy Angel Cake Churro Bites A Sweet Twist On A Classic Treat is an absolute game-changer. What makes these bites so incredibly special is their ingenious simplicity combined with an explosion of familiar yet elevated flavors and textures. Imagine the airy, delicate lightness of angel food cake, perfectly encapsulated in a golden, crispy shell, dusted generously with cinnamon sugar. It’s a texture party in every bite – soft, pillowy interior meeting a satisfyingly crunchy exterior. I love how quickly these come together, transforming a store-bought (or homemade, if you’re feeling ambitious!) angel food cake into something utterly spectacular with minimal fuss. It’s proof that sometimes, the most innovative desserts are born from unexpected combinations, offering a nostalgic taste with an exciting new dimension.

Why These Bites Are Your Next Dessert Obsession

I genuinely can’t stress enough how addictive these are. They’re not just churro-flavored; they’re an experience. The sweetness is perfectly balanced, never cloying, and the warmth of the cinnamon sugar against the subtle vanilla of the cake is pure magic. They’re incredibly versatile for any occasion, from casual family gatherings to more formal dinner parties. Plus, they offer a brilliant solution for using up leftover angel food cake – though I suspect you’ll be buying angel food cake specifically to make these once you taste them! They embody everything I look for in a great recipe: ease, deliciousness, and that undeniable “wow” factor. The way the angel cake absorbs just enough of the crisping agent to become wonderfully tender yet still hold its shape, creating that perfect churro-like bite, is simply masterful. It’s a dessert that feels gourmet but is surprisingly approachable for even novice bakers.

Serving Suggestions & Creative Variations to Elevate Your Experience

Now, while these Crispy Angel Cake Churro Bites A Sweet Twist On A Classic Treat are absolutely phenomenal on their own, part of the fun is experimenting with how to serve them! For a classic experience, I highly recommend serving them warm with a rich, velvety chocolate dipping sauce or a luscious salted caramel dip. A light dusting of powdered sugar on top before serving adds a beautiful finish. Feeling adventurous? Consider a raspberry coulis for a tart counterpoint to the sweetness, or even a dollop of vanilla bean ice cream on the side for an à la mode experience that takes them to a whole new level. For a delightful breakfast or brunch treat, pair them with fresh berries and a drizzle of maple syrup. During the holidays, you could incorporate a pinch of nutmeg or cardamom into the cinnamon sugar mixture for a festive twist. Think about dipping them in a cream cheese glaze for a “churro donut hole” vibe, or even adding a tiny sprinkle of sea salt to the cinnamon sugar to really make the flavors pop. The possibilities are truly endless, allowing you to customize this already incredible dessert to suit any palate or occasion.

Your Turn: Try Them, Love Them, Share Them!

I’m incredibly excited for you to try this recipe. It truly brings me so much joy to share creations that I’m passionate about, and these churro bites are definitely at the top of that list. So, please, gather your ingredients, set aside some time, and dive into making these incredible Crispy Angel Cake Churro Bites A Sweet Twist On A Classic Treat. I have a feeling they’ll become a fast favorite in your home, just as they have in mine. Once you’ve had the chance to whip up a batch (or two, because let’s be real, one batch won’t last long!), I’d absolutely love to hear about your experience. Did you try a new serving suggestion? Did you add a unique twist? Did your family devour them in minutes? Share your thoughts, your photos, and your triumphs! Your feedback and culinary adventures truly inspire me, and I can’t wait to see how you make these delightful churro bites your own. Happy baking!


Crispy Angel Cake Churro Bites: A Sweet Twist on Dessert

Imagine the airy, delicate crumb of an angel food cake, transformed into perfectly bite-sized pieces, then given the golden, crispy exterior and signature cinnamon-sugar coating of a traditional churro. These bites offer an irresistible combination of textures and flavors, surprisingly simple to prepare for any occasion.

Prep Time
15 Minutes
Cook Time
15 Minutes
Total Time
30 Minutes
Servings
8 servings

Ingredients


Instructions


Important Information

Nutrition Facts (Per Serving)

It is important to consider this information as approximate and not to use it as definitive health advice.

Allergy Information

Please check ingredients for potential allergens and consult a health professional if in doubt.

« Previous Post
Unforgettable Lemon Cake Recipe: A Must-Try for Dessert Lovers
Next Post »
Best Banana Cake Recipe: Incredibly Moist & Easy to Bake!

If you enjoyed this…

Oreo Poke Cake: Delicious Recipe & Easy Instructions

Pineapple Ice Cream Homemade: The Ultimate Guide to Making It

Easy Strawberry Shortcake: The Perfect Summer Dessert

Primary Sidebar

Browse by Diet

BreakfastDinnerLunchDessertAppetizer

Sweet Peach Yogurt Parfait Delight

One of my fondest memories is from a lazy summer afternoon spent at my grandmother’s house. The sun filtered through the kitchen window, casting a warm glow over the table where she would create her culinary magic. It was during one of those blissful moments that I first tasted her Peach Yogurt Parfait with Honey and Granola. The sweet aroma of ripe peaches mingling with creamy yogurt and the crunch of granola was nothing short of heavenly. It felt like summer captured in a bowl, and I still remember the joy of diving in with a spoon, each layer revealing a new burst of flavor.

When I think about that parfait, I can almost hear the gentle hum of the bees outside, reminding me of the floral notes that honey brings to every bite. The vibrant yellows and soft oranges of the peaches contrast beautifully with the creamy white yogurt and the golden crunch of granola. It’s a dish that not only looks delightful but also tastes like a celebration of fresh, wholesome ingredients.

What makes my version of this Peach Yogurt Parfait special is the careful balance of flavors and textures. I use ripe, juicy peaches, drizzled with locally sourced honey, and a homemade granola that’s bursting with nuts and seeds for an extra crunch. It’s a simple dish, but every layer is crafted with love and attention.

Let me show you exactly how to make this delightful parfait, so you can bring a bit of that summer magic into your kitchen!

Sweet Peach Yogurt Parfait Delight

Why You’ll Love This Recipe

  • Delightfully creamy texture from the Greek yogurt, paired with the juicy sweetness of fresh peaches.
  • Ready in under 20 minutes, making it a quick and satisfying breakfast or snack option.
  • Budget-friendly, using common ingredients that you may already have in your pantry.
  • Customizable with your favorite granola and nuts, allowing you to tailor each parfait to your taste.
  • Perfectly balanced flavors with the bright acidity of lemon juice and the sweetness of honey enhancing the peaches.

Ingredients

  • For the Parfait:
  • 2 cups plain Greek yogurt (or vanilla yogurt for a sweeter option)
  • 2 large ripe peaches, diced (about 2 cups)
  • 1 tablespoon fresh lemon juice (to prevent browning of peaches)
  • 2 tablespoons honey (plus more for drizzling)
  • 1 teaspoon vanilla extract (optional for extra flavor)
  • For the Granola:
  • 1 cup granola (store-bought or homemade; see notes for a simple granola recipe)
  • 1/4 cup sliced almonds (optional for added crunch)
  • 1/4 cup shredded coconut (optional for added flavor)

Let’s dive into some key ingredients that make this Peach Yogurt Parfait so delightful! First, the Greek yogurt is not only creamy but also packed with protein, making it a satisfying option for breakfast or a snack. If you’re looking for a sweeter option, you can easily substitute it with vanilla yogurt, though it may alter the overall flavor balance. Next, the ripe peaches are the star of the show; their natural sweetness shines through, so I recommend choosing peaches that yield slightly to pressure, indicating they’re perfectly ripe. If peaches aren’t in season, feel free to use nectarines or even frozen peaches—just thaw them before use. Finally, honey adds a lovely floral sweetness that ties everything together. If you prefer, maple syrup can serve as a delicious substitute.

Step-by-Step Instructions

  1. Start by preparing the peaches. Wash them thoroughly, then slice and dice them into bite-sized pieces. In a medium bowl, toss the diced peaches with 1 tablespoon of fresh lemon juice to prevent browning. Set aside for about 5 minutes while the lemon juice works its magic.
  2. In a separate bowl, combine the Greek yogurt, 2 tablespoons of honey, and 1 teaspoon of vanilla extract if using. Stir the mixture until smooth and thoroughly blended. This should take about a minute. Avoid overmixing to maintain the creaminess of the yogurt.
  3. Now it’s time to layer your parfait. Grab a clear glass or bowl to showcase your beautiful creation. Start with a generous spoonful of the yogurt mixture at the bottom—about 1/4 cup will do. Use a spoon to spread it evenly.
  4. Add a layer of the diced peaches over the yogurt, ensuring they cover the yogurt completely. You might want to use about half of what you have prepared—roughly 1 cup. This layer should be visually appealing, so arrange the peaches neatly.
  5. Sprinkle 1/4 cup of granola over the peaches. This adds a delightful crunch. Make sure to distribute it evenly to ensure every bite has that satisfying texture. Avoid packing it down too tightly, as you want it to maintain its crunch.
  6. Repeat the layers: spoon in another 1/4 cup of yogurt, followed by another cup of peaches, and another sprinkle of granola. You should have at least two layers, but feel free to add more depending on your glass size.
  7. Finish off your parfait with a drizzle of honey on top for added sweetness and a touch of elegance. If you’re using sliced almonds or shredded coconut, sprinkle them on top now. It adds a lovely visual contrast and extra flavor.
  8. Serve immediately or refrigerate for up to 30 minutes before serving to allow the flavors to meld together. However, I recommend enjoying it fresh to maintain the granola’s crunch.

Pro Tips for the Best Peach Yogurt Parfait With Honey And Granola

  • Make sure to choose ripe peaches for the best flavor and texture. A common mistake is using unripe fruit, which can lead to a less enjoyable parfait. Look for peaches that are fragrant and slightly soft to the touch.
  • Use a clear glass to assemble your parfait; this not only makes for a beautiful presentation but also allows you to see the colorful layers, which adds to the enjoyment of eating it.
  • For an even creamier texture, consider whipping the Greek yogurt with a hand mixer for a couple of minutes before layering. This small adjustment makes a huge difference in mouthfeel.
  • Be mindful of the granola-to-yogurt ratio. Too much granola can overwhelm the parfait, while too little can make it feel too creamy. Aim for about 1/4 cup of granola per layer for the perfect balance.
  • If you’re making this for a gathering, consider preparing the yogurt and peaches ahead of time and layering them just before serving. This ensures the granola stays crunchy!

Variations & Serving Ideas

There are so many ways to get creative with your Peach Yogurt Parfait! For a tropical twist, swap out the peaches for mangoes or pineapples and top with coconut flakes. If you prefer a berry flavor, mix in some blueberries or strawberries with the peaches for added color and taste. For a nutty version, incorporate chopped walnuts or pecans instead of almonds.

As for serving ideas, this parfait pairs beautifully with a side of scrambled eggs for a hearty breakfast or fresh fruit salad for a light lunch. You might also enjoy it alongside whole grain toast with almond butter for an energizing snack. The contrast of flavors and textures will elevate your meal experience!

Storage, Make-Ahead & Reheating

The Peach Yogurt Parfait is best enjoyed fresh, but you can prepare some components ahead of time. Store the layered parfait in an airtight container in the refrigerator for up to 24 hours. However, be cautious; the granola may lose its crunch if stored too long. You can freeze the yogurt and peach mixture for up to 2 months; just remember to thaw it in the refrigerator overnight before serving.

If you plan to enjoy this dish the next day, it can taste even better as the flavors meld together. Just remember to add the granola right before serving to keep its delightful crunch!

Frequently Asked Questions

Can I make Peach Yogurt Parfait With Honey And Granola ahead of time?

Yes — in fact, it tastes even better the next day as the flavors meld. However, I recommend waiting to add the granola until just before serving to maintain its crunch.

What can I substitute for Greek yogurt?

If you prefer a lighter option, you can substitute Greek yogurt with regular yogurt or a dairy-free alternative like coconut yogurt. Just remember that this may alter the creaminess and flavor profile slightly.

Can I use frozen peaches for this parfait?

Absolutely! Just make sure to thaw the frozen peaches before using them. They will still add great flavor, though the texture may be slightly softer than fresh peaches.

How do I make the parfait vegan?

To make a vegan version, substitute the Greek yogurt with a plant-based yogurt alternative, and replace honey with maple syrup or agave nectar. This keeps the parfait sweet while adhering to a vegan diet.

What other fruits can I use in this recipe?

You can mix and match fruits based on your preference. Try using strawberries, blueberries, raspberries, or even bananas. Just make sure to adjust the lemon juice as needed to prevent browning.

Sweet Peach Yogurt Parfait Delight

Final Thoughts

The Peach Yogurt Parfait with Honey and Granola is a delightful blend of creamy yogurt, sweet peaches, and crunchy granola that creates a satisfying and nourishing treat. Each layer bursts with flavor, making it a perfect choice for breakfast or a light dessert.

This is the kind of recipe I come back to again and again, especially when I want something refreshing and wholesome to start my day. The harmony of sweet and tart flavors, combined with the delightful crunch, never fails to lift my spirits!

I encourage you to give this parfait a try and indulge in its comforting goodness. Feel free to share your results or even add your own twist—perhaps a sprinkle of cinnamon or a handful of nuts. Enjoy creating your perfect parfait!

Print
clock clock iconcutlery cutlery iconflag flag iconfolder folder iconinstagram instagram iconpinterest pinterest iconfacebook facebook iconprint print iconsquares squares iconheart heart iconheart solid heart solid icon

Peach Yogurt Parfait


  • Author: Lily author
  • Total Time: 15 minutes
  • Yield: 4 servings 1x
Pin Recipe
Print Recipe

Description

This Peach Yogurt Parfait combines creamy Greek yogurt, juicy peaches, and crunchy granola for a delightful treat. It’s a perfect breakfast or snack that captures the essence of summer in every bite.


Ingredients

Scale
  • For the Parfait:
  • 2 cups plain Greek yogurt (or vanilla yogurt for a sweeter option)
  • 2 large ripe peaches, diced (about 2 cups)
  • 1 tablespoon fresh lemon juice (to prevent browning of peaches)
  • 2 tablespoons honey (plus more for drizzling)
  • 1 teaspoon vanilla extract (optional for extra flavor)
  • For the Granola:
  • 1 cup granola (store-bought or homemade; see notes for a simple granola recipe)
  • 1/4 cup sliced almonds (optional for added crunch)
  • 1/4 cup shredded coconut (optional for added flavor)

Instructions

  1. Start by preparing the peaches. Wash them thoroughly, then slice and dice them into bite-sized pieces. In a medium bowl, toss the diced peaches with 1 tablespoon of fresh lemon juice to prevent browning. Set aside for about 5 minutes while the lemon juice works its magic.
  2. In a separate bowl, combine the Greek yogurt, 2 tablespoons of honey, and 1 teaspoon of vanilla extract if using. Stir the mixture until smooth and thoroughly blended. This should take about a minute. Avoid overmixing to maintain the creaminess of the yogurt.
  3. Now it’s time to layer your parfait. Grab a clear glass or bowl to showcase your beautiful creation. Start with a generous spoonful of the yogurt mixture at the bottom—about 1/4 cup will do. Use a spoon to spread it evenly.
  4. Add a layer of the diced peaches over the yogurt, ensuring they cover the yogurt completely. You might want to use about half of what you have prepared—roughly 1 cup. This layer should be visually appealing, so arrange the peaches neatly.
  5. Sprinkle 1/4 cup of granola over the peaches. This adds a delightful crunch. Make sure to distribute it evenly to ensure every bite has that satisfying texture. Avoid packing it down too tightly, as you want it to maintain its crunch.
  6. Repeat the layers: spoon in another 1/4 cup of yogurt, followed by another cup of peaches, and another sprinkle of granola. You should have at least two layers, but feel free to add more depending on your glass size.
  7. Finish off your parfait with a drizzle of honey on top for added sweetness and a touch of elegance. If you’re using sliced almonds or shredded coconut, sprinkle them on top now. It adds a lovely visual contrast and extra flavor.
  8. Serve immediately or refrigerate for up to 30 minutes before serving to allow the flavors to meld together. However, I recommend enjoying it fresh to maintain the granola’s crunch.
  • Prep Time: 15 mins
  • Cook Time: 0 mins
  • Category: Breakfast
  • Method: No-cook
  • Cuisine: American

Nutrition

  • Serving Size: 1 parfait
  • Calories: 250
  • Sugar: 20 g
  • Sodium: 50 mg
  • Fat: 5 g
  • Saturated Fat: 2 g
  • Unsaturated Fat: 3 g
  • Trans Fat: 0 g
  • Carbohydrates: 40 g
  • Fiber: 3 g
  • Protein: 10 g
  • Cholesterol: 10 mg

Keywords: Choose ripe peaches for the best flavor and texture. Use a clear glass for a beautiful presentation. For creaminess, consider whipping the yogurt before layering. Be mindful of the granola-to-yogurt ratio. Prepare yogurt and peaches ahead of time for gatherings, layering just before serving.

Did you make this recipe?

Share a photo and tag us — we can't wait to see what you've made!

Sun-Kissed Frozen Orange Cream Slush

As a child, summer days felt like they lasted forever. I remember the sticky heat wrapping around me as I played outside, my laughter mingling with the sounds of the neighborhood. But nothing could cool me down quite like the moment I’d spot my grandmother, laboring over her blender, whipping up her famous Frozen Orange Creamsicle Slush. That vibrant orange treat, with its frosty texture and sweet citrus aroma, was like a burst of sunshine in a cup. Just one sip, and I could feel the coolness wash over me, sparking pure joy.

This Frozen Orange Creamsicle Slush has a way of making you feel like a kid again. Its creamy, dreamy consistency is a delightful balance of bright orange and soft vanilla, inviting you to dive right in. The refreshing tang of orange dances on your tongue, while the smooth creaminess envelops you in a comforting embrace. It’s a nostalgic treat that’s perfect for hot summer afternoons or anytime you need a little pick-me-up.

What makes my version of this slush stand out is the addition of a hint of vanilla bean, which elevates the flavor and adds an extra layer of richness. Plus, it’s super easy to whip up with just a few simple ingredients that you probably already have on hand! So, if you’re ready to relive those sun-soaked memories, let me show you exactly how to make it.

Sun-Kissed Frozen Orange Cream Slush

Why You’ll Love This Recipe

  • Each slush is a perfect blend of creamy vanilla and zesty orange, creating a nostalgic flavor reminiscent of summer days.
  • This refreshing treat is ready in under 15 minutes, making it an ideal quick dessert for unexpected guests or hot afternoons.
  • With just 8 simple ingredients, it’s budget-friendly, ensuring you don’t have to break the bank to enjoy a delicious slush.
  • The slush has a perfectly smooth texture, thanks to the combination of ice and ice cream, providing a delightful contrast to the bright citrus flavors.
  • It’s highly customizable; you can easily adjust the sweetness and add fresh herbs for a unique twist that suits your taste.

Ingredients

  • 2 cups orange juice (freshly squeezed or store-bought)
  • 1 cup vanilla ice cream
  • 1 cup crushed ice
  • 1/2 cup milk (whole or 2%)
  • 1/4 cup granulated sugar (adjust based on sweetness preference)
  • 1 teaspoon vanilla extract
  • Zest of 1 orange (for added flavor)
  • Fresh orange slices and mint leaves (for garnish)

The star of this Frozen Orange Creamsicle Slush is the orange juice, which provides the vibrant, citrusy base. Freshly squeezed juice will yield the brightest flavor, but store-bought options can be just as convenient. If you’re opting for store-bought, choose 100% pure juice with no added sugars for the best results. Another essential ingredient is the vanilla ice cream; it adds creaminess and sweetness. You can substitute it with dairy-free ice cream if you’re looking for a vegan option. Whole or 2% milk complements the ice cream, creating a smooth blend. If you want a lower-calorie version, almond or oat milk can be good alternatives.

Lastly, the granulated sugar can be adjusted based on your sweetness preference. If you prefer a more natural sweetener, consider using honey or agave syrup. The orange zest enhances the flavor profile, providing an aromatic pop that brings the whole slush together. Don’t skip it! It adds an extra layer of brightness that makes this slush truly special.

Step-by-Step Instructions

  1. Start by preparing your ingredients. Gather 2 cups of orange juice, 1 cup of vanilla ice cream, and 1 cup of crushed ice. Make sure the ice is finely crushed, as larger chunks can make blending difficult.
  2. In a blender, combine the orange juice, vanilla ice cream, crushed ice, and 1/2 cup of milk. Add 1/4 cup of granulated sugar and 1 teaspoon of vanilla extract. If you like a sweeter slush, consider adding a bit more sugar at this stage.
  3. Add the zest of 1 orange to the blender. This step is crucial for enhancing the citrus flavor of your slush. Make sure not to include the bitter white pith—only the flavorful zest.
  4. Blend the mixture on medium-high speed for about 30-45 seconds. Stop once the ingredients are fully combined and the slush has a smooth, even consistency. If you notice large chunks of ice, blend for an additional 10-15 seconds. Avoid over-blending, as this can make the slush too liquidy.
  5. Once blended, taste the slush. If it needs more sweetness, add a little more sugar and blend for a few more seconds. If it’s too thick, you can add a splash of milk to reach your desired consistency.
  6. Pour the slush into glasses. This recipe typically serves 4, but you can easily double it for larger gatherings. Use a spoon to help guide the slush into the glasses if needed.
  7. Garnish each serving with fresh orange slices and mint leaves. The mint not only adds a pop of color but also a refreshing aroma that complements the citrus flavors beautifully.
  8. Serve immediately and enjoy! If you’ve made extra, you can refrigerate it for a short time, but it’s best enjoyed fresh.

Pro Tips for the Best Frozen Orange Creamsicle Slush

  • Don’t skip the orange zest! It’s a game-changer for flavor. Always zest before juicing to make it easier.
  • Use a high-powered blender for the best texture. A standard blender may struggle with ice, leading to uneven consistency. If you have a food processor, that can work too, but ensure the ice is finely crushed.
  • Adjust the ice-to-liquid ratio carefully. If your slush is too thick, it won’t blend well. Start with less ice and add more until you reach your preferred texture.
  • Be cautious with the sugar! Always start with the lower amount, as you can easily add more, but it’s hard to fix an overly sweet slush.
  • For a fun twist, consider adding a splash of coconut milk or a handful of fresh fruit like strawberries or pineapple. This not only enhances the flavor but also adds a beautiful color contrast.

Variations & Serving Ideas

There are countless ways to put a spin on your Frozen Orange Creamsicle Slush. Consider making a tropical version by adding in some pineapple juice or coconut milk for a delightful tropical twist. If you’re feeling adventurous, try incorporating a handful of frozen mango or peach slices for added sweetness. For a lighter version, swap out the vanilla ice cream for Greek yogurt for a creamy yet tangy alternative.

As for serving ideas, this refreshing slush pairs wonderfully with light summer dishes like grilled chicken skewers, fish tacos, or a simple salad topped with citrus vinaigrette. The bright, zesty flavors of the slush complement these dishes perfectly, making them an ideal pairing for a sunny day.

Storage, Make-Ahead & Reheating

This Frozen Orange Creamsicle Slush is best enjoyed fresh, but if you have leftovers, you can store them in an airtight container in the fridge for up to 2 days. Just keep in mind that the slush may lose some of its texture over time as the ice melts. It doesn’t freeze well, as the ice will turn into a solid block. If you must freeze it, blend again after thawing to restore the slushy consistency. This treat is best the day you make it, as the flavors meld together beautifully overnight, enhancing its deliciousness.

Frequently Asked Questions

Can I make Frozen Orange Creamsicle Slush ahead of time?

Yes — in fact, it tastes even better the next day as the flavors meld. However, it’s best to enjoy it fresh, as the texture can change if stored for too long. If you need to prepare it ahead, keep it in the fridge and re-blend before serving.

What kind of orange juice should I use?

For the best flavor, use freshly squeezed orange juice. However, if you’re short on time, opt for 100% pure store-bought juice without added sugars. This will ensure that your slush remains flavorful and refreshing.

Can I substitute the vanilla ice cream?

Absolutely! If you’re looking for a dairy-free option, coconut milk ice cream or a non-dairy vanilla ice cream can work wonderfully. They will still provide the creamy texture and sweetness you desire.

How can I adjust the sweetness of my slush?

You can easily adjust the sweetness by modifying the amount of sugar added. Start with 1/4 cup and taste the mixture before blending. If you prefer it sweeter, add more sugar gradually until it reaches your desired level.

What should I do if my slush is too thick?

If your slush is too thick, simply add a splash of milk or orange juice and blend again. This will help achieve a more drinkable consistency while maintaining the slushy texture. Adjust gradually to reach your preferred thickness.

Sun-Kissed Frozen Orange Cream Slush

Final Thoughts

The Frozen Orange Creamsicle Slush is a delightful blend of refreshing citrus and creamy goodness, making it a perfect treat for warm days or any time you crave a taste of nostalgia. The way the bright orange flavor dances with the creamy texture truly elevates this slush, transforming it into a satisfying escape from the everyday.

This is the kind of recipe I come back to again and again, especially when I’m looking to cool down or impress guests at a summer gathering. It’s simple to make and always brings smiles all around! I encourage you to try this recipe for yourself—don’t hesitate to share your results or even put your own spin on it. Happy slushing!

Print
clock clock iconcutlery cutlery iconflag flag iconfolder folder iconinstagram instagram iconpinterest pinterest iconfacebook facebook iconprint print iconsquares squares iconheart heart iconheart solid heart solid icon

Frozen Orange Creamsicle Slush


  • Author: Lily author
  • Total Time: 15 minutes
  • Yield: 4 servings 1x
Pin Recipe
Print Recipe

Description

This Frozen Orange Creamsicle Slush is a refreshing treat that combines creamy vanilla and zesty orange flavors. Perfect for hot summer days, it brings back nostalgic memories with every sip.


Ingredients

Scale
  • 2 cups orange juice (freshly squeezed or store-bought)
  • 1 cup vanilla ice cream
  • 1 cup crushed ice
  • 1/2 cup milk (whole or 2%)
  • 1/4 cup granulated sugar (adjust based on sweetness preference)
  • 1 teaspoon vanilla extract
  • Zest of 1 orange (for added flavor)
  • Fresh orange slices and mint leaves (for garnish)

Instructions

  1. Start by preparing your ingredients. Gather 2 cups of orange juice, 1 cup of vanilla ice cream, and 1 cup of crushed ice. Make sure the ice is finely crushed, as larger chunks can make blending difficult.
  2. In a blender, combine the orange juice, vanilla ice cream, crushed ice, and 1/2 cup of milk. Add 1/4 cup of granulated sugar and 1 teaspoon of vanilla extract. If you like a sweeter slush, consider adding a bit more sugar at this stage.
  3. Add the zest of 1 orange to the blender. This step is crucial for enhancing the citrus flavor of your slush. Make sure not to include the bitter white pith—only the flavorful zest.
  4. Blend the mixture on medium-high speed for about 30-45 seconds. Stop once the ingredients are fully combined and the slush has a smooth, even consistency. If you notice large chunks of ice, blend for an additional 10-15 seconds. Avoid over-blending, as this can make the slush too liquidy.
  5. Once blended, taste the slush. If it needs more sweetness, add a little more sugar and blend for a few more seconds. If it’s too thick, you can add a splash of milk to reach your desired consistency.
  6. Pour the slush into glasses. This recipe typically serves 4, but you can easily double it for larger gatherings. Use a spoon to help guide the slush into the glasses if needed.
  7. Garnish each serving with fresh orange slices and mint leaves. The mint not only adds a pop of color but also a refreshing aroma that complements the citrus flavors beautifully.
  8. Serve immediately and enjoy! If you’ve made extra, you can refrigerate it for a short time, but it's best enjoyed fresh.
  • Prep Time: 15 min
  • Cook Time: 0 min
  • Category: Dessert
  • Method: Blending
  • Cuisine: American

Nutrition

  • Serving Size: 1 serving
  • Calories: 200
  • Sugar: 30 g
  • Sodium: 50 mg
  • Fat: 5 g
  • Saturated Fat: 3 g
  • Unsaturated Fat: 2 g
  • Trans Fat: 0 g
  • Carbohydrates: 40 g
  • Fiber: 1 g
  • Protein: 2 g
  • Cholesterol: 20 mg

Keywords: Don't skip the orange zest! It's a game-changer for flavor. Always zest before juicing to make it easier.

Did you make this recipe?

Share a photo and tag us — we can't wait to see what you've made!

Zesty Lemon Poppy Seed Delight

One rainy afternoon, I found myself in my grandmother’s cozy kitchen, the kind that always smelled like warmth and love. She was whipping up her famous Lemon Poppy Seed Loaf, a recipe that had been passed down through generations. As the batter came together, the zesty aroma of fresh lemons filled the air, mingling perfectly with the nutty fragrance of poppy seeds. I can still picture her, apron-clad, as she expertly drizzled a vibrant citrus icing over the loaf, creating a glossy, sun-kissed finish that beckoned us to dive in. It was a moment that sparked my own passion for baking, and this recipe has become a cherished staple in my home ever since.

When you take a bite of this Lemon Poppy Seed Loaf, it’s like a burst of sunshine on your palate. The loaf is beautifully golden, with a tender crumb that melts in your mouth. Each slice is speckled with tiny poppy seeds, adding a delightful crunch that contrasts beautifully with the tangy sweetness of the lemon. And that citrus icing? It’s the finishing touch that elevates this loaf from ordinary to extraordinary, with its bright, zesty flavor dancing on your taste buds.

This recipe stands out because it embraces simplicity while delivering on flavor. I’ve added a hint of vanilla to the batter, enhancing the overall taste and making it even more indulgent. Trust me, once you make this Lemon Poppy Seed Loaf With Citrus Icing, it’ll become a go-to in your baking repertoire.

So, let me show you exactly how to make it!

Zesty Lemon Poppy Seed Delight

Why You’ll Love This Recipe

  • Moist and tender crumb that melts in your mouth, thanks to the perfect balance of butter and buttermilk.
  • Bright, zesty lemon flavor paired with crunchy poppy seeds, creating a delightful texture and taste experience.
  • Easy to whip up in just about an hour, perfect for last-minute gatherings or a cozy afternoon treat.
  • Budget-friendly with everyday ingredients, making it an accessible option for all home bakers.
  • The citrus icing adds a sweet tang that elevates the loaf, turning a simple recipe into a showstopper!

Ingredients

  • 1 ½ cups (190g) all-purpose flour
  • 1 teaspoon baking powder
  • ½ teaspoon baking soda
  • ½ teaspoon salt
  • 3 tablespoons poppy seeds
  • ½ cup (115g) unsalted butter, softened to room temperature
  • 1 cup (200g) granulated sugar
  • 2 large eggs
  • 1 teaspoon vanilla extract
  • 1 teaspoon lemon zest (from about 1 medium lemon)
  • ½ cup (120ml) buttermilk
  • 2 tablespoons fresh lemon juice

For the Citrus Icing:

  • 1 cup (120g) powdered sugar
  • 2 tablespoons fresh lemon juice
  • 1 tablespoon orange juice
  • 1 teaspoon lemon zest (for garnish, optional)

Let’s dive into the key ingredients that make this Lemon Poppy Seed Loaf so special. The all-purpose flour provides the structure and base for the loaf, while the baking powder and baking soda ensure it rises perfectly, giving the loaf a light texture. For a gluten-free variation, you could substitute the flour with a gluten-free all-purpose blend. Poppy seeds not only add a delightful crunch but also contribute to the unique flavor profile that pairs well with the citrus notes.

Unsalted butter is crucial for achieving the buttery richness that makes this loaf so moist. If you’re looking for a dairy-free option, coconut oil or a vegan butter can be used instead. The buttermilk is another essential component, providing acidity that activates the baking soda for a fluffy texture. If you don’t have buttermilk on hand, you can easily make a substitute by mixing ½ cup of milk with 1 tablespoon of vinegar or lemon juice and letting it sit for about 5 minutes.

Step-by-Step Instructions

  1. Preheat your oven to 350°F (175°C). Grease a 9×5-inch loaf pan or line it with parchment paper for easy removal later.
  2. In a medium mixing bowl, whisk together 1 ½ cups of all-purpose flour, 1 teaspoon of baking powder, ½ teaspoon of baking soda, ½ teaspoon of salt, and 3 tablespoons of poppy seeds. This helps to evenly distribute the baking agents and ensures a uniform rise.
  3. In a large mixing bowl, cream together ½ cup of softened unsalted butter and 1 cup of granulated sugar using an electric mixer on medium speed for about 3-4 minutes, until the mixture is light and fluffy. Make sure to scrape down the sides of the bowl occasionally.
  4. Add 2 large eggs, 1 teaspoon of vanilla extract, and 1 teaspoon of lemon zest to the creamed butter and sugar, mixing until fully combined. You want a smooth consistency, so ensure there are no lumps of butter.
  5. In a small bowl, combine ½ cup of buttermilk and 2 tablespoons of fresh lemon juice. Alternately add the dry ingredients and buttermilk mixture to the butter mixture, starting and ending with the dry ingredients. Mix just until combined; do not overmix, as this can lead to a dense loaf.
  6. Pour the batter into the prepared loaf pan. Smooth the top with a spatula, ensuring it’s even. Bake in the preheated oven for 50-60 minutes, or until a toothpick inserted in the center comes out clean. The edges should be lightly golden brown, and the center should feel just set.
  7. Once baked, remove the loaf from the oven and allow it to cool in the pan for about 10 minutes. Then, transfer it to a wire rack to cool completely. Resist the urge to slice too soon, as it will be crumbly if it’s still warm.
  8. While the loaf is cooling, prepare the citrus icing. In a medium bowl, whisk together 1 cup of powdered sugar, 2 tablespoons of fresh lemon juice, and 1 tablespoon of orange juice until smooth. If the icing is too thick, you can add a little more juice to reach your desired consistency.
  9. Once the loaf is completely cool, drizzle the citrus icing over the top. If you like, sprinkle with an additional teaspoon of lemon zest for an extra pop of flavor and color.

Pro Tips for the Best Lemon Poppy Seed Loaf With Citrus Icing

  • Be careful not to overmix your batter; this is a common mistake that can lead to a dense loaf. Mix just until the dry ingredients are incorporated for a light and fluffy texture.
  • Use room temperature ingredients, especially the butter and eggs. This helps to create a smoother batter and ensures even baking. Take your eggs out of the fridge about 30 minutes before you start.
  • For a more pronounced lemon flavor, consider adding a little lemon extract in addition to the zest and juice. Just a half teaspoon can elevate the citrus notes significantly.
  • When measuring your flour, spoon it into the measuring cup and level it off with a knife instead of scooping directly from the bag. This prevents packing and ensures you don’t end up with a dry loaf.
  • Invest in a good quality loaf pan; it makes a difference in heat distribution, which ensures even baking. If your pan is dark-coated, reduce the oven temperature by 25°F to prevent over-browning.

Variations & Serving Ideas

For a delightful twist, consider adding blueberries or raspberries to the batter for a fruity burst of flavor. You can also experiment with different citrus fruits—try lime or grapefruit zest and juice for a refreshing change. For a healthier option, substitute half of the all-purpose flour with whole wheat flour for added fiber without compromising too much on texture.

This Lemon Poppy Seed Loaf pairs beautifully with a light salad, such as a mixed greens salad with a vinaigrette, or a cup of tea for a cozy afternoon treat. It also complements a creamy cheese platter, as the acidity of the loaf balances rich cheeses perfectly. Lastly, a scoop of vanilla ice cream on the side creates a delightful contrast of temperatures and flavors!

Storage, Make-Ahead & Reheating

This Lemon Poppy Seed Loaf can be stored at room temperature for up to 3 days if wrapped tightly in plastic wrap. If you want to keep it longer, it freezes well for up to 3 months. To freeze, wrap the loaf tightly in plastic wrap and then in aluminum foil to prevent freezer burn.

When you’re ready to enjoy it again, simply thaw it in the fridge overnight. Reheat individual slices in the microwave for 15-20 seconds or in a toaster oven until warmed through. Interestingly, many people find that this loaf tastes even better the next day, as the flavors have time to meld!

Frequently Asked Questions

Can I make Lemon Poppy Seed Loaf With Citrus Icing ahead of time?

Yes — in fact, it tastes even better the next day! You can make the loaf a day in advance, allowing the flavors to develop. Just be sure to store it in an airtight container to maintain its moisture.

Can I substitute the poppy seeds?

Absolutely! If you don’t have poppy seeds on hand or prefer an alternative, you can use sesame seeds for a similar crunch or omit them entirely for a smooth loaf.

What can I use instead of buttermilk?

If you don’t have buttermilk, you can easily create a substitute by mixing ½ cup of milk (dairy or plant-based) with 1 tablespoon of vinegar or lemon juice. Let it sit for 5 minutes before using in the recipe.

How can I make this recipe gluten-free?

To make a gluten-free version of this Lemon Poppy Seed Loaf, substitute the all-purpose flour with a gluten-free all-purpose flour blend. Just ensure that the blend contains a binding agent like xanthan gum for the best results.

What is the best way to store leftover loaf?

Leftover Lemon Poppy Seed Loaf should be stored in an airtight container at room temperature for up to 3 days. For longer storage, wrap it tightly and freeze for up to 3 months. Thaw it before serving for the best texture.

Zesty Lemon Poppy Seed Delight

Final Thoughts

The Lemon Poppy Seed Loaf with Citrus Icing is truly a delightful treat that brings a burst of brightness to any occasion. The zesty lemon flavor combined with the subtle crunch of poppy seeds creates a satisfying balance, while the citrus icing adds a touch of sweetness that perfectly complements the loaf’s tanginess.

This is the kind of recipe I come back to again and again, especially when I want to brighten up a gloomy day or celebrate a small victory. The aroma that fills the kitchen as it bakes is absolutely heavenly! I encourage you to give this recipe a try; you might just find it becoming a beloved staple in your home. Don’t forget to share your results or even add your own unique twist—I can’t wait to see what you create!

Print
clock clock iconcutlery cutlery iconflag flag iconfolder folder iconinstagram instagram iconpinterest pinterest iconfacebook facebook iconprint print iconsquares squares iconheart heart iconheart solid heart solid icon

Lemon Poppy Seed Loaf


  • Author: Lily author
  • Total Time: 32 minute
  • Yield: 1 loaf 1x
Pin Recipe
Print Recipe

Description

This Lemon Poppy Seed Loaf is a delightful treat that combines zesty lemon flavor with crunchy poppy seeds. Topped with a citrus icing, it’s perfect for any occasion.


Ingredients

Scale
  • 1 ½ cups (190g) all-purpose flour
  • 1 teaspoon baking powder
  • ½ teaspoon baking soda
  • ½ teaspoon salt
  • 3 tablespoons poppy seeds
  • ½ cup (115g) unsalted butter, softened to room temperature
  • 1 cup (200g) granulated sugar
  • 2 large eggs
  • 1 teaspoon vanilla extract
  • 1 teaspoon lemon zest (from about 1 medium lemon)
  • ½ cup (120ml) buttermilk
  • 2 tablespoons fresh lemon juice
  • 1 cup (120g) powdered sugar
  • 2 tablespoons fresh lemon juice
  • 1 tablespoon orange juice
  • 1 teaspoon lemon zest (for garnish, optional)

Instructions

  1. Preheat your oven to 350°F (175°C). Grease a 9×5-inch loaf pan or line it with parchment paper for easy removal later.
  2. In a medium mixing bowl, whisk together 1 ½ cups of all-purpose flour, 1 teaspoon of baking powder, ½ teaspoon of baking soda, ½ teaspoon of salt, and 3 tablespoons of poppy seeds. This helps to evenly distribute the baking agents and ensures a uniform rise.
  3. In a large mixing bowl, cream together ½ cup of softened unsalted butter and 1 cup of granulated sugar using an electric mixer on medium speed for about 3-4 minutes, until the mixture is light and fluffy. Make sure to scrape down the sides of the bowl occasionally.
  4. Add 2 large eggs, 1 teaspoon of vanilla extract, and 1 teaspoon of lemon zest to the creamed butter and sugar, mixing until fully combined. You want a smooth consistency, so ensure there are no lumps of butter.
  5. In a small bowl, combine ½ cup of buttermilk and 2 tablespoons of fresh lemon juice. Alternately add the dry ingredients and buttermilk mixture to the butter mixture, starting and ending with the dry ingredients. Mix just until combined; do not overmix, as this can lead to a dense loaf.
  6. Pour the batter into the prepared loaf pan. Smooth the top with a spatula, ensuring it’s even. Bake in the preheated oven for 50-60 minutes, or until a toothpick inserted in the center comes out clean. The edges should be lightly golden brown, and the center should feel just set.
  7. Once baked, remove the loaf from the oven and allow it to cool in the pan for about 10 minutes. Then, transfer it to a wire rack to cool completely. Resist the urge to slice too soon, as it will be crumbly if it’s still warm.
  8. While the loaf is cooling, prepare the citrus icing. In a medium bowl, whisk together 1 cup of powdered sugar, 2 tablespoons of fresh lemon juice, and 1 tablespoon of orange juice until smooth. If the icing is too thick, you can add a little more juice to reach your desired consistency.
  9. Once the loaf is completely cool, drizzle the citrus icing over the top. If you like, sprinkle with an additional teaspoon of lemon zest for an extra pop of flavor and color.
  • Prep Time: 15 mins
  • Cook Time: 50-60 mins
  • Category: Dessert
  • Method: Baking
  • Cuisine: American

Nutrition

  • Serving Size: 1 slice
  • Calories: 200
  • Sugar: 15 g
  • Sodium: 150 mg
  • Fat: 8 g
  • Saturated Fat: 5 g
  • Unsaturated Fat: 3 g
  • Trans Fat: 0 g
  • Carbohydrates: 30 g
  • Fiber: 1 g
  • Protein: 3 g
  • Cholesterol: 40 mg

Keywords: Be careful not to overmix your batter; this is a common mistake that can lead to a dense loaf. Use room temperature ingredients for a smoother batter and even baking.

Did you make this recipe?

Share a photo and tag us — we can't wait to see what you've made!

  • Privacy Policy
  • Terms Of Service
  • Contact
  • About
  • GDPR

Copyright © 2025 Homesmad