Caramel Coffee Buttercream Cake is more than just a dessert; it’s an invitation to an unparalleled culinary experience, a truly spectacular creation that promises to delight all your senses. Imagine the rich, aromatic depth of freshly brewed coffee mingling harmoniously with the buttery sweetness of golden caramel, all encased in a tender, moist cake and crowned with a cloud of silky buttercream. As an enthusiastic baker, I can confidently say that crafting and sharing this masterpiece brings immense satisfaction and joy.
A Delicious History and Modern Indulgence
While coffee has a storied past, captivating palates across the globe for centuries, and caramel has been a beloved confectionery treat for ages, their ingenious combination into a cake like this represents a relatively modern marvel. People absolutely adore this dish not only for its exquisitely decadent taste, where the slight bitterness of coffee perfectly balances the luscious sweetness of caramel, but also for its luxurious, melt-in-your-mouth texture. The light, airy sponge, coupled with the smooth, exquisitely creamy buttercream, creates a delightful sensation with every single forkful. This particular Caramel Coffee Buttercream Cake is truly a showstopper, making it perfect for grand celebrations, intimate gatherings, or simply as a sophisticated indulgence to elevate your everyday afternoon tea. It’s a guaranteed crowd-pleaser that embodies pure comfort and elegance.
Ingredients:
For the Coffee-Infused Vanilla Cake Layers:
- 2 ½ cups (300g) all-purpose flour: I always recommend sifting your flour for the lightest, fluffiest cake. This ensures no lumps and a perfectly uniform texture.
- 2 cups (400g) granulated sugar: Provides sweetness and helps keep the cake moist.
- 1 tablespoon baking powder: Our leavening agent to give the cake its beautiful rise. Make sure it’s fresh!
- ½ teaspoon salt: Crucial for balancing the sweetness and enhancing all the other flavors. Don’t skip it!
- 1 cup (226g) unsalted butter, softened: Needs to be at room temperature, but not melted. It should yield slightly when pressed. This is key for creating that light, airy crumb when creamed with sugar.
- 4 large eggs, at room temperature: Just like butter, room temperature eggs emulsify better with the other ingredients, leading to a smoother batter and a more consistent cake texture.
- 2 teaspoons pure vanilla extract: A classic flavor enhancer that truly makes everything better.
- 1 cup (240ml) whole milk, at room temperature: Whole milk provides richness and moisture. Again, room temperature is important for proper emulsification.
- ½ cup (120ml) strong brewed coffee or espresso, cooled to room temperature: This is where we get that lovely coffee essence in our cake. Make sure it’s cooled to avoid cooking the eggs or butter in the batter. You can brew a fresh pot or use instant espresso powder dissolved in hot water and then cooled.
For the Homemade Salted Caramel Sauce:
- 1 ½ cups (300g) granulated sugar: The foundation of our caramel.
- ¼ cup (60ml) water: Helps the sugar dissolve evenly, preventing crystallization, especially important when making dry caramel.
- 1 cup (240ml) heavy cream, warmed: This needs to be warm before adding to the hot sugar to prevent seizing and ensure a smooth, luxurious sauce. Gently warm it in a microwave or small saucepan.
- ½ cup (113g) unsalted butter, cut into cubes, at room temperature: Adds richness and a beautiful silky texture to our caramel.
- 1 teaspoon flaky sea salt: A touch of salt beautifully balances the sweetness of the caramel, making it even more addictive. Adjust to your preference!
- 1 teaspoon pure vanilla extract: Enhances the caramel’s depth of flavor.
For the Coffee Swiss Meringue Buttercream:
- 6 large egg whites (approximately 180g): Make sure there’s absolutely no yolk in your whites, as fat will prevent them from whipping properly.
- 1 ½ cups (300g) granulated sugar: Used to stabilize the meringue and provide sweetness.
- 2 ½ cups (565g) unsalted butter, softened but still cool: This is a crucial ingredient for Swiss Meringue Buttercream. It needs to be soft enough to incorporate but cool enough to maintain the emulsion. It should be pliable but not greasy or melty.
- 2 teaspoons pure vanilla extract: To complement the coffee and caramel flavors.
- 2 tablespoons espresso powder: For that rich coffee flavor! I recommend a high-quality espresso powder for the best results.
- 2 tablespoons hot water: To dissolve our espresso powder into a concentrated coffee liquid.
- ½ cup (120ml) of the homemade salted caramel sauce (from above): This will be swirled into our buttercream, adding incredible flavor and a beautiful ripple effect.
Equipment You’ll Need:
- Three 8-inch round cake pans
- Parchment paper
- Stand mixer with whisk and paddle attachments (a hand mixer will work, but a stand mixer makes Swiss Meringue Buttercream much easier)
- Large heatproof bowl (for the double boiler)
- Small to medium heavy-bottomed saucepan (for caramel)
- Rubber spatulas, whisks, measuring cups, and spoons
- Offset spatulas (for frosting)
- Cake turntable (optional, but incredibly helpful for decorating)
- Piping bags and decorative tips (optional, for advanced decoration)
Phase 1: Preparing the Coffee-Infused Vanilla Cake Layers
Let’s Get Baking Those Delicious Cake Layers!
Creating a moist, tender cake is the foundation of our Caramel Coffee Buttercream Cake. Follow these steps carefully for success!
- Preheat and Prepare: Start by preheating your oven to 350°F (175°C). This ensures the oven is at the correct temperature when your batter is ready, which is vital for proper rising. Grease and flour three 8-inch round cake pans, or line the bottoms with parchment paper circles and then grease the sides. I prefer parchment circles; they make removal so much easier!
- Combine Dry Ingredients: In a medium bowl, whisk together the sifted all-purpose flour, granulated sugar, baking powder, and salt. Whisking ensures these ingredients are evenly distributed, so your leavening is consistent throughout the cake.
- Cream Butter and Sugar: In the bowl of your stand mixer fitted with the paddle attachment, or with a hand mixer, beat the softened unsalted butter on medium speed for about 1-2 minutes until it’s light and creamy. Then, gradually add the granulated sugar, beating on medium-high speed for another 3-5 minutes. This step, known as creaming, is critical. It incorporates air into the butter and sugar mixture, which creates tiny pockets that expand in the oven, giving your cake a wonderfully light and fluffy texture. Scrape down the sides of the bowl often to ensure everything is well combined.
- Incorporate Eggs and Vanilla: Reduce the mixer speed to medium-low. Add the large eggs one at a time, beating well after each addition. Make sure each egg is fully incorporated before adding the next. This prevents the mixture from curdling and ensures a smooth batter. Once all eggs are in, mix in the pure vanilla extract. The mixture should look light and fluffy.
- Alternate Dry and Wet Ingredients: Now, we’ll gradually add the dry ingredients alternately with the liquid ingredients to our butter mixture, starting and ending with the dry. With the mixer on low speed, add about one-third of the flour mixture to the butter mixture, mixing just until combined. Then, pour in half of the whole milk and half of the cooled strong brewed coffee, mixing until just incorporated. Repeat this process: another third of the flour, then the remaining milk and coffee, and finally the last third of the flour. Do not overmix! Overmixing develops the gluten in the flour too much, which can lead to a tough, dry cake. Mix only until no streaks of flour remain. A few small lumps are perfectly fine.
- Divide and Bake: Divide the cake batter evenly among your three prepared cake pans. I like to use a kitchen scale for this to ensure my layers are perfectly uniform, which makes assembly much easier. Smooth the tops with an offset spatula. Bake for 25-30 minutes, or until a wooden skewer or toothpick inserted into the center of a cake comes out clean. The cakes should spring back lightly when gently touched.
- Cooling Process: Once baked, remove the cakes from the oven and let them cool in their pans on a wire rack for about 10-15 minutes. This allows them to firm up slightly before being removed. After 10-15 minutes, carefully invert the cakes onto the wire rack, remove the pans, and gently peel off the parchment paper. Let them cool completely to room temperature before frosting. This is a very important step! Frosting warm cakes will cause your buttercream to melt and slide right off, creating a messy situation. You can even wrap them tightly in plastic wrap once cool and refrigerate them overnight, or freeze them for longer storage, if you’re not decorating immediately.
Phase 2: Crafting the Homemade Salted Caramel Sauce
A Little Sweet and Salty Indulgence!
This rich, buttery caramel will be both incorporated into our buttercream and drizzled over the finished cake. It’s easier than you think!
- Prepare Your Ingredients: Have all your ingredients measured out and ready to go. This includes the heavy cream, which should be gently warmed (either in a small saucepan over low heat or in the microwave) to prevent seizing when added to the hot sugar. Also, have your butter cubes, salt, and vanilla extract ready. Caramel-making moves quickly once the sugar starts to cook, so mise en place is key!
- Cook the Sugar and Water: In a medium, heavy-bottomed saucepan, combine the granulated sugar and water. Stir gently with a wooden spoon or spatula just to combine and moisten all the sugar. Place the saucepan over medium heat. Do not stir once the sugar begins to boil. Instead, gently swirl the pan occasionally to ensure even cooking. You can also brush down the sides of the pan with a wet pastry brush to prevent sugar crystals from forming.
- Watch for Color: The mixture will first boil, then turn clear, and then gradually begin to color. This process takes some patience. Keep a close eye on it! It will go from pale amber to a rich, deep golden-brown very quickly. You’re looking for an amber color, similar to an old penny. Do not let it get too dark, or it will taste burnt. If it smells burnt, you’ll need to start over. This usually takes about 8-12 minutes, but timing can vary greatly.
- Add Warm Cream: As soon as the sugar reaches that perfect amber color, immediately and carefully pour the warmed heavy cream into the hot sugar mixture. Be extremely cautious as the mixture will bubble up violently and release a lot of steam. Stand back and pour slowly. Continue to whisk vigorously until the mixture is smooth and fully combined. The caramel will be very hot!
- Stir in Butter, Salt, and Vanilla: Remove the saucepan from the heat. Add the cubed unsalted butter, sea salt, and vanilla extract. Stir constantly with a whisk or rubber spatula until all the butter has melted and is fully incorporated, and the caramel is smooth and glossy. The butter will give it that incredible richness and velvety texture.
- Cool and Store: Carefully pour the finished salted caramel sauce into a heatproof jar or container. Allow it to cool completely at room temperature. As it cools, it will thicken considerably. Once cool, cover and store it in the refrigerator. It will last for several weeks. Before using, you may need to gently warm it in the microwave or a double boiler to achieve a pourable consistency. We’ll need about ½ cup for the buttercream and the rest for drizzling!
Phase 3: Whipping Up the Silky Coffee Swiss Meringue Buttercream
The Dreamy Frosting that Ties it All Together!
Swiss Meringue Buttercream (SMBC) is incredibly smooth, stable, and less sweet than American buttercream, making it perfect for our multi-layered cake. Don’t be intimidated; I’ll walk you through it!
- Prepare Coffee Essence: In a small bowl, dissolve the espresso powder in the hot water. Stir until completely smooth and set aside to cool slightly. This creates a concentrated coffee flavor that will infuse our buttercream.
- Set Up Double Boiler for Meringue Base: Combine the large egg whites and granulated sugar in the bowl of your stand mixer (make sure it’s a heatproof bowl). Place this bowl over a saucepan of simmering water, ensuring the bottom of the bowl does not touch the water. This creates a double boiler effect.
- Heat and Whisk Egg Whites: Whisk the egg white and sugar mixture constantly over the simmering water. You are aiming to dissolve the sugar granules completely and pasteurize the egg whites. Continue whisking until the mixture reaches 160°F (71°C) on an instant-read thermometer. Alternatively, rub a small amount of the mixture between your thumb and forefinger; if you don’t feel any grittiness from the sugar, it’s ready. This usually takes about 5-8 minutes.
- Whip the Meringue: Immediately remove the bowl from the heat and attach it to your stand mixer fitted with the whisk attachment. Begin whipping on medium-high speed. Continue to whip the meringue for about 10-15 minutes, or until it is very thick, glossy, and holds stiff peaks. Crucially, the bowl must feel completely cool to the touch. If the bowl is still warm, your butter will melt when added. This cooling process is essential for a stable buttercream.
- Gradually Add Butter: Once the meringue is cool and holding stiff peaks, switch from the whisk attachment to the paddle attachment on your stand mixer. With the mixer on medium-low speed, begin adding the softened but still cool unsalted butter, one cube at a time. Add a new cube only after the previous one has been fully incorporated. The mixture might look curdled or soupy at this stage – don’t panic! This is completely normal and part of the process. Keep beating!
- Beat Until Smooth: Increase the mixer speed to medium-high and continue to beat the buttercream. It might look like scrambled eggs or a broken mess for a while, but eventually, it will come together into a wonderfully smooth, fluffy, and cohesive buttercream. This can take anywhere from 5-15 minutes of continuous beating after all the butter is added. Keep beating until it’s light, airy, and spreadable.
- Flavor and Fold in Caramel: Once your SMBC is smooth and beautiful, beat in the vanilla extract and the cooled dissolved espresso powder. Mix until just combined. Finally, gently fold in ½ cup of your cooled homemade salted caramel sauce with a rubber spatula. You can marble it in for a beautiful swirl or fully incorporate it, depending on your preference. I love a good swirl for visual appeal and pockets of intense caramel flavor!
Phase 4: Assembling and Decorating Your Caramel Coffee Buttercream Cake
The Grand Finale!
This is where all your hard work comes together to create a stunning and delicious Caramel Coffee Buttercream Cake. Take your time, and enjoy the process!
- Prepare Your Cake Layers: Ensure your cake layers are completely cool. If they have domes on top, use a serrated knife or a cake leveler to trim them flat. This creates even layers and a stable cake structure. A cake turntable makes this step, and all subsequent frosting steps, significantly easier.
- First Layer and Filling: Place one leveled cake layer on your serving plate or cake stand. Spread a generous layer of the Coffee Swiss Meringue Buttercream evenly over the top, reaching close to the edges. You can create a small “dam” or ring of buttercream around the perimeter before filling the center if you plan to add extra caramel filling, to ensure it doesn’t seep out. You can also drizzle a small amount of extra caramel directly onto the buttercream filling for an extra burst of flavor, but be mindful not to add too much liquid.
- Stack and Fill: Carefully place the second cake layer on top, gently pressing down to secure it. Repeat the buttercream filling and optional caramel drizzle. Place the third and final cake layer on top, pressing down gently once more.
- Apply the Crumb Coat: Now for the “crumb coat.” This is a very thin layer of buttercream that traps any loose cake crumbs, preventing them from mixing into your final, pristine layer of frosting. Apply a thin, even layer of buttercream over the entire cake, top and sides. Don’t worry about perfection here; its sole job is to seal in those crumbs.
- Chill the Crumb-Coated Cake: Once the crumb coat is applied, place the cake in the refrigerator for at least 20-30 minutes, or until the buttercream is firm to the touch. This chilling process is essential. It sets the crumb coat, making the final frosting much easier and cleaner.
- Apply the Final Frosting Layer: Once the crumb coat is firm, remove the cake from the refrigerator. Apply a thicker, more generous layer of the Coffee Swiss Meringue Buttercream over the top and sides of the cake. Use an offset spatula or a bench scraper to smooth the frosting, working your way around the cake until you achieve your desired finish. You can go for perfectly smooth, or create beautiful swirls and textures with your spatula. Take your time, adding more buttercream as needed, and continuously scraping your spatula clean for the smoothest results.
- Decorate and Drizzle: This is where your cake truly comes to life! Gently warm any remaining homemade salted caramel sauce if it has thickened too much, until it’s a pourable consistency. Drizzle the caramel over the top of the cake, allowing some to artfully drip down the sides. You can use a spoon or a squeeze bottle for more control. For an extra touch, you can pipe additional buttercream borders or rosettes around the top edge of the cake using a piping bag and a star tip. A sprinkle of flaky sea salt on top of the caramel drizzle can also look lovely and enhance the flavor.
- Serve and Store: Your stunning Caramel Coffee Buttercream Cake is now ready to be enjoyed! Slice with a sharp, warm knife for clean cuts. Store any leftover cake in an airtight container at room temperature for up to 2-3 days, or in the refrigerator for up to 5 days. For the best flavor and texture, if refrigerated, allow the cake to come closer to room temperature for about 30-60 minutes before serving. Enjoy every single, delightful bite of your homemade masterpiece!

Conclusion:
And there you have it, my friends! We’ve reached the sweet finale of our culinary journey, and I genuinely hope you’re as excited as I am about the prospect of bringing this magnificent creation to life in your own kitchen. This isn’t just another dessert recipe; it’s an invitation to experience something truly special, a symphony of flavors that will dance on your palate and leave an unforgettable impression. From the moment you taste that first bite, you’ll understand why this particular cake has become such a beloved staple in my baking repertoire. The rich, deep notes of coffee, perfectly balanced by the sweet, buttery embrace of caramel, all enveloped in a cloud of creamy, dreamy buttercream, create a dessert experience that is nothing short of transcendent. It’s the kind of cake that makes you close your eyes and savor every single morsel, a true testament to the power of thoughtful flavor combinations and a little bit of baking magic. Trust me when I say, this recipe delivers on its promise of pure, unadulterated bliss, making it an absolute must-try for anyone who appreciates fine desserts.
Serving Suggestions to Elevate Your Experience
Now that your stunning cake is baked and beautifully adorned, let’s talk about how to best enjoy it. A generous slice of this decadent treat pairs exquisitely with a freshly brewed cup of strong, black coffee or a delicate, unsweetened Earl Grey tea – the bitterness of the beverage beautifully cuts through the sweetness of the cake, creating a harmonious balance. For a truly luxurious after-dinner experience, consider serving it alongside a scoop of vanilla bean ice cream, allowing the melting ice cream to mingle with the cake’s flavors. It’s also an absolutely perfect centerpiece for any celebration, from birthdays and anniversaries to simple weekend gatherings, promising to wow your guests and earn you endless compliments. Imagine the smiles when you present such a beautifully crafted dessert!
Endless Possibilities: Delicious Variations to Try
One of the things I love most about baking is the opportunity for creativity and personalization. While the original recipe for this
Caramel Coffee Buttercream Cake
is undeniably perfect as is, don’t hesitate to make it your own! For an extra textural element, try folding toasted, chopped pecans or walnuts into the cake batter, or sprinkling them between the layers with the buttercream. If you’re a chocolate enthusiast, a drizzle of dark chocolate ganache over the top, or even some mini chocolate chips incorporated into the batter, would be an absolutely divine addition. Feeling adventurous? You could experiment with a different coffee flavor in your buttercream, perhaps a hazelnut coffee extract, or even a hint of cardamom for a spiced twist. If you prefer a less intense coffee flavor, simply reduce the amount of espresso powder, or for a bolder kick, opt for a strong shot of cooled espresso instead. You could also transform this recipe into gorgeous individual cupcakes, perfect for parties, simply by adjusting the baking time. The possibilities are truly endless, and I encourage you to play around with these suggestions to discover your own perfect version.
Your Turn: Bake, Share, and Inspire!
Now, it’s over to you! I genuinely hope you feel inspired and ready to tackle this incredible recipe. There’s an immense sense of satisfaction that comes with creating something so delicious and beautiful with your own hands, and I promise you, the reward for your efforts will be well worth it. Don’t be shy – dive in, follow the steps, and enjoy the wonderful process of baking. Once your magnificent creation is complete, please, please share your experience with me! I absolutely adore seeing your baking successes and hearing your thoughts. Snap a photo of your finished cake, share it on your favorite social media platform, and tag me (if you know where to find me!) or leave a comment below. Let me know what you loved about it, any variations you tried, or even if you have questions. Your feedback and beautiful creations truly make my day and inspire others to give it a try. So, preheat your ovens, gather your ingredients, and let’s get baking this show-stopping dessert!
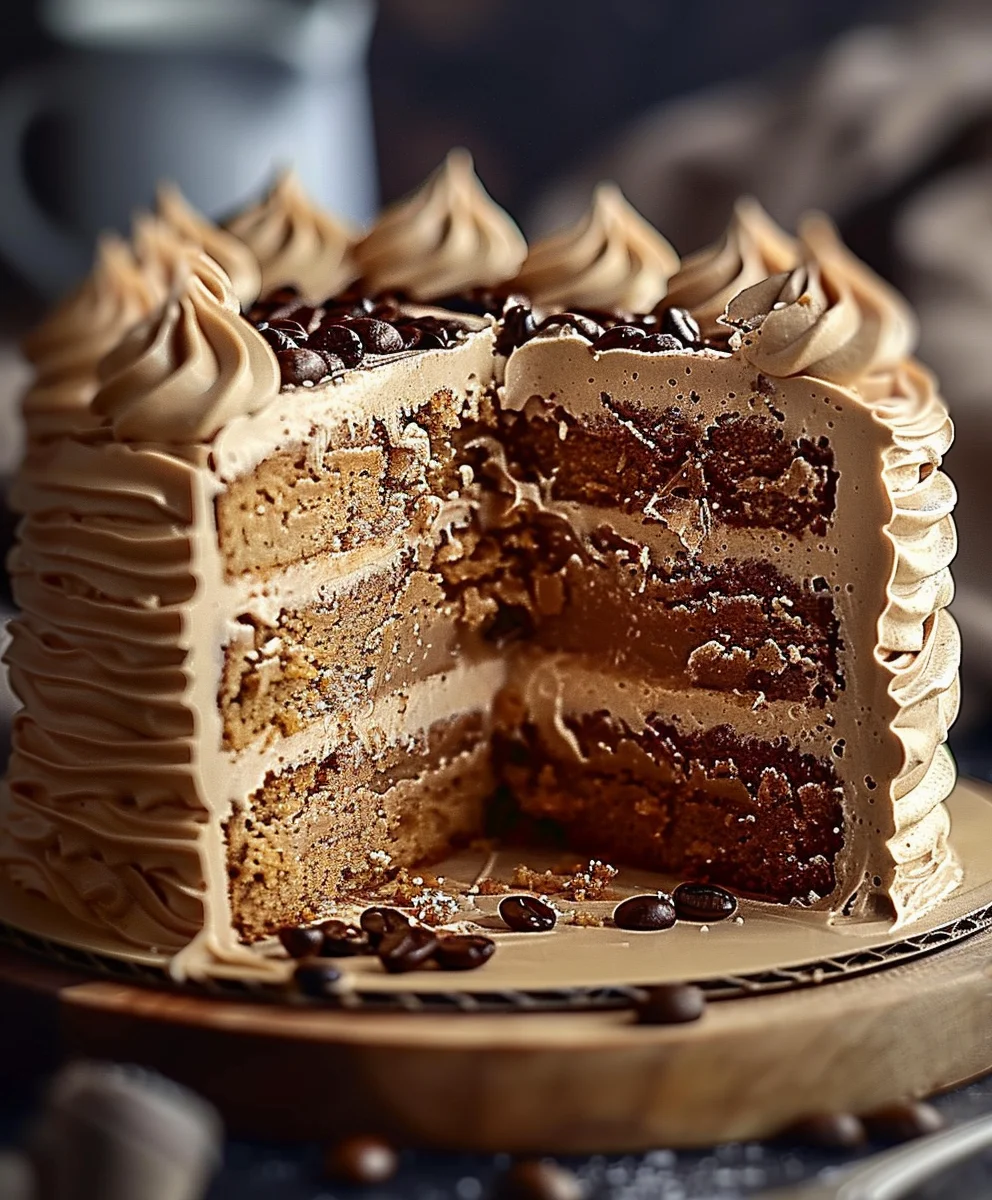
Caramel Coffee Buttercream Cake
This Caramel Coffee Buttercream Cake is a spectacular creation combining rich coffee, buttery caramel, and tender cake crowned with silky buttercream. Perfect for any celebration, it’s a guaranteed crowd-pleaser.
Ingredients
-
2 ½ cups (300g) all-purpose flour
-
2 cups (400g) granulated sugar (for cake)
-
1 tablespoon baking powder
-
½ teaspoon salt (for cake)
-
1 cup (226g) unsalted butter, softened (for cake)
-
4 large eggs, at room temperature
-
2 teaspoons pure vanilla extract (for cake)
-
1 cup (240ml) whole milk, at room temperature
-
½ cup (120ml) strong brewed coffee or espresso, cooled
-
1 ½ cups (300g) granulated sugar (for caramel)
-
¼ cup (60ml) water (for caramel)
-
1 cup (240ml) heavy cream, warmed
-
½ cup (113g) unsalted butter, cubed, at room temperature (for caramel)
-
1 teaspoon flaky sea salt (for caramel)
-
1 teaspoon pure vanilla extract (for caramel)
-
6 large egg whites (approx. 180g)
-
1 ½ cups (300g) granulated sugar (for buttercream)
-
2 ½ cups (565g) unsalted butter, softened but cool (for buttercream)
-
2 teaspoons pure vanilla extract (for buttercream)
-
2 tablespoons espresso powder
-
2 tablespoons hot water (for espresso)
-
½ cup (120ml) homemade salted caramel sauce (for buttercream)
Instructions
-
Step 1
Preheat oven to 350°F (175°C). Prepare three 8-inch round cake pans by greasing/flouring or lining with parchment. In a medium bowl, whisk together 2 ½ cups flour, 2 cups granulated sugar, 1 tbsp baking powder, and ½ tsp salt. -
Step 2
In a stand mixer, cream 1 cup softened unsalted butter until light. Gradually add 2 cups granulated sugar, beating 3-5 min until fluffy. Incorporate 4 room temperature eggs one at a time, then mix in 2 tsp vanilla extract. -
Step 3
Alternately add the dry ingredient mixture and the wet mixture (1 cup whole milk + ½ cup strong brewed coffee, cooled) to the butter mixture, starting and ending with dry ingredients. Mix on low speed until just combined, do not overmix. -
Step 4
Divide batter evenly among prepared pans. Bake for 25-30 minutes, or until a wooden skewer comes out clean. Cool cakes in pans for 10-15 minutes, then invert onto a wire rack to cool completely. -
Step 5
For the Salted Caramel Sauce: In a heavy-bottomed saucepan, combine 1 ½ cups granulated sugar and ¼ cup water. Cook over medium heat without stirring (swirl occasionally) until it reaches a deep golden-amber color (approx. 8-12 min). Immediately and carefully pour in 1 cup warmed heavy cream, whisking vigorously until smooth. Remove from heat, then stir in ½ cup cubed unsalted butter, 1 tsp flaky sea salt, and 1 tsp vanilla extract until smooth and glossy. Pour into a heatproof jar and cool completely. Store refrigerated. -
Step 6
For the Coffee Swiss Meringue Buttercream: Dissolve 2 tbsp espresso powder in 2 tbsp hot water; set aside to cool. In a heatproof stand mixer bowl, combine 6 large egg whites and 1 ½ cups granulated sugar. Place over simmering water (double boiler) and whisk constantly until sugar dissolves and mixture reaches 160°F (71°C). -
Step 7
Remove from heat. Whip on medium-high speed with a whisk attachment for 10-15 minutes until very thick, glossy, stiff peaks form, and the bowl is completely cool to the touch. Switch to the paddle attachment. With the mixer on medium-low, gradually add 2 ½ cups softened but cool unsalted butter, one cube at a time, ensuring each is incorporated. Increase speed to medium-high and beat for 5-15 minutes until smooth, fluffy, and cohesive. -
Step 8
Beat in 2 tsp vanilla extract and the cooled dissolved espresso powder. Gently fold in ½ cup of the cooled homemade salted caramel sauce. -
Step 9
Assembly: Ensure cooled cake layers are level. Place one layer on a serving plate, spread with buttercream. Repeat with second and third layers. Apply a thin “crumb coat” of buttercream over the entire cake, then chill for 20-30 minutes until firm. -
Step 10
Apply a final, thicker layer of buttercream to the cake, smoothing the top and sides. Gently warm remaining caramel sauce if needed, then drizzle over the top, allowing some to drip down the sides. Optionally, decorate with piped buttercream or flaky sea salt. -
Step 11
Slice and serve. Store leftovers in an airtight container at room temperature for 2-3 days, or refrigerated for up to 5 days. Allow to come to room temperature before serving if refrigerated.
Important Information
Nutrition Facts (Per Serving)
It is important to consider this information as approximate and not to use it as definitive health advice.
Allergy Information
Please check ingredients for potential allergens and consult a health professional if in doubt.