Festive Cranberry Turkey Stuffing Balls are here to truly elevate your holiday dining experience! I know, the thought of preparing an elaborate holiday meal can often feel overwhelming, but what if I told you there’s a magnificent way to present a classic, beloved side dish with incredible elegance and surprising ease? Stuffing, or dressing as it’s affectionately known in some regions, has long been a quintessential component of festive gatherings, particularly Thanksgiving and Christmas feasts. It’s a dish steeped in tradition, offering a comforting blend of savory herbs, bread, and often, a touch of sweetness.
People absolutely adore stuffing for its irresistible combination of textures – that perfectly golden, crispy exterior giving way to a moist, aromatic interior. My favorite part about this particular rendition is how it transforms the traditional, often messy, communal dish into charming, individual servings. The addition of vibrant cranberries provides a delightful tartness that beautifully cuts through the richness, while the turkey element ensures every bite is hearty and harmonious. With these individual Festive Cranberry Turkey Stuffing Balls, you gain all the beloved flavors and textures of your grandmother’s recipe, but in a convenient, visually appealing format that will undoubtedly impress your guests and streamline your serving process. They are simply perfect for reducing serving-time fuss and adding a touch of gourmet flair to any holiday table.
Ingredients:
My dears, let’s gather everything we need to create these truly spectacular Festive Cranberry Turkey Stuffing Balls. The quality of your ingredients really shines through here, so pick the best you can!
- For the Bread Base:
- 1 pound (approximately 16 cups cubed) stale bread. I highly recommend a mix of sourdough and challah, or even a good quality country white bread. Stale bread is key because it absorbs the broth beautifully without becoming mushy.
- For the Aromatics and Flavor Foundation:
- 1 large yellow onion, finely diced.
- 3 stalks celery, finely diced.
- 4 cloves garlic, minced.
- ½ cup (1 stick) unsalted butter.
- 2 tablespoons olive oil.
- For the Fresh Herb Bouquet:
- ¼ cup fresh sage leaves, finely chopped. Please, use fresh; it makes all the difference!
- 2 tablespoons fresh thyme leaves, finely chopped.
- 1 tablespoon fresh rosemary, finely chopped.
- ¼ cup fresh parsley, finely chopped.
- For the Meaty Goodness (optional, but highly recommended for depth):
- 1 pound ground turkey or turkey sausage (mild or sweet Italian style works wonderfully). If you opt for sausage, taste for seasoning before adding extra salt later.
- For the Festive Touch:
- 1 cup dried cranberries, sweetened. These burst with tart-sweet flavor in every bite.
- ½ cup toasted pecans or walnuts, roughly chopped (optional, for extra crunch and nutty flavor).
- For the Moistness and Binding:
- 2 large eggs, lightly beaten.
- 4-5 cups low-sodium chicken or turkey broth, warmed. The exact amount will vary based on your bread and desired moisture level, so start with 4 and add more if needed.
- For Seasoning:
- 1 tablespoon poultry seasoning.
- 1 teaspoon salt, or to taste.
- ½ teaspoon freshly ground black pepper, or to taste.
- A pinch of red pepper flakes (optional, for a subtle kick).
Preparing Your Ingredients: The Foundation of Flavor
Alright, friends, let’s get our hands dirty and prepare everything for these glorious Festive Cranberry Turkey Stuffing Balls! A little mise en place goes a long way to make the cooking process smooth and enjoyable.
- Prepare Your Bread: The first and most crucial step is getting your bread ready. If your bread isn’t already stale, you’ll need to cube it into roughly ½ to ¾-inch pieces. I find that about 16 cups of cubed bread is perfect. Then, spread these cubes out on a large baking sheet and let them air dry for at least 8-12 hours, or even overnight. Alternatively, if you’re short on time, you can toast them in a 250°F (120°C) oven for 20-30 minutes, tossing occasionally, until they are dried out but not browned. The goal here is to remove as much moisture as possible without burning, which allows the bread to soak up all that wonderful broth and flavor without turning into a gummy mess. Once dried, transfer the bread cubes to your largest mixing bowl.
- Chop Your Aromatics: Grab your onion and celery, and dice them finely. Uniformity in size helps them cook evenly. For the garlic, mince it. I prefer a finer chop for the aromatics in stuffing balls so they blend seamlessly into the mixture.
- Harvest and Chop Your Fresh Herbs: This is where so much of the classic stuffing flavor comes from! Pluck the leaves from your fresh sage, thyme, and rosemary. Give them a good, fine chop. Then, coarsely chop your fresh parsley. Using fresh herbs is non-negotiable for this recipe, my dear. Their vibrant, aromatic oils truly elevate the stuffing to another level compared to dried herbs.
- Brown the Ground Turkey (if using): If you’re adding ground turkey or turkey sausage for an extra layer of savory depth (which I highly recommend for these Festive Cranberry Turkey Stuffing Balls!), heat a large skillet over medium-high heat. Add a tablespoon of olive oil, then crumble in your ground turkey or turkey sausage. Cook, breaking it up with a spoon, until it’s fully browned and cooked through, about 5-7 minutes. Once cooked, drain off any excess fat from the skillet. You want all that delicious turkey flavor without making your stuffing greasy. Transfer the cooked turkey to a separate plate for now.
- Toast Your Nuts (Optional but Delicious): If you’re adding pecans or walnuts, I suggest quickly toasting them. Spread them on a dry skillet over medium heat for 3-5 minutes, tossing frequently, until fragrant. This really brings out their flavor and adds a lovely crunch. Let them cool, then roughly chop them.
Crafting the Flavorful Stuffing Mixture
Now that all our gorgeous ingredients are prepped, it’s time to bring them together to create the heart of our Festive Cranberry Turkey Stuffing Balls – the stuffing mixture itself!
- Sauté the Aromatics: Return your large skillet (the one you used for the turkey, if applicable, or a clean one) to medium heat. Add the ½ cup of unsalted butter and 2 tablespoons of olive oil. Once the butter is melted and shimmering, add your finely diced onion and celery. Cook gently, stirring occasionally, until they are softened and translucent but not browned, about 8-10 minutes. This slow sauté really develops their sweetness and depth.
- Infuse with Garlic and Herbs: Add your minced garlic to the skillet with the softened onion and celery. Cook for another minute until fragrant, being careful not to burn the garlic. Then, stir in your finely chopped fresh sage, thyme, rosemary, and the tablespoon of poultry seasoning. Cook for just 1-2 minutes more, until the herbs are fragrant and their aromas fill your kitchen. This brief cooking time helps release their essential oils, intensifying their flavor.
- Combine Dry Ingredients: Into that very large bowl with your stale bread cubes, add the cooked ground turkey (if using), the dried cranberries, and your toasted, chopped pecans or walnuts (if using). Now, carefully spoon the hot, aromatic sautéed vegetable and herb mixture from the skillet over the bread mixture. Gently toss everything together using a large spoon or your clean hands. You want to distribute the warm, buttery aromatics evenly throughout the bread.
- Prepare the Wet Binder: In a separate medium-sized bowl, whisk together the 2 lightly beaten large eggs and 4 cups of the warmed low-sodium chicken or turkey broth. Season this liquid mixture with 1 teaspoon of salt and ½ teaspoon of freshly ground black pepper. If you’re feeling adventurous, a tiny pinch of red pepper flakes can add a lovely, subtle warmth. Warming the broth slightly helps the bread absorb it more readily.
- Moisten the Mixture: Now for the magic! Gradually pour about 3 cups of the wet binder mixture over the dry ingredients in your large bowl. Using your hands (which I find is truly the best tool for stuffing!) or a sturdy spoon, gently mix and toss everything together. The goal is to moisten all the bread cubes without making them soggy. You want the mixture to be consistently damp and cohesive enough to hold a ball shape, but not saturated. Add the remaining broth, a half-cup at a time, if the mixture still feels too dry or crumbly. This step is important: don’t overmix, but ensure all the bread has a chance to absorb the liquid. The final texture should be moist and pleasantly soft.
- Rest for Flavor Development: Once everything is thoroughly mixed, cover the bowl with a clean kitchen towel or plastic wrap and let the stuffing mixture rest at room temperature for at least 15-20 minutes. This resting period allows the bread to fully absorb the liquids and flavors to meld together beautifully. It truly makes a difference in the final texture and taste of your Festive Cranberry Turkey Stuffing Balls.
Forming and Baking Your Festive Cranberry Turkey Stuffing Balls
The moment of truth is here! Let’s transform this incredible mixture into those delightful, perfectly portioned stuffing balls that will steal the show on your holiday table.
- Preheat Your Oven and Prep Baking Sheets: Before you start rolling, preheat your oven to 375°F (190°C). Line two large baking sheets with parchment paper. This prevents sticking and makes cleanup a breeze, leaving you more time to enjoy the festivities!
- Form the Stuffing Balls: Lightly grease your hands with a little bit of olive oil or cooking spray – this helps prevent sticking and makes rolling easier. Scoop out portions of the stuffing mixture, aiming for about 2-3 tablespoons per ball, which is roughly the size of a golf ball to a small plum. Gently but firmly roll the mixture between your palms to form compact balls. You want them to hold together well without being overly dense or squashed. Consistency in size is important for even baking, so try to make them as uniform as possible.
- Arrange on Baking Sheets: Place the formed stuffing balls onto your prepared baking sheets, leaving a little space between each one (about 1 inch). Don’t crowd the baking sheets, as this will steam the balls instead of allowing them to brown and crisp up beautifully. If you have too many for two sheets, bake in batches.
- Initial Bake – Covered: To ensure the Festive Cranberry Turkey Stuffing Balls cook through and stay wonderfully moist inside, cover the baking sheets loosely with aluminum foil. This traps steam and helps them cook evenly without drying out too quickly. Bake for 20 minutes with the foil on.
- Final Bake – Uncovered for Golden Perfection: After 20 minutes, carefully remove the aluminum foil. Return the baking sheets to the oven and continue baking for another 20-25 minutes, or until the stuffing balls are beautifully golden brown and delightfully crispy on the outside. Keep a close eye on them during this phase, as oven temperatures can vary. You’re looking for that appealing crisp exterior.
- Check for Doneness: If you used ground turkey directly in your stuffing and are concerned about it being fully cooked, you can insert an instant-read thermometer into the center of a few balls; it should register 165°F (74°C). Otherwise, visual cues of a golden, crispy exterior and a wonderfully fragrant aroma are usually enough.
Elevating Your Stuffing Balls: Serving and Storage Tips
Congratulations! Your kitchen is now filled with the irresistible aroma of these magnificent Festive Cranberry Turkey Stuffing Balls. Here’s how to serve them with flair and keep them delicious for days to come.
- Allow to Rest: Once out of the oven, let your Festive Cranberry Turkey Stuffing Balls rest on the baking sheets for 5-10 minutes. This allows them to firm up slightly and makes them easier to handle without crumbling.
- Serving Suggestions: These delightful stuffing balls are incredibly versatile.
- As a Side Dish: They are, of course, a perfect accompaniment to roasted turkey, chicken, or pork. Their individual portion size makes serving a breeze!
- With Gravy: A generous drizzle of homemade turkey gravy or a rich mushroom gravy is an absolute must. The gravy seeps into the stuffing, creating an incredibly comforting bite.
- With Cranberry Sauce: A dollop of homemade cranberry sauce, or even a good quality store-bought one, provides a wonderful tart counterpoint to the savory stuffing.
- Appetizer Option: Serve them on a platter with toothpicks for a fantastic holiday appetizer. They are always a crowd-pleaser!
- Main Course Reinvention: Don’t just relegate them to the side! Serve a few balls alongside a simple green salad for a lighter, yet satisfying meal.
- Make-Ahead Instructions: These stuffing balls are fantastic for preparing in advance, making your holiday cooking much less stressful!
- Stuffing Mixture: You can prepare the entire stuffing mixture (up to step 11) up to 2 days in advance. Store it covered tightly in the refrigerator. When ready to bake, let it come to room temperature for about 30 minutes before forming the balls.
- Formed and Unbaked: You can form the balls (step 13) and arrange them on the baking sheets. Cover tightly with plastic wrap and refrigerate for up to 24 hours. When ready to bake, proceed with baking as directed, adding an extra 5-10 minutes to the covered baking time since they will be cold.
- Fully Baked: You can bake the stuffing balls completely, let them cool, and then store them in an airtight container in the refrigerator for up to 3-4 days.
- Reheating Baked Stuffing Balls:
- Oven Method (Recommended): This is my preferred method for reheating, as it helps retain their crisp exterior. Preheat your oven to 350°F (175°C). Place the stuffing balls on a baking sheet and cover loosely with foil. Bake for 15-20 minutes, or until heated through. For extra crispiness, remove the foil for the last 5 minutes.
- Microwave Method: While convenient, the microwave can make them a little softer. Place a few balls on a microwave-safe plate, cover with a damp paper towel, and heat for 1-2 minutes, or until warmed through.
- Freezing Instructions: These Festive Cranberry Turkey Stuffing Balls freeze beautifully!
- Unbaked: Form the balls and flash freeze them on a baking sheet until solid. Then transfer them to a freezer-safe bag or container, layered with parchment paper, for up to 1 month. Bake from frozen, adding an extra 15-20 minutes to the total baking time, still covering for the first part.
- Baked: Let the fully baked and cooled stuffing balls freeze solid on a baking sheet. Then transfer them to a freezer-safe bag or container for up to 2-3 months. Reheat in a 350°F (175°C) oven, covered, for 25-30 minutes, or until heated through.
-
Creative Variations to Personalize Your Stuffing Balls:
While the basic recipe for these Festive Cranberry Turkey Stuffing Balls is perfect, feel free to get creative and tailor them to your family’s preferences!
- Vegetarian/Vegan Option: Easily omit the ground turkey and use vegetable broth instead of chicken/turkey broth. For a vegan version, you can replace the eggs with flax eggs (1 tbsp ground flaxseed mixed with 3 tbsp water per egg, let sit for 5 minutes).
- Adding More Vegetables: Sauté finely chopped mushrooms alongside the onions and celery for an earthier flavor, or add some chopped bell peppers for extra color and sweetness.
- Cheese Please! Stir in ½ cup of grated Parmesan or Gruyere cheese into the mixture for an extra layer of savory richness.
- Spice It Up: If you love a little heat, increase the red pepper flakes or add a pinch of cayenne pepper to the mixture.
- Citrus Zest: The brightness of orange zest can really complement the cranberries. Add about 1 teaspoon of fresh orange zest to the mixture along with the liquids.
- Different Dried Fruits: While cranberries are classic, feel free to experiment with other dried fruits like chopped dried apricots or cherries for a different sweet-tart note.
- Gluten-Free: Simply swap out the regular bread for a good quality gluten-free bread. Ensure it’s stale or toasted to achieve the right texture.
Conclusion:
Well, my friends, we’ve reached the end of our culinary journey today, and I genuinely hope you’re as excited as I am about what we’ve explored. This isn’t just another stuffing recipe; it’s a game-changer, a showstopper, and truly a dish that encapsulates the warmth and joy of a special meal. I’ve poured my heart into perfecting these Festive Cranberry Turkey Stuffing Balls, and I promise you, they are an absolute must-try for anyone looking to elevate their holiday spread or even just an ordinary Sunday dinner into something truly extraordinary. The harmonious blend of savory turkey, the bright, tart burst of cranberries, the earthy depth of herbs, and the comforting texture of perfectly seasoned bread comes together in a symphony of flavors that truly sings on the palate. Imagine biting into that crispy, golden-brown exterior, revealing a moist, incredibly flavorful interior – it’s pure bliss. They offer all the beloved taste of traditional stuffing but in a delightful, individual serving format that makes them incredibly versatile and elegant. No more messy scoops of stuffing; just perfect, golden spheres of deliciousness ready to impress, each one a testament to thoughtful cooking.
But the beauty of these stuffing balls extends far beyond their exquisite taste and polished presentation. They are remarkably convenient, especially if you’re planning a larger gathering. You can prepare them well in advance, shape them, refrigerate or even freeze them, and then simply bake them off when you’re ready to serve. This kind of make-ahead flexibility is an absolute lifesaver during busy holiday seasons, allowing you to spend more precious time with your loved ones and less time fussing in the kitchen. They free up valuable oven space, too, which is a significant bonus when you’re juggling multiple dishes. I truly believe that once you experience the ease and fantastic flavor of this recipe, it will quickly become a cherished tradition in your home, just as it has in mine. It’s not just about the food; it’s about creating joyful memories and bringing smiles to the faces around your table with something homemade and truly special.
Serving Suggestions and Creative Variations:
Now, let’s talk about how to truly make these your own and enjoy them in countless ways. While they are undeniably the perfect accompaniment to a roasted turkey or chicken, please don’t limit your imagination! Picture these golden spheres nestled alongside a succulent pork tenderloin, as a hearty side to a glazed ham, or even as a delightful component of a brunch spread. They’re also absolutely divine served as elegant appetizers at a cocktail party; simply make them a bit smaller, perhaps two bites each, and serve them with a vibrant cranberry dipping sauce or a rich, creamy gravy on the side. For a more casual meal, imagine them tucked into a leftover turkey sandwich with a smear of artisanal mayonnaise and a crisp lettuce leaf – talk about an upgraded lunch! I also love to crumble any leftover stuffing balls into a fresh salad for an incredible textural and flavor boost, or even use them as a savory topping for a comforting, creamy soup. They are incredibly versatile, offering delightful possibilities for every meal and occasion.
And when it comes to variations, the possibilities are truly endless, inviting you to experiment and personalize to your heart’s content. If you’re catering to different dietary needs, you could easily make a vegetarian version by swapping the turkey sausage for sautéed mushrooms or plant-based sausage, and ensuring you use a robust vegetable broth instead of chicken broth. For an extra touch of decadence and crunch, consider adding some chopped toasted pecans or walnuts for an additional layer of nutty flavor that pairs beautifully with the cranberries. A generous sprinkle of crumbled blue cheese or sharp cheddar mixed into the stuffing before baking would introduce a delightful tanginess and a creamy texture. Don’t be afraid to play with the herbs either! While sage, thyme, and rosemary are classics, a hint of marjoram or a touch of finely chopped parsley can brighten the flavor profile beautifully. For those who enjoy a little heat, a pinch of red pepper flakes would offer a subtle, intriguing kick. Try serving them with different sauces too: a rich, homemade turkey gravy is classic, but a spiced apple chutney or even a simple balsamic glaze could offer an exciting and unexpected contrast. Imagine air-frying them for an extra crispy exterior, or baking them in muffin tins for an even more uniform and perfectly portioned shape. The beauty is in making them truly and uniquely yours.
Your Turn to Create and Share!
So, my fellow home cooks, now it’s your turn! I sincerely hope this recipe has inspired you to step into your kitchen and give these incredible stuffing balls a try. I promise you, the effort is minimal compared to the incredible flavors and the immense satisfaction you’ll gain from serving them. There’s something truly special about preparing a dish that not only tastes amazing but also brings a touch of warmth and genuine cheer to your table. Don’t be shy; embrace the process, savor the wonderful aromas that will fill your home, and get ready to enjoy a truly delightful culinary experience. I am so excited for you to discover the magic within these individual portions of deliciousness and to see the joy they bring to your dining occasions.
After you’ve made them, I would absolutely love to hear about your experience! Did you stick to the recipe exactly, or did you put your own unique spin on it? What did your family and friends think of them? Please don’t hesitate to share your thoughts, your successes, and even your creative variations in the comments below. Your feedback is incredibly valuable, and it’s wonderful to build a community where we can all learn from and inspire each other with our culinary adventures. Snap a photo, drop a comment, and let us know how your Festive Cranberry Turkey Stuffing Balls turned out! Happy cooking, and may your kitchen always be filled with joy, delicious aromas, and unforgettable meals!
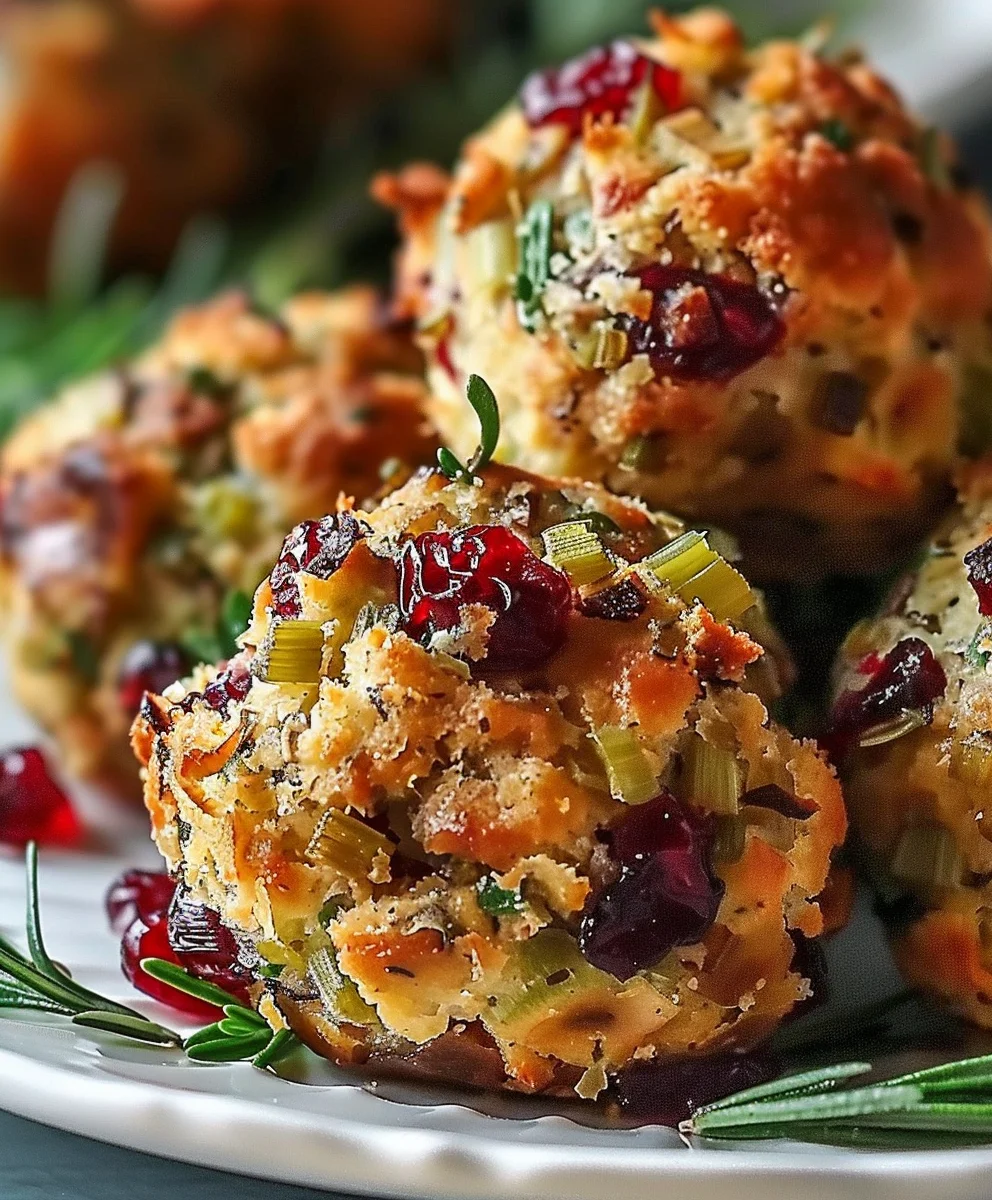
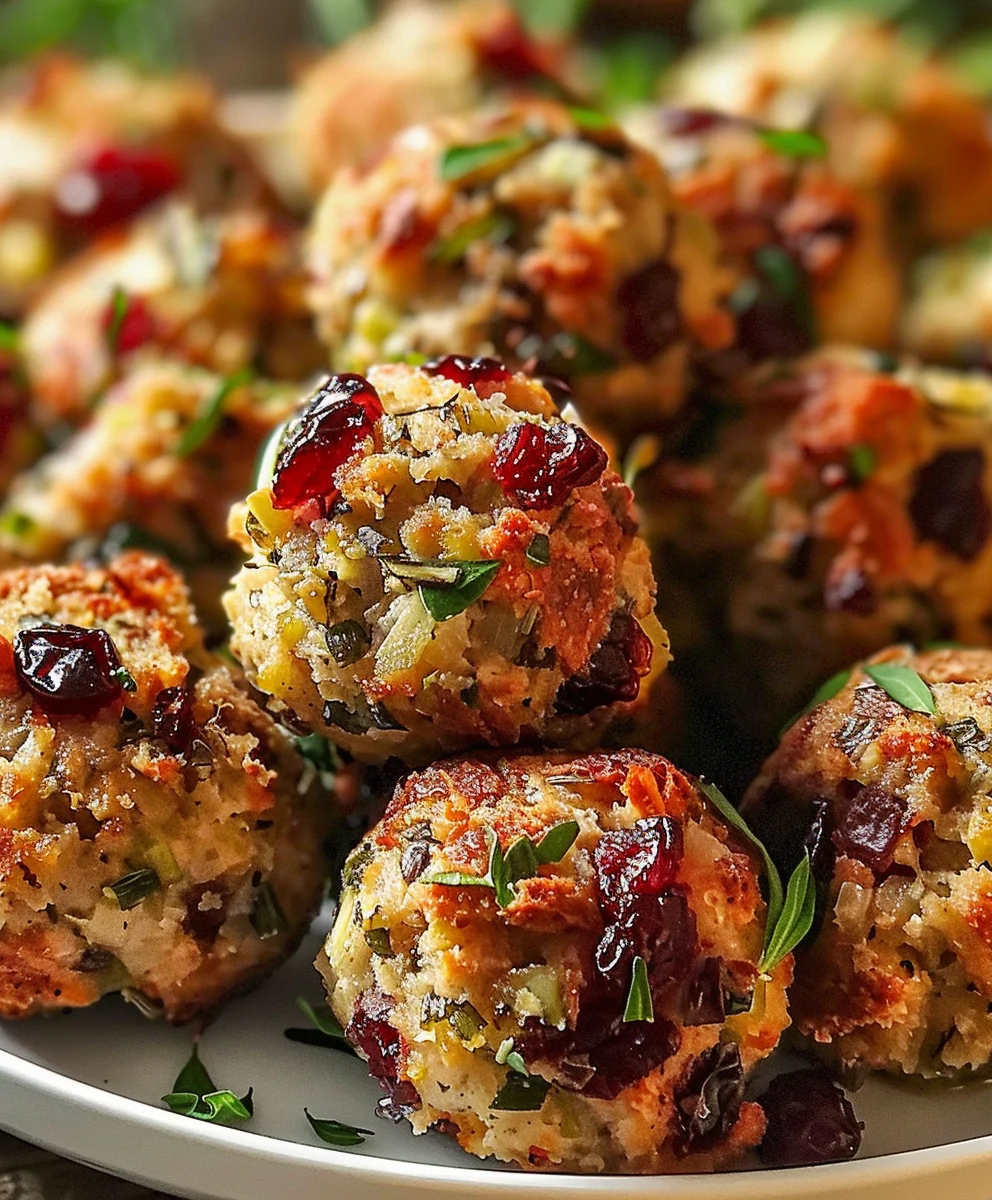
Festive Cranberry Turkey Stuffing Balls
Elevate your holiday meal with these elegant, individual Festive Cranberry Turkey Stuffing Balls. Combining savory turkey, tart cranberries, and aromatic herbs, they offer all the beloved flavors of traditional stuffing in a convenient, crispy-on-the-outside, moist-on-the-inside format.
Ingredients
-
1 pound ground turkey
-
1 cup dried cranberries
-
1 cup breadcrumbs
-
1 onion, diced
-
2 cloves garlic, minced
-
1 teaspoon dried sage
-
1 teaspoon dried thyme
-
1/2 teaspoon salt
-
1/4 teaspoon pepper
-
1/4 cup chicken broth
-
2 eggs, beaten
-
1/4 cup chopped parsley
Instructions
-
Step 1
Dice the onion and mince the garlic. Have dried cranberries, breadcrumbs, dried sage, dried thyme, salt, pepper, and chopped parsley ready. -
Step 2
In a large skillet, brown the ground turkey over medium-high heat, breaking it up with a spoon. Drain any excess fat and set the cooked turkey aside. In the same skillet, cook the diced onion over medium heat until softened (about 5-7 minutes). Add the minced garlic, dried sage, and dried thyme; cook for 1 minute until fragrant. -
Step 3
In a large mixing bowl, combine the breadcrumbs, cooked ground turkey, dried cranberries, and the sautéed onion and herb mixture. -
Step 4
In a separate bowl, whisk together the chicken broth, beaten eggs, salt, pepper, and chopped parsley. Gradually pour this liquid mixture over the dry ingredients in the large bowl, mixing gently with your hands or a spoon until all ingredients are just moistened and cohesive enough to hold a ball shape. Let the mixture rest for 15-20 minutes to allow flavors to meld. -
Step 5
Preheat your oven to 375°F (190°C). Line a baking sheet with parchment paper. Gently roll the stuffing mixture into golf-ball sized balls (about 2-3 tablespoons each) and place them on the prepared baking sheet, leaving some space between each. Bake, covered loosely with aluminum foil, for 15 minutes. Remove the foil and bake for another 15-20 minutes, or until golden brown and crispy on the outside. -
Step 6
Allow the stuffing balls to rest for 5-10 minutes before serving. Enjoy as a festive side dish, with gravy, or as an appetizer.
Important Information
Nutrition Facts (Per Serving)
It is important to consider this information as approximate and not to use it as definitive health advice.
Allergy Information
Please check ingredients for potential allergens and consult a health professional if in doubt.