The Best Christmas Fudge Recipe isn’t just a collection of ingredients; it’s a taste of pure holiday magic, a sweet indulgence that perfectly encapsulates the spirit of the festive season. I find myself returning to this timeless treat year after year, eager to share its rich, creamy delight with family and friends. There’s something truly special about a homemade confection that whispers tradition and warmth into the coldest days of winter.
A Legacy of Sweetness
Fudge, with its delightfully smooth texture, actually began as an accidental creation in the late 19th century, often attributed to a Baltimore college student. From those serendipitous beginnings, it quickly evolved into a beloved American confection. Its simplicity and versatility made it a favorite for home cooks, and its ability to be easily made in large batches cemented its place as a staple for holiday gatherings. The act of making fudge often conjures nostalgic memories of kitchens filled with warmth and laughter, a tradition passed down through generations.
What makes people adore fudge, especially around Christmas? For me, it’s the unparalleled melt-in-your-mouth experience, the intense flavor that can range from deep, dark chocolate to vibrant peppermint, and the comforting sense of tradition it brings. It’s the ultimate edible gift, a small square of happiness that shows you care. Preparing this recipe is not just about baking; it’s about crafting moments, creating joy, and adding a touch of homemade warmth to the festive season. I promise you, once you taste the unparalleled creaminess and perfect balance of sweetness this recipe offers, you’ll agree that this truly is The Best Christmas Fudge Recipe you’ll ever make. It’s time to bring that festive magic right into your kitchen!

Ingredients:
- 3 cups granulated sugar: For that essential sweetness and the foundational structure of our fudge. I find that regular white granulated sugar works perfectly here, contributing to the smooth texture we’re aiming for.
- 1 ½ sticks (¾ cup) unsalted butter: I always recommend unsalted butter so you can control the salt content precisely. Cut it into roughly 1-inch pieces to help it melt more evenly and quickly when we start cooking. This butter adds incredible richness and a luscious mouthfeel to our Christmas fudge.
- ⅔ cup evaporated milk (1 regular can, 5 oz): This is one of my secret ingredients for truly creamy fudge! Evaporated milk, being more concentrated than regular milk, contributes a wonderful richness and helps the fudge achieve its classic smooth, dense consistency. Do not substitute with sweetened condensed milk, as that will dramatically alter the final product.
- 12 ounces (about 2 cups) good quality semi-sweet chocolate chips: While you can use chocolate chunks or even a chopped chocolate bar, I find that chocolate chips melt beautifully and integrate smoothly into the hot fudge base. Semi-sweet offers a perfect balance that isn’t overly sweet, allowing the other festive flavors to shine.
- 1 standard jar (7 ounces) marshmallow crème (also known as marshmallow fluff): This is another key ingredient for achieving that wonderfully soft, creamy, melt-in-your-mouth texture that distinguishes truly great fudge. It helps prevent crystallization and keeps the fudge from becoming grainy.
- 1 teaspoon pure vanilla extract: A good quality vanilla extract is non-negotiable for deepening and rounding out all the flavors. It brings a warmth that is essential for a Christmas treat.
- ½ teaspoon fine sea salt: Just a touch of salt is crucial for balancing the sweetness and enhancing the overall flavor profile of the fudge. It makes all the difference!
- Optional Christmas Mix-ins (choose one or a combination):
- ½ teaspoon pure peppermint extract: If you love a classic mint chocolate pairing, this is a must-add! It gives a delightful holiday zing.
- ¾ cup crushed candy canes: For a beautiful festive crunch and an extra burst of peppermint flavor. Make sure they are finely crushed to disperse well.
- ¾ cup chopped walnuts, pecans, or almonds: For those who appreciate a nutty texture and earthy flavor contrast. Lightly toasting them beforehand can bring out even more depth.
- ¼ cup festive sprinkles: To add a pop of color and a playful touch, especially if you’re making this with little helpers!
Preparation is Key!
-
Prepare Your Pan: My first step, even before I gather my ingredients, is always to prepare my baking pan. I typically use an 8×8-inch square pan for fudge, which yields a nice thick piece. You can also use a 9×9-inch pan for slightly thinner pieces. The secret to easy removal and clean cuts is to line the pan thoroughly. I grab a sheet of parchment paper and carefully press it into the bottom and up the sides, leaving an overhang on two opposite sides. This parchment paper sling will be your best friend when it’s time to lift the cooled fudge out of the pan. If you don’t have parchment, you can lightly grease and flour the pan, or simply grease it very well, but trust me, parchment makes life so much easier.
-
Measure and Mise en Place: This step cannot be stressed enough, especially when making fudge. Fudge making is a somewhat time-sensitive process once you start cooking, so having all your ingredients pre-measured and ready to go is absolutely critical. This culinary term, “mise en place,” meaning “everything in its place,” is your guide here. I measure out my sugar, have my butter pieces ready, measure the evaporated milk, and most importantly, have the chocolate chips, marshmallow crème, vanilla extract, and salt all in a large heatproof bowl right next to the stove. If you’re using any optional mix-ins like crushed candy canes or nuts, measure and prepare those now too. Having everything prepped ensures you can add ingredients quickly and efficiently when the time comes, preventing any potential mishaps.
-
Set Up Your Thermometer: For truly perfect fudge, a reliable candy thermometer is essential. Clip it securely to the side of your heavy-bottomed saucepan before you even add the ingredients. Make sure the tip of the thermometer is submerged in the mixture but not touching the bottom of the pan. This will give you an accurate reading of the mixture’s temperature as it cooks. Don’t eyeball this; precision is truly your friend when it comes to the soft-ball stage we’re aiming for.
Crafting the Rich Fudge Base
-
Combine the Core Ingredients: In a large, heavy-bottomed saucepan (and I really mean heavy-bottomed, as it helps prevent scorching), combine the granulated sugar, cubed unsalted butter, and evaporated milk. This trio forms the sweet and creamy foundation of our Christmas fudge. I like to give it a good stir with a wooden spoon or heatproof spatula to thoroughly combine everything before placing it on the heat.
-
Bring to a Rolling Boil: Place your saucepan over medium heat. Now, this is where a little patience and attention come in. You’ll want to stir the mixture constantly at first, just until the butter has fully melted and the sugar has completely dissolved. You can feel for any remaining sugar crystals by rubbing a small amount of the mixture between your fingers – if it feels gritty, keep stirring. This initial stirring is crucial to prevent sugar crystals from forming later and making your fudge grainy. Once the sugar is fully dissolved and the mixture is smooth, increase the heat slightly to medium-high. Bring the mixture to a full, rolling boil. A rolling boil means that even when you stir it, the bubbles continue to vigorously break the surface.
-
Cook to the Soft-Ball Stage: Once the mixture reaches a rolling boil, stop stirring. That’s right, resist the urge to stir! Stirring at this stage can encourage sugar crystals to form on the sides of the pan, which can then fall back into the fudge and create a grainy texture. Just let it boil, allowing your candy thermometer to do its job. You’re aiming for a temperature of 234-237°F (112-114°C), which is the “soft-ball stage.” This stage is critical; too low, and your fudge will be too soft and won’t set properly; too high, and it will be hard and crumbly. For me, 236°F is usually the sweet spot for that perfect balance of firm yet melt-in-your-mouth texture. This process can take anywhere from 8 to 15 minutes, depending on your stove and saucepan. Keep a close eye on the thermometer, but also watch for the visual cues: the mixture will thicken, become darker in color, and the bubbles will become smaller and more concentrated. If you don’t have a thermometer, you can test for the soft-ball stage by dropping a small amount of the hot syrup into a cup of very cold water. It should form a soft, pliable ball that holds its shape but is easily flattened when pressed.
Achieving Fudge Perfection
-
Remove from Heat and Add Remaining Ingredients: As soon as your fudge mixture reaches the ideal temperature (234-237°F), immediately remove the saucepan from the heat. Don’t let it sit on the hot burner for even a moment longer, as residual heat can cause it to overcook. This is where having your mise en place ready shines! Quickly add your pre-measured chocolate chips, marshmallow crème, vanilla extract, and salt to the hot mixture in the saucepan. Do not stir yet! Just let them sit on top for about 2-3 minutes. The residual heat from the cooked sugar mixture will begin to melt the chocolate and warm the marshmallow crème, making the stirring process much smoother and easier.
-
Stir Until Smooth and Glossy: After allowing the ingredients to sit and warm for a few minutes, it’s time for the most satisfying part of the process: stirring! With a sturdy spoon or spatula, begin to stir vigorously. At first, it might look a bit separated and messy, but keep going. Scrape down the sides and bottom of the pan to ensure everything is incorporated. The chocolate chips will melt, the marshmallow crème will blend, and the whole mixture will transform into a thick, smooth, and glossy fudge. You’ll know it’s ready when it’s completely uniform in color and texture, with no streaks of unmixed chocolate or marshmallow. This vigorous stirring usually takes about 3-5 minutes. It’s important to stir until it loses some of its sheen and starts to thicken slightly, indicating it’s beginning to cool down and crystallize into fudge, rather than just being a warm chocolate sauce. This rapid cooling and crystallization through stirring is what gives fudge its characteristic texture.
-
Incorporate Optional Christmas Mix-ins: If you’re adding any of those wonderful optional Christmas flavors or textures, now is the time to fold them in. Gently but thoroughly stir in your peppermint extract, crushed candy canes, chopped nuts, or festive sprinkles. Work quickly but carefully to ensure they are evenly distributed throughout the fudge. If you’re using crushed candy canes, be aware that the residual heat might slightly melt the candy coating, giving a subtle pink swirl, which is perfectly charming for Christmas fudge!
The Grand Finale: Setting and Serving
-
Pour and Spread: As soon as the fudge is perfectly smooth and any mix-ins are incorporated, immediately pour the hot fudge into your prepared 8×8-inch pan. Because fudge sets quickly, you’ll want to work with a bit of urgency here. Use an offset spatula or the back of a spoon to quickly spread the fudge evenly into the pan. If you’ve left the parchment paper overhang, you can gently tap the pan on your counter a few times to help settle the fudge and release any air bubbles, creating a perfectly smooth top. You can also press any extra candy cane bits or sprinkles on top at this stage for added decoration.
-
Cool and Set: Now comes the hardest part for me: patience! Allow the fudge to cool completely and set at room temperature for at least 2 hours, or ideally, 4 hours. I find that allowing it to set slowly at room temperature results in the best texture – firm but not brittle. You can place it in the refrigerator after about an hour to speed up the process if you’re in a hurry, but avoid refrigerating it immediately, as rapid cooling can sometimes affect the texture. You’ll know it’s fully set when it feels firm to the touch and no longer yields significantly when pressed gently.
-
Lift, Cut, and Serve: Once the fudge is completely set, use the parchment paper overhang as a sling to carefully lift the entire slab of fudge out of the pan and onto a cutting board. Remove the parchment paper. Now for the fun part: cutting! I find that a large, sharp knife, slightly warmed under hot water and then wiped dry, makes for the cleanest cuts. Cut the fudge into 1-inch squares or whatever size you prefer. I always wipe my knife clean after every few cuts to ensure pristine edges. Arrange your beautiful “The Best Christmas Fudge Recipe” on a festive platter and watch it disappear!
-
Storage: This magnificent Christmas fudge keeps wonderfully! Store it in an airtight container at room temperature for up to 2 weeks, or in the refrigerator for up to 3 weeks. If refrigerating, I like to let it sit out for 10-15 minutes before serving to allow it to soften slightly and bring out its full creamy texture and rich flavor. You can also freeze fudge for up to 3 months; just be sure to wrap it tightly in plastic wrap and then place it in a freezer-safe bag or container. Thaw at room temperature when you’re ready to enjoy a taste of Christmas later in the year. This truly is The Best Christmas Fudge Recipe, and I hope you enjoy making and sharing it as much as I do!
Conclusion:
So, there you have it – my absolute favorite fudge recipe, a true holiday hero! After walking you through each simple step, I genuinely hope you’ve caught a glimpse of just how effortlessly you can create something truly magical right in your own kitchen. This isn’t just any ordinary fudge; it’s the kind of confection that brings immediate smiles, creates lasting memories, and practically melts on your tongue with every decadent bite. We’re talking about a rich, incredibly creamy, utterly irresistible treat that manages to be both remarkably easy to make and unbelievably delicious. It strikes that perfect balance of convenience and gourmet quality, making it an indispensable addition to your festive repertoire, year after year. Honestly, I firmly believe that this truly is The Best Christmas Fudge Recipe you’ll ever encounter, and once you try it, I’m confident you’ll wholeheartedly agree. Its velvety smooth texture, combined with that deep, comforting chocolate essence, is simply divine. It’s the sort of treat that feels luxurious yet evokes a profound sense of comforting nostalgia, making every bite a little journey back to cherished holiday moments and warmth.
But the joy of this incredible fudge doesn’t stop at its creation; it extends beautifully into how you choose to share and enjoy it. For a start, think about gifting! Cut your finished fudge into neat squares or, for an extra festive touch, use small cookie cutters to create delightful shapes like stars, trees, or bells. Then, arrange them elegantly in small, charming cellophane bags tied with a festive ribbon, or tuck them into decorative tins. These make incredibly thoughtful, heartfelt homemade gifts for neighbors, teachers, colleagues, or anyone deserving of a special treat. Imagine presenting a small box of this glorious fudge alongside a gourmet coffee blend or a selection of fine teas – what a truly delightful and personalized gesture! For your own holiday spread, it’s an absolute showstopper on any dessert platter. Arrange the fudge squares artfully amongst other festive cookies, truffles, and candied nuts to create a visually appealing spread. You can even drizzle a little melted white chocolate over some pieces for an elegant contrasting swirl, or sprinkle with a pinch of flaky sea salt to dramatically enhance the chocolate’s depth and complexity. Small, bite-sized pieces are also fantastic for a buffet setting, allowing guests to easily pick up a treat without needing extra plates or cutlery. Consider pairing it with a small glass of cold milk, a shot of rich espresso, or even a robust red wine for an unexpected, sophisticated pairing that truly elevates the entire experience.
Beyond just serving, this recipe offers a fantastic canvas for creative exploration. While it’s absolutely perfect as is, please don’t hesitate to experiment with variations to truly make it your own and suit your unique tastes. For a wonderfully refreshing twist, try adding half a teaspoon of peppermint extract along with the vanilla – a classic holiday combination that’s incredibly popular and invigorating. Or, for a bright, citrusy note, grate in the zest of an orange during the final mixing stage; chocolate and orange are, after all, a match made in culinary heaven! If you’re a fan of nuts, stir in a cup of chopped pecans, walnuts, or almonds just before pouring the fudge into the pan, adding a delightful crunch and earthy flavor that complements the chocolate beautifully. For an extra layer of decadence, consider swirling in some melted caramel or peanut butter just after pouring the fudge into the pan, using a skewer or knife to create beautiful, enticing marbled patterns. You could also sprinkle the top with an array of festive embellishments like colorful sprinkles, crushed candy canes, mini chocolate chips, or even a light dusting of high-quality cocoa powder for a sophisticated, slightly bitter finish. For those who love a bit of an adventurous kick, a tiny pinch of cayenne pepper can add an intriguing warmth that surprisingly complements and enhances the chocolate’s richness. The possibilities are truly endless, allowing you to tailor this incredible fudge to suit any palate, holiday theme, or special occasion imaginable.
I genuinely hope you feel incredibly inspired and excited to dive into your kitchen and whip up a batch (or even two!) of this wonderful, festive fudge. It’s an incredibly rewarding experience, from the very moment the simple ingredients come together to that first blissful, melt-in-your-mouth bite. There’s a special kind of profound satisfaction that comes from sharing homemade treats, and I promise you, this fudge will bring immense joy and delight to everyone who tries it. Whether you’re making it for a bustling festive gathering, as thoughtful, heartfelt gifts, or simply to treat yourself to a moment of pure, unadulterated indulgence, it’s a recipe that delivers on all fronts – taste, ease, and sheer deliciousness. So, please, gather your ingredients, follow these simple, straightforward steps, and prepare to be utterly amazed by the deliciousness you’ll create. And once you’ve experienced the magic yourself, I would absolutely love to hear from you! Please come back and share your experiences, your favorite serving ideas, or any delightful variations you came up with in the comments below. Your creativity inspires me immensely, and I truly can’t wait to see how you make this fantastic festive treat your very own. Happy baking, and most importantly, happy holidays!
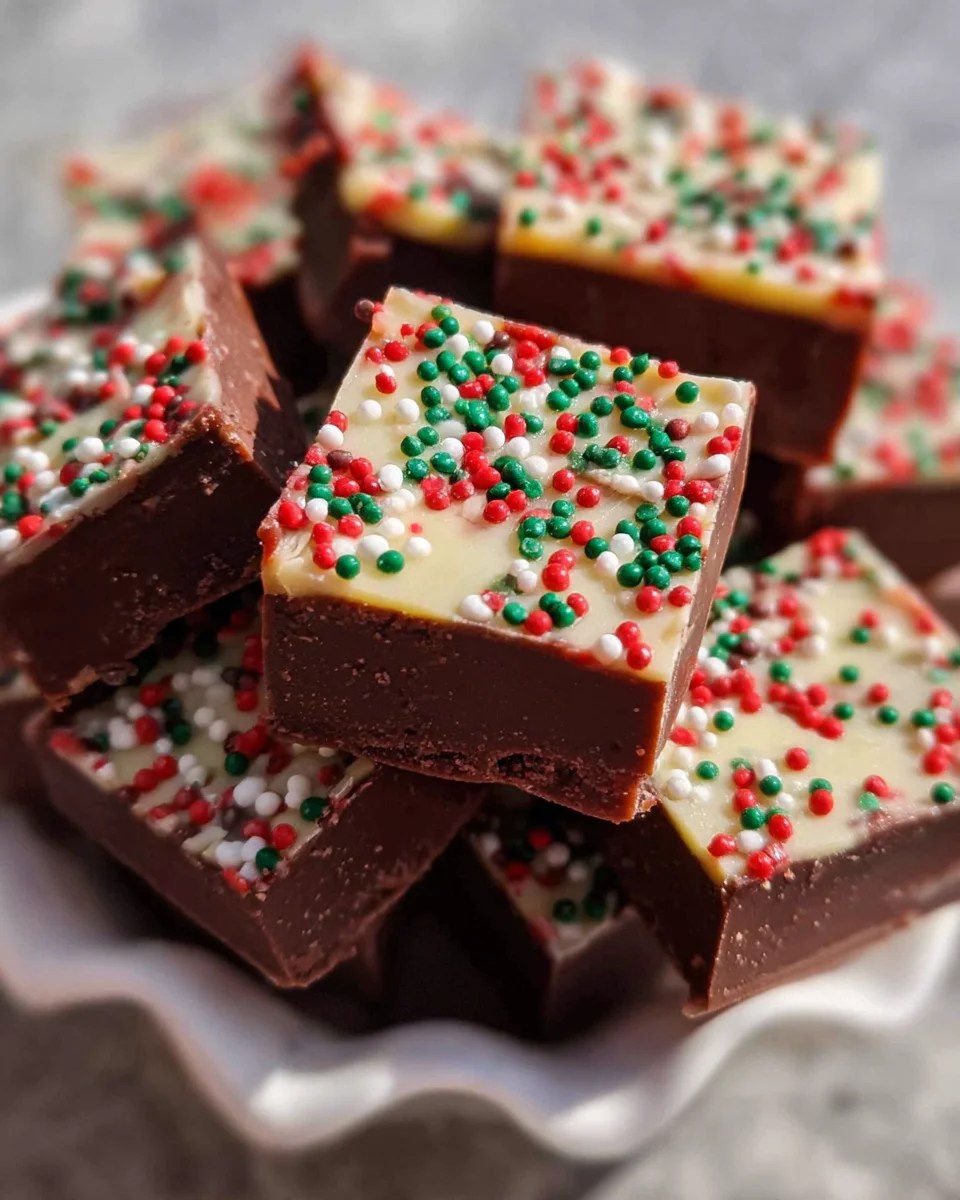
Best Christmas Fudge Recipe: Easy, Creamy, Festive Treat!
This Best Christmas Fudge Recipe is a taste of pure holiday magic, a sweet indulgence that perfectly encapsulates the festive season. This easy, creamy, homemade confection brings tradition and warmth, making it the ultimate edible gift.
Ingredients
Instructions
Important Information
Nutrition Facts (Per Serving)
It is important to consider this information as approximate and not to use it as definitive health advice.
Allergy Information
Please check ingredients for potential allergens and consult a health professional if in doubt.