Ina Garten Sweet Potato Casserole With Pecans is truly more than just a side dish; it’s a beloved symbol of holiday cheer and comforting flavors that warms the soul. Just imagine the tantalizing aroma wafting from your oven—that perfect blend of velvety sweet potato, a whisper of warm spices, and the irresistible crunch of toasted pecans creating an olfactory symphony. This casserole is a cornerstone of festive gatherings, stirring up cherished memories of family meals and joyful celebrations.
While sweet potato casserole has long held a revered place on tables, particularly during American Thanksgiving and Christmas feasts, Ina Garten’s particular rendition elevates this classic to something truly extraordinary. Known for her impeccable taste and ability to refine traditional dishes with elegant simplicity, Ina Garten brings her signature touch to this comforting staple. People adore this dish not only for its luxurious, creamy texture and perfectly balanced sweetness, but also for the delightful textural contrast provided by the buttery, crunchy pecan topping. It’s a harmonious blend of flavors and textures that perfectly complements any main course, yet shines brightly enough to be a star in its own right. Prepare to make the Ina Garten Sweet Potato Casserole With Pecans a cherished part of your own culinary traditions.

Ingredients:
- For the Sweet Potato Base:
- 3 ½ – 4 pounds (about 5-6 medium) sweet potatoes, preferably Jewel or Garnet varieties, scrubbed clean
- ½ cup (1 stick) unsalted butter, softened at room temperature, plus extra for greasing your baking dish
- ½ cup whole milk or heavy cream, warmed slightly
- ½ cup light brown sugar, packed
- ¼ cup pure maple syrup (grade A dark, robust taste, if you can find it, otherwise any pure maple syrup will do beautifully)
- 2 large eggs, at room temperature, lightly beaten
- 1 ½ teaspoons ground cinnamon
- ½ teaspoon freshly grated nutmeg (trust me, fresh makes all the difference!)
- ¼ teaspoon ground ginger
- ¼ teaspoon ground allspice
- 1 teaspoon pure vanilla extract
- 1 teaspoon kosher salt, or to taste
- Pinch of freshly ground black pepper (optional, but it really highlights the sweetness!)
- For the Irresistible Pecan Streusel Topping:
- 1 ½ cups pecan halves, roughly chopped (you want some texture here!)
- ½ cup all-purpose flour
- ½ cup light brown sugar, packed
- ¼ cup granulated sugar
- ½ teaspoon ground cinnamon
- ¼ teaspoon kosher salt
- 6 tablespoons (¾ stick) unsalted butter, very cold and cut into small ½-inch cubes
Phase 1: Preparing the Velvety Sweet Potato Mash
- Preheat and Prepare the Sweet Potatoes: My first step for any great casserole is always proper preparation. Preheat your oven to a cozy 400°F (200°C). While the oven heats, take your sweet potatoes. You have a couple of options for cooking them: boiling or roasting. I personally prefer roasting them because it truly caramelizes their natural sugars, resulting in a deeper, more complex flavor profile that boiling simply can’t achieve. If you’re roasting, prick each sweet potato several times with a fork and place them directly on a baking sheet. Roast for 45-60 minutes, or until they are incredibly tender when pierced with a knife. The skins should wrinkle and some of the internal sugars might even start to seep out a little – that’s a good sign! If you opt for boiling, peel the sweet potatoes, cut them into 1-inch chunks, and boil them in salted water until very tender, about 15-20 minutes. Drain them exceptionally well.
- Cool and Peel (if roasting): Once your roasted sweet potatoes are tender, carefully remove them from the oven and allow them to cool just enough so you can handle them comfortably. The skins should slip off quite easily. For boiled potatoes, proceed directly to the next step.
- Mash or Puree for Silky Smoothness: Now for the fun part! Scoop the cooked sweet potato flesh into a large mixing bowl. You want to make sure there are no fibrous bits left, so a potato ricer is fantastic for achieving an incredibly smooth texture. If you don’t have a ricer, a sturdy potato masher will do the trick, but you might need to work a little harder to eliminate lumps. For the absolute silkiest consistency, you could even pass the mashed potatoes through a food mill or briefly use an immersion blender right in the bowl. We’re aiming for a luxurious, uniform texture here for our Ina Garten Sweet Potato Casserole With Pecans.
- Incorporate the Richness: Into your mashed sweet potatoes, add the softened ½ cup of unsalted butter, the slightly warmed ½ cup of whole milk or heavy cream, ½ cup of packed light brown sugar, and ¼ cup of pure maple syrup. These ingredients are going to give our casserole that signature creamy, sweet, and comforting foundation. Use a large spoon or a spatula to thoroughly combine everything until it’s beautifully smooth and all the butter has melted and integrated.
- Spice it Up and Bind: Next, it’s time for the aromatic elements and the binding agents. Stir in the 2 lightly beaten room-temperature eggs, 1 ½ teaspoons of ground cinnamon, ½ teaspoon of freshly grated nutmeg, ¼ teaspoon of ground ginger, ¼ teaspoon of ground allspice, 1 teaspoon of pure vanilla extract, and 1 teaspoon of kosher salt. A tiny pinch of black pepper, if you’re feeling adventurous, can really enhance the overall flavor profile by adding a subtle warmth. Mix everything thoroughly until all the spices are evenly distributed and the eggs are fully incorporated. You want to make sure there are no streaks of unmixed egg, as this could affect the texture of your finished casserole. Taste a tiny spoonful and adjust salt or sweetness if you feel it needs it. This is your chance to really make it your own!
- Prepare for Baking: Generously butter a 9×13-inch baking dish (or an equivalent 3-quart oven-safe dish). A little extra butter on the dish ensures a beautiful, golden crust and prevents sticking. Pour the sweet potato mixture into the prepared baking dish, spreading it evenly with your spatula. Set this aside while we prepare the glorious pecan topping.
Phase 2: Crafting the Irresistible Pecan Streusel Topping
This pecan topping is what truly elevates this dish, providing a wonderful textural contrast and an extra layer of nutty, buttery sweetness to your Ina Garten Sweet Potato Casserole With Pecans. Don’t skimp on this part!
- Combine Dry Ingredients: In a medium-sized bowl, combine the 1 ½ cups of roughly chopped pecan halves, ½ cup of all-purpose flour, ½ cup of packed light brown sugar, ¼ cup of granulated sugar, ½ teaspoon of ground cinnamon, and ¼ teaspoon of kosher salt. Use a fork or a whisk to thoroughly mix these dry ingredients together. You want to make sure the spices and sugars are evenly distributed so every bite of the topping is flavorful.
- Cut in the Cold Butter: Now, for the magic that creates that perfect streusel texture. Add the 6 tablespoons (¾ stick) of very cold unsalted butter, which you’ve cut into small ½-inch cubes. Using your fingertips, a pastry blender, or two knives, cut the butter into the dry ingredients until the mixture resembles coarse crumbs with some pea-sized pieces of butter remaining. The key here is to work quickly so the butter stays cold. Cold butter is essential for a crumbly, not greasy, topping. You want to achieve a texture that holds together slightly when squeezed but still remains crumbly.
Phase 3: Assembling and Baking Your Casserole to Perfection
- Top the Sweet Potatoes: Evenly sprinkle the prepared pecan streusel topping over the sweet potato mixture in your baking dish. Make sure it’s distributed right to the edges so every serving gets a generous helping of that delicious crunch.
- Bake Until Golden and Bubbly: Place the baking dish into your preheated 400°F (200°C) oven. Bake for 30-40 minutes, or until the sweet potato casserole is heated through, gently bubbling around the edges, and the pecan topping is beautifully golden brown and fragrant. If you notice the topping browning too quickly before the casserole is fully heated through, you can loosely tent it with aluminum foil for the last 10-15 minutes of baking.
- Rest Before Serving: Once baked to perfection, carefully remove the Ina Garten Sweet Potato Casserole With Pecans from the oven. Allow it to rest for at least 10-15 minutes before serving. This resting period is crucial; it allows the casserole to set slightly, making it easier to serve and ensuring that every spoonful holds its shape and warmth beautifully. Plus, the flavors continue to meld and deepen as it rests.
A Few Expert Tips for Your Ina Garten Sweet Potato Casserole With Pecans
I always love to share a few extra pointers to help you achieve the very best results, ensuring your sweet potato casserole becomes a cherished part of your holiday table or any special meal.
-
Choosing Your Sweet Potatoes:
For this recipe, I highly recommend using orange-fleshed sweet potatoes like Jewel or Garnet varieties. They are wonderfully moist and sweet, perfect for mashing into a creamy casserole. White or purple varieties tend to be starchier and less sweet, which isn’t quite what we’re going for in this indulgent dish.
-
Make-Ahead Magic:
This casserole is a fantastic make-ahead option, which is always a lifesaver during busy times. You can prepare the sweet potato base up to two days in advance. Simply spread it into your buttered baking dish, cover tightly with plastic wrap, and refrigerate. Prepare the pecan streusel topping and store it in a separate airtight container in the refrigerator. When you’re ready to bake, sprinkle the topping over the sweet potato base and bake as directed, adding an extra 10-15 minutes to the baking time since it will be going into the oven cold. This pre-preparation ensures a stress-free cooking experience!
-
Freezing Instructions:
If you want to get even further ahead, this sweet potato casserole freezes beautifully! Assemble the entire casserole (with the topping) in a freezer-safe baking dish. Wrap it very tightly with a layer of plastic wrap and then a layer of aluminum foil. It can be frozen for up to 3 months. When you’re ready to bake, thaw it in the refrigerator overnight. Then, remove the plastic wrap, leave the foil on, and bake at 350°F (175°C) for about 45 minutes to an hour, or until heated through. Remove the foil for the last 15-20 minutes to allow the topping to crisp up and brown.
-
Personalizing Your Casserole:
While this recipe for Ina Garten Sweet Potato Casserole With Pecans is perfect as is, feel free to customize it to your taste. A splash of bourbon or rum in the sweet potato mixture can add a delightful depth of flavor for an adult twist. For an extra hint of citrus, you could add a teaspoon of orange zest to either the sweet potato base or the pecan topping. You can also play with the spices – a tiny bit more ginger or a dash of cardamom can create an interesting new dimension.
-
Serving Suggestions:
This rich and comforting casserole is, of course, a holiday staple, pairing perfectly with roasted turkey, ham, or prime rib. But don’t limit it to just special occasions! It’s also a wonderful side dish for a cozy Sunday supper, offering a delicious balance of sweet and savory that complements a variety of main courses. It’s truly a versatile dish that brings warmth and flavor to any table.
Conclusion:
Well, my friends, if there’s one dish that truly encapsulates comfort, elegance, and pure, unadulterated deliciousness, it’s the recipe we’ve just explored. I genuinely believe that mastering this particular sweet potato casserole with its delightful pecan topping will elevate any meal it graces. It’s not just a side; it’s a centerpiece, a conversation starter, and a dish that consistently receives rave reviews from everyone who tries it. The creamy, naturally sweet base perfectly harmonizes with the buttery, crunchy pecans, creating a texture and flavor profile that is simply irresistible. This is more than just a recipe; it’s an experience, a tradition waiting to be born in your kitchen.
What truly sets this rendition apart, and why I’m so passionate about sharing it with you, is the thoughtful balance of flavors and the straightforward approach that makes it accessible to cooks of all levels. There’s a certain magic that happens when simple, high-quality ingredients are brought together with care, and that’s precisely what you find here. When you prepare the Ina Garten Sweet Potato Casserole With Pecans, you’re not just following steps; you’re crafting something truly special, something that speaks to the heart of home cooking. It’s rich without being overly heavy, sweet without being cloying, and utterly satisfying down to the last spoonful. This recipe has a way of becoming an instant classic, a requested dish at every family gathering, precisely because it delivers on its promise of deliciousness every single time. It truly is a testament to how humble ingredients can be transformed into something extraordinary with just a little attention and love.
Now that you’re armed with the knowledge to create this masterpiece, let’s talk about how to make it even more spectacular. While it’s undeniably the star of any holiday feast—think Thanksgiving turkey, Christmas ham, or a grand Easter spread—don’t relegate it solely to special occasions. This versatile casserole makes an incredible companion to a simple roast chicken on a Sunday afternoon, complements grilled pork chops beautifully, or even elevates a casual weeknight dinner. Imagine serving it alongside a vibrant green salad to cut through the richness, or perhaps with some perfectly seared scallops for an unexpected, gourmet pairing. Its comforting nature also makes it a fantastic addition to a hearty brunch spread, offering a delightful sweet counterpoint to savory eggs and bacon. You might even find yourself craving it as a standalone treat, perhaps with a dollop of crème fraîche or a scoop of vanilla bean ice cream.
And for those of you who love to put your own spin on things, this recipe is wonderfully adaptable. Feeling a little extra decadent? Try adding a splash of bourbon or rum to the sweet potato mixture before baking for a sophisticated warmth that elevates the natural sweetness. If pecans aren’t your only love, consider swapping them for walnuts, slivered almonds, or even a mix of your favorite nuts in the topping for a different textural dimension. For a truly different texture, you could replace half the pecan topping with mini marshmallows during the last 10 minutes of baking, allowing them to brown and become wonderfully gooey and caramelized. A sprinkle of freshly grated orange zest in the sweet potato mash can brighten the entire dish, or a pinch of ground ginger alongside the cinnamon and nutmeg can add another layer of complex spice. Don’t be afraid to experiment with your favorite warm spices; a touch of allspice or cardamom could be surprisingly delightful, deepening the aromatic profile of the casserole. You could even bake it in individual ramekins for elegant single servings, perfect for a dinner party.
So, my dear food enthusiasts, I implore you: clear your calendar, gather your ingredients, and set aside some time to experience the sheer joy of preparing this remarkable sweet potato casserole. I promise you, the aroma alone will be worth the effort, and the taste will leave you wondering why you haven’t made it sooner. Once you’ve had the pleasure of tasting and sharing this incredible dish, I would absolutely love to hear from you! What variations did you try? Who did you share it with? Did it become a new favorite in your household? Please share your stories, tips, and photos – your culinary adventures inspire us all and help others discover new ways to enjoy this classic. Happy cooking, and prepare to be utterly charmed by this delightful creation!
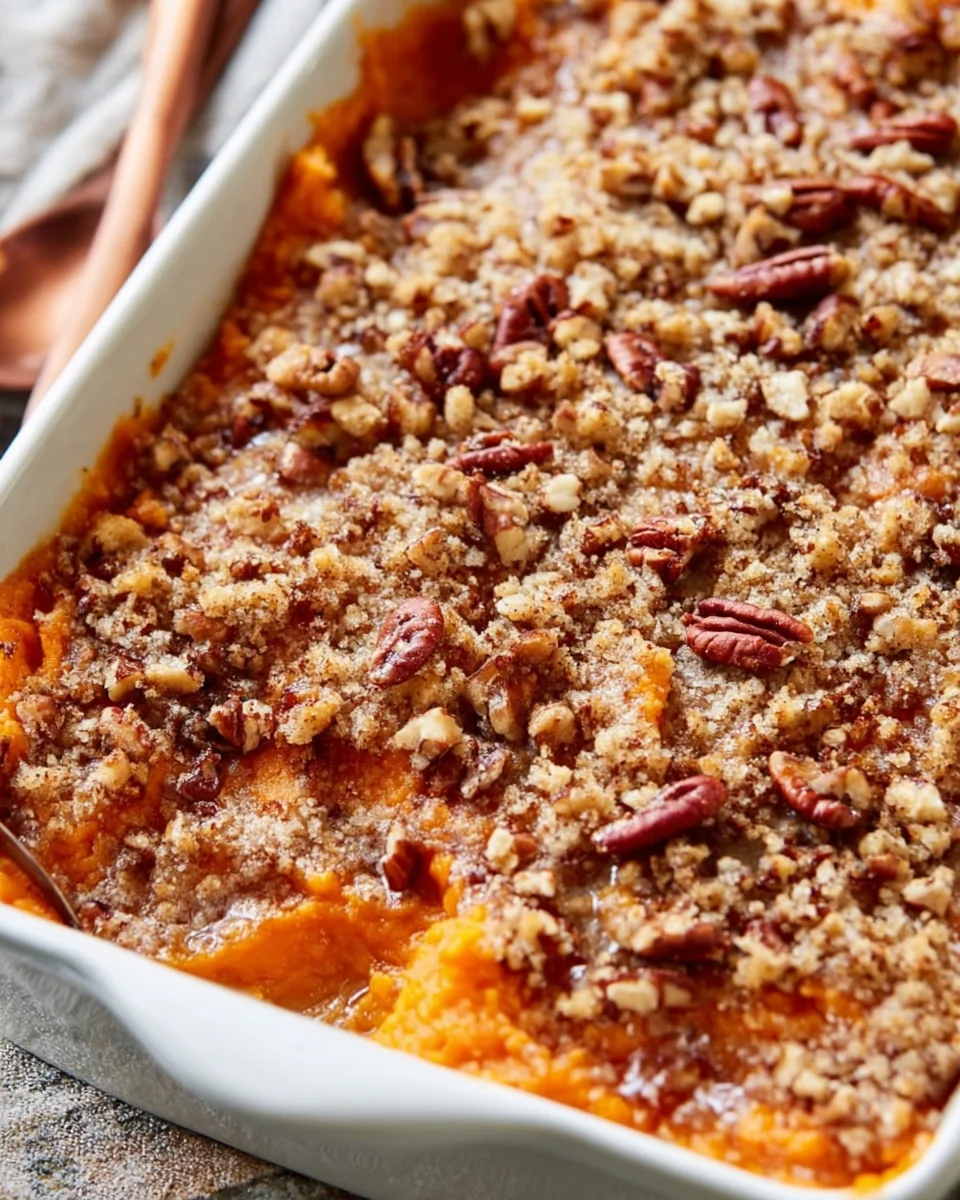
Ina Garten Sweet Potato Casserole with Pecans
This Ina Garten Sweet Potato Casserole with Pecans is a beloved holiday side dish, featuring velvety sweet potato mash with warm spices and an irresistible crunchy pecan streusel topping. A harmonious blend of flavors and textures perfect for festive gatherings.
Ingredients
Instructions
Important Information
Nutrition Facts (Per Serving)
It is important to consider this information as approximate and not to use it as definitive health advice.
Allergy Information
Please check ingredients for potential allergens and consult a health professional if in doubt.