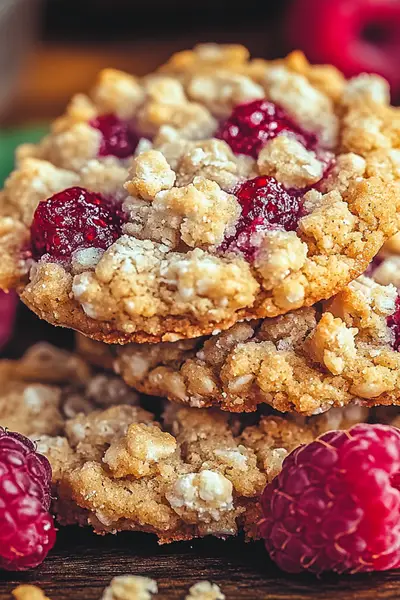
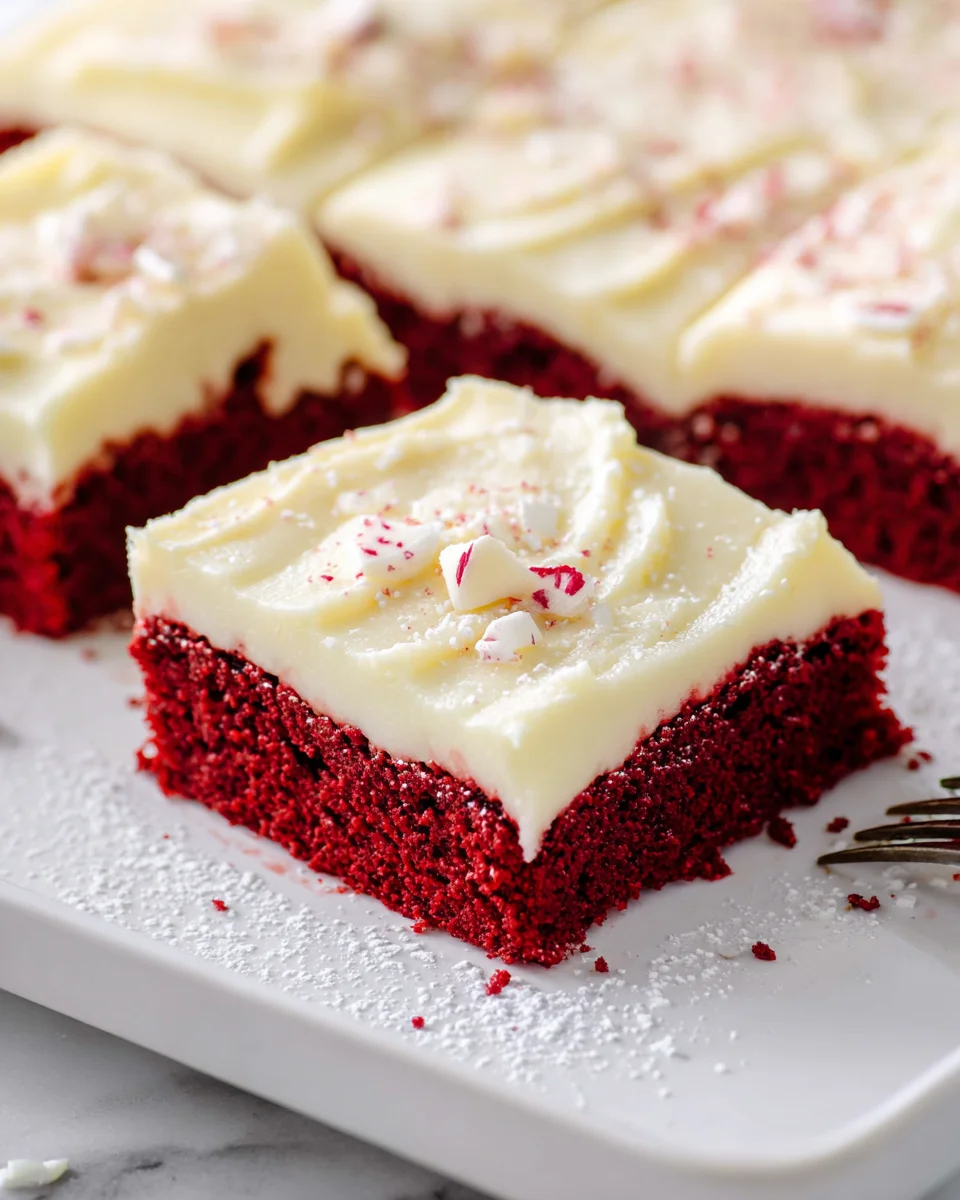
Red Velvet Cookie Bars are here to revolutionize your dessert experience! I’m so excited to share this recipe with you because it perfectly captures the rich, dramatic flavor of a classic red velvet cake, but in an incredibly convenient, chewy bar form that’s just perfect for sharing. Trust me, you won’t have to fuss with multiple cake layers or intricate frosting techniques; these bars deliver all the beloved taste with a fraction of the effort, making them a true game-changer in your baking repertoire.
The allure of red velvet has a fascinating history, often shrouded in a bit of mystery and luxury, becoming a culinary icon known for its vibrant hue and unique flavor profile. It’s that subtle hint of cocoa balanced by a delicate tang, traditionally enhanced by buttermilk and vinegar, which gives it its distinctive character. Paired with the indulgent cream cheese frosting, this combination makes red velvet universally adored. I believe we’ve transformed that beloved experience into something even more accessible and delightfully shareable with this recipe.
Why you’ll love these Red Velvet Cookie Bars:
People absolutely adore these bars not just for their stunning visual appeal, but for their irresistible combination of soft, tender chewiness and the smooth, creamy tang of the frosting. They are simply perfect for potlucks, parties, or just a delightful treat at home on a cozy evening. Get ready to bake a batch that I promise will disappear in no time!

Ingredients:
- For the Red Velvet Cookie Bars:
- 2 ½ cups (300g) all-purpose flour
- ¼ cup (25g) unsweetened cocoa powder (natural, not Dutch-processed, for that classic red velvet tang)
- 1 teaspoon baking soda
- ½ teaspoon salt
- 1 cup (226g) unsalted butter, softened to room temperature
- 1 ¾ cups (350g) granulated sugar
- 2 large eggs, at room temperature
- 2 teaspoons vanilla extract (pure vanilla is always best!)
- 2 tablespoons buttermilk (if you don’t have buttermilk, you can make your own by adding ½ teaspoon of lemon juice or white vinegar to 2 tablespoons of regular milk and letting it sit for 5 minutes)
- 2-3 tablespoons liquid red food coloring (gel food coloring works beautifully for a vibrant color; adjust to your desired intensity)
- ½ cup (60g) white chocolate chips (optional, but they add a lovely textural contrast and sweetness to the Red Velvet Cookie Bars)
- For the Cream Cheese Frosting:
- 8 ounces (226g) full-fat cream cheese, softened to room temperature
- ½ cup (113g) unsalted butter, softened to room temperature
- 3-4 cups (360-480g) powdered sugar (confectioners’ sugar), sifted, adjusted to your desired sweetness and consistency
- 1 teaspoon vanilla extract
- 1-2 tablespoons milk or heavy cream (optional, for thinning if needed)
Equipment You’ll Need:
Before we dive into creating these amazing Red Velvet Cookie Bars, make sure you have your tools ready. You’ll need a 9×13 inch baking pan, parchment paper, a large mixing bowl (or a stand mixer with a paddle attachment), a whisk, rubber spatulas, measuring cups and spoons, and a wire rack for cooling. Having everything prepped makes the process much smoother and more enjoyable, especially when you’re aiming for that perfect batch of Red Velvet Cookie Bars.
Getting Started: Preparing Your Red Velvet Cookie Bar Batter
-
Preheat and Prepare: First things first, let’s get our oven ready. Preheat your oven to 350°F (175°C). While the oven is heating up, prepare your 9×13 inch baking pan. Line it with parchment paper, leaving an overhang on the sides. This parchment paper sling will be your best friend when it comes to lifting out your glorious Red Velvet Cookie Bars for easy slicing. Lightly grease the exposed parts of the pan that aren’t covered by parchment, and the parchment itself, with a little cooking spray or butter. This ensures nothing sticks, and you get beautifully clean edges on your Red Velvet Cookie Bars.
-
Whisk Dry Ingredients: In a medium bowl, whisk together the all-purpose flour, unsweetened cocoa powder, baking soda, and salt. Make sure these dry ingredients are thoroughly combined. The cocoa powder is crucial here, giving our Red Velvet Cookie Bars their subtle chocolatey depth and helping to activate that iconic red color. Set this mixture aside for a moment.
-
Cream Butter and Sugar: In a large mixing bowl, or the bowl of your stand mixer fitted with the paddle attachment, beat the softened unsalted butter and granulated sugar together. You’ll want to do this on medium speed until the mixture is light, fluffy, and pale in color. This process typically takes about 2-3 minutes. Don’t rush this step, as proper creaming incorporates air, which contributes to the lovely texture of your Red Velvet Cookie Bars. Scrape down the sides of the bowl occasionally to ensure everything is evenly incorporated.
-
Add Wet Ingredients: Now it’s time to add the eggs, one at a time. Beat each egg into the butter-sugar mixture until it’s just combined before adding the next. Then, stir in the vanilla extract. The vanilla enhances all the other flavors in these Red Velvet Cookie Bars. Following this, pour in the buttermilk and the red food coloring. Mix on low speed until the color is evenly distributed throughout the mixture. You’ll see that beautiful red hue begin to develop! Feel free to add a little more food coloring if you desire a deeper, more dramatic red for your Red Velvet Cookie Bars.
-
Combine Wet and Dry: Gradually add the dry ingredient mixture to the wet ingredients, mixing on low speed until just combined. Be careful not to overmix at this stage; overmixing can lead to tough Red Velvet Cookie Bars. We’re aiming for a tender, chewy texture. A few streaks of flour are perfectly fine; you’ll finish mixing by hand. Once mostly combined, gently fold in the optional white chocolate chips with a rubber spatula if you’re using them. They add a delightful surprise to every bite of these Red Velvet Cookie Bars.
-
Spread the Batter: Transfer the thick, vibrant red batter into your prepared 9×13 inch baking pan. Use your spatula to spread it evenly into all corners of the pan. You want a consistent thickness across the entire pan so that your Red Velvet Cookie Bars bake uniformly. This ensures every piece is as perfect as the last.
Baking Your Perfect Red Velvet Cookie Bars
-
Bake to Perfection: Place the baking pan in your preheated oven. Bake for approximately 25-30 minutes. The exact baking time can vary depending on your oven, so keep an eye on them. You’ll know your Red Velvet Cookie Bars are done when the edges are lightly golden brown and a wooden skewer or toothpick inserted into the center comes out with moist crumbs attached, but not wet batter. The center should also look set and not jiggly. Don’t overbake, or your Red Velvet Cookie Bars might become dry!
-
Cool Completely: Once baked, remove the pan from the oven and place it on a wire rack to cool completely. This is a crucial step! Resist the urge to frost warm Red Velvet Cookie Bars, as the cream cheese frosting will melt and create a messy situation. Cooling can take 1-2 hours, or you can even pop them in the fridge for about 30-45 minutes to speed up the process once they’ve cooled down significantly on the counter. Make sure they are absolutely, positively cool to the touch before moving on to the next step for these Red Velvet Cookie Bars.
Crafting the Cream Cheese Frosting
-
Whip Cream Cheese and Butter: While your Red Velvet Cookie Bars are cooling, you can prepare the luscious cream cheese frosting. In a clean large mixing bowl, or the bowl of your stand mixer, beat the softened cream cheese and softened unsalted butter together on medium speed until smooth and creamy. This typically takes about 2-3 minutes. Make sure there are no lumps of cream cheese or butter, as this will affect the texture of your frosting. The key to a silky smooth frosting for your Red Velvet Cookie Bars is starting with truly softened ingredients.
-
Add Vanilla and Powdered Sugar: Add the vanilla extract and begin to gradually add the sifted powdered sugar, one cup at a time, mixing on low speed until fully incorporated before adding more. Sifting the powdered sugar beforehand is important to prevent lumps in your frosting. Once all the powdered sugar is added, increase the speed to medium-high and beat for another 1-2 minutes until the frosting is light, fluffy, and smooth. This aeration step creates that wonderful, airy texture that pairs so well with the dense Red Velvet Cookie Bars.
-
Adjust Consistency (if needed): If your frosting seems too thick, you can add milk or heavy cream, one tablespoon at a time, until you reach your desired spreading consistency. If it’s too thin, you can add a little more sifted powdered sugar. I personally love a frosting that’s easy to spread but still holds its shape beautifully on top of these Red Velvet Cookie Bars.
Assembling and Serving Your Irresistible Red Velvet Cookie Bars
-
Frost the Cooled Bars: Once your Red Velvet Cookie Bars are completely cool, use the parchment paper overhang to carefully lift the entire slab out of the baking pan and transfer it to a cutting board or a flat surface. This makes frosting and cutting so much easier. Now, spread the glorious cream cheese frosting evenly over the top of the cooled Red Velvet Cookie Bars. You can use an offset spatula or the back of a spoon to create lovely swirls or a perfectly smooth finish, whichever you prefer. Don’t be shy; load up that frosting! It’s an essential part of the Red Velvet Cookie Bar experience.
-
Chill for Setting: For cleaner slices and a firmer frosting, I highly recommend chilling the frosted Red Velvet Cookie Bars in the refrigerator for at least 30 minutes. This allows the frosting to set nicely, making for much tidier cuts and preventing the frosting from squishing out when you slice them. It’s a small step that makes a big difference in presentation.
-
Slice and Serve: After chilling, remove the Red Velvet Cookie Bars from the refrigerator. Using a sharp knife, cut the large slab into individual bars. You can make them as large or as small as you like – squares, rectangles, or even triangles if you’re feeling fancy! For the cleanest cuts, wipe your knife clean with a damp cloth after each slice. Arrange them on a platter and prepare for compliments! These Red Velvet Cookie Bars are truly a showstopper.
-
Storage: Store any leftover Red Velvet Cookie Bars in an airtight container in the refrigerator for up to 3-4 days due to the cream cheese frosting. While they are delicious cold, I often find that letting them sit at room temperature for about 15-20 minutes before serving enhances their flavor and texture even more, allowing the frosting to soften slightly and the cookie bar to become perfectly tender. These Red Velvet Cookie Bars are fantastic for parties, potlucks, or just a sweet treat at home!
Tips for the Best Red Velvet Cookie Bars:
-
Don’t Skimp on Quality Ingredients:
Using good quality butter, cream cheese, and pure vanilla extract really makes a difference in the final taste of your Red Velvet Cookie Bars. Since there aren’t many ingredients, each one plays a starring role in the overall flavor profile. Opt for full-fat cream cheese for the richest, most stable frosting. Natural cocoa powder is key for that traditional red velvet tang and helps the red color truly pop.
-
Room Temperature Ingredients are Non-Negotiable:
This is probably the most crucial tip for any baking recipe, especially for these Red Velvet Cookie Bars. Softened butter and cream cheese will cream together smoothly, incorporating air and creating a lighter, more consistent batter and frosting. Cold ingredients will lead to lumpy mixtures and a denser end product. Plan ahead and take your butter, eggs, and cream cheese out of the fridge at least an hour or two before you start baking.
-
Measure Flour Correctly:
Too much flour can result in dry, crumbly Red Velvet Cookie Bars. The best way to measure flour is to lightly spoon it into your measuring cup and then level it off with the back of a knife. Avoid scooping directly from the bag, as this compacts the flour and you’ll end up with more than you need. Precision in measuring dry ingredients will ensure your Red Velvet Cookie Bars have the perfect texture.
-
Achieving that Perfect Red Hue:
The amount of red food coloring can be adjusted to your preference. Gel food coloring often gives a more intense and vibrant color with less liquid, which is ideal as too much liquid can alter the batter consistency. Start with 2 tablespoons and add more until you reach your desired shade of red for your Red Velvet Cookie Bars. Remember, the color might deepen slightly during baking.
-
Preventing Frosting Meltdowns:
As mentioned in the instructions, ensure your Red Velvet Cookie Bars are completely cool before applying the cream cheese frosting. Even slightly warm bars will cause the frosting to melt and slide off, creating a less-than-appetizing appearance. Patience here is a virtue that will be rewarded with beautifully frosted Red Velvet Cookie Bars.
-
Experiment with Toppings:
While classic Red Velvet Cookie Bars are fantastic on their own, don’t hesitate to get creative with toppings! A sprinkle of extra white chocolate chips, some festive red and white sprinkles, or even a dusting of cocoa powder can add an extra touch of flair. Crushed pecans or walnuts can also add a nice crunch and earthy flavor that complements the red velvet perfectly, taking your Red Velvet Cookie Bars to the next level.
-
Don’t Overbake:
Overbaking is the enemy of chewy, moist cookie bars. Keep a close eye on your Red Velvet Cookie Bars during the last few minutes of baking. They should be set around the edges but still look slightly soft in the very center. They will continue to cook slightly from residual heat once removed from the oven. A slightly underbaked center often yields the chewiest, most delightful Red Velvet Cookie Bars.
Conclusion:
Well, my friend, we’ve reached the sweet end of our journey, and I genuinely hope you’re feeling as excited as I am about these incredible treats. This isn’t just another recipe; it’s an invitation to experience pure joy in every bite. I truly believe that once you try this recipe, it will quickly become a cherished favorite in your baking repertoire, one you’ll return to again and again for its sheer simplicity and profound deliciousness.
Why These Red Velvet Cookie Bars Are a Must-Try:
What makes these particular Red Velvet Cookie Bars stand out from the crowd? It’s a harmonious blend of stunning visuals, tantalizing textures, and an unforgettable flavor that truly sings. The rich, deep red hue of the cookie base, often associated with luxury and indulgence, immediately captivates the eye, especially when contrasted with the luscious, bright white swirl of tangy cream cheese frosting. But beyond their undeniable beauty, these bars offer a textural experience that is simply sublime. Imagine a perfectly soft, chewy cookie bar that melts in your mouth, providing just the right amount of resistance before giving way to its tender interior. This delightful chewiness is perfectly complemented by the silky, smooth, and ever-so-slightly tart cream cheese frosting, which cuts through the sweetness of the cookie beautifully, creating a balanced and deeply satisfying treat. It’s that perfect balance of sweet and tangy, soft and chewy, that elevates these bars from good to absolutely phenomenal. Plus, let’s be honest, baking cookies in bar form is inherently less fussy than individual cookies, saving you time and effort without compromising on taste or presentation.
Elevating Your Experience: Serving Suggestions and Variations
While these Red Velvet Cookie Bars are undeniably perfect straight from the pan (once cooled, of course!), there are so many delightful ways to enjoy and customize them. For a truly decadent dessert experience, I love serving a square warm, perhaps briefly microwaved for 10-15 seconds, alongside a scoop of premium vanilla bean ice cream or even a rich coffee-flavored ice cream. The warmth of the bar melting slightly into the cold ice cream creates a heavenly contrast. Another wonderful pairing is with a steaming cup of freshly brewed coffee or a soothing herbal tea – the perfect afternoon pick-me-up or evening indulgence. Don’t shy away from garnishes either! A sprinkle of mini chocolate chips, a dusting of cocoa powder, or even a few fresh raspberries or strawberries can add an extra layer of visual appeal and a burst of complementary flavor. For those feeling a bit adventurous, consider a few variations to make this recipe uniquely yours. You could gently fold in some white chocolate chips into the cookie dough for an extra layer of sweetness and texture, or perhaps a handful of chopped pecans for a delightful crunch. If you’re hosting a festive occasion, a scattering of holiday sprinkles over the frosting before it sets could transform these into a celebratory masterpiece. You could even experiment with a touch of orange zest in the cream cheese frosting for a bright, citrusy twist that surprisingly complements the red velvet flavor. The possibilities are truly endless, limited only by your imagination!
Your Turn to Bake and Share!
Now, it’s your turn to experience the magic! I wholeheartedly encourage you to roll up your sleeves, preheat your oven, and embark on this wonderful baking adventure. Trust me, the aroma that will fill your kitchen as these bars bake is a treat in itself. There’s something incredibly therapeutic about the process of creating something delicious from scratch, and the reward of biting into a homemade Red Velvet Cookie Bar that you’ve created is simply unparalleled. Don’t hesitate, dive in! Once you’ve had a chance to bake and taste these incredible treats, please, please share your experience with me! I absolutely adore hearing about your kitchen successes, your personal twists on recipes, and the joy these dishes bring into your home. Did you try a unique variation? Did they become an instant hit at your last gathering? Let me know in the comments or wherever you share your culinary adventures. Your feedback and stories inspire me and others in our baking community. Happy baking, my friends; I can’t wait to hear all about it!
Best Red Velvet Cookie Bars – Quick, Easy, Decadent
Revolutionize your dessert experience with these Red Velvet Cookie Bars! Capturing the rich, dramatic flavor of classic red velvet cake in a convenient, chewy bar form, these decadent treats are perfect for sharing without the fuss of cake layers or intricate frosting. They deliver all the beloved taste with a fraction of the effort, making them a true game-changer.
Ingredients
Instructions
Important Information
Nutrition Facts (Per Serving)
It is important to consider this information as approximate and not to use it as definitive health advice.
Allergy Information
Please check ingredients for potential allergens and consult a health professional if in doubt.