Gin Extractgerbread Pancakes Recipe offers an exciting and truly unique twist on a timeless breakfast classic that I am incredibly excited to share with you.
I’ve always believed that the best meals tell a story, and this particular creation whispers tales of comforting winter mornings with an unexpected, elegant secret. While gingerbread itself boasts a storied past, tracing its origins back to ancient cultures and evolving into the festive treat we cherish today, our innovative approach takes this beloved flavor profile to new heights. The subtle infusion of gin extract introduces a sophisticated layer of botanical notes, perfectly complementing the warming ginger, cinnamon, and nutmeg, creating a taste experience that is both familiar and wonderfully novel.
People adore this dish not just for its incredibly fluffy texture and intoxicating aroma, but for the sheer delight of discovering such a harmonious and elevated flavor profile in a breakfast staple. It’s a culinary fusion that transforms a simple stack of pancakes into an extraordinary experience, making each bite irresistibly aromatic and utterly delightful. This particular Gin Extractgerbread Pancakes Recipe is designed not just to satisfy your palate, but to surprise and enchant, whether you’re looking to elevate your weekend brunch or simply indulge in a moment of refined comfort.
Ingredients:
-
For the Gin Extractgerbread Pancakes:
- 2 cups (240g) all-purpose flour
- 2 tablespoons granulated sugar
- 1 tablespoon baking powder
- 1 teaspoon ground ginger
- 1 teaspoon ground cinnamon
- ½ teaspoon ground nutmeg
- ¼ teaspoon ground cloves
- ½ teaspoon salt
- 1 ½ cups whole milk (or a non-dairy alternative like almond or oat milk)
- ¼ cup unsulphured molasses
- 2 large eggs, lightly beaten
- ¼ cup (56g) unsalted butter, melted and slightly cooled, plus extra for greasing the griddle
- 1 ½ teaspoons pure vanilla extract
- 1 teaspoon gin extract (this is where the “Gin Extractgerbread Pancakes Recipe” truly shines!)
- Optional: Zest of 1 orange, finely grated
-
For the Orange-Maple Gin Syrup (Highly Recommended!):
- 1 cup pure maple syrup (Grade A or B for richer flavor)
- ¼ cup freshly squeezed orange juice
- 1 tablespoon gin extract
- 1 tablespoon unsalted butter
- ¼ teaspoon ground ginger
- Optional garnish: Thinly sliced orange wheels, fresh cranberries, or a dusting of powdered sugar
Gathering Your Tools and Prepping
- Before we dive into the delightful world of these Gin Extractgerbread Pancakes, let’s get our kitchen ready. I always find that having everything organized makes the cooking process so much more enjoyable and less stressful.
- First, lay out all your ingredients on the counter. This practice, known as “mise en place,” ensures you don’t forget anything and that every measurement is accurate. Trust me, it makes a huge difference, especially when you’re dealing with spices.
- Grab two large mixing bowls. One will be for our dry ingredients, and the other for the wet. You’ll also need a whisk, a spatula, and measuring cups and spoons.
- If you haven’t already, melt your ¼ cup of unsalted butter for the pancake batter. You can do this in a microwave in short bursts or in a small saucepan over low heat. Once melted, set it aside to cool slightly. We don’t want to add hot butter directly to our eggs, as it could scramble them!
- Preheat your griddle or a large non-stick frying pan over medium-low heat. Getting the temperature right from the start is crucial for perfectly golden pancakes. I usually aim for a setting that’s hot enough to sizzle a drop of water but not so hot that it instantly evaporates. A consistent temperature throughout cooking will ensure even browning and a fluffy interior.
- If you’re making the optional Orange-Maple Gin Syrup, have a small saucepan ready for that too. It’s best made fresh while the pancakes are cooking or just before serving.
Mixing the Dry Ingredients
- In your first large mixing bowl, we’ll combine all the dry stars of our Gin Extractgerbread Pancakes Recipe. Add the 2 cups of all-purpose flour, 2 tablespoons of granulated sugar, and 1 tablespoon of baking powder. Baking powder is our leavening agent here, responsible for those wonderfully fluffy pancakes!
- Next, let’s introduce the warming spices that give gingerbread its signature flavor: 1 teaspoon of ground ginger, 1 teaspoon of ground cinnamon, ½ teaspoon of ground nutmeg, and ¼ teaspoon of ground cloves. The aroma alone is enough to get you excited!
- Don’t forget the ½ teaspoon of salt. Salt doesn’t just make things salty; it actually enhances all the other flavors, balancing the sweetness and making the spices pop.
- Using your whisk, thoroughly combine all these dry ingredients. Make sure there are no lumps of flour or pockets of baking powder. Whisking ensures an even distribution of all the spices and leavening agents, which is key for a consistent texture and flavor in every pancake. Give it a good 30 seconds to a minute of whisking until everything looks uniform.
Combining the Wet Ingredients
- Now, in your second large mixing bowl, we’ll bring together the liquid components. Pour in the 1 ½ cups of whole milk. I find whole milk gives the best richness and tenderness, but feel free to use your preferred milk.
- Add the ¼ cup of unsulphured molasses. This is another powerhouse ingredient for our “Gin Extractgerbread Pancakes Recipe,” providing that deep, characteristic gingerbread color and flavor, as well as a lovely moisture. Make sure it’s unsulphured, as sulphured molasses can have a slightly bitter taste.
- Crack your 2 large eggs into the bowl and lightly beat them with your whisk before adding them to the milk and molasses. This ensures they integrate smoothly into the batter.
- Next, add the cooled melted butter. Remember, it should be just warm or at room temperature, not hot. Stir it in gently.
- Now for the extracts! Add 1 ½ teaspoons of pure vanilla extract for that comforting sweetness and the star of the show: 1 teaspoon of gin extract. This subtle yet distinct botanical note is what elevates these from regular gingerbread pancakes to a truly unique and sophisticated breakfast experience. It’s the secret ingredient that makes our Gin Extractgerbread Pancakes Recipe truly special.
- If you’re using it, grate in the zest of 1 orange. The citrus brightens up all the warm spices and adds another layer of complexity that complements the gin extract beautifully.
- Whisk all these wet ingredients together until they are well combined and the molasses is fully incorporated. The mixture should be smooth and a lovely rich brown color.
Bringing It All Together: The Pancake Batter
- This is where the magic happens! Create a well in the center of your dry ingredients bowl.
- Pour the entire wet ingredient mixture into the well of the dry ingredients.
- Now, using your whisk or a spatula, gently fold the wet ingredients into the dry. The key here is not to overmix! Overmixing develops the gluten in the flour, leading to tough, chewy pancakes instead of light, fluffy ones. Mix just until the wet and dry ingredients are combined and there are no large streaks of dry flour remaining. A few small lumps are perfectly fine, even desirable. This gives the pancakes a beautiful tender crumb.
- Let the batter rest for 5-10 minutes. This short rest allows the gluten to relax and the baking powder to start working its magic, resulting in an even fluffier texture. It also gives the flavors a moment to meld.
Cooking Your Gin Extractgerbread Pancakes
- By now, your griddle or frying pan should be nicely preheated. Lightly grease it with a little butter or cooking spray. I like using a small pat of butter on a paper towel to evenly coat the surface for the best browning.
- Pour about ¼ cup of batter for each pancake onto the hot griddle. You can adjust the size according to your preference, but ¼ cup usually yields a good medium-sized pancake. Don’t overcrowd the griddle; give each pancake some breathing room.
- Cook for about 2-3 minutes on the first side, or until you see bubbles forming on the surface of the pancake and the edges look set. The bubbles are your cue that it’s time to flip!
- Carefully slide your spatula under each pancake and flip it over. Cook for another 1-2 minutes on the second side, or until golden brown and cooked through. The internal temperature should be cooked, and if you gently press the center, it should spring back.
- Transfer the cooked pancakes to a plate and keep them warm while you cook the remaining batter. I often place them on a baking sheet in a very low oven (around 200°F / 95°C) to keep them toasty. Repeat the greasing and cooking process for the rest of the batter. You should yield about 12-16 delicious Gin Extractgerbread Pancakes.
Crafting the Orange-Maple Gin Syrup (Optional but Highly Recommended!)
- While your pancakes are cooking, or just as you finish up, let’s whip up this incredible syrup that perfectly complements our Gin Extractgerbread Pancakes Recipe. In a small saucepan, combine the 1 cup of pure maple syrup, ¼ cup of freshly squeezed orange juice, and 1 tablespoon of gin extract. The orange and gin notes in the syrup will echo those in the pancakes, creating a cohesive flavor profile.
- Add the 1 tablespoon of unsalted butter and ¼ teaspoon of ground ginger. The butter adds a lovely richness and silky texture, while the ginger enhances the overall gingerbread theme.
- Place the saucepan over medium heat and bring the mixture to a gentle simmer, stirring occasionally until the butter is melted and all ingredients are well combined. Let it simmer for 2-3 minutes to allow the flavors to meld and slightly thicken. Don’t boil it vigorously, as this can reduce the volume too much.
- Remove from heat and keep warm until serving. If you prepare it ahead of time and it thickens too much, you can gently reheat it with a splash more orange juice or water.
Assembling and Serving Your Masterpiece
- Now for the grand finale! Arrange a stack of your freshly cooked Gin Extractgerbread Pancakes on a serving plate. I usually go for a stack of three or four per person, depending on appetites.
- Generously spoon the warm Orange-Maple Gin Syrup over the top, letting it cascade down the sides of the stack. This syrup truly takes the Gin Extractgerbread Pancakes Recipe to the next level of indulgence.
- For an extra touch of elegance and flavor, garnish with thinly sliced orange wheels, a sprinkle of fresh cranberries, or a dusting of powdered sugar. A dollop of whipped cream or crème fraîche would also be absolutely divine if you’re feeling extra fancy.
- Serve immediately and prepare for rave reviews! These Gin Extractgerbread Pancakes are a fantastic way to start a weekend morning or even for a special brunch. The aroma filling your kitchen will be absolutely intoxicating, and the unique combination of warming spices with a hint of botanical gin is simply unforgettable. Enjoy every delightful bite!

Conclusion:
And there you have it, my friends! We’ve journeyed through the delightful process of creating something truly special, a breakfast or brunch experience that transcends the ordinary. I genuinely believe that this particular recipe isn’t just another item to tick off your culinary list; it’s an invitation to savor a moment of pure, unadulterated comfort and joy. What makes this dish an absolute must-try, in my humble opinion, is its uncanny ability to perfectly balance robust, aromatic spices with an underlying hint of something a little extra, a subtle warmth that lingers beautifully on the palate. Imagine those frosty mornings, or even a lazy Sunday afternoon, transformed by the sheer coziness these fluffy delights bring to the table. They’re a hug in pancake form, a comforting embrace that starts your day, or brightens your afternoon, with a gentle, yet unforgettable, flavor explosion. The texture, too, is a dream – incredibly light, wonderfully fluffy, and just substantial enough to feel satisfying without being overly heavy. This isn’t just a meal; it’s a mood, a delightful culinary adventure that promises to become a beloved staple in your home.
Now, let’s talk about taking this masterpiece to the next level with some serving suggestions and delightful variations. While they are absolutely phenomenal on their own, perhaps with just a drizzle of warm maple syrup, I encourage you to get creative and personalize your pancake experience. For a truly decadent treat, I love serving these with a generous dollop of freshly whipped cream, perhaps infused with a touch of vanilla or even a hint of orange zest for an added layer of aroma. Candied ginger pieces, finely chopped, sprinkled over the top offer a wonderful textural contrast and an extra kick of that classic gingerbread spice. Another fantastic option is a warm apple compote, gently spiced with cinnamon and cloves; the sweet-tart apples complement the pancakes beautifully. If you’re feeling particularly adventurous, a scattering of dark chocolate chips, melted into gooey pockets, can add a luxurious richness that’s utterly irresistible. And for a truly adult twist, especially if you’re enjoying these for a special brunch, consider a light dusting of confectioners’ sugar alongside a small glass of mulled cider or even a gently spiced hot toddy (for the adults, of course!). Don’t forget about fresh fruit! Sliced pears, caramelized bananas, or even a vibrant berry medley can add freshness and a lovely burst of color.
But the adventure doesn’t stop there!
Consider some delightful variations to make this recipe uniquely yours. If you prefer a slightly denser, nuttier pancake, you could experiment with substituting a quarter of the all-purpose flour with whole wheat pastry flour or even almond flour. For an extra layer of flavor and texture, a handful of finely chopped pecans or walnuts folded into the batter just before cooking would be absolutely divine. Perhaps you’re looking for an even more intense spice profile? Feel free to adjust the amounts of ginger, cinnamon, and cloves to your personal preference, or even introduce a pinch of allspice or nutmeg. And who says these have to be just pancakes? This versatile batter would make equally fantastic waffles! Just pour it into your preheated waffle iron and cook until golden and crisp. You could even turn them into mini-pancakes, perfect for little hands or for creating a beautiful, elegant stack for a special occasion. Imagine a stack of these mini delights, each with a different topping, presented beautifully. The possibilities are truly endless, and that’s the beauty of cooking – it’s an art form, a canvas for your creativity.
So, what are you waiting for?
I truly hope that reading about this delightful creation has inspired you to roll up your sleeves and give it a try. There’s immense satisfaction in creating something so wonderfully delicious from scratch, and I promise you, the aroma alone will be enough to get your taste buds tingling. This isn’t just about following instructions; it’s about experiencing the joy of cooking, the warmth of your kitchen, and the delight on the faces of those you share it with. I am incredibly excited for you to discover the unique charm of this Gin Extractgerbread Pancakes Recipe. It’s a recipe that I hold dear, and I’m confident it will quickly become a cherished part of your culinary repertoire. Once you’ve whipped up a batch, please, please come back and share your experience with me and our community! Did you try a unique topping? Did you experiment with a different flour? How did your family react? Your insights, your photos, and your comments truly make this journey all the more rewarding for everyone. Let’s celebrate the magic of homemade food together! Happy cooking, my friends, and enjoy every single delicious bite!
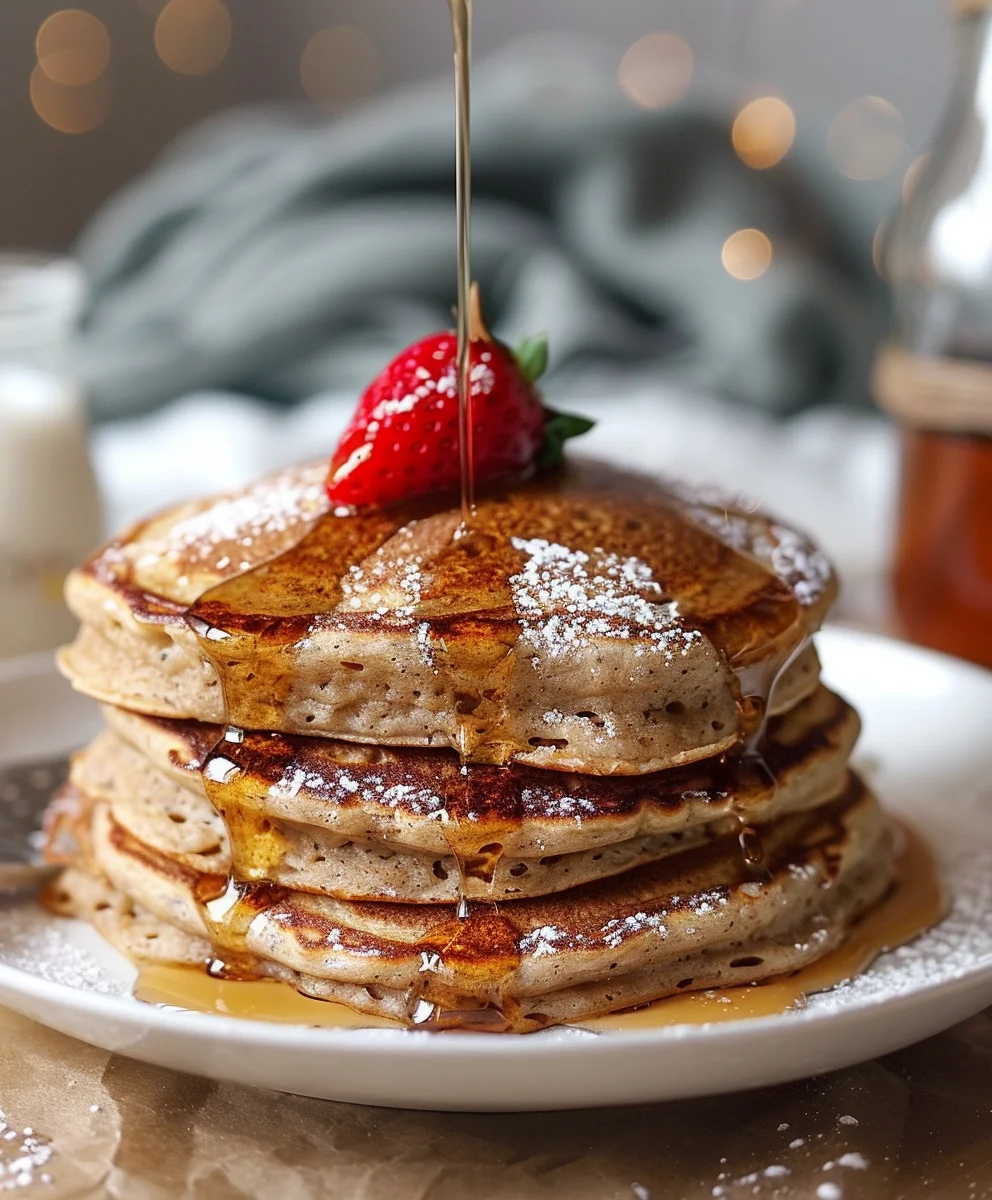
Gingerbread Pancakes Recipe
A unique twist on classic gingerbread pancakes, offering a sophisticated flavor profile and incredibly fluffy texture for an elegant holiday brunch.
Ingredients
-
1½ cups (190g) all-purpose flour
-
1 tbsp baking powder
-
1 tsp ground ginger
-
1 tsp ground cinnamon
-
¼ tsp ground cloves
-
Pinch of salt
-
2 large eggs
-
¾ cup (190ml) whole milk
-
¼ cup (65g) unsalted butter, melted, plus more for greasing
-
2 tbsp unsulphured molasses
-
2 tbsp brown sugar
-
½ tsp vanilla extract
Instructions
-
Step 1
Gather all ingredients and tools. Melt ¼ cup butter and let cool. Preheat griddle to medium-low. Have a small saucepan ready for optional syrup. -
Step 2
In a large bowl, whisk together 1½ cups flour, 2 tbsp brown sugar, 1 tbsp baking powder, 1 tsp ground ginger, 1 tsp ground cinnamon, ¼ tsp ground cloves, and a pinch of salt until well combined. -
Step 3
In another large bowl, whisk together ¾ cup milk, 2 tbsp molasses, 2 lightly beaten eggs, ¼ cup melted butter, and ½ tsp vanilla extract until smooth. -
Step 4
Pour the wet mixture into the dry ingredients. Gently fold with a whisk or spatula until just combined, being careful not to overmix. A few small lumps are acceptable. Let batter rest for 5-10 minutes. -
Step 5
Lightly grease the preheated griddle. Pour about ¼ cup batter per pancake. Cook for 2-3 minutes until bubbles form on the surface, then flip and cook for another 1-2 minutes until golden brown and cooked through. Keep cooked pancakes warm while finishing the rest of the batter. -
Step 6
In a small saucepan, combine 1 cup pure maple syrup, ¼ cup freshly squeezed orange juice, 1 tbsp non-alcoholic botanical extract, 1 tbsp unsalted butter, and ¼ tsp ground ginger. Bring to a gentle simmer over medium heat for 2-3 minutes, stirring until butter melts and flavors meld. Keep warm. -
Step 7
Stack pancakes on a serving plate. Generously spoon warm Orange-Maple Botanical Syrup over them. Garnish as desired (e.g., thinly sliced orange wheels, fresh cranberries, or a dusting of powdered sugar). Serve immediately.
Important Information
Nutrition Facts (Per Serving)
It is important to consider this information as approximate and not to use it as definitive health advice.
Allergy Information
Please check ingredients for potential allergens and consult a health professional if in doubt.