• Skip to primary navigation
  • Skip to main content
  • Skip to primary sidebar
Homesmad

Homesmad

  • Home
  • Breakfast & Brunch
  • Appetizers & Snacks
  • Dinner
  • Dessert
  • About
  • Privacy Policy
  • Contact
Homesmad
  • Home
  • Breakfast & Brunch
  • Appetizers & Snacks
  • Dinner
  • Dessert
  • About
  • Privacy Policy
  • Contact

Butternut Squash Mac & Cheese: Creamy & Healthy Comfort

October 3, 2025 by Lily author

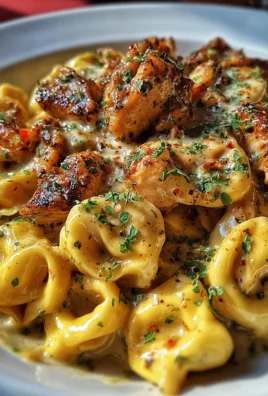
Butternut Squash Mac And Cheese – the very name promises a delightful fusion, doesn’t it? As a lifelong devotee of classic macaroni and cheese, I’ve always been on the lookout for ways to elevate this beloved comfort food without sacrificing its soul. And let me tell you, this recipe does exactly that. While the humble mac and cheese boasts a history stretching back centuries, evolving from simple baked pasta dishes to the iconic, cheesy staple we adore today, the addition of vibrant butternut squash is a relatively modern, yet utterly brilliant, twist.

What makes this particular dish so universally adored? It’s a symphony of textures and flavors. Imagine the creamy, molten cheddar and Gruyere mingling perfectly with the naturally sweet, earthy notes of roasted butternut squash. This isn’t just a side dish; it’s a hearty, satisfying meal that brings warmth and a touch of wholesome goodness to your table. People adore this Butternut Squash Mac And Cheese because it transforms a guilty pleasure into a vibrant, vitamin-rich culinary experience that’s both deeply comforting and surprisingly sophisticated. It’s the perfect answer for those seeking both indulgence and a serving of vegetables, all wrapped up in one irresistibly cheesy package.

Butternut Squash Mac & Cheese: Creamy & Healthy Comfort this RECIPE

Ingredients:

  • For the Butternut Squash:
    • 1 medium butternut squash (about 2-3 pounds), peeled, deseeded, and cut into 1-inch cubes
    • 2 tablespoons olive oil
    • ½ teaspoon salt
    • ¼ teaspoon black pepper
  • For the Pasta:
    • 1 pound elbow macaroni, cavatappi, or medium shell pasta
    • 1 tablespoon salt (for pasta water)
  • For the Cheese Sauce:
    • ½ cup (1 stick) unsalted butter
    • ½ cup all-purpose flour
    • 4 cups whole milk, warmed (you can warm it gently in the microwave or a separate saucepan)
    • 1 cup vegetable or chicken broth (low sodium preferred)
    • 1 teaspoon Dijon mustard (optional, but highly recommended for depth)
    • ½ teaspoon freshly grated nutmeg (essential for a rich cheese sauce)
    • ¼ teaspoon cayenne pepper (optional, for a subtle warmth)
    • 1 teaspoon salt, or to taste
    • ½ teaspoon black pepper, or to taste
    • 4 cups (about 1 pound) shredded sharp cheddar cheese, freshly grated
    • 2 cups (about ½ pound) shredded Gruyère cheese, freshly grated
    • ½ cup grated Parmesan cheese, freshly grated
  • For the Optional Topping (for baked version):
    • 1 cup panko breadcrumbs
    • 2 tablespoons melted butter
    • ¼ cup grated Parmesan cheese
  • Garnish (Optional):
    • Fresh parsley or chives, chopped

Preparation of Butternut Squash:

  1. Preheat your oven and prepare the squash: First things first, let’s get that oven roaring. Preheat your oven to a cozy 400°F (200°C). While it’s heating up, grab your butternut squash. Peeling a butternut squash can sometimes feel like a mini workout, but a good vegetable peeler makes it much easier. Once peeled, carefully cut it in half lengthwise, scoop out all the seeds and fibrous bits with a spoon – trust me, you don’t want those in your mac and cheese! Then, dice the squash into uniform 1-inch cubes. Uniformity is key here; it ensures all the pieces cook evenly, giving you that consistently tender texture we’re aiming for.
  2. Roast the squash for deep flavor: Now, transfer those beautiful butternut squash cubes onto a large baking sheet. Drizzle them generously with 2 tablespoons of olive oil. Sprinkle with ½ teaspoon of salt and ¼ teaspoon of black pepper. Using your hands, gently toss everything together until each cube is nicely coated. Spread them out into a single layer – overcrowding the pan will steam the squash instead of roasting it, and we want lovely caramelized edges for maximum flavor. Pop the baking sheet into your preheated oven and roast for about 25-30 minutes. You’ll know they’re ready when they’re fork-tender and have those delightful, slightly browned edges. This roasting step is crucial; it brings out the natural sweetness and depth of the squash, which will contribute immensely to the overall richness of our Butternut Squash Mac And Cheese.
  3. Cool slightly: Once roasted, remove the squash from the oven and let it cool on the baking sheet for a few minutes. This makes it easier to handle and blend.

Creating the Silky Butternut Squash Purée:

  1. Blend for ultimate smoothness: Carefully transfer all the roasted butternut squash to a high-powered blender or food processor. Add ½ cup of the warmed whole milk (from the 4 cups total) and ½ cup of vegetable or chicken broth. Begin blending on a low speed, gradually increasing to high, until you achieve an incredibly smooth, velvety purée. You might need to pause and scrape down the sides a few times to ensure there are no lumpy bits. We want this purée to be as luxurious and lump-free as possible, as it will be the secret ingredient lending that signature creamy texture and subtle sweetness to our dish. The consistency should be thick but pourable; if it’s too thick, add a little more broth or milk, a tablespoon at a time, until you reach that perfect silky consistency. Set this beautiful purée aside.

Building the Irresistible Cheese Sauce Base:

  1. Prepare your mise en place: Before we start with the sauce, it’s a good idea to have all your ingredients ready and measured out. Grate your cheeses if you haven’t already – freshly grated cheese melts much more smoothly than pre-shredded varieties, which often contain anti-caking agents. Have your warmed milk, broth, seasonings, and the butternut squash purée within easy reach. This makes the sauce-making process much smoother and prevents any last-minute scrambling.
  2. Start the roux (the foundation of flavor): In a large, heavy-bottomed pot or Dutch oven, melt ½ cup of unsalted butter over medium heat. Once the butter is fully melted and slightly shimmering, sprinkle in ½ cup of all-purpose flour. Immediately begin whisking continuously. This combination of butter and flour is called a roux, and it’s what will thicken our beautiful cheese sauce. Continue to whisk for about 2-3 minutes, cooking out the raw flour taste. The mixture should become a light, golden “blonde” roux and smell delightfully nutty, like pie crust. Do not let it brown too much, as this will change the flavor of your sauce.
  3. Gradually incorporate the liquids: This is a crucial step for a lump-free sauce! Slowly, very slowly, pour in the remaining 3½ cups of warmed whole milk, whisking vigorously the entire time. The roux will initially seize up and form a thick paste, but keep whisking! As you continue to pour and whisk, it will gradually smooth out. Once all the milk is incorporated, pour in the remaining ½ cup of vegetable or chicken broth. Continue whisking constantly over medium heat until the sauce thickens to a consistency that coats the back of a spoon – this usually takes about 5-7 minutes. Be patient and keep whisking; lumps are your enemy here!
  4. Season the béchamel: Once thickened, reduce the heat to low. Stir in the 1 teaspoon of Dijon mustard (if using), ½ teaspoon of freshly grated nutmeg, ¼ teaspoon of cayenne pepper (if using), 1 teaspoon of salt, and ½ teaspoon of black pepper. Taste and adjust seasonings as needed. The nutmeg is particularly important; it really enhances the savory, creamy notes of cheese sauces without overpowering them.
  5. Add the cheeses for ultimate creaminess: Now for the magic! Remove the pot from the heat – this is important to prevent the cheese from seizing or becoming grainy. Add the shredded sharp cheddar, Gruyère, and Parmesan cheeses in batches, stirring gently with a wooden spoon or spatula until each batch is fully melted and incorporated before adding the next. The residual heat from the sauce is more than enough to melt the cheese beautifully. Once all the cheese is melted and you have a smooth, glorious cheese sauce, stir in the reserved butternut squash purée. Mix well until everything is perfectly combined into a vibrant, creamy, and undeniably luscious Butternut Squash Mac And Cheese sauce. Taste again and adjust any seasonings if necessary.

Cooking the Pasta to Perfection:

  1. Boil the water: While you’re working on your sauce, bring a large pot of water to a rolling boil. It should be a truly robust boil. Once boiling, add 1 tablespoon of salt to the water. Salting your pasta water is non-negotiable! It’s the only chance you get to season the pasta itself from the inside out, making a huge difference in the final flavor of your Butternut Squash Mac And Cheese.
  2. Cook the pasta al dente: Add the 1 pound of elbow macaroni (or your chosen pasta shape) to the boiling salted water. Stir occasionally to prevent sticking. Cook according to package directions, but aim for slightly al dente – meaning it should be firm to the bite, not mushy. It will continue to cook a little more when combined with the hot sauce, and even more so if you plan to bake it. This usually takes about 6-8 minutes for elbow macaroni.
  3. Drain thoroughly, do not rinse: Once cooked to your liking, immediately drain the pasta in a colander. Do NOT rinse the pasta! Rinsing removes the starches that help the sauce cling to the noodles, and we definitely want that sauce to stick!

Assembling Your Creamy Butternut Squash Mac And Cheese:

  1. Combine pasta and sauce: Transfer the drained, hot pasta directly back into the large pot with your glorious butternut squash cheese sauce. Gently fold everything together using a large spoon or spatula, ensuring every single noodle is completely coated in that thick, rich, vibrant orange sauce. Take your time to mix it thoroughly, allowing the pasta to absorb some of that incredible flavor. This is where the magic truly happens, and your Butternut Squash Mac And Cheese starts to look like the comforting masterpiece it’s destined to be.

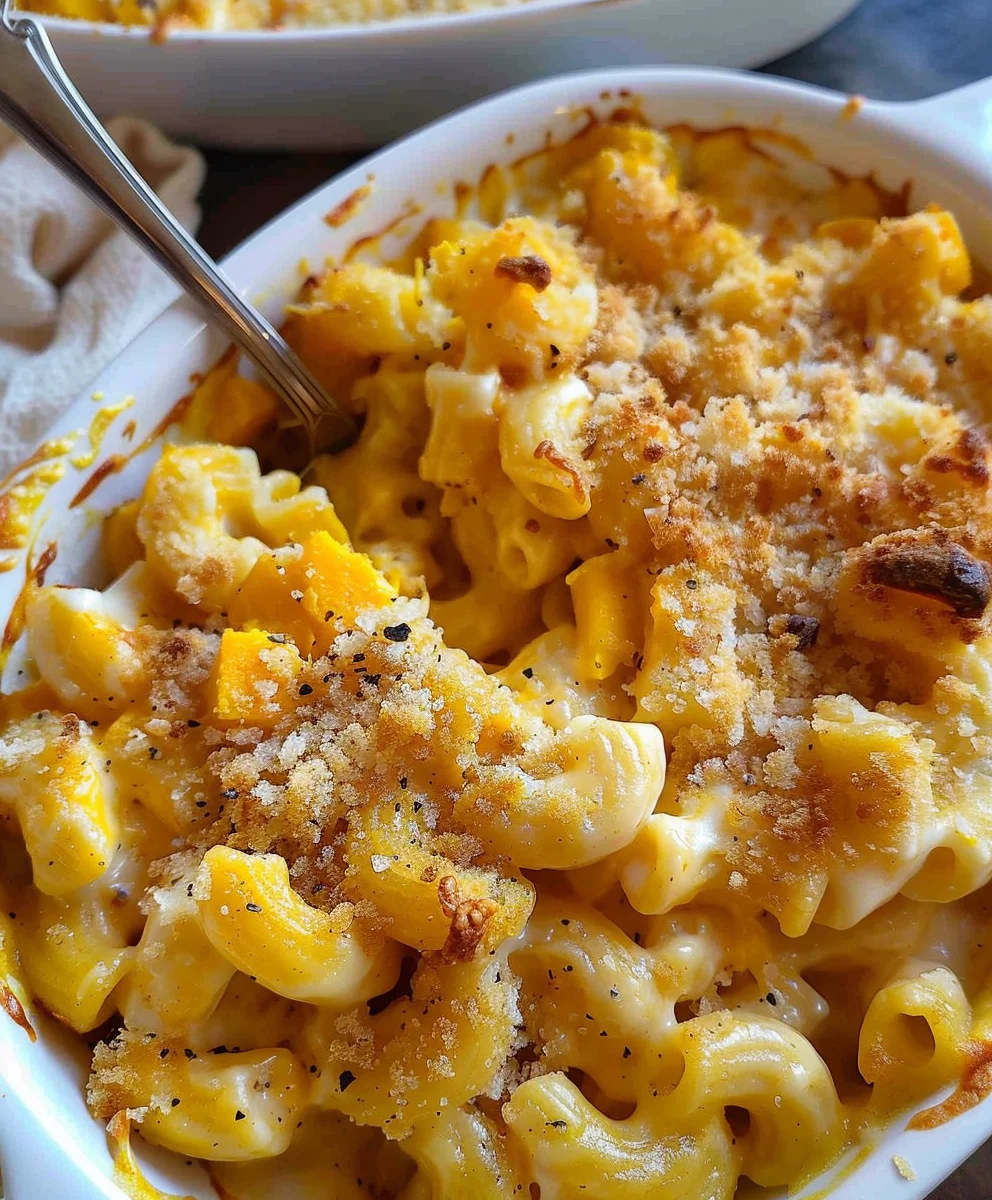
Baking for Golden Perfection (Optional but Recommended!):

While this Butternut Squash Mac And Cheese is absolutely divine straight from the pot, baking it adds an extra layer of texture and a beautiful golden crust that takes it to another level of indulgence. If you choose to bake, follow these steps:

  1. Preheat and prepare baking dish: If you’re going for the baked version, preheat your oven to 375°F (190°C). Lightly grease a 9×13 inch baking dish (or an equivalent size) with butter or cooking spray.
  2. Prepare the topping: In a small bowl, combine 1 cup of panko breadcrumbs, 2 tablespoons of melted butter, and ¼ cup of grated Parmesan cheese. Stir until the breadcrumbs are evenly coated. Panko breadcrumbs are fantastic for this because they create an extra crispy, crunchy topping.
  3. Assemble and bake: Pour the luscious Butternut Squash Mac And Cheese into your prepared baking dish, spreading it evenly. Sprinkle the buttery panko mixture generously over the top. You can also add an extra layer of your favorite cheese (like cheddar or Gruyère) under the breadcrumbs for an even cheesier crust.
  4. Bake until bubbly and golden: Place the dish in the preheated oven and bake for 20-25 minutes, or until the sauce is bubbly around the edges and the topping is beautifully golden brown and crispy. If you notice the topping browning too quickly, you can loosely tent it with aluminum foil for the last few minutes of baking.
  5. Rest before serving: Once out of the oven, let your baked Butternut Squash Mac And Cheese rest for about 5-10 minutes before serving. This allows the sauce to set slightly, preventing it from being too runny and making it easier to serve. Plus, it gives you a moment to admire your culinary creation before diving in!

Serving Suggestions and Storage Tips:

  1. Serve warm: Your Butternut Squash Mac And Cheese is best served warm, ideally right after it’s made or baked. Garnish with a sprinkle of fresh chopped parsley or chives for a pop of color and freshness, if desired. This dish is wonderfully hearty on its own, but it also pairs beautifully with a simple green salad with a light vinaigrette to cut through the richness, or alongside roasted chicken or pork.
  2. Storage: Leftovers can be stored in an airtight container in the refrigerator for up to 3-4 days.
  3. Reheating: To reheat, add a splash of milk or broth to the mac and cheese, then gently warm it on the stovetop over low heat, stirring occasionally, or in the microwave in short bursts until heated through. Avoid overheating, as this can cause the cheese sauce to break or become oily.
  4. Freezing (for convenience): This Butternut Squash Mac And Cheese freezes remarkably well. Allow the cooked mac and cheese to cool completely. Transfer it to freezer-safe containers or aluminum foil pans. Cover tightly with plastic wrap and then aluminum foil. It can be frozen for up to 2-3 months. To reheat from frozen, thaw in the refrigerator overnight, then bake covered at 350°F (175°C) until heated through, uncovering for the last 10-15 minutes if you desire a crispy topping. You might need to add a little extra milk or broth when reheating to bring back its creamy consistency.

Tips for the Perfect Butternut Squash Mac And Cheese Every Time:

  • Freshly Grated Cheese is Key: I cannot emphasize this enough! Pre-shredded cheeses often contain cellulose or starches to prevent clumping, which can lead to a grainy or less smooth sauce. Grating your own cheese, even though it takes a few extra minutes, will yield a significantly smoother and more luxurious cheese sauce for your Butternut Squash Mac And Cheese. The effort is truly worth it for that velvety texture.
  • Warm Your Milk: Adding cold milk to a hot roux can cause the roux to seize up and make it harder to achieve a smooth sauce. Gently warming the milk beforehand helps it incorporate more smoothly and prevents lumps.
  • Don’t Overcook Your Pasta: Remember, your pasta will continue to cook when it’s mixed with the hot sauce, and even more so if you choose to bake it. Aim for a true al dente stage, where it still has a slight bite, to prevent mushy noodles in your finished Butternut Squash Mac And Cheese.
  • Adjust Seasoning as You Go: Taste your sauce at various stages – after adding liquids, after adding cheese, and after combining with the squash purée. Salt levels can vary depending on your broth and cheese choices, so it’s always best to adjust to your personal preference. Don’t be shy with the nutmeg; it truly elevates the flavor!
  • Consider Variations: Feel free to experiment! You can add a pinch of smoked paprika for a smoky undertone, or a touch of onion or garlic powder to the sauce for extra aromatic depth. A tablespoon of cream cheese or mascarpone can also be stirred into the finished sauce for an even richer, tangier finish. For a vegetarian option, always ensure your broth is vegetable-based.
  • Make it a Family Affair: This recipe for Butternut Squash Mac And Cheese is a fantastic dish to involve little helpers. They can help with mashing the squash (if not blending), grating cheese (with supervision!), or stirring the pasta. It’s a comforting meal that brings everyone together!

Enjoy crafting this incredibly comforting and flavorful Butternut Squash Mac And Cheese. It’s a dish that truly warms the soul and satisfies those deep cravings for creamy, cheesy goodness with a healthy, vibrant twist.

Butternut Squash Mac & Cheese: Creamy & Healthy Comfort

Conclusion:

My dear fellow food enthusiasts, as we reach the end of our culinary journey with this incredible Butternut Squash Mac And Cheese, I truly hope you’re as excited as I am about getting this dish into your kitchen. We’ve explored the magic behind transforming humble ingredients into something truly extraordinary, and I can confidently say this isn’t just another mac and cheese recipe. This is the recipe that will redefine your comfort food experience, offering a delightful twist on a classic that is both incredibly satisfying and surprisingly nourishing.

What makes this Butternut Squash Mac And Cheese an absolute must-try? It’s the perfect harmony of flavors and textures, where the natural sweetness and creamy texture of roasted butternut squash beautifully complement the sharp, savory notes of the cheese blend. It’s an ingenious way to incorporate a wholesome vegetable into a dish that typically doesn’t feature one so prominently, making it a fantastic option for those seeking a healthier take on a beloved classic, or even for playfully sneaking some extra nutrients into picky eaters’ meals. The vibrant color alone is enough to brighten any dinner table, and the velvety smooth sauce, achieved through thoughtful preparation, clings to every pasta shell, ensuring a burst of flavor in every single bite. I truly believe this recipe is a game-changer for anyone who loves rich, comforting food but also appreciates the benefits of incorporating more vegetables into their diet. It’s decadent without being overly heavy, and it leaves you feeling satisfied in the most wonderful way.

Now, let’s talk about how you can best enjoy this golden masterpiece. While it absolutely shines as a standalone main course, perhaps alongside a crisp, simple green salad tossed with a vinaigrette, its versatility is one of its strongest assets. Imagine it as the star of your next cozy weeknight dinner, paired with some perfectly grilled chicken or roasted pork tenderloin. For holiday gatherings or special occasions, it makes an incredibly impressive and unique side dish, offering a vibrant alternative to traditional offerings and undoubtedly becoming a talking point among your guests.

Consider serving generous scoops alongside a hearty beef stew or a slow-cooked brisket, allowing the creamy pasta to beautifully cut through the richness of the meat.

Don’t forget about brunch either; a smaller portion could be a delightful accompaniment to scrambled eggs and bacon. For beverages, a crisp, unoaked Chardonnay or a refreshing hard apple cider would perfectly complement its creamy, savory-sweet profile, enhancing the overall dining experience.

But the fun doesn’t stop there! I encourage you to see this recipe as a fantastic foundation for your own culinary creativity. Feel free to experiment with different cheese combinations – perhaps adding a smoky gouda, a pungent blue cheese, or even a spicy pepper jack for an extra kick. For a textural contrast and an extra layer of flavor, consider stirring in some sautéed spinach or kale, or even some roasted broccoli florets at the end. If you’re craving some protein, crispy bacon bits, crumbled sausage, or shredded rotisserie chicken would be glorious additions. For those who love a bit of heat, a pinch of red pepper flakes or a drizzle of sriracha in the sauce can elevate the experience. And for the ultimate finishing touch, a sprinkle of toasted breadcrumbs or fresh herbs like chives or parsley can add a wonderful crunch and freshness.

This recipe is incredibly forgiving and truly invites your personal touch, allowing you to tailor it perfectly to your family’s preferences.

So, my friends, I urge you, absolutely implore you, to set aside some time soon and give this Butternut Squash Mac And Cheese a try. I am genuinely confident that once you taste its creamy, comforting goodness, it will secure a permanent spot in your recipe rotation. It’s more than just food; it’s an experience, a warm hug in a bowl that nourishes both body and soul. Once you’ve had a chance to whip up your own batch, please, please come back and share your experience with me! I would absolutely love to hear how it turned out for you, any creative twists you added, or who you shared it with. Your feedback and stories are what make this community so special. Happy cooking, and I can’t wait to hear all about your delicious adventures!


Butternut Squash Mac And Cheese

Butternut Squash Mac And Cheese

Butternut Squash Mac And Cheese offers a delightful fusion of classic comfort food with wholesome goodness. This dish elevates traditional macaroni and cheese by incorporating creamy, naturally sweet roasted butternut squash, transforming a guilty pleasure into a vibrant, vitamin-rich culinary experience that is deeply comforting and satisfying.

Prep Time
25 Minutes

Cook Time
18 Minutes

Total Time
53 Minutes

Servings
4 servings

Ingredients

  • ⅔ cup cooked, mashed butternut squash
  • ½ pound mezzi rigatoni or small shaped pasta
  • 1 ¼ cup shredded cheddar cheese
  • ¾ cup shredded smoked gouda cheese
  • ½ cup shredded Parmesan cheese
  • ¼ cup unsalted butter
  • ¼ cup all-purpose flour
  • 2 cups milk
  • 1 teaspoon salt
  • ½ teaspoon ground nutmeg
  • ⅛ teaspoon ground pepper
  • ¼ teaspoon Tabasco sauce
  • 1 cup panko breadcrumbs (for optional topping)
  • 2 tablespoons melted butter (for optional topping)
  • ¼ cup grated Parmesan cheese (for optional topping)

Instructions

  1. Step 1
    Preheat oven to 400°F (200°C). If starting with raw squash, peel, deseed, and dice. Toss with olive oil, salt, and pepper, then roast for 25-30 minutes until tender. Let cool slightly, then mash or blend until smooth. Measure ⅔ cup of the mashed squash and set aside.
  2. Step 2
    Bring a large pot of salted water to a rolling boil. Add ½ pound mezzi rigatoni or similar small pasta and cook until al dente, about 6-8 minutes. Drain thoroughly; do not rinse.
  3. Step 3
    In a large, heavy-bottomed pot, melt ¼ cup unsalted butter over medium heat. Whisk in ¼ cup all-purpose flour for 2-3 minutes to form a light, golden roux.
  4. Step 4
    Gradually whisk in 2 cups warm milk until smooth. Continue whisking over medium heat until thickened, about 5-7 minutes. Reduce heat to low. Stir in 1 teaspoon salt, ½ teaspoon ground nutmeg, ⅛ teaspoon ground pepper, and ¼ teaspoon Tabasco sauce.
  5. Step 5
    Remove pot from heat. Add 1 ¼ cup shredded cheddar, ¾ cup shredded smoked gouda, and ½ cup shredded Parmesan cheese in batches, stirring until fully melted and smooth. Stir in the ⅔ cup mashed butternut squash until well combined.
  6. Step 6
    Add the drained, cooked pasta to the cheese sauce. Gently fold until every noodle is coated. Serve warm.
  7. Step 7
    For a baked version, preheat oven to 375°F (190°C). Transfer mac and cheese to a greased 9×13 inch baking dish. Combine 1 cup panko breadcrumbs, 2 tablespoons melted butter, and ¼ cup Parmesan cheese; sprinkle evenly over the top. Bake for 20-25 minutes until bubbly and golden. Let rest 5-10 minutes before serving.

Important Information

Nutrition Facts (Per Serving)

It is important to consider this information as approximate and not to use it as definitive health advice.

Allergy Information

Please check ingredients for potential allergens and consult a health professional if in doubt.

« Previous Post
Garlic Butter Steak Bites & Potatoes: Tender & Crispy!
Next Post »
Delicious Fall Harvest Pasta Salad Recipe – Perfect for Any Meal!

If you enjoyed this…

Quick Chicken Pot Pie Pasta – Easy Weeknight Meal!

Maple Bacon Brie

Maple Bacon Brie Cheese

Comforting Slow Cooker Fall Chicken Stew – Cozy Autumn Meal

Primary Sidebar

Browse by Diet

BreakfastDinnerLunchDessertAppetizer

Sweet Peach Yogurt Parfait Delight

One of my fondest memories is from a lazy summer afternoon spent at my grandmother’s house. The sun filtered through the kitchen window, casting a warm glow over the table where she would create her culinary magic. It was during one of those blissful moments that I first tasted her Peach Yogurt Parfait with Honey and Granola. The sweet aroma of ripe peaches mingling with creamy yogurt and the crunch of granola was nothing short of heavenly. It felt like summer captured in a bowl, and I still remember the joy of diving in with a spoon, each layer revealing a new burst of flavor.

When I think about that parfait, I can almost hear the gentle hum of the bees outside, reminding me of the floral notes that honey brings to every bite. The vibrant yellows and soft oranges of the peaches contrast beautifully with the creamy white yogurt and the golden crunch of granola. It’s a dish that not only looks delightful but also tastes like a celebration of fresh, wholesome ingredients.

What makes my version of this Peach Yogurt Parfait special is the careful balance of flavors and textures. I use ripe, juicy peaches, drizzled with locally sourced honey, and a homemade granola that’s bursting with nuts and seeds for an extra crunch. It’s a simple dish, but every layer is crafted with love and attention.

Let me show you exactly how to make this delightful parfait, so you can bring a bit of that summer magic into your kitchen!

Sweet Peach Yogurt Parfait Delight

Why You’ll Love This Recipe

  • Delightfully creamy texture from the Greek yogurt, paired with the juicy sweetness of fresh peaches.
  • Ready in under 20 minutes, making it a quick and satisfying breakfast or snack option.
  • Budget-friendly, using common ingredients that you may already have in your pantry.
  • Customizable with your favorite granola and nuts, allowing you to tailor each parfait to your taste.
  • Perfectly balanced flavors with the bright acidity of lemon juice and the sweetness of honey enhancing the peaches.

Ingredients

  • For the Parfait:
  • 2 cups plain Greek yogurt (or vanilla yogurt for a sweeter option)
  • 2 large ripe peaches, diced (about 2 cups)
  • 1 tablespoon fresh lemon juice (to prevent browning of peaches)
  • 2 tablespoons honey (plus more for drizzling)
  • 1 teaspoon vanilla extract (optional for extra flavor)
  • For the Granola:
  • 1 cup granola (store-bought or homemade; see notes for a simple granola recipe)
  • 1/4 cup sliced almonds (optional for added crunch)
  • 1/4 cup shredded coconut (optional for added flavor)

Let’s dive into some key ingredients that make this Peach Yogurt Parfait so delightful! First, the Greek yogurt is not only creamy but also packed with protein, making it a satisfying option for breakfast or a snack. If you’re looking for a sweeter option, you can easily substitute it with vanilla yogurt, though it may alter the overall flavor balance. Next, the ripe peaches are the star of the show; their natural sweetness shines through, so I recommend choosing peaches that yield slightly to pressure, indicating they’re perfectly ripe. If peaches aren’t in season, feel free to use nectarines or even frozen peaches—just thaw them before use. Finally, honey adds a lovely floral sweetness that ties everything together. If you prefer, maple syrup can serve as a delicious substitute.

Step-by-Step Instructions

  1. Start by preparing the peaches. Wash them thoroughly, then slice and dice them into bite-sized pieces. In a medium bowl, toss the diced peaches with 1 tablespoon of fresh lemon juice to prevent browning. Set aside for about 5 minutes while the lemon juice works its magic.
  2. In a separate bowl, combine the Greek yogurt, 2 tablespoons of honey, and 1 teaspoon of vanilla extract if using. Stir the mixture until smooth and thoroughly blended. This should take about a minute. Avoid overmixing to maintain the creaminess of the yogurt.
  3. Now it’s time to layer your parfait. Grab a clear glass or bowl to showcase your beautiful creation. Start with a generous spoonful of the yogurt mixture at the bottom—about 1/4 cup will do. Use a spoon to spread it evenly.
  4. Add a layer of the diced peaches over the yogurt, ensuring they cover the yogurt completely. You might want to use about half of what you have prepared—roughly 1 cup. This layer should be visually appealing, so arrange the peaches neatly.
  5. Sprinkle 1/4 cup of granola over the peaches. This adds a delightful crunch. Make sure to distribute it evenly to ensure every bite has that satisfying texture. Avoid packing it down too tightly, as you want it to maintain its crunch.
  6. Repeat the layers: spoon in another 1/4 cup of yogurt, followed by another cup of peaches, and another sprinkle of granola. You should have at least two layers, but feel free to add more depending on your glass size.
  7. Finish off your parfait with a drizzle of honey on top for added sweetness and a touch of elegance. If you’re using sliced almonds or shredded coconut, sprinkle them on top now. It adds a lovely visual contrast and extra flavor.
  8. Serve immediately or refrigerate for up to 30 minutes before serving to allow the flavors to meld together. However, I recommend enjoying it fresh to maintain the granola’s crunch.

Pro Tips for the Best Peach Yogurt Parfait With Honey And Granola

  • Make sure to choose ripe peaches for the best flavor and texture. A common mistake is using unripe fruit, which can lead to a less enjoyable parfait. Look for peaches that are fragrant and slightly soft to the touch.
  • Use a clear glass to assemble your parfait; this not only makes for a beautiful presentation but also allows you to see the colorful layers, which adds to the enjoyment of eating it.
  • For an even creamier texture, consider whipping the Greek yogurt with a hand mixer for a couple of minutes before layering. This small adjustment makes a huge difference in mouthfeel.
  • Be mindful of the granola-to-yogurt ratio. Too much granola can overwhelm the parfait, while too little can make it feel too creamy. Aim for about 1/4 cup of granola per layer for the perfect balance.
  • If you’re making this for a gathering, consider preparing the yogurt and peaches ahead of time and layering them just before serving. This ensures the granola stays crunchy!

Variations & Serving Ideas

There are so many ways to get creative with your Peach Yogurt Parfait! For a tropical twist, swap out the peaches for mangoes or pineapples and top with coconut flakes. If you prefer a berry flavor, mix in some blueberries or strawberries with the peaches for added color and taste. For a nutty version, incorporate chopped walnuts or pecans instead of almonds.

As for serving ideas, this parfait pairs beautifully with a side of scrambled eggs for a hearty breakfast or fresh fruit salad for a light lunch. You might also enjoy it alongside whole grain toast with almond butter for an energizing snack. The contrast of flavors and textures will elevate your meal experience!

Storage, Make-Ahead & Reheating

The Peach Yogurt Parfait is best enjoyed fresh, but you can prepare some components ahead of time. Store the layered parfait in an airtight container in the refrigerator for up to 24 hours. However, be cautious; the granola may lose its crunch if stored too long. You can freeze the yogurt and peach mixture for up to 2 months; just remember to thaw it in the refrigerator overnight before serving.

If you plan to enjoy this dish the next day, it can taste even better as the flavors meld together. Just remember to add the granola right before serving to keep its delightful crunch!

Frequently Asked Questions

Can I make Peach Yogurt Parfait With Honey And Granola ahead of time?

Yes — in fact, it tastes even better the next day as the flavors meld. However, I recommend waiting to add the granola until just before serving to maintain its crunch.

What can I substitute for Greek yogurt?

If you prefer a lighter option, you can substitute Greek yogurt with regular yogurt or a dairy-free alternative like coconut yogurt. Just remember that this may alter the creaminess and flavor profile slightly.

Can I use frozen peaches for this parfait?

Absolutely! Just make sure to thaw the frozen peaches before using them. They will still add great flavor, though the texture may be slightly softer than fresh peaches.

How do I make the parfait vegan?

To make a vegan version, substitute the Greek yogurt with a plant-based yogurt alternative, and replace honey with maple syrup or agave nectar. This keeps the parfait sweet while adhering to a vegan diet.

What other fruits can I use in this recipe?

You can mix and match fruits based on your preference. Try using strawberries, blueberries, raspberries, or even bananas. Just make sure to adjust the lemon juice as needed to prevent browning.

Sweet Peach Yogurt Parfait Delight

Final Thoughts

The Peach Yogurt Parfait with Honey and Granola is a delightful blend of creamy yogurt, sweet peaches, and crunchy granola that creates a satisfying and nourishing treat. Each layer bursts with flavor, making it a perfect choice for breakfast or a light dessert.

This is the kind of recipe I come back to again and again, especially when I want something refreshing and wholesome to start my day. The harmony of sweet and tart flavors, combined with the delightful crunch, never fails to lift my spirits!

I encourage you to give this parfait a try and indulge in its comforting goodness. Feel free to share your results or even add your own twist—perhaps a sprinkle of cinnamon or a handful of nuts. Enjoy creating your perfect parfait!

Print
clock clock iconcutlery cutlery iconflag flag iconfolder folder iconinstagram instagram iconpinterest pinterest iconfacebook facebook iconprint print iconsquares squares iconheart heart iconheart solid heart solid icon

Peach Yogurt Parfait


  • Author: Lily author
  • Total Time: 15 minutes
  • Yield: 4 servings 1x
Pin Recipe
Print Recipe

Description

This Peach Yogurt Parfait combines creamy Greek yogurt, juicy peaches, and crunchy granola for a delightful treat. It’s a perfect breakfast or snack that captures the essence of summer in every bite.


Ingredients

Scale
  • For the Parfait:
  • 2 cups plain Greek yogurt (or vanilla yogurt for a sweeter option)
  • 2 large ripe peaches, diced (about 2 cups)
  • 1 tablespoon fresh lemon juice (to prevent browning of peaches)
  • 2 tablespoons honey (plus more for drizzling)
  • 1 teaspoon vanilla extract (optional for extra flavor)
  • For the Granola:
  • 1 cup granola (store-bought or homemade; see notes for a simple granola recipe)
  • 1/4 cup sliced almonds (optional for added crunch)
  • 1/4 cup shredded coconut (optional for added flavor)

Instructions

  1. Start by preparing the peaches. Wash them thoroughly, then slice and dice them into bite-sized pieces. In a medium bowl, toss the diced peaches with 1 tablespoon of fresh lemon juice to prevent browning. Set aside for about 5 minutes while the lemon juice works its magic.
  2. In a separate bowl, combine the Greek yogurt, 2 tablespoons of honey, and 1 teaspoon of vanilla extract if using. Stir the mixture until smooth and thoroughly blended. This should take about a minute. Avoid overmixing to maintain the creaminess of the yogurt.
  3. Now it’s time to layer your parfait. Grab a clear glass or bowl to showcase your beautiful creation. Start with a generous spoonful of the yogurt mixture at the bottom—about 1/4 cup will do. Use a spoon to spread it evenly.
  4. Add a layer of the diced peaches over the yogurt, ensuring they cover the yogurt completely. You might want to use about half of what you have prepared—roughly 1 cup. This layer should be visually appealing, so arrange the peaches neatly.
  5. Sprinkle 1/4 cup of granola over the peaches. This adds a delightful crunch. Make sure to distribute it evenly to ensure every bite has that satisfying texture. Avoid packing it down too tightly, as you want it to maintain its crunch.
  6. Repeat the layers: spoon in another 1/4 cup of yogurt, followed by another cup of peaches, and another sprinkle of granola. You should have at least two layers, but feel free to add more depending on your glass size.
  7. Finish off your parfait with a drizzle of honey on top for added sweetness and a touch of elegance. If you’re using sliced almonds or shredded coconut, sprinkle them on top now. It adds a lovely visual contrast and extra flavor.
  8. Serve immediately or refrigerate for up to 30 minutes before serving to allow the flavors to meld together. However, I recommend enjoying it fresh to maintain the granola’s crunch.
  • Prep Time: 15 mins
  • Cook Time: 0 mins
  • Category: Breakfast
  • Method: No-cook
  • Cuisine: American

Nutrition

  • Serving Size: 1 parfait
  • Calories: 250
  • Sugar: 20 g
  • Sodium: 50 mg
  • Fat: 5 g
  • Saturated Fat: 2 g
  • Unsaturated Fat: 3 g
  • Trans Fat: 0 g
  • Carbohydrates: 40 g
  • Fiber: 3 g
  • Protein: 10 g
  • Cholesterol: 10 mg

Keywords: Choose ripe peaches for the best flavor and texture. Use a clear glass for a beautiful presentation. For creaminess, consider whipping the yogurt before layering. Be mindful of the granola-to-yogurt ratio. Prepare yogurt and peaches ahead of time for gatherings, layering just before serving.

Did you make this recipe?

Share a photo and tag us — we can't wait to see what you've made!

Sun-Kissed Frozen Orange Cream Slush

As a child, summer days felt like they lasted forever. I remember the sticky heat wrapping around me as I played outside, my laughter mingling with the sounds of the neighborhood. But nothing could cool me down quite like the moment I’d spot my grandmother, laboring over her blender, whipping up her famous Frozen Orange Creamsicle Slush. That vibrant orange treat, with its frosty texture and sweet citrus aroma, was like a burst of sunshine in a cup. Just one sip, and I could feel the coolness wash over me, sparking pure joy.

This Frozen Orange Creamsicle Slush has a way of making you feel like a kid again. Its creamy, dreamy consistency is a delightful balance of bright orange and soft vanilla, inviting you to dive right in. The refreshing tang of orange dances on your tongue, while the smooth creaminess envelops you in a comforting embrace. It’s a nostalgic treat that’s perfect for hot summer afternoons or anytime you need a little pick-me-up.

What makes my version of this slush stand out is the addition of a hint of vanilla bean, which elevates the flavor and adds an extra layer of richness. Plus, it’s super easy to whip up with just a few simple ingredients that you probably already have on hand! So, if you’re ready to relive those sun-soaked memories, let me show you exactly how to make it.

Sun-Kissed Frozen Orange Cream Slush

Why You’ll Love This Recipe

  • Each slush is a perfect blend of creamy vanilla and zesty orange, creating a nostalgic flavor reminiscent of summer days.
  • This refreshing treat is ready in under 15 minutes, making it an ideal quick dessert for unexpected guests or hot afternoons.
  • With just 8 simple ingredients, it’s budget-friendly, ensuring you don’t have to break the bank to enjoy a delicious slush.
  • The slush has a perfectly smooth texture, thanks to the combination of ice and ice cream, providing a delightful contrast to the bright citrus flavors.
  • It’s highly customizable; you can easily adjust the sweetness and add fresh herbs for a unique twist that suits your taste.

Ingredients

  • 2 cups orange juice (freshly squeezed or store-bought)
  • 1 cup vanilla ice cream
  • 1 cup crushed ice
  • 1/2 cup milk (whole or 2%)
  • 1/4 cup granulated sugar (adjust based on sweetness preference)
  • 1 teaspoon vanilla extract
  • Zest of 1 orange (for added flavor)
  • Fresh orange slices and mint leaves (for garnish)

The star of this Frozen Orange Creamsicle Slush is the orange juice, which provides the vibrant, citrusy base. Freshly squeezed juice will yield the brightest flavor, but store-bought options can be just as convenient. If you’re opting for store-bought, choose 100% pure juice with no added sugars for the best results. Another essential ingredient is the vanilla ice cream; it adds creaminess and sweetness. You can substitute it with dairy-free ice cream if you’re looking for a vegan option. Whole or 2% milk complements the ice cream, creating a smooth blend. If you want a lower-calorie version, almond or oat milk can be good alternatives.

Lastly, the granulated sugar can be adjusted based on your sweetness preference. If you prefer a more natural sweetener, consider using honey or agave syrup. The orange zest enhances the flavor profile, providing an aromatic pop that brings the whole slush together. Don’t skip it! It adds an extra layer of brightness that makes this slush truly special.

Step-by-Step Instructions

  1. Start by preparing your ingredients. Gather 2 cups of orange juice, 1 cup of vanilla ice cream, and 1 cup of crushed ice. Make sure the ice is finely crushed, as larger chunks can make blending difficult.
  2. In a blender, combine the orange juice, vanilla ice cream, crushed ice, and 1/2 cup of milk. Add 1/4 cup of granulated sugar and 1 teaspoon of vanilla extract. If you like a sweeter slush, consider adding a bit more sugar at this stage.
  3. Add the zest of 1 orange to the blender. This step is crucial for enhancing the citrus flavor of your slush. Make sure not to include the bitter white pith—only the flavorful zest.
  4. Blend the mixture on medium-high speed for about 30-45 seconds. Stop once the ingredients are fully combined and the slush has a smooth, even consistency. If you notice large chunks of ice, blend for an additional 10-15 seconds. Avoid over-blending, as this can make the slush too liquidy.
  5. Once blended, taste the slush. If it needs more sweetness, add a little more sugar and blend for a few more seconds. If it’s too thick, you can add a splash of milk to reach your desired consistency.
  6. Pour the slush into glasses. This recipe typically serves 4, but you can easily double it for larger gatherings. Use a spoon to help guide the slush into the glasses if needed.
  7. Garnish each serving with fresh orange slices and mint leaves. The mint not only adds a pop of color but also a refreshing aroma that complements the citrus flavors beautifully.
  8. Serve immediately and enjoy! If you’ve made extra, you can refrigerate it for a short time, but it’s best enjoyed fresh.

Pro Tips for the Best Frozen Orange Creamsicle Slush

  • Don’t skip the orange zest! It’s a game-changer for flavor. Always zest before juicing to make it easier.
  • Use a high-powered blender for the best texture. A standard blender may struggle with ice, leading to uneven consistency. If you have a food processor, that can work too, but ensure the ice is finely crushed.
  • Adjust the ice-to-liquid ratio carefully. If your slush is too thick, it won’t blend well. Start with less ice and add more until you reach your preferred texture.
  • Be cautious with the sugar! Always start with the lower amount, as you can easily add more, but it’s hard to fix an overly sweet slush.
  • For a fun twist, consider adding a splash of coconut milk or a handful of fresh fruit like strawberries or pineapple. This not only enhances the flavor but also adds a beautiful color contrast.

Variations & Serving Ideas

There are countless ways to put a spin on your Frozen Orange Creamsicle Slush. Consider making a tropical version by adding in some pineapple juice or coconut milk for a delightful tropical twist. If you’re feeling adventurous, try incorporating a handful of frozen mango or peach slices for added sweetness. For a lighter version, swap out the vanilla ice cream for Greek yogurt for a creamy yet tangy alternative.

As for serving ideas, this refreshing slush pairs wonderfully with light summer dishes like grilled chicken skewers, fish tacos, or a simple salad topped with citrus vinaigrette. The bright, zesty flavors of the slush complement these dishes perfectly, making them an ideal pairing for a sunny day.

Storage, Make-Ahead & Reheating

This Frozen Orange Creamsicle Slush is best enjoyed fresh, but if you have leftovers, you can store them in an airtight container in the fridge for up to 2 days. Just keep in mind that the slush may lose some of its texture over time as the ice melts. It doesn’t freeze well, as the ice will turn into a solid block. If you must freeze it, blend again after thawing to restore the slushy consistency. This treat is best the day you make it, as the flavors meld together beautifully overnight, enhancing its deliciousness.

Frequently Asked Questions

Can I make Frozen Orange Creamsicle Slush ahead of time?

Yes — in fact, it tastes even better the next day as the flavors meld. However, it’s best to enjoy it fresh, as the texture can change if stored for too long. If you need to prepare it ahead, keep it in the fridge and re-blend before serving.

What kind of orange juice should I use?

For the best flavor, use freshly squeezed orange juice. However, if you’re short on time, opt for 100% pure store-bought juice without added sugars. This will ensure that your slush remains flavorful and refreshing.

Can I substitute the vanilla ice cream?

Absolutely! If you’re looking for a dairy-free option, coconut milk ice cream or a non-dairy vanilla ice cream can work wonderfully. They will still provide the creamy texture and sweetness you desire.

How can I adjust the sweetness of my slush?

You can easily adjust the sweetness by modifying the amount of sugar added. Start with 1/4 cup and taste the mixture before blending. If you prefer it sweeter, add more sugar gradually until it reaches your desired level.

What should I do if my slush is too thick?

If your slush is too thick, simply add a splash of milk or orange juice and blend again. This will help achieve a more drinkable consistency while maintaining the slushy texture. Adjust gradually to reach your preferred thickness.

Sun-Kissed Frozen Orange Cream Slush

Final Thoughts

The Frozen Orange Creamsicle Slush is a delightful blend of refreshing citrus and creamy goodness, making it a perfect treat for warm days or any time you crave a taste of nostalgia. The way the bright orange flavor dances with the creamy texture truly elevates this slush, transforming it into a satisfying escape from the everyday.

This is the kind of recipe I come back to again and again, especially when I’m looking to cool down or impress guests at a summer gathering. It’s simple to make and always brings smiles all around! I encourage you to try this recipe for yourself—don’t hesitate to share your results or even put your own spin on it. Happy slushing!

Print
clock clock iconcutlery cutlery iconflag flag iconfolder folder iconinstagram instagram iconpinterest pinterest iconfacebook facebook iconprint print iconsquares squares iconheart heart iconheart solid heart solid icon

Frozen Orange Creamsicle Slush


  • Author: Lily author
  • Total Time: 15 minutes
  • Yield: 4 servings 1x
Pin Recipe
Print Recipe

Description

This Frozen Orange Creamsicle Slush is a refreshing treat that combines creamy vanilla and zesty orange flavors. Perfect for hot summer days, it brings back nostalgic memories with every sip.


Ingredients

Scale
  • 2 cups orange juice (freshly squeezed or store-bought)
  • 1 cup vanilla ice cream
  • 1 cup crushed ice
  • 1/2 cup milk (whole or 2%)
  • 1/4 cup granulated sugar (adjust based on sweetness preference)
  • 1 teaspoon vanilla extract
  • Zest of 1 orange (for added flavor)
  • Fresh orange slices and mint leaves (for garnish)

Instructions

  1. Start by preparing your ingredients. Gather 2 cups of orange juice, 1 cup of vanilla ice cream, and 1 cup of crushed ice. Make sure the ice is finely crushed, as larger chunks can make blending difficult.
  2. In a blender, combine the orange juice, vanilla ice cream, crushed ice, and 1/2 cup of milk. Add 1/4 cup of granulated sugar and 1 teaspoon of vanilla extract. If you like a sweeter slush, consider adding a bit more sugar at this stage.
  3. Add the zest of 1 orange to the blender. This step is crucial for enhancing the citrus flavor of your slush. Make sure not to include the bitter white pith—only the flavorful zest.
  4. Blend the mixture on medium-high speed for about 30-45 seconds. Stop once the ingredients are fully combined and the slush has a smooth, even consistency. If you notice large chunks of ice, blend for an additional 10-15 seconds. Avoid over-blending, as this can make the slush too liquidy.
  5. Once blended, taste the slush. If it needs more sweetness, add a little more sugar and blend for a few more seconds. If it’s too thick, you can add a splash of milk to reach your desired consistency.
  6. Pour the slush into glasses. This recipe typically serves 4, but you can easily double it for larger gatherings. Use a spoon to help guide the slush into the glasses if needed.
  7. Garnish each serving with fresh orange slices and mint leaves. The mint not only adds a pop of color but also a refreshing aroma that complements the citrus flavors beautifully.
  8. Serve immediately and enjoy! If you’ve made extra, you can refrigerate it for a short time, but it's best enjoyed fresh.
  • Prep Time: 15 min
  • Cook Time: 0 min
  • Category: Dessert
  • Method: Blending
  • Cuisine: American

Nutrition

  • Serving Size: 1 serving
  • Calories: 200
  • Sugar: 30 g
  • Sodium: 50 mg
  • Fat: 5 g
  • Saturated Fat: 3 g
  • Unsaturated Fat: 2 g
  • Trans Fat: 0 g
  • Carbohydrates: 40 g
  • Fiber: 1 g
  • Protein: 2 g
  • Cholesterol: 20 mg

Keywords: Don't skip the orange zest! It's a game-changer for flavor. Always zest before juicing to make it easier.

Did you make this recipe?

Share a photo and tag us — we can't wait to see what you've made!

Zesty Lemon Poppy Seed Delight

One rainy afternoon, I found myself in my grandmother’s cozy kitchen, the kind that always smelled like warmth and love. She was whipping up her famous Lemon Poppy Seed Loaf, a recipe that had been passed down through generations. As the batter came together, the zesty aroma of fresh lemons filled the air, mingling perfectly with the nutty fragrance of poppy seeds. I can still picture her, apron-clad, as she expertly drizzled a vibrant citrus icing over the loaf, creating a glossy, sun-kissed finish that beckoned us to dive in. It was a moment that sparked my own passion for baking, and this recipe has become a cherished staple in my home ever since.

When you take a bite of this Lemon Poppy Seed Loaf, it’s like a burst of sunshine on your palate. The loaf is beautifully golden, with a tender crumb that melts in your mouth. Each slice is speckled with tiny poppy seeds, adding a delightful crunch that contrasts beautifully with the tangy sweetness of the lemon. And that citrus icing? It’s the finishing touch that elevates this loaf from ordinary to extraordinary, with its bright, zesty flavor dancing on your taste buds.

This recipe stands out because it embraces simplicity while delivering on flavor. I’ve added a hint of vanilla to the batter, enhancing the overall taste and making it even more indulgent. Trust me, once you make this Lemon Poppy Seed Loaf With Citrus Icing, it’ll become a go-to in your baking repertoire.

So, let me show you exactly how to make it!

Zesty Lemon Poppy Seed Delight

Why You’ll Love This Recipe

  • Moist and tender crumb that melts in your mouth, thanks to the perfect balance of butter and buttermilk.
  • Bright, zesty lemon flavor paired with crunchy poppy seeds, creating a delightful texture and taste experience.
  • Easy to whip up in just about an hour, perfect for last-minute gatherings or a cozy afternoon treat.
  • Budget-friendly with everyday ingredients, making it an accessible option for all home bakers.
  • The citrus icing adds a sweet tang that elevates the loaf, turning a simple recipe into a showstopper!

Ingredients

  • 1 ½ cups (190g) all-purpose flour
  • 1 teaspoon baking powder
  • ½ teaspoon baking soda
  • ½ teaspoon salt
  • 3 tablespoons poppy seeds
  • ½ cup (115g) unsalted butter, softened to room temperature
  • 1 cup (200g) granulated sugar
  • 2 large eggs
  • 1 teaspoon vanilla extract
  • 1 teaspoon lemon zest (from about 1 medium lemon)
  • ½ cup (120ml) buttermilk
  • 2 tablespoons fresh lemon juice

For the Citrus Icing:

  • 1 cup (120g) powdered sugar
  • 2 tablespoons fresh lemon juice
  • 1 tablespoon orange juice
  • 1 teaspoon lemon zest (for garnish, optional)

Let’s dive into the key ingredients that make this Lemon Poppy Seed Loaf so special. The all-purpose flour provides the structure and base for the loaf, while the baking powder and baking soda ensure it rises perfectly, giving the loaf a light texture. For a gluten-free variation, you could substitute the flour with a gluten-free all-purpose blend. Poppy seeds not only add a delightful crunch but also contribute to the unique flavor profile that pairs well with the citrus notes.

Unsalted butter is crucial for achieving the buttery richness that makes this loaf so moist. If you’re looking for a dairy-free option, coconut oil or a vegan butter can be used instead. The buttermilk is another essential component, providing acidity that activates the baking soda for a fluffy texture. If you don’t have buttermilk on hand, you can easily make a substitute by mixing ½ cup of milk with 1 tablespoon of vinegar or lemon juice and letting it sit for about 5 minutes.

Step-by-Step Instructions

  1. Preheat your oven to 350°F (175°C). Grease a 9×5-inch loaf pan or line it with parchment paper for easy removal later.
  2. In a medium mixing bowl, whisk together 1 ½ cups of all-purpose flour, 1 teaspoon of baking powder, ½ teaspoon of baking soda, ½ teaspoon of salt, and 3 tablespoons of poppy seeds. This helps to evenly distribute the baking agents and ensures a uniform rise.
  3. In a large mixing bowl, cream together ½ cup of softened unsalted butter and 1 cup of granulated sugar using an electric mixer on medium speed for about 3-4 minutes, until the mixture is light and fluffy. Make sure to scrape down the sides of the bowl occasionally.
  4. Add 2 large eggs, 1 teaspoon of vanilla extract, and 1 teaspoon of lemon zest to the creamed butter and sugar, mixing until fully combined. You want a smooth consistency, so ensure there are no lumps of butter.
  5. In a small bowl, combine ½ cup of buttermilk and 2 tablespoons of fresh lemon juice. Alternately add the dry ingredients and buttermilk mixture to the butter mixture, starting and ending with the dry ingredients. Mix just until combined; do not overmix, as this can lead to a dense loaf.
  6. Pour the batter into the prepared loaf pan. Smooth the top with a spatula, ensuring it’s even. Bake in the preheated oven for 50-60 minutes, or until a toothpick inserted in the center comes out clean. The edges should be lightly golden brown, and the center should feel just set.
  7. Once baked, remove the loaf from the oven and allow it to cool in the pan for about 10 minutes. Then, transfer it to a wire rack to cool completely. Resist the urge to slice too soon, as it will be crumbly if it’s still warm.
  8. While the loaf is cooling, prepare the citrus icing. In a medium bowl, whisk together 1 cup of powdered sugar, 2 tablespoons of fresh lemon juice, and 1 tablespoon of orange juice until smooth. If the icing is too thick, you can add a little more juice to reach your desired consistency.
  9. Once the loaf is completely cool, drizzle the citrus icing over the top. If you like, sprinkle with an additional teaspoon of lemon zest for an extra pop of flavor and color.

Pro Tips for the Best Lemon Poppy Seed Loaf With Citrus Icing

  • Be careful not to overmix your batter; this is a common mistake that can lead to a dense loaf. Mix just until the dry ingredients are incorporated for a light and fluffy texture.
  • Use room temperature ingredients, especially the butter and eggs. This helps to create a smoother batter and ensures even baking. Take your eggs out of the fridge about 30 minutes before you start.
  • For a more pronounced lemon flavor, consider adding a little lemon extract in addition to the zest and juice. Just a half teaspoon can elevate the citrus notes significantly.
  • When measuring your flour, spoon it into the measuring cup and level it off with a knife instead of scooping directly from the bag. This prevents packing and ensures you don’t end up with a dry loaf.
  • Invest in a good quality loaf pan; it makes a difference in heat distribution, which ensures even baking. If your pan is dark-coated, reduce the oven temperature by 25°F to prevent over-browning.

Variations & Serving Ideas

For a delightful twist, consider adding blueberries or raspberries to the batter for a fruity burst of flavor. You can also experiment with different citrus fruits—try lime or grapefruit zest and juice for a refreshing change. For a healthier option, substitute half of the all-purpose flour with whole wheat flour for added fiber without compromising too much on texture.

This Lemon Poppy Seed Loaf pairs beautifully with a light salad, such as a mixed greens salad with a vinaigrette, or a cup of tea for a cozy afternoon treat. It also complements a creamy cheese platter, as the acidity of the loaf balances rich cheeses perfectly. Lastly, a scoop of vanilla ice cream on the side creates a delightful contrast of temperatures and flavors!

Storage, Make-Ahead & Reheating

This Lemon Poppy Seed Loaf can be stored at room temperature for up to 3 days if wrapped tightly in plastic wrap. If you want to keep it longer, it freezes well for up to 3 months. To freeze, wrap the loaf tightly in plastic wrap and then in aluminum foil to prevent freezer burn.

When you’re ready to enjoy it again, simply thaw it in the fridge overnight. Reheat individual slices in the microwave for 15-20 seconds or in a toaster oven until warmed through. Interestingly, many people find that this loaf tastes even better the next day, as the flavors have time to meld!

Frequently Asked Questions

Can I make Lemon Poppy Seed Loaf With Citrus Icing ahead of time?

Yes — in fact, it tastes even better the next day! You can make the loaf a day in advance, allowing the flavors to develop. Just be sure to store it in an airtight container to maintain its moisture.

Can I substitute the poppy seeds?

Absolutely! If you don’t have poppy seeds on hand or prefer an alternative, you can use sesame seeds for a similar crunch or omit them entirely for a smooth loaf.

What can I use instead of buttermilk?

If you don’t have buttermilk, you can easily create a substitute by mixing ½ cup of milk (dairy or plant-based) with 1 tablespoon of vinegar or lemon juice. Let it sit for 5 minutes before using in the recipe.

How can I make this recipe gluten-free?

To make a gluten-free version of this Lemon Poppy Seed Loaf, substitute the all-purpose flour with a gluten-free all-purpose flour blend. Just ensure that the blend contains a binding agent like xanthan gum for the best results.

What is the best way to store leftover loaf?

Leftover Lemon Poppy Seed Loaf should be stored in an airtight container at room temperature for up to 3 days. For longer storage, wrap it tightly and freeze for up to 3 months. Thaw it before serving for the best texture.

Zesty Lemon Poppy Seed Delight

Final Thoughts

The Lemon Poppy Seed Loaf with Citrus Icing is truly a delightful treat that brings a burst of brightness to any occasion. The zesty lemon flavor combined with the subtle crunch of poppy seeds creates a satisfying balance, while the citrus icing adds a touch of sweetness that perfectly complements the loaf’s tanginess.

This is the kind of recipe I come back to again and again, especially when I want to brighten up a gloomy day or celebrate a small victory. The aroma that fills the kitchen as it bakes is absolutely heavenly! I encourage you to give this recipe a try; you might just find it becoming a beloved staple in your home. Don’t forget to share your results or even add your own unique twist—I can’t wait to see what you create!

Print
clock clock iconcutlery cutlery iconflag flag iconfolder folder iconinstagram instagram iconpinterest pinterest iconfacebook facebook iconprint print iconsquares squares iconheart heart iconheart solid heart solid icon

Lemon Poppy Seed Loaf


  • Author: Lily author
  • Total Time: 13 minute
  • Yield: 1 loaf 1x
Pin Recipe
Print Recipe

Description

This Lemon Poppy Seed Loaf is a delightful treat that combines zesty lemon flavor with crunchy poppy seeds. Topped with a citrus icing, it’s perfect for any occasion.


Ingredients

Scale
  • 1 ½ cups (190g) all-purpose flour
  • 1 teaspoon baking powder
  • ½ teaspoon baking soda
  • ½ teaspoon salt
  • 3 tablespoons poppy seeds
  • ½ cup (115g) unsalted butter, softened to room temperature
  • 1 cup (200g) granulated sugar
  • 2 large eggs
  • 1 teaspoon vanilla extract
  • 1 teaspoon lemon zest (from about 1 medium lemon)
  • ½ cup (120ml) buttermilk
  • 2 tablespoons fresh lemon juice
  • 1 cup (120g) powdered sugar
  • 2 tablespoons fresh lemon juice
  • 1 tablespoon orange juice
  • 1 teaspoon lemon zest (for garnish, optional)

Instructions

  1. Preheat your oven to 350°F (175°C). Grease a 9×5-inch loaf pan or line it with parchment paper for easy removal later.
  2. In a medium mixing bowl, whisk together 1 ½ cups of all-purpose flour, 1 teaspoon of baking powder, ½ teaspoon of baking soda, ½ teaspoon of salt, and 3 tablespoons of poppy seeds. This helps to evenly distribute the baking agents and ensures a uniform rise.
  3. In a large mixing bowl, cream together ½ cup of softened unsalted butter and 1 cup of granulated sugar using an electric mixer on medium speed for about 3-4 minutes, until the mixture is light and fluffy. Make sure to scrape down the sides of the bowl occasionally.
  4. Add 2 large eggs, 1 teaspoon of vanilla extract, and 1 teaspoon of lemon zest to the creamed butter and sugar, mixing until fully combined. You want a smooth consistency, so ensure there are no lumps of butter.
  5. In a small bowl, combine ½ cup of buttermilk and 2 tablespoons of fresh lemon juice. Alternately add the dry ingredients and buttermilk mixture to the butter mixture, starting and ending with the dry ingredients. Mix just until combined; do not overmix, as this can lead to a dense loaf.
  6. Pour the batter into the prepared loaf pan. Smooth the top with a spatula, ensuring it’s even. Bake in the preheated oven for 50-60 minutes, or until a toothpick inserted in the center comes out clean. The edges should be lightly golden brown, and the center should feel just set.
  7. Once baked, remove the loaf from the oven and allow it to cool in the pan for about 10 minutes. Then, transfer it to a wire rack to cool completely. Resist the urge to slice too soon, as it will be crumbly if it’s still warm.
  8. While the loaf is cooling, prepare the citrus icing. In a medium bowl, whisk together 1 cup of powdered sugar, 2 tablespoons of fresh lemon juice, and 1 tablespoon of orange juice until smooth. If the icing is too thick, you can add a little more juice to reach your desired consistency.
  9. Once the loaf is completely cool, drizzle the citrus icing over the top. If you like, sprinkle with an additional teaspoon of lemon zest for an extra pop of flavor and color.
  • Prep Time: 15 mins
  • Cook Time: 50-60 mins
  • Category: Dessert
  • Method: Baking
  • Cuisine: American

Nutrition

  • Serving Size: 1 slice
  • Calories: 200
  • Sugar: 15 g
  • Sodium: 150 mg
  • Fat: 8 g
  • Saturated Fat: 5 g
  • Unsaturated Fat: 3 g
  • Trans Fat: 0 g
  • Carbohydrates: 30 g
  • Fiber: 1 g
  • Protein: 3 g
  • Cholesterol: 40 mg

Keywords: Be careful not to overmix your batter; this is a common mistake that can lead to a dense loaf. Use room temperature ingredients for a smoother batter and even baking.

Did you make this recipe?

Share a photo and tag us — we can't wait to see what you've made!

  • Privacy Policy
  • Terms Of Service
  • Contact
  • About
  • GDPR

Copyright © 2025 Homesmad