• Skip to primary navigation
  • Skip to main content
  • Skip to primary sidebar
Homesmad

Homesmad

  • Home
  • Breakfast & Brunch
  • Appetizers & Snacks
  • Dinner
  • Dessert
  • About
  • Privacy Policy
  • Contact
Homesmad
  • Home
  • Breakfast & Brunch
  • Appetizers & Snacks
  • Dinner
  • Dessert
  • About
  • Privacy Policy
  • Contact

California Turkey Club Wrap: The Ultimate Recipe Guide

February 28, 2026 by Lily author

The Ultimate California Turkey Club Wrap Guide Everything You Need To Know

Oh boy, have I got something truly special for you today! When I crave a meal that’s fresh, satisfying, and bursting with flavor, my mind immediately jumps to a perfectly crafted wrap. But not just any wrap – we’re talking about the pinnacle of wrap perfection: The Ultimate California Turkey Club Wrap. This isn’t just a recipe; it’s a comprehensive guide to mastering a dish that will undoubtedly become a staple in your culinary repertoire.

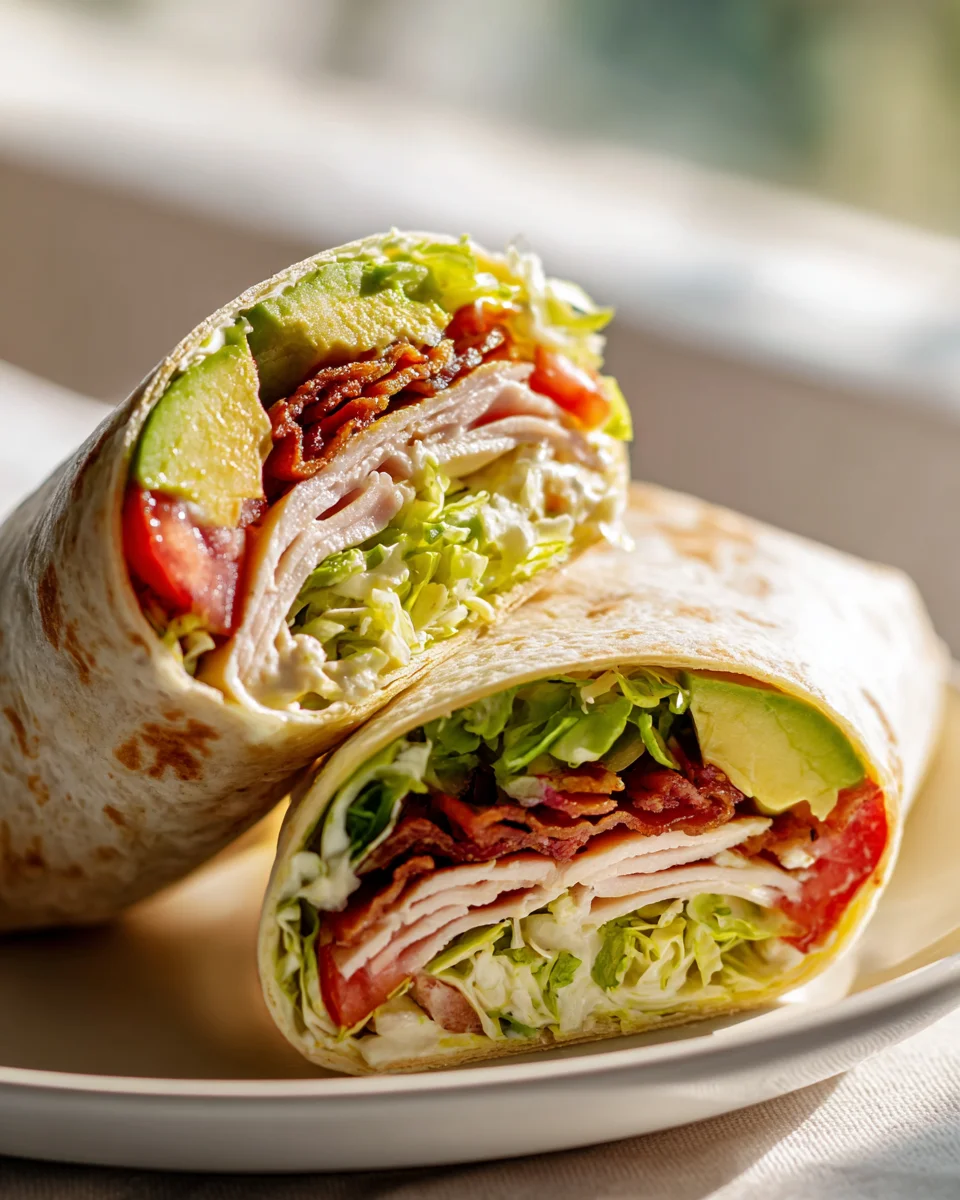
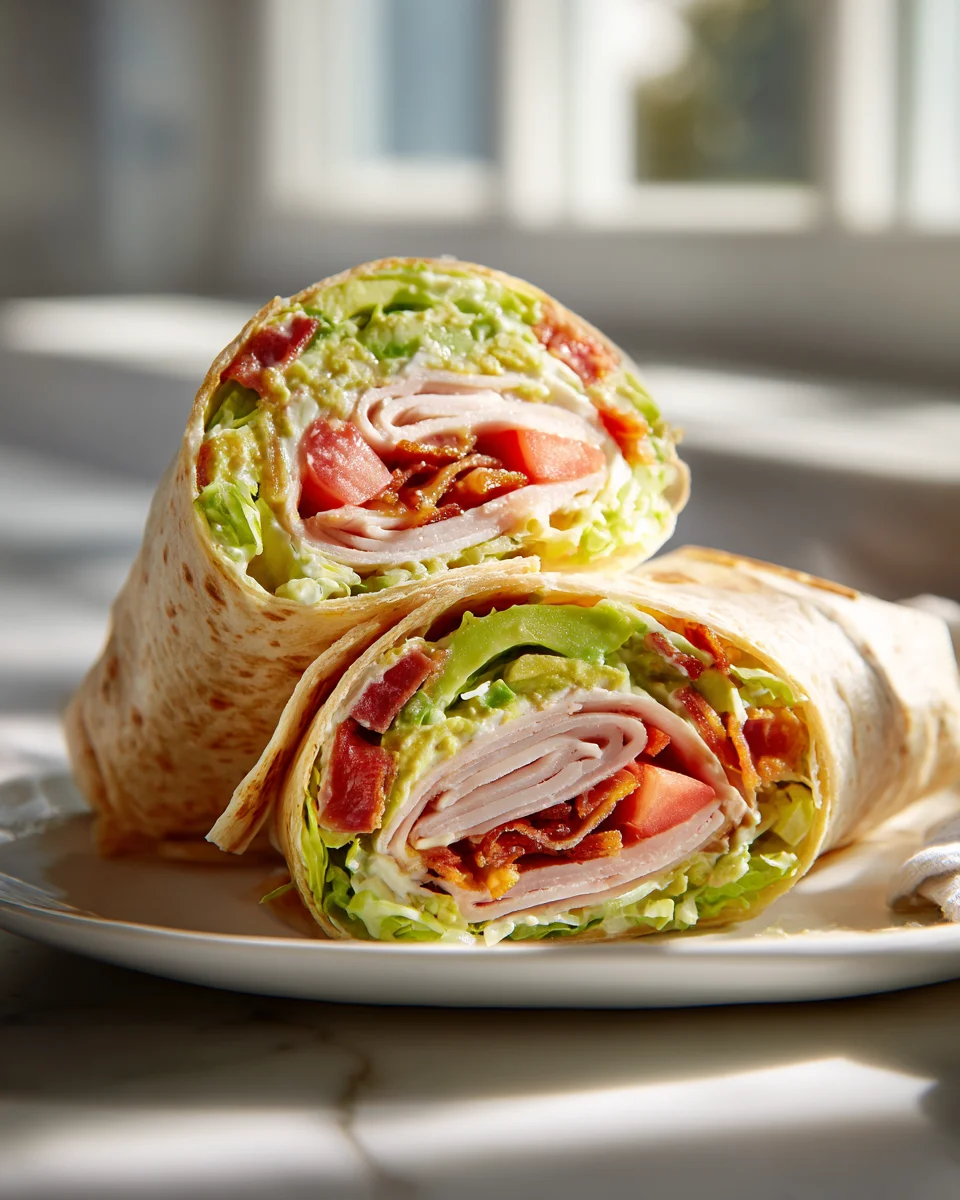
What makes this particular wrap so utterly irresistible? Imagine succulent slices of lean turkey, crisp slices of savory beef bacon (yes, beef bacon!), ripe avocado creaminess, juicy tomatoes, fresh greens, and a secret zesty spread, all hugged tightly within a soft tortilla. It’s the beloved classic club sandwich, reimagined with a vibrant California twist and ingeniously wrapped up for maximum portability and enjoyment. I promise you, once you take that first bite, you’ll understand exactly why this isn’t just a turkey wrap – it’s the ultimate one.

California Turkey Club Wrap: The Ultimate Recipe Guide this RECIPE

Welcome, fellow food enthusiasts, to my comprehensive guide on crafting the ultimate California Turkey Club Wrap! This isn’t just a recipe; it’s a journey into making a wrap that embodies fresh, flavorful, and satisfying California vibes. From choosing the perfect ingredients to mastering the art of the wrap, I’m here to share everything you need to know to create a truly spectacular lunch or light dinner.

Ingredient Notes

Creating the ultimate California Turkey Club Wrap starts with selecting the best ingredients. Each component plays a crucial role in delivering that signature fresh and hearty flavor profile. Here’s what I recommend and some thoughts on substitutions:

  • The Wrap Foundation: Large Flour Tortillas
    I always reach for large (10-12 inch) flour tortillas. They’re pliable, easy to roll, and hold a good amount of delicious filling. For a healthier twist or a different flavor, consider whole wheat, spinach, or sun-dried tomato tortillas. The key is to choose one that’s sturdy enough to handle all your wonderful fillings without tearing.
  • The Star: Sliced Turkey Breast
    For that authentic club experience, opt for high-quality, thinly sliced oven-roasted turkey breast. Deli-sliced is perfectly fine, but if you can find freshly sliced turkey from your local butcher or deli counter, it often makes a noticeable difference in flavor and texture. Avoid overly processed or heavily spiced varieties; we want the natural turkey flavor to shine.
  • The “Club” Element: Crispy Beef Bacon or Prosciutto
    A club isn’t a club without that salty, savory crunch! Since we’re substituting pork, crispy beef bacon is an excellent choice. Cook it until it’s wonderfully crisp, then pat it dry to remove excess grease. Alternatively, thinly sliced beef prosciutto offers a delightful, slightly less greasy, and equally flavorful cured beef option. Whichever you choose, make sure it’s rendered beautifully crisp.
  • The Creamy Californian Touch: Ripe Avocado
    This is where the “California” really comes into play! A perfectly ripe Haas avocado, sliced or mashed, adds incredible creaminess and a buttery, nutty flavor that complements the other ingredients beautifully. Look for avocados that yield slightly to gentle pressure. If you’re short on time, pre-packaged guacamole can work in a pinch, but fresh is always best.
  • The Crisp & Fresh: Lettuce and Alfalfa Sprouts
    Romaine or green leaf lettuce provides a lovely, crisp base. But to truly elevate this to a California wrap, I swear by fresh alfalfa sprouts. They add a delicate, earthy crunch and a touch of gourmet freshness that is simply irresistible. If sprouts aren’t your thing, a mix of baby greens or spinach would also be wonderful.
  • The Juicy Slice: Ripe Tomato
    A few slices of a ripe, juicy tomato are essential for moisture and a burst of fresh flavor. Beefsteak or Roma tomatoes work well here. Make sure to slice them thinly so they don’t overwhelm the wrap or make it too watery.
  • The Melty Mildness: Cheese Slices
    Provolone, Monterey Jack, or mild cheddar are my top picks. They offer a subtle creaminess and a lovely savory note without dominating the other flavors. Two slices per wrap usually does the trick!
  • The Essential Spreads: Mayonnaise & Dijon Mustard
    Classic mayonnaise provides the essential creaminess and binds everything together. For an extra layer of flavor and a touch of tang, I love to add a thin smear of good quality Dijon mustard. You could also experiment with a light aioli or a creamy ranch dressing for a different profile.
  • Optional Freshness & Crunch: Thinly Sliced Red Onion & Cucumber
    For those who appreciate a bit more zing, a few paper-thin slices of red onion can add a fantastic bite. Similarly, thinly sliced cucumber can provide an extra layer of refreshing crunch.

Step-by-Step Instructions

Alright, now that we have our fantastic ingredients ready, let’s assemble this masterpiece! Follow these steps for a perfectly constructed Ultimate California Turkey Club Wrap:

  1. Prep Your Ingredients:
    • First, cook your beef bacon until it’s wonderfully crispy. I like to do this in a skillet over medium heat, then drain it on paper towels to get rid of any excess fat. Once cooled slightly, you can crumble it or keep it in strips.
    • While the bacon cools, wash and thoroughly dry your lettuce and sprouts.
    • Slice your ripe tomato and avocado. For the avocado, I usually slice it thinly, but a rough mash with a fork works beautifully too. If you’re using red onion or cucumber, slice those super thin now as well.
  2. Warm Your Tortilla (Optional, but Recommended):
    Lightly warming your tortilla in a dry skillet over low heat for about 15-20 seconds per side, or in the microwave for 10-15 seconds, makes it more pliable and easier to roll without cracking. This step makes a big difference, trust me!
  3. Spread the Flavor Base:
    Lay your warm tortilla flat on a clean surface or a large cutting board. Spread a generous, even layer of mayonnaise (and Dijon mustard, if using) across the entire surface of the tortilla, leaving about a one-inch border around the edges. This acts as a delicious adhesive and flavor base.
  4. Layer with Care (This is Key for Structural Integrity!):
    The order of layering matters for a wrap that holds together and delivers balanced flavor in every bite.

    • Greens First: Start by laying a bed of lettuce (and optionally, the sprouts) down the center of the tortilla. This creates a barrier that helps prevent the tortilla from getting soggy and gives you a good base to build on.
    • Turkey Time: Arrange your sliced turkey breast over the greens. I usually fold or stack it slightly to create a nice, even layer.
    • Cheese, Please: Place your cheese slices directly on top of the turkey.
    • Juicy Tomato: Follow with your ripe tomato slices.
    • Crispy Club Element: Now add your crispy beef bacon or beef prosciutto.
    • Creamy Avocado: Next, layer your avocado slices or spread your mashed avocado.
    • The Final Freshness: If you’re using alfalfa sprouts, layer them on top of the avocado now. If you’re adding thin red onion or cucumber, place them here too.
  5. The Art of the Roll:
    This is where practice makes perfect!

    • Fold in the sides of the tortilla first, about an inch or two over the filling, to create enclosed ends.
    • Then, starting from the bottom edge closest to you, tightly roll the tortilla upwards, tucking in the filling as you go. Keep it as snug as possible to ensure a compact, easy-to-eat wrap.
    • Once rolled, you should have a firm, cylindrical wrap.
  6. Serve It Up:
    For a clean presentation and easier eating, I like to slice the wrap in half diagonally. You can secure each half with a toothpick if desired. Serve immediately and enjoy your perfectly crafted Ultimate California Turkey Club Wrap!

Tips & Suggestions

To truly master “The Ultimate California Turkey Club Wrap,” here are some of my go-to tips and creative suggestions that can elevate your wrap game:

  • Tortilla Flexibility is Your Friend: As I mentioned in the steps, warming your tortilla is a game-changer. A slightly warm tortilla is much more pliable, making it less likely to crack or tear as you roll. It also allows the wrap to hold its shape better.
  • Don’t Overfill: This is a common pitfall! While it’s tempting to cram in as much deliciousness as possible, an overstuffed wrap is difficult to roll and messy to eat. Aim for a generous but manageable amount of filling that allows the tortilla to close securely.
  • Layering Strategy for Success: Always start with a barrier of greens (like lettuce) on the tortilla before adding wetter ingredients like tomatoes or avocado. This helps prevent the tortilla from becoming soggy too quickly. Placing the cheese and turkey towards the bottom also helps create a sturdy base.
  • Avocado Acumen: For the best texture and flavor, ensure your avocado is perfectly ripe. If you’re not eating the wrap immediately, a squeeze of lemon or lime juice over the avocado slices can help prevent browning. Alternatively, if you prefer, you can mash the avocado with a little salt, pepper, and a touch of lime juice for a ready-made spread.
  • Crispy Beef Bacon is Non-Negotiable: Don’t undercook your beef bacon. That satisfying crunch is a hallmark of a club sandwich. If you’re using beef prosciutto, a quick pan-fry to crisp it slightly will also enhance its texture and flavor.
  • Get Creative with Spreads: While mayo and Dijon are classic, don’t be afraid to experiment! A chipotle mayo can add a smoky kick, a basil pesto aioli brings Italian-Californian flair, or even a light garlic herb cream cheese spread could be fantastic. For a non-alcohol alternative to a balsamic reduction, simply simmer balsamic vinegar with a touch of maple syrup until thickened.
  • Texture Play: Want more crunch beyond the bacon and lettuce? Consider adding thinly sliced bell peppers (red or yellow for sweetness), shredded carrots, or even a handful of crushed pita chips inside for an unexpected textural element.
  • The Perfect Cut: Cutting your wrap diagonally isn’t just for aesthetics; it provides a larger surface area for easier biting and often helps showcase all those beautiful layers inside. A sharp serrated knife works best for a clean cut.
  • Pairing Suggestions: This wrap is incredibly versatile. It’s fantastic on its own for a quick lunch, but it also pairs wonderfully with a simple side salad (perhaps with a light vinaigrette), a bowl of fresh fruit, or even some sweet potato fries for a heartier meal.

Storage

While the Ultimate California Turkey Club Wrap is definitely at its peak when enjoyed fresh, sometimes you need to prep ahead. Here’s how I handle storage to keep it as delicious as possible:

  • Best Eaten Fresh: I cannot stress this enough – due to the avocado and fresh vegetables, this wrap is truly best enjoyed immediately after assembly. The crispness of the lettuce, the creamy texture of the avocado, and the freshness of the tomato are all at their prime right after it’s made.
  • Prepping Components Separately: If you’re looking to save time for a quick assembly later, the best approach is to prepare your components individually and store them separately.
    • Cooked Beef Bacon: Once cooled, store crispy beef bacon in an airtight container at room temperature for up to 2 days, or in the refrigerator for up to 5 days. You can re-crisp it quickly in a pan or microwave if needed.
    • Sliced Turkey and Cheese: Keep these together in an airtight container or zip-top bag in the refrigerator for up to 3-4 days.
    • Washed Greens: Store washed and dried lettuce and sprouts in an airtight container lined with a paper towel in the refrigerator. They typically last 3-5 days.
    • Sliced Vegetables (Tomato, Onion, Cucumber): Store these in separate airtight containers in the refrigerator. Tomatoes generally last well for a few days, but remember they can release moisture.
    • Avocado: This is the trickiest component. Whole, ripe avocados can be stored at room temperature until ready to use. Once sliced or mashed, avocado browns quickly due to oxidation. To minimize this, you can tightly press plastic wrap directly onto the surface of sliced or mashed avocado, or store it in an airtight container with a slice of lemon or a splash of lime juice. Even with these precautions, it’s really best to slice the avocado just before assembling your wrap.
  • Assembled Wrap (Short-Term Storage): If you absolutely must assemble the wrap a few hours ahead (e.g., for a lunch you’ll eat later the same day), here are my tips:
    • Layering matters: Ensure you have a good layer of lettuce or greens between the tortilla and any wetter ingredients (like tomato or avocado) to act as a barrier.
    • Wrap Tightly: Once rolled, wrap the entire wrap very tightly in plastic wrap or parchment paper, then again in foil. This helps hold its shape and minimizes air exposure, which can lead to sogginess and browning.
    • Refrigerate Immediately: Store the tightly wrapped wrap in the refrigerator. It will hold up reasonably well for about 3-4 hours. Beyond that, you risk the tortilla becoming soggy and the avocado browning significantly.
    • Avoid Freezing: Wraps with fresh vegetables, especially avocado and lettuce, do not freeze well at all. The texture will be completely compromised upon thawing.
  • Preventing Soggy Tortillas: The key here is to keep moisture-rich ingredients from direct contact with the tortilla for extended periods. As mentioned, greens provide a barrier. Additionally, ensure your tomatoes are well-drained, and don’t overdo it with very wet spreads.

California Turkey Club Wrap: The Ultimate Recipe Guide

Final Thoughts

And there you have it! I truly hope this comprehensive walkthrough for The Ultimate California Turkey Club Wrap Guide Everything You Need To Know has left you feeling inspired and ready to create something truly delicious. This isn’t just another wrap recipe; it’s a meticulously crafted experience designed to bring vibrant California flavors right into your kitchen.

I genuinely believe that The Ultimate California Turkey Club Wrap Guide Everything You Need To Know is a must-try for anyone seeking a meal that perfectly balances convenience, incredible taste, and satisfying textures. From the succulent turkey and crispy beef bacon to the creamy avocado and tangy dressing, every single component is thoughtfully included to ensure a harmonious and utterly delightful bite. It’s a complete guide, ensuring your success from start to finish.

So, I wholeheartedly encourage you to dive in and make The Ultimate California Turkey Club Wrap Guide Everything You Need To Know. Whether you’re whipping it up for a quick lunch, a light dinner, or a refreshing picnic, I promise it will quickly become a cherished favorite. Get ready to experience the ultimate blend of fresh ingredients and fantastic flavor – you deserve this culinary sunshine!

Print
clock clock iconcutlery cutlery iconflag flag iconfolder folder iconinstagram instagram iconpinterest pinterest iconfacebook facebook iconprint print iconsquares squares iconheart heart iconheart solid heart solid icon

California Turkey Club Wrap: The Ultimate Recipe Guide


  • Author: Lily author
  • Total Time: 25 minutes
  • Yield: 2 servings
Pin Recipe
Print Recipe

Description

Experience the fresh and satisfying flavors of the Ultimate California Turkey Club Wrap, featuring succulent turkey, crispy beef bacon, and creamy avocado. This portable wrap is perfect for lunch or a light dinner, bursting with vibrant California vibes.


Ingredients

  • Large Flour Tortillas
  • Sliced Turkey Breast
  • Crispy Beef Bacon or Prosciutto
  • Ripe Avocado
  • Lettuce (Romaine or Green Leaf)
  • Alfalfa Sprouts
  • Ripe Tomato (Beefsteak or Roma)
  • Cheese Slices (Provolone, Monterey Jack, or Mild Cheddar)
  • Mayonnaise
  • Dijon Mustard
  • Thinly Sliced Red Onion (optional)
  • Thinly Sliced Cucumber (optional)

Instructions

  1. Prep Your Ingredients: Cook your beef bacon until it's wonderfully crispy. Drain it on paper towels to remove excess fat. While the bacon cools, wash and dry your lettuce and sprouts. Slice your ripe tomato and avocado.
  2. Warm Your Tortilla (Optional, but Recommended): Lightly warm your tortilla in a dry skillet over low heat for about 15-20 seconds per side, or in the microwave for 10-15 seconds.
  3. Spread the Flavor Base: Lay your warm tortilla flat and spread a generous layer of mayonnaise (and Dijon mustard, if using) across the entire surface, leaving a one-inch border around the edges.
  4. Layer with Care: Start by laying a bed of lettuce (and optionally, the sprouts) down the center of the tortilla. Arrange your sliced turkey breast over the greens. Place your cheese slices on top of the turkey. Follow with your ripe tomato slices. Add your crispy beef bacon or beef prosciutto. Layer your avocado slices or spread your mashed avocado. If using alfalfa sprouts, layer them on top of the avocado now.
  5. The Art of the Roll: Fold in the sides of the tortilla first, then tightly roll the tortilla upwards from the bottom edge closest to you, tucking in the filling as you go.
  6. Serve It Up: Slice the wrap in half diagonally for a clean presentation. Serve immediately and enjoy your Ultimate California Turkey Club Wrap!
  • Prep Time: 15 mins
  • Cook Time: 10 mins
  • Category: Lunch
  • Method: Assembling
  • Cuisine: American

Nutrition

  • Serving Size: 1 wrap
  • Calories: 600
  • Sugar: 4 g
  • Sodium: 900 mg
  • Fat: 35 g
  • Saturated Fat: 10 g
  • Unsaturated Fat: 20 g
  • Trans Fat: 0 g
  • Carbohydrates: 45 g
  • Fiber: 5 g
  • Protein: 30 g
  • Cholesterol: 80 mg

Keywords: Warming your tortilla makes it more pliable and easier to roll. Don't overfill your wrap to avoid difficulty in rolling. Ensure a good layer of greens is used to prevent sogginess from wetter ingredients.

Did you make this recipe?

Share a photo and tag us — we can't wait to see what you've made!

« Previous Post
Savory Mediterranean Beef Meatloaf with Garlic Herb Sauce
Next Post »
Easy Sesame Chicken: Better Than Takeout in Mins!

If you enjoyed this…

Curry Chicken Salad: The Ultimate Recipe and Guide

Delicious Chicken Avocado Melt Sandwich Recipe to Try Today!

Pepperoni Pizza Grilled Cheese: The Ultimate Comfort Food Recipe

Primary Sidebar

Browse by Diet

BreakfastDinnerLunchDessertAppetizer

Sweet Peach Yogurt Parfait Delight

One of my fondest memories is from a lazy summer afternoon spent at my grandmother’s house. The sun filtered through the kitchen window, casting a warm glow over the table where she would create her culinary magic. It was during one of those blissful moments that I first tasted her Peach Yogurt Parfait with Honey and Granola. The sweet aroma of ripe peaches mingling with creamy yogurt and the crunch of granola was nothing short of heavenly. It felt like summer captured in a bowl, and I still remember the joy of diving in with a spoon, each layer revealing a new burst of flavor.

When I think about that parfait, I can almost hear the gentle hum of the bees outside, reminding me of the floral notes that honey brings to every bite. The vibrant yellows and soft oranges of the peaches contrast beautifully with the creamy white yogurt and the golden crunch of granola. It’s a dish that not only looks delightful but also tastes like a celebration of fresh, wholesome ingredients.

What makes my version of this Peach Yogurt Parfait special is the careful balance of flavors and textures. I use ripe, juicy peaches, drizzled with locally sourced honey, and a homemade granola that’s bursting with nuts and seeds for an extra crunch. It’s a simple dish, but every layer is crafted with love and attention.

Let me show you exactly how to make this delightful parfait, so you can bring a bit of that summer magic into your kitchen!

Sweet Peach Yogurt Parfait Delight

Why You’ll Love This Recipe

  • Delightfully creamy texture from the Greek yogurt, paired with the juicy sweetness of fresh peaches.
  • Ready in under 20 minutes, making it a quick and satisfying breakfast or snack option.
  • Budget-friendly, using common ingredients that you may already have in your pantry.
  • Customizable with your favorite granola and nuts, allowing you to tailor each parfait to your taste.
  • Perfectly balanced flavors with the bright acidity of lemon juice and the sweetness of honey enhancing the peaches.

Ingredients

  • For the Parfait:
  • 2 cups plain Greek yogurt (or vanilla yogurt for a sweeter option)
  • 2 large ripe peaches, diced (about 2 cups)
  • 1 tablespoon fresh lemon juice (to prevent browning of peaches)
  • 2 tablespoons honey (plus more for drizzling)
  • 1 teaspoon vanilla extract (optional for extra flavor)
  • For the Granola:
  • 1 cup granola (store-bought or homemade; see notes for a simple granola recipe)
  • 1/4 cup sliced almonds (optional for added crunch)
  • 1/4 cup shredded coconut (optional for added flavor)

Let’s dive into some key ingredients that make this Peach Yogurt Parfait so delightful! First, the Greek yogurt is not only creamy but also packed with protein, making it a satisfying option for breakfast or a snack. If you’re looking for a sweeter option, you can easily substitute it with vanilla yogurt, though it may alter the overall flavor balance. Next, the ripe peaches are the star of the show; their natural sweetness shines through, so I recommend choosing peaches that yield slightly to pressure, indicating they’re perfectly ripe. If peaches aren’t in season, feel free to use nectarines or even frozen peaches—just thaw them before use. Finally, honey adds a lovely floral sweetness that ties everything together. If you prefer, maple syrup can serve as a delicious substitute.

Step-by-Step Instructions

  1. Start by preparing the peaches. Wash them thoroughly, then slice and dice them into bite-sized pieces. In a medium bowl, toss the diced peaches with 1 tablespoon of fresh lemon juice to prevent browning. Set aside for about 5 minutes while the lemon juice works its magic.
  2. In a separate bowl, combine the Greek yogurt, 2 tablespoons of honey, and 1 teaspoon of vanilla extract if using. Stir the mixture until smooth and thoroughly blended. This should take about a minute. Avoid overmixing to maintain the creaminess of the yogurt.
  3. Now it’s time to layer your parfait. Grab a clear glass or bowl to showcase your beautiful creation. Start with a generous spoonful of the yogurt mixture at the bottom—about 1/4 cup will do. Use a spoon to spread it evenly.
  4. Add a layer of the diced peaches over the yogurt, ensuring they cover the yogurt completely. You might want to use about half of what you have prepared—roughly 1 cup. This layer should be visually appealing, so arrange the peaches neatly.
  5. Sprinkle 1/4 cup of granola over the peaches. This adds a delightful crunch. Make sure to distribute it evenly to ensure every bite has that satisfying texture. Avoid packing it down too tightly, as you want it to maintain its crunch.
  6. Repeat the layers: spoon in another 1/4 cup of yogurt, followed by another cup of peaches, and another sprinkle of granola. You should have at least two layers, but feel free to add more depending on your glass size.
  7. Finish off your parfait with a drizzle of honey on top for added sweetness and a touch of elegance. If you’re using sliced almonds or shredded coconut, sprinkle them on top now. It adds a lovely visual contrast and extra flavor.
  8. Serve immediately or refrigerate for up to 30 minutes before serving to allow the flavors to meld together. However, I recommend enjoying it fresh to maintain the granola’s crunch.

Pro Tips for the Best Peach Yogurt Parfait With Honey And Granola

  • Make sure to choose ripe peaches for the best flavor and texture. A common mistake is using unripe fruit, which can lead to a less enjoyable parfait. Look for peaches that are fragrant and slightly soft to the touch.
  • Use a clear glass to assemble your parfait; this not only makes for a beautiful presentation but also allows you to see the colorful layers, which adds to the enjoyment of eating it.
  • For an even creamier texture, consider whipping the Greek yogurt with a hand mixer for a couple of minutes before layering. This small adjustment makes a huge difference in mouthfeel.
  • Be mindful of the granola-to-yogurt ratio. Too much granola can overwhelm the parfait, while too little can make it feel too creamy. Aim for about 1/4 cup of granola per layer for the perfect balance.
  • If you’re making this for a gathering, consider preparing the yogurt and peaches ahead of time and layering them just before serving. This ensures the granola stays crunchy!

Variations & Serving Ideas

There are so many ways to get creative with your Peach Yogurt Parfait! For a tropical twist, swap out the peaches for mangoes or pineapples and top with coconut flakes. If you prefer a berry flavor, mix in some blueberries or strawberries with the peaches for added color and taste. For a nutty version, incorporate chopped walnuts or pecans instead of almonds.

As for serving ideas, this parfait pairs beautifully with a side of scrambled eggs for a hearty breakfast or fresh fruit salad for a light lunch. You might also enjoy it alongside whole grain toast with almond butter for an energizing snack. The contrast of flavors and textures will elevate your meal experience!

Storage, Make-Ahead & Reheating

The Peach Yogurt Parfait is best enjoyed fresh, but you can prepare some components ahead of time. Store the layered parfait in an airtight container in the refrigerator for up to 24 hours. However, be cautious; the granola may lose its crunch if stored too long. You can freeze the yogurt and peach mixture for up to 2 months; just remember to thaw it in the refrigerator overnight before serving.

If you plan to enjoy this dish the next day, it can taste even better as the flavors meld together. Just remember to add the granola right before serving to keep its delightful crunch!

Frequently Asked Questions

Can I make Peach Yogurt Parfait With Honey And Granola ahead of time?

Yes — in fact, it tastes even better the next day as the flavors meld. However, I recommend waiting to add the granola until just before serving to maintain its crunch.

What can I substitute for Greek yogurt?

If you prefer a lighter option, you can substitute Greek yogurt with regular yogurt or a dairy-free alternative like coconut yogurt. Just remember that this may alter the creaminess and flavor profile slightly.

Can I use frozen peaches for this parfait?

Absolutely! Just make sure to thaw the frozen peaches before using them. They will still add great flavor, though the texture may be slightly softer than fresh peaches.

How do I make the parfait vegan?

To make a vegan version, substitute the Greek yogurt with a plant-based yogurt alternative, and replace honey with maple syrup or agave nectar. This keeps the parfait sweet while adhering to a vegan diet.

What other fruits can I use in this recipe?

You can mix and match fruits based on your preference. Try using strawberries, blueberries, raspberries, or even bananas. Just make sure to adjust the lemon juice as needed to prevent browning.

Sweet Peach Yogurt Parfait Delight

Final Thoughts

The Peach Yogurt Parfait with Honey and Granola is a delightful blend of creamy yogurt, sweet peaches, and crunchy granola that creates a satisfying and nourishing treat. Each layer bursts with flavor, making it a perfect choice for breakfast or a light dessert.

This is the kind of recipe I come back to again and again, especially when I want something refreshing and wholesome to start my day. The harmony of sweet and tart flavors, combined with the delightful crunch, never fails to lift my spirits!

I encourage you to give this parfait a try and indulge in its comforting goodness. Feel free to share your results or even add your own twist—perhaps a sprinkle of cinnamon or a handful of nuts. Enjoy creating your perfect parfait!

Print
clock clock iconcutlery cutlery iconflag flag iconfolder folder iconinstagram instagram iconpinterest pinterest iconfacebook facebook iconprint print iconsquares squares iconheart heart iconheart solid heart solid icon

Peach Yogurt Parfait


  • Author: Lily author
  • Total Time: 15 minutes
  • Yield: 4 servings 1x
Pin Recipe
Print Recipe

Description

This Peach Yogurt Parfait combines creamy Greek yogurt, juicy peaches, and crunchy granola for a delightful treat. It’s a perfect breakfast or snack that captures the essence of summer in every bite.


Ingredients

Scale
  • For the Parfait:
  • 2 cups plain Greek yogurt (or vanilla yogurt for a sweeter option)
  • 2 large ripe peaches, diced (about 2 cups)
  • 1 tablespoon fresh lemon juice (to prevent browning of peaches)
  • 2 tablespoons honey (plus more for drizzling)
  • 1 teaspoon vanilla extract (optional for extra flavor)
  • For the Granola:
  • 1 cup granola (store-bought or homemade; see notes for a simple granola recipe)
  • 1/4 cup sliced almonds (optional for added crunch)
  • 1/4 cup shredded coconut (optional for added flavor)

Instructions

  1. Start by preparing the peaches. Wash them thoroughly, then slice and dice them into bite-sized pieces. In a medium bowl, toss the diced peaches with 1 tablespoon of fresh lemon juice to prevent browning. Set aside for about 5 minutes while the lemon juice works its magic.
  2. In a separate bowl, combine the Greek yogurt, 2 tablespoons of honey, and 1 teaspoon of vanilla extract if using. Stir the mixture until smooth and thoroughly blended. This should take about a minute. Avoid overmixing to maintain the creaminess of the yogurt.
  3. Now it’s time to layer your parfait. Grab a clear glass or bowl to showcase your beautiful creation. Start with a generous spoonful of the yogurt mixture at the bottom—about 1/4 cup will do. Use a spoon to spread it evenly.
  4. Add a layer of the diced peaches over the yogurt, ensuring they cover the yogurt completely. You might want to use about half of what you have prepared—roughly 1 cup. This layer should be visually appealing, so arrange the peaches neatly.
  5. Sprinkle 1/4 cup of granola over the peaches. This adds a delightful crunch. Make sure to distribute it evenly to ensure every bite has that satisfying texture. Avoid packing it down too tightly, as you want it to maintain its crunch.
  6. Repeat the layers: spoon in another 1/4 cup of yogurt, followed by another cup of peaches, and another sprinkle of granola. You should have at least two layers, but feel free to add more depending on your glass size.
  7. Finish off your parfait with a drizzle of honey on top for added sweetness and a touch of elegance. If you’re using sliced almonds or shredded coconut, sprinkle them on top now. It adds a lovely visual contrast and extra flavor.
  8. Serve immediately or refrigerate for up to 30 minutes before serving to allow the flavors to meld together. However, I recommend enjoying it fresh to maintain the granola’s crunch.
  • Prep Time: 15 mins
  • Cook Time: 0 mins
  • Category: Breakfast
  • Method: No-cook
  • Cuisine: American

Nutrition

  • Serving Size: 1 parfait
  • Calories: 250
  • Sugar: 20 g
  • Sodium: 50 mg
  • Fat: 5 g
  • Saturated Fat: 2 g
  • Unsaturated Fat: 3 g
  • Trans Fat: 0 g
  • Carbohydrates: 40 g
  • Fiber: 3 g
  • Protein: 10 g
  • Cholesterol: 10 mg

Keywords: Choose ripe peaches for the best flavor and texture. Use a clear glass for a beautiful presentation. For creaminess, consider whipping the yogurt before layering. Be mindful of the granola-to-yogurt ratio. Prepare yogurt and peaches ahead of time for gatherings, layering just before serving.

Did you make this recipe?

Share a photo and tag us — we can't wait to see what you've made!

Sun-Kissed Frozen Orange Cream Slush

As a child, summer days felt like they lasted forever. I remember the sticky heat wrapping around me as I played outside, my laughter mingling with the sounds of the neighborhood. But nothing could cool me down quite like the moment I’d spot my grandmother, laboring over her blender, whipping up her famous Frozen Orange Creamsicle Slush. That vibrant orange treat, with its frosty texture and sweet citrus aroma, was like a burst of sunshine in a cup. Just one sip, and I could feel the coolness wash over me, sparking pure joy.

This Frozen Orange Creamsicle Slush has a way of making you feel like a kid again. Its creamy, dreamy consistency is a delightful balance of bright orange and soft vanilla, inviting you to dive right in. The refreshing tang of orange dances on your tongue, while the smooth creaminess envelops you in a comforting embrace. It’s a nostalgic treat that’s perfect for hot summer afternoons or anytime you need a little pick-me-up.

What makes my version of this slush stand out is the addition of a hint of vanilla bean, which elevates the flavor and adds an extra layer of richness. Plus, it’s super easy to whip up with just a few simple ingredients that you probably already have on hand! So, if you’re ready to relive those sun-soaked memories, let me show you exactly how to make it.

Sun-Kissed Frozen Orange Cream Slush

Why You’ll Love This Recipe

  • Each slush is a perfect blend of creamy vanilla and zesty orange, creating a nostalgic flavor reminiscent of summer days.
  • This refreshing treat is ready in under 15 minutes, making it an ideal quick dessert for unexpected guests or hot afternoons.
  • With just 8 simple ingredients, it’s budget-friendly, ensuring you don’t have to break the bank to enjoy a delicious slush.
  • The slush has a perfectly smooth texture, thanks to the combination of ice and ice cream, providing a delightful contrast to the bright citrus flavors.
  • It’s highly customizable; you can easily adjust the sweetness and add fresh herbs for a unique twist that suits your taste.

Ingredients

  • 2 cups orange juice (freshly squeezed or store-bought)
  • 1 cup vanilla ice cream
  • 1 cup crushed ice
  • 1/2 cup milk (whole or 2%)
  • 1/4 cup granulated sugar (adjust based on sweetness preference)
  • 1 teaspoon vanilla extract
  • Zest of 1 orange (for added flavor)
  • Fresh orange slices and mint leaves (for garnish)

The star of this Frozen Orange Creamsicle Slush is the orange juice, which provides the vibrant, citrusy base. Freshly squeezed juice will yield the brightest flavor, but store-bought options can be just as convenient. If you’re opting for store-bought, choose 100% pure juice with no added sugars for the best results. Another essential ingredient is the vanilla ice cream; it adds creaminess and sweetness. You can substitute it with dairy-free ice cream if you’re looking for a vegan option. Whole or 2% milk complements the ice cream, creating a smooth blend. If you want a lower-calorie version, almond or oat milk can be good alternatives.

Lastly, the granulated sugar can be adjusted based on your sweetness preference. If you prefer a more natural sweetener, consider using honey or agave syrup. The orange zest enhances the flavor profile, providing an aromatic pop that brings the whole slush together. Don’t skip it! It adds an extra layer of brightness that makes this slush truly special.

Step-by-Step Instructions

  1. Start by preparing your ingredients. Gather 2 cups of orange juice, 1 cup of vanilla ice cream, and 1 cup of crushed ice. Make sure the ice is finely crushed, as larger chunks can make blending difficult.
  2. In a blender, combine the orange juice, vanilla ice cream, crushed ice, and 1/2 cup of milk. Add 1/4 cup of granulated sugar and 1 teaspoon of vanilla extract. If you like a sweeter slush, consider adding a bit more sugar at this stage.
  3. Add the zest of 1 orange to the blender. This step is crucial for enhancing the citrus flavor of your slush. Make sure not to include the bitter white pith—only the flavorful zest.
  4. Blend the mixture on medium-high speed for about 30-45 seconds. Stop once the ingredients are fully combined and the slush has a smooth, even consistency. If you notice large chunks of ice, blend for an additional 10-15 seconds. Avoid over-blending, as this can make the slush too liquidy.
  5. Once blended, taste the slush. If it needs more sweetness, add a little more sugar and blend for a few more seconds. If it’s too thick, you can add a splash of milk to reach your desired consistency.
  6. Pour the slush into glasses. This recipe typically serves 4, but you can easily double it for larger gatherings. Use a spoon to help guide the slush into the glasses if needed.
  7. Garnish each serving with fresh orange slices and mint leaves. The mint not only adds a pop of color but also a refreshing aroma that complements the citrus flavors beautifully.
  8. Serve immediately and enjoy! If you’ve made extra, you can refrigerate it for a short time, but it’s best enjoyed fresh.

Pro Tips for the Best Frozen Orange Creamsicle Slush

  • Don’t skip the orange zest! It’s a game-changer for flavor. Always zest before juicing to make it easier.
  • Use a high-powered blender for the best texture. A standard blender may struggle with ice, leading to uneven consistency. If you have a food processor, that can work too, but ensure the ice is finely crushed.
  • Adjust the ice-to-liquid ratio carefully. If your slush is too thick, it won’t blend well. Start with less ice and add more until you reach your preferred texture.
  • Be cautious with the sugar! Always start with the lower amount, as you can easily add more, but it’s hard to fix an overly sweet slush.
  • For a fun twist, consider adding a splash of coconut milk or a handful of fresh fruit like strawberries or pineapple. This not only enhances the flavor but also adds a beautiful color contrast.

Variations & Serving Ideas

There are countless ways to put a spin on your Frozen Orange Creamsicle Slush. Consider making a tropical version by adding in some pineapple juice or coconut milk for a delightful tropical twist. If you’re feeling adventurous, try incorporating a handful of frozen mango or peach slices for added sweetness. For a lighter version, swap out the vanilla ice cream for Greek yogurt for a creamy yet tangy alternative.

As for serving ideas, this refreshing slush pairs wonderfully with light summer dishes like grilled chicken skewers, fish tacos, or a simple salad topped with citrus vinaigrette. The bright, zesty flavors of the slush complement these dishes perfectly, making them an ideal pairing for a sunny day.

Storage, Make-Ahead & Reheating

This Frozen Orange Creamsicle Slush is best enjoyed fresh, but if you have leftovers, you can store them in an airtight container in the fridge for up to 2 days. Just keep in mind that the slush may lose some of its texture over time as the ice melts. It doesn’t freeze well, as the ice will turn into a solid block. If you must freeze it, blend again after thawing to restore the slushy consistency. This treat is best the day you make it, as the flavors meld together beautifully overnight, enhancing its deliciousness.

Frequently Asked Questions

Can I make Frozen Orange Creamsicle Slush ahead of time?

Yes — in fact, it tastes even better the next day as the flavors meld. However, it’s best to enjoy it fresh, as the texture can change if stored for too long. If you need to prepare it ahead, keep it in the fridge and re-blend before serving.

What kind of orange juice should I use?

For the best flavor, use freshly squeezed orange juice. However, if you’re short on time, opt for 100% pure store-bought juice without added sugars. This will ensure that your slush remains flavorful and refreshing.

Can I substitute the vanilla ice cream?

Absolutely! If you’re looking for a dairy-free option, coconut milk ice cream or a non-dairy vanilla ice cream can work wonderfully. They will still provide the creamy texture and sweetness you desire.

How can I adjust the sweetness of my slush?

You can easily adjust the sweetness by modifying the amount of sugar added. Start with 1/4 cup and taste the mixture before blending. If you prefer it sweeter, add more sugar gradually until it reaches your desired level.

What should I do if my slush is too thick?

If your slush is too thick, simply add a splash of milk or orange juice and blend again. This will help achieve a more drinkable consistency while maintaining the slushy texture. Adjust gradually to reach your preferred thickness.

Sun-Kissed Frozen Orange Cream Slush

Final Thoughts

The Frozen Orange Creamsicle Slush is a delightful blend of refreshing citrus and creamy goodness, making it a perfect treat for warm days or any time you crave a taste of nostalgia. The way the bright orange flavor dances with the creamy texture truly elevates this slush, transforming it into a satisfying escape from the everyday.

This is the kind of recipe I come back to again and again, especially when I’m looking to cool down or impress guests at a summer gathering. It’s simple to make and always brings smiles all around! I encourage you to try this recipe for yourself—don’t hesitate to share your results or even put your own spin on it. Happy slushing!

Print
clock clock iconcutlery cutlery iconflag flag iconfolder folder iconinstagram instagram iconpinterest pinterest iconfacebook facebook iconprint print iconsquares squares iconheart heart iconheart solid heart solid icon

Frozen Orange Creamsicle Slush


  • Author: Lily author
  • Total Time: 15 minutes
  • Yield: 4 servings 1x
Pin Recipe
Print Recipe

Description

This Frozen Orange Creamsicle Slush is a refreshing treat that combines creamy vanilla and zesty orange flavors. Perfect for hot summer days, it brings back nostalgic memories with every sip.


Ingredients

Scale
  • 2 cups orange juice (freshly squeezed or store-bought)
  • 1 cup vanilla ice cream
  • 1 cup crushed ice
  • 1/2 cup milk (whole or 2%)
  • 1/4 cup granulated sugar (adjust based on sweetness preference)
  • 1 teaspoon vanilla extract
  • Zest of 1 orange (for added flavor)
  • Fresh orange slices and mint leaves (for garnish)

Instructions

  1. Start by preparing your ingredients. Gather 2 cups of orange juice, 1 cup of vanilla ice cream, and 1 cup of crushed ice. Make sure the ice is finely crushed, as larger chunks can make blending difficult.
  2. In a blender, combine the orange juice, vanilla ice cream, crushed ice, and 1/2 cup of milk. Add 1/4 cup of granulated sugar and 1 teaspoon of vanilla extract. If you like a sweeter slush, consider adding a bit more sugar at this stage.
  3. Add the zest of 1 orange to the blender. This step is crucial for enhancing the citrus flavor of your slush. Make sure not to include the bitter white pith—only the flavorful zest.
  4. Blend the mixture on medium-high speed for about 30-45 seconds. Stop once the ingredients are fully combined and the slush has a smooth, even consistency. If you notice large chunks of ice, blend for an additional 10-15 seconds. Avoid over-blending, as this can make the slush too liquidy.
  5. Once blended, taste the slush. If it needs more sweetness, add a little more sugar and blend for a few more seconds. If it’s too thick, you can add a splash of milk to reach your desired consistency.
  6. Pour the slush into glasses. This recipe typically serves 4, but you can easily double it for larger gatherings. Use a spoon to help guide the slush into the glasses if needed.
  7. Garnish each serving with fresh orange slices and mint leaves. The mint not only adds a pop of color but also a refreshing aroma that complements the citrus flavors beautifully.
  8. Serve immediately and enjoy! If you’ve made extra, you can refrigerate it for a short time, but it's best enjoyed fresh.
  • Prep Time: 15 min
  • Cook Time: 0 min
  • Category: Dessert
  • Method: Blending
  • Cuisine: American

Nutrition

  • Serving Size: 1 serving
  • Calories: 200
  • Sugar: 30 g
  • Sodium: 50 mg
  • Fat: 5 g
  • Saturated Fat: 3 g
  • Unsaturated Fat: 2 g
  • Trans Fat: 0 g
  • Carbohydrates: 40 g
  • Fiber: 1 g
  • Protein: 2 g
  • Cholesterol: 20 mg

Keywords: Don't skip the orange zest! It's a game-changer for flavor. Always zest before juicing to make it easier.

Did you make this recipe?

Share a photo and tag us — we can't wait to see what you've made!

Zesty Lemon Poppy Seed Delight

One rainy afternoon, I found myself in my grandmother’s cozy kitchen, the kind that always smelled like warmth and love. She was whipping up her famous Lemon Poppy Seed Loaf, a recipe that had been passed down through generations. As the batter came together, the zesty aroma of fresh lemons filled the air, mingling perfectly with the nutty fragrance of poppy seeds. I can still picture her, apron-clad, as she expertly drizzled a vibrant citrus icing over the loaf, creating a glossy, sun-kissed finish that beckoned us to dive in. It was a moment that sparked my own passion for baking, and this recipe has become a cherished staple in my home ever since.

When you take a bite of this Lemon Poppy Seed Loaf, it’s like a burst of sunshine on your palate. The loaf is beautifully golden, with a tender crumb that melts in your mouth. Each slice is speckled with tiny poppy seeds, adding a delightful crunch that contrasts beautifully with the tangy sweetness of the lemon. And that citrus icing? It’s the finishing touch that elevates this loaf from ordinary to extraordinary, with its bright, zesty flavor dancing on your taste buds.

This recipe stands out because it embraces simplicity while delivering on flavor. I’ve added a hint of vanilla to the batter, enhancing the overall taste and making it even more indulgent. Trust me, once you make this Lemon Poppy Seed Loaf With Citrus Icing, it’ll become a go-to in your baking repertoire.

So, let me show you exactly how to make it!

Zesty Lemon Poppy Seed Delight

Why You’ll Love This Recipe

  • Moist and tender crumb that melts in your mouth, thanks to the perfect balance of butter and buttermilk.
  • Bright, zesty lemon flavor paired with crunchy poppy seeds, creating a delightful texture and taste experience.
  • Easy to whip up in just about an hour, perfect for last-minute gatherings or a cozy afternoon treat.
  • Budget-friendly with everyday ingredients, making it an accessible option for all home bakers.
  • The citrus icing adds a sweet tang that elevates the loaf, turning a simple recipe into a showstopper!

Ingredients

  • 1 ½ cups (190g) all-purpose flour
  • 1 teaspoon baking powder
  • ½ teaspoon baking soda
  • ½ teaspoon salt
  • 3 tablespoons poppy seeds
  • ½ cup (115g) unsalted butter, softened to room temperature
  • 1 cup (200g) granulated sugar
  • 2 large eggs
  • 1 teaspoon vanilla extract
  • 1 teaspoon lemon zest (from about 1 medium lemon)
  • ½ cup (120ml) buttermilk
  • 2 tablespoons fresh lemon juice

For the Citrus Icing:

  • 1 cup (120g) powdered sugar
  • 2 tablespoons fresh lemon juice
  • 1 tablespoon orange juice
  • 1 teaspoon lemon zest (for garnish, optional)

Let’s dive into the key ingredients that make this Lemon Poppy Seed Loaf so special. The all-purpose flour provides the structure and base for the loaf, while the baking powder and baking soda ensure it rises perfectly, giving the loaf a light texture. For a gluten-free variation, you could substitute the flour with a gluten-free all-purpose blend. Poppy seeds not only add a delightful crunch but also contribute to the unique flavor profile that pairs well with the citrus notes.

Unsalted butter is crucial for achieving the buttery richness that makes this loaf so moist. If you’re looking for a dairy-free option, coconut oil or a vegan butter can be used instead. The buttermilk is another essential component, providing acidity that activates the baking soda for a fluffy texture. If you don’t have buttermilk on hand, you can easily make a substitute by mixing ½ cup of milk with 1 tablespoon of vinegar or lemon juice and letting it sit for about 5 minutes.

Step-by-Step Instructions

  1. Preheat your oven to 350°F (175°C). Grease a 9×5-inch loaf pan or line it with parchment paper for easy removal later.
  2. In a medium mixing bowl, whisk together 1 ½ cups of all-purpose flour, 1 teaspoon of baking powder, ½ teaspoon of baking soda, ½ teaspoon of salt, and 3 tablespoons of poppy seeds. This helps to evenly distribute the baking agents and ensures a uniform rise.
  3. In a large mixing bowl, cream together ½ cup of softened unsalted butter and 1 cup of granulated sugar using an electric mixer on medium speed for about 3-4 minutes, until the mixture is light and fluffy. Make sure to scrape down the sides of the bowl occasionally.
  4. Add 2 large eggs, 1 teaspoon of vanilla extract, and 1 teaspoon of lemon zest to the creamed butter and sugar, mixing until fully combined. You want a smooth consistency, so ensure there are no lumps of butter.
  5. In a small bowl, combine ½ cup of buttermilk and 2 tablespoons of fresh lemon juice. Alternately add the dry ingredients and buttermilk mixture to the butter mixture, starting and ending with the dry ingredients. Mix just until combined; do not overmix, as this can lead to a dense loaf.
  6. Pour the batter into the prepared loaf pan. Smooth the top with a spatula, ensuring it’s even. Bake in the preheated oven for 50-60 minutes, or until a toothpick inserted in the center comes out clean. The edges should be lightly golden brown, and the center should feel just set.
  7. Once baked, remove the loaf from the oven and allow it to cool in the pan for about 10 minutes. Then, transfer it to a wire rack to cool completely. Resist the urge to slice too soon, as it will be crumbly if it’s still warm.
  8. While the loaf is cooling, prepare the citrus icing. In a medium bowl, whisk together 1 cup of powdered sugar, 2 tablespoons of fresh lemon juice, and 1 tablespoon of orange juice until smooth. If the icing is too thick, you can add a little more juice to reach your desired consistency.
  9. Once the loaf is completely cool, drizzle the citrus icing over the top. If you like, sprinkle with an additional teaspoon of lemon zest for an extra pop of flavor and color.

Pro Tips for the Best Lemon Poppy Seed Loaf With Citrus Icing

  • Be careful not to overmix your batter; this is a common mistake that can lead to a dense loaf. Mix just until the dry ingredients are incorporated for a light and fluffy texture.
  • Use room temperature ingredients, especially the butter and eggs. This helps to create a smoother batter and ensures even baking. Take your eggs out of the fridge about 30 minutes before you start.
  • For a more pronounced lemon flavor, consider adding a little lemon extract in addition to the zest and juice. Just a half teaspoon can elevate the citrus notes significantly.
  • When measuring your flour, spoon it into the measuring cup and level it off with a knife instead of scooping directly from the bag. This prevents packing and ensures you don’t end up with a dry loaf.
  • Invest in a good quality loaf pan; it makes a difference in heat distribution, which ensures even baking. If your pan is dark-coated, reduce the oven temperature by 25°F to prevent over-browning.

Variations & Serving Ideas

For a delightful twist, consider adding blueberries or raspberries to the batter for a fruity burst of flavor. You can also experiment with different citrus fruits—try lime or grapefruit zest and juice for a refreshing change. For a healthier option, substitute half of the all-purpose flour with whole wheat flour for added fiber without compromising too much on texture.

This Lemon Poppy Seed Loaf pairs beautifully with a light salad, such as a mixed greens salad with a vinaigrette, or a cup of tea for a cozy afternoon treat. It also complements a creamy cheese platter, as the acidity of the loaf balances rich cheeses perfectly. Lastly, a scoop of vanilla ice cream on the side creates a delightful contrast of temperatures and flavors!

Storage, Make-Ahead & Reheating

This Lemon Poppy Seed Loaf can be stored at room temperature for up to 3 days if wrapped tightly in plastic wrap. If you want to keep it longer, it freezes well for up to 3 months. To freeze, wrap the loaf tightly in plastic wrap and then in aluminum foil to prevent freezer burn.

When you’re ready to enjoy it again, simply thaw it in the fridge overnight. Reheat individual slices in the microwave for 15-20 seconds or in a toaster oven until warmed through. Interestingly, many people find that this loaf tastes even better the next day, as the flavors have time to meld!

Frequently Asked Questions

Can I make Lemon Poppy Seed Loaf With Citrus Icing ahead of time?

Yes — in fact, it tastes even better the next day! You can make the loaf a day in advance, allowing the flavors to develop. Just be sure to store it in an airtight container to maintain its moisture.

Can I substitute the poppy seeds?

Absolutely! If you don’t have poppy seeds on hand or prefer an alternative, you can use sesame seeds for a similar crunch or omit them entirely for a smooth loaf.

What can I use instead of buttermilk?

If you don’t have buttermilk, you can easily create a substitute by mixing ½ cup of milk (dairy or plant-based) with 1 tablespoon of vinegar or lemon juice. Let it sit for 5 minutes before using in the recipe.

How can I make this recipe gluten-free?

To make a gluten-free version of this Lemon Poppy Seed Loaf, substitute the all-purpose flour with a gluten-free all-purpose flour blend. Just ensure that the blend contains a binding agent like xanthan gum for the best results.

What is the best way to store leftover loaf?

Leftover Lemon Poppy Seed Loaf should be stored in an airtight container at room temperature for up to 3 days. For longer storage, wrap it tightly and freeze for up to 3 months. Thaw it before serving for the best texture.

Zesty Lemon Poppy Seed Delight

Final Thoughts

The Lemon Poppy Seed Loaf with Citrus Icing is truly a delightful treat that brings a burst of brightness to any occasion. The zesty lemon flavor combined with the subtle crunch of poppy seeds creates a satisfying balance, while the citrus icing adds a touch of sweetness that perfectly complements the loaf’s tanginess.

This is the kind of recipe I come back to again and again, especially when I want to brighten up a gloomy day or celebrate a small victory. The aroma that fills the kitchen as it bakes is absolutely heavenly! I encourage you to give this recipe a try; you might just find it becoming a beloved staple in your home. Don’t forget to share your results or even add your own unique twist—I can’t wait to see what you create!

Print
clock clock iconcutlery cutlery iconflag flag iconfolder folder iconinstagram instagram iconpinterest pinterest iconfacebook facebook iconprint print iconsquares squares iconheart heart iconheart solid heart solid icon

Lemon Poppy Seed Loaf


  • Author: Lily author
  • Total Time: 36 minute
  • Yield: 1 loaf 1x
Pin Recipe
Print Recipe

Description

This Lemon Poppy Seed Loaf is a delightful treat that combines zesty lemon flavor with crunchy poppy seeds. Topped with a citrus icing, it’s perfect for any occasion.


Ingredients

Scale
  • 1 ½ cups (190g) all-purpose flour
  • 1 teaspoon baking powder
  • ½ teaspoon baking soda
  • ½ teaspoon salt
  • 3 tablespoons poppy seeds
  • ½ cup (115g) unsalted butter, softened to room temperature
  • 1 cup (200g) granulated sugar
  • 2 large eggs
  • 1 teaspoon vanilla extract
  • 1 teaspoon lemon zest (from about 1 medium lemon)
  • ½ cup (120ml) buttermilk
  • 2 tablespoons fresh lemon juice
  • 1 cup (120g) powdered sugar
  • 2 tablespoons fresh lemon juice
  • 1 tablespoon orange juice
  • 1 teaspoon lemon zest (for garnish, optional)

Instructions

  1. Preheat your oven to 350°F (175°C). Grease a 9×5-inch loaf pan or line it with parchment paper for easy removal later.
  2. In a medium mixing bowl, whisk together 1 ½ cups of all-purpose flour, 1 teaspoon of baking powder, ½ teaspoon of baking soda, ½ teaspoon of salt, and 3 tablespoons of poppy seeds. This helps to evenly distribute the baking agents and ensures a uniform rise.
  3. In a large mixing bowl, cream together ½ cup of softened unsalted butter and 1 cup of granulated sugar using an electric mixer on medium speed for about 3-4 minutes, until the mixture is light and fluffy. Make sure to scrape down the sides of the bowl occasionally.
  4. Add 2 large eggs, 1 teaspoon of vanilla extract, and 1 teaspoon of lemon zest to the creamed butter and sugar, mixing until fully combined. You want a smooth consistency, so ensure there are no lumps of butter.
  5. In a small bowl, combine ½ cup of buttermilk and 2 tablespoons of fresh lemon juice. Alternately add the dry ingredients and buttermilk mixture to the butter mixture, starting and ending with the dry ingredients. Mix just until combined; do not overmix, as this can lead to a dense loaf.
  6. Pour the batter into the prepared loaf pan. Smooth the top with a spatula, ensuring it’s even. Bake in the preheated oven for 50-60 minutes, or until a toothpick inserted in the center comes out clean. The edges should be lightly golden brown, and the center should feel just set.
  7. Once baked, remove the loaf from the oven and allow it to cool in the pan for about 10 minutes. Then, transfer it to a wire rack to cool completely. Resist the urge to slice too soon, as it will be crumbly if it’s still warm.
  8. While the loaf is cooling, prepare the citrus icing. In a medium bowl, whisk together 1 cup of powdered sugar, 2 tablespoons of fresh lemon juice, and 1 tablespoon of orange juice until smooth. If the icing is too thick, you can add a little more juice to reach your desired consistency.
  9. Once the loaf is completely cool, drizzle the citrus icing over the top. If you like, sprinkle with an additional teaspoon of lemon zest for an extra pop of flavor and color.
  • Prep Time: 15 mins
  • Cook Time: 50-60 mins
  • Category: Dessert
  • Method: Baking
  • Cuisine: American

Nutrition

  • Serving Size: 1 slice
  • Calories: 200
  • Sugar: 15 g
  • Sodium: 150 mg
  • Fat: 8 g
  • Saturated Fat: 5 g
  • Unsaturated Fat: 3 g
  • Trans Fat: 0 g
  • Carbohydrates: 30 g
  • Fiber: 1 g
  • Protein: 3 g
  • Cholesterol: 40 mg

Keywords: Be careful not to overmix your batter; this is a common mistake that can lead to a dense loaf. Use room temperature ingredients for a smoother batter and even baking.

Did you make this recipe?

Share a photo and tag us — we can't wait to see what you've made!

  • Privacy Policy
  • Terms Of Service
  • Contact
  • About
  • GDPR

Copyright © 2025 Homesmad