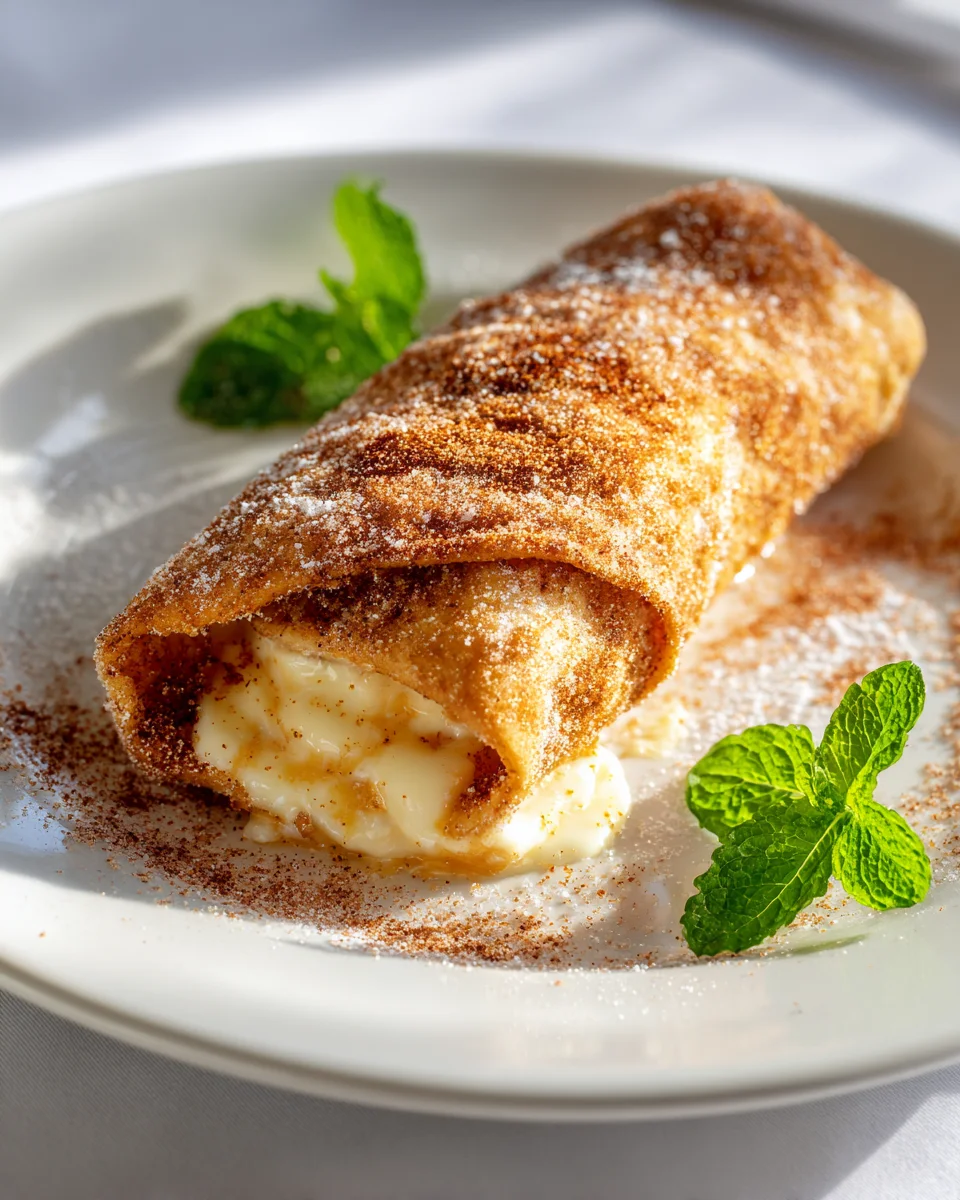
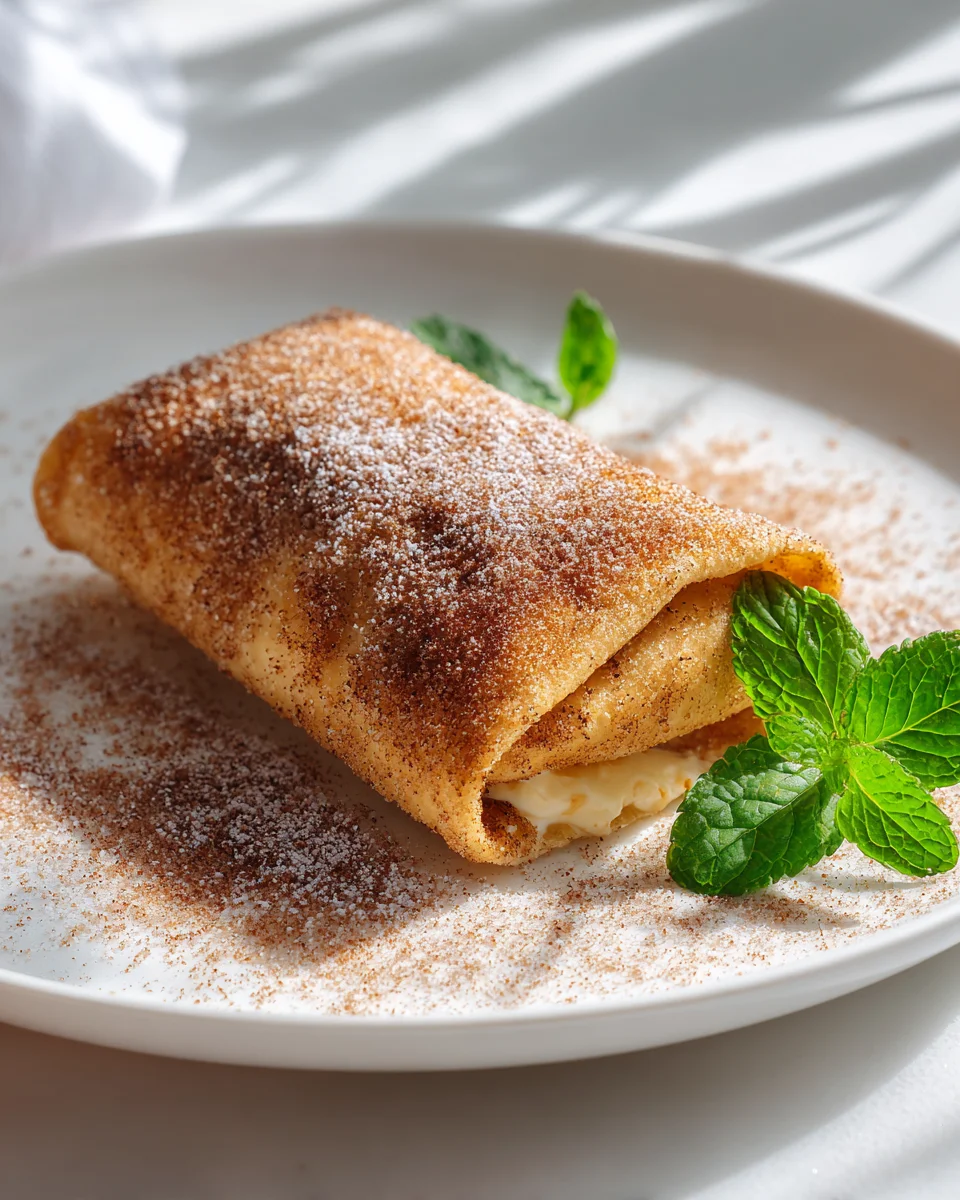
Cheesecake Dessert Chimichangas With Cinnamon Sugar
Oh my goodness, get ready to have your taste buds absolutely dazzled! I am so incredibly excited to introduce you to the magic that is Cheesecake Dessert Chimichangas With Cinnamon Sugar. This isn’t just any dessert; it’s a culinary adventure that takes two beloved concepts and marries them into something truly spectacular and utterly crave-worthy. What makes this recipe so special, you ask? Well, we’re taking the creamy, dreamy, tangy lusciousness of cheesecake filling, wrapping it snugly in a tortilla, frying it to a perfect golden crisp, and then rolling it in the most aromatic and irresistible cinnamon sugar blend. It’s an unexpected fusion that works beyond imagination!
You are going to absolutely love these because they offer a fantastic play on textures and flavors – the warm, crispy exterior gives way to a soft, creamy, and delightful cheesecake center, all enhanced by the sweet spice of cinnamon sugar. They’re a showstopper dessert that’s perfect for impressing guests at a dinner party, bringing to a potluck, or simply treating yourself to something uniquely decadent. Imagine biting into that warm, crispy shell to find a rich, cheesecake filling – it’s pure heaven in every bite!
Ingredient Notes
Crafting the perfect Cheesecake Dessert Chimichangas starts with understanding our key players. I always say, quality ingredients make all the difference, especially when you’re dealing with something as inherently delightful as cheesecake and cinnamon sugar!
- Cream Cheese: This is the heart of our cheesecake filling. I highly recommend using full-fat, block-style cream cheese for the richest, creamiest texture. It needs to be softened completely at room temperature before you start mixing. Trust me, trying to beat cold cream cheese is a battle you won’t win easily, and it will leave you with lumps. If you’re looking to lighten things up slightly, a reduced-fat cream cheese can work, but be aware it might result in a slightly less rich filling. I wouldn’t go for a non-dairy cream cheese alternative here, as the texture and flavor profile might be too different for what we’re aiming for with a classic cheesecake taste.
- Granulated Sugar: Essential for sweetening our cheesecake filling and for the glorious cinnamon sugar coating. For the filling, it dissolves beautifully and provides that clean, sweet base. For the coating, it’s the perfect crystal for adherence and crunch. You could experiment with a mix of granulated and light brown sugar in the filling for a hint of molasses depth, but keep the coating purely granulated for best results.
- Vanilla Extract: A crucial flavor enhancer. I always use pure vanilla extract; the imitation stuff just doesn’t deliver the same warmth and complexity. It really elevates the cheesecake flavor, tying everything together beautifully.
- Flour Tortillas: The vessel for our deliciousness! Medium-sized (about 8-inch) flour tortillas are ideal. They’re pliable enough to roll without tearing and sturdy enough to hold the filling and withstand frying. Corn tortillas are a no-go for this recipe; they’ll crack and won’t give you the desired texture or flavor. If you can only find larger tortillas, you might just get fewer but larger chimichangas. Warm them slightly before filling for maximum flexibility.
- Butter (Melted): This is primarily for brushing the chimichangas before the cinnamon sugar coating. It helps the sugar adhere and adds another layer of rich flavor. You could use a neutral oil like canola or vegetable oil if you prefer, especially if you’re trying to keep things dairy-free, but butter adds that undeniable dessert touch.
- Cinnamon: The other star of our coating! Ground cinnamon, mixed with sugar, transforms these fried treats into something truly irresistible. Make sure your cinnamon is fresh for the best aroma and flavor. You could also try adding a pinch of nutmeg or cardamom to your cinnamon sugar for an extra layer of spice, but I usually stick to classic cinnamon for these.
- Oil for Frying: A neutral-flavored oil with a high smoke point is best. I typically use canola, vegetable, or peanut oil. You’ll need enough to allow the chimichangas to be at least partially submerged, ensuring even cooking and a golden-brown finish.
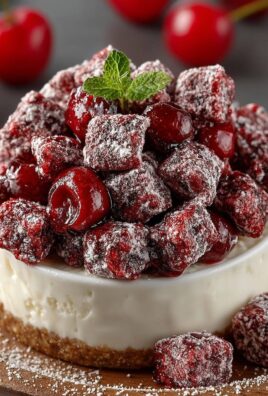
- Optional Add-ins: Get creative with your filling! I sometimes add a tablespoon or two of fruit preserves (like cherry or raspberry) swirled into the cream cheese, or a sprinkle of mini chocolate chips. Just be mindful not to overfill, as too much moisture or bulk can make them harder to seal and prone to bursting.
Step-by-Step Instructions
Making these Cheesecake Dessert Chimichangas is such a fun and rewarding process. Here’s how I get them perfectly golden and delicious every time:
- Prepare the Cheesecake Filling: First things first, get that cream cheese softened. In a medium bowl, I beat the softened cream cheese with an electric mixer on medium speed until it’s completely smooth and creamy. Then, I gradually add the granulated sugar, continuing to beat until it’s fully incorporated and the mixture is light and fluffy. Finally, I beat in the vanilla extract. Scrape down the sides of the bowl as needed to make sure everything is well combined. This is your luscious cheesecake base!
- Warm the Tortillas: This step is super important for preventing tears. I briefly warm my flour tortillas in the microwave for about 10-15 seconds each, or stack them wrapped in a damp paper towel and microwave for about 30-45 seconds until they’re warm and pliable. This makes them much easier to roll without cracking.
- Assemble the Chimichangas: Lay a warm tortilla flat on a clean surface. I spoon about 2-3 tablespoons of the cheesecake filling slightly off-center on the tortilla, leaving plenty of room around the edges. Don’t overfill, or they’ll be hard to seal! Fold one side of the tortilla over the filling, then fold in the two opposite sides (like you’re wrapping a burrito). Now, tightly roll the tortilla from the filled side until you have a neat, compact package. To seal, I usually brush the edge of the tortilla with a little water or a dab of egg wash (if I have an egg handy) before making the final roll. This helps keep them secure during frying. Repeat with the remaining tortillas and filling.
- Prepare the Frying Station: In a sturdy, heavy-bottomed pot or deep skillet, pour enough neutral oil (like canola or vegetable) to come about 1-2 inches up the sides. Heat the oil over medium-high heat until it reaches about 350-375°F (175-190°C). If you don’t have a thermometer, you can test it by dropping a small piece of tortilla into the oil; it should sizzle immediately and turn golden quickly.
- Fry the Chimichangas: Carefully place 1-2 chimichangas into the hot oil, seam-side down first, being careful not to overcrowd the pan. Fry for 2-3 minutes per side, or until they are beautifully golden brown and crispy. Keep a close eye on them, as they can brown quickly!
- Drain and Coat: Once golden, I carefully remove the chimichangas from the oil with tongs or a slotted spoon and place them on a wire rack set over a baking sheet lined with paper towels. This allows excess oil to drain off. While they’re still warm, brush each chimichanga generously with melted butter.
- Cinnamon Sugar Coating: In a shallow dish, mix together your granulated sugar and cinnamon. Immediately after brushing with butter, roll each warm chimichanga in the cinnamon sugar mixture until it’s evenly coated on all sides. The warmth helps the sugar adhere beautifully.
- Serve Immediately: These are best enjoyed warm, right after coating!
Tips & Suggestions
I’ve made my share of dessert chimichangas, and I’ve picked up a few tricks along the way to ensure they come out perfect every time. Here are my go-to tips:
- Cream Cheese Temperature is Key: I can’t stress this enough! Make sure your cream cheese is at true room temperature. If it’s too cold, you’ll end up with lumps in your filling, no matter how much you beat it. Take it out of the fridge at least an hour before you plan to start.
- Don’t Overfill: It’s tempting to cram as much cheesecake filling as possible into each tortilla, but resist! About 2-3 tablespoons is generally perfect for an 8-inch tortilla. Too much filling makes them difficult to roll and seal, and increases the chance of them bursting during frying.
- Seal Them Tight: A well-sealed chimichanga is a happy chimichanga! I often use a tiny bit of water on the final edge of the tortilla to help it stick. You could also use an egg wash (a beaten egg with a tablespoon of water) for a more robust seal. This prevents the filling from escaping into the hot oil.
- Oil Temperature Matters: Frying at the right temperature is crucial for crispy, evenly cooked chimichangas without being greasy. If the oil isn’t hot enough, they’ll soak up too much oil and become soggy. If it’s too hot, they’ll burn on the outside before the inside is properly warmed through. A deep-fry thermometer is your best friend here. Aim for 350-375°F (175-190°C).
- Alternate Cooking Methods (for a lighter option):
- Baking: If you prefer not to deep-fry, you can bake these! Preheat your oven to 400°F (200°C). Brush the assembled chimichangas generously with melted butter (or spray with cooking spray) and bake for 15-20 minutes, flipping halfway through, until golden brown and crispy. The texture won’t be quite the same as fried, but they’re still delicious!
- Air Frying: For an even crispier, less oily alternative, I love using my air fryer. Preheat your air fryer to 375°F (190°C). Brush the chimichangas with melted butter or spray with cooking spray. Air fry in batches for 8-12 minutes, flipping halfway, until golden and crisp.
- Coat While Warm: Apply the melted butter and then roll in cinnamon sugar immediately after cooking. The residual heat helps the butter stick and allows the cinnamon sugar to create a beautiful, sparkly crust.
- Serving Suggestions: These are fantastic on their own, but why stop there? I love serving them with a scoop of vanilla ice cream, a dollop of whipped cream, a drizzle of chocolate sauce or caramel, or even a side of fresh berries. A fruit compote (like cherry or berry) can also be a delightful accompaniment.
- Make Ahead Option: You can assemble the chimichangas up to a day in advance. Arrange them in a single layer on a baking sheet, cover tightly with plastic wrap, and refrigerate. Let them come closer to room temperature for about 15-20 minutes before frying or baking.
Storage
While these Cheesecake Dessert Chimichangas are undeniably at their absolute best served fresh and warm, I know sometimes you might have leftovers or want to prep ahead. Here’s how I handle storage:
- Cooked Chimichangas: If you have any leftover cooked chimichangas (it’s rare in my house!), you can store them in an airtight container at room temperature for up to 1 day. However, they will lose their crispness and the cinnamon sugar coating might become a bit damp. For slightly longer storage, you can refrigerate them for up to 2-3 days. Again, they won’t be as crispy, but the flavor will still be there. I don’t recommend freezing already cooked chimichangas, as the texture of the tortilla and the cream cheese filling can become quite unpleasant upon thawing.
- Uncooked Chimichangas (Make Ahead): This is my preferred method if I’m preparing them in advance. Assemble the chimichangas as per the instructions, but do not fry or coat them. Place them in a single layer on a baking sheet lined with parchment paper, making sure they aren’t touching. Cover the baking sheet tightly with plastic wrap or transfer them to an airtight container. You can refrigerate them for up to 24 hours. When you’re ready to cook, let them sit at room temperature for about 15-20 minutes while your oil heats up. This helps them cook more evenly and prevents excessive moisture from being introduced to the hot oil.
- Reheating Cooked Chimichangas: To bring back some of their glory, I usually reheat cooked chimichangas in an oven or air fryer.
- Oven: Preheat your oven to 350°F (175°C). Place the chimichangas on a baking sheet and bake for about 8-12 minutes, or until warmed through and the tortillas have crisped up slightly.
- Air Fryer: Reheat in an air fryer at 350°F (175°C) for about 4-6 minutes, flipping halfway, until crispy and hot. This is my favorite method for reviving them, as it really helps restore the crispness!
I generally avoid microwaving them for reheating, as it tends to make the tortillas soft and chewy rather than crispy, which defeats the purpose of a chimichanga!
Final Thoughts
And there you have it! I truly hope you’re as excited about this recipe as I am. We’ve taken the familiar joy of cheesecake and transformed it into something utterly unique and incredibly fun to eat. The magic truly happens when that warm, creamy cheesecake filling meets the crispy, golden fried tortilla, all elevated by the comforting embrace of cinnamon sugar. Each bite offers a delightful contrast of textures and flavors that is simply irresistible.
So, if you’re looking to impress your friends, surprise your family, or simply treat yourself to an unforgettable dessert experience, I wholeheartedly recommend diving into this creation. The Cheesecake Dessert Chimichangas With Cinnamon Sugar are more than just a sweet treat; they’re an adventure for your taste buds, a perfect blend of comfort and carnival fun. Give them a try – I promise, you won’t regret it!

Cheesecake Dessert Chimichangas: Cinnamon Sugar Delights
- Total Time: 45 minutes
- Yield: 4 servings 1x
Description
Indulge in the delightful fusion of creamy cheesecake and crispy chimichangas, all rolled in aromatic cinnamon sugar. This dessert is a perfect treat for any occasion, guaranteed to impress your guests!
Ingredients
- 8 oz Cream Cheese, softened
- 1/2 cup Granulated Sugar
- 1 tsp Vanilla Extract
- 4 medium Flour Tortillas (about 8-inch)
- 2 tbsp Butter, melted
- 1 tsp Ground Cinnamon
- Oil for Frying
- Optional Add-ins: fruit preserves (like cherry or raspberry), mini chocolate chips
Instructions
- Prepare the Cheesecake Filling: In a medium bowl, beat the softened cream cheese with an electric mixer on medium speed until smooth and creamy. Gradually add the granulated sugar, continuing to beat until fully incorporated and light and fluffy. Beat in the vanilla extract, scraping down the sides of the bowl as needed.
- Warm the Tortillas: Warm the flour tortillas in the microwave for about 10-15 seconds each, or stack them wrapped in a damp paper towel and microwave for about 30-45 seconds until warm and pliable.
- Assemble the Chimichangas: Lay a warm tortilla flat on a clean surface. Spoon about 2-3 tablespoons of the cheesecake filling slightly off-center on the tortilla. Fold one side of the tortilla over the filling, then fold in the two opposite sides. Roll the tortilla tightly from the filled side until you have a neat package, sealing the edge with a little water or egg wash.
- Prepare the Frying Station: In a heavy-bottomed pot or deep skillet, pour enough neutral oil to come about 1-2 inches up the sides. Heat the oil over medium-high heat until it reaches about 350-375°F (175-190°C).
- Fry the Chimichangas: Carefully place 1-2 chimichangas into the hot oil, seam-side down. Fry for 2-3 minutes per side until golden brown and crispy.
- Drain and Coat: Remove the chimichangas from the oil and place them on a wire rack over a baking sheet lined with paper towels. Brush each chimichanga generously with melted butter.
- Cinnamon Sugar Coating: In a shallow dish, mix together granulated sugar and cinnamon. Roll each warm chimichanga in the cinnamon sugar mixture until evenly coated.
- Serve Immediately: Enjoy the chimichangas warm, right after coating!
- Prep Time: 30 mins
- Cook Time: 15 mins
- Category: Dessert
- Method: Frying
- Cuisine: Mexican
Nutrition
- Serving Size: 1 chimichanga
- Calories: 320
- Sugar: 15 g
- Sodium: 250 mg
- Fat: 18 g
- Saturated Fat: 10 g
- Unsaturated Fat: 6 g
- Trans Fat: 0 g
- Carbohydrates: 35 g
- Fiber: 1 g
- Protein: 4 g
- Cholesterol: 40 mg
Keywords: Ensure cream cheese is at room temperature for a smooth filling. Don't overfill the tortillas to prevent bursting during frying. Seal the edges tightly for best results.