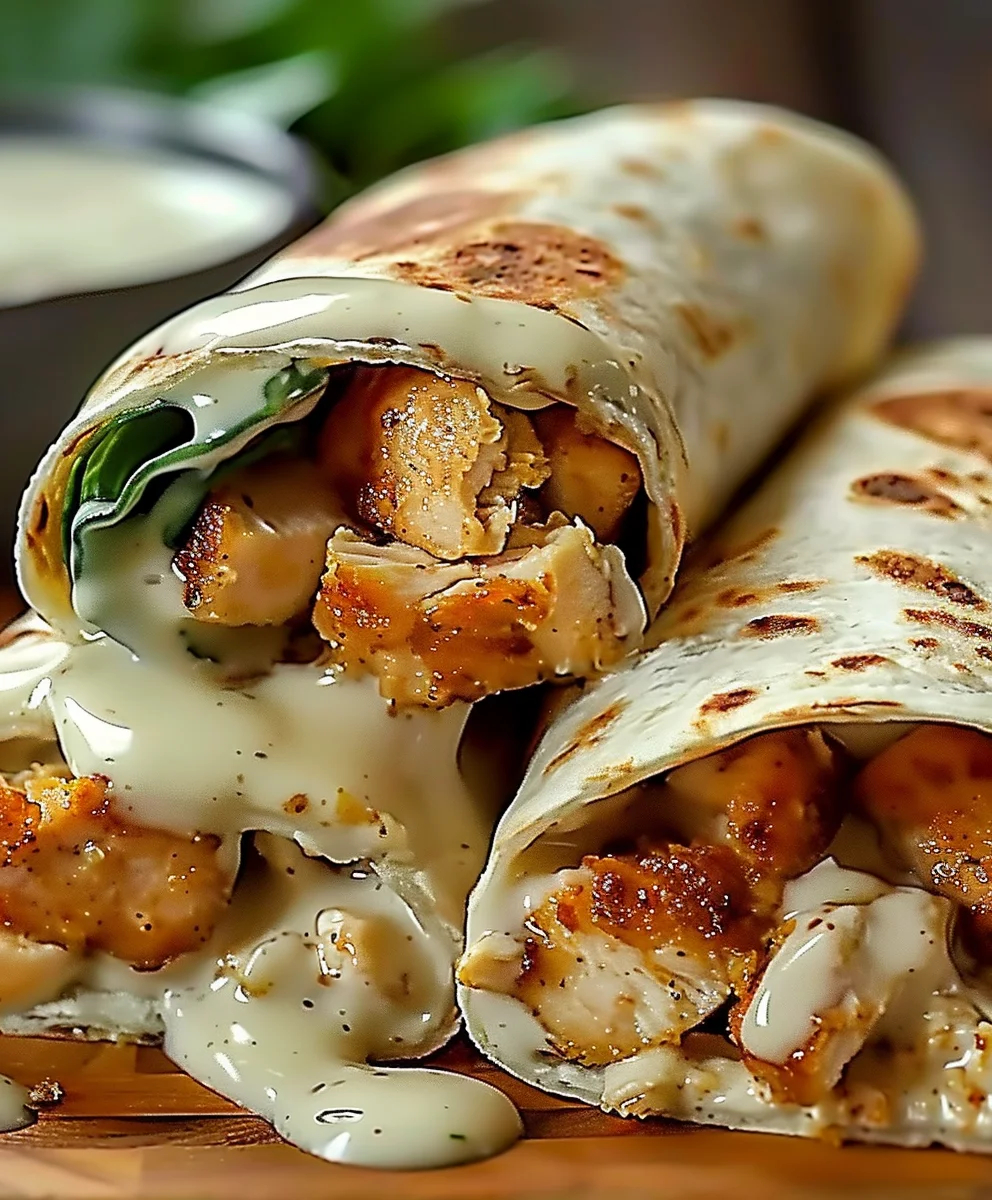
Cheesy Garlic Chicken Wraps Recipe – prepare to discover your new favorite go-to meal that perfectly marries convenience with an explosion of flavor!
Have you ever craved something incredibly satisfying, quick to prepare, and universally loved? Look no further. This delightful creation takes tender, succulent chicken, infuses it with aromatic garlic, blankets it in gooey, melted cheese, and wraps it all up in a soft tortilla. While not tracing back to ancient empires, this modern culinary hero has rapidly ascended to popularity, becoming a beloved staple for busy families and discerning foodies alike. Its widespread appeal stems from its ingenious simplicity and incredibly adaptable nature, making it a perfect fit for diverse palates and occasions.
Why This Dish is a Crowd-Pleaser
People absolutely adore this dish for countless reasons. Firstly, the taste profile is simply irresistible: the savory depth of perfectly cooked chicken is beautifully complemented by the pungent, earthy notes of fresh garlic, all softened and enriched by the creamy texture and tangy goodness of melted cheese. Every bite offers a harmonious blend that tantalizes the taste buds. Furthermore, the convenience factor is unparalleled; it’s an ideal solution for a quick weeknight dinner, a satisfying lunch, or even an impressive, fuss-free appetizer. This Cheesy Garlic Chicken Wraps Recipe is more than just a meal; it’s an invitation to enjoy comfort food that feels both indulgent and surprisingly easy to achieve.
Ingredients:
- For the Chicken:
- 1.5 lbs (about 680g) boneless, skinless chicken breasts or thighs, thinly sliced or cut into 1-inch pieces
- 2 tablespoons olive oil, divided
- 4 cloves garlic, minced (for marinade)
- 1 teaspoon dried oregano
- 1 teaspoon dried basil
- 1/2 teaspoon smoked paprika
- 1/4 teaspoon black pepper
- 1/2 teaspoon salt, or to taste
- 1 tablespoon fresh lemon juice
- For the Cheesy Garlic Sauce:
- 2 tablespoons unsalted butter
- 4-5 cloves garlic, minced (for sauce)
- 4 oz (about 113g) cream cheese, softened
- 1/2 cup milk (whole milk or half-and-half works best for richness)
- 1 cup shredded sharp cheddar cheese
- 1/2 cup shredded mozzarella cheese
- 1/4 teaspoon black pepper
- Salt to taste (start with 1/4 teaspoon)
- Pinch of red pepper flakes (optional, for a hint of heat)
- For the Wraps & Fresh Toppings:
- 8-10 large flour tortillas (burrito-sized, about 10 inches)
- 2 cups shredded crisp lettuce (Romaine or iceberg are excellent choices)
- 1 large ripe tomato, diced
- 1/2 red onion, thinly sliced or finely diced
- 1/2 cup shredded additional cheddar or Monterey Jack cheese (for layering in wraps)
- Fresh parsley or cilantro, chopped (for garnish, optional)
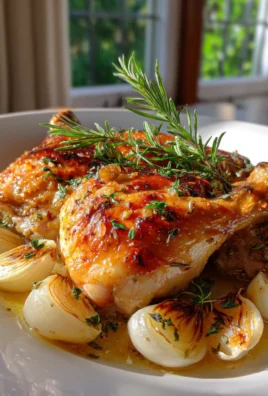
Preparing the Flavorful Chicken
- Prepare the Chicken: First things first, let’s get our chicken ready. If you’re using chicken breasts, I find that slicing them horizontally to create thinner cutlets, then dicing them into roughly 1-inch pieces works wonderfully. This ensures they cook evenly and fit perfectly into our wraps. For chicken thighs, simply cut them into similar 1-inch pieces. Pat your chicken thoroughly dry with paper towels; this is a crucial step for achieving a nice sear!
- Marinate the Chicken: In a medium bowl, combine your prepped chicken with 1 tablespoon of olive oil, the minced garlic (4 cloves), dried oregano, dried basil, smoked paprika, black pepper, and salt. Add the fresh lemon juice – this not only adds a bright flavor but also helps tenderize the chicken. Toss everything together until every piece of chicken is beautifully coated. Now, cover the bowl and let it marinate in the refrigerator for at least 20-30 minutes. If you have more time, an hour or even up to 4 hours will deepen the flavors even more. Trust me, this marination step is what takes our “Cheesy Garlic Chicken Wraps Recipe” to the next level of deliciousness.
- Cook the Chicken: Heat the remaining 1 tablespoon of olive oil in a large skillet or frying pan over medium-high heat. Once the oil is shimmering and hot, add the marinated chicken in a single layer. Avoid overcrowding the pan; if necessary, cook the chicken in batches. This allows the chicken to sear and brown properly rather than steam. Cook for 4-6 minutes per side, or until the chicken is golden brown, cooked through, and reaches an internal temperature of 165°F (74°C). Once cooked, remove the chicken from the pan and set it aside on a plate. You can loosely tent it with foil to keep it warm while you prepare the other components. Resting the chicken ensures it stays juicy!
Crafting the Irresistible Cheesy Garlic Sauce
This cheesy garlic sauce is the heart and soul of our “Cheesy Garlic Chicken Wraps Recipe.” It’s creamy, garlicky, and utterly addictive!
- Melt the Butter and Sauté Garlic: Using the same skillet you used for the chicken (no need to clean it, those browned bits add extra flavor!), reduce the heat to medium. Add the 2 tablespoons of unsalted butter and let it melt. Once melted, add the 4-5 cloves of minced garlic for the sauce. Sauté the garlic for about 1 minute, just until it becomes fragrant. Be very careful not to burn the garlic, as burnt garlic can taste bitter. We want that beautiful, aromatic garlic essence.
- Incorporate Cream Cheese and Milk: Add the softened cream cheese to the pan. Use a whisk or a wooden spoon to break it down and stir it until it starts to melt and become smooth. Gradually pour in the 1/2 cup of milk, whisking continuously to combine it with the cream cheese and melted butter. Keep stirring until you have a smooth, lump-free base. This might take a couple of minutes, but patience here pays off.
- Melt in the Cheeses: Now comes the best part! Add the shredded sharp cheddar cheese and mozzarella cheese to the pan. Continue to stir constantly over medium-low heat. The goal here is to gently melt the cheeses until they are completely smooth and integrated into the sauce. This will create a rich, thick, and utterly gooey texture. Don’t rush this process; low and slow heat prevents the cheese from becoming oily or grainy.
- Season the Sauce: Once the sauce is silky smooth, season it with 1/4 teaspoon of black pepper and salt to taste. I usually start with 1/4 teaspoon of salt and add more if needed after tasting. If you like a little kick, now is the time to add that pinch of red pepper flakes. Give it one final stir. Remove the sauce from the heat; it will thicken slightly as it cools. This creamy, dreamy sauce is what truly defines our “Cheesy Garlic Chicken Wraps Recipe.”
Prepping the Fresh Toppings and Wraps
While our chicken and sauce are spectacular, the fresh, crisp components are essential for a balanced and satisfying wrap experience.
- Prepare Your Veggies: Wash and thoroughly dry your lettuce. Shred it finely. Dice your ripe tomato into small, bite-sized pieces. For the red onion, you can either thinly slice it for a stronger onion flavor or finely dice it if you prefer a milder taste and better distribution in the wrap. Having all your fresh toppings ready and within reach will make the assembly process much smoother and more enjoyable.
- Warm the Tortillas (Optional but Recommended): While not strictly necessary, lightly warming your flour tortillas can make a world of difference. It makes them more pliable and less likely to crack when you fold them, and a warm tortilla just tastes better! You can warm them individually in a dry skillet over medium heat for about 15-20 seconds per side, microwave them in a stack wrapped in a damp paper towel for 30-45 seconds, or even wrap them in foil and place them in a preheated oven at 300°F (150°C) for 5-10 minutes.
Assembling Your Cheesy Garlic Chicken Wraps
Now for the grand finale – bringing all these delicious components together to create your amazing “Cheesy Garlic Chicken Wraps Recipe”!
- Lay Out a Tortilla: Place a warmed flour tortilla on a clean, flat surface. Think of it as your canvas for culinary creativity.
- Spread the Cheesy Garlic Sauce: Spoon a generous amount of our luscious cheesy garlic sauce down the center of the tortilla, leaving about an inch or two empty around the edges. Don’t be shy with the sauce; it’s the star! However, avoid overfilling it to ensure easy folding.
- Add the Chicken: Next, place a portion of your perfectly cooked, marinated chicken over the sauce. Distribute it evenly across the sauced area.
- Layer on the Fresh Toppings: Now, pile on your fresh toppings! Add a good amount of shredded lettuce, diced tomato, and sliced or diced red onion over the chicken. The contrast of the cool, crisp vegetables against the warm chicken and sauce is delightful.
- Sprinkle More Cheese: For that extra burst of cheesiness that truly embodies a “Cheesy Garlic Chicken Wraps Recipe,” sprinkle a bit more shredded cheddar or Monterey Jack cheese over the vegetables. This also helps to bind everything together slightly once wrapped.
-
Expert Folding Technique:
This is where technique comes into play for a neat, portable wrap:
- First, fold the left and right sides of the tortilla inward, over the filling, by about 1-2 inches. This creates a secure “pocket” to hold the ingredients.
- Then, fold the bottom edge of the tortilla tightly up and over the filling. Tuck it in firmly.
- While maintaining that tight fold, begin to roll the wrap away from you, from the bottom to the top. Keep the roll as tight as possible without tearing the tortilla. Continue rolling until you have a compact, cylinder-shaped wrap.
Repeat this process for all remaining tortillas and filling ingredients until you have a beautiful stack of homemade Cheesy Garlic Chicken Wraps!
Optional: Grilling or Pan-Frying for Extra Crispiness
For an extra layer of texture and warmth, I absolutely love to lightly grill or pan-fry my assembled wraps.
- Crisp Up the Wraps: Heat a dry skillet or a grill pan over medium heat. Place the assembled wraps, seam-side down, in the hot pan. Cook for 2-3 minutes per side, or until the tortilla is golden brown and slightly crispy, and the cheese inside has melted wonderfully. This also helps to seal the wrap and makes it even more enjoyable to eat.
Serving Suggestions and Customization for Your Cheesy Garlic Chicken Wraps
These Cheesy Garlic Chicken Wraps are fantastic on their own, but here are a few ideas to make them even better or to suit different preferences:
- Serve Immediately: These wraps are best enjoyed fresh and warm, especially if you’ve given them that extra crisping step. The flavors are vibrant, and the textures are perfect.
- Pairing: They pair wonderfully with a simple green salad, a side of crispy fries, or even a refreshing fruit salad. For a light lunch, a cup of your favorite soup would also be a great accompaniment.
- Heat Factor: If you love a bit more spice, consider adding a dash of cayenne pepper to your chicken marinade or a pinch more red pepper flakes to the sauce. You could also include finely chopped jalapeños in your fresh toppings.
- Vegetable Variations: Feel free to customize the vegetables based on what you love or have on hand. Sliced bell peppers (any color), corn kernels, black beans, or even some sautéed mushrooms would be excellent additions.
- Cheese Choices: While cheddar and mozzarella provide classic meltiness and flavor, don’t hesitate to experiment with other cheeses like Monterey Jack, Pepper Jack (for a kick), or even a smoky provolone for a different profile in your “Cheesy Garlic Chicken Wraps Recipe.”
- Make-Ahead Tips: You can prepare the chicken and the cheesy garlic sauce a day in advance and store them separately in airtight containers in the refrigerator. When you’re ready to eat, simply reheat the chicken and sauce gently, prepare your fresh toppings, and assemble the wraps. This makes for a super quick weeknight meal!
- Storage: If you have any leftover assembled wraps (though I doubt you will!), you can wrap them tightly in plastic wrap and store them in the refrigerator for up to 2 days. Reheat gently in a dry skillet or in the microwave until warmed through.
Enjoy creating and devouring this fantastic “Cheesy Garlic Chicken Wraps Recipe”! It’s a crowd-pleaser that’s bursting with flavor in every single bite.

Conclusion:
So, there you have it – my absolute favorite way to transform simple ingredients into something truly extraordinary. I genuinely believe this isn’t just another meal; it’s an experience waiting to happen in your kitchen. What makes this recipe a non-negotiable addition to your repertoire? Well, for starters, it hits all the right notes: the tender, perfectly seasoned chicken, the irresistible gooey melted cheese, the fragrant whisper of garlic that permeates every single bite, all wrapped snugly in a soft tortilla. It’s comfort food elevated, but without any of the fuss. You get that gourmet-feeling satisfaction on a weeknight schedule, which, let’s be honest, is a culinary miracle in itself. It’s the kind of dish that brings smiles to faces, sparks conversations around the dinner table, and leaves everyone feeling utterly content. It’s surprisingly quick to assemble, making it ideal for those busy evenings when you crave something homemade and delicious but are short on time. Yet, it also feels special enough to serve when friends come over, garnering compliments with minimal effort. The balance of flavors is just impeccable – savory, slightly tangy, with that beautiful richness from the cheese and a fresh counterpoint from any added vegetables. It’s a complete meal in a handheld package, minimizing dishes and maximizing flavor, making it a truly versatile and beloved option for any occasion.
Now, while these wraps are spectacular just as they are, I love to think about how we can take them even further or adapt them to suit different tastes and occasions.
Serving Suggestions:
For a complete meal, I often serve these alongside a crisp, simple green salad with a light vinaigrette. The freshness cuts through the richness beautifully, creating a perfect balance. A bowl of warm tomato soup or a creamy roasted red pepper soup also makes for a cozy pairing, especially on a cooler evening, offering that comforting warmth. And don’t forget the dipping sauces! A side of creamy ranch, a spicy sriracha mayo for those who love a kick, a cool avocado crema, or even just a squeeze of fresh lime juice can elevate each bite with a burst of extra flavor. If you’re feeling adventurous, a quick homemade coleslaw adds a lovely crunch and tang that complements the savory chicken perfectly. They also make fantastic appetizers, cut into smaller pinwheels, for a party spread – always a crowd-pleaser!
Creative Variations to Explore:
-
Cheese Choices:
While cheddar is a timeless classic for its meltability and flavor, feel free to experiment! Monterey Jack offers a milder, extra-melty quality, Colby is another great all-rounder, or try pepper jack for a subtle, delightful kick. A blend of mozzarella and provolone could also be amazing, giving it a more Italian-inspired twist. A sprinkle of freshly grated Parmesan cheese, either mixed into the filling or on top during the final warming stage, adds another layer of irresistible umami and a wonderfully nutty depth.
-
Veggies Galore:
Want to sneak in more nutrients? Sautéed spinach, finely diced bell peppers (any color!), thinly sliced onions, or even some sweet corn kernels can be added directly to the chicken mixture, boosting flavor and nutrition. For fresh additions after heating, shredded crisp lettuce, diced ripe tomatoes, or a dollop of vibrant fresh salsa are always welcome, adding texture and brightness.
-
Spice It Up:
If you’re a fan of heat, a pinch of red pepper flakes in the chicken mixture, a dash of your favorite hot sauce, or incorporating some finely chopped jalapeños (fresh or pickled) will certainly give it that extra zing you crave. Smoked paprika can also add a wonderful, deep, smoky flavor profile that complements the garlic and cheese beautifully.
-
Protein Swap:
While chicken is undeniably fantastic, this concept works beautifully with other proteins too. Leftover shredded turkey is an excellent substitute, ground beef or even plant-based crumbles could be used for a vegetarian option. Just remember to adjust cooking times accordingly to ensure everything is thoroughly heated and cooked through.
-
Wrap Alternatives:
Not a fan of traditional flour tortillas? No problem! Try whole wheat tortillas for a healthier twist, or even large crisp lettuce cups for a low-carb option (though you might lose some of the “wrap” integrity for the full melty cheese experience). Pita bread or flatbreads could also be used and folded over, creating a different textural sensation.
-
Make it a Bowl:
Deconstruct it for a different presentation! Serve the cheesy garlic chicken mixture over a bed of fluffy rice, quinoa, or even cauliflower rice, topped with your favorite fresh salsa, creamy avocado slices, and a dollop of cooling sour cream or Greek yogurt. It’s the same great flavor, just a different, equally delicious, presentation.
-
Garlic Level:
I’m a firm believer that you can never have too much garlic, but adjust it to your personal preference. For a sweeter, mellower, and less pungent garlic flavor, consider roasting the garlic beforehand. This transforms its sharp bite into a rich, almost buttery sweetness that is absolutely divine.
I am truly passionate about this Cheesy Garlic Chicken Wraps Recipe, and I sincerely hope you give it a try. It’s one of those recipes that consistently delivers on flavor, ease, and sheer deliciousness, making it a true staple in my kitchen. I promise, once you experience the golden, slightly crisp tortilla giving way to that juicy, cheesy, garlicky chicken filling, you’ll understand why I rave about it so much. Don’t let another weeknight pass by without experiencing the joy and satisfaction of these incredible wraps. Your culinary adventure starts now!
And please, when you do make them, I would absolutely love to hear from you. Share your photos on social media – tag me if you do! – or drop a comment below to let me know how they turned out, what amazing variations you tried, or what your family thought. Your feedback truly inspires me and helps our little cooking community grow stronger and more creative. Happy cooking, my friends! I can’t wait to hear about your cheesy, garlicky success!
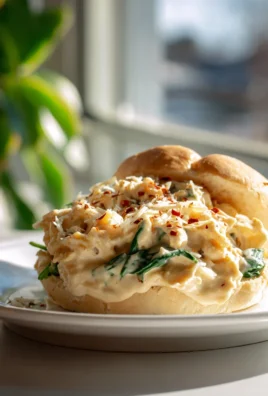
Cheesy Garlic Chicken Wraps
Prepare to discover your new favorite go-to meal that perfectly marries convenience with an explosion of flavor! This delightful creation takes tender, succulent chicken, infuses it with aromatic garlic, blankets it in gooey, melted cheese, and wraps it all up in a soft tortilla.
Ingredients
-
2 cups cooked chicken, shredded
-
1 cup shredded mozzarella cheese
-
1/2 cup cream cheese, softened
-
1/4 cup sour cream
-
2 cloves garlic, minced
-
1 teaspoon garlic powder
-
1 teaspoon onion powder
-
1/2 teaspoon salt
-
1/4 teaspoon black pepper
-
4 large flour tortillas
-
1 cup fresh spinach leaves
-
1/2 cup diced tomatoes
-
1/4 cup chopped fresh parsley (optional)
-
Olive oil for cooking
Instructions
-
Step 1
In a bowl, combine shredded cooked chicken, softened cream cheese, sour cream, minced garlic, garlic powder, onion powder, salt, and black pepper. Mix well. Fold in 1 cup shredded mozzarella cheese. -
Step 2
Wash fresh spinach and dice tomatoes. Chop fresh parsley, if using. -
Step 3
Lightly warm flour tortillas in a dry skillet or microwave until pliable. -
Step 4
Spread a generous portion of the chicken mixture down the center of each warmed tortilla. Top with fresh spinach, diced tomatoes, and optional parsley. -
Step 5
Fold in the left and right sides of the tortilla over the filling (about 1-2 inches). Then, fold the bottom edge tightly up and over the filling. Roll the wrap away from you, keeping it compact, until a tight cylinder is formed. -
Step 6
For a golden, crispy finish, lightly brush assembled wraps with olive oil. Pan-fry in a dry skillet over medium heat for 2-3 minutes per side until golden brown. Serve immediately.
Important Information
Nutrition Facts (Per Serving)
It is important to consider this information as approximate and not to use it as definitive health advice.
Allergy Information
Please check ingredients for potential allergens and consult a health professional if in doubt.