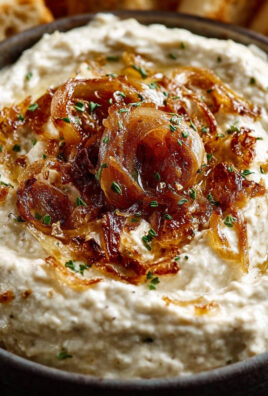
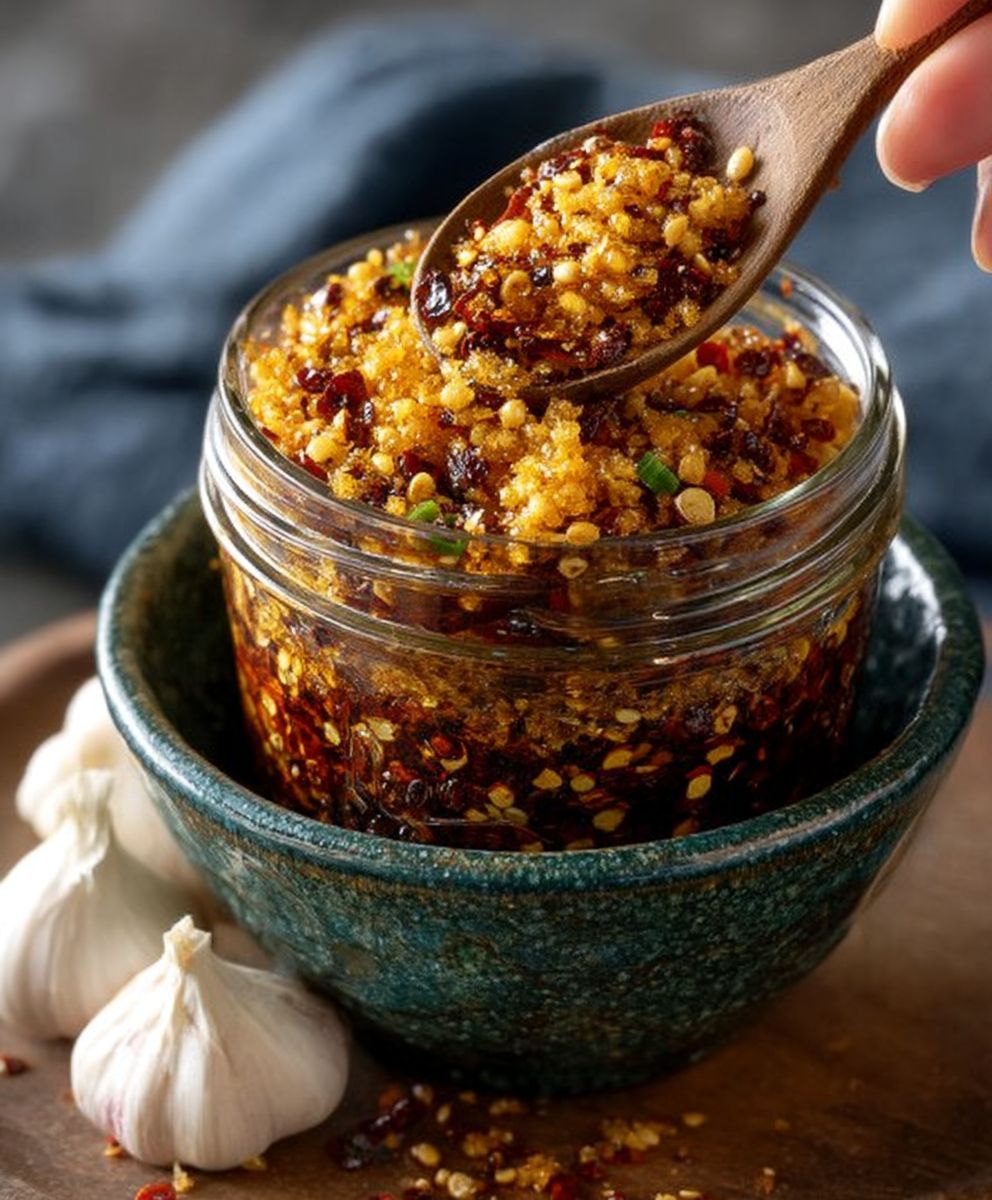
Chili Garlic Crunch: Prepare to have your taste buds tantalized! This isn’t just a condiment; it’s a flavor explosion waiting to happen. Imagine a symphony of textures and tastes – crispy garlic, fiery chili flakes, and a satisfying crunch that elevates every dish it graces. I’m so excited to share this recipe with you!
While its exact origins are debated, the concept of infusing oil with chili and garlic has roots in various Asian cuisines. From Southeast Asian chili oils to Chinese chili garlic sauces, the idea of capturing these bold flavors in a shelf-stable format has been around for generations. This particular iteration, Chili Garlic Crunch, has taken the culinary world by storm, and for good reason!
What makes this condiment so irresistible? It’s the perfect balance of heat, savory garlic notes, and that addictive crunch. People adore it because it’s incredibly versatile. Sprinkle it on eggs, noodles, avocado toast, pizza, or even ice cream (yes, really!). It adds depth and complexity to even the simplest meals. Plus, it’s incredibly easy to make at home, allowing you to customize the spice level and ingredients to your liking. Get ready to add a serious kick to your kitchen creations!

Ingredients:
- 1 cup dried red chili flakes (Korean gochugaru or a mix of chili flakes for varying heat)
- 1/2 cup neutral oil (vegetable, canola, or peanut oil)
- 1/4 cup minced garlic (about 6-8 cloves)
- 1/4 cup minced shallots (about 2-3 shallots)
- 2 tablespoons soy sauce (low sodium preferred)
- 1 tablespoon brown sugar (packed)
- 1 tablespoon sesame seeds (toasted or untoasted)
- 1 teaspoon red pepper powder (optional, for extra color and heat)
- 1/2 teaspoon salt (or to taste)
- 1/4 teaspoon ground Sichuan peppercorns (optional, for a numbing sensation)
Preparing the Aromatics:
Okay, let’s get started! The key to a really flavorful chili garlic crunch is to build a solid aromatic base. This means taking our time with the garlic and shallots to really coax out their deliciousness.
- Mincing the Garlic and Shallots: This is probably the most tedious part, but trust me, it’s worth it. You want a fine mince for both the garlic and shallots. A food processor can work in a pinch, but be careful not to over-process them into a paste. I prefer to do it by hand for better control. Aim for pieces that are roughly the same size so they cook evenly.
- Preparing the Chili Flakes: If you’re using larger chili flakes, you might want to give them a quick pulse in a spice grinder or food processor to break them down a bit. This will help them release their flavor more readily into the oil. However, don’t grind them into a powder – we still want some texture. If you’re using gochugaru, you can skip this step as it’s already finely ground.
Infusing the Oil:
This is where the magic happens! We’re going to gently infuse the oil with the flavors of garlic, shallots, and chili. Low and slow is the name of the game here. We don’t want to burn anything, just slowly extract all that goodness.
- Heating the Oil: In a medium-sized saucepan or wok, add the neutral oil. Heat it over medium-low heat. The goal is to get the oil hot enough to gently sizzle the aromatics, but not so hot that they burn. A good way to test the temperature is to drop a tiny piece of garlic into the oil. If it sizzles gently, you’re good to go.
- Adding the Garlic and Shallots: Once the oil is heated, add the minced garlic and shallots. Stir constantly with a heat-resistant spatula or wooden spoon. We want to cook them until they are golden brown and fragrant, about 10-15 minutes. Be patient! This process takes time. Keep a close eye on them, as they can go from golden to burnt very quickly. If they start to brown too fast, reduce the heat.
- Adding the Chili Flakes: Once the garlic and shallots are golden brown, carefully add the chili flakes. Stir constantly to ensure they are evenly distributed in the oil. Continue cooking for another 2-3 minutes, until the chili flakes have deepened in color and the oil is a vibrant red. Be careful not to burn the chili flakes, as they will become bitter.
Adding the Flavor Boosters:
Now it’s time to add those extra ingredients that will really take our chili garlic crunch to the next level. We’re talking soy sauce, brown sugar, sesame seeds, and those optional flavor enhancers like red pepper powder and Sichuan peppercorns.
- Adding the Soy Sauce and Brown Sugar: Carefully pour in the soy sauce and brown sugar. The mixture will sizzle and bubble, so be cautious. Stir constantly until the brown sugar is completely dissolved. The soy sauce adds a savory umami flavor, while the brown sugar provides a touch of sweetness that balances the heat.
- Adding the Sesame Seeds and Optional Spices: Stir in the sesame seeds, red pepper powder (if using), Sichuan peppercorns (if using), and salt. The sesame seeds add a nutty flavor and a pleasant crunch. The red pepper powder adds extra color and heat, while the Sichuan peppercorns provide a unique numbing sensation that’s characteristic of Sichuan cuisine.
- Simmering and Adjusting Seasoning: Reduce the heat to low and let the mixture simmer for another 2-3 minutes, stirring occasionally. This will allow the flavors to meld together. Taste and adjust the seasoning as needed. If you want it spicier, add more chili flakes or red pepper powder. If you want it sweeter, add a little more brown sugar. If you want it saltier, add a pinch more salt.
Cooling and Storing:
Almost there! Now we just need to let our chili garlic crunch cool down and then store it properly so we can enjoy it for weeks to come.
- Cooling the Chili Garlic Crunch: Remove the saucepan from the heat and let the chili garlic crunch cool completely. As it cools, the flavors will continue to develop and deepen. It’s important to let it cool completely before storing it, as this will prevent condensation from forming and potentially spoiling the crunch.
- Storing the Chili Garlic Crunch: Once the chili garlic crunch is completely cool, transfer it to an airtight container. A glass jar is ideal. Make sure the jar is clean and dry. Store the chili garlic crunch in a cool, dark place, such as a pantry or cupboard. It will keep for several weeks, or even months, if stored properly.
Tips and Variations:
Want to customize your chili garlic crunch? Here are a few ideas to get you started:
- Adjust the Heat Level: Use different types of chili flakes to control the heat level. For a milder crunch, use gochugaru or a mild chili flake blend. For a spicier crunch, use a hotter chili flake blend or add a pinch of cayenne pepper.
- Add Different Spices: Experiment with different spices to create your own unique flavor profile. Try adding ground ginger, cumin, coriander, or star anise.
- Add Nuts: For extra crunch and flavor, add chopped peanuts, cashews, or almonds. Add them to the oil along with the garlic and shallots.
- Add Dried Shrimp: For a more complex and savory flavor, add a small amount of dried shrimp. Soak the dried shrimp in warm water for 15 minutes, then chop them finely and add them to the oil along with the garlic and shallots.
- Make it Vegan: To make this recipe vegan, use a vegan-friendly soy sauce and brown sugar.
Serving Suggestions:
The possibilities are endless! Here are just a few ideas:
- Drizzle it over noodles: This is a classic way to enjoy chili garlic crunch. It adds a burst of flavor and texture to any type of noodle dish.
- Top your eggs with it: Scrambled, fried, or poached, eggs are always better with a sprinkle of chili garlic crunch.
- Add it to stir-fries: Give your stir-fries a spicy kick with a spoonful of chili garlic crunch.
- Use it as a condiment for dumplings: Dip your dumplings in chili garlic crunch for an extra layer of flavor.
- Spread it on toast: For a simple and delicious snack, spread some chili garlic crunch on toast.
- Mix it into rice: Add a spoonful of chili garlic crunch to your rice for a flavorful side dish.
- Use it as a marinade: Marinate chicken, pork, or tofu in chili garlic crunch for a spicy and flavorful meal.
Conclusion:
This Chili Garlic Crunch isn’t just another condiment; it’s a flavor explosion waiting to happen! I truly believe this recipe is a must-try for anyone who loves adding a kick and a whole lot of umami to their meals. The combination of crispy garlic, fiery chili flakes, and that satisfying crunch is simply irresistible. It’s the kind of thing you’ll find yourself reaching for again and again, transforming even the simplest dishes into something special.
Think about it: a spoonful on your morning eggs, stirred into your noodles, or even just sprinkled over a plain bowl of rice. The possibilities are endless! And that’s what makes this recipe so fantastic – its versatility. It’s not just for Asian-inspired dishes either. I’ve found it works wonders on avocado toast, grilled vegetables, and even as a surprising topping for pizza.
Serving Suggestions and Variations:
Don’t be afraid to experiment! If you’re feeling adventurous, try adding a touch of sweetness with a drizzle of honey or maple syrup. For a nuttier flavor, incorporate some toasted sesame seeds or chopped peanuts. And if you’re a real spice fiend, feel free to increase the amount of chili flakes to your liking. Remember, this recipe is a starting point, a canvas for your own culinary creativity.
Here are a few of my favorite ways to use this incredible Chili Garlic Crunch:
* Elevate your eggs: Scrambled, fried, or poached, a sprinkle of this crunch adds a delightful texture and flavor.
* Spice up your noodles: Toss it with your favorite noodles and a splash of soy sauce for a quick and easy meal.
* Boost your veggies: Roasted broccoli, grilled asparagus, or even a simple salad are instantly elevated with a spoonful of this goodness.
* Top your tacos: Add a crunchy and spicy element to your tacos for an extra layer of flavor.
* Enhance your soups: A swirl of this crunch in your soup adds a delightful texture and a burst of flavor.
I’ve even used it as a marinade for chicken and fish, and the results were absolutely delicious! The garlic and chili infuse the protein with incredible flavor, and the crispy bits add a wonderful texture.
I know you might be thinking, “Another condiment recipe? Do I really need this?” And my answer is a resounding YES! This Chili Garlic Crunch is so much more than just a condiment; it’s a flavor enhancer, a texture booster, and a culinary game-changer. It’s the secret ingredient that will take your dishes from ordinary to extraordinary.
So, what are you waiting for? Gather your ingredients, fire up your stove, and get ready to experience the magic of this incredible recipe. I promise you won’t be disappointed.
I’m so excited for you to try this recipe and discover all the amazing ways you can use it. Once you do, please come back and share your experience in the comments below! I’d love to hear how you’re using it, what variations you’ve tried, and what dishes you’ve transformed with this amazing Chili Garlic Crunch. Happy cooking!
Chili Garlic Crunch: The Ultimate Guide to Flavor and Uses
Homemade chili garlic crunch, packed with flavor and spice. Perfect for adding a kick to noodles, eggs, stir-fries, and more!
Ingredients
Instructions
Recipe Notes
- Heat Level: Adjust the heat by using different types of chili flakes. Gochugaru is milder.
- Spice Variations: Experiment with ground ginger, cumin, coriander, or star anise.
- Add Nuts: Add chopped peanuts, cashews, or almonds along with the garlic and shallots.
- Dried Shrimp: Add finely chopped dried shrimp for a savory flavor. Soak in warm water for 15 minutes before adding.
- Vegan: Use vegan-friendly soy sauce and brown sugar.
- Serving Suggestions: Drizzle over noodles, top eggs, add to stir-fries, use as a dumpling condiment, spread on toast, mix into rice, or use as a marinade.