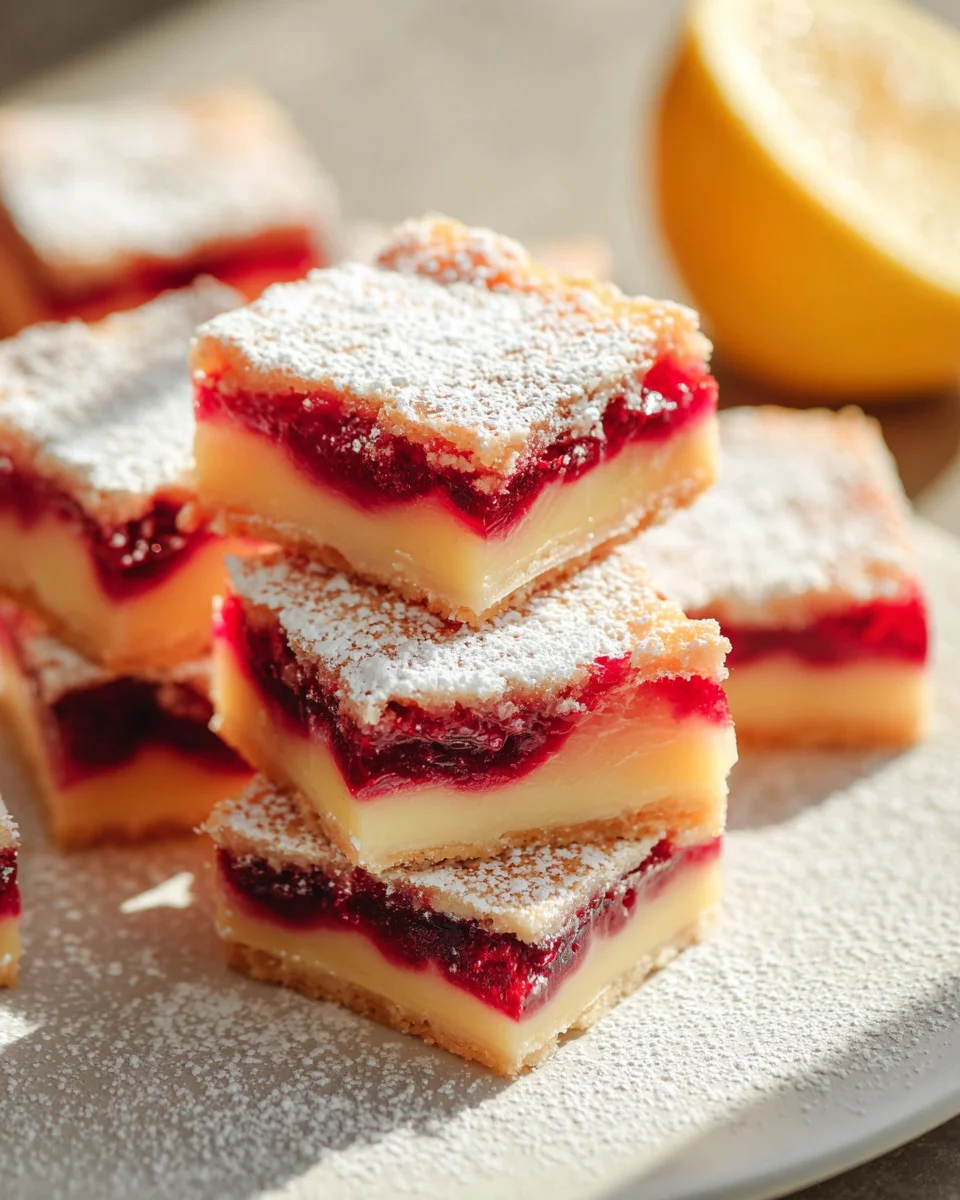
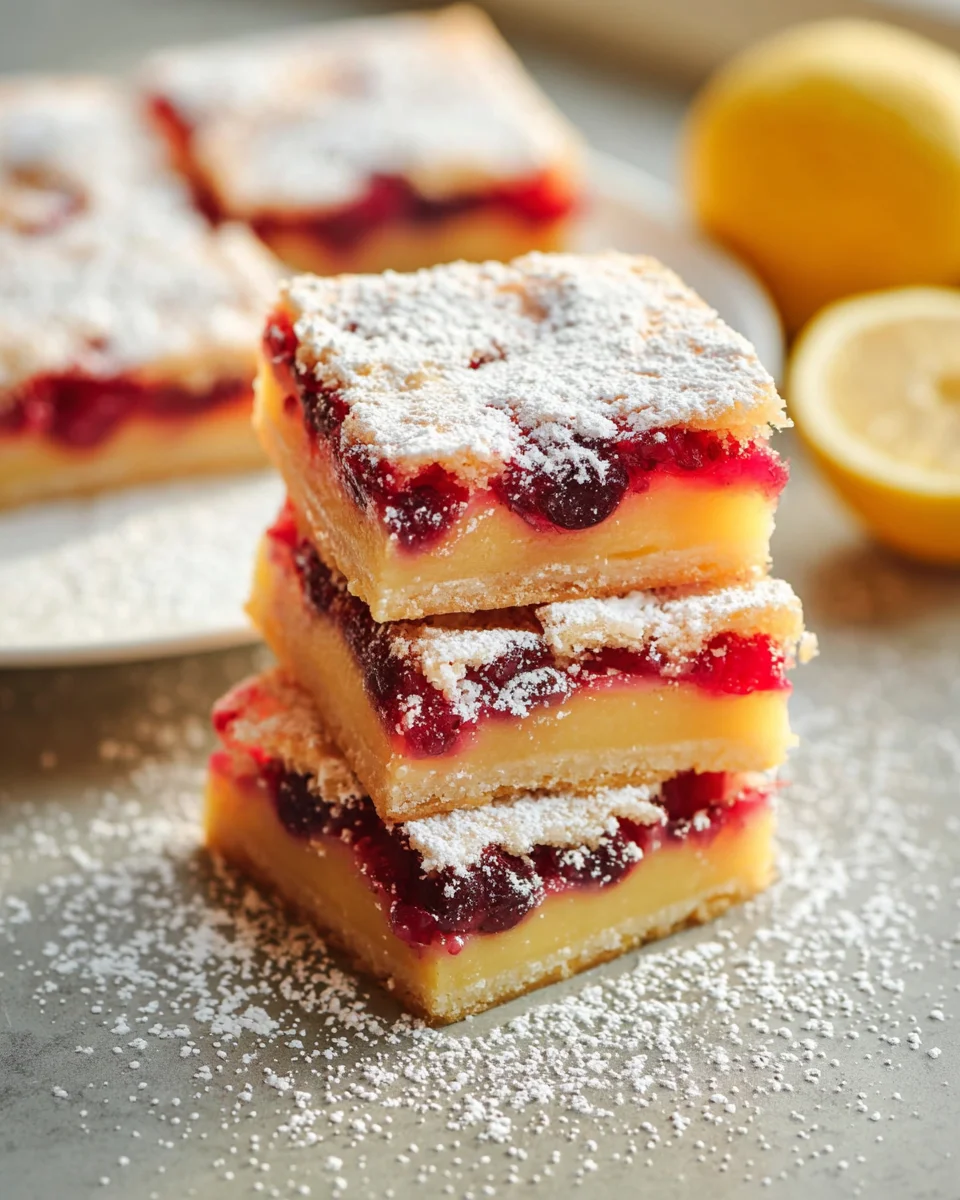
Cranberry Lemon Bars
Cranberry Lemon Bars. Oh, where do I even begin with these delightful little squares of sunshine? This isn’t just a recipe; it’s an invitation to experience a symphony of flavors that will brighten your day, no matter the season. I absolutely adore how these bars take the beloved classic lemon bar and elevate it with a sophisticated, fruity twist that makes them truly special.
What makes these Cranberry Lemon Bars so extraordinary is that incredible dance between the tartness of fresh cranberries and the vibrant, zesty punch of lemon. It’s a flavor combination that’s both invigorating and comforting, creating a wonderfully balanced sweet-tart profile that keeps you coming back for more. There’s a beautiful depth here that you just don’t get with plain lemon bars, and that gorgeous blush of cranberry adds a touch of elegance.
You are going to fall head over heels for these bars because they are simply irresistible! They manage to be both incredibly indulgent and wonderfully refreshing. The buttery, tender shortbread crust provides the perfect foundation, crumbling delicately in your mouth, while the creamy, smooth lemon-cranberry filling delivers an explosion of bright, tangy flavor with every bite. I find myself making them for everything from casual brunches to elegant dinner parties because they always impress and are surprisingly easy to whip up.
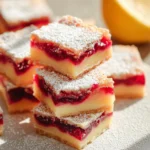
In a nutshell, this dish is a delectable two-layered bar featuring a golden, buttery shortbread base crowned with a luscious, intensely flavored custard filling infused with the bright, citrusy zing of lemon and the deep, tart notes of cranberry. Get ready to bake a treat that looks as good as it tastes and will undoubtedly become a new favorite in your kitchen!
Ingredient Notes
Crafting the perfect batch of Cranberry Lemon Bars starts with understanding the role each ingredient plays. I find that using high-quality components truly makes a difference in the final taste and texture of these delightful treats.
- For the Shortbread Crust:
- All-Purpose Flour: This forms the sturdy, yet tender foundation of our bars. It provides the structure for the shortbread.
- Granulated Sugar: Just enough to sweeten the crust without making it overly rich, balancing the tartness of the filling.
- Salt: A pinch enhances all the other flavors, bringing out the butteriness of the crust.
- Unsalted Butter (cold, cubed): This is paramount! Cold butter ensures a tender, crumbly crust. I always use unsalted so I can control the salt content precisely.
- For the Cranberry Lemon Filling:
- Granulated Sugar: This is the primary sweetener for our tart lemon and cranberry filling. Adjust to your preference – I like mine fairly tart, but you can add a little more if you prefer a sweeter bar.
- Large Eggs: Eggs are crucial here, providing richness, structure, and helping the filling set beautifully into a custard-like consistency.
- All-Purpose Flour: A small amount helps to slightly thicken the filling, preventing it from being too runny and ensuring it sets up perfectly.
- Fresh Lemon Zest: Don’t skip this! The zest holds the vibrant lemon oils, giving our bars an intense, aromatic lemon flavor that juice alone can’t achieve.
- Fresh Lemon Juice: The essential tart component! Freshly squeezed lemon juice is non-negotiable for that bright, zesty tang. Bottled simply won’t yield the same vibrant flavor.
- Fresh or Frozen Cranberries: The star of the show alongside lemon! Whether fresh or frozen, these ruby gems provide bursts of tartness and beautiful color. If using frozen, there’s no need to thaw them first.
- Optional Topping:
- Powdered Sugar: A light dusting adds a touch of elegance and an extra hint of sweetness, complementing the tartness of the bars.
- Substitutions I’ve Tried:
- Butter: For a dairy-free option, I’ve had success using a good quality plant-based butter substitute in the crust. The texture can vary slightly, but it still works well.
- Flour: If you’re looking for a gluten-free option, a 1:1 gluten-free all-purpose baking blend can often be substituted in both the crust and the filling. Just ensure it contains xanthan gum for best results.
- Cranberries: While this recipe is all about the cranberry, if fresh or frozen aren’t available, you could technically use dried cranberries. I would suggest rehydrating them slightly in hot water for about 10 minutes, then draining thoroughly, to prevent them from becoming too tough in the baked filling. However, fresh or frozen are truly preferred for their juiciness.
Step-by-Step Instructions
Making Cranberry Lemon Bars might seem intimidating, but I promise you, with these clear steps, you’ll be baking like a pro in no time. Precision is key, especially with baking, so follow along!
- Prepare Your Pan: First, I always preheat my oven to 350°F (175°C). Then, I line a 9×13 inch baking pan with parchment paper, leaving an overhang on the sides. This makes it incredibly easy to lift the finished bars out for cutting later. A light spray of cooking non-stick spray under the parchment helps it stay put.
- Make the Shortbread Crust:
- In a medium bowl, I whisk together the all-purpose flour, granulated sugar, and salt for the crust.
- Next, I add the cold, cubed unsalted butter to the dry ingredients. Using a pastry blender, my fingertips, or a food processor, I cut the butter into the flour mixture until it resembles coarse crumbs. Some pea-sized pieces of butter are perfectly fine – they contribute to the tender texture.
- I then firmly press this crumb mixture evenly into the bottom of the prepared baking pan. I use the bottom of a flat glass or my knuckles to ensure it’s compact and even.
- Pre-bake the Crust: Bake the crust for about 15-20 minutes, or until it’s lightly golden around the edges. This pre-baking step ensures a crispy base that won’t get soggy from the filling. Once baked, I remove it from the oven but leave the oven on.
- Prepare the Cranberry Lemon Filling:
- While the crust is baking, I start on the filling. In a large bowl, I whisk together the granulated sugar and the large eggs until they are well combined and slightly frothy.
- Then, I gradually whisk in the all-purpose flour until it’s smooth and no lumps remain.
- I stir in the fresh lemon zest and the fresh lemon juice. The aroma at this stage is absolutely incredible!
- Finally, I gently fold in the fresh or frozen cranberries. I try not to overmix here, just enough to distribute them evenly throughout the lemony mixture.
- Combine and Bake:
- Carefully pour the cranberry lemon filling evenly over the warm, pre-baked shortbread crust in the pan.
- Return the pan to the oven and bake for another 25-35 minutes, or until the filling is set. I look for the edges to be lightly golden, and the center should no longer jiggle when gently nudged.
- Cool and Serve:
- This is arguably the hardest part – patience! I remove the pan from the oven and let the bars cool completely on a wire rack at room temperature. This can take a couple of hours. Cooling completely is crucial for clean, neat slices.
- Once completely cool, I use the parchment paper overhang to lift the entire slab of bars out of the pan and transfer it to a cutting board.
- Using a sharp knife, I cut the bars into squares or rectangles. For extra neatness, wipe the knife clean between cuts.
- Before serving, I often dust them with a light coating of powdered sugar. It adds a lovely finish and a hint of sweetness.
Tips & Suggestions
Having made my fair share of Cranberry Lemon Bars, I’ve picked up a few tricks along the way that I think will help you achieve the best results. These tips are specific to making sure your bars are perfect every time!
- Cold Butter is Your Best Friend: For the shortbread crust, always use very cold butter, cut into small cubes. This is essential for achieving that tender, flaky, and crumbly texture we want. If your butter gets too warm, pop it back in the fridge for a few minutes before mixing.
- Don’t Skip the Zest: While the lemon juice provides the tartness, the lemon zest is where most of the vibrant, aromatic lemon flavor resides. Use a microplane to get a fine zest without any bitter white pith. I always recommend zesting your lemons before juicing them; it’s much easier!
- Patience is a Virtue (Especially for Cooling): I know it’s tempting to cut into these beauties while they’re still warm, but resist! Allowing the Cranberry Lemon Bars to cool completely, preferably for several hours or even overnight, is crucial. This allows the filling to fully set and solidify, ensuring clean, sharp cuts and preventing the bars from falling apart.
- Mind the Baking Time: Keep an eye on your oven. Oven temperatures can vary, so the baking time is a guideline. The filling should be set with slightly golden edges, but you don’t want to overbake it, or the lemon custard can become rubbery. A slight jiggle in the very center is okay; it will firm up as it cools.
- For the Cranberries: If using fresh cranberries, you can leave them whole for bigger bursts of flavor, or roughly chop them if you prefer them more evenly distributed. Frozen cranberries work wonderfully and can be added directly to the filling mixture without thawing.
- Enhance the Tartness (or Sweetness): If you absolutely love tart desserts, you can slightly reduce the sugar in the filling. Conversely, if you prefer a sweeter bar, add an extra tablespoon or two of sugar. Taste your lemon juice beforehand to gauge its tartness!
- Clean Cuts: For really neat slices, I often use a large, sharp chef’s knife and wipe the blade clean with a damp cloth between each cut. This prevents the filling from sticking and creating messy edges.
- Consider a Vanilla Hint: While these are decidedly lemon and cranberry, a tiny splash (half a teaspoon) of vanilla extract in the filling mixture can round out the flavors beautifully without overpowering the stars of the show.
Storage
Once you’ve enjoyed your first Cranberry Lemon Bar, you’ll definitely want to know the best way to keep the rest fresh. These bars, with their luscious, custard-like filling, require a little attention to detail when it comes to storage.
- Room Temperature: I generally do not recommend storing Cranberry Lemon Bars at room temperature for an extended period, especially in warmer climates. Due to the egg-based filling, they are best kept chilled to maintain freshness and food safety. They can be left out for an hour or two for serving, but no longer.
- Refrigerator (My Preferred Method): This is the ideal way to store your Cranberry Lemon Bars. Once completely cooled and cut, I place them in a single layer in an airtight container. If you need to stack them, separate the layers with parchment paper to prevent sticking. Stored this way, they will stay fresh and delicious in the refrigerator for about 3 to 5 days. I find they actually taste even better the next day after the flavors have had more time to meld!
- Freezing for Longer Storage: Yes, you can absolutely freeze Cranberry Lemon Bars! This is a fantastic option if you’ve made a large batch or want to prepare them ahead of time.
- Preparation for Freezing: Once the bars are completely cool and cut into individual portions, arrange them in a single layer on a baking sheet and place them in the freezer for about an hour, or until solid. This “flash freezing” prevents them from sticking together.
- Packaging: Once frozen solid, transfer the bars to an airtight freezer-safe container or a heavy-duty freezer bag. You can stack them, separating layers with parchment paper.
- Shelf Life: Stored correctly, Cranberry Lemon Bars can last in the freezer for up to 2 to 3 months.
- Thawing Frozen Bars: When you’re ready to enjoy a frozen bar, simply remove it from the freezer and let it thaw in the refrigerator overnight, or at room temperature for about 1-2 hours. They will be just as delightful as when they were freshly baked!
- Serving Chilled: I personally love these bars served chilled straight from the fridge. The cool, tart filling is incredibly refreshing.
Final Thoughts
There’s something truly magical about the combination of bright, tangy lemon and the subtle sweetness and chew of cranberries, especially when nestled on a buttery shortbread crust. I truly believe these Cranberry Lemon Bars are more than just a dessert; they’re a little ray of sunshine on a plate!
From their vibrant color to their irresistible balance of tart and sweet, these bars are a guaranteed crowd-pleaser and a personal favorite. They’re perfect for a festive gathering, a cozy afternoon treat, or simply when you need a little burst of joy. Trust me, once you experience the delightful chew of the cranberries contrasting with the creamy lemon filling, you’ll understand why these Cranberry Lemon Bars are an absolute must-try. I can’t wait for you to bake them and fall in love!
Cranberry Lemon Bars: Tangy, Sweet & Easy Dessert Recipe
- Total Time: 1 hour 10 minutes
- Yield: 16 servings
Description
These Cranberry Lemon Bars are a delightful combination of tart cranberries and zesty lemon, all atop a buttery shortbread crust. Perfect for any occasion, they are both refreshing and indulgent!
Ingredients
- For the Shortbread Crust:
- All-Purpose Flour
- Granulated Sugar
- Salt
- Unsalted Butter (cold, cubed)
- For the Cranberry Lemon Filling:
- Granulated Sugar
- Large Eggs
- All-Purpose Flour
- Fresh Lemon Zest
- Fresh Lemon Juice
- Fresh or Frozen Cranberries
- Optional Topping:
- Powdered Sugar
Instructions
- Prepare Your Pan: Preheat your oven to 350°F (175°C) and line a 9×13 inch baking pan with parchment paper, leaving an overhang on the sides.
- Make the Shortbread Crust: In a medium bowl, whisk together the all-purpose flour, granulated sugar, and salt. Add the cold, cubed unsalted butter and cut it into the flour mixture until it resembles coarse crumbs. Press the crumb mixture evenly into the bottom of the prepared baking pan. Pre-bake the crust for about 15-20 minutes until lightly golden.
- Prepare the Cranberry Lemon Filling: In a large bowl, whisk together the granulated sugar and large eggs until well combined. Gradually whisk in the all-purpose flour until smooth. Stir in the fresh lemon zest and fresh lemon juice, then gently fold in the fresh or frozen cranberries.
- Combine and Bake: Pour the cranberry lemon filling evenly over the warm, pre-baked shortbread crust. Return the pan to the oven and bake for another 25-35 minutes until the filling is set.
- Cool and Serve: Allow the bars to cool completely on a wire rack at room temperature. Once cool, lift the bars out of the pan using the parchment paper overhang and cut into squares or rectangles. Dust with powdered sugar before serving.
- Prep Time: 20 mins
- Cook Time: 50 mins
- Category: Dessert
- Method: Baking
- Cuisine: American
Nutrition
- Serving Size: 1 bar
- Calories: 200
- Sugar: 15 g
- Sodium: 50 mg
- Fat: 10 g
- Saturated Fat: 6 g
- Unsaturated Fat: 3 g
- Trans Fat: 0 g
- Carbohydrates: 25 g
- Fiber: 1 g
- Protein: 2 g
- Cholesterol: 50 mg
Keywords: Use very cold butter for the crust to achieve a tender texture. Don't skip the lemon zest for maximum flavor, and allow the bars to cool completely before cutting for clean slices.