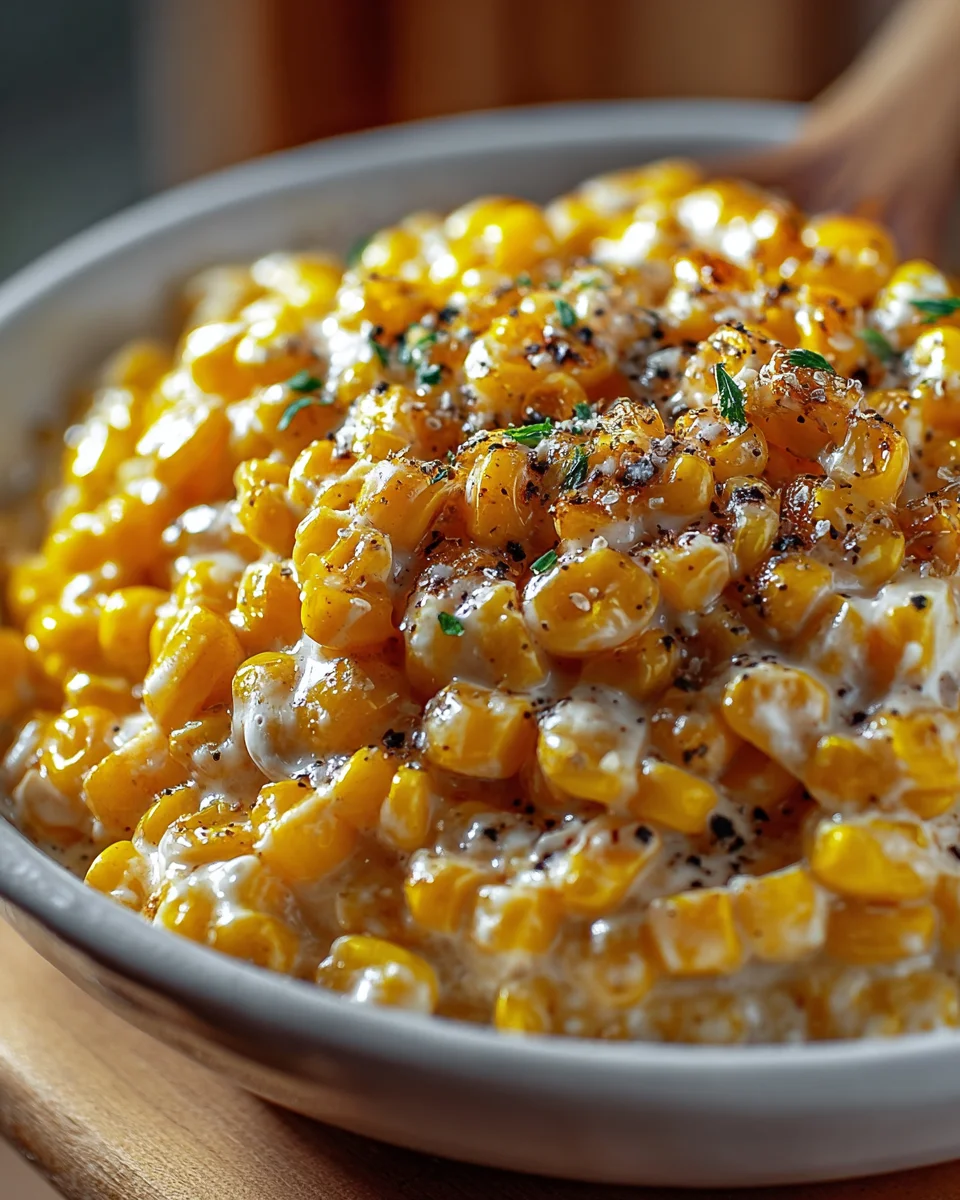
Creamy Honey Butter Skillet Corn Recipe
Hey everyone! Get ready to discover your new favorite side dish, because I’m absolutely thrilled to share my go-to Creamy Honey Butter Skillet Corn Recipe with you. This isn’t just any corn on the cob or boiled kernels; this is a dish that takes humble corn and elevates it to something truly extraordinary. What makes it so special, you ask? It’s that magical trifecta of flavors: the natural sweetness of the corn enhanced by a touch of golden honey, all enveloped in a luxuriously creamy, buttery sauce, cooked to perfection right in your skillet.
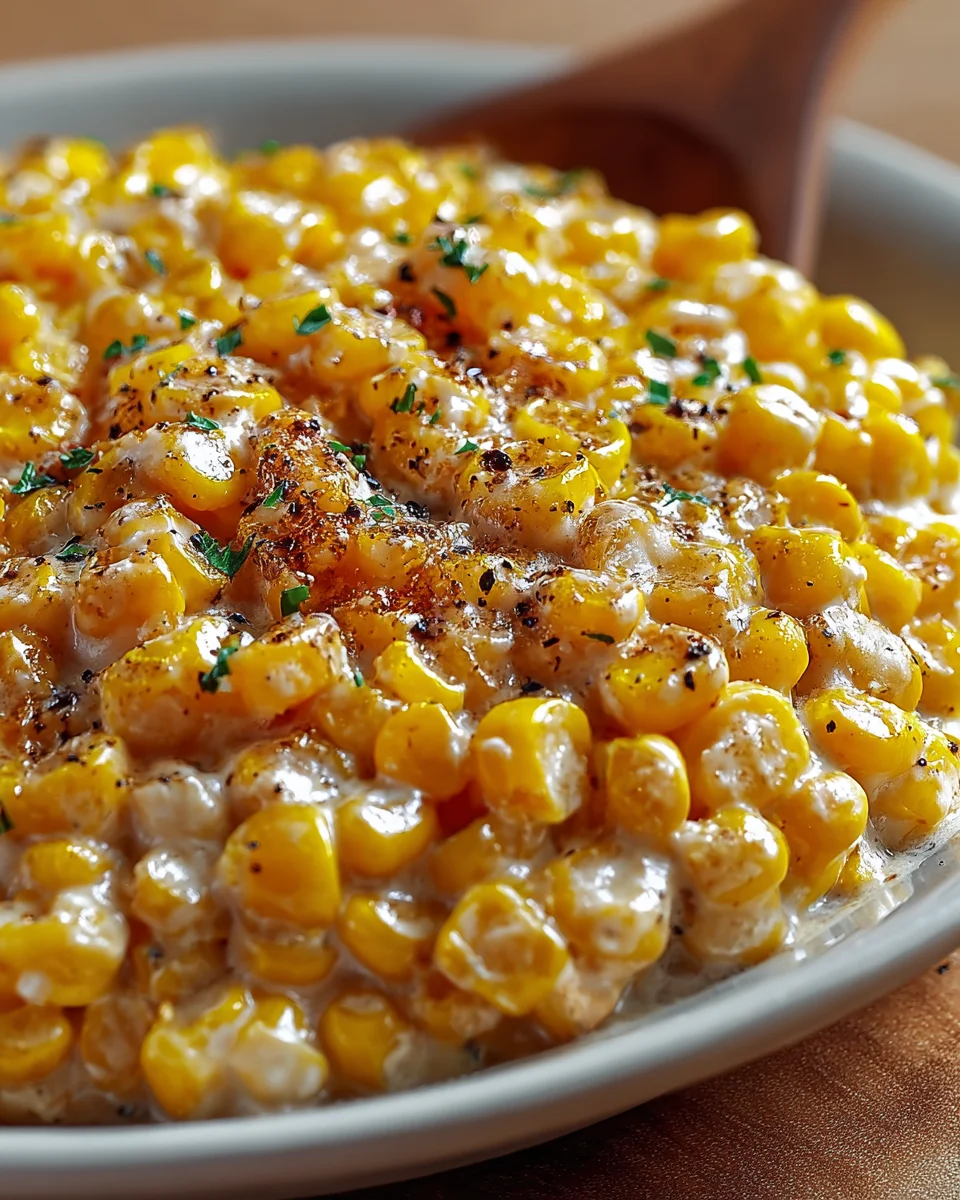
You are going to absolutely adore this recipe because it strikes the perfect balance between simple and spectacular. It’s incredibly easy to whip up, making it ideal for a busy weeknight, yet it’s impressive enough to grace any holiday table or backyard barbecue. Imagine tender, sweet corn kernels, glistening in a velvety, rich sauce that’s just bursting with comforting, sweet-and-savory goodness. It’s a side dish that honestly steals the show sometimes!
So, what exactly is this delightful creation? It’s a quick-cooking dish where fresh or frozen corn is simmered in a rich mixture of butter, cream, and a hint of honey until it’s perfectly tender and coated in a thick, luscious sauce. The skillet cooking method ensures a beautiful caramelization on some of the corn, adding even more depth of flavor. Trust me, once you try this creamy, sweet, and utterly irresistible corn, you’ll be making it again and again. It’s pure comfort in a bowl!
Ingredient Notes
Hello there! I’m so excited to share one of my absolute favorite, ridiculously easy, and incredibly delicious side dishes with you: my Creamy Honey Butter Skillet Corn. This recipe is a game-changer, turning a humble vegetable into a luxurious, sweet, and savory treat that pairs beautifully with just about anything. Before we dive into the cooking, let’s chat a bit about the stars of our show and any handy substitutions you might consider.
The Essentials for Creamy Honey Butter Skillet Corn
- Corn: For convenience, I often reach for a 16-ounce bag of frozen corn, thawed, or two 15-ounce cans of sweet corn, thoroughly drained. Both work wonderfully and make this dish incredibly quick. If you’re lucky enough to have fresh corn on the cob, absolutely go for it! Just cut the kernels off about 3-4 ears of corn – the flavor is truly unbeatable. Just make sure it’s fresh and sweet.
- Unsalted Butter: This is the backbone of our “honey butter.” Using unsalted butter gives us complete control over the final seasoning. If you only have salted butter on hand, that’s perfectly fine, just be mindful and adjust the amount of added salt later in the recipe.
- Honey: The “honey” in honey butter! This is what gives our corn that delightful sweetness and a lovely, subtle floral note. Any good quality honey will do. Clover, wildflower, or even a local varietal will be fantastic. I wouldn’t recommend skimping on this ingredient as it’s crucial to the dish’s signature flavor.
- Heavy Cream: This is where the magic happens for that incredible “creamy” texture. Heavy cream provides a rich, velvety mouthfeel that coats every kernel of corn. Don’t be shy with it!
- Fresh Garlic: A couple of cloves of minced fresh garlic really elevate the flavor profile, adding a warm, aromatic depth that balances the sweetness. While garlic powder can be a substitute in a pinch, fresh garlic truly makes a difference here.
- Salt and Freshly Ground Black Pepper: Simple seasonings are all you need to bring out the best in this dish. Always taste and adjust as you go!
- Optional Garnish (but highly recommended!): A sprinkle of fresh chopped chives or parsley adds a pop of color and a touch of fresh, herbaceous flavor right at the end.
Smart Substitutions and Variations
- Dairy-Free Option: If you need to make this dairy-free, you can easily swap the butter for a good quality vegan butter alternative. For the heavy cream, full-fat canned coconut cream (the thick part from the top of an unshaken can) works surprisingly well, though it will impart a subtle coconut flavor, which I personally find delicious with corn!
- Sweetener Alternatives: While honey is integral to the name and flavor, if you have dietary restrictions, you could try maple syrup or agave nectar. However, be aware that the taste will differ from the original “honey butter” profile.
- Cream Lighter Options: If you’re looking for a slightly less rich version, you could try half-and-half or even whole milk instead of heavy cream. Just note that the sauce won’t be quite as thick or decadent, but it will still be wonderfully creamy.
- Spice It Up: For those who love a little heat, a tiny pinch of cayenne pepper or a few red pepper flakes added with the garlic can give this dish a lovely kick without overpowering the sweetness.
Gather your ingredients, and let’s get ready to transform some corn into a truly unforgettable side dish!
Step-by-Step Instructions
Get ready for one of the easiest and most rewarding cooking experiences! This Creamy Honey Butter Skillet Corn comes together in a flash, making it perfect for a weeknight dinner or as an impressive, effortless addition to any special meal. Here’s how we make this magic happen:
Prep Your Ingredients
- First things first, prep your corn: If you’re using frozen corn, make sure it’s thawed completely. You can do this by letting it sit at room temperature for a bit, or by rinsing it under cold water in a colander. If you’re using canned corn, drain it very well. For fresh corn, carefully slice the kernels off the cob with a sharp knife.
- Mince the garlic: Peel and finely mince your garlic cloves. This ensures the garlic flavor is well distributed and doesn’t overpower the other delicate flavors.
- Gather everything: Have your butter, honey, heavy cream, salt, and pepper all measured out and ready to go. Mis en place makes cooking so much smoother!
Let’s Get Cooking!
- Melt the Butter and Sauté the Garlic: Grab a large, heavy-bottomed skillet (a cast iron skillet works beautifully here for even heating) and place it over medium heat. Add the unsalted butter to the skillet. Once the butter has melted and is gently bubbling, add your minced garlic. Sauté for about 30 seconds to 1 minute, stirring constantly, until the garlic becomes fragrant. Be very careful not to let the garlic brown or burn, as it can turn bitter quickly. We just want that beautiful aroma to bloom!
- Add the Corn: Carefully add the prepared corn to the skillet with the fragrant butter and garlic. Stir well to coat all the corn kernels. Continue to cook for about 3-5 minutes, stirring occasionally, until the corn is heated through and slightly tender-crisp. If you’re using fresh corn, you might need an extra minute or two to get it to your desired tenderness. We’re aiming for a pleasant bite, not mushy corn!
- Stir in the Cream and Honey: Now for the good stuff! Pour in the heavy cream and drizzle in the honey over the corn. Stir everything together thoroughly, making sure the honey is fully incorporated and the corn is glistening with the creamy sauce.
- Simmer and Thicken: Bring the mixture to a gentle simmer, then reduce the heat to low. Let it simmer gently for about 5-7 minutes, stirring occasionally, until the sauce has thickened slightly and beautifully coats the corn kernels. The cream will reduce a bit, concentrating all those amazing flavors.
- Season to Perfection: Taste the corn and season generously with salt and freshly ground black pepper. This is your moment to adjust the flavors. Does it need a little more sweetness? Add a touch more honey. Does it need a bit more savory balance? Add a pinch more salt. Remember, taste as you go!
- Serve Immediately: Remove the skillet from the heat. If you’re using fresh chives or parsley, sprinkle them over the corn right before serving for a burst of color and freshness. Serve your Creamy Honey Butter Skillet Corn hot and enjoy every spoonful!
This dish is so versatile and utterly comforting. It’s perfect served alongside grilled beef, roasted chicken, or any of your favorite main courses. Prepare to have people asking for the recipe!
Tips & Suggestions
Making Creamy Honey Butter Skillet Corn is straightforward, but a few insider tips can elevate your dish from simply delicious to absolutely unforgettable. Here are my favorite suggestions to help you master this incredible side dish:
- Don’t Overcook the Corn: The key to excellent skillet corn is maintaining a tender-crisp texture. Whether you’re using fresh, frozen, or canned corn, avoid overcooking it to the point of mushiness. We want a slight bite to each kernel. If using fresh corn, it’s particularly important to keep an eye on it.
- Adjust Sweetness to Your Liking: The amount of honey suggested is a good starting point, but sweetness is a personal preference. Feel free to add a little more honey if you prefer a sweeter corn, or slightly less if you like it more savory. Always taste and adjust before serving!
- Amp Up the Flavor with Aromatics: While fresh garlic is a must, don’t hesitate to experiment. A tiny pinch of onion powder can add another layer of savory depth if you’re feeling adventurous, or a very finely minced shallot sautéed with the garlic can introduce a lovely subtle sweetness.
- Embrace Fresh Herbs: Finishing your skillet corn with fresh herbs is not just for looks! Chopped chives, fresh parsley, or even a sprinkle of fresh dill can add a wonderful brightness and contrasting flavor that cuts through the richness of the cream and butter. It truly makes the dish sing.
- Consider a Touch of Acidity: This might sound counterintuitive for a creamy, sweet dish, but a tiny squeeze of fresh lime juice or even a splash of apple cider vinegar (no alcohol here!) right at the very end can brighten all the flavors beautifully. It helps to balance the richness and sweetness, making the dish feel less heavy and more vibrant. Use sparingly, a quarter teaspoon is often enough!
- Spice it Up (if you dare!): If you enjoy a little heat, a small pinch of cayenne pepper or a few red pepper flakes added along with the garlic can give your honey butter corn a fantastic zing. It’s a wonderful contrast to the sweetness and creaminess.
- Skillet Choice Matters: A heavy-bottomed skillet, like cast iron, is ideal for this recipe. It distributes heat evenly, preventing hot spots and ensuring your corn cooks uniformly without scorching.
- Serving Suggestions Beyond the Plate: While it’s a phenomenal side dish for roasted meats (think succulent beef roasts or juicy grilled chicken), don’t limit its potential. This creamy corn is also fantastic as a topping for baked potatoes, stirred into a grain bowl, or even as a base for a quick weeknight vegetarian meal alongside some crusty bread.
- Don’t Rush the Simmer: Allowing the cream and honey to gently simmer for a few minutes not only thickens the sauce but also allows the flavors to meld beautifully. This short simmering time is crucial for developing that rich, cohesive taste.
With these tips in your culinary arsenal, your Creamy Honey Butter Skillet Corn will be a guaranteed crowd-pleaser every time. Happy cooking!
Storage
Once you’ve enjoyed your delicious Creamy Honey Butter Skillet Corn, you might find yourself with some tempting leftovers. Proper storage is key to keeping it fresh and tasty for another meal. Here’s what you need to know:
- Cool Completely: Before storing, it’s crucial to let your Creamy Honey Butter Skillet Corn cool down to room temperature. Transfer it from the hot skillet to a clean bowl to help it cool faster. Never put hot food directly into the refrigerator, as it can raise the internal temperature of your fridge and potentially spoil other foods.
- Airtight Container: Once cooled, transfer the corn into an airtight container. This helps prevent it from absorbing odors from other foods in your refrigerator and keeps it from drying out.
- Refrigeration: Stored properly in an airtight container, your Creamy Honey Butter Skillet Corn will keep wonderfully in the refrigerator for up to 3-4 days. It makes for a fantastic quick lunch or an easy re-heat side dish!
- Reheating on the Stovetop: My preferred method for reheating is on the stovetop. Place the leftover corn in a small saucepan or skillet over low to medium-low heat. Stir gently and frequently to prevent it from sticking to the bottom. Because cream-based sauces can thicken significantly when chilled, you might want to add a splash (a tablespoon or two) of milk or cream to help loosen the sauce and bring it back to its original creamy consistency. Heat until warmed through, but avoid boiling vigorously.
- Reheating in the Microwave: If you’re short on time, the microwave is also an option. Transfer a single serving to a microwave-safe dish. Heat on 50% power in 1-minute increments, stirring well after each interval, until warmed through. Again, if it appears too thick, stir in a tiny bit of milk or cream. Be careful not to overheat, as this can sometimes cause the cream to separate.
- Freezing (Generally Not Recommended): For creamy dishes like this, freezing is generally not recommended. The heavy cream can separate and become grainy or watery upon thawing and reheating, significantly affecting the texture. While it’s technically safe to freeze, the quality of the dish will likely be diminished. I’d highly recommend enjoying this dish fresh or within the refrigerated timeframe for the best experience.
Enjoy your delicious Creamy Honey Butter Skillet Corn, whether it’s fresh from the skillet or savored as a delightful leftover!
Final Thoughts
Well, there you have it! I truly hope you’re as excited as I am about the prospect of making this incredible Creamy Honey Butter Skillet Corn Recipe. I can confidently say that this isn’t just another corn dish; it’s a culinary experience that will surprise and delight everyone who tries it. The magic lies in that perfect balance: the inherent sweetness of the corn, elevated by a whisper of honey, all wrapped in a luscious, creamy, buttery sauce that simply melts in your mouth.
Whether you’re looking for an unforgettable side dish for a casual weeknight meal, a dazzling addition to your holiday spread, or a guaranteed crowd-pleaser for any gathering, the Creamy Honey Butter Skillet Corn Recipe delivers every single time. It’s simple enough for beginners but boasts a flavor profile that feels gourmet. Trust me on this one – once you taste the comforting warmth and vibrant sweetness of this dish, you’ll understand why I consider it an absolute must-try. Go ahead, give it a whirl; I promise your taste buds will thank you!

Creamy Honey Butter Skillet Corn: Your New Favorite Side!
- Total Time: 25 minutes
- Yield: 4 servings 1x
Description
This Creamy Honey Butter Skillet Corn elevates humble corn to a luxurious side dish with its rich, buttery sauce and sweet honey flavor. Perfect for any occasion, this dish is sure to impress your guests and family alike.
Ingredients
- 16-ounce bag of frozen corn, thawed or two 15-ounce cans of sweet corn, thoroughly drained
- 3–4 ears of fresh corn, kernels cut off
- Unsalted Butter
- Honey
- Heavy Cream
- Fresh Garlic, minced
- Salt
- Freshly Ground Black Pepper
- Fresh chopped chives or parsley (optional garnish)
Instructions
- If using frozen corn, ensure it's thawed completely. For canned corn, drain it very well. For fresh corn, slice the kernels off the cob.
- Peel and finely mince the garlic cloves.
- Have your butter, honey, heavy cream, salt, and pepper all measured out and ready to go.
- In a large, heavy-bottomed skillet over medium heat, melt the unsalted butter. Once bubbling, add the minced garlic and sauté for about 30 seconds to 1 minute until fragrant.
- Add the prepared corn to the skillet and stir well to coat. Cook for about 3-5 minutes until heated through and slightly tender-crisp.
- Pour in the heavy cream and drizzle in the honey over the corn. Stir thoroughly to combine.
- Bring the mixture to a gentle simmer, then reduce the heat to low. Let it simmer for about 5-7 minutes until the sauce thickens slightly.
- Taste the corn and season with salt and freshly ground black pepper. Adjust sweetness with more honey if desired.
- Remove from heat and sprinkle with fresh chives or parsley before serving hot.
- Prep Time: 10 mins
- Cook Time: 15 mins
- Category: Side Dish
- Method: Skillet Cooking
- Cuisine: American
Nutrition
- Serving Size: 1 bowl
- Calories: 250
- Sugar: 10 g
- Sodium: 200 mg
- Fat: 15 g
- Saturated Fat: 9 g
- Unsaturated Fat: 4 g
- Trans Fat: 0 g
- Carbohydrates: 30 g
- Fiber: 3 g
- Protein: 4 g
- Cholesterol: 40 mg
Keywords: For a dairy-free option, use vegan butter and full-fat canned coconut cream. Adjust sweetness to your liking and consider adding a squeeze of lime juice for brightness.